
• TalkBass has been independent since 1998. Add your voice.
    Create a free account to reply to discussions, view embedded media, and browse with fewer display ads.
    Join freeLog in
    Want zero display ads or expanded classifieds tools? Compare plans.

SX Ursa 6 Fretless Mod

I wanted to get an early jump today so with just a few hours of sleep I got up and applied the decal to the headstock. Then I took it outside and finished the first spray can of Minwax lacquer on the neck, which was good for about 7 1/2 additional coats. All in all the neck and headstock have about 14-15 lacquer coats.

While the spray/rattle can is a convenience, the results are a far cry from what I see on other projects online where appropriate spraying equipment is used in the right working area/conditions... Yeah, it's covered but it needs some level/wet sanding, and some polishing/buffing. The decal ridge is clearly visible so I don't know if it needs more coats before I sand it. Don't want to sand the decal right off! :rollno:

I'm going to let the neck cure for a couple of days while I read up on the wet sanding technique. Never done it before and I don't know what I should be doing. However, from a strict practical standpoint, the neck is sealed and the orange poly finish is gone.

Looking forward to applying the epoxy coat next weekend! :hyper:
 

Attachments

  • decal_applied_sm.jpg
    decal_applied_sm.jpg
    36.6 KB · Views: 181
  • not_sanded_2_sm.jpg
    not_sanded_2_sm.jpg
    39.9 KB · Views: 155
I discovered a great article in Stewmac on wet sanding before finishing: Invalid Link Removed

Also, my new pickguard...

new_pickguard_2_sm.jpg

...and the System3 epoxy...

system3_sm.jpg

...that I ordered arrived today! I'm going to let the lacquer cure until Saturday before I attempt to wet sand it. Also, I'm not sure if the headstock needs a few (or several) more layers... the decal looks like it could be sanded off if I'm not careful! While the lacquer continues to cure I'll work on shielding the cavities.
 
Last edited:
Started guttin' the electronics... Notice that I had doweled the holes for the stock bridge when I installed the current (Hipshot) one. I will dowel again as the bridge is not perfectly aligned so I'll take care of that now.

electronics_1_sm.jpg

For those of you who have never taken the control plate off, this is how it looks like underneath.

electronics_2_sm.jpg

On my fretted 6, the pickups are glued to the covers, but on this one they were not. That's nice in case some day I find other pickups that may fit under the current covers so I won't have to re-route the neck pickup cavity and/or alter the pickguard to fit a different pickup in there. Or who knows, I may one day try winding my own pickups... hey, it's all about the experimentation and learning that gets me excited about these projects.

electronics_3_sm.jpg

And here it is... the bridge pickup and the stock magnet under it.

electronics_4_sm.jpg

Although the pickups have different color cables (red is neck; yellow is bridge) I still labeled them with a sharpie just case... (knowing me)

electronics_5_sm.jpg

Here are the body routes in all their swimming pool glory! The funky looking patters on the finish are ceiling reflections (same when you see the Audere photo).

electronics_6_sm.jpg

I had measured the control cavity depth before I ordered the Audere preamp to make sure that it would fit, but for those that are curious, on this bass the depth was 1.25" (a little shallower towards the input jack).

electronics_7_sm.jpg

Here's the new pickguard and the Audere... The new pickguard fits like a glove, but the Audere control plate is NOT the same size/shape as the original control plate, and the holes do not align... rather than trying to fit the pickguard I'll just dowel the three little control plate holes and drill new ones. It'll be fine I'm sure.

electronics_8_sm.jpg

The Audere buttons tower over the plate... they're much higher than the original plate knobs and understandably so as they are stacked knobs.

electronics_9_sm.jpg

Well, this is all for now. I'll work on the shielding tomorrow night.
 
I was able to work on the shielding job tonight..

The neck and control cavities' pools are easy. The bridge pickup cavity requires a lot more patience... Notice the copper strip extending from the neck route to one of the pickguard screw holes; the bottom of the pickguard is also shielded and will connect to the rest of the shield at this point when the screw goes in.

shielding_1_sm.jpg

I ran a cable from the bridge pickup cavity to the control cavity and soldered it to the copper shield on both sides...

...here...

shielding_2_sm.jpg

...and here...

shielding_3_sm.jpg

Notice on the pickup photo that I placed a small strip of copper tape on the body close the to bridge ground cable hole. The ground cable will be sandwiched between the copper tape and the bridge for a better connection.

With a volt meter I then tested for continuity by measuring resistance across various points in the shield. The ohm resistance was an average of 0.5 across multiple points; I'll take it.

I don't have any pickup foam padding at hand, but I've found that weather stripping foam works very well. I applied two strips to the bridge pickup since that one sits normally higher (closer to the strings). The neck pickup was ok with only one strip.

shielding_4_sm.jpg

The bridge is now installed, nicely aligned...

shielding_5_sm.jpg

Both pickups are installed. I started screwing the pickguard in place and I ran out of screws! I must have misplaced them or they fell out of the plastic bag where I was keeping them... :rollno: I'll try to find them tomorrow or else I'll have to hit Home Depot on Saturday.

shielding_6_sm.jpg

This is it for tonight. I will be installing the Audere preamp next. Also this weekend the lacquer should be properly cured for wet sanding. I'm getting close to applying the epoxy! So far I'm liking the results.
 
Never found the screws. They must have found their way to the carpet where a very willing wife just vacuumed them up.

So I paid a visit to my local GC to see if they had any...

fender_pickguard_screws_sm.jpg

It gives me great comfort to have finally "fenderized" my humble build. Surely the pickguard will now synchronously couple with the body to resonate in the good frequency spectrum... I'm not going to wait to tell you all that I can already hear the vastly improved tone. :woot:

And the Audere is installed!

audere_installed_sm.jpg

I crimped the cavity shield ground wire with the bridge ground and the Audere ground wires. Both pickups' hot and common wires went to the connecting thingy in the Audere. I'll have to wait until everything is put together to adjust the low-z gain adjustment.

As I mentioned before, I doweled the three control plate screw holes and drilled new ones. It's not perfectly aligned, but when you consider that:

1) This is a Walrus King build, and..
2) It's custom-made...

It's a no-brainer. Check.

As good as it looks I can tell y'all that it will NEVER WORK.... Turns out the bridge ground wire and bridge pickup wires come into the cavity at the exact spot to not let the battery sit all the way down in the cavity... as a result I can't fit the battery under the Audere. Tried a thousand times; it's a no go. :banghead:

So now I'm faced with the need to route a battery box cavity. As you look on the photo, I'm thinking the area immediately west of the preamp and south of the bridge (on the back side of course).

Oh well, at least now I won't have to unscrew the whole preamp to change the battery.
 
Last edited:
I got beat by the lacquer finish...

Today I started wet sanding the neck. I used 800, 1000, 1200, 1500 and 2000 grit sandpaper. All was going well on the back of the headstock... that ended up pretty smooth I'd say. Then I sanded the rest of the back of the neck, and the front of the headstock. I wasn't sure how much I could sand without damaging the decal. Now that the neck is drying I think I could sand more to get rid of the "orange peel".

But then I noticed it... the water found its way through some of the peg holes, expanding the wood and causing the wood and lacquer to crack... There is a crack from the G peg hole extending for about an inch all the way under the walrus decal... :( there is a smaller crack on the back, extending from the same G peg hole, through the small guide screw hole towards the fingerboard... about 3/4". I'm hoping that these cracks are only superficial.

At this point I'm going to throw aesthetics out the window and just focus on functionality. The back of the neck is smooth and that's what counts. I will proceed with the epoxy layer application this weekend. Pics to come.
 
On Engine207's epoxy thread, Brian (the luthier that did the epoxy job) talks about applying a thin coat of acetone-diluted epoxy in order to seal the maple and prevent bubbles. Regarding this, the instructions for the System 3 epoxy state:

"Porous objects such as paper should be sealed first with spray lacquer to preserve their appearance."

I decided to spray a couple of coats from the left over rattle can I had.

Here's the neck all masked and ready to be sprayed:

lacquer_on_fingerboard_1_sm.jpg

And here is how it looks like after a couple of coats:

lacquer_on_fingerboard_2_sm.jpg

I'm going to let that cure for a day or two and then proceed with the epoxy application.

On another note, the battery box and route template arrived today. I'm noticing that the battery route will have to go deep... I measured the thickness of the body at the planned installation position, and it is 4cm... the battery box will require a route 3cm deep... leaving only 1cm of wood. I better think this through and proceed with caution... however, there's no holding me back now. I've learned so much that I think I will do another build/mod soon, even if that means that I completely trash this bass and I have to order another one from Rondo (which will be the natural ash 6-er, currently not in stock). But that's a story for another day. In the meantime, stay tuned as I hope to finish this work sometime next week or weekend at the latest.
 
As good as it looks I can tell y'all that it will NEVER WORK.... Turns out the bridge ground wire and bridge pickup wires come into the cavity at the exact spot to not let the battery sit all the way down in the cavity... as a result I can't fit the battery under the Audere. Tried a thousand times; it's a no go. :banghead:

So now I'm faced with the need to route a battery box cavity. As you look on the photo, I'm thinking the area immediately west of the preamp and south of the bridge (on the back side of course).

Oh well, at least now I won't have to unscrew the whole preamp to change the battery.

My G&L basses have made be a big fan of the flip-top battery boxes! Because they DON'T have them, not because they do! Think dark stage. Floor boards with big cracks. Bunch of tiny screw to hold control plate or cover on. Continue on to likely result...

Even though my G&Ls have threaded inserts on the cover plates and all my SX basses have been modded with threaded inserts on the control plates and pickguards, nevertheless flip top battery boxes ARE the answer! Note that some are better than others. My older Carvin boxes had contacts a bit iffy, but the newer Carvin ones are great. Also the older ones took a deep rout while the newer ones have the battery in the flatter dimension and aren't so deep.
 
Also the older ones took a deep rout while the newer ones have the battery in the flatter dimension and aren't so deep.

Allparts have these (which it looks like the newer ones you are referring to)...

http://www.allparts.com/EP-0929-023-9-Volt-Battery-Compartment_p_1348.html

...but I had already ordered one if these (the 9v version)...

http://www.bestbassgear.com/battery-boxes.htm

So, the one I got requires the deep route. I think it'll work... but there's only one way to find out...
 
The epoxy is curing... four more days. I noticed a white greasy substance on the surface... after some research I found out that it is (must be) an effect called "blushing". I'm sure it'll be alright after sanding; my main concern is how hard will the epoxy be after it cures? Another interesting note is that the epoxy didn't exactly level perfectly... it did flow to cover all areas but if you look at it from the side the surface of the epoxy that has now settled has some smooth waves/ripples in some areas. I guess the sanding block will take care of that.

So now I'm moving on to installing the battery box. This battery box requires a 1" 9/32" deep route. The bass body is 1" 5/8" thick (including the thick poly finish). Converting the body to 32ths of an inch is 1" 20/32", which means I only have 11/32" of wood/poly left at the bottom end of the route. I decided to install the battery box forward of the preamp control cavity, just southeast of the neck pickup (see photo)... on the back side, of course. :)

battery_box_sm.jpg

My reasoning is that this area is covered by the pickguard so in case anything goes wrong it won't be noticeable. Also, the swimming pool route makes it easier to drill from the neck pickup route into the battery box route, and "route" the battery box cable into the neck pickup cavity, across the channel and finally into the control cavity. It should work.

I'm going to sleep over it and tomorrow I'll get some double-sided tape and a piece of scrap wood to take a couple of router practice runs on.
 
Last edited:
Tonight I finally gathered the courage to work on my first routing job ever...

Here's the battery box guide in place held by double sided tape. I first applied the blue masking tape and laid out my measurement markings on it, that way the double sided tape would not contact the finish.

battery_route_2_sm.jpg

The route had to be a hair deeper than 1 1/4" (1 9/32" to be exact). I decided to work on 1/4" pass increments. For each pass, I drilled a pilot hole so that the route bit would start at the right depth.

battery_route_3_sm.jpg

However, rookie that I am, I seem to have picked the wrong routing bits... or somehow I incorrectly installed the bit on the router. I was not able to use the guide correctly because the guide section of the bit was still too high... so I chewed into the guide itself here an there... oh, well. I did get the hole routed and everything seemed to go fine...

...until the time came to drill the hole from the neck pickup into the battery box. :rollno: Guess what happened... Now, guess how many times it happened... However, because TB's sacred rule is "pics or it didn't happen", and I'm NOT going to show you folks the pics... well, we can all keep this one under wraps, can't we. :D

Anyway, here's the battery box, finally installed.

battery_box_installed_sm.jpg

The battery box does not have the terminals marked, so when I went to place the battery in I was at a loss as to which was the positive terminal. After a quick google search I discovered that red is positive. Looking into the battery box with a flashlight I looked to see which contact had the red cable behind it, and so the battery went in. I barely noticed when the preamp's light came on, but I caught a small flash out of the corner of my eye...

The Audere turns on when you insert an instrument cable into the jack. Now came the "smoke" test...

battery_test_sm.jpg

...and voilá! It works!!! :hyper:

On to finishing the neck once the epoxy cures.
 
  • Like
Reactions: s0707 and El Spearo
Things have moved a bit on my end... sorry that I didn't document all with photos. I have other priorities, and then a window opened up and I jumped at the opportunity and in my haste I forgot to take pics. But here are some...

This is the neck after I let the epoxy cure for 5 days.

sanding_block_sm.jpg

I started wet sanding with 100 grit, and progressively went from 320, 400, 600, 800, 1000, 1200, 1500 up to 2000. It is crucial to be patient. I ended up with a layer that is a hair over 1/32 at the nut, and a hair over 1/32 at the neck heel center increasing to a hair over 2/32 at the sides (IOW, the radius is 14" at the nut, but slightly flatter at the heel).

I shimmed the neck using a maple shim that is about 3.33 cm long or 1/3 of the full pocket size of 10 cm; from the end of the neck pocket to just over the first set of screw holes. I also used very thin shims from maple veneer to shim the sides of the neck and make it fit snugly in the pocket. It seems to have worked.

I put it all together just to get an idea of what is going to look like, but I still need to make adjustments to the action, pickup heights. I believe in very small neck truss rods adjustments and since this neck was removed for a few weeks I don't want to stress it too soon.

walrus_king_1_sm.jpg

For all that are interested but have never worked with epoxy before... it is HARD... and it is HEAVY. I was concerned at how heavy the neck felt after all that epoxy had been applied and cured. Fortunately after the sanding was done the weight was significantly reduced. It seems to balance well (no neck dive that I notice).

Here is the headstock, dixie cup mod and all. I didn't have to shim the nut... turns out now the strings are at a better (much lower) height w/o any buzz that I notice. But the jury is still out as the neck settles over the next couple of days.

walrus_king_headstock_sm.jpg

Here's another angle.

walrus_king_3_sm.jpg

I also need to fine-tune the gain of the Audere pots so that it doesn't change volume level when engaging the "low Z".

I plan to do a final or more complete report this weekend time permitting, but yes, I will be uploading some sound samples within the next week or so. It's almost complete!!! :)
 
Things have moved a bit on my end... sorry that I didn't document all with photos. I have other priorities, and then a window opened up and I jumped at the opportunity and in my haste I forgot to take pics. But here are some...

This is the neck after I let the epoxy cure for 5 days.

View attachment 413570

I started wet sanding with 100 grit, and progressively went from 320, 400, 600, 800, 1000, 1200, 1500 up to 2000. It is crucial to be patient. I ended up with a layer that is a hair over 1/32 at the nut, and a hair over 1/32 at the neck heel center increasing to a hair over 2/32 at the sides (IOW, the radius is 14" at the nut, but slightly flatter at the heel).

I shimmed the neck using a maple shim that is about 3.33 cm long or 1/3 of the full pocket size of 10 cm; from the end of the neck pocket to just over the first set of screw holes. I also used very thin shims from maple veneer to shim the sides of the neck and make it fit snugly in the pocket. It seems to have worked.

I put it all together just to get an idea of what is going to look like, but I still need to make adjustments to the action, pickup heights. I believe in very small neck truss rods adjustments and since this neck was removed for a few weeks I don't want to stress it too soon.

View attachment 413578

For all that are interested but have never worked with epoxy before... it is HARD... and it is HEAVY. I was concerned at how heavy the neck felt after all that epoxy had been applied and cured. Fortunately after the sanding was done the weight was significantly reduced. It seems to balance well (no neck dive that I notice).

Here is the headstock, dixie cup mod and all. I didn't have to shim the nut... turns out now the strings are at a better (much lower) height w/o any buzz that I notice. But the jury is still out as the neck settles over the next couple of days.

View attachment 413583

Here's another angle.

View attachment 413584

I also need to fine-tune the gain of the Audere pots so that it doesn't change volume level when engaging the "low Z".

I plan to do a final or more complete report this weekend time permitting, but yes, I will be uploading some sound samples within the next week or so. It's almost complete!!! :)
TIGHT
 
Looks great!

Yup! Seems to be really coming along. I think you've got the right idea on the neck too. What I did was like you decided to first just let the strings pull on the neck under full tuning tension for a while until the neck kind of "settled in" and then at that point use the truss rods to pull the finger board back to the totally flat profile it had before it was under tension. That proved to work very well and the bass is now still true after quite some time. In my other fretless case, I got antsy and didn't allow the settle time and just tried to crank it all up at once. And what happened was the finger board developed a slight "hump" in one spot which caused buzzing on some notes when action was set low. Was not a biggie. I just sanded it flat again and put it back together and it was great, but just sayin'.
 
I really wanted to post a video or some sort of sound sample before the weekend was over. Recording is really a challenge for me (apart from lack of skill) because of self-monitoring options. Most of the time I can't hear the highs and when I do it's because I've cranked them too much that they're too harsh... the lows I can mostly "feel", so don't know when the sound is too boomy and dynamics is a challenge. Long story. Don't worry about it folks.

The reason I wanted to convert my Ursa 6 fretless to unlined was mostly to FORCE me to listen to the sound rather than relying on the lines. From that standpoint this modding journey has been a success. I'm actually very pleased with how it turned out. The fingerboard is flat and smooth and hard. I feel like I can spend the next few years learning on this instrument and be perfectly happy. It's well balanced, looks good, and plays nice, and the Audere provides an added tonal flexibility that wasn't there before.

So today, after almost "bricking" my router and fighting for a long time to fix it, and giving myself a crash course on recording and creating videos I finally got to sit around and record a video. You can find in on my "PrietoBassChannel", right here, in all its out-of-tune glory. :woot:

Well, it's only one video, but you gotta start somewhere right?

I'll post a few more notes/observations in a few hours. I hope this thread can help someone out there thinking about modding his/her SX bass.
 
I'm going to catch a movie with my family in a couple of hours, so before I go, here are my final thoughts.

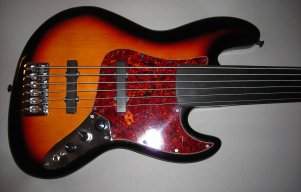
But before, here are photos of my two SX 6ers, one fretted and the fretless I just modded so y'all can get an idea what my fretless started as (identical to the fretted except the frets of course).

Front view:
SX_6ers_front_sm.jpg

Back view:
SX_6ers_back_sm.jpg

For the video I had to quickly learn how to palm mute and play with my thumb. That's how Darrell Craig Harris plays it (of course he's a monster bassist) but the main reason is that I'm still not getting the sound I want out of the G and C strings when I pluck them with my index and middle fingers. I'll figure out the Audere EQ eventually, but for the time being, thumb playing it was, with the help of that scrunchie thing you see there on the neck (those are Gruv gear wraps). fivestringgecko had sent me one a while back and I didn't know what to do with it. I eventually figured out that, among other things, they help get rid of all those extra harmonics and ringing noise on the smaller strings when you place the wrap just over the nut. So that's how I use them primarily, and I liked them so much that I ordered a set of 3 for my other basses. Now, it goes without saying that there's also a moral lesson here: bassists should not play with their nuts uncovered... ;)

Anyway... the fretless does not suffer from the infamous C# on the G string (6th fret) dead spot, or at least it is not very noticeable. The fretted one has one that is fairly pronounced, but I was able to minimize it with a "Fender Fatfinger". Hmm hum, it works, IMO-IME.

Ah, I almost forgot, the fretless is strung with TI Jazz flats. I've had them in there since I bought this bass six months ago, and I like them... or let me rephrase that: I better like them, darn it, because @ $125 USD a set I'm not going to change my opinion of them until I've had them on the bass for at least a few years. :)

To wrap things up, here are a few lessons learned:

1) Find yourself a comfortable and safe work area.
2) Do not use your router in your living room... Your wife (or significant other) will let you know why in a hurry....
3) Do not spray lacquer out in the open; create some sort of spraying booth to protect the object from flying dust. Do not bring lacquered sprayed things inside the house without letting them dry fully first.
4) For drilling holes, say, from a pickup route to a battery route, don't use a short drill bit; use one long enough that the drill won't come in contact with the body finish... :rollno: I'd never do something that foolish; I'm just sayin'...!
5) Always measure twice! Heck, measure five times and sleep over it. Then cut, drill, route.
6) If you're spraying lacquer over lines laid with a "Professional CYA Line Straightener Instrument" (a.k.a. "sharpie") spray very light coats to avoid the marker ink from running down the finish...
7) Avoid letting water get in the headstock tuning peg and guide holes when wet sanding. The water will get in there, expand the wood, and crack the lacquer finish.

I've had a blast doing this. Literally. Would I do this again? In a heartbeat. I just don't have the space for another bass right now, but I'm already thinking of other projects I'd like to try.

This is all. Thanks to everyone that participated and provided me with feedback, ideas and encouragement.
 
  • Like
Reactions: chuck norriss