• TalkBass has been independent since 1998. Add your voice.
    Create a free account to reply to discussions, view embedded media, and browse with fewer display ads.
    Join freeLog in
    Want zero display ads or expanded classifieds tools? Compare plans.

The Hossenfeffer III Build

While I wait for the Covid-Glacial shipping process for parts, might as well make templates. I don't know what other people use, my process as follows:
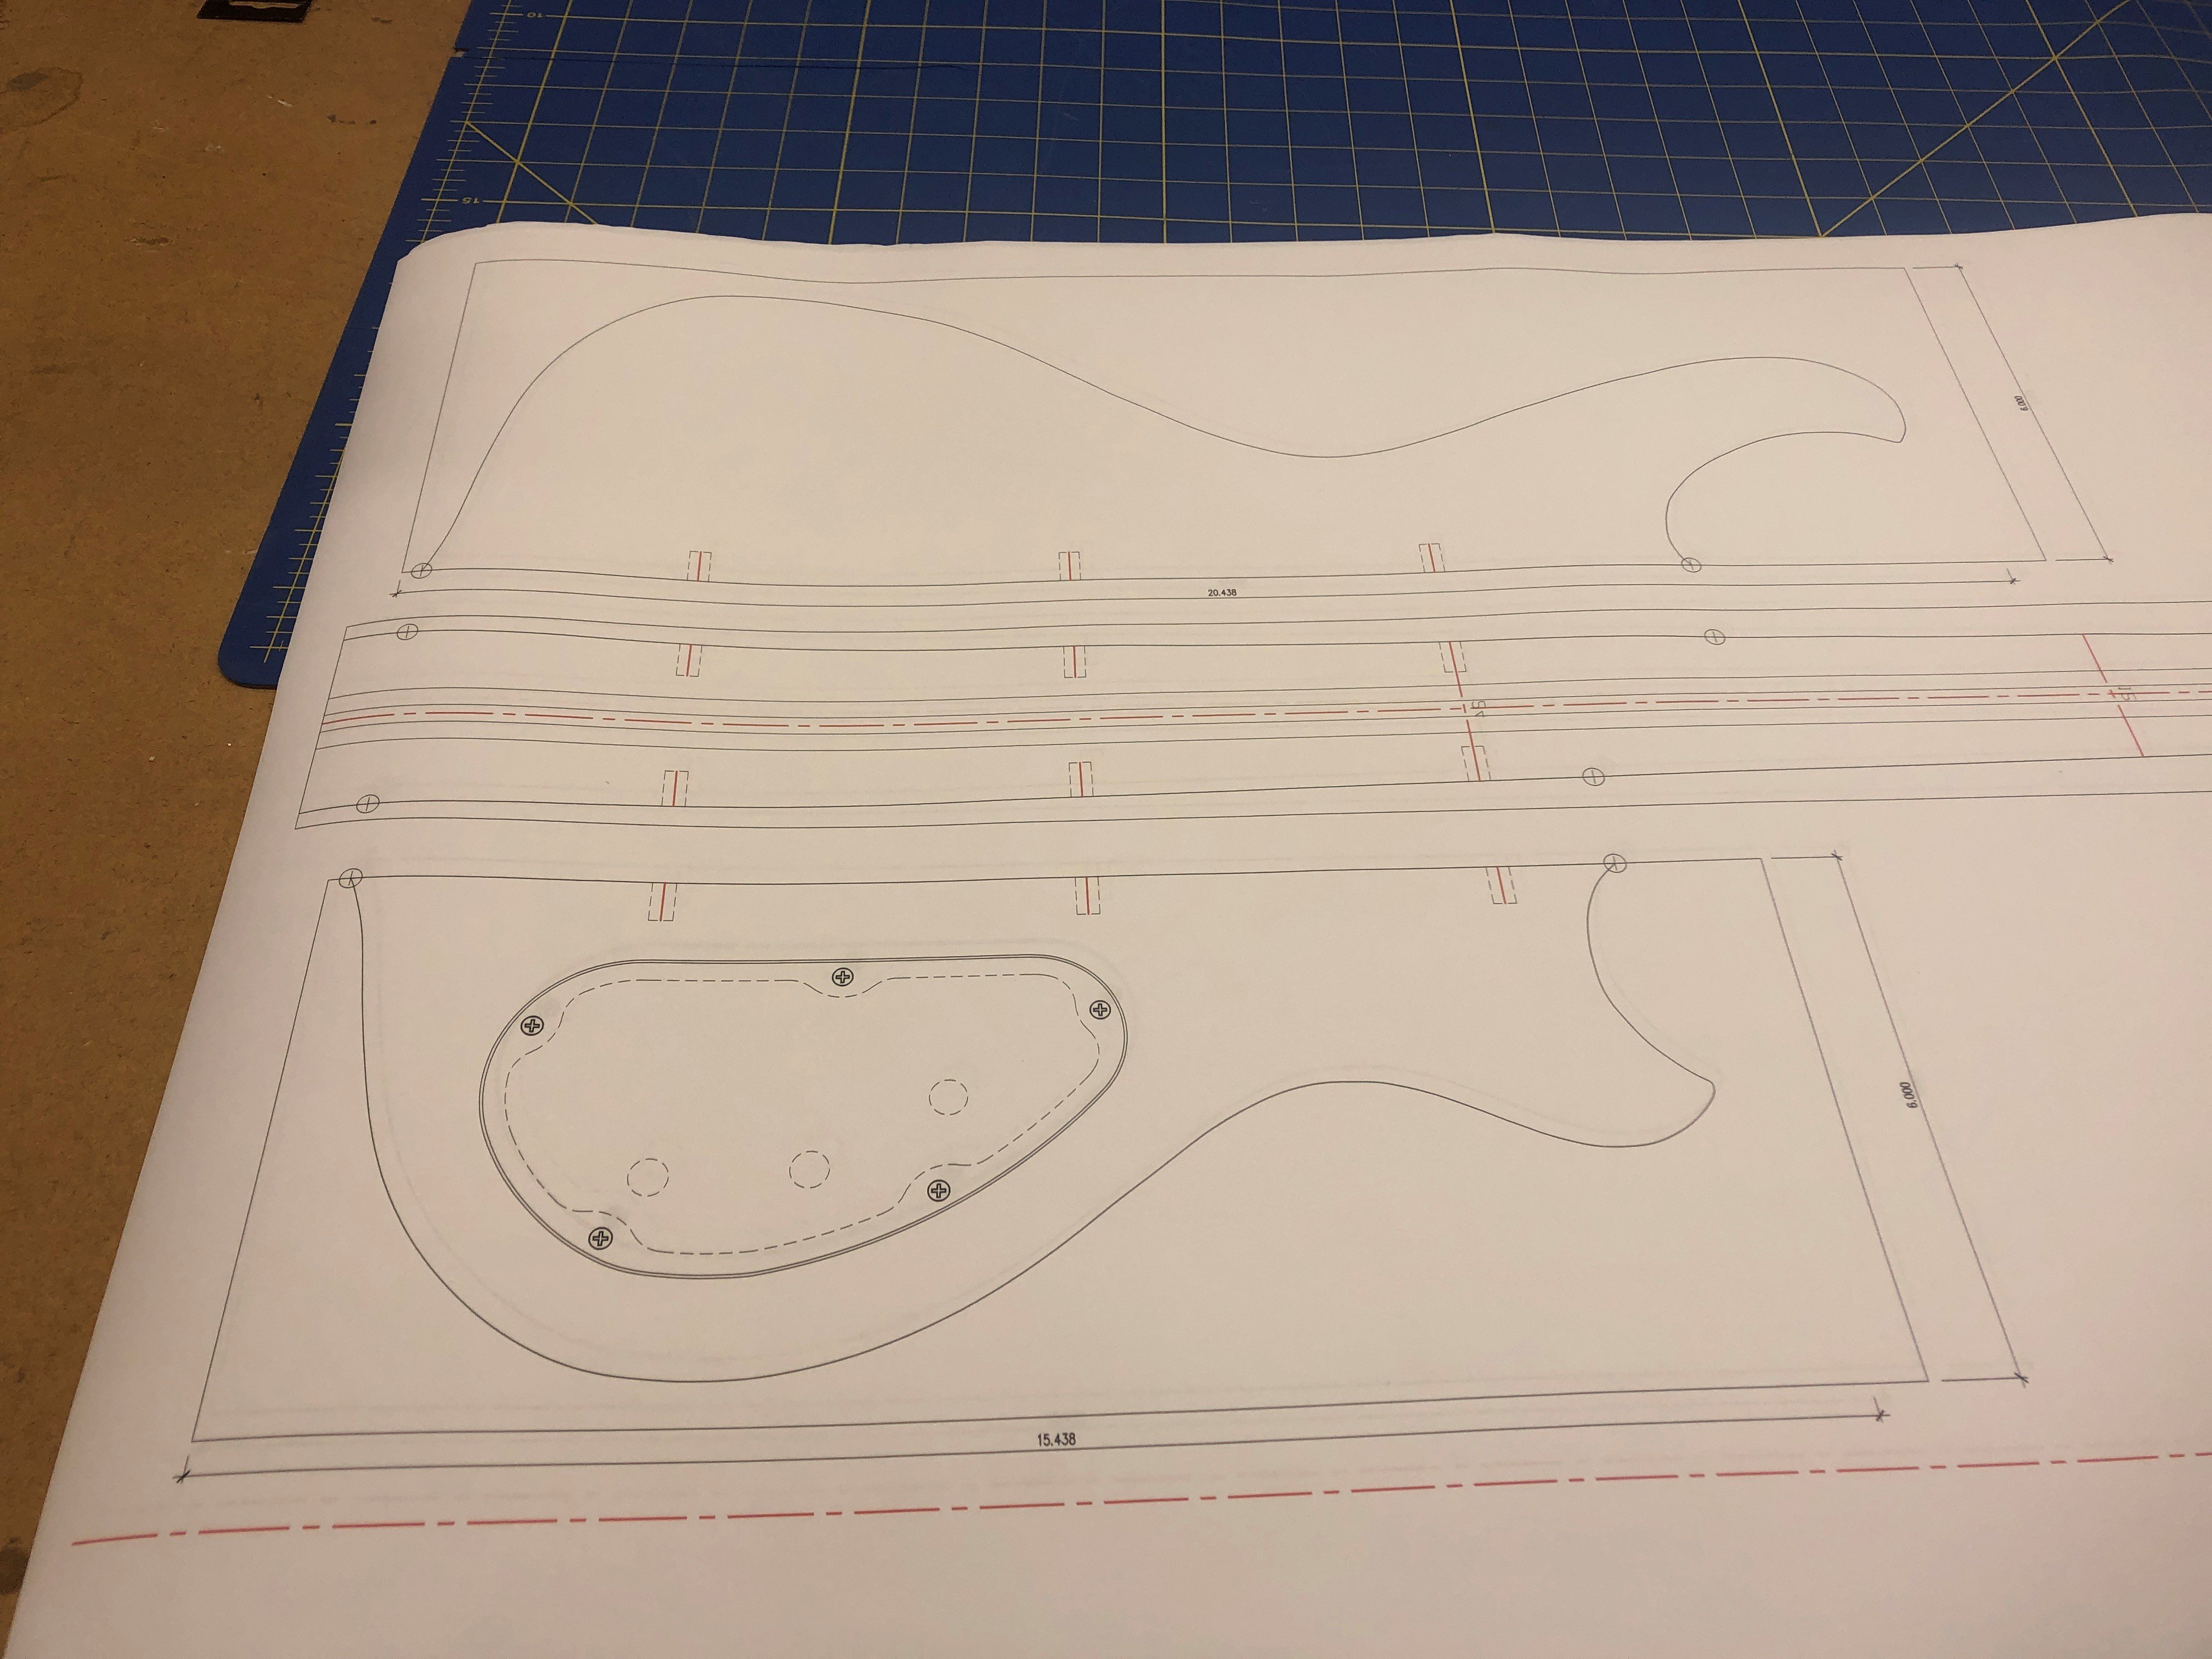
1:1 CAD drawing printed out on bond. You can see the dowel centers that will pin the whole thing together
G5s5ZbC.jpg


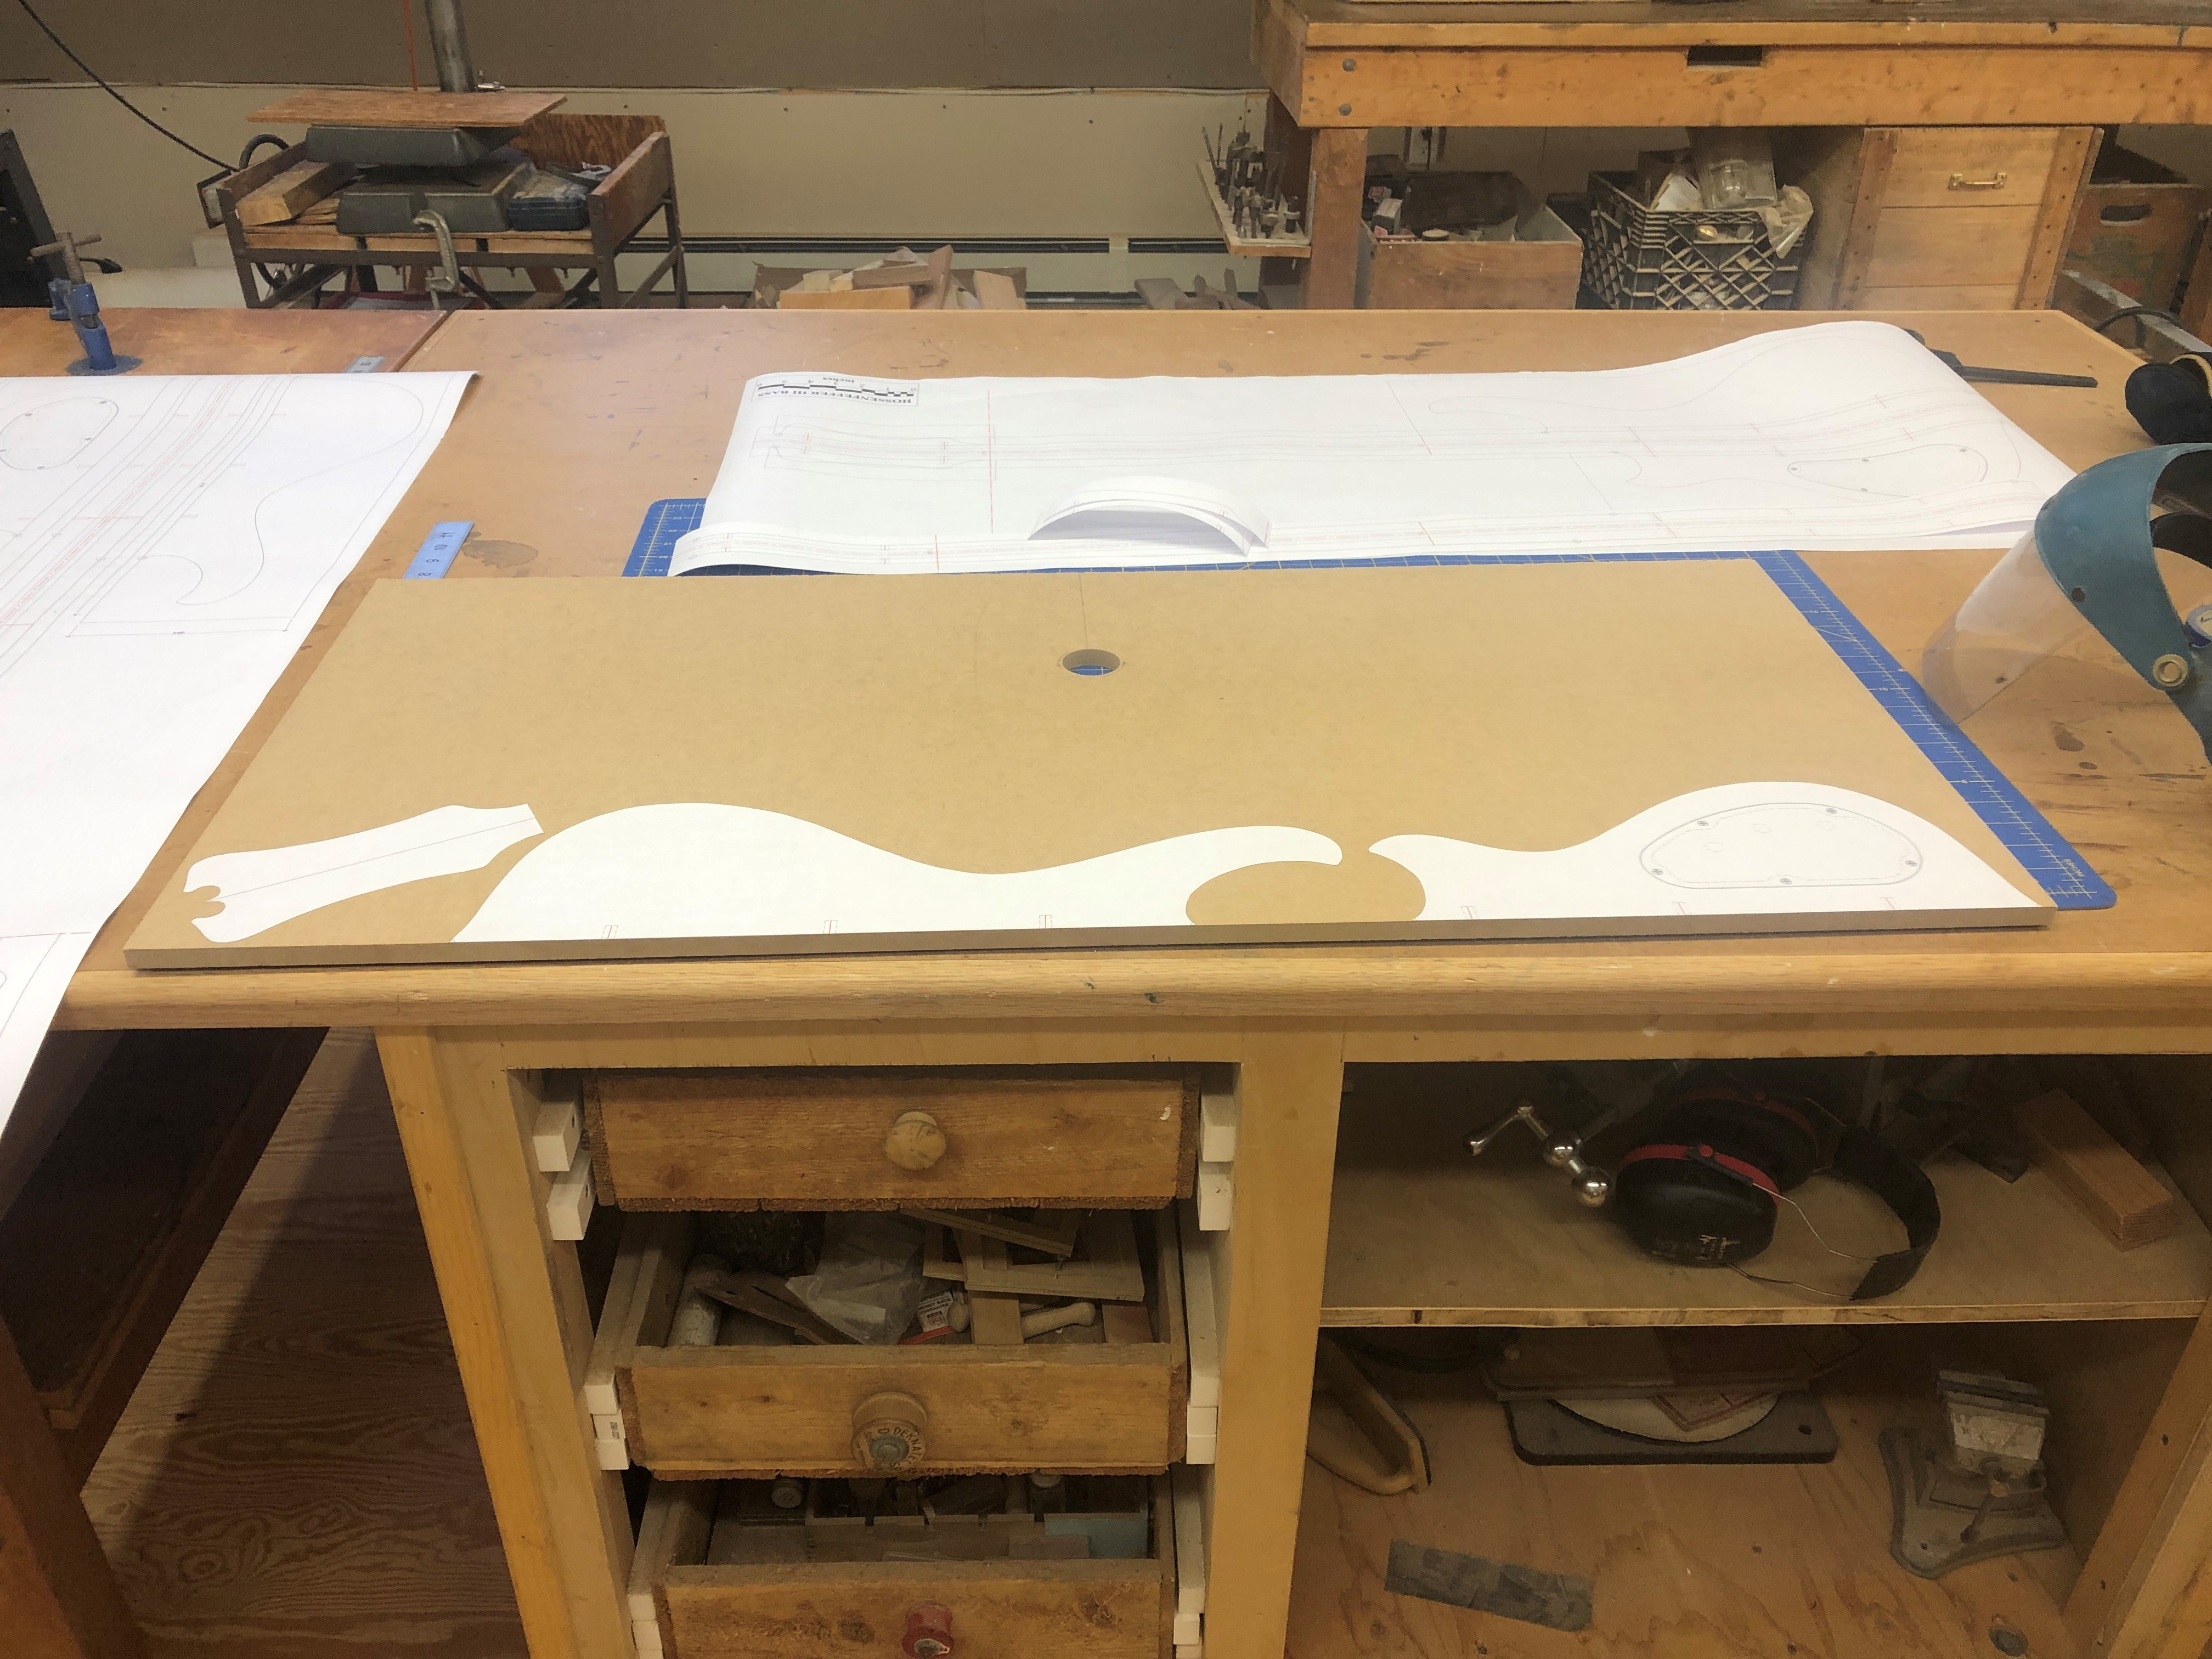
Glued to 5/8" MDF with Super 77. Some people use plywood, but this is a lot easier to sand
eo3ULlg.jpg


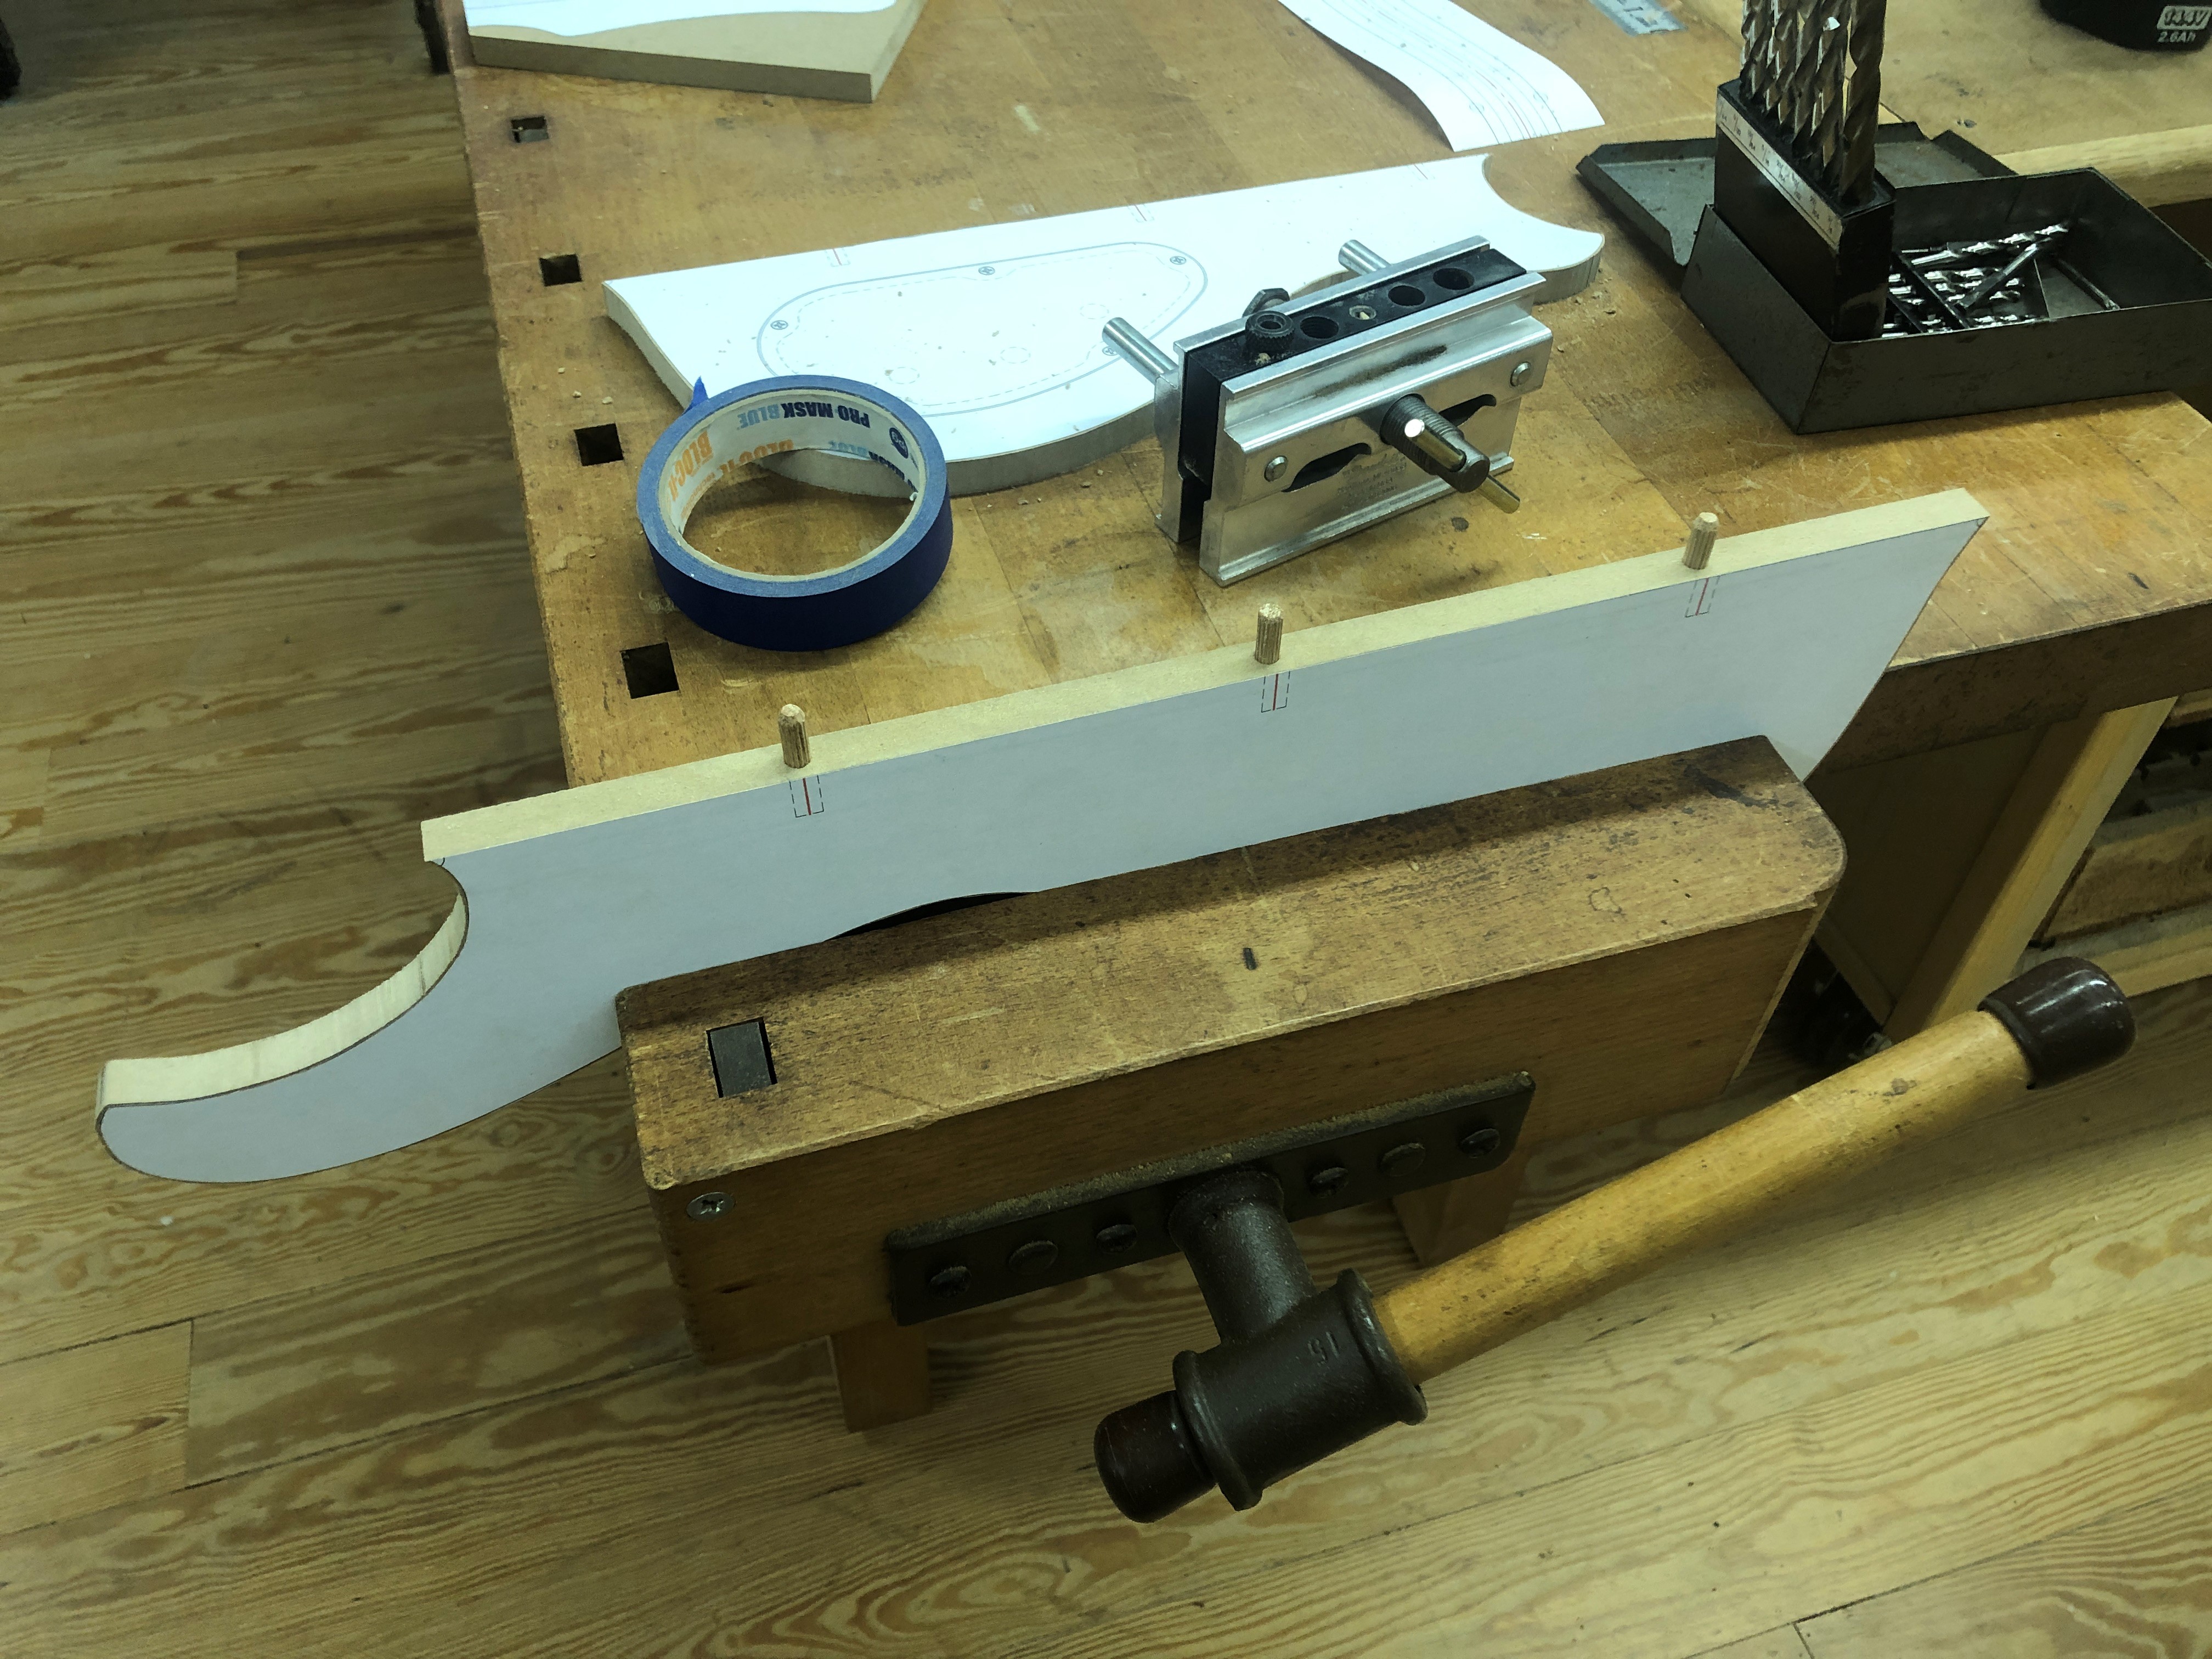
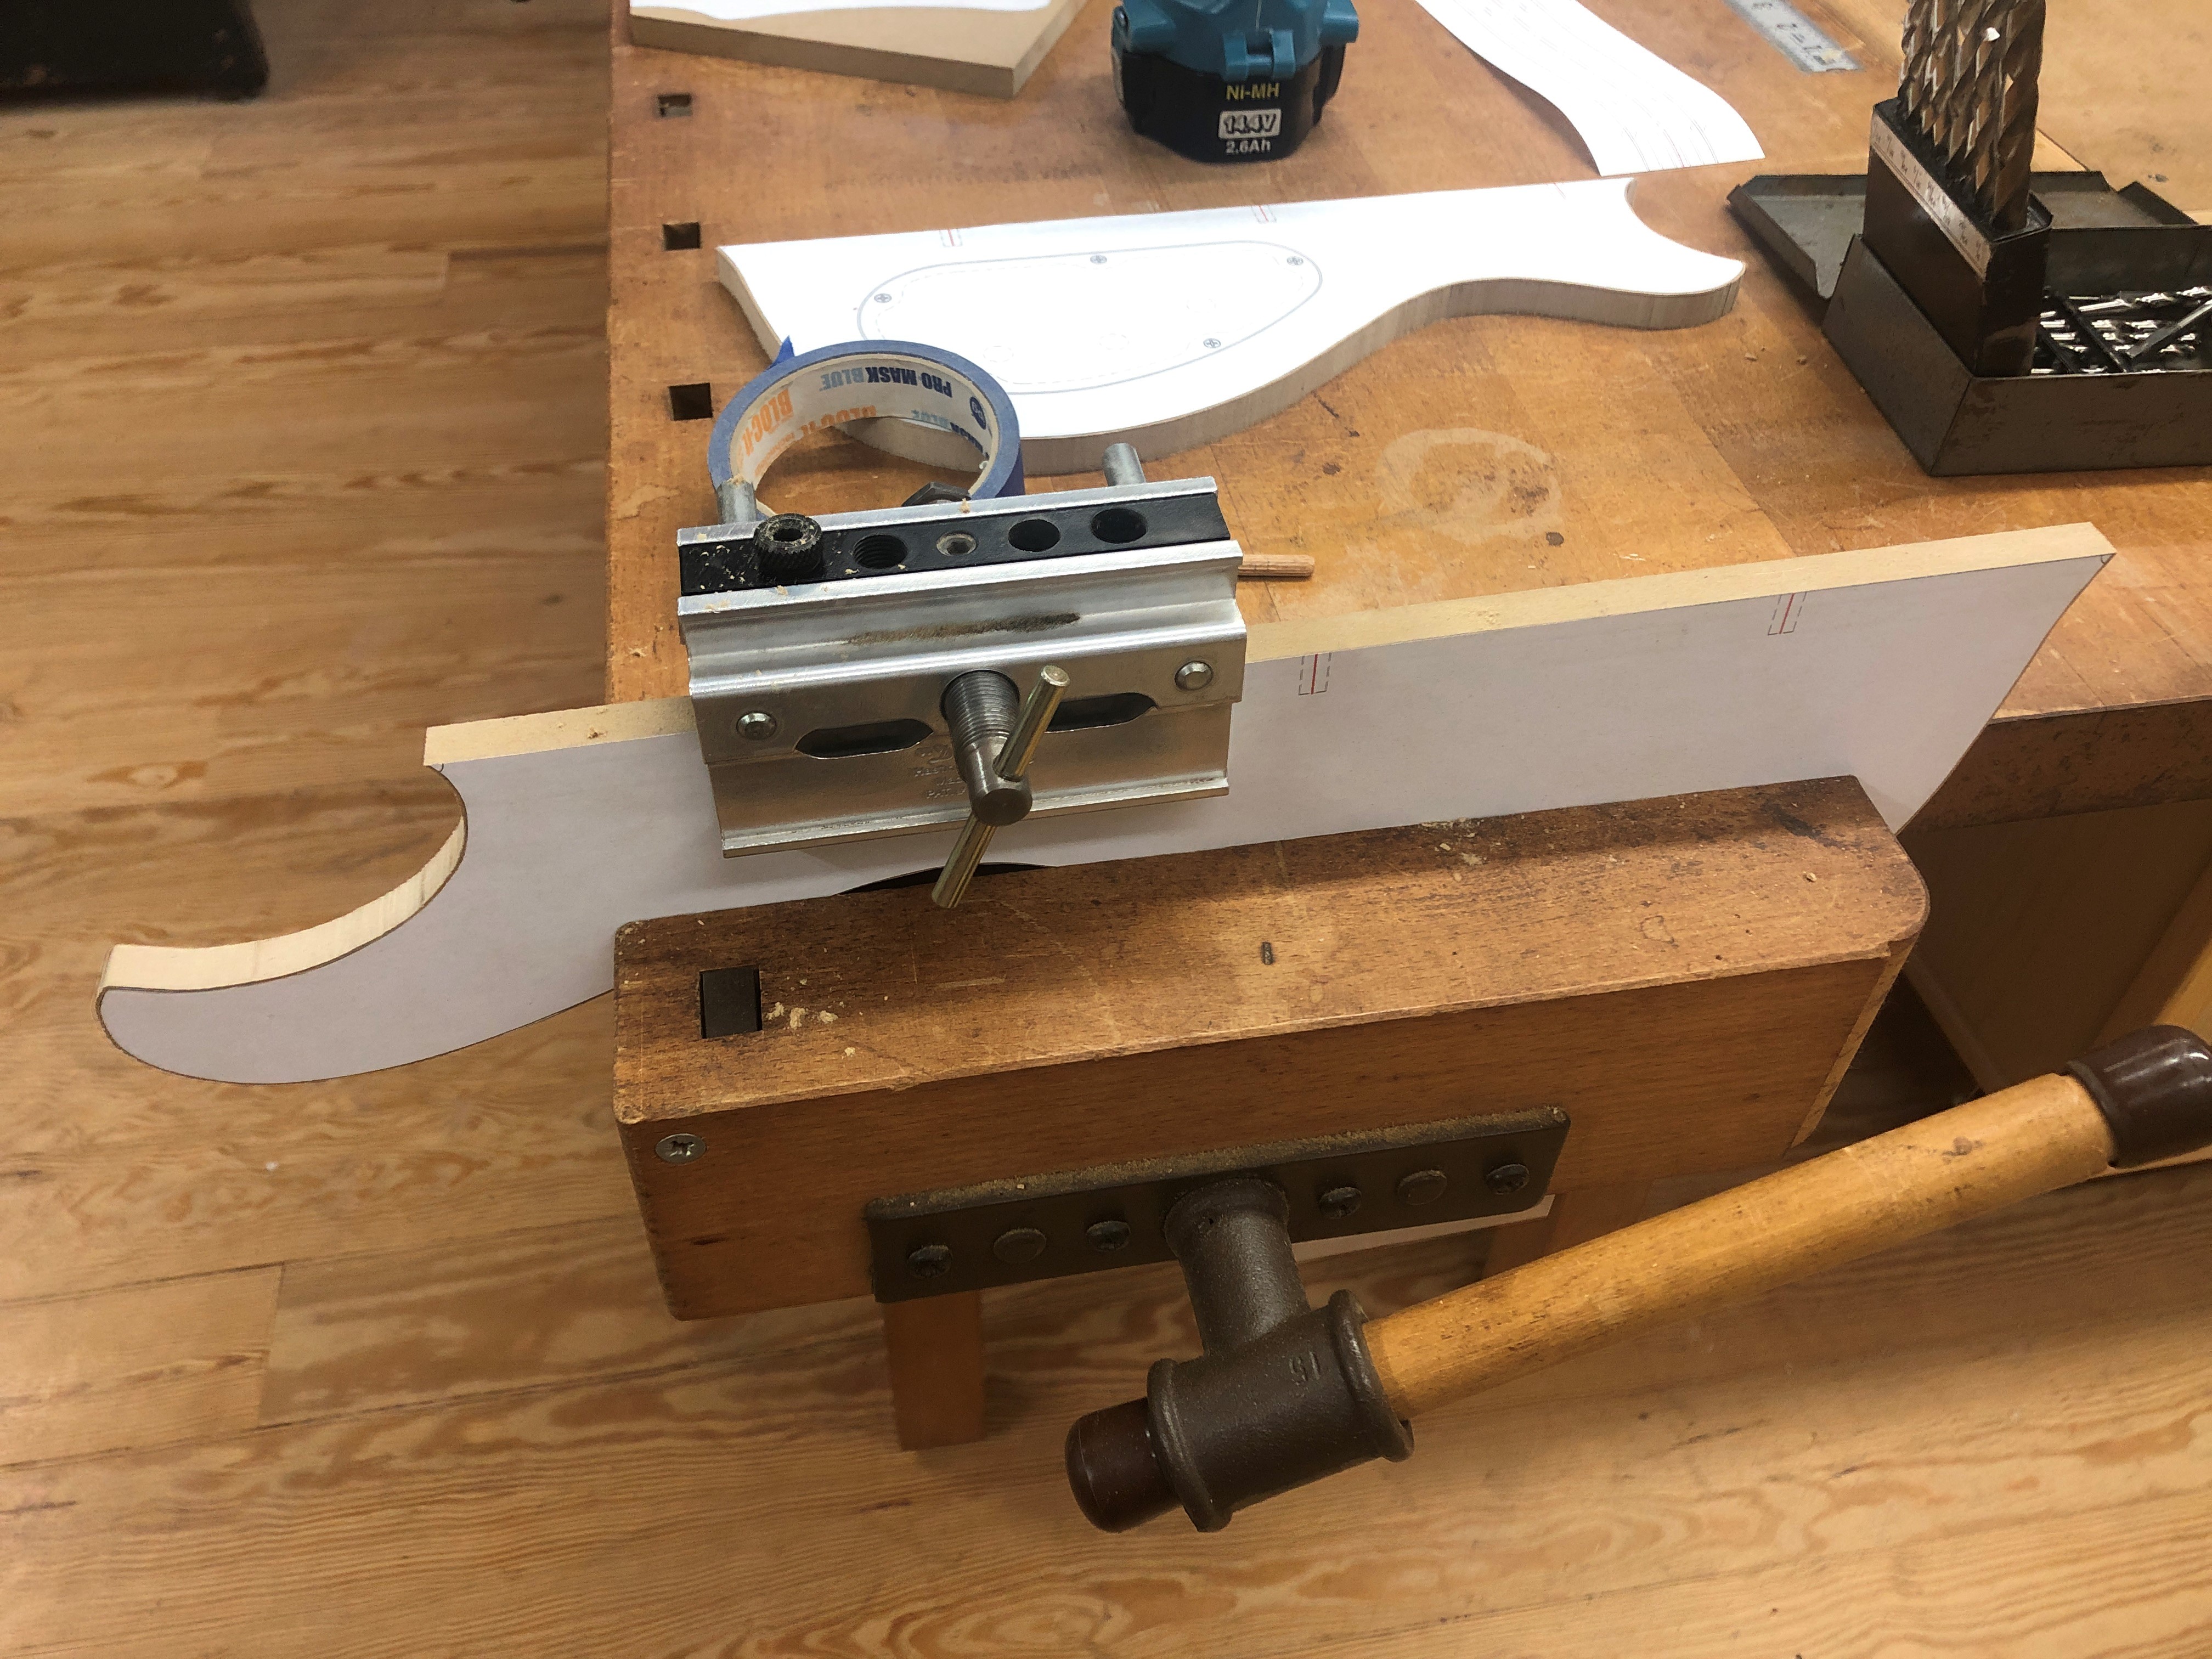
Bandsaw to shape around 1/16" outside my line, then drill for 1/4" dowels
dHUalmo.jpg

FOa6wIt.jpg


I don't own a ROSS, maybe next christmas. This is just my Robosander with the bearing below the table. I've gotten pretty good with it, but a ROSS would be nice....
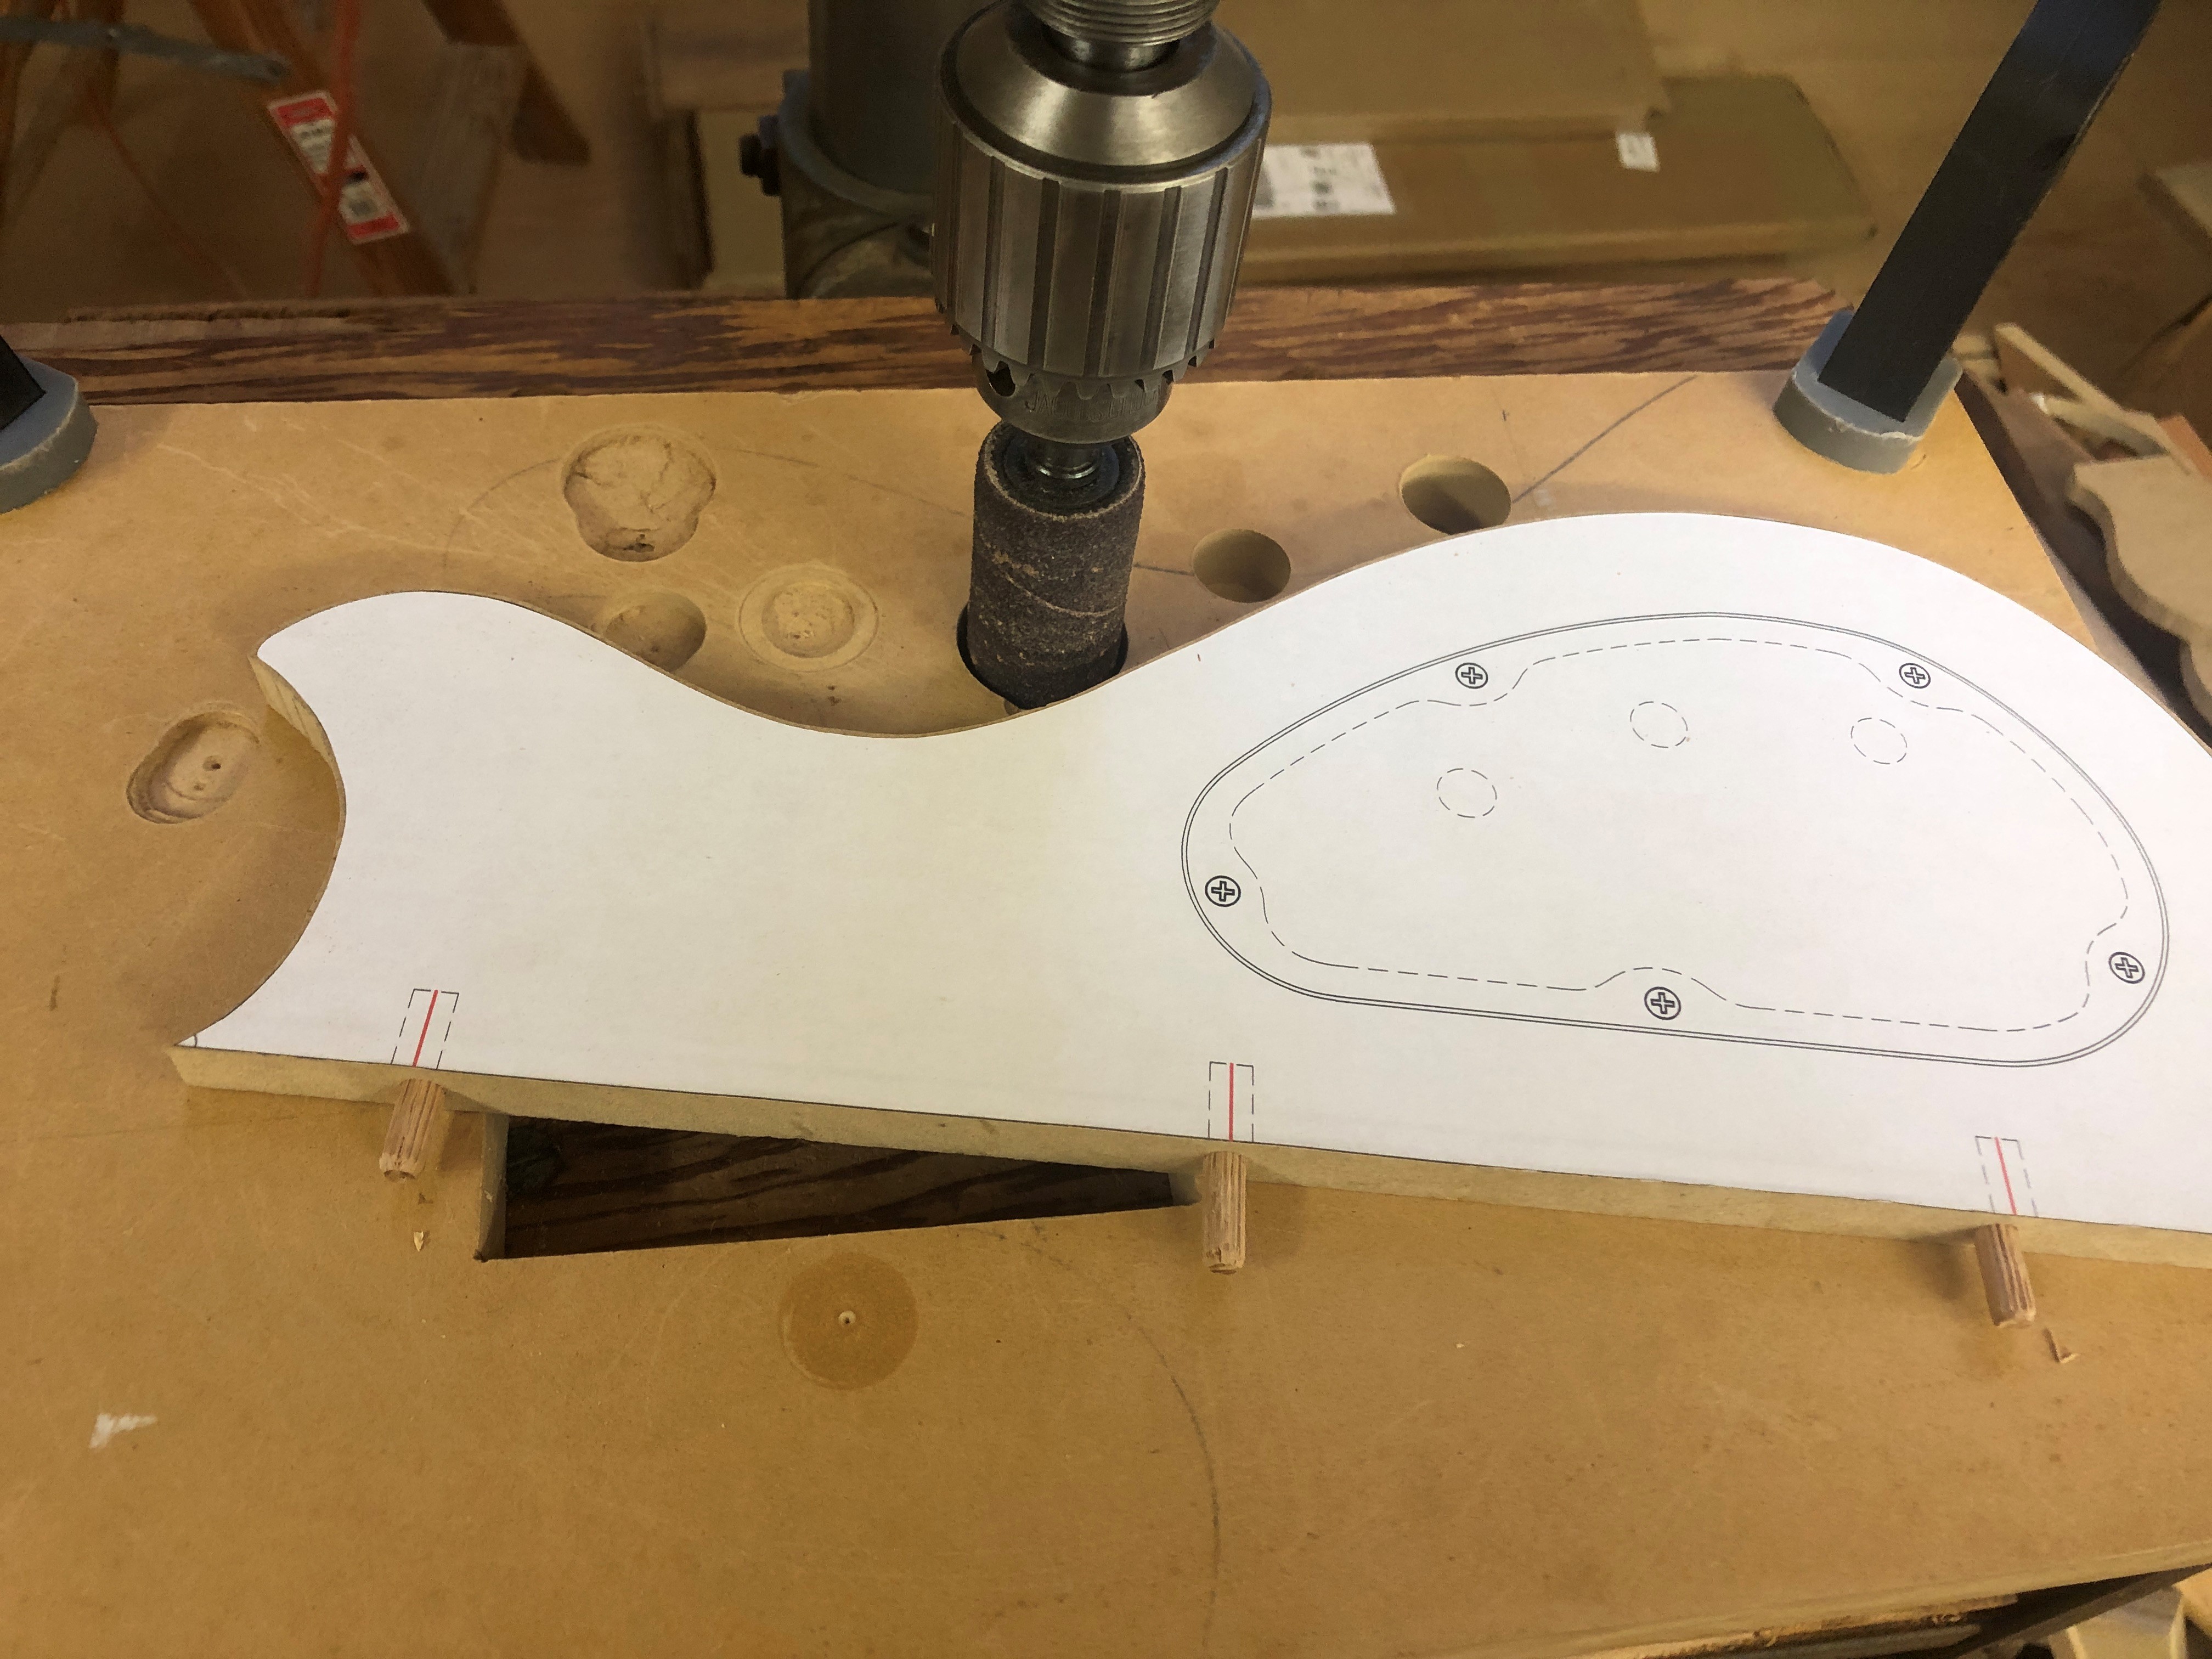
kmQIT2o.jpg


Some low-budget compass sanders using the spray can and few strips of thin cut-off waste laminated together. I mark the edge with cross-hatch and compass-sand until all the high and low spots are gone, took about 5 minutes each side after the Robosander. I'll go back and soak the edges with CA glue to harden them up once I'm 100% satisfied with the fair curves.
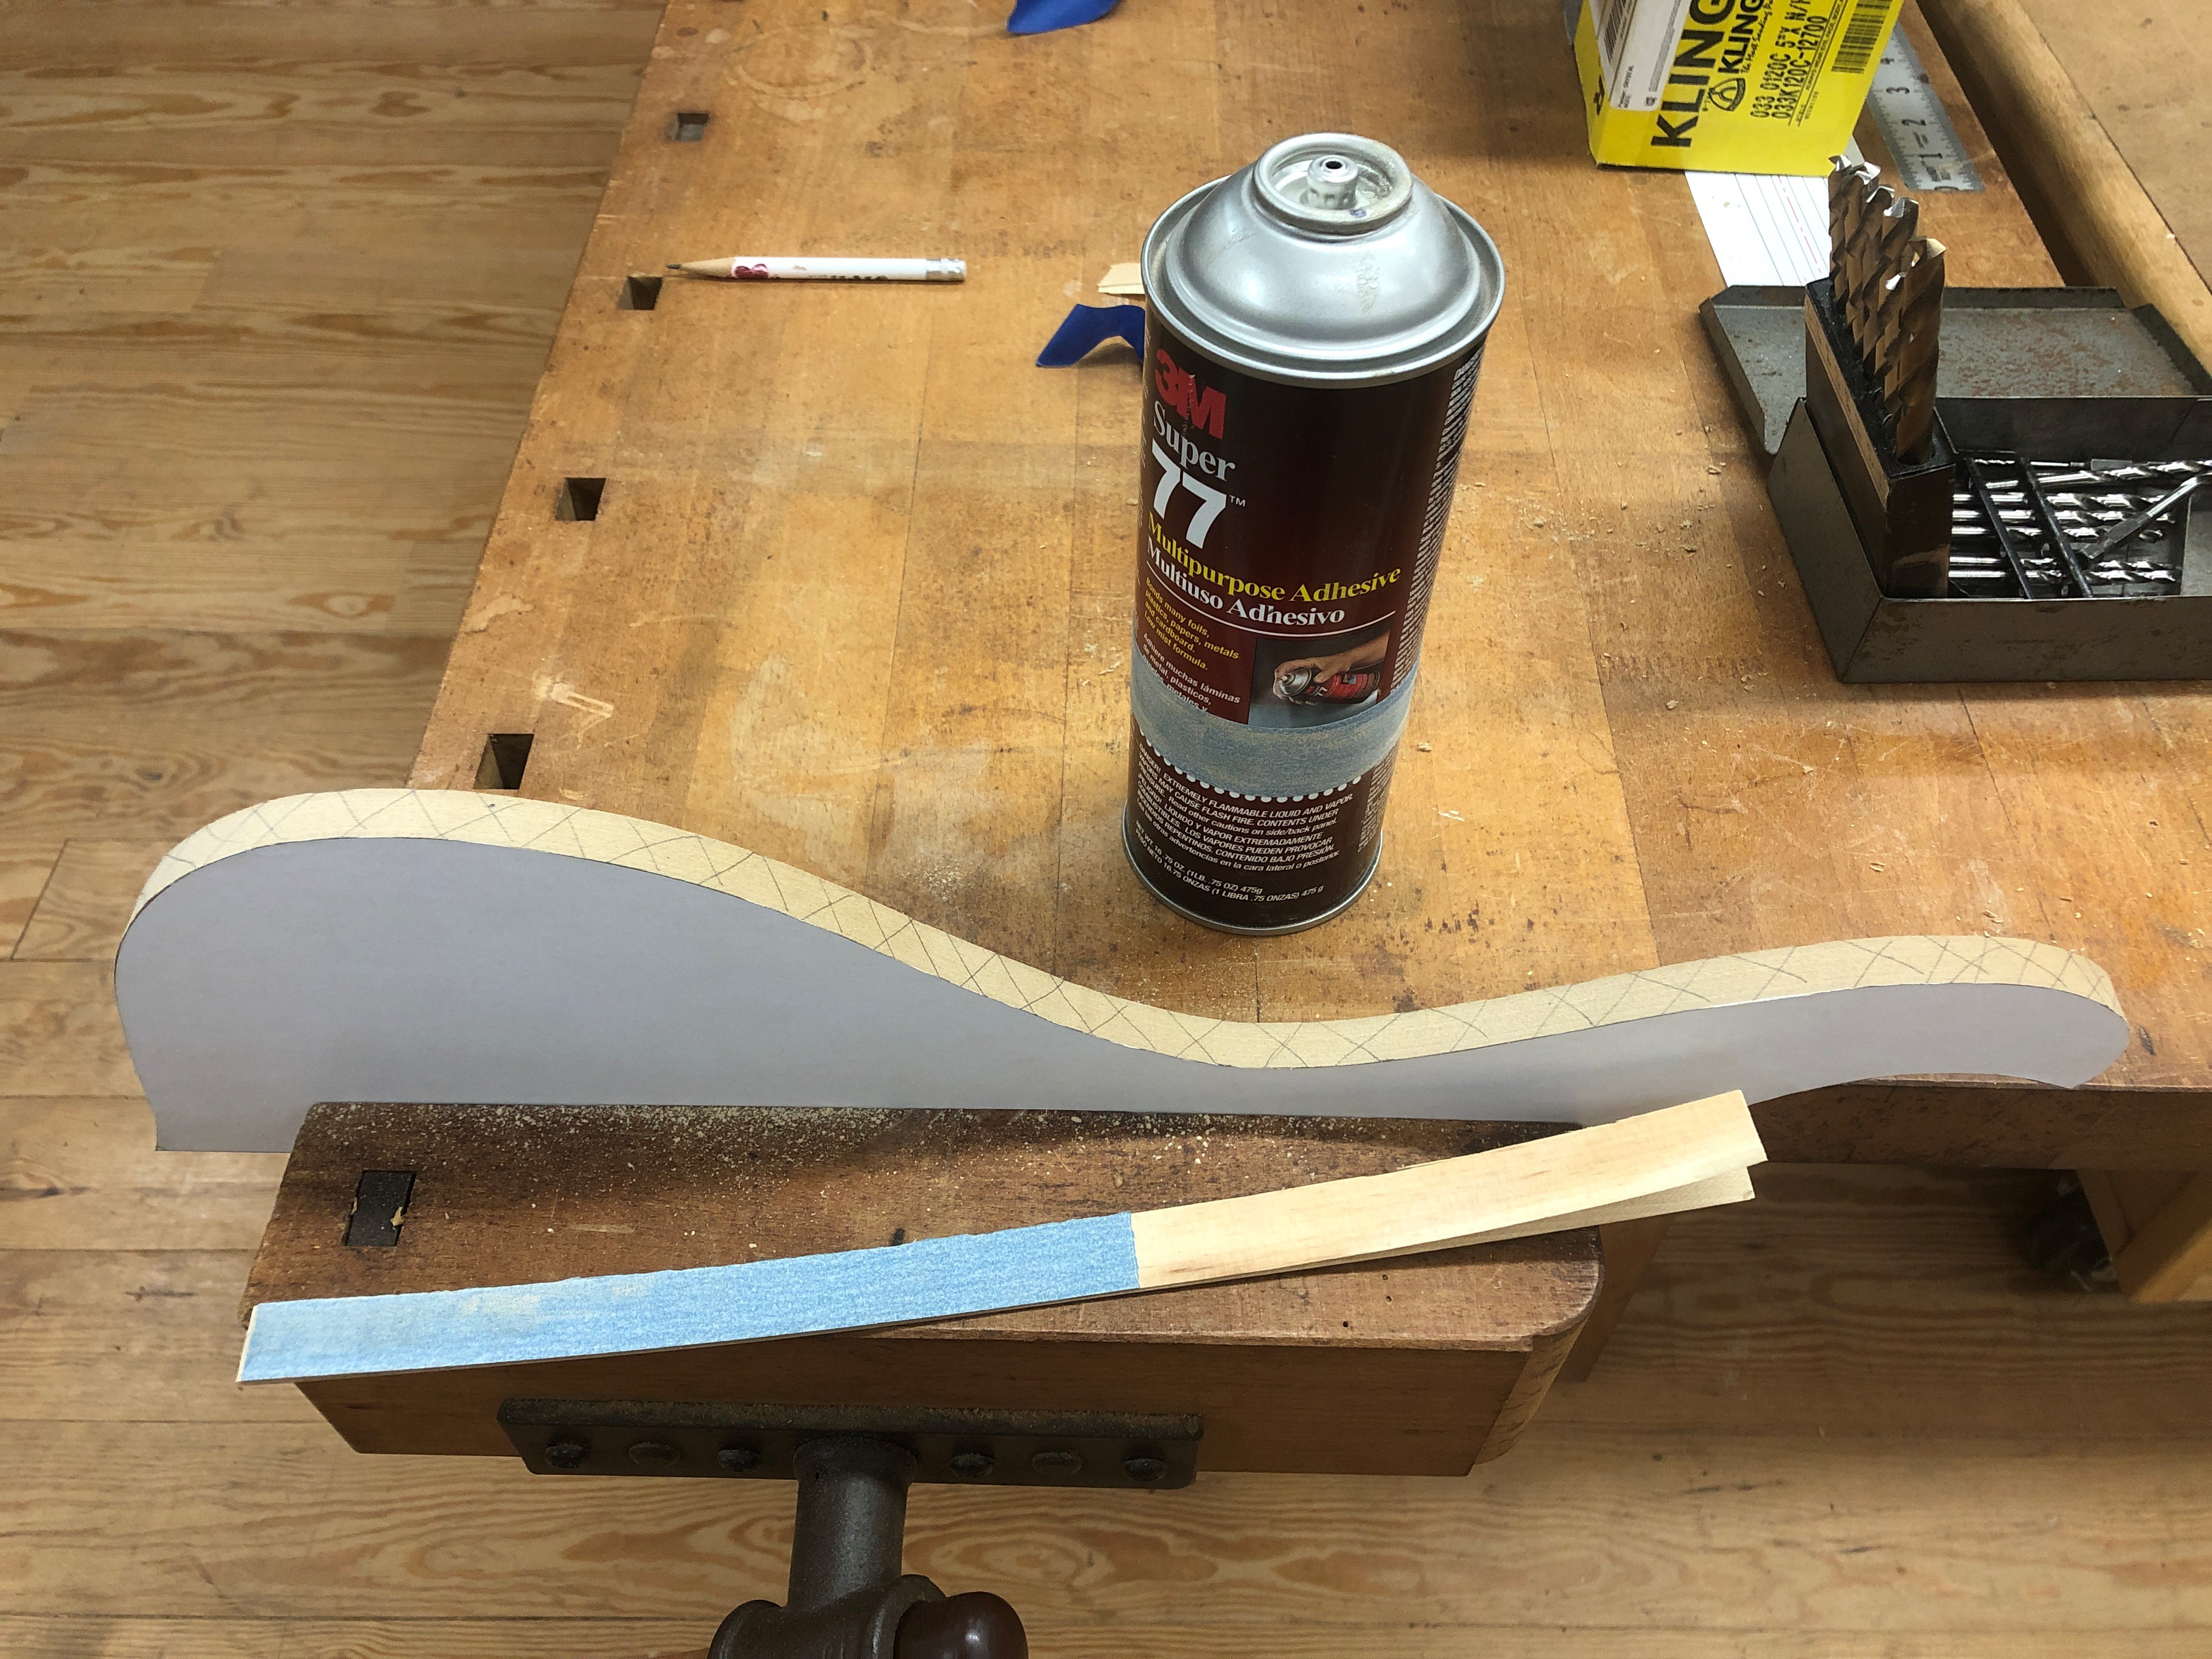
1V2vZlJ.jpg


The finished body-wing templates. I have to get some 5/8" x 48" MDF for the neck template, off to HD tomorrow. I'll drill the Heart Omega cutouts with a forstner, but I really can't do that until the wood laminations are assembled, or maybe do a separate dedicated template for that, since the cutouts overlap from body wings to neck beam. I'll do the pup and bridge routes, pickups, control cavity, and F-Hole as separate templates
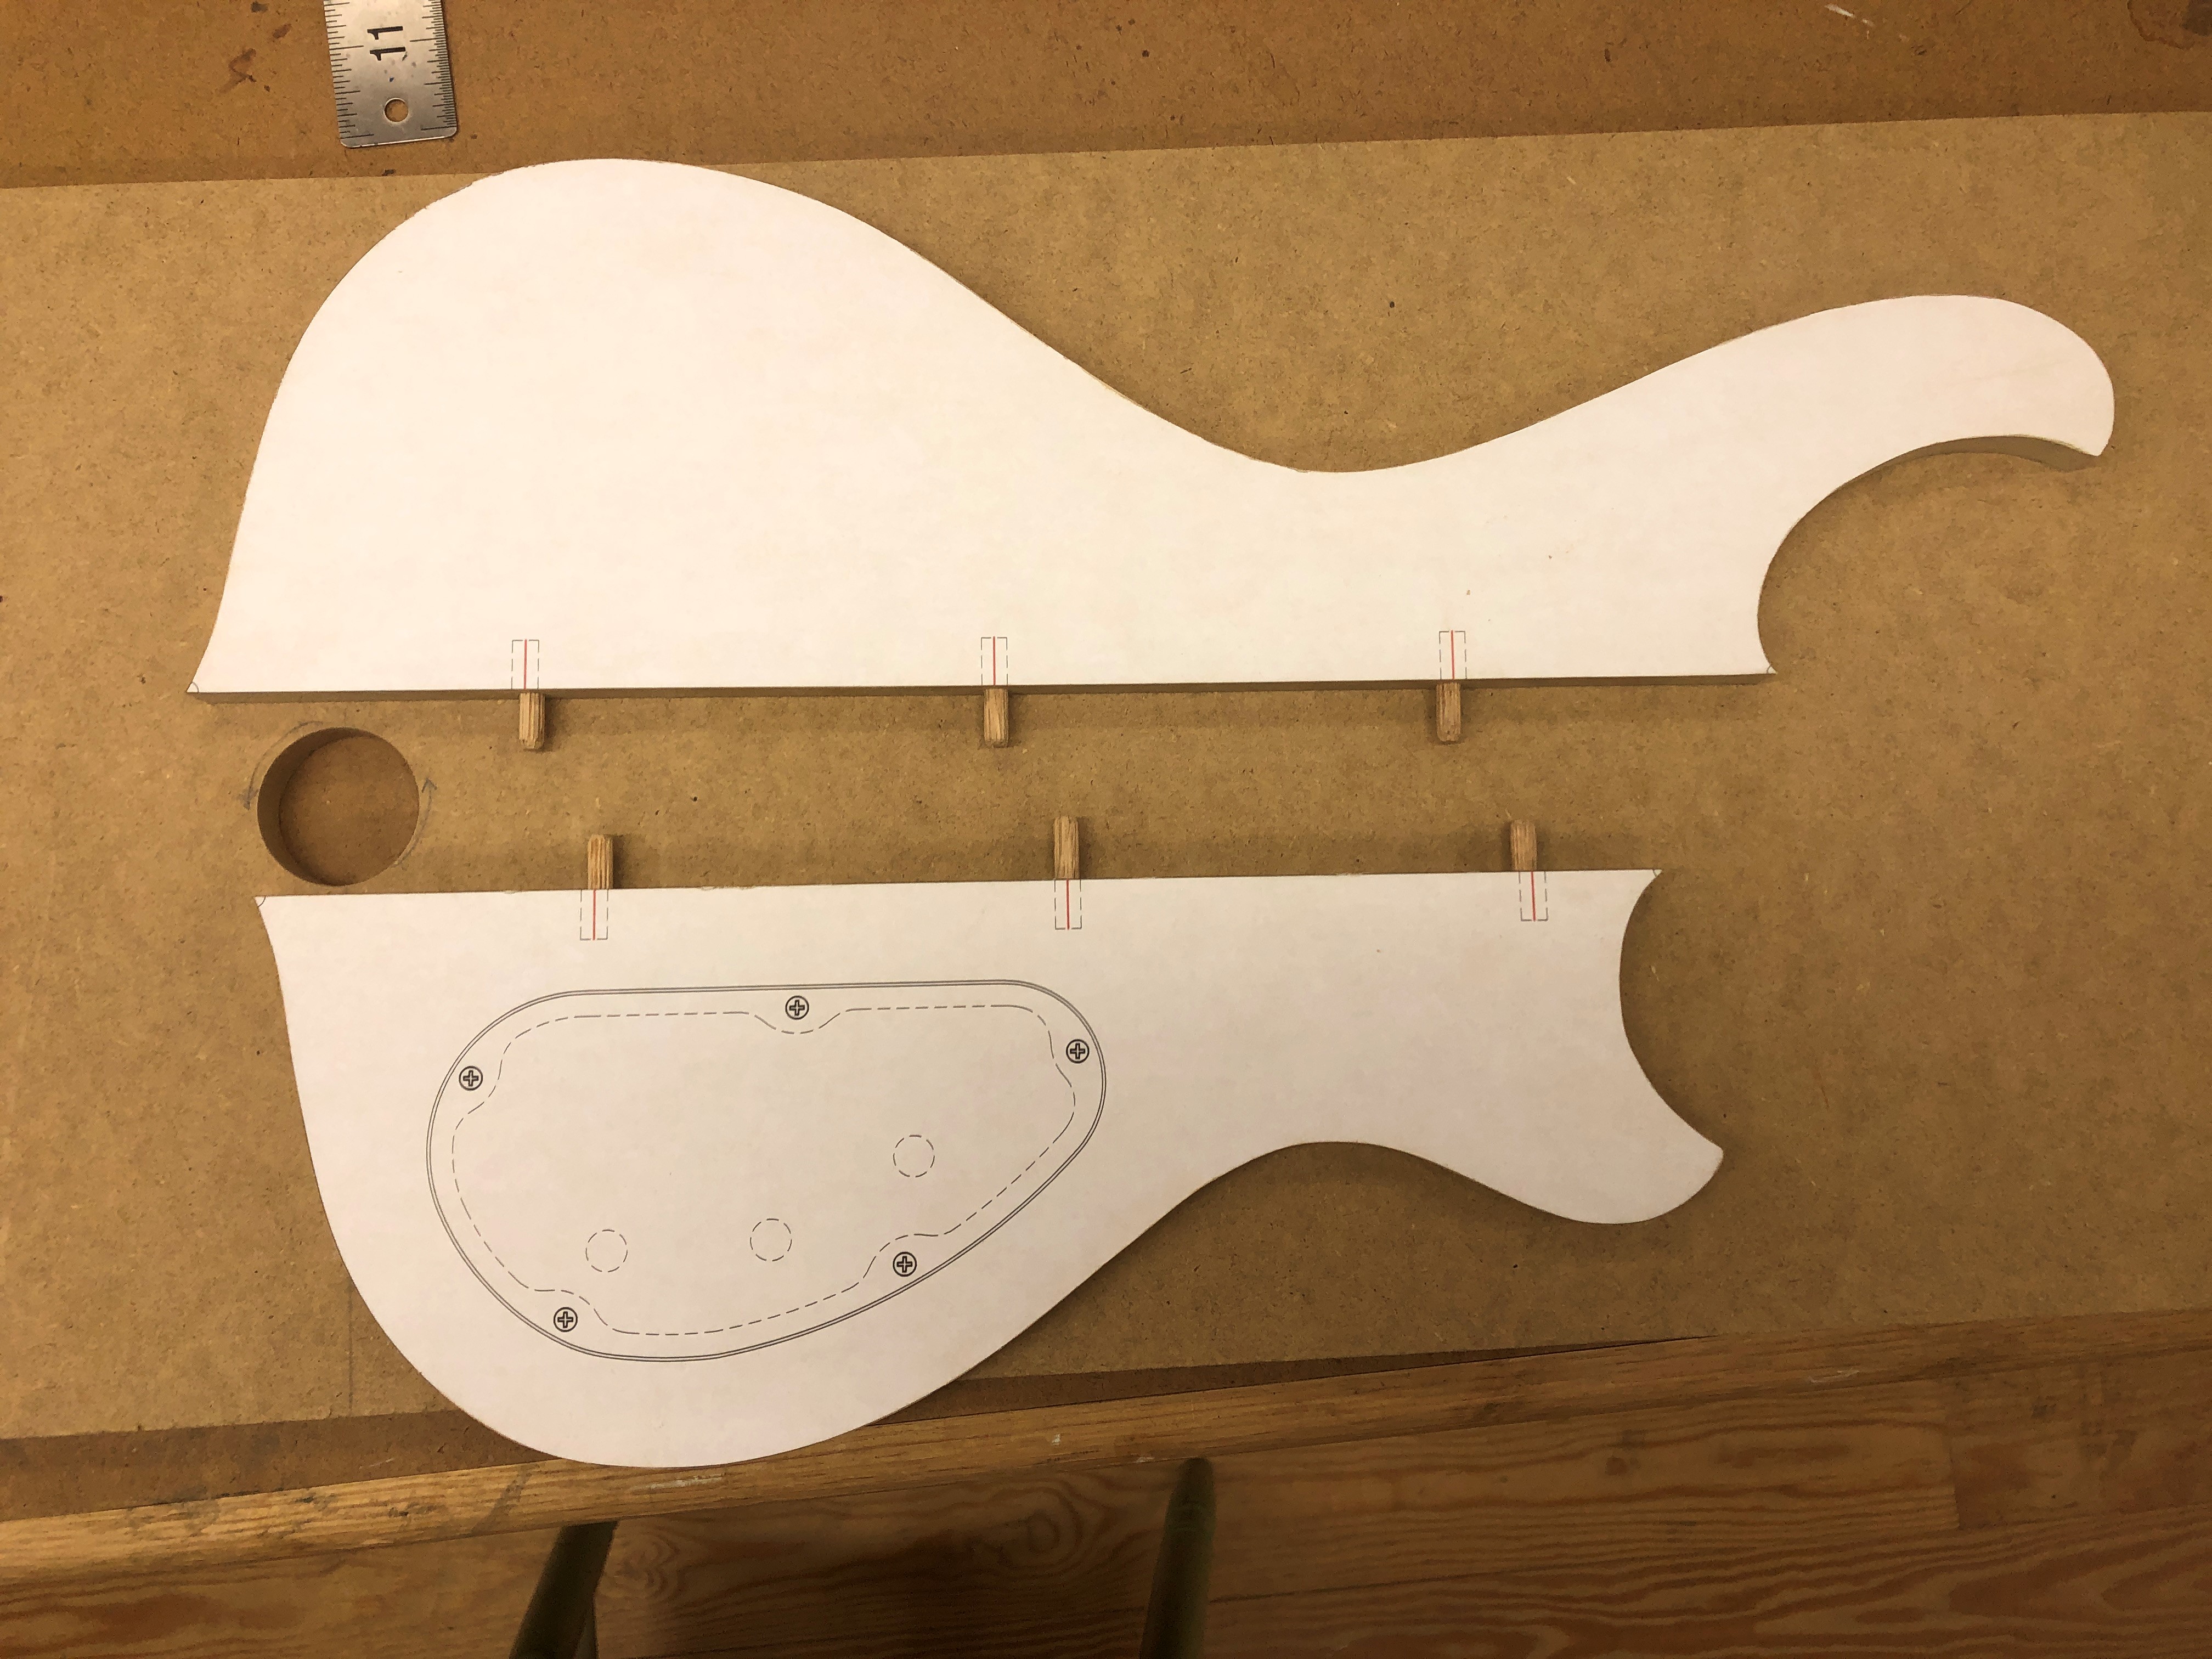
VlFD6eB.jpg


Merry Christmas, All. Kind of a weird one, just Zoom calls with relatives and my oldest son, but it is what it is, and so far my whole family healthy, I'm a lucky man.
 
Last edited:
Got the neck template made and doweled to body wing templates:
h0I0AR7.jpg


Rear view of the loosely assembled template rear view
IDLXseZ.jpg


Front View. The discoloration around the paper edges is due to my slightly over-zealous application of CA glue to harden the edges:D. I keep forgetting how nasty that stuff is, makes my eyes water like crazy.

BAiTap8.jpg


Of course, I had to immediately play "Air Bass" with it, sits really naturally on my knee, and the belly cutout is just right. the neck is noticeably shorter at the nut, I think I'm gonna like it.

headstock template. I'm a little nervous about binding that wee little point, might have to round it a little or do a mitered binding joint
gjBYSON.jpg


The Axemasters compensated brass nut finally arrived, looks like it will polish up nicely. Smoke and mirrors? I don't know yet.
fr1GPx0.jpg


Control cavity cover template. I'm going to try running a 1/32" downcut spiral dremel bit around it on scrap to see if I can use it to cut a perfect "seamless" cover in the back.
WvNhm4Y.jpg


This is all coming together pretty quick, but I'm going to run out of templates to make before all my lumber arrives.......
 
I could use some advice on how to handle the control cavity cover. I've never done a true "continuous grain" version, where the cover is cut directly out of the back material fo perfect grain match.

The body will be a Hippie Sandwich, 1-1/2" thick total. The back wood will be 1" thick sapele mahogany, then a 1/4" thick maple middle layer, with a 1/4" cococbolo front cap.

Here's the template for the cavity cover, Im leaving 1/32" all around for clearance.
WvNhm4Y.jpg


Here's the template for the "shelf" the cover will sit on, with some thickened areas for screws or magnets. Not my best template making job, but it will do:
3rYTfp6.jpg


Since the back is 1" thick, the only way I can think to do this is by cutting the cover profile all the way through the sapele plank and then planing the cover back down to about 3/16" thick. That would leave a cover-sized hole in my sapele that would have to be infilled to form the "shelf". Is there a better way to do this?


Continuing the template making (because I'm WAITING for lumber), I made the pup routing template. The pups are Seymour Duncan Basslines soapbar humbuckers (look familiar @ctmullins? :D). I realized they are very slightly wider at the base than at the top, which allows them to come out of the original mold they are cast in. 5 layers of blue painters tape = 1/32" or so, so I wrapped the base of the pup to allow 1/32" clearance at the tightest point, the base, and glued up some 3/4" MDF tight to the tape.
GQLAvCh.jpg

UFzTrgV.jpg

SYcAvuu.jpg


Does that look like too much gap? In retrospect, given the very slight "taper towards the top, I could set the gap very tight, like maybe one or two layers of tape at the base, which will increase very slightly to something like 1/64" at the opening. Advice?
 

Attachments

  • 3rYTfp6.jpg
    3rYTfp6.jpg
    1.1 MB · Views: 28
Last edited:
Loving seeing all your template making process @Gilmourisgod, and yeah, my process was much like yours. Draw in CAD, print to 20lb bond at full scale (having access to that ability is sweet), cut it out and affix it to MDF, band saw close to line and since I do have access to a spindle sander I used that to clean it up. I've got a lot more templates to make on my build, but I'm stuck on the budget for electronics and until I get my pickups, pre and controls in hand I don't want to do anything just yet. But yeah man, love all your templates! Thanks for the detailed posts.
 
I just saw a thread over on TDPRI in which a builder makes a matched control cavity cover. Basically you need some extra thickness on the body blank, then you plane away around the cavity cover (using the router sled planing method), then slice off the cavity cover with a japanese pull saw.

How much extra thickness do you have right now, @Gilmourisgod ?

Details here: How about some S-ish build fun!
 
For control cavity covers, I do something similar, but I use a slightly different process. I rough cut my body blanks about 1/4" too thick then resaw a slice off the back and keep the waste piece to cut the cover from. I also don't leave a ledge around the actual route, just three little islands to stick magnets to. Then you can press on either extreme end of the cavity to pop it up and release the magnets. Makes for a super clean look - matching wood grain and no screws!
 
I'm not quite up to date on the thread. Are you capping the Sapele with a decorative top? In that case you can saw out the control cavity now, before gluing anything up. Saw right to the edge of the body wing piece, such that the neck blank becomes one side wall of the cavity. Save the chunk you cut out, and slice a piece off for the cover. You don't get to preserve the little islands for the screws/magnets this way, but you can glue blocks in to use for that. That's what I do when I don't have extra thickness for the usual method.
 
Yeah, thats similar to what was thinking, but not tight to the neck beam. I’ll be cutting a “plug” of sapele out of the 1” thick back and sawing a 3/16” thick piece of it off to become the cover. The trick is making that cut cleanly. Going to experiment with some mahogany scrap to see what works best. I was thinking I could run a 1/32” Dremel bit, with the 1/8” shaft running along in contact with my cover template, to cut a perfect slot into the surface of the sapele. That might risk burning the MDF template of overheating the bit, but maybe if I do it in very shallow passes..........
 
  • Like
Reactions: dwizum
Meh. That first attempt at a pup rout template was a bust, it just looks like too much clearance to my eye. It's tight at the bottom of the route and a little sloppy at the top, the taper in pup dimension top ot bottom is imperceptible just looking at it, but it's definitely there. MDF is cheap, I'll keep trying until I get it right. I only get one chance to cut the cocobolo top right, I have to be 100% sure of the template. Learned that the hard way, repeatedly.
 
F-Hole Template. Question is: Can I hack binding this? Ive never done an f-hole, bound or otherwise. I'm thinking I could make a positive "donut hole" template, which would be this exact profile, but .040" smaller all around as a form for the binding, effectively "clamping" the binding while the glue dries. Anybody done a bound F-Hole? ( that sounds wrong doesn't it?)
zsbxAgu.jpg


On that note, I'm damn near out of templates to build, in USPS purgatory. I stupidly ordered the Warwick bridge and Tailpiece from a place in Germany (because it was half the price of everywhere else), now my package is in some kind of USPS tracking black hole. Same with some lumber and other parts, going on three weeks shipping time for most of it. Yeah, i know, First World Whiny Problems.......
 
Last edited:
Now this is a very cool project.

First a very Happy New Year!

Lots of comments, sorry!

Love the newest headstock design, because it sort of mirrors the heel of the guitar. As for doing the binding, definitely miter the center and keep the edge sharp. You will be very happy with the results!

Richlite is awesome! It's a fabulous material for fretboards, but if you can get it with fret slots and radiused, definitely do that. It's a very tough material to cut narrow fret slots into and to sand a radius into.

Now this is the long part, about inlays. I highly suggest using MOP or Abalone for fret markers. On the second build for my daughter she wanted Heart shaped fret markers and her name in script in the headstock. The body was Heart shaped along with the pickguard and cavity cover. Just keep in mind that my daughter was very impatient (is it done yet?) and in my mind I thought building fast was the goal. Obviously I learned that's not true...

Diving into inlay without any experience gained me some experience very quickly. Like the saw you use and the blades you use make a tremendous difference. After doing quite a bit of research a Knew Concepts saw was purchased along with the blades I thought would work, they didn't, the 4.0 blades seem to be the best for cutting MOP. By the way get this 30 minute epoxy to glue the fretboard to your neck. It leaves enough time to align the board and get everything clamped in place.

Screen Shot 2021-01-01 at 7.55.13 AM.png

Building the holder (can't remember what it's called) for the material is a must. It allows you to support the material and maneuver the saw to any angle to cut the MOP.Once you get the material cut out, you can use files and sandpaper to shape/smooth the edges

Couple of tips on cutting MOP. First the dust is horrible for your lungs wear a mask, Second if you wear glasses, get dust on them and then wipe the lenses they will scratch... badly. Ask how I know.

It's pretty easy to cut and the results are really amazing.
Screen Shot 2021-01-01 at 7.57.33 AM.png
Not bad for a first timer in a hurry.

My daughter loved it!
IMG_4566.JPG

Depending on if you know someone with a CNC, you can have the markers cut by them. I had my buddy cut a set of initials that were set into the 12th fret of a Richlite fingerboard.

Screen Shot 2021-01-01 at 7.50.47 AM.png


Cutting the Richlite for the inlay is a bit tricky, as there is so little resistance when using the downward spiral cutters, depending on how you approach with the cutter, it will be slow going, but in the other direction it grabs and cuts more than you want it to.

Yes you can cut the fret inlays on a radiused fretboard. I did it over a 12 inch radius without a jig, but would definitely use some sort of jig if I were to do it now. Maybe double stick tape very thin boards along the edge of the fingerboard to support the dremel router base.

As for filling in the gaps on Richlite, just mix some dust with 5 minute epoxy and Bob's your uncle.

Here is the finished inlay.
IMG_4664.JPG

After seeing the quality of the work you do, I know you would get the hang of this and do an amazing job.

The trouble is all these tools and stuff are expensive, so I propose a trade of sorts. I can ship the saw, blades, blade lubricant, holder, a few pieces of MOP, a piece of Richlite (I got a sample pack) to you allowing you have something to do while waiting for all your other stuff to finally arrive.

When you are done, just ship back the tools!

What would I like in return? I need help with the drawings for my new build and am useless at using any drawing programs on a computer. I have some pretty good straight on photos of the bass. Would you create the drawings in trade?

Either way it's cool.

Thanks and I can't wait to see how this build comes along!
 
Last edited:
Template Boy, The Movie, Part 3
I realized i was going to have a really hard time binding this F-Hole as I first cut it, so I widened it slightly by about 1/16" all around, which doesn't sound like much, but alllowed me to make a positive "donut hole" .040" smaller, which is the binding thickness. the theory is that this gives me a jig of sorts to pre-bend the binding, and something to clamp it tightly while it dries. We'll see how that works out in real life. Damn well better work, took me two hours to build it. :D
XaLSwra.jpg

zujl8mX.jpg


And then I FINALLY got my Warwick bridge. 4 weeks lead time, and it was worth it. I paid half the going rate from any US supplier, including shipping, from a German company called Banzai Music, and its a gorgeously finished and nicely detailed piece of kit. It's also pretty heavy, hopefully not so heavy that it overwhelms the ultralite tuners. The string spacing is adjustable, but the tailpiece isn't, so I'm inclined to set the bridge string spacing to match the tailpiece so I have straight string pulls through the bridge out to the tailpiece. I think it would look like a** if the strings started splaying out behind the bridge. That spacing works out to something like 18.7mm spacing, a hair wider than the 18 I'm used to, but i can live with that. The upshot of that though, is that my MDF neck template is about 1/8" too narrow, so I'll have to re-make it, no big whup.

Wtscg8F.jpg

WLdFCOe.jpg


The bridge itself is two-piece, and clearly intended to be sunk into the body. The bottom piece is like a big "sustain block" that screws to the bottom of the recess and gets buried. The saddles are individually adjustable for height, but you can move the whole bridge up and down in it's recess with hex screws. This means that within reason, I should be able to get it to work without any neck angle, for which I am pathetically grateful. I've never built anything with neck angle, and I was frankly dreading it a little. (yeah i know @Rôckhewer, a little hacky, baby steps)

rNRZeq8.jpg


Got my 1/4" maple veneer (center layer) and 5/4 sapele mahogany (back wood), all I'm still waiting for is the purple heart, which was supposed to be here today but... isnt. if all goes well, i can start making the neck beam next weekend. Thanks for looking at .... not much.
 
Last edited:
Template Boy, The Movie, Part 3
I realized i was going to have a really hard time binding this F-Hole as I first cut it, so I widened it slightly by about 1/16" all around, which doesn't sound like much, but alllowed me to make a positive "donut hole" .040" smaller, which is the binding thickness. the theory is that this gives me a jig of sorts to pre-bend the binding, and something to clamp it tightly while it dries. We'll see how that works out in real life. Damn well better work, took me two hours to build it. :D
View attachment 4117127
View attachment 4117128

And then I FINALLY got my Warwick bridge. 4 weeks lead time, and it was worth it. I paid half the going rate from any US supplier, including shipping, from a German company called Banzai Music, and its a gorgeously finished and nicely detailed piece of kit. It's also pretty heavy, hopefully not so heavy that it overwhelms the ultralite tuners. The string spacing is adjustable, but the tailpiece isn't, so I'm inclined to set the bridge string spacing to match the tailpiece so I have straight string pulls through the bridge out to the tailpiece. I think it would look like a** if the strings started splaying out behind the bridge. That spacing works out to something like 18.7mm spacing, a hair wider than the 18 I'm used to, but i can live with that. The upshot of that though, is that my MDF neck template is about 1/8" too narrow, so I'll have to re-make it, no big whup.

View attachment 4117129
View attachment 4117130

The bridge itself is two-piece, and clearly intended to be sunk into the body. The bottom piece is like a big "sustain block" that screws to the bottom of the recess and gets buried. The saddles are individually adjustable for height, but you can move the whole bridge up and down in it's recess with hex screws. This means that within reason, I should be able to get it to work without any neck angle, for which I am pathetically grateful. I've never built anything with neck angle, and I was frankly dreading it a little. (yeah i know @Rôckhewer, a little hacky, baby steps)

View attachment 4117131

Got my 1/4" maple veneer (center layer) and 5/4 sapele mahogany (back wood), all I'm still waiting for is the purple heart, which was supposed to be here today but... isnt. if all goes well, i can start making the neck beam next weekend. Thanks for looking at .... not much.
The up/down movement of the bridge is how you'll do the bulk of the action adjustment, the saddles are more of a fine adjustment. They can't go too low or the string will contact the piece the actual saddle sits in.
 
Just an FYI the Warwick is very similar to the Spector and does not have a neck angle. And yes the bridge and stop piece are sunk into the body.

I trust your CAD skills will allow you to get all the dimensions just right!

Instead of posting a bunch of photos, I'm emailing them to you.

It's a good idea to make the F hole wider is great. Binding can be really professional looking and this will be very cool!
 
Last edited: