

Enjoy the benefits of a premium membership!
Upgrade Account
-
TalkBass has been independent since 1998. Add your voice.
Create a free account to reply to discussions, view embedded media, and browse with fewer display ads.
Join free Log in
Want zero display ads or expanded classifieds tools? Compare plans.
You are using an out of date browser. It may not display this or other websites correctly.
You should upgrade or use an alternative browser.
You should upgrade or use an alternative browser.
The Hossenfeffer IV Build
- Thread starter Gilmourisgod
- Start date
More options
Who Replied?
I've been eyeballing one of those for some times now. See no reason why it wouldn't work just fine. I even see Tim Sway using the same thing on his YT videos....
My Ebay Special fret caul works like a dream, love this thing
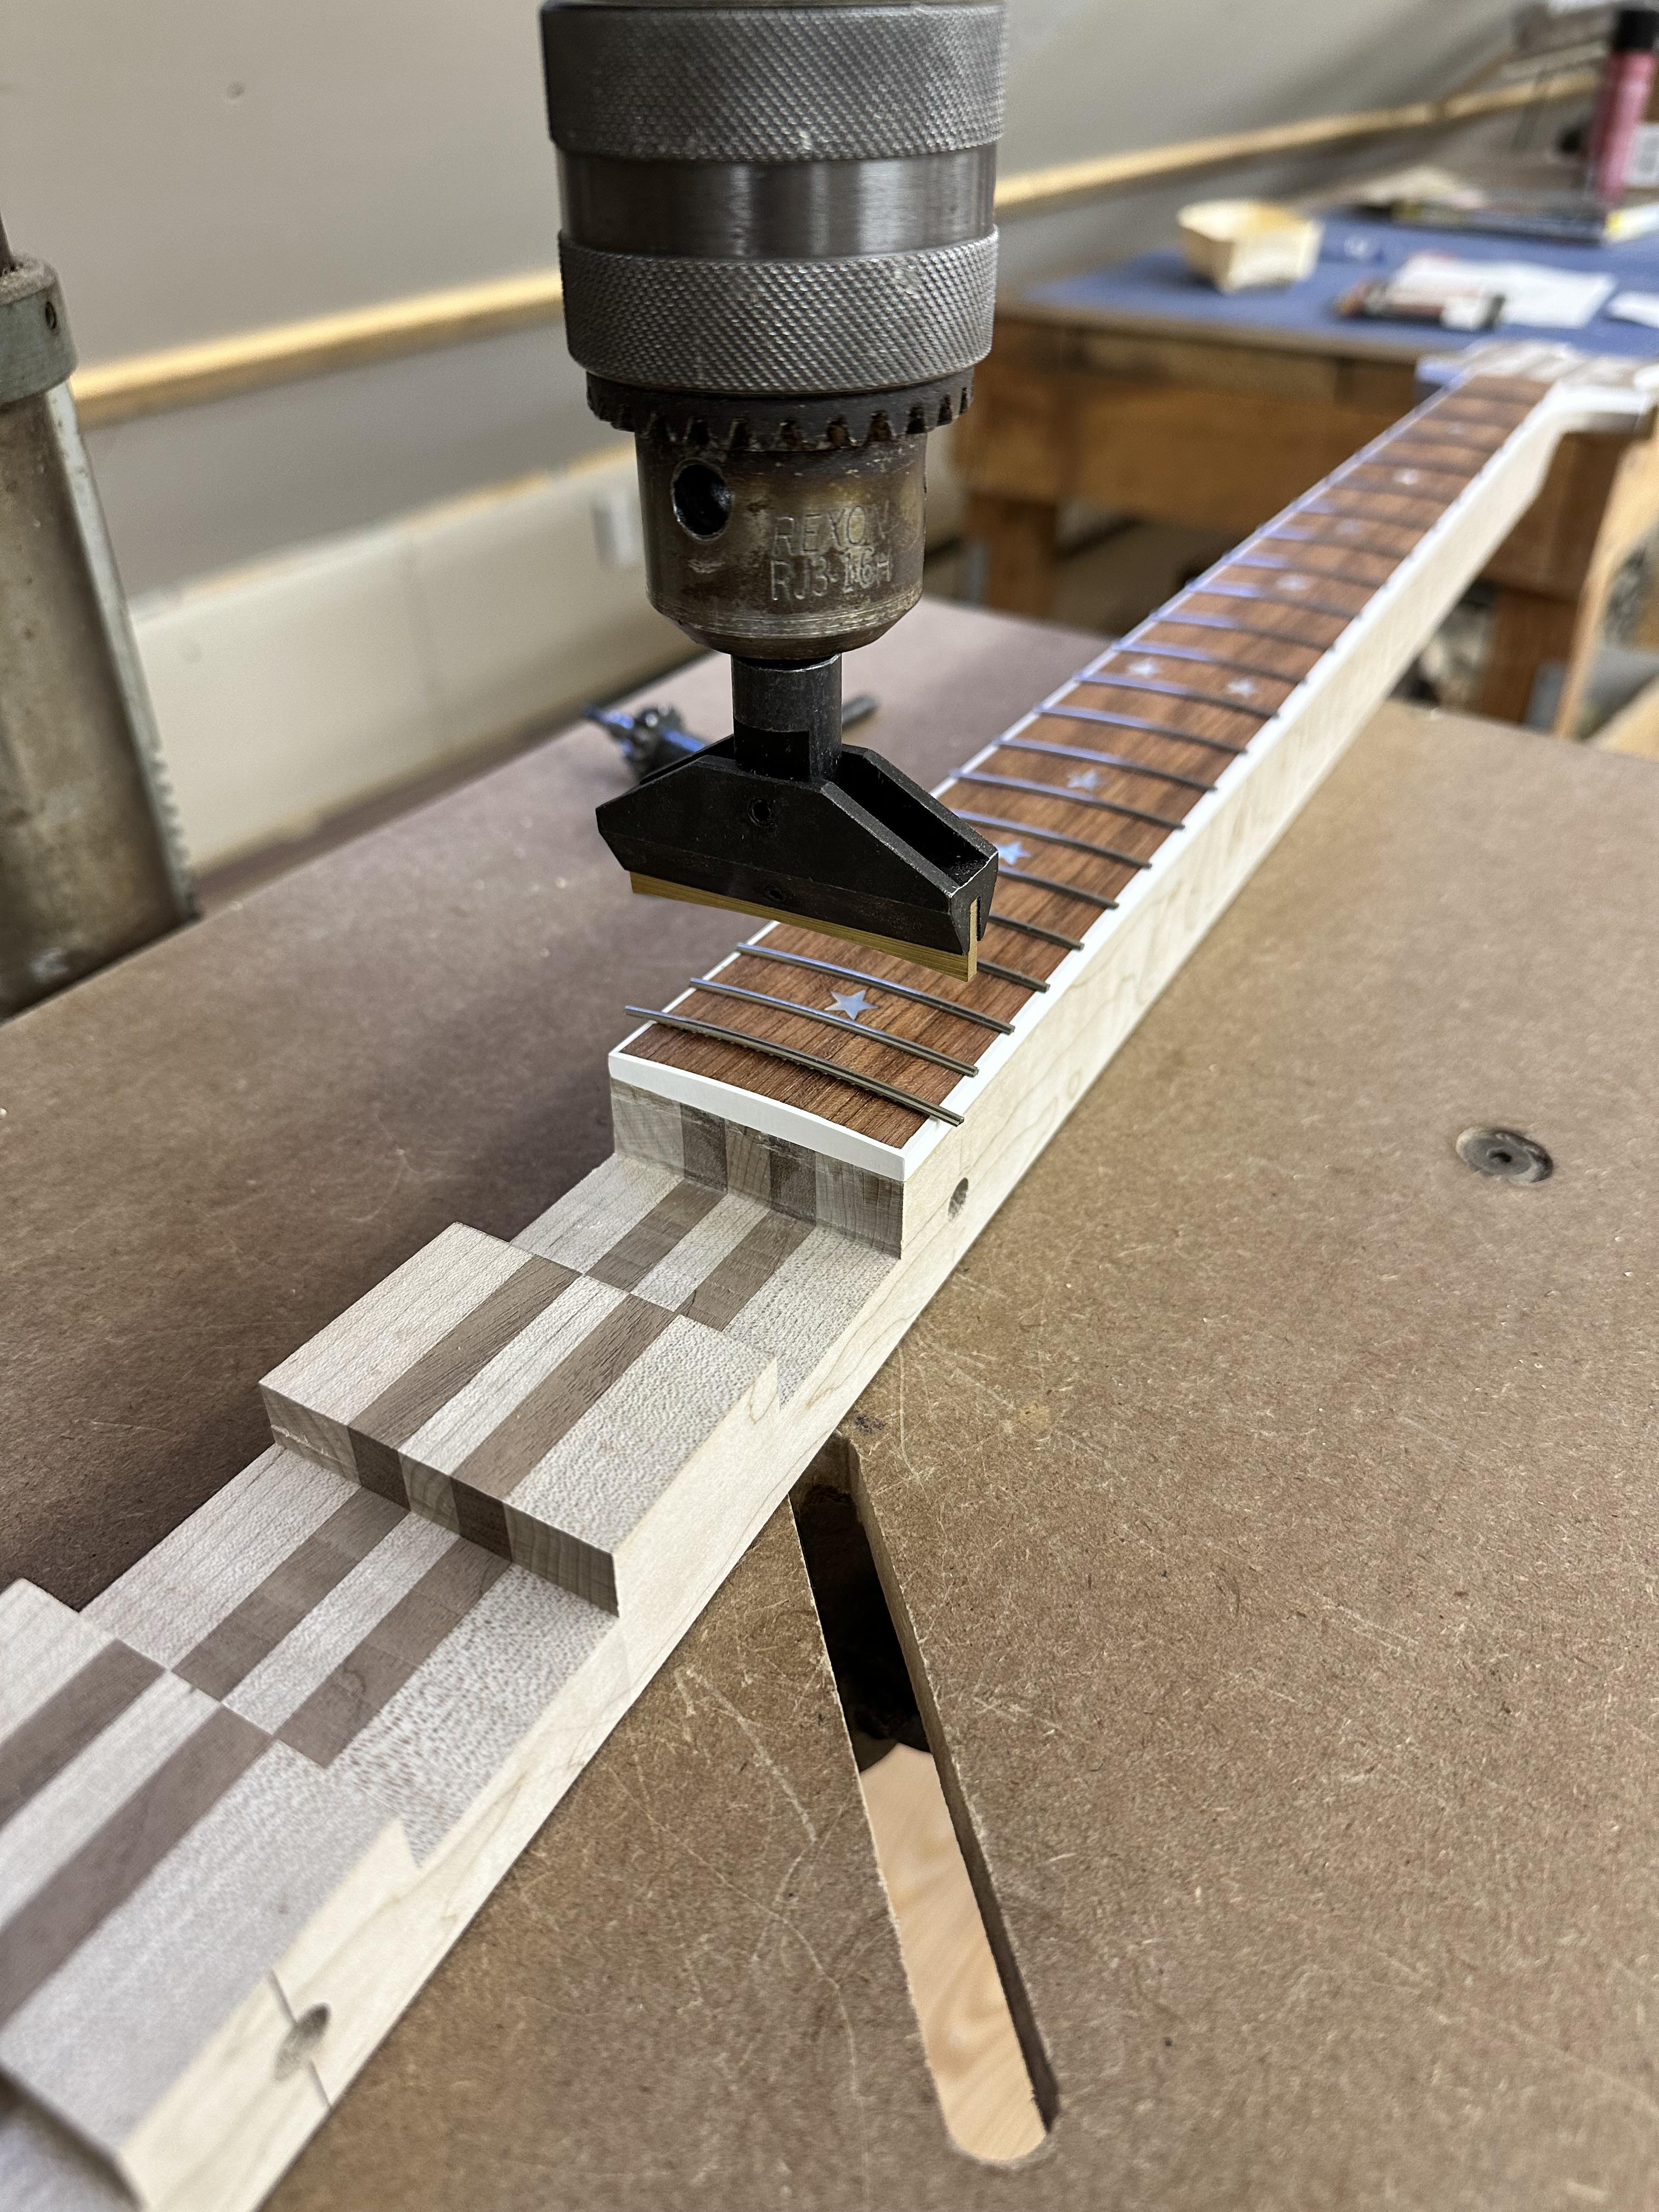
...
Sounds like JetBlue or Spirit. We flew Spirit to Chicago a couple years back and it was the same thing. You want water? $5 please! It was literally like that AT&T commercial where the airline hostess tells them everything is an added fee.Word to the wise: Avoid Icelandair if humanly possible. A fiasco of changed gates, missed connections, etc. And then, on combined 8 hours of flight time, they provide only water. You want a pack of peanuts? Pay me. Dried up microwave sandwich? Pay me. 9 euro please. Crappy little headphones? 5 euros. You want a pillow with somebody else's hair on it? See if somebody left one in the overhead. Flight attendants too busy yukking it up in the galley. Paris was predictably fabulous, I feel like I'm in Fun Withdrawl now, back to cold, rainy New England. More Shop Time, I guess.

Sorry to hear about the Wuhan, hope you'r feeling better. I'm currently battling something, but according to my government issued COVID test, it's not the Wuhan. I still feel like crap tho, so I got that going for me.



Neck carving finally under way after bandsawing off the waste. I like to start with a perfect flat at the back of the neck before I start cutting facets, which involves an excruciatingly finicky setup in my neck router box to account for the increased neck thickness from nut to heel. Lots of angled shims, trial and error, trying not to bend the neck out of straight in the box, etc. I don't know how other people do this, took me half the day just to set it up. Must be a better way! I'm marking facets with green tape, because I am friggin' blind. I know there are other ways to carve a neck, but this at least gives me the illusion of control and precision. A nerve-wracking process for me, only my third full neck carve. the first two are kind chunky in the "shoulders" right below the fingerboard, hoping to shape this one a little more comfortable in my hand.
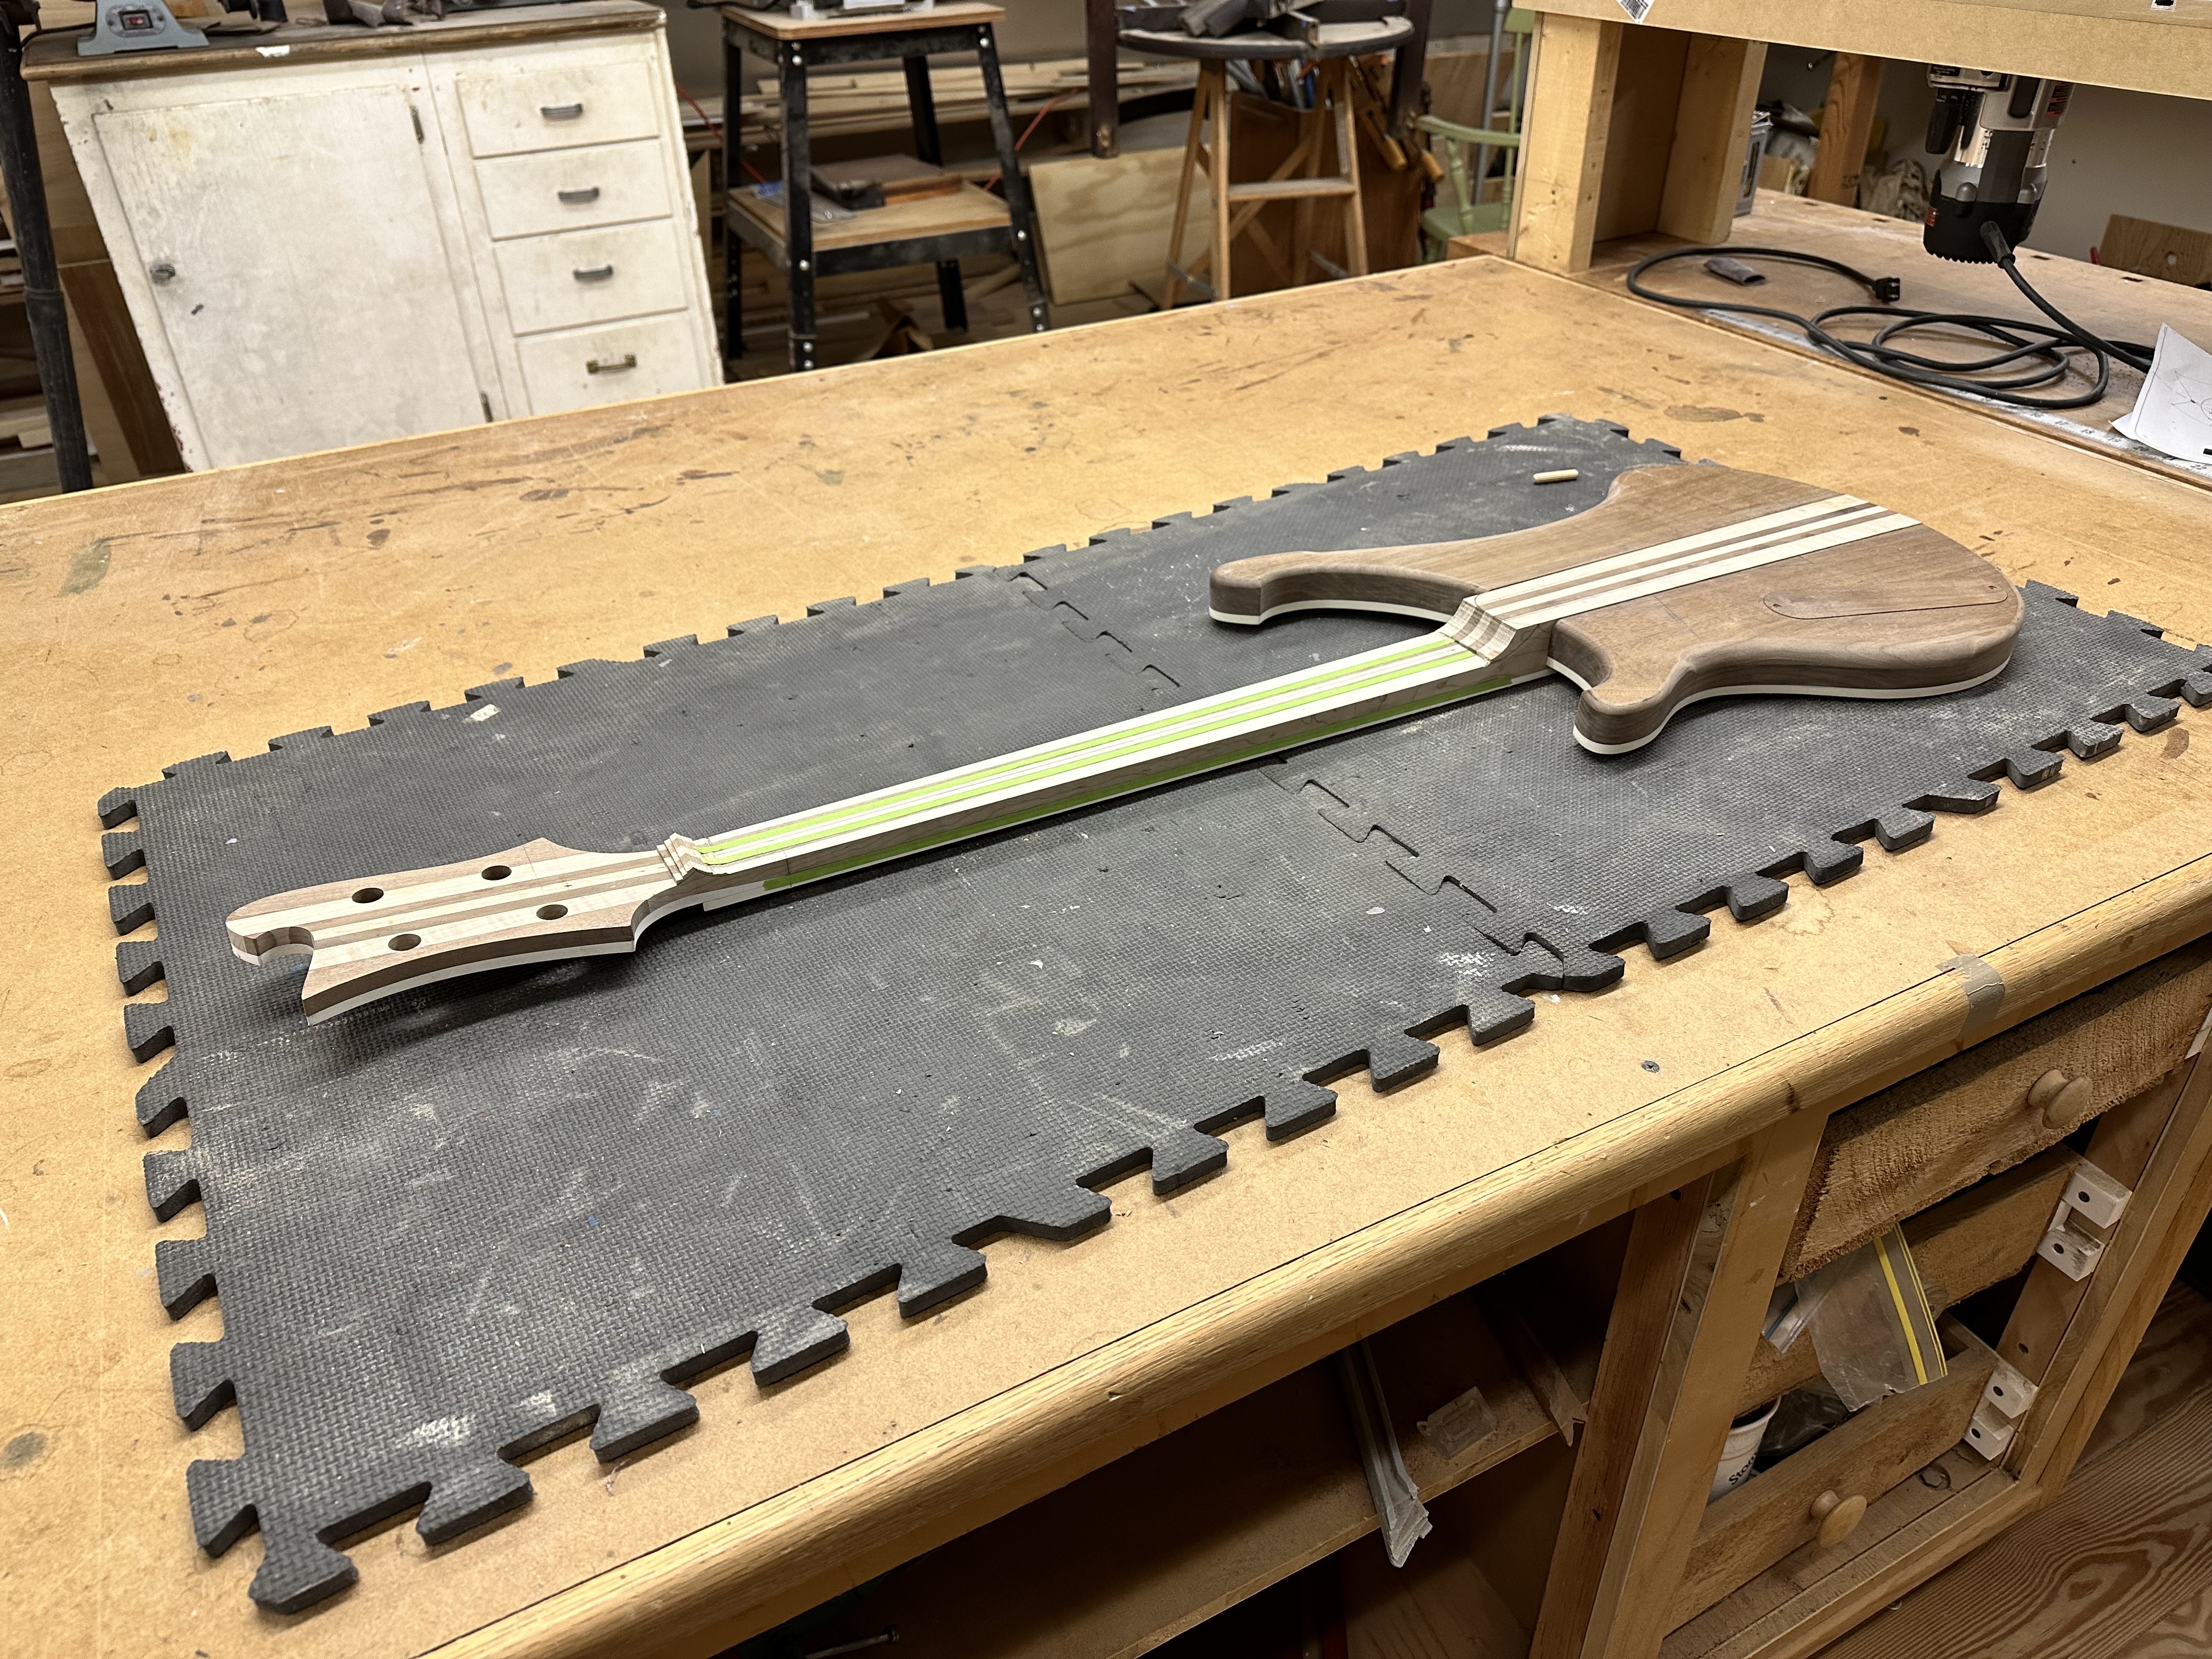
I'd love to see some more info on your router box setup. I need to build something so I'm always looking at others' designs and how well they work.
Not much to see in my case, it’s just an opened top and ends MDF box around 36” long. Crude, like most of my jigs. I should make a better one. I’m sure Bruce Johnson has something ideal for the job, I’m still kind of a hack jig maker.
Yeah, mostly I wanna look at the bridge for the router and see how you did that part. The box is pretty basic, but the router bridge is the key.Not much to see in my case, it’s just an opened top and ends MDF box around 36” long. Crude, like most of my jigs. I should make a better one. I’m sure Bruce Johnson has something ideal for the job, I’m still kind of a hack jig maker.
Started neck carve. These builds take me so long, it's been two years since the last one, so I lose the benefit of exerience. That said, this one went pretty smoothly. Took me about 5 hours all told. I spent a lot of time getting the initial facets cut perfectly, the rest went pretty quick. I borrowed my son's Shinto rasp, and I'm a convert. The coarse side wasn't much use, tended to "skate" on the hard maple, but the fine side is excellent. Father's day Gift!
I use my knockoff Vinson neck Jig for this which keeps the neck from flexing while I carve it. Facet method per usual.
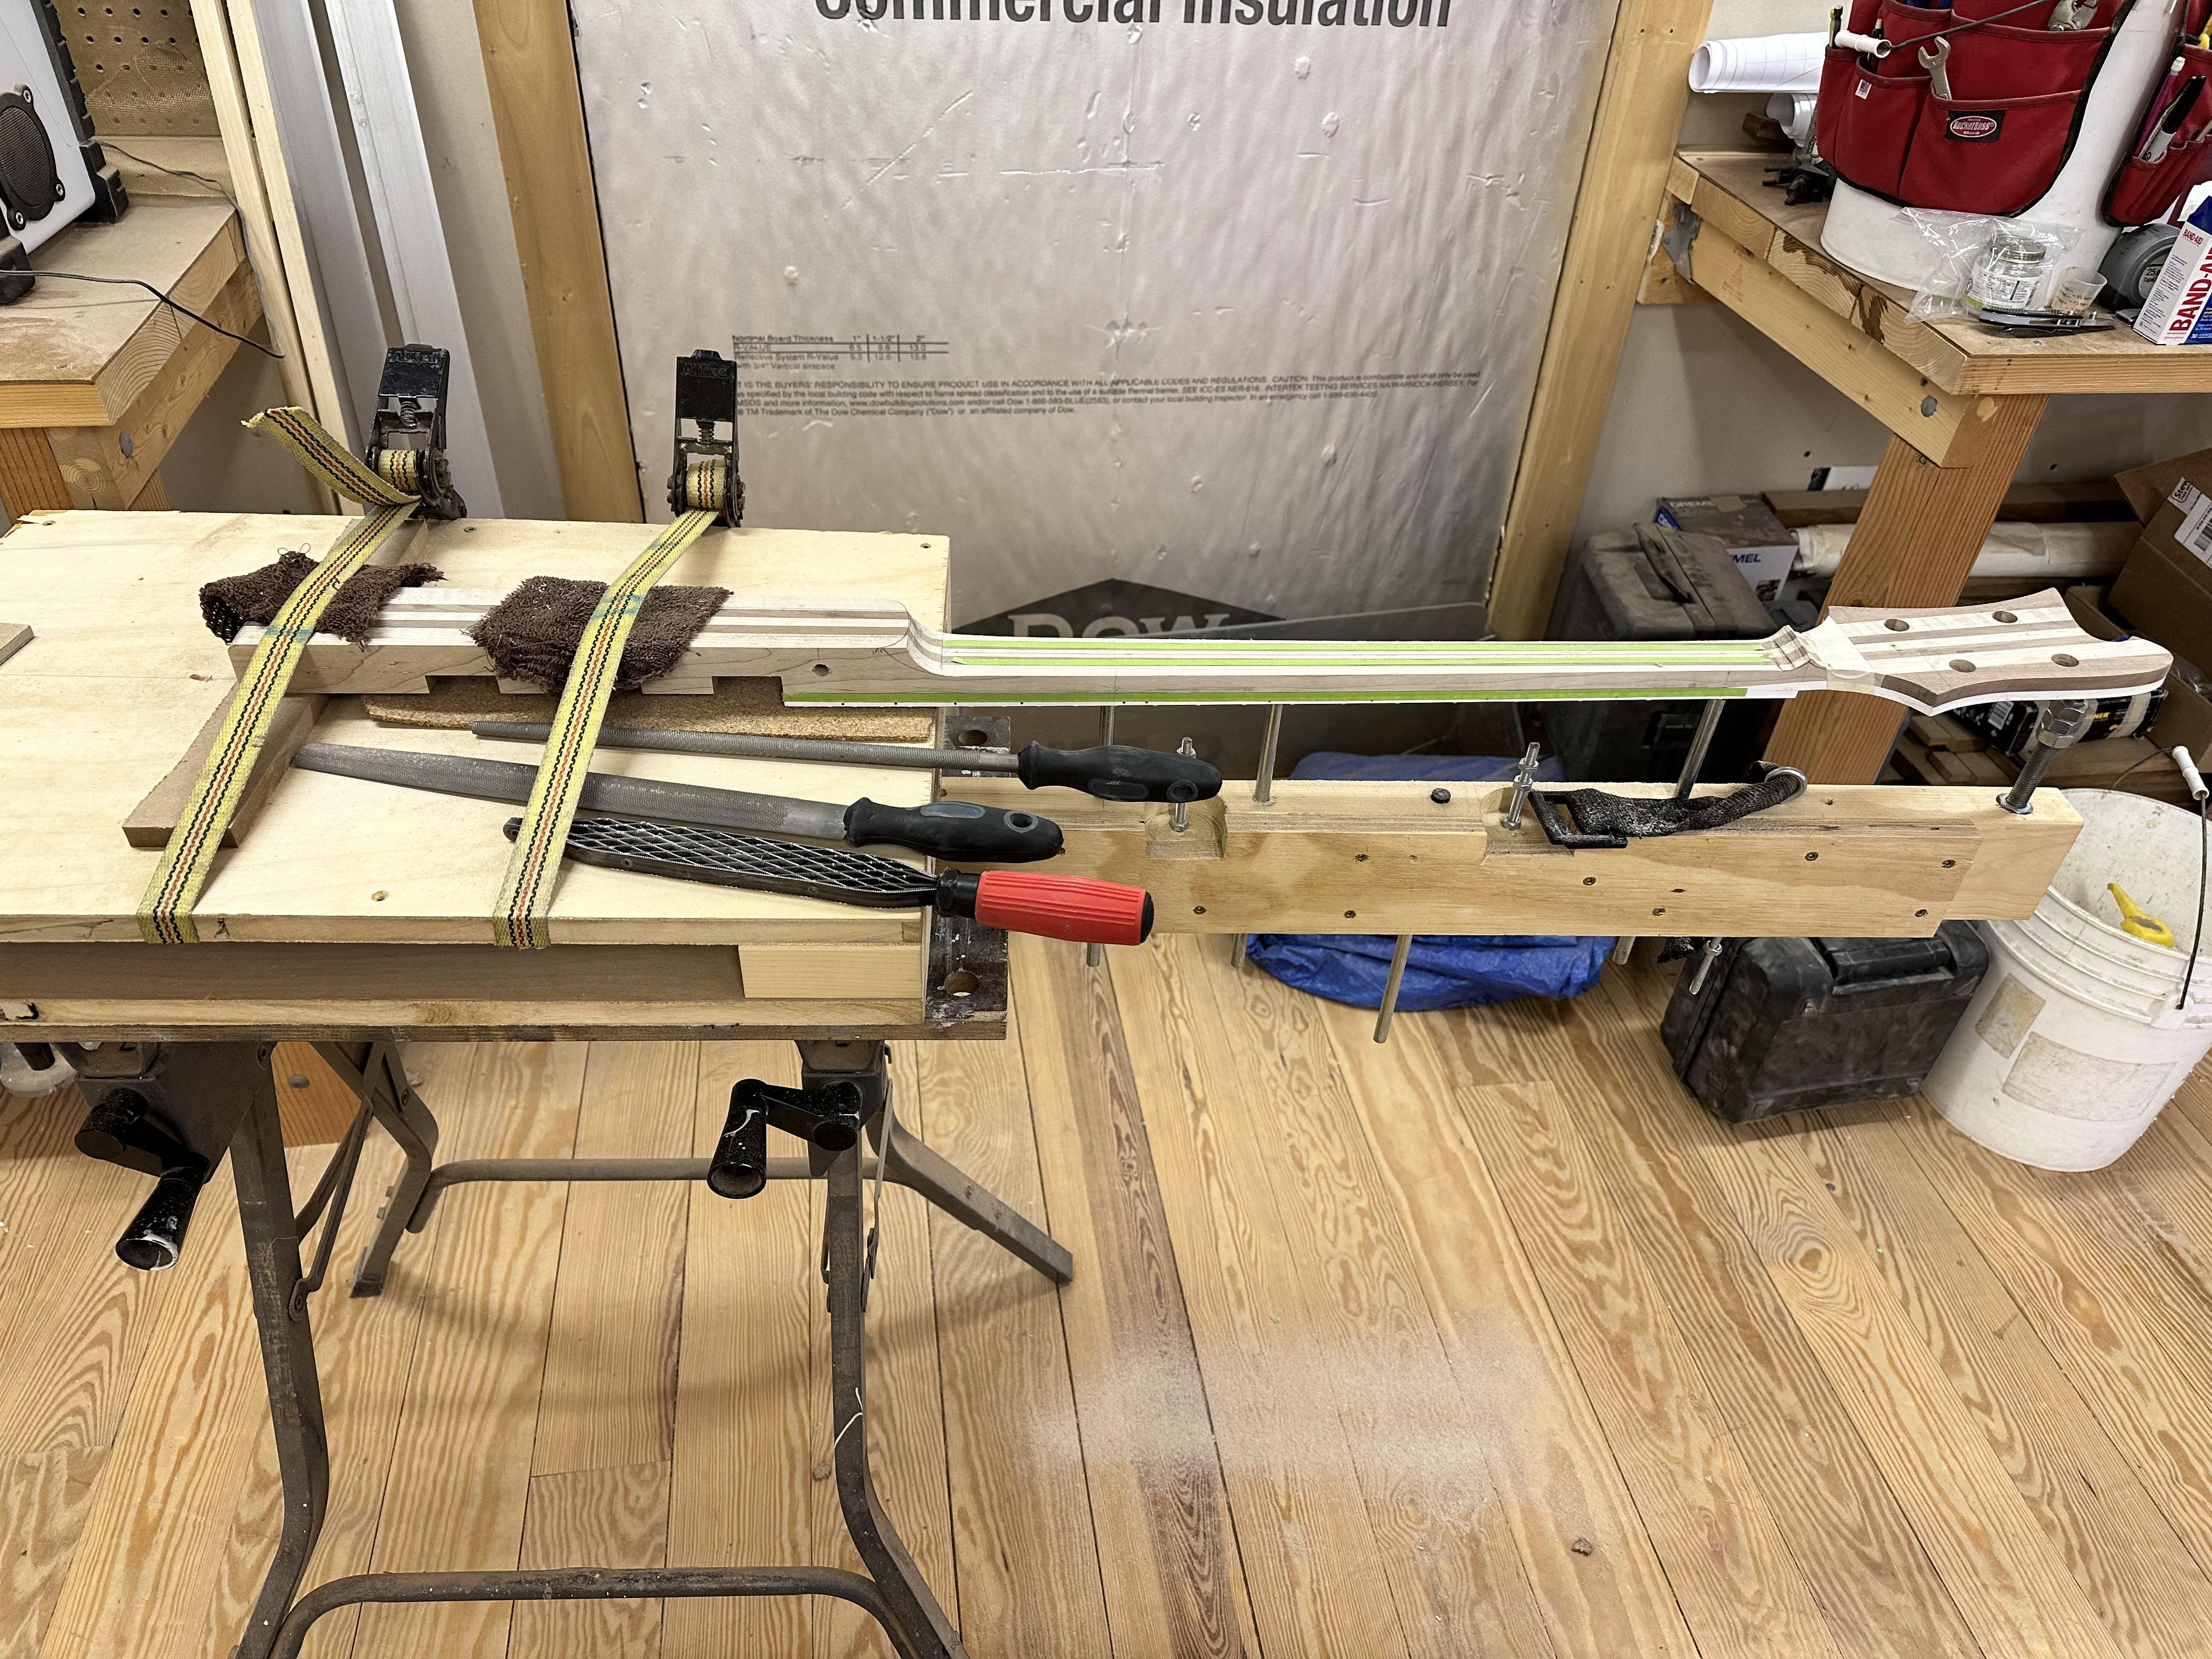
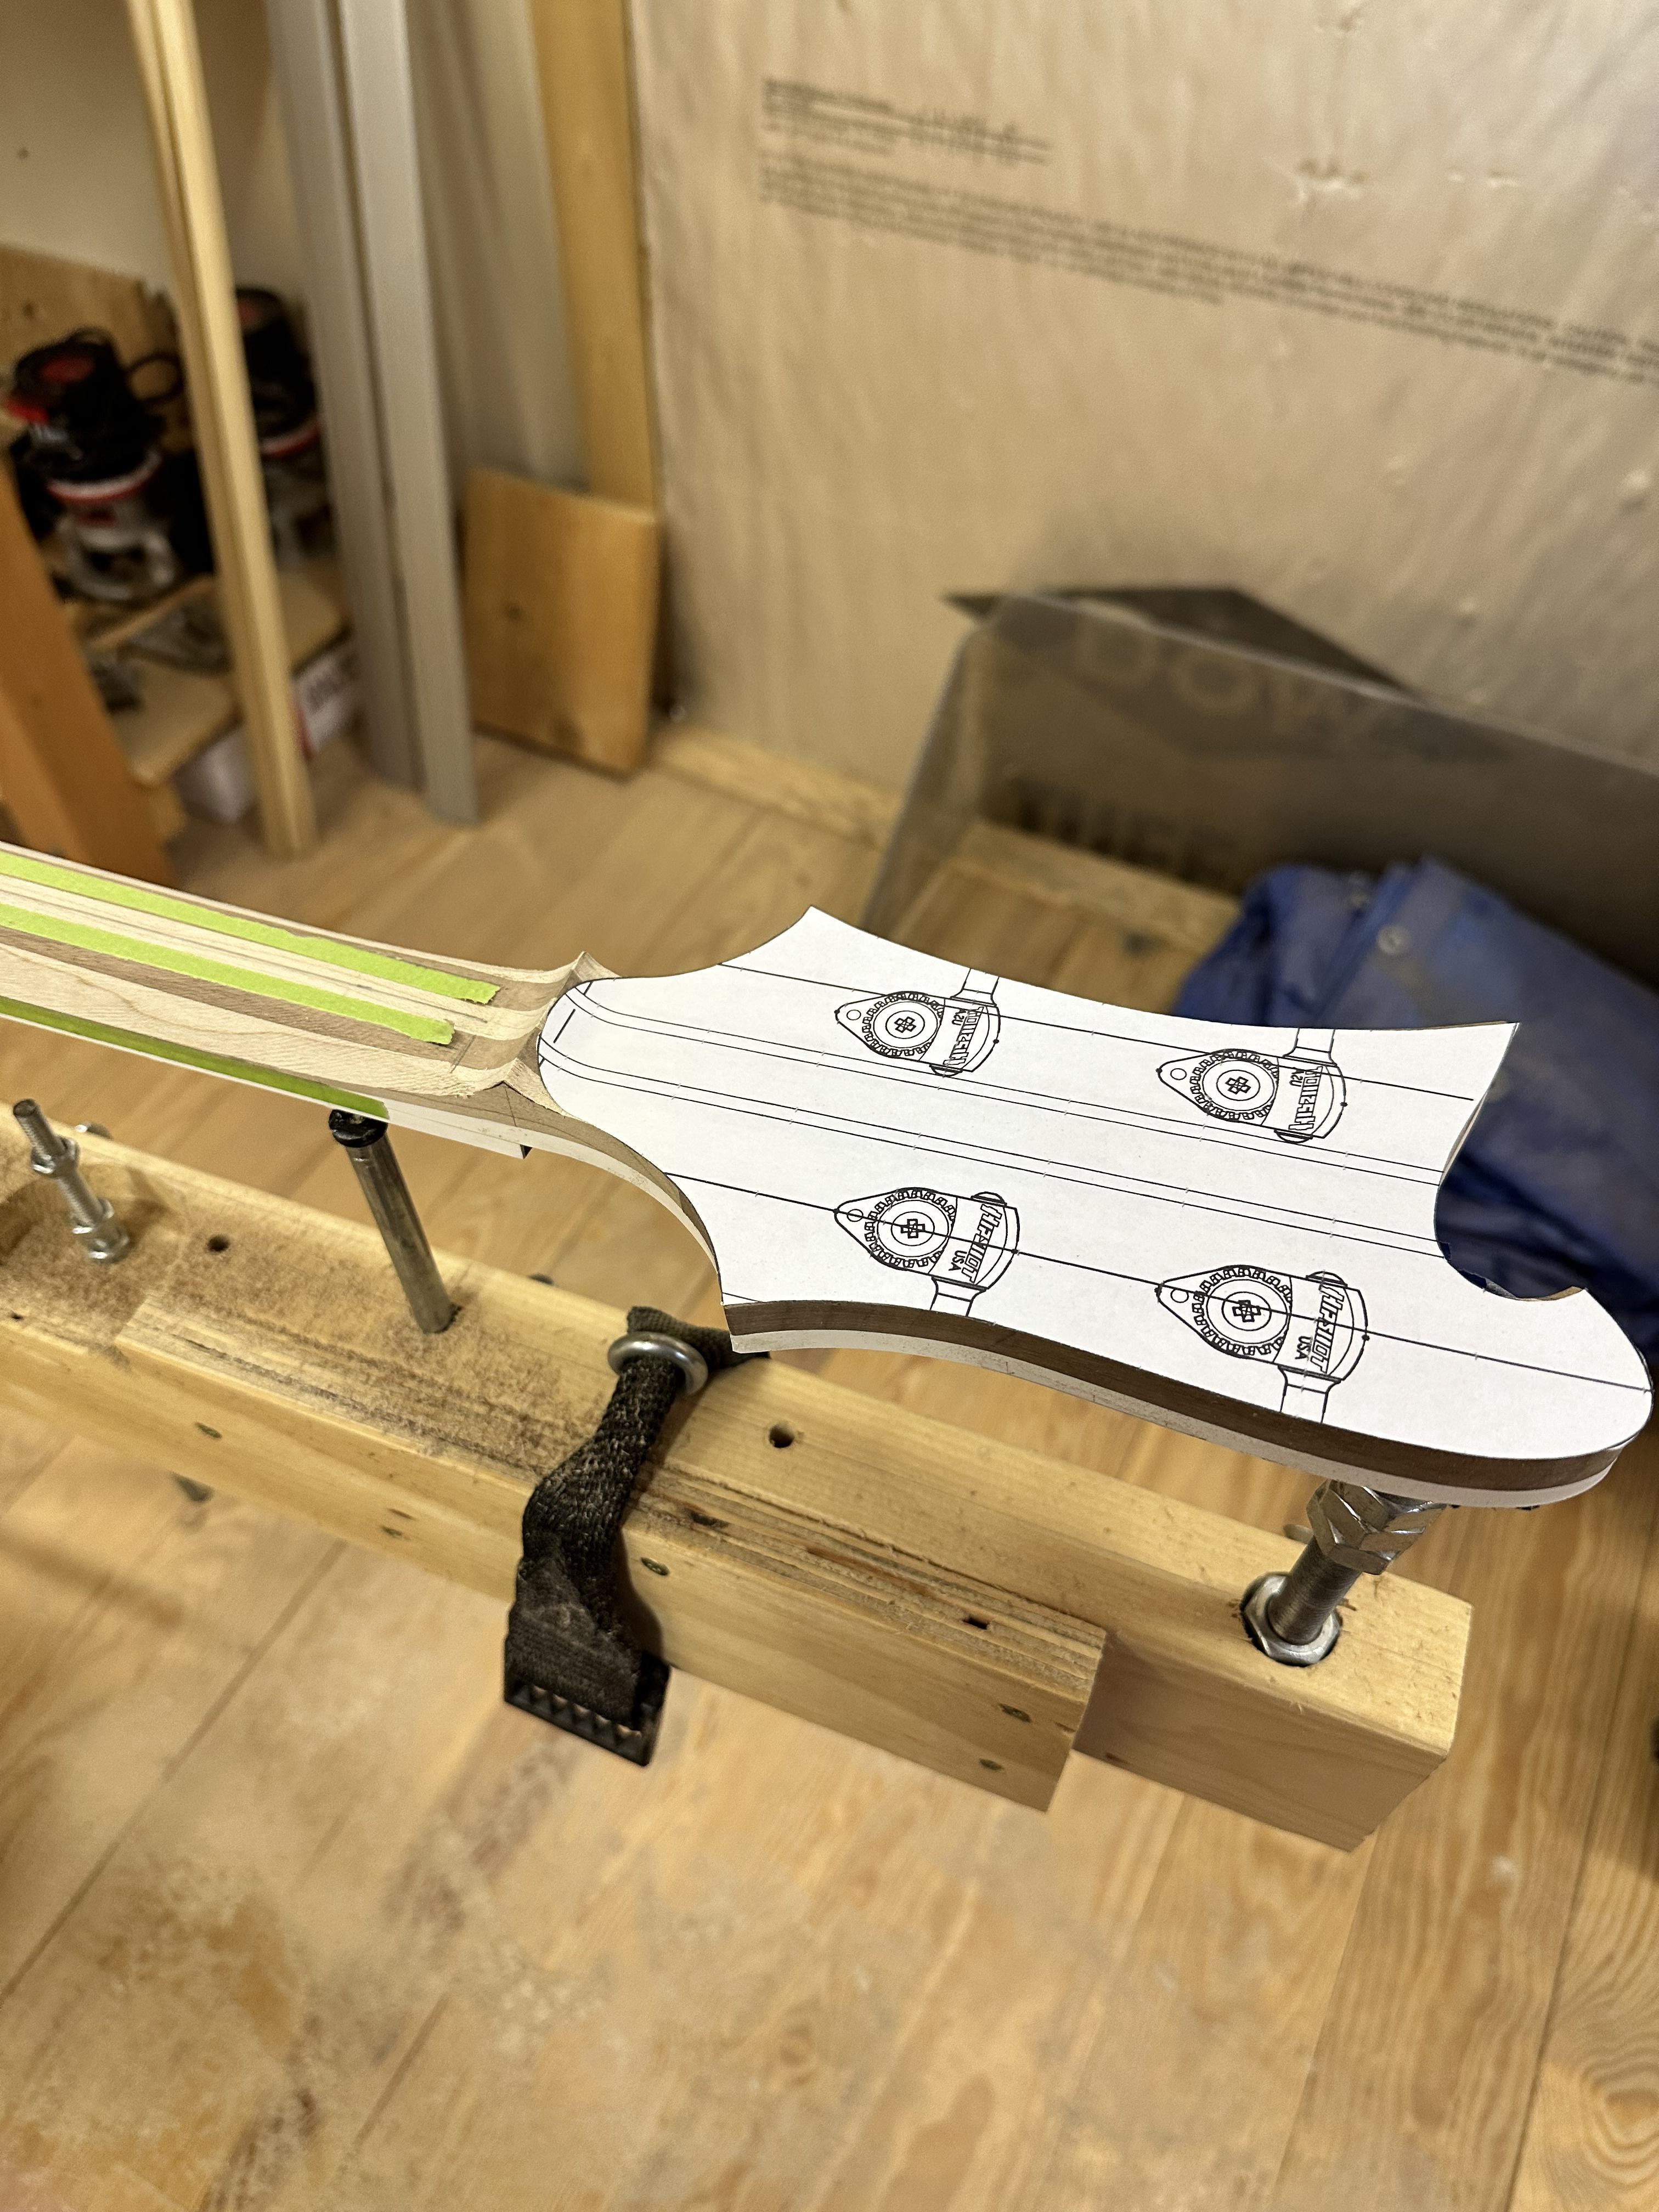
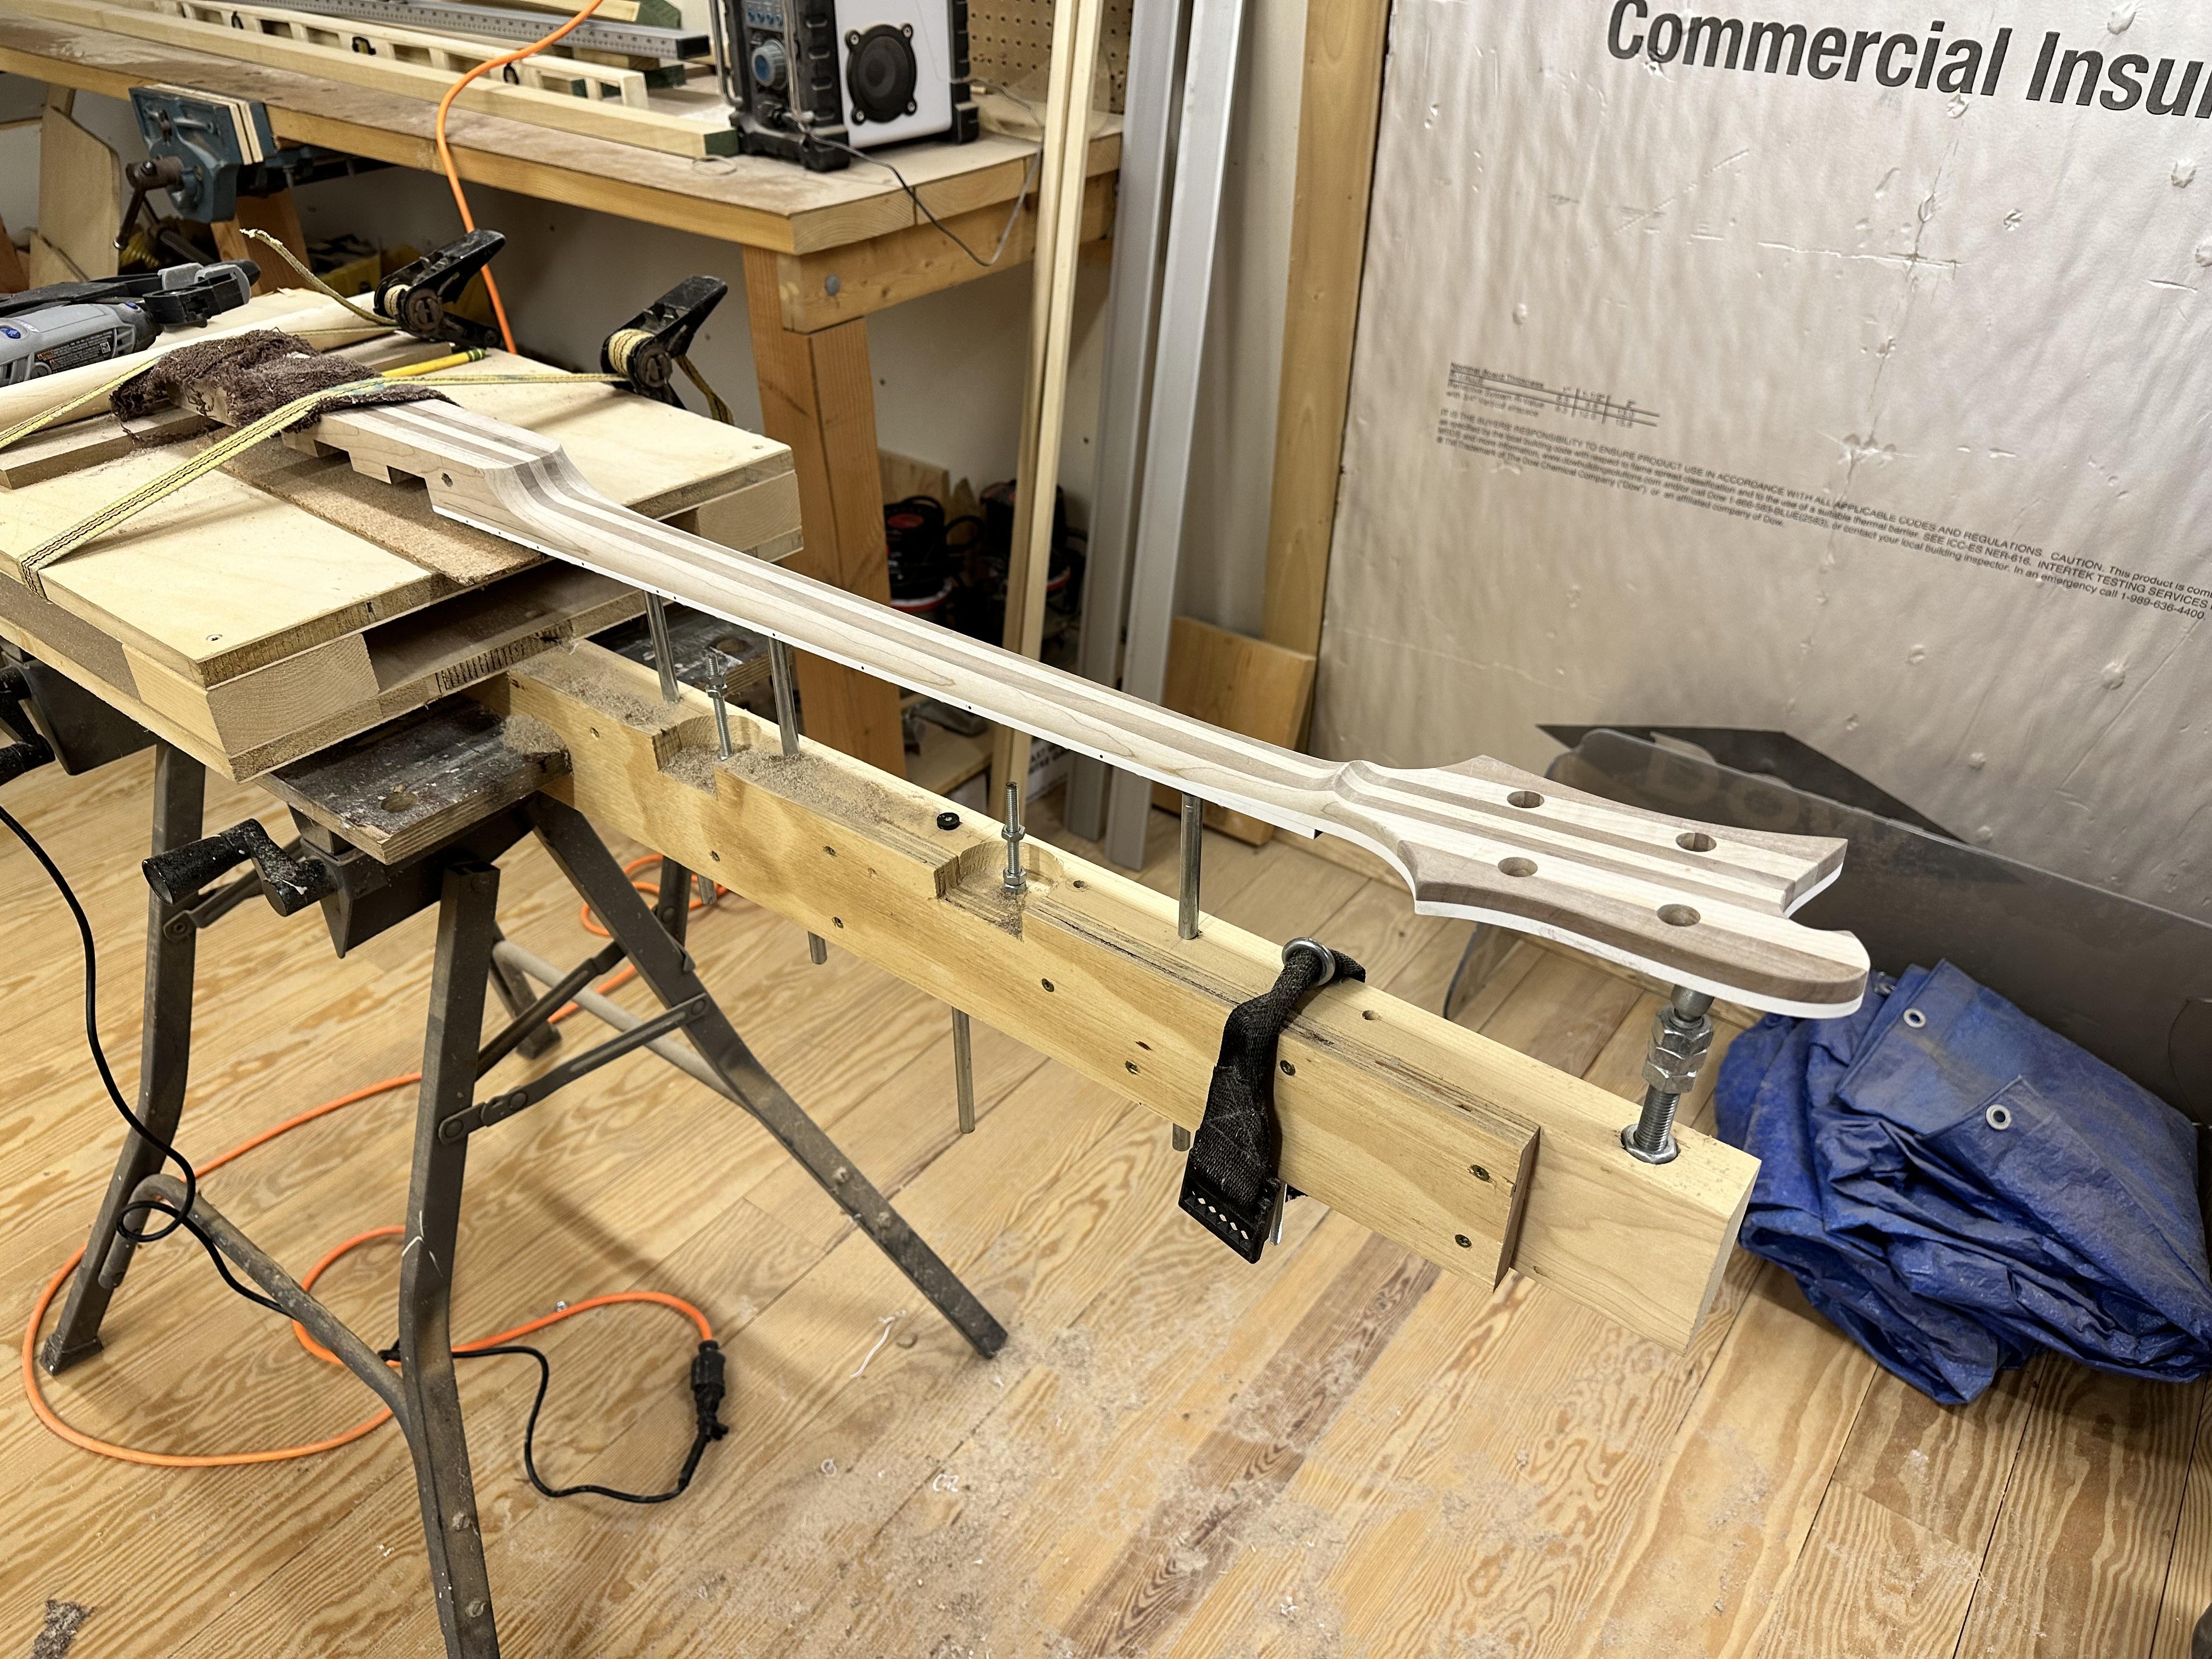
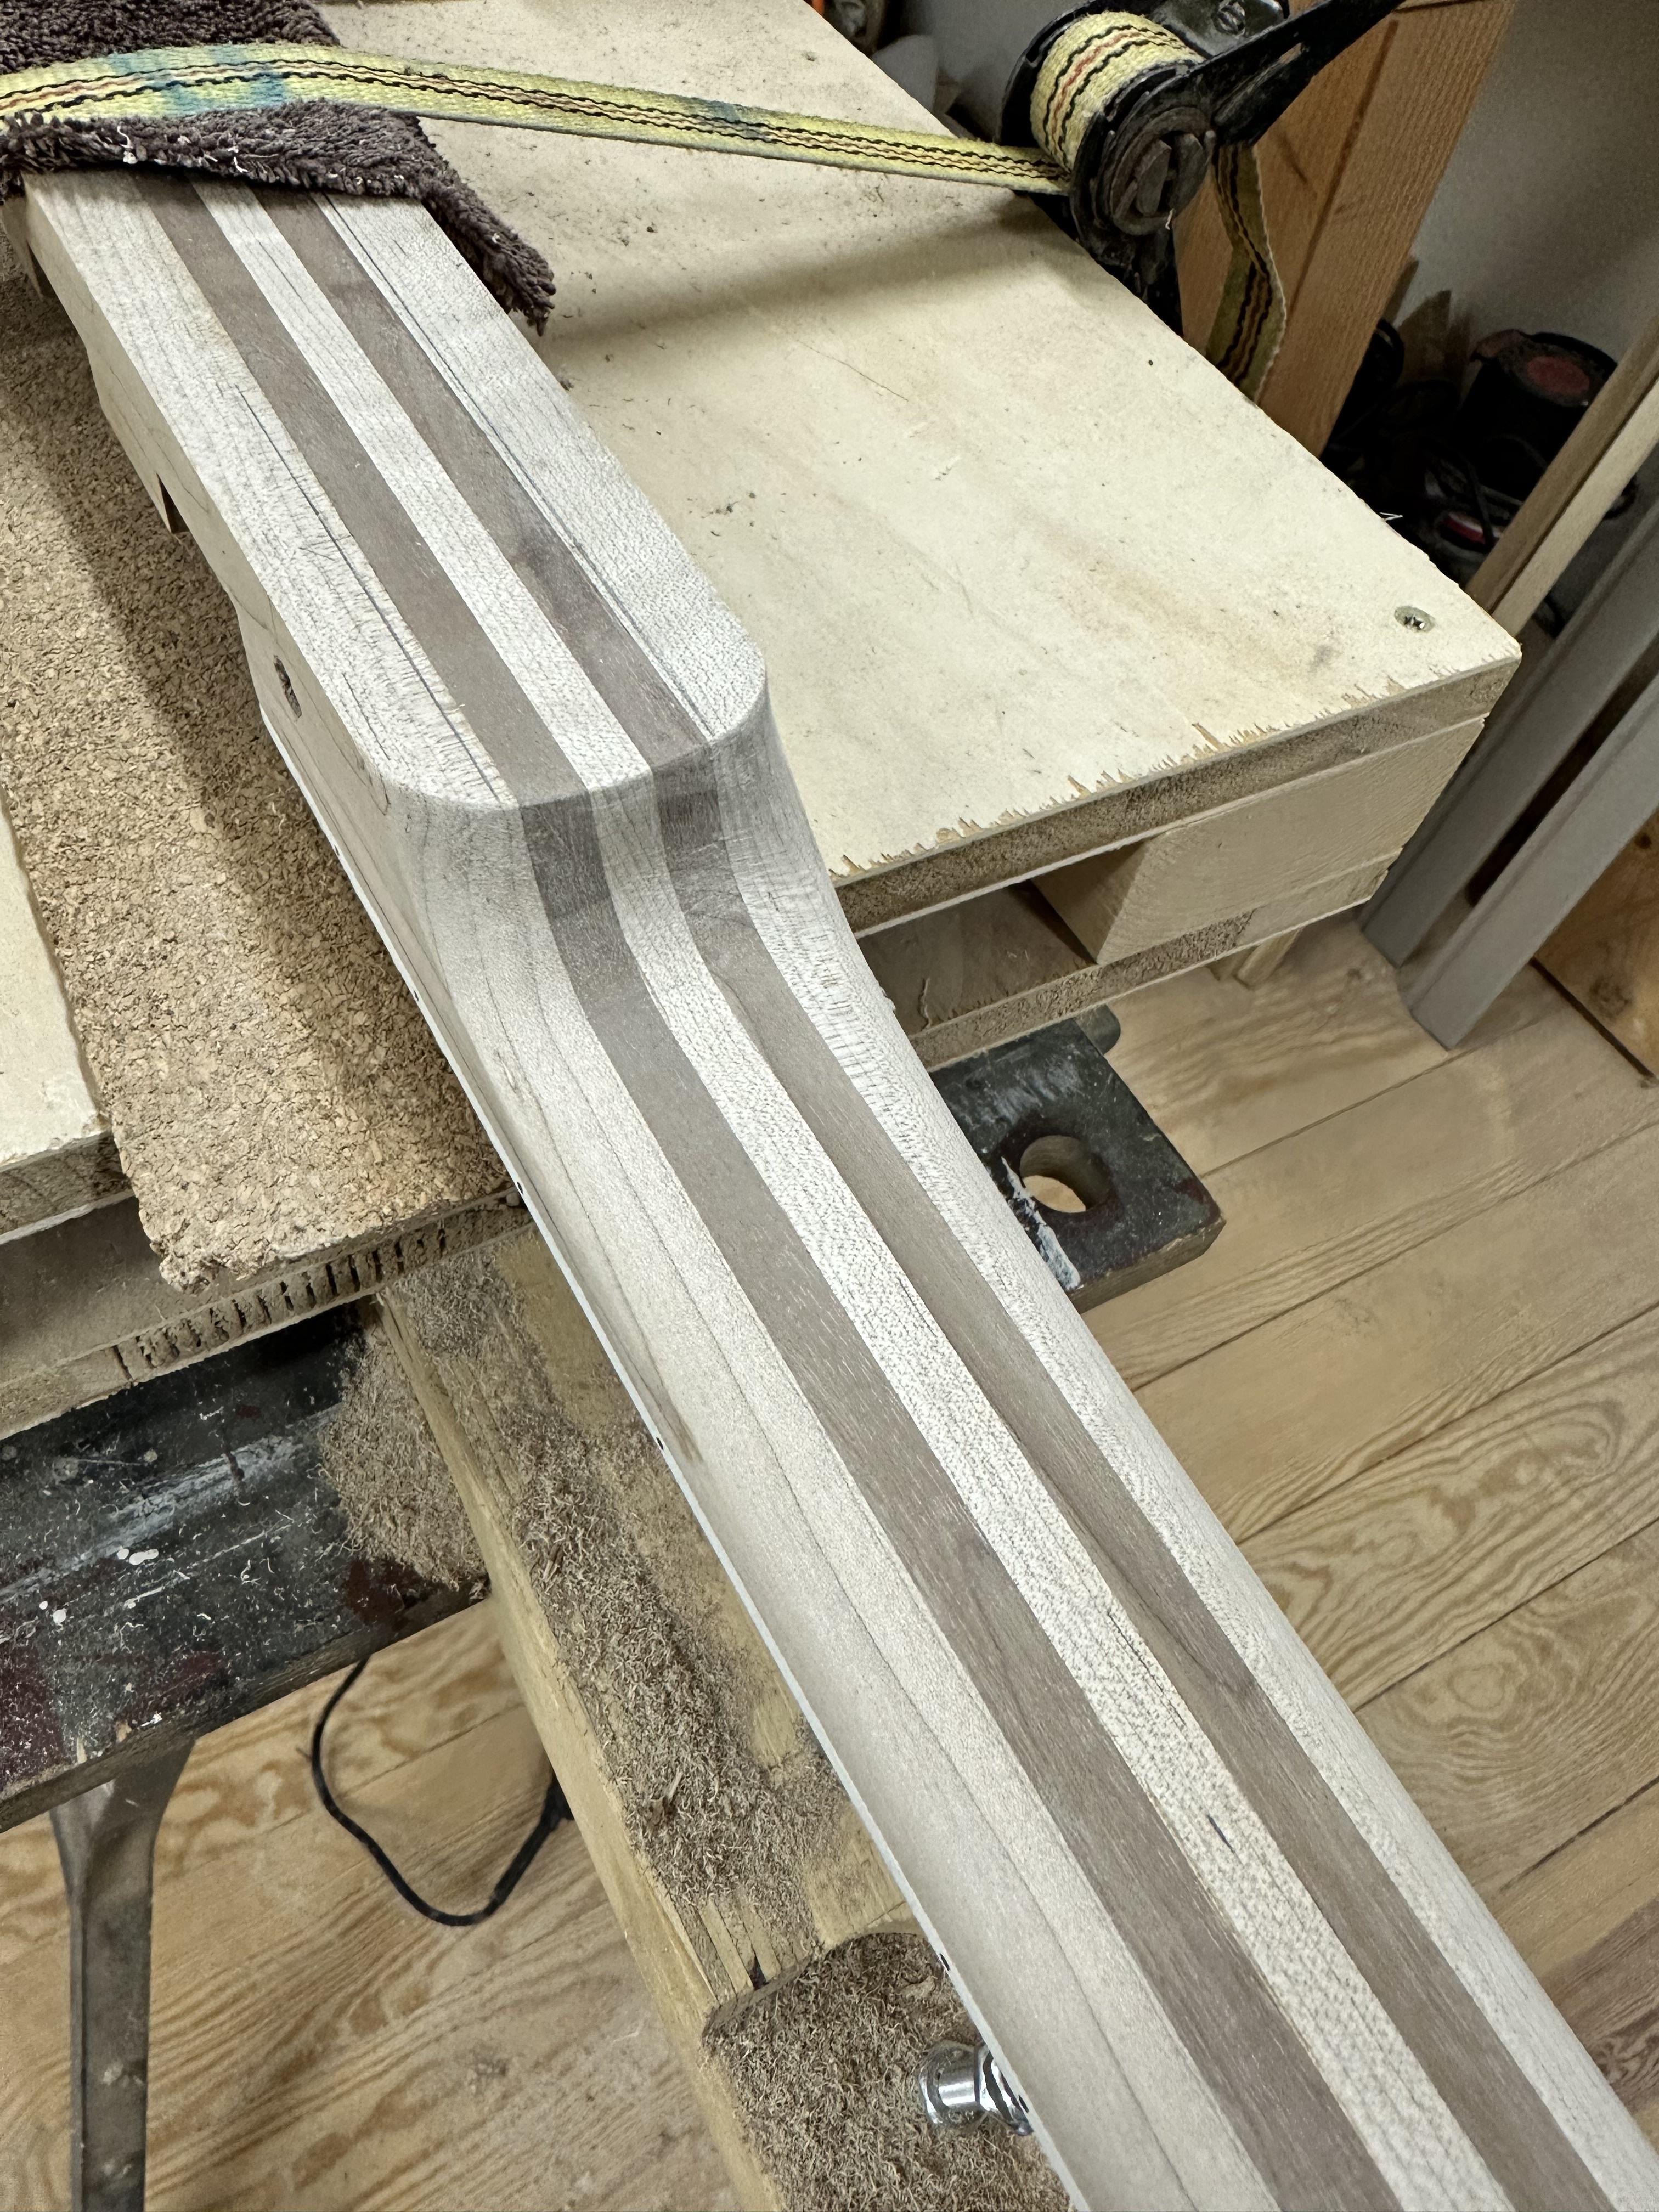
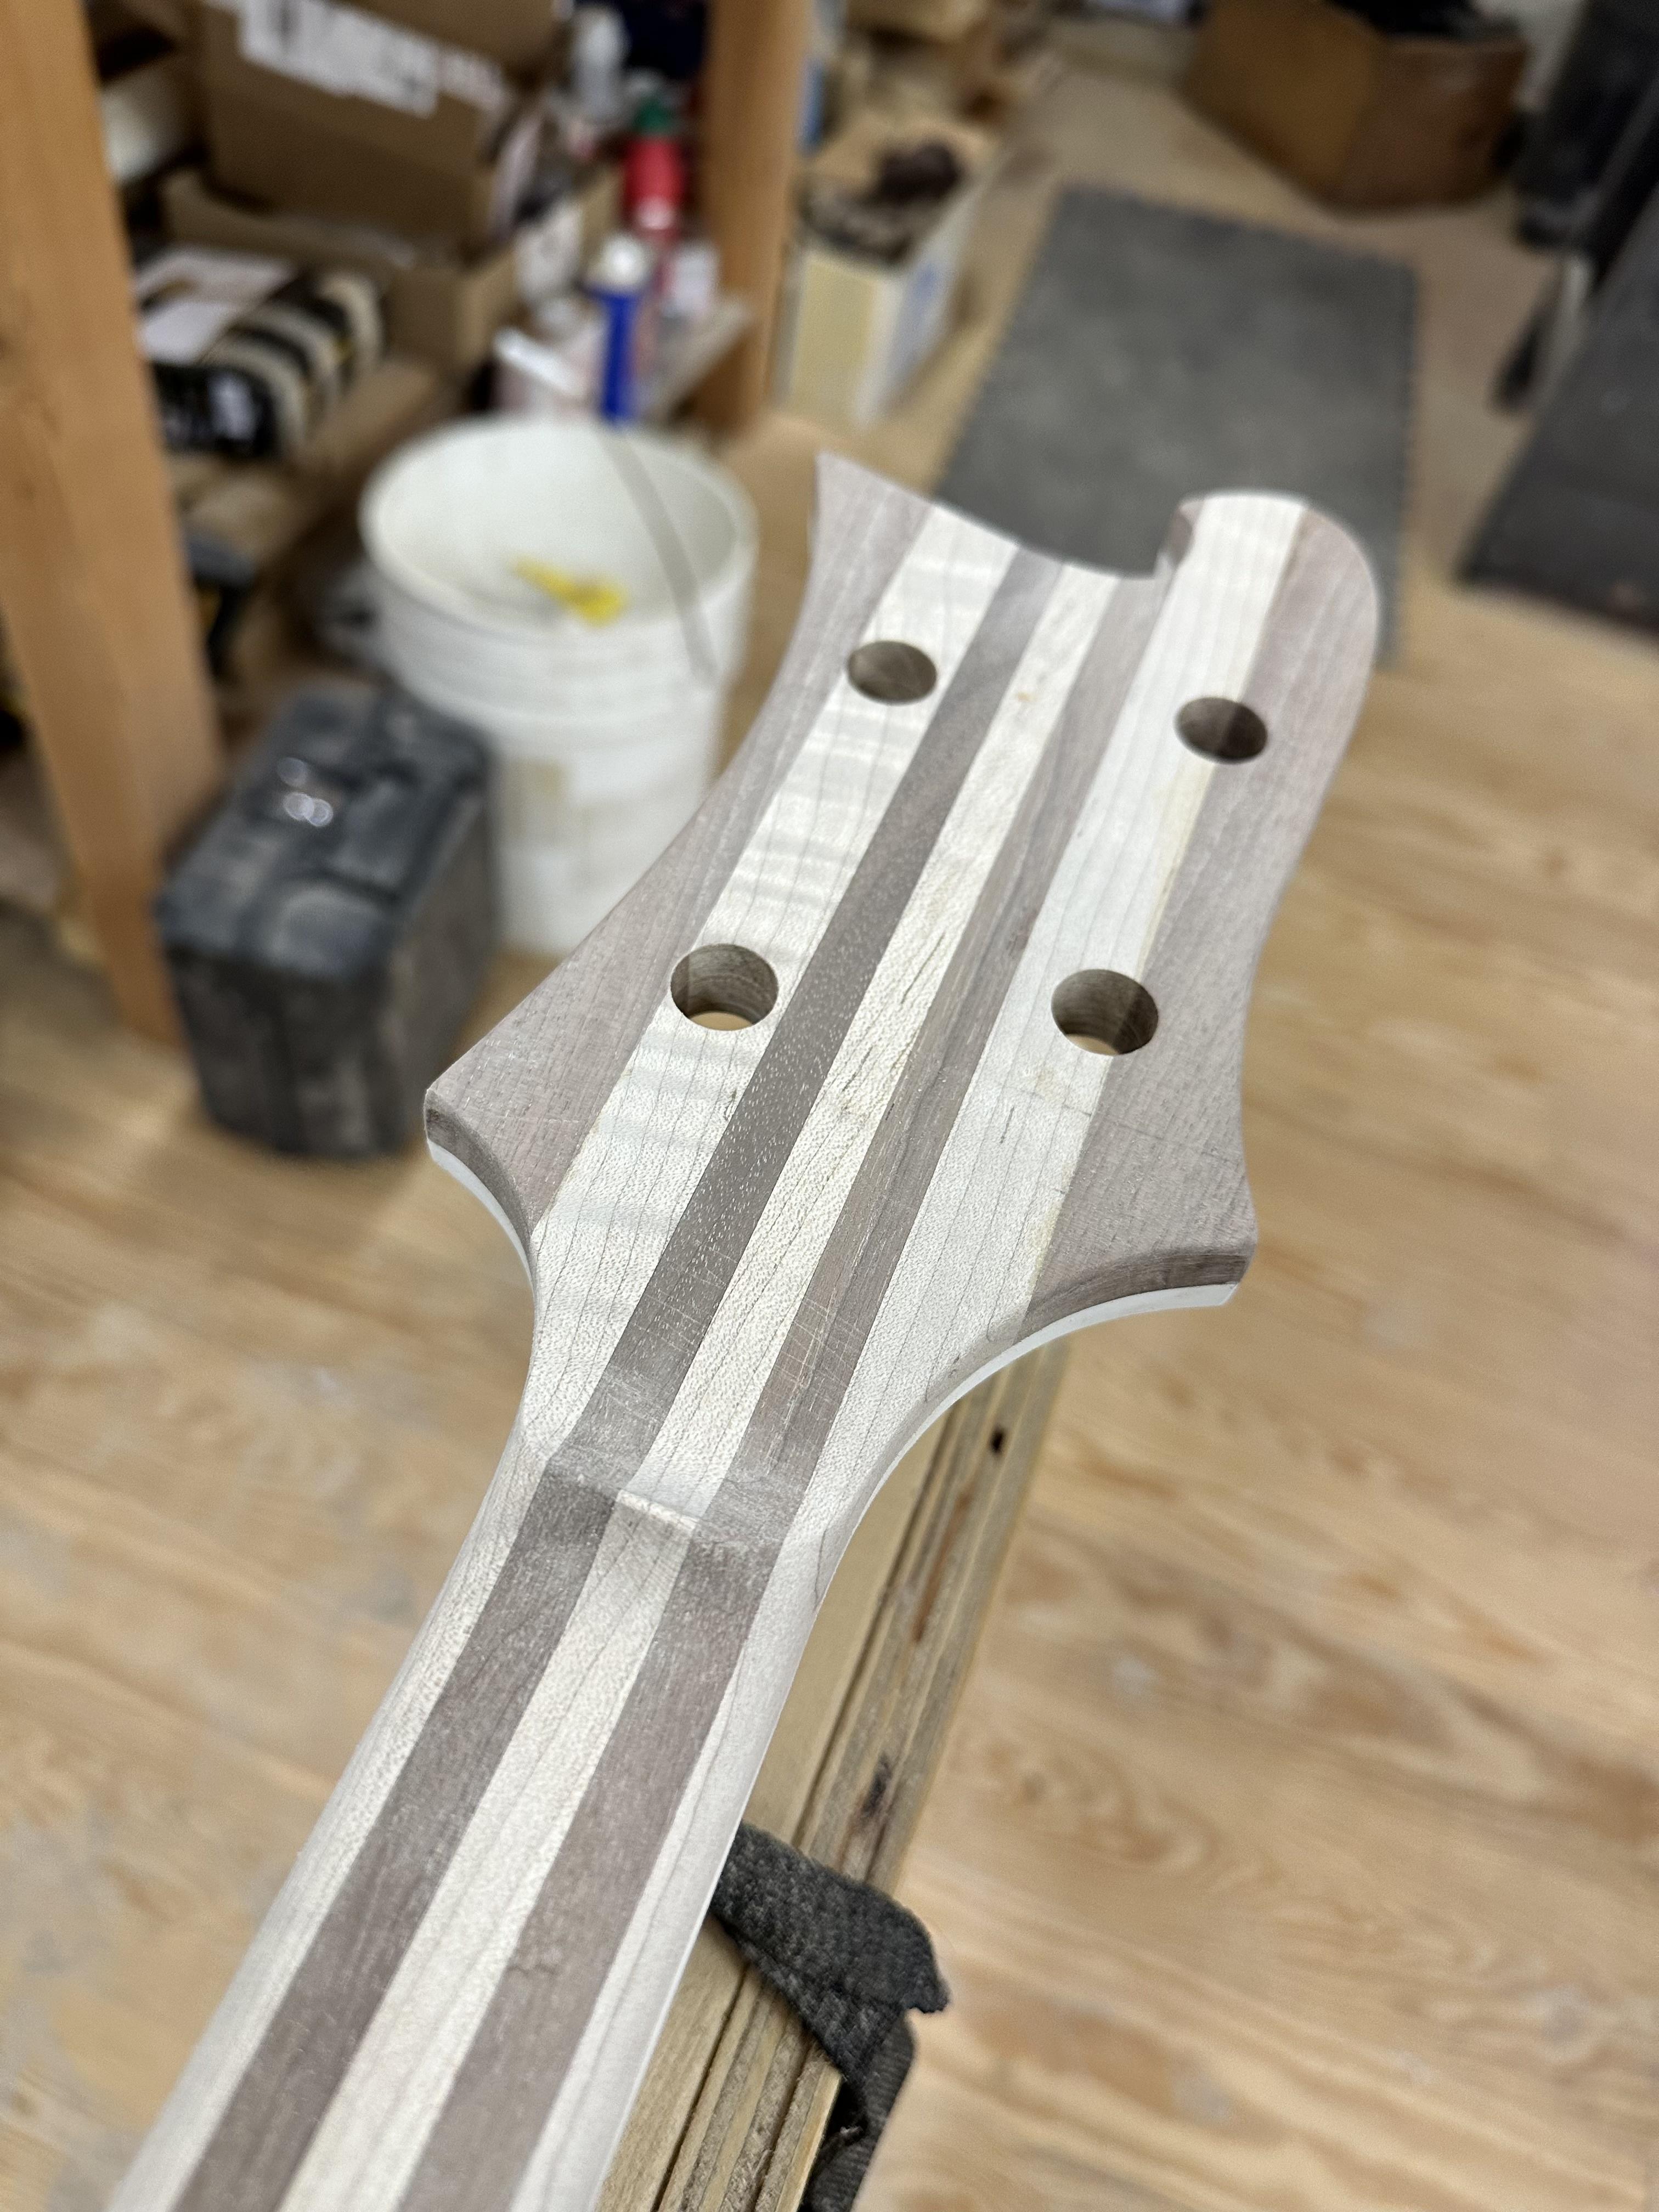
Still a lot of sanding to do, but that's the worst of it. This one is probably the thinnest i've carved yet, feels better in my slightly arthritic hands.
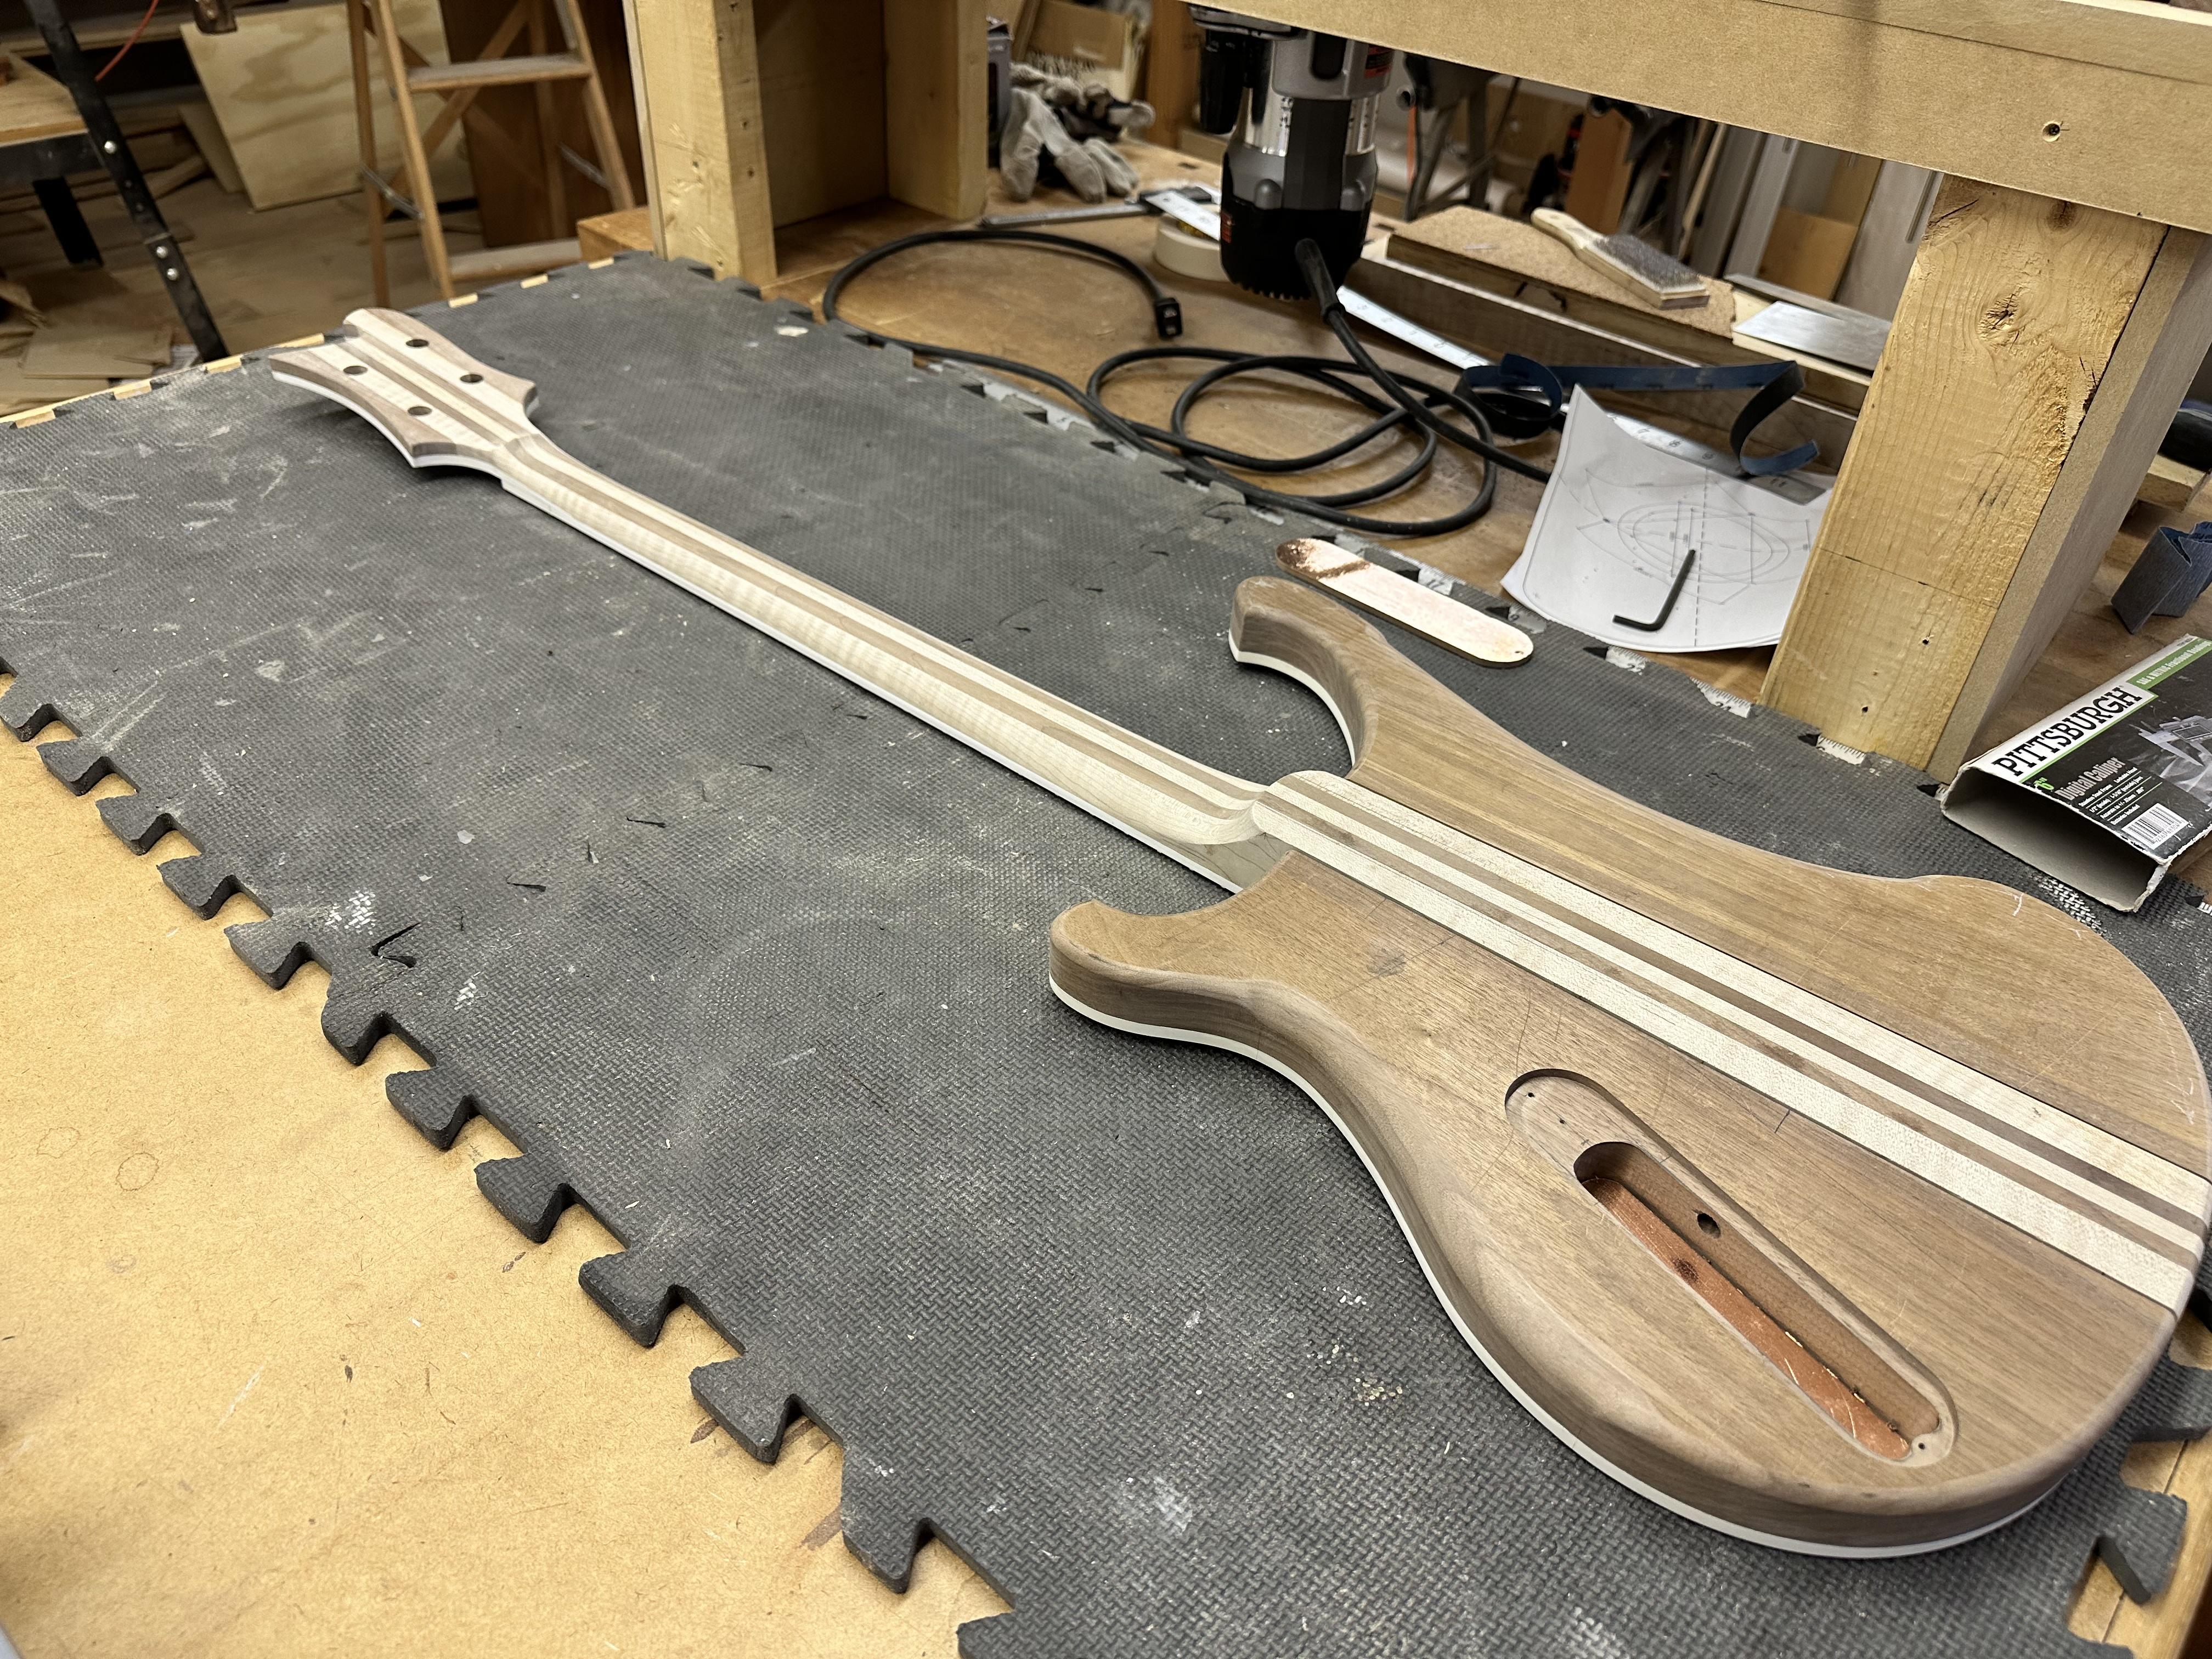
Next up: making a brass nut

I use my knockoff Vinson neck Jig for this which keeps the neck from flexing while I carve it. Facet method per usual.
Still a lot of sanding to do, but that's the worst of it. This one is probably the thinnest i've carved yet, feels better in my slightly arthritic hands.
Next up: making a brass nut

Very nice work, your keen eye for detail really shows in those closeup photos. That's some exceptionally clean binding!Started neck carve. These builds take me so long, it's been two years since the last one, so I lose the benefit of exerience. That said, this one went pretty smoothly. Took me about 5 hours all told. I spent a lot of time getting the initial facets cut perfectly, the rest went pretty quick. I borrowed my son's Shinto rasp, and I'm a convert. The coarse side wasn't much use, tended to "skate" on the hard maple, but the fine side is excellent. Father's day Gift!
I use my knockoff Vinson neck Jig for this which keeps the neck from flexing while I carve it. Facet method per usual.
Still a lot of sanding to do, but that's the worst of it. This one is probably the thinnest i've carved yet, feels better in my slightly arthritic hands.
Next up: making a brass nut



It's actually my version of the Vinson Neck Jig, which is in turn a knockoff of the original wooden Stewmac neck jig for simulating string tension when leveling frets. I did a whole thread on it a few years back, and Bruce Johnson has built several versions over the years, but no longer uses. There are multiple opinions how much difference this makes on new basses, I can only say I've used it on three builds so far, and it seems to yield good results. The basic concept is that you string it to pitch, rotate into playing position to add gavity effects, flatten the neck, and then zero the dial indicators. When you rotate back to horizontal, everything moves a little, you use the attachments to get it back to zero. t's pretty finicky in practice, but I'll guess I'll keep using it. Plus it make a great neck carving jig.....The neck carving jig is awesome.

https://www.talkbass.com/threads/stewmac-matt-vinson-style-neck-jig.1253008/
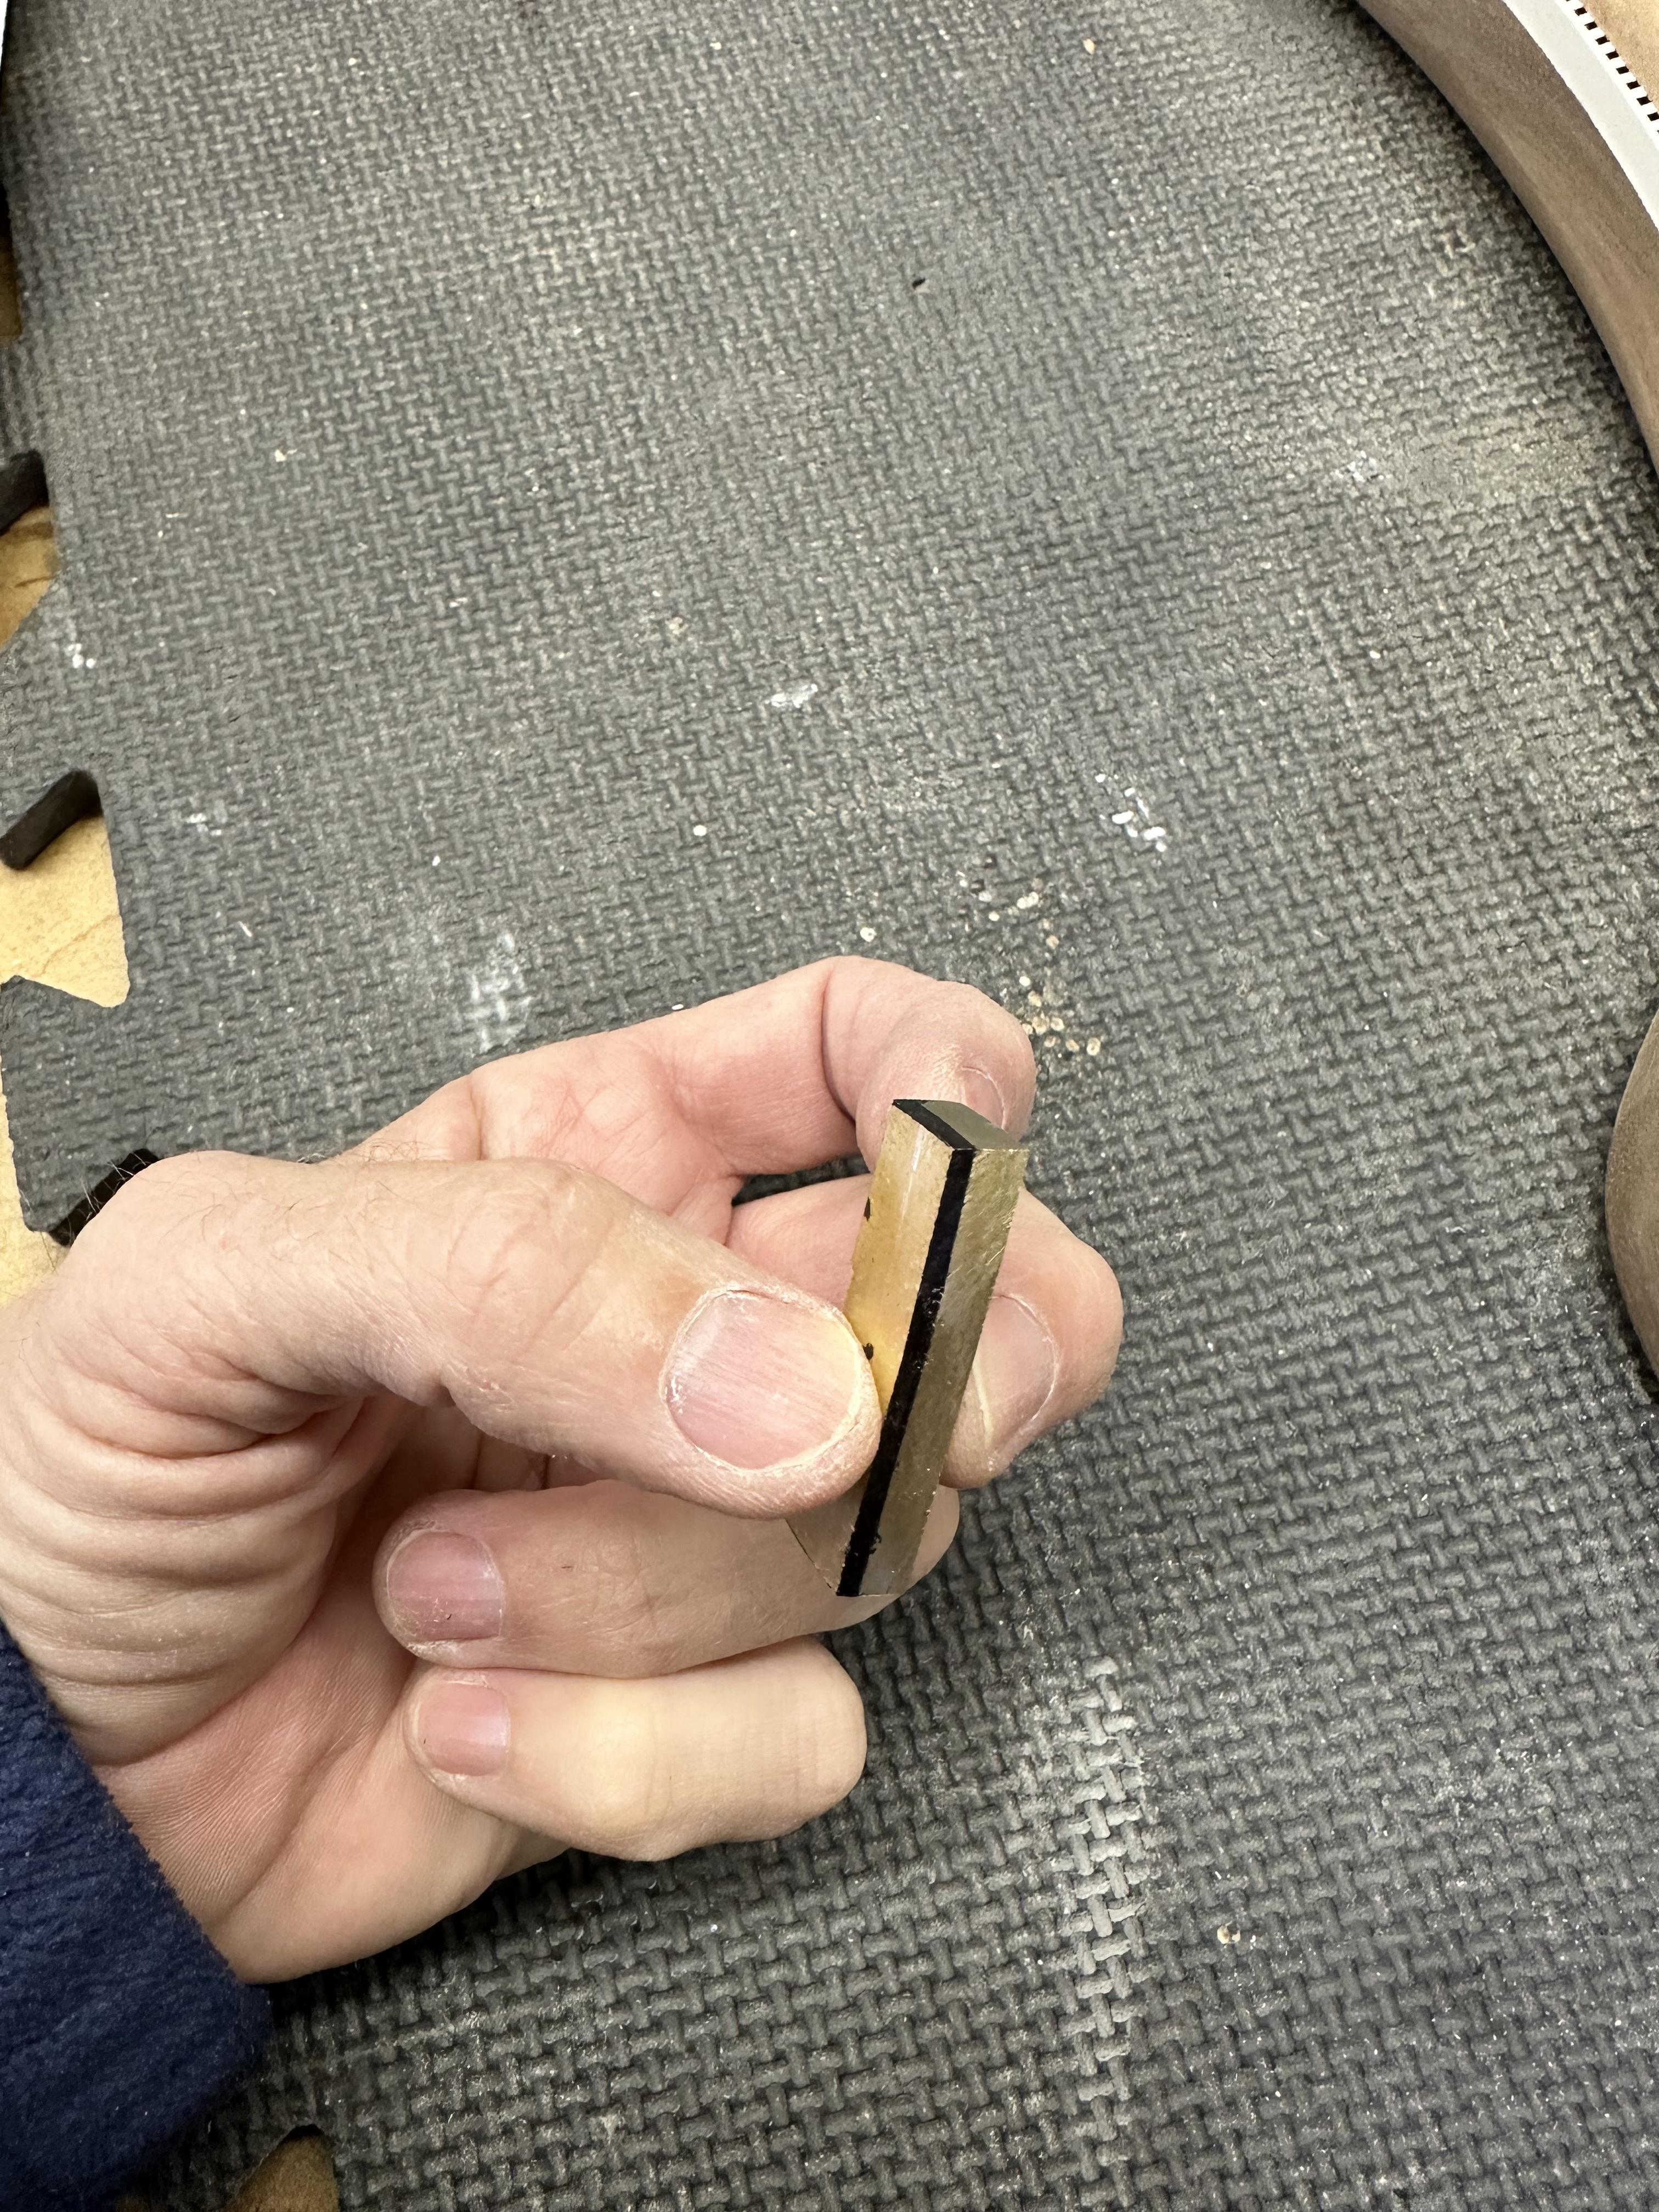
I've reached the "pesky procedures that must be done" phase. First up was thinning my 1/4" thick brass nut blank to 3/16". I don't have access to an end mill, or really any metalworking machines, so per usual... I wing it. Put some masking tape on the blank at 3/16" thickness, mark the waste remainder with Sharpie, and grind all the black off with my belt sander and some files, burned fingers and all. Gotta be a better way...
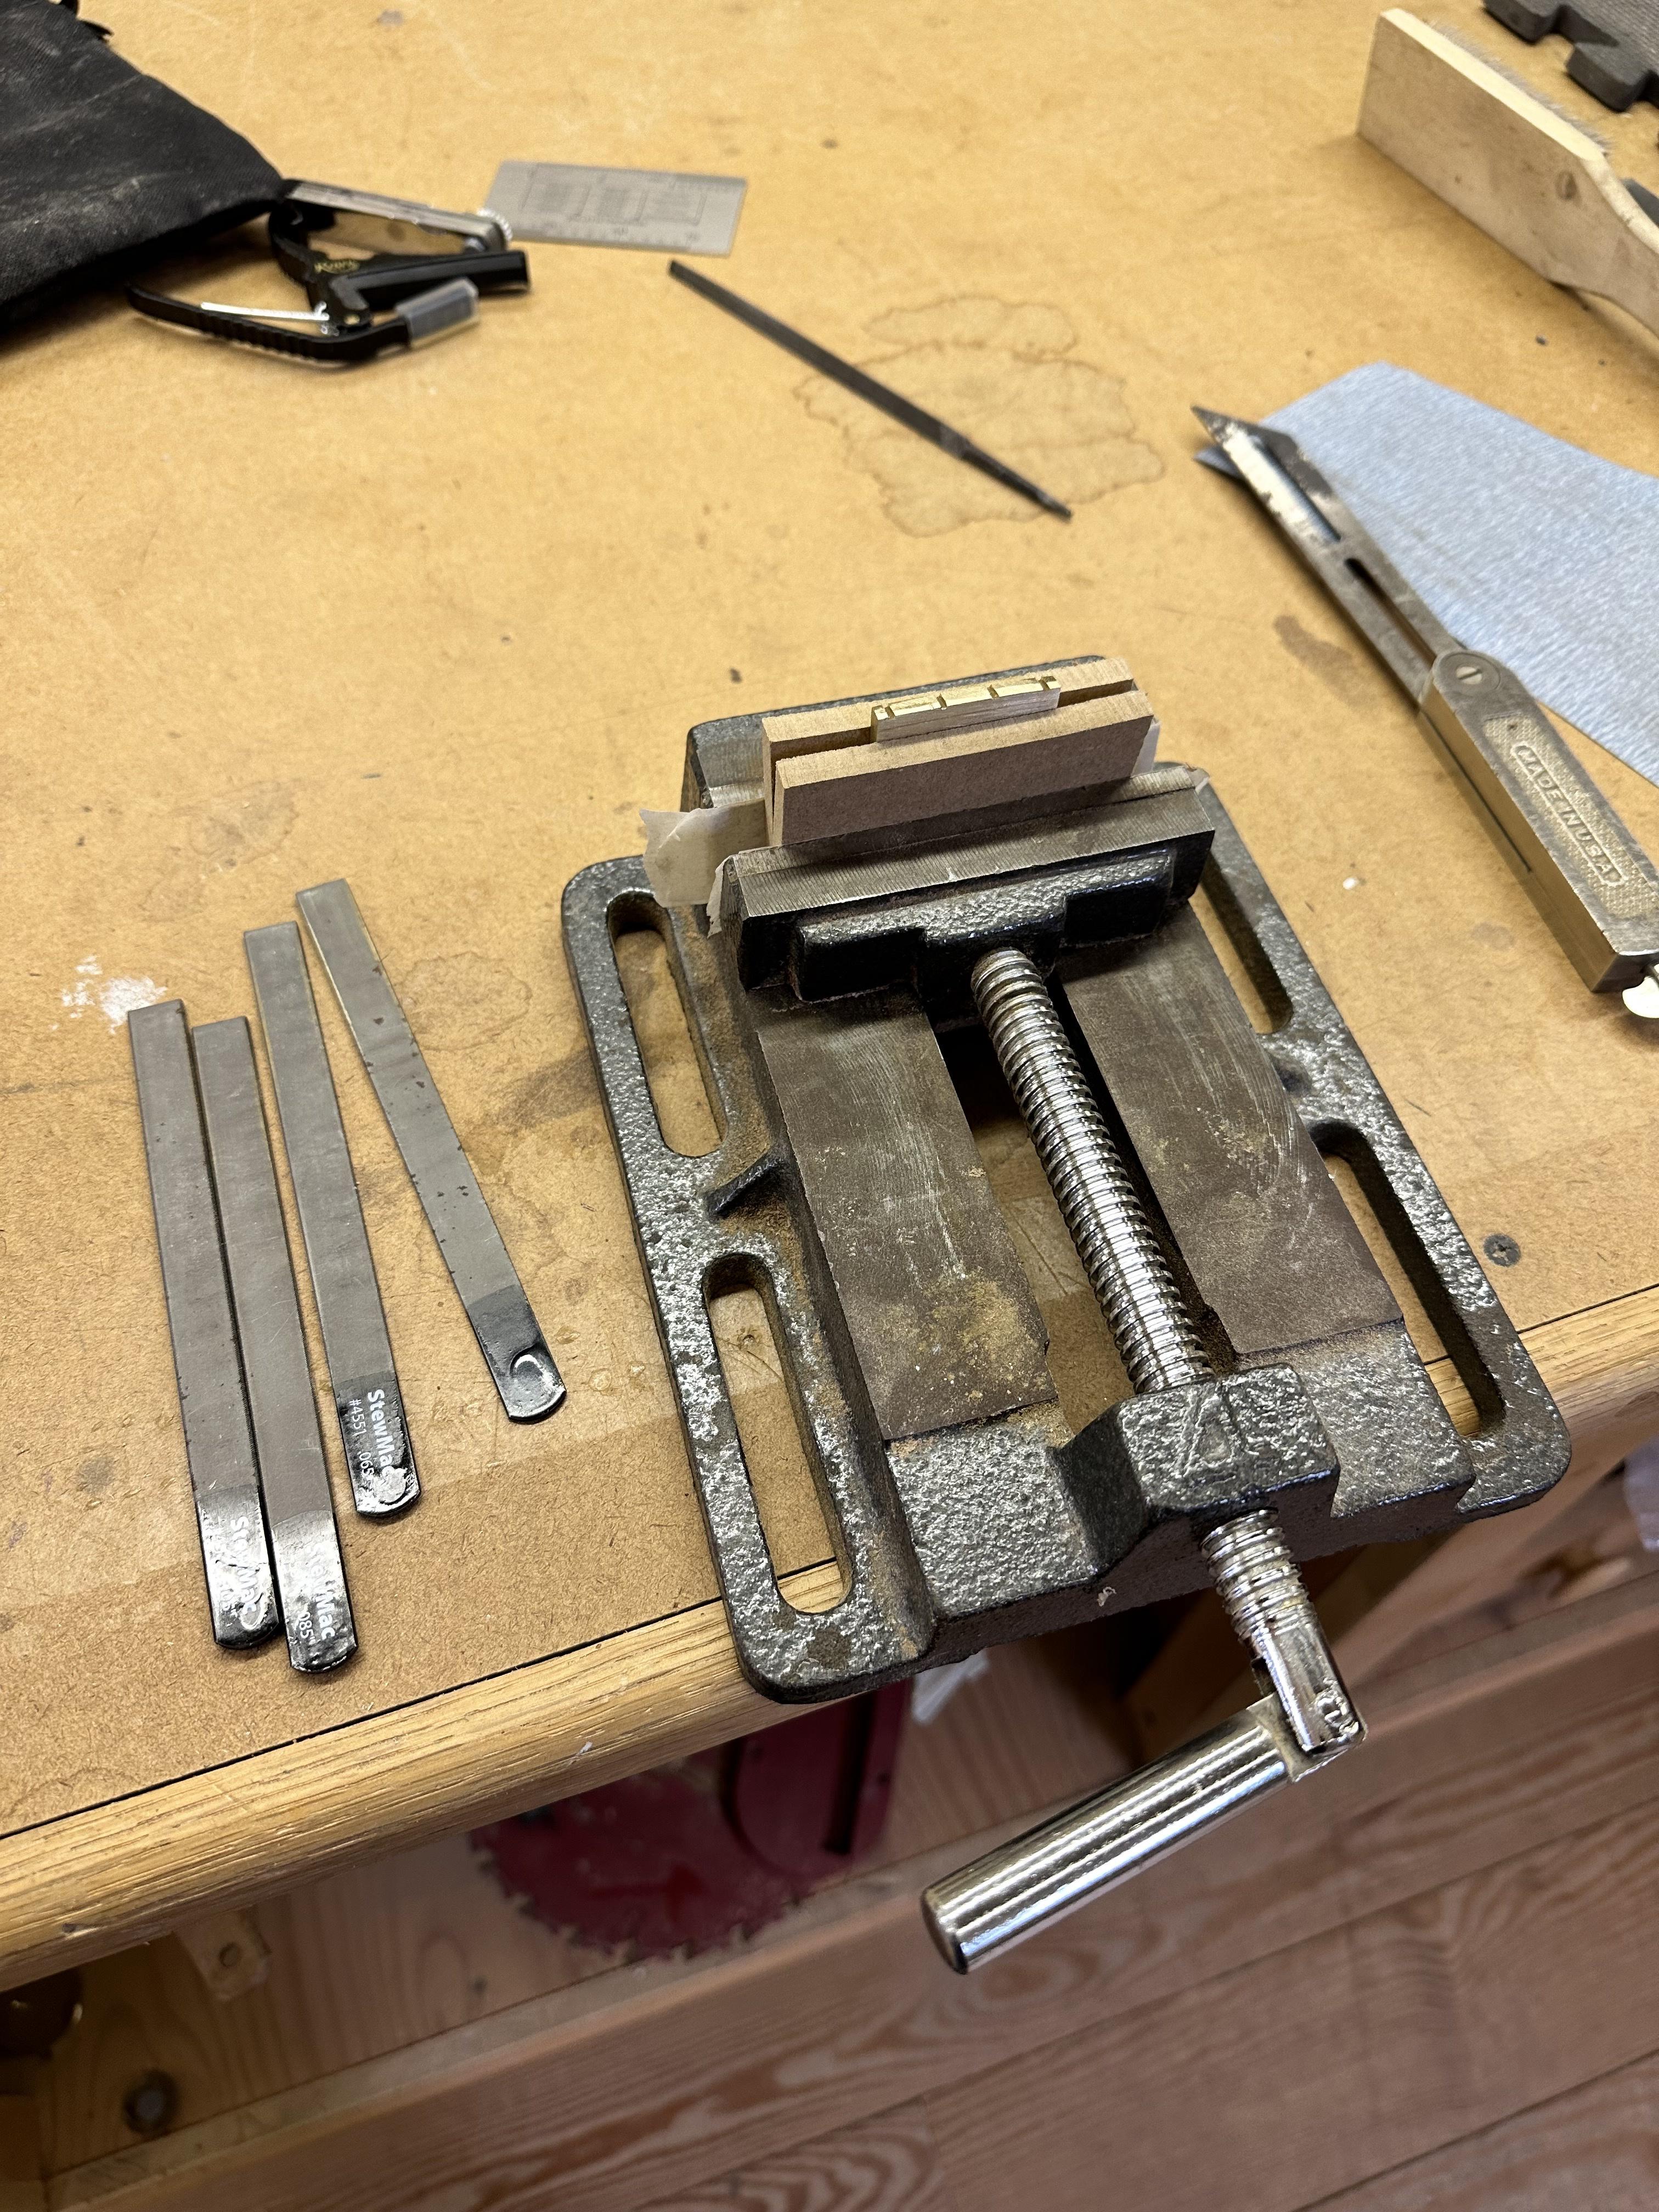
My el-cheapo "nut filing vise"
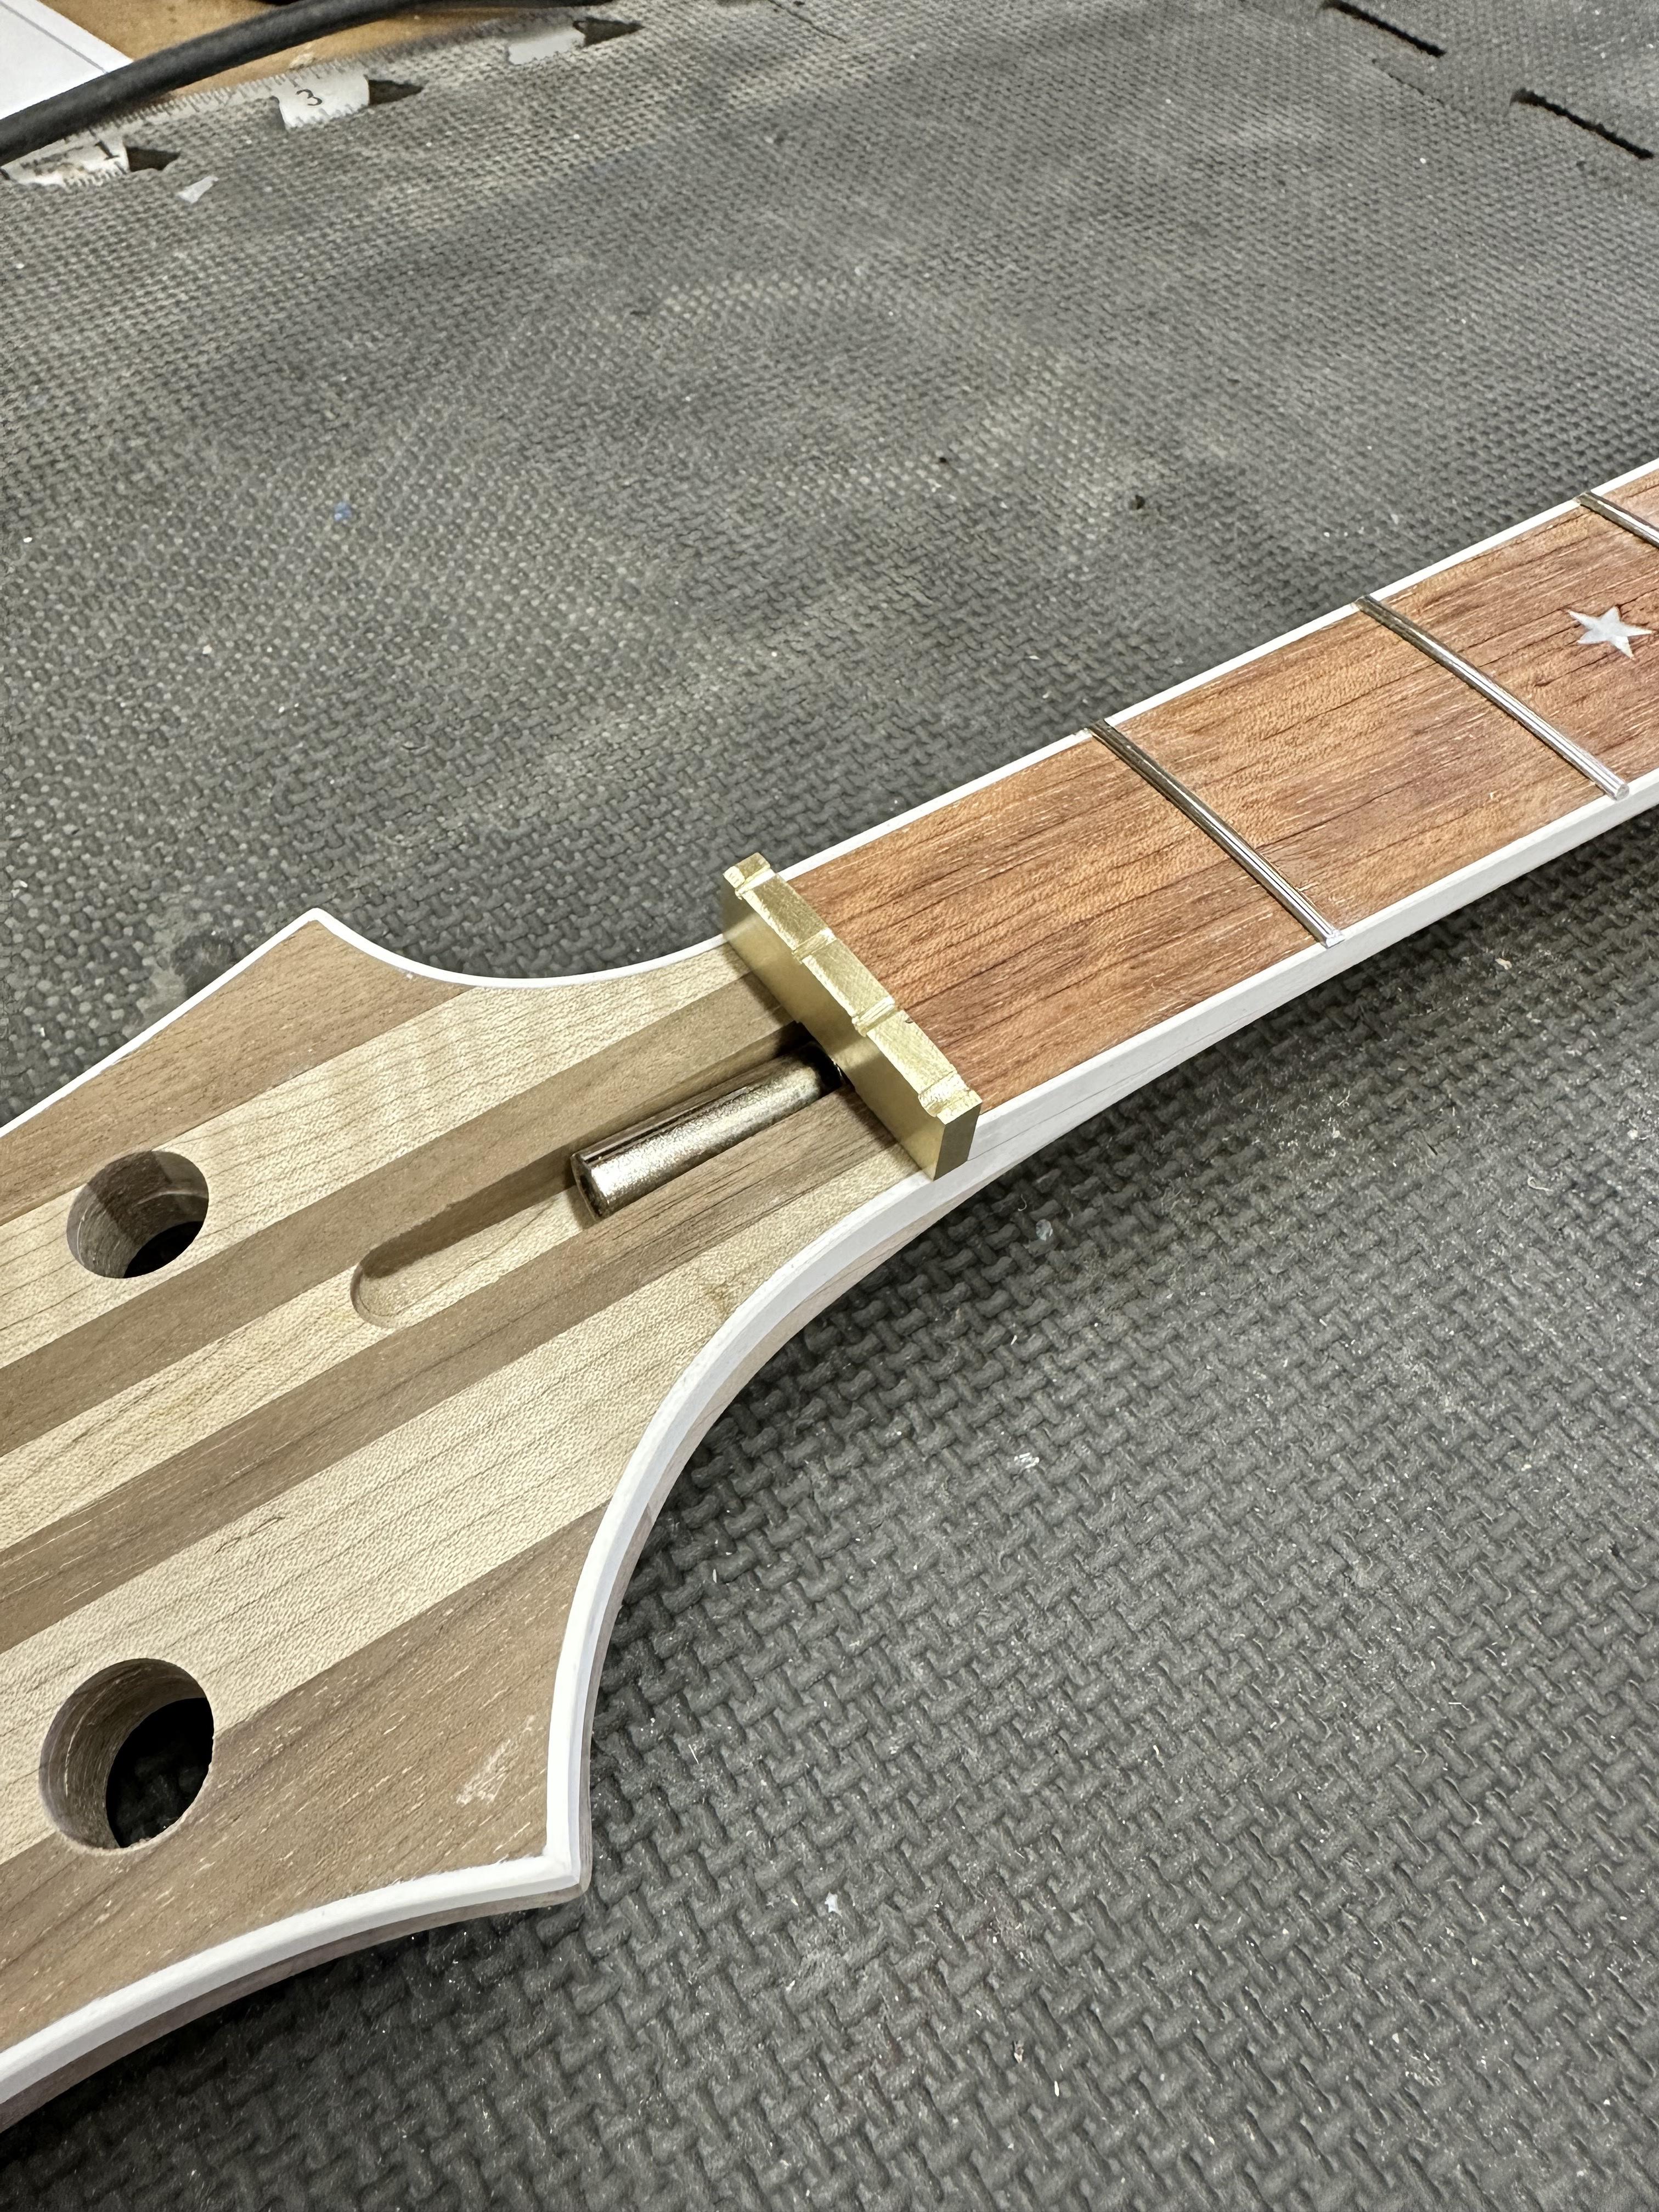
Marked the slots for Even Spacing center to center, E and G centers 1/8" from edge of nut. Thinking I probably should have gone 5/32" instead, but if it feels too close to the edge when I string it up... I'll be making a new nut.
Still way high, and slots will go deeper, but no point hacking this any further until I get the body wings glued on and the bridge set so I can string it up.
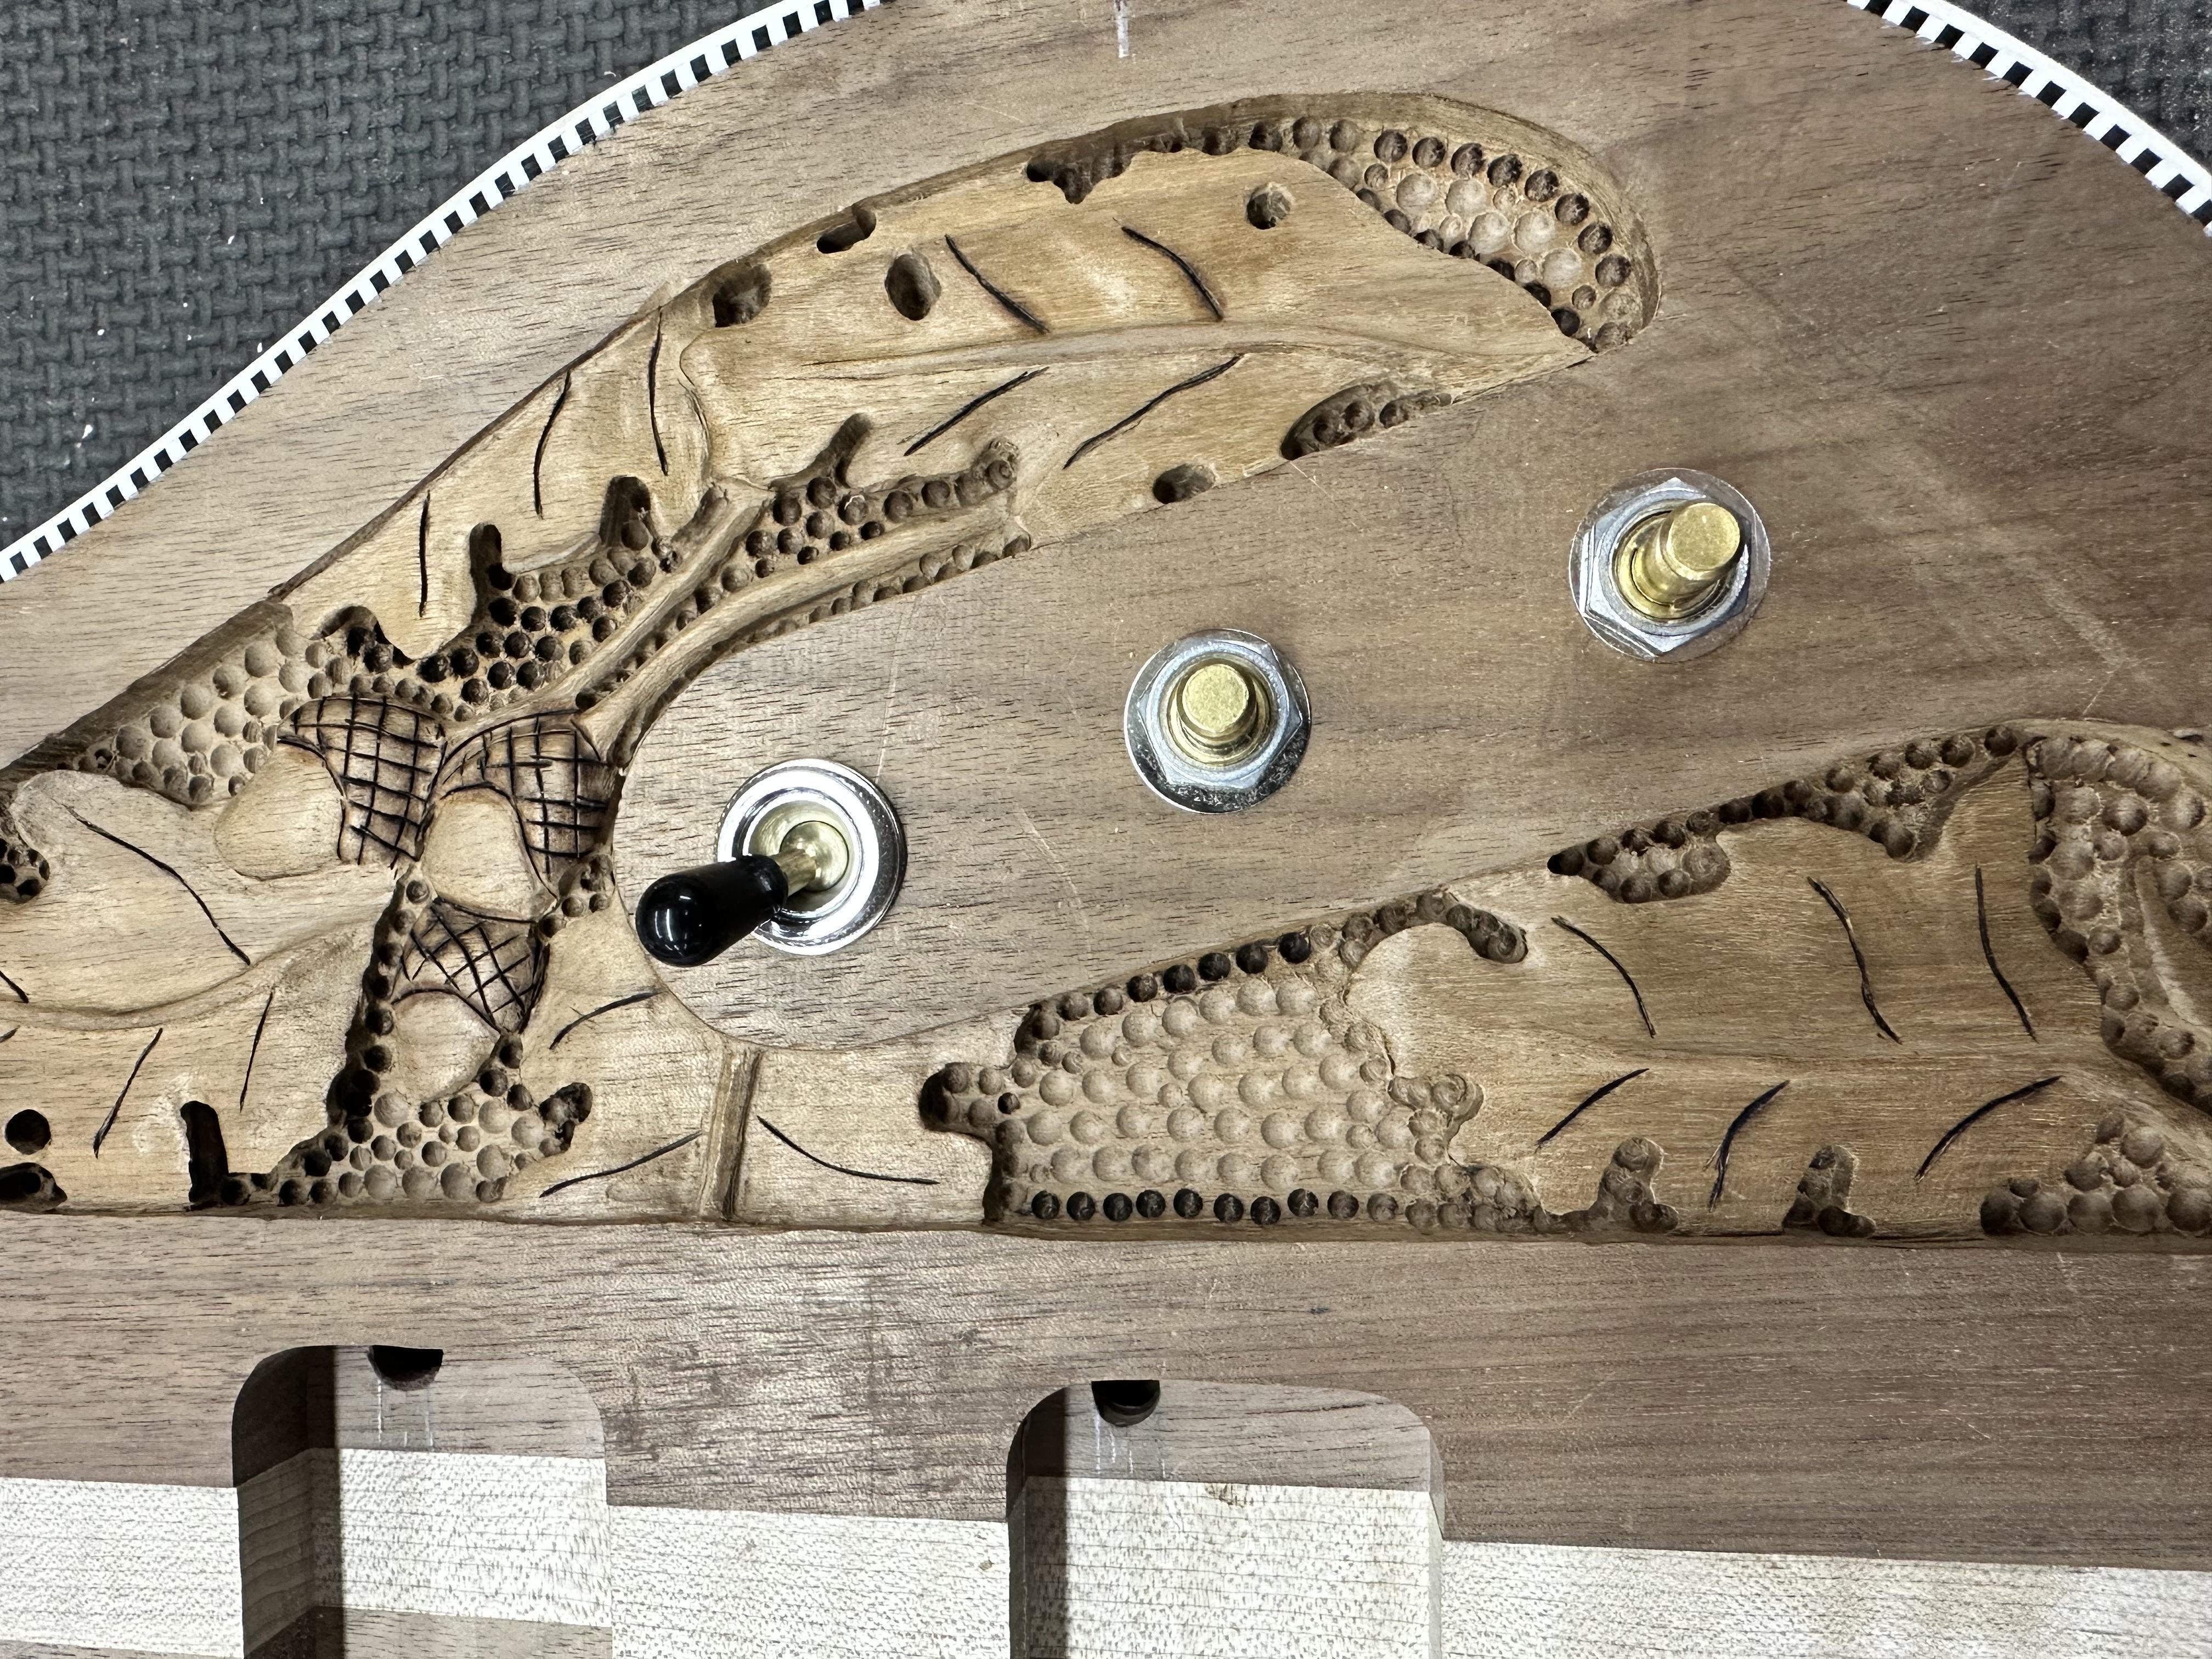
Mocked up the controls, that Freeway Switch just fits. Switch is pretty slick, just like a 6-speed stick shift. I made the cavity cover oversize in case I ever decide to add a battery for active electronics, a small nuclear fusion reactor, etc.
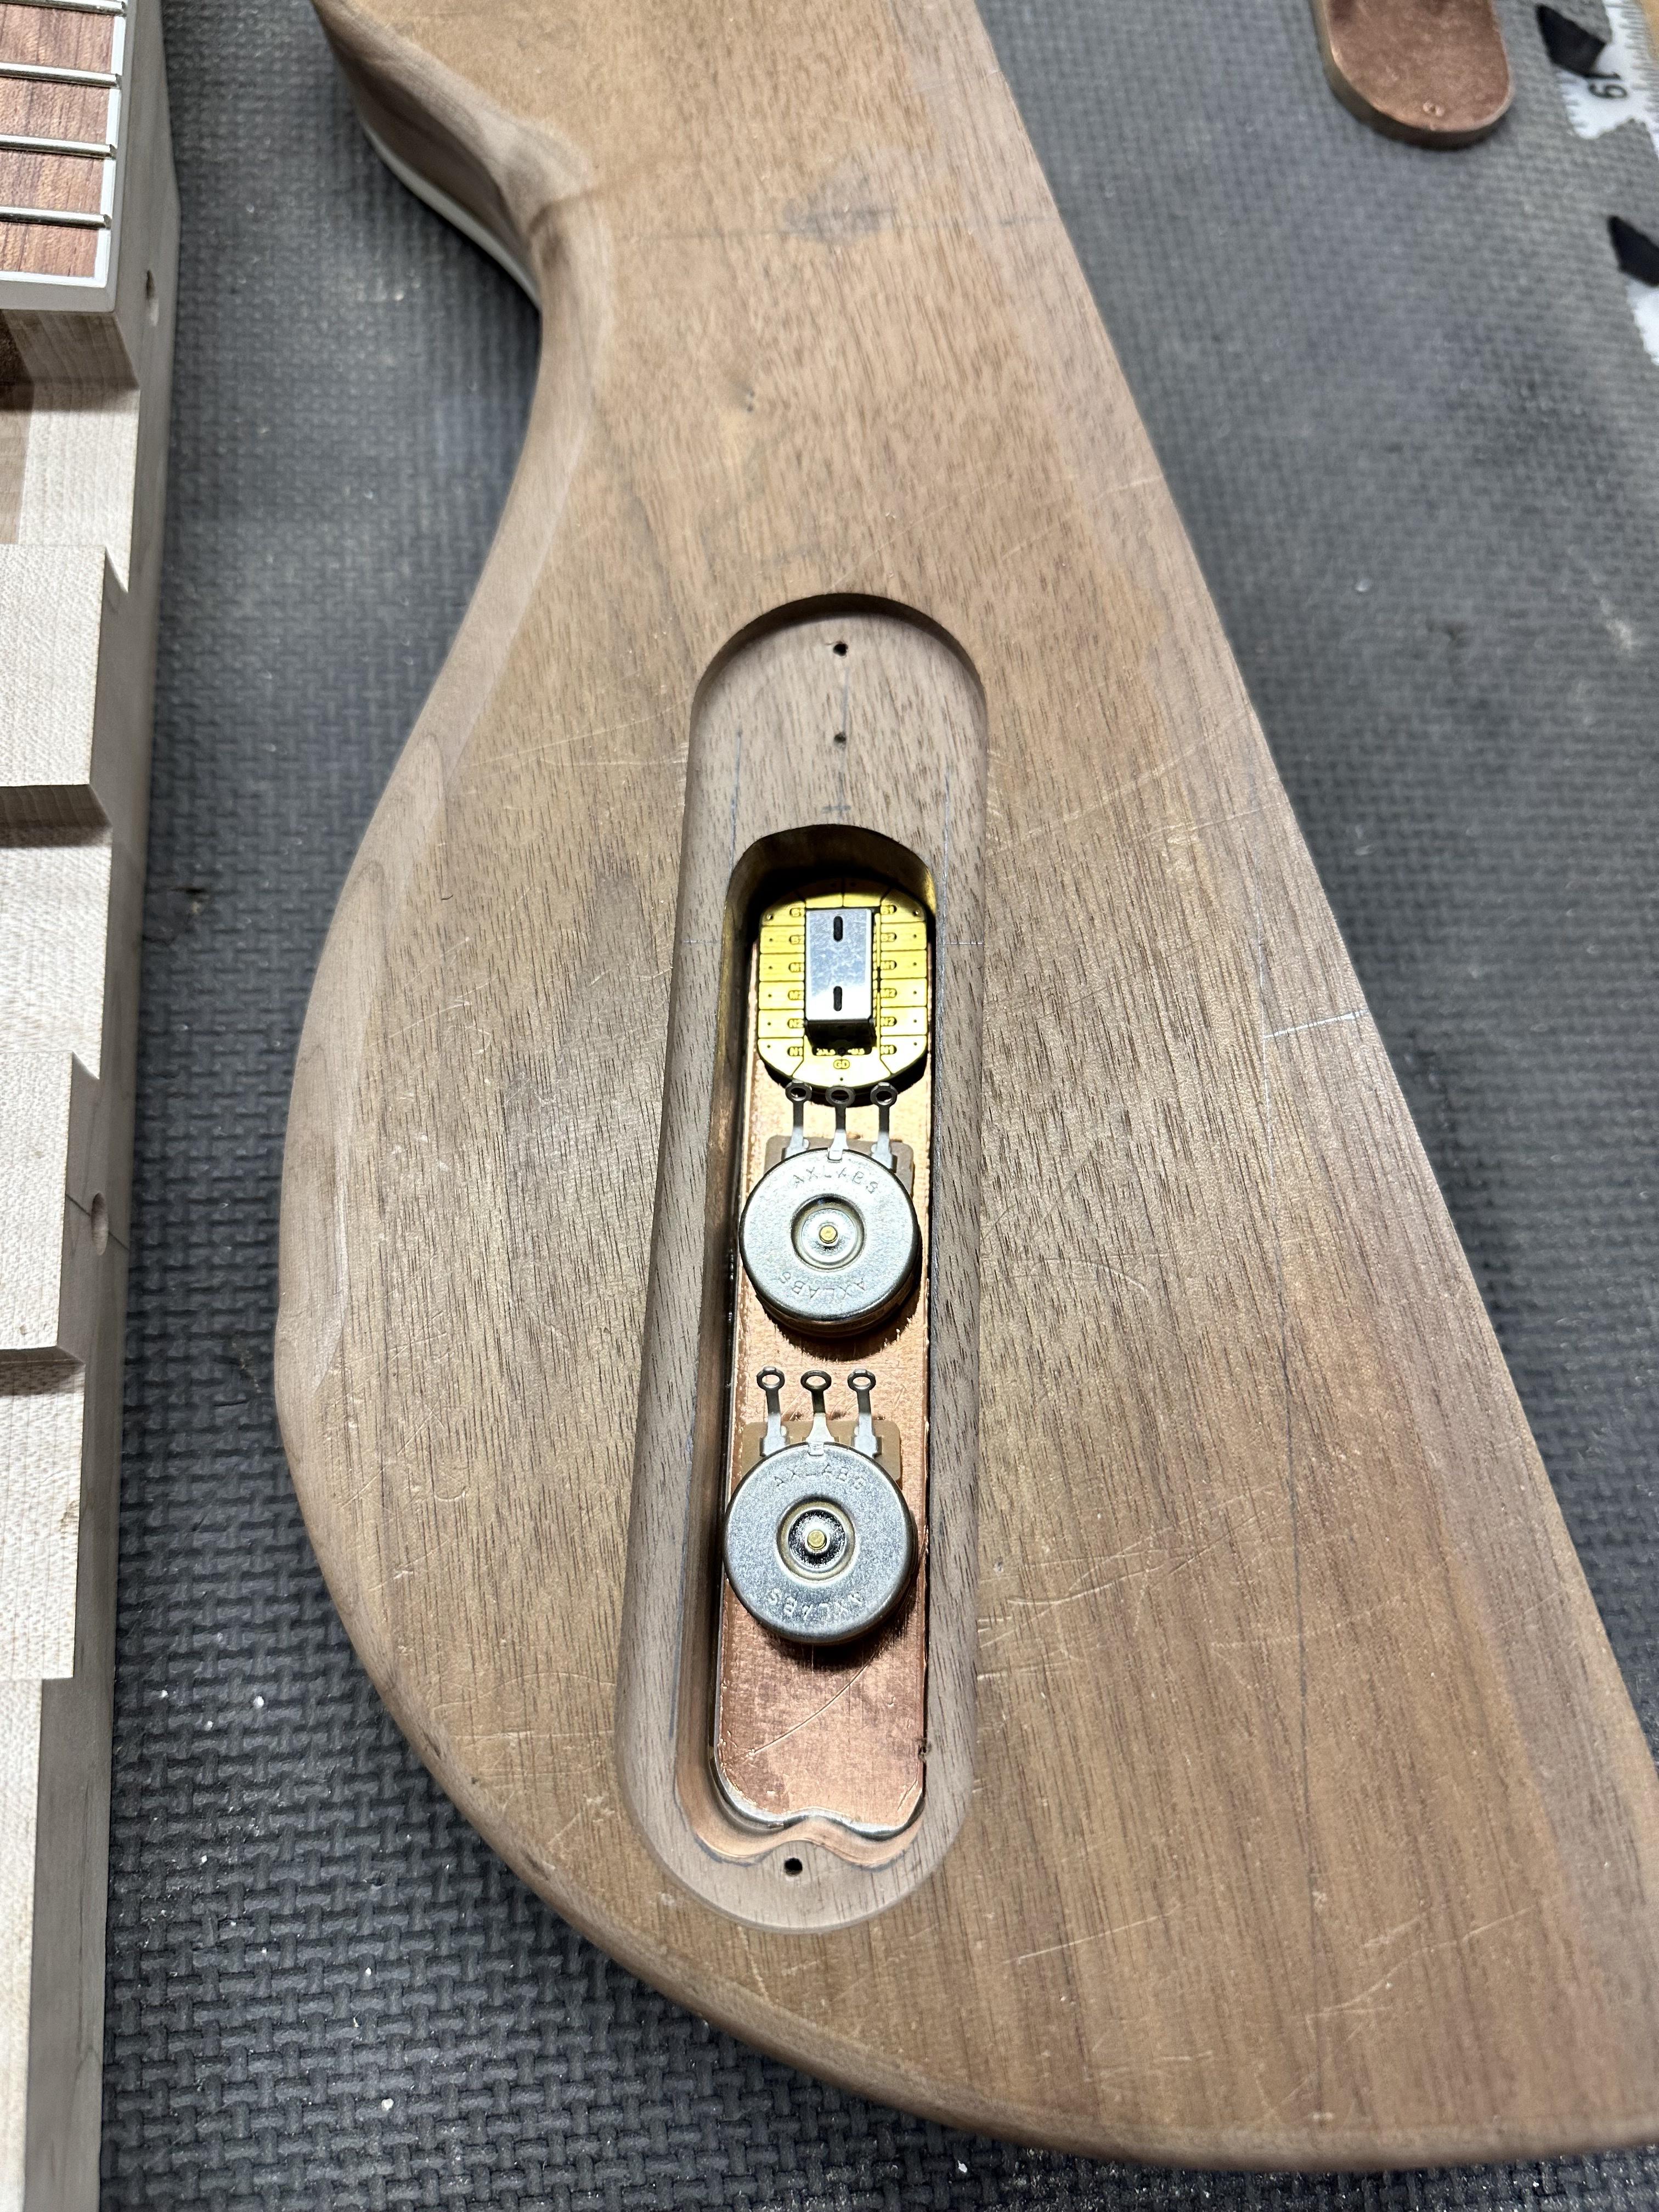
Once I get the pickup wiring channels fully sorted, no remaining excuse not to glue the wings on, maybe this weekend......
My el-cheapo "nut filing vise"
Marked the slots for Even Spacing center to center, E and G centers 1/8" from edge of nut. Thinking I probably should have gone 5/32" instead, but if it feels too close to the edge when I string it up... I'll be making a new nut.
Still way high, and slots will go deeper, but no point hacking this any further until I get the body wings glued on and the bridge set so I can string it up.
Mocked up the controls, that Freeway Switch just fits. Switch is pretty slick, just like a 6-speed stick shift. I made the cavity cover oversize in case I ever decide to add a battery for active electronics, a small nuclear fusion reactor, etc.
Once I get the pickup wiring channels fully sorted, no remaining excuse not to glue the wings on, maybe this weekend......
Last edited:

I made the cavity cover oversize in case I ever decide to add a battery for active electronics, a small nuclear fusion reactor, etc.
My vote is for the small nuclear fusion reactor. I saw a YouTube video yesterday about how they are starting to use thorium instead of uranium in smaller reactors. More taste, less waste, or something like that. Looks great!
It's always good to thin your nuts. 
I think the thorium reactor discussion is regarding "tastes great, less filling" if I recall correctly.
I think the thorium reactor discussion is regarding "tastes great, less filling" if I recall correctly.
Awesome build! Keep up the good work!I've reached the "pesky procedures that must be done" phase. First up was thinning my 1/4" thick brass nut blank to 3/16". I don't have access to an end mill, or really any metalworking machines, so per usual... I wing it. Put some masking tape on the blank at 3/16" thickness, mark the waste remainder with Sharpie, and grind all the black off with my belt sander and some files, burned fingers and all. Gotta be a better way...
My el-cheapo "nut filing vise"
Marked the slots for Even Spacing center to center, E and G centers 1/8" from edge of nut. Thinking I probably should have gone 5/32" instead, but if it feels too close to the edge when I string it up... I'll be making a new nut.
Still way high, and slots will go deeper, but no point hacking this any further until I get the body wings glued on and the bridge set so I can string it up.
Mocked up the controls, that Freeway Switch just fits. Switch is pretty slick, just like a 6-speed stick shift. I made the cavity cover oversize in case I ever decide to add a battery for active electronics, a small nuclear fusion reactor, etc.
Once I get the pickup wiring channels fully sorted, no remaining excuse not to glue the wings on, maybe this weekend......
I’m a little embarrassed about the state of the walnut on the back, I must have been dragging it around on bolt heads or something. I have those foam pads you see on the background, just need to start using them earlier in the build. Gonna have to steam the worst dings out!

I’m a little embarrassed about the state of the walnut on the back, I must have been dragging it around on bolt heads or something. I have those foam pads you see on the background, just need to start using them earlier in the build. Gonna have to steam the worst dings out!
Road worn on the back only. A new feature worth at least a few extra bucks!

Lemmy's Ghost has been doing the authentic buckle-rash for ya...Road worn on the back only. A new feature worth at least a few extra bucks!
well... nothing a little steam and hours of sanding won't fix. One big downside of slow builds: walnut wings and a maple neck beam initially machined to exactly the same thickness don't stay that way for two years. The walnut wings seem to have "grown" a bit, something like 1/64" or maybe a fat 128th. So I'll be sanding that all flush too....


