• TalkBass has been independent since 1998. Add your voice.
    Create a free account to reply to discussions, view embedded media, and browse with fewer display ads.
    Join freeLog in
    Want zero display ads or expanded classifieds tools? Compare plans.

The SCP - Single Cut P-Bass

Small update. First off: the rotosounds are growing on me. They have a great mellow tone that goes great with the pickup and overall character of the bass.

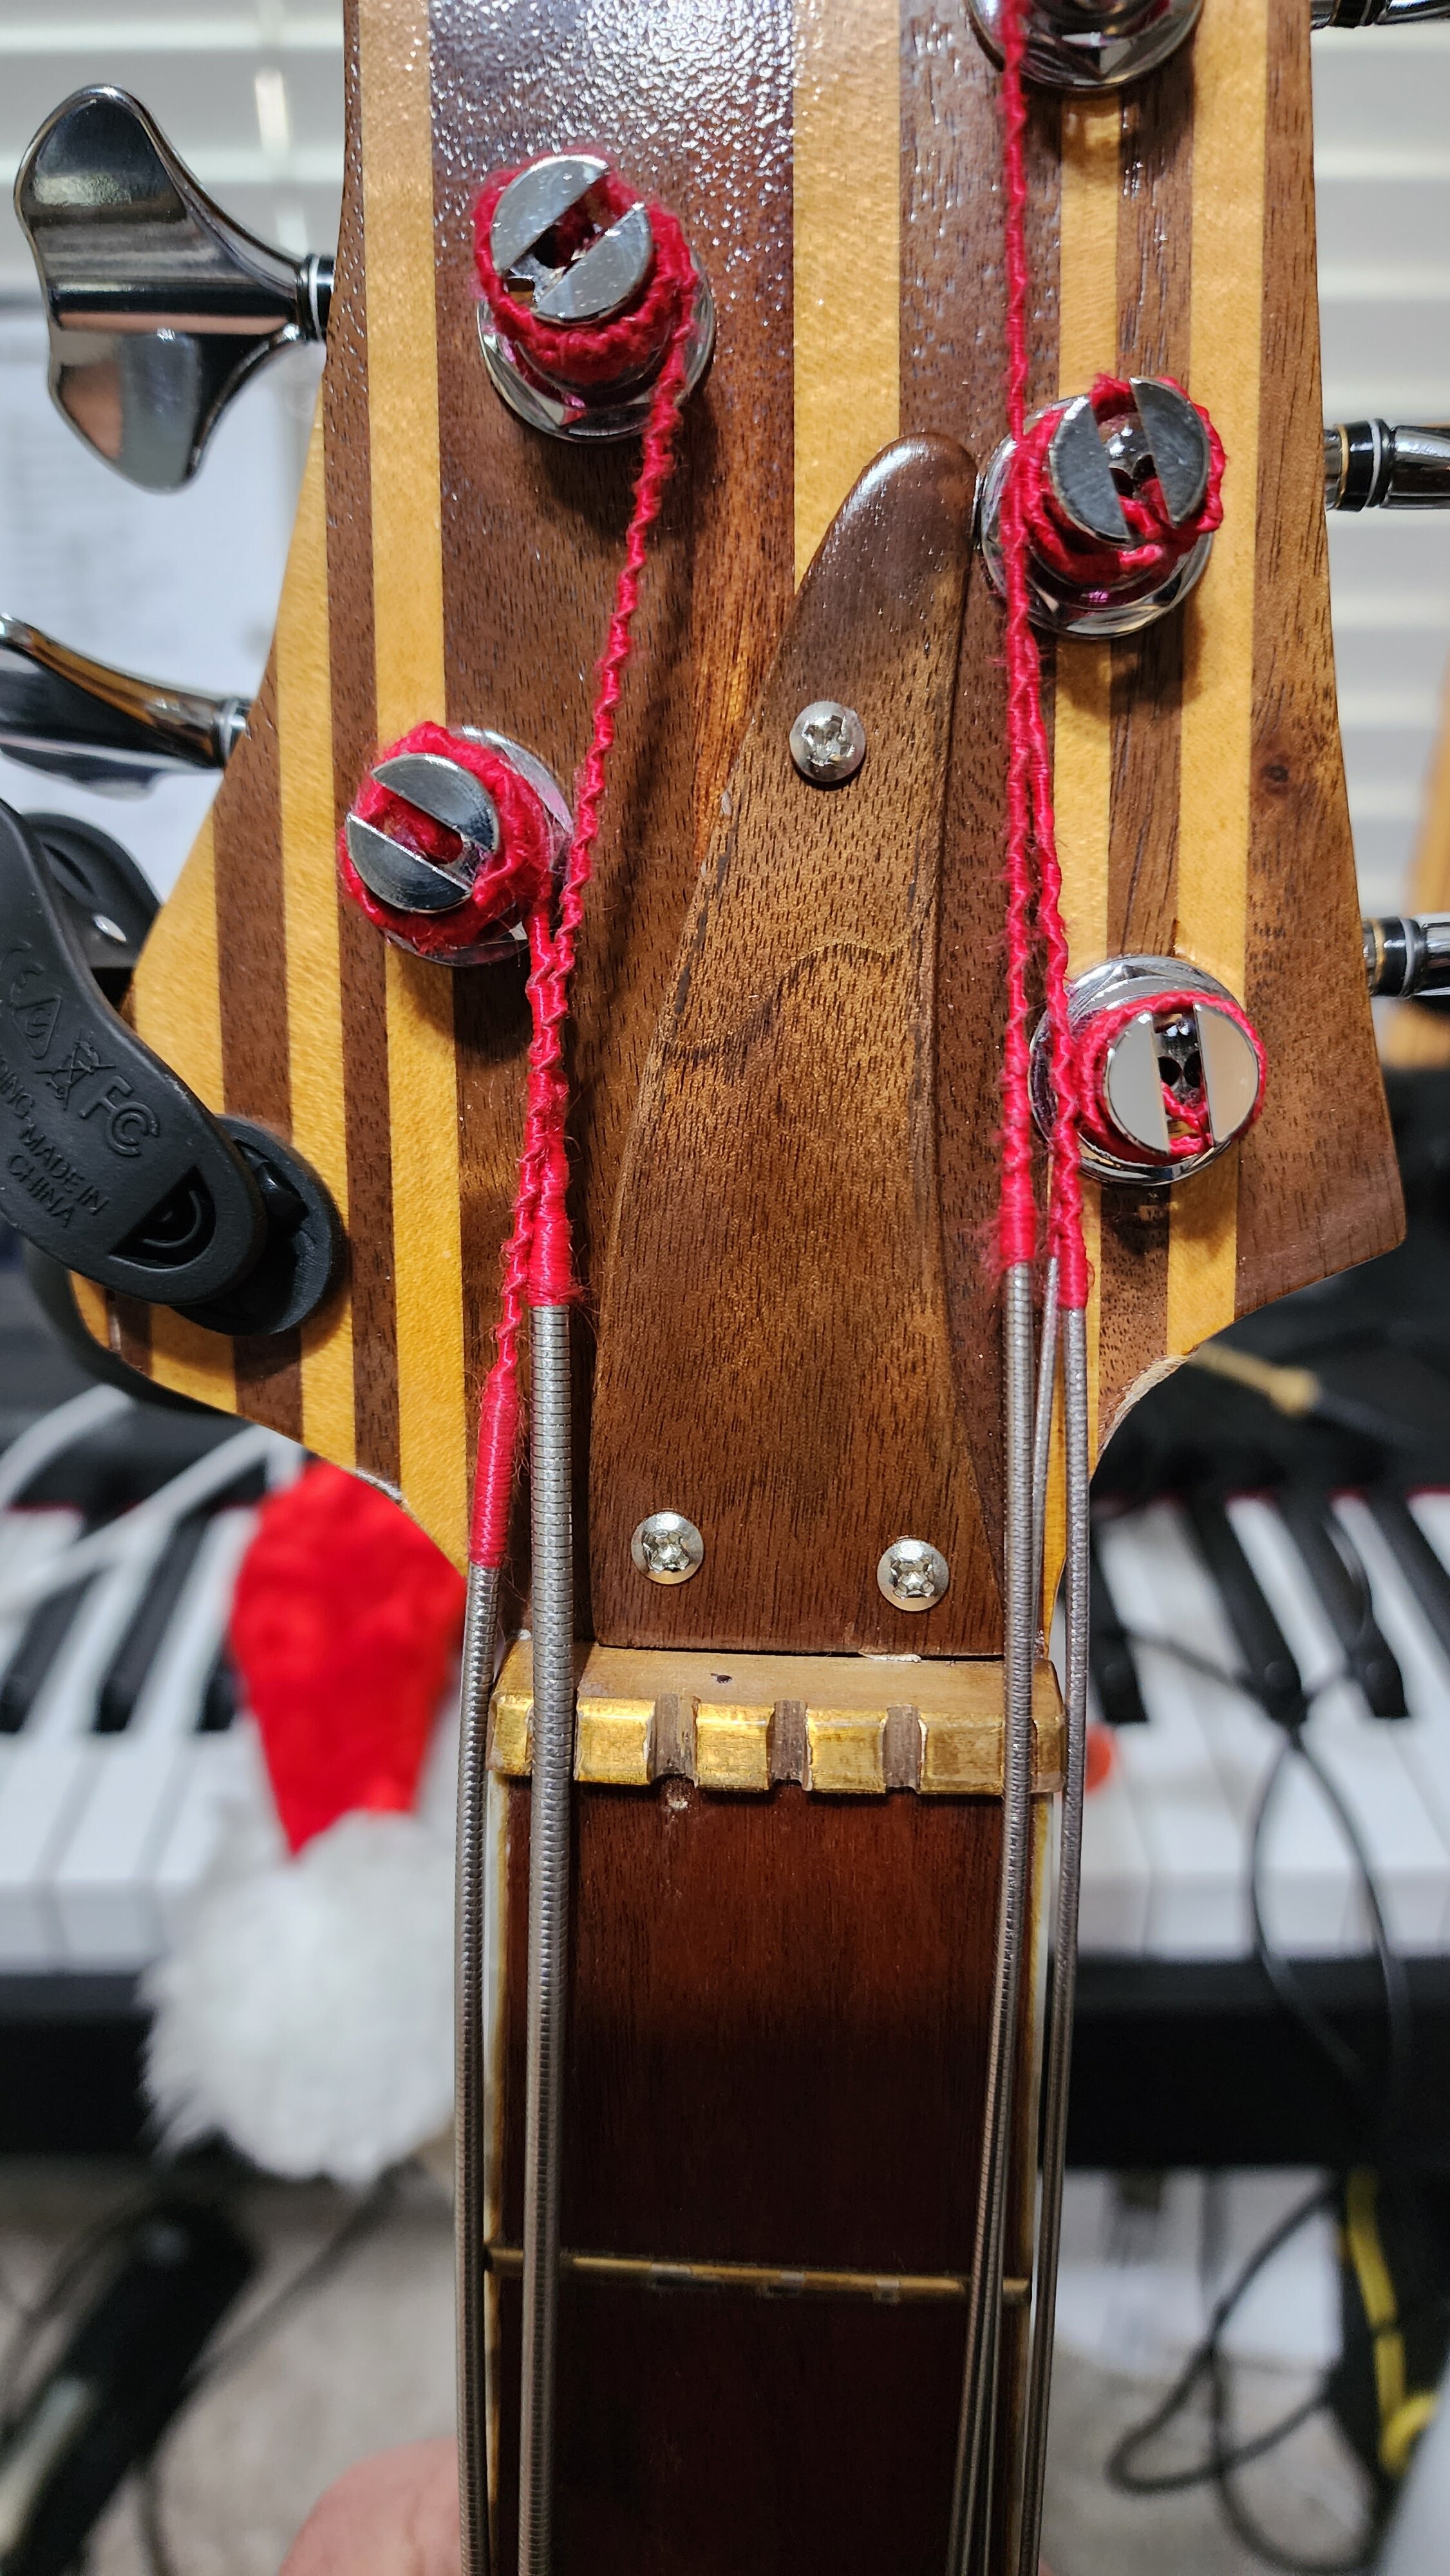
Second: the lack of a truss rod cover has bothered me. So I made a simple one out of some scrap walnut. I think it looks nice, but I'm hoping to do something the has the name of the bass on it, once I figure out a logo that I like.

And yes. I know the bottom two holes don't line up...:banghead::banghead::banghead:
20230913_080424.jpg
 
Small update. First off: the rotosounds are growing on me. They have a great mellow tone that goes great with the pickup and overall character of the bass.

Second: the lack of a truss rod cover has bothered me. So I made a simple one out of some scrap walnut. I think it looks nice, but I'm hoping to do something the has the name of the bass on it, once I figure out a logo that I like.

And yes. I know the bottom two holes don't line up...:banghead::banghead::banghead:
View attachment 5188548


As long as they don’t line up on purpose (or you at least claim it’s on purpose) that’s fine. It’s only an issue if you meant for them to line up. :D


It was on purpose, right? :thumbsup:
 
I've been happily playing the bass for a few months, and I've noticed that the action above the 12th fret is suboptimal.

The bridge is set as low as possible, and the pickup is as high as possible.

I tried adding a shim, but that seems to throw off the bridge height and it goes wonky.

I could just file the bridge saddles and see where it goes. That doesn't quite seem like the right answer though.

After wracking my brain I think the best way to approach this is to make a jig that has independently adjustable feet so that I can set it at the precise angle relative to the body...

I guess I am seeking opinions and guidance on how to solve this.
 
Last edited:
  • Like
Reactions: 1960jbass
What went wonky with the shim? I can see how the usual quick'n'dirty solution of jamming a guitar pick in the pocket would cause some weirdness with this highly un-square pocket, but a full-sized angled shim should get you there OK.

If you want to re-route the pocket at an angle, I've done that successfully using the same template as used to route the pocket originally, just shimming up one end so the template sits at a small angle to the body. In this case you might need to shim both ends by different amounts to make sure the template clears the raised rim on the body. Be careful that the bearing on the router bit doesn't fall into the gap between the template and the body or Bad Things Will Occur.

If you have a router sled jig, another option is to set up the body so it sits at the appropriate angle to the bed of the jig. Now the sled should be parallel to the plane of the strings and you can use that to double-check that you have the expected distance from the sled down to the neck pocket and to the bridge before you start cutting.
With this setup you can probably skip the neck pocket template altogether and just pilot the bit off the existing neck pocket walls. I haven't done it this way with an angled pocket, but have deepened an existing parallel pocket this way.
 
  • Like
Reactions: Videojunkie
I pr
What went wonky with the shim? I can see how the usual quick'n'dirty solution of jamming a guitar pick in the pocket would cause some weirdness with this highly un-square pocket, but a full-sized angled shim should get you there OK.

If you want to re-route the pocket at an angle, I've done that successfully using the same template as used to route the pocket originally, just shimming up one end so the template sits at a small angle to the body. In this case you might need to shim both ends by different amounts to make sure the template clears the raised rim on the body. Be careful that the bearing on the router bit doesn't fall into the gap between the template and the body or Bad Things Will Occur.

If you have a router sled jig, another option is to set up the body so it sits at the appropriate angle to the bed of the jig. Now the sled should be parallel to the plane of the strings and you can use that to double-check that you have the expected distance from the sled down to the neck pocket and to the bridge before you start cutting.
With this setup you can probably skip the neck pocket template altogether and just pilot the bit off the existing neck pocket walls. I haven't done it this way with an angled pocket, but have deepened an existing parallel pocket this way.

I think the problem with the shim was that it raised the neck too high for the angle I had on It. The entire neck pocket is almost 7" long, so paper thin at one end led to almost 1/8" at the other.

Without doing anything, the neck is dead flat (at least as flat as any straightedge I own) the strings are about 4 ish mm off the frets. (About the diameter of the B string.) At about the 19th fret. This is progressive along the fretboard, and it's not super terrible, I am used to a very low action on both my Spector and The Rick-Man, so it feels wrong.

I think I want to tilt it to remove about 1/16" at the neck end of the slot, but making the jig and setting it up that accurately (and making sure it doesn't move) will be a bit of a challenge.
 
So after putting it off for a while, and busy on other endeavors, I tackled the neck joint finally.

Part of the motivation is that I'm playing this bass next weekend, and during rehearsal this morning, I realized how kind of awful the action really is. Especially compared to my other basses.

So. How does one set up a router jig to take about 1/32 off at an angle in an unusually shaped neck pocket on an rounded body with no flat angles?

Very carefully. Like measuring dozens of times before going anywhere near a cutting tool, let alone placing said cutting tool anywhere near the instrument.

This elegant Rube Goldberg contraption is holding the bass level on a big knee pad. Clamped on top of that is the jig for the neck pocket.
20240921_130743.jpg


All of that, to make a relatively tiny cut in the wood.


20240921_131233.jpg


Some delicate work with a sharp chisel and a sanding stick, and the neck pocket now has a very tiny angle.

The new neck angle has halved the string height at the 12th fret, something I couldn't do with the bridge as it is bottomed out.
 
Last edited:
So after putting it off for a while, and busy on other endeavors, I tackled the neck joint finally.

Part of the motivation is that I'm playing this bass next weekend, and during rehearsal this morning, I realized how kind of awful the action really is. Especially compared to my other basses.

So. How does one set up a router jig to take about 1/32 off at an angle in an unusually shaped neck pocket on an rounded body with no flat angles?

Very carefully. Like measuring dozens of times before going anywhere near a cutting tool, let alone placing said cutting tool anywhere near the instrument.

This elegant Rube Goldberg contraption is holding the bass level on a big knee pad. Clamped on top of that is the jig for the neck pocket.
View attachment 7035397

All of that, to make a relatively tiny cut in the wood.


View attachment 7035398

Some delicate work with a sharp chisel and a sanding stick, and the neck pocket now has a very tiny angle.

The new neck angle has halved the string height at the 12th fret, something I couldn't do with the bridge as it is bottomed out.


Good work on a delicate job. You need to save those pictures for the next “shim my neck or not?” thread. :roflmao: :smug:
 
  • Like
Reactions: Videojunkie
Old thread, new updates.

So. Recently, the electronics on this bass have gone wonky after working perfectly since it was completed. While I was messing around with electronics I realized how janky the control plate on this bass was. So I fired up my CAD (and promptly discovered my license had expired... damn you SaaS). So I then downloaded freeCAD and made a new drawing of the control plate (which took much longer than expected due to differences between free and auto CAD products...)

Sent off to the fine folks at SendCutSend, and now I have a new set of control plates that need some TLC with fine sandpaper and polishing compound.

Add in a mouser order for some components and now I have new set of control plates to wire up.
 

Attachments

  • 20250729_182306.jpg
    20250729_182306.jpg
    409 KB · Views: 9
Last edited:
Can you take a picture showing the rig you're using to hold them in this picture?
This is the helping hands stand..
Unfortunately, it looks like they discontinued it. But I am sure there are other similar ones on the market.


If I had to buy one today, I'd look at this one:
 
As an Amazon Associate, TalkBass may receive commissions from qualifying purchases made via links on this site.
  • Like
Reactions: lark_z

Latest posts