• TalkBass has been independent since 1998. Add your voice.
    Create a free account to reply to discussions, view embedded media, and browse with fewer display ads.
    Join freeLog in
    Want zero display ads or expanded classifieds tools? Compare plans.

There's another storm brewing!

Pickup routs

I finished the pup routs. To work around the protrusion of the fingerboard-over-body, i put two scrap pieces on the wings, then a board with an aperture on top to rout through., kind of like a sled and rails.
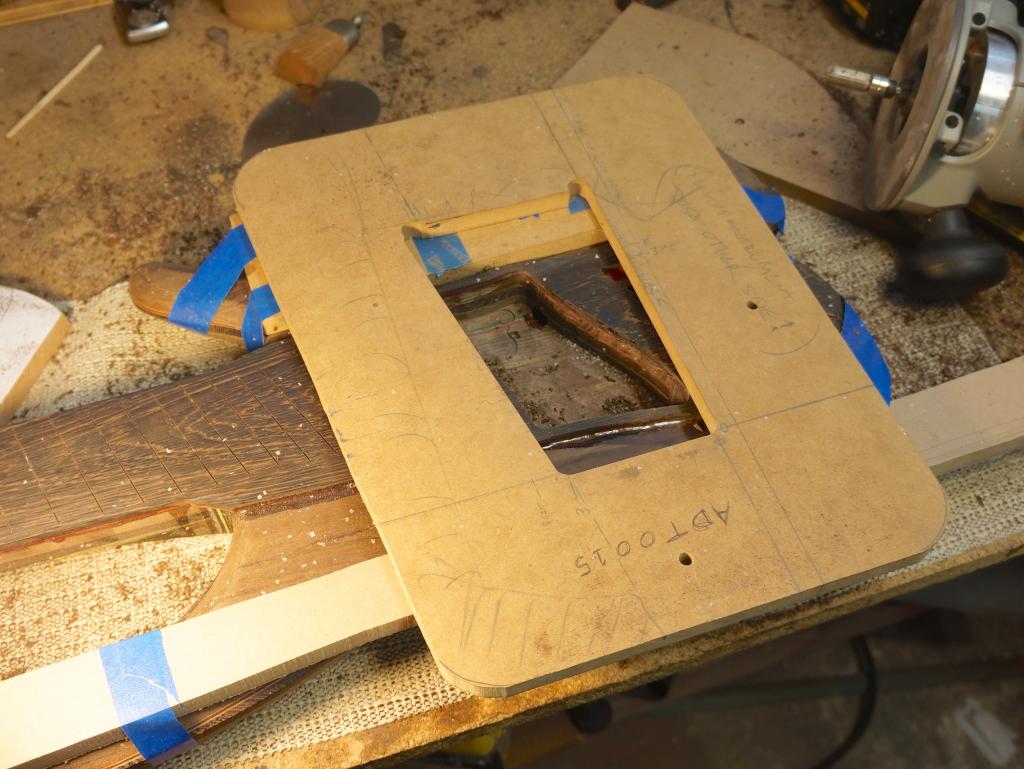
DSC00641_zpsd2398ca4.jpg

The tricky part is that the guide for the bearing was the FB, and part of it had some epoxy fillet climbing it, so I had only about .100 bearing contact for the first pass.

The pup cavity depth worked out such that the bottom of the rout is in a black layer of the green-black-green stripe.
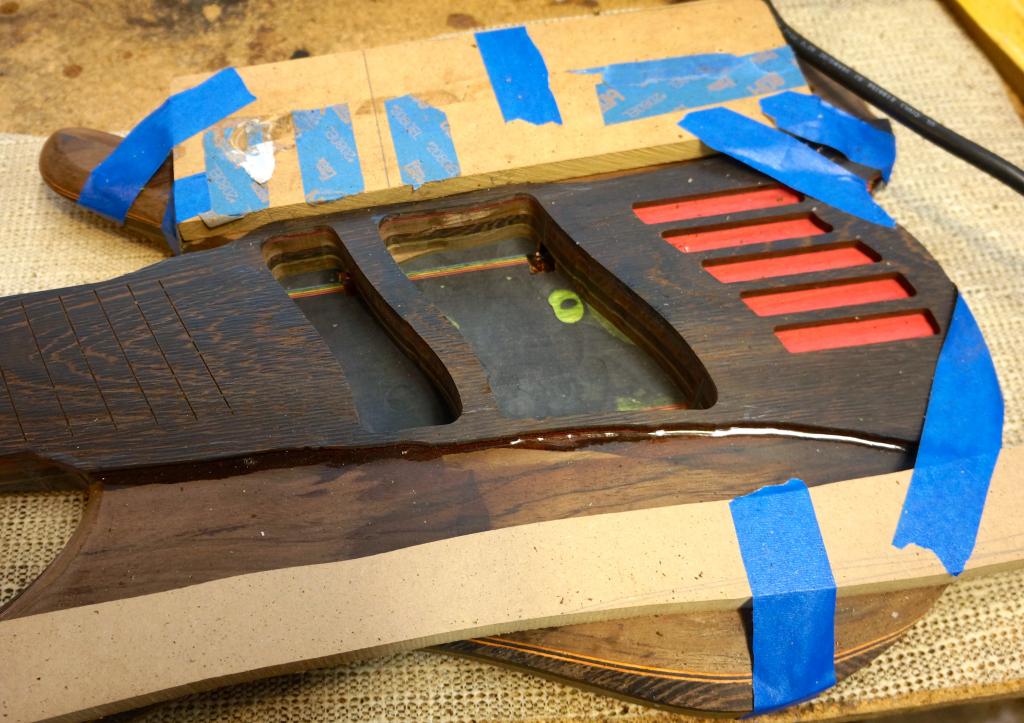
DSC00643_zps90cec308.jpg


Headstock pre-carve

I put a lot of extra wood in the headstock at the end of the neck, so that I could carve something interesting later. All that wood, however, is too much to even allow my placing the HS template properly, in order to trace the outline. So I needed to start carving some of the excess material.

Starting to carve, using chisels. The rounded one is called a gouge, right?
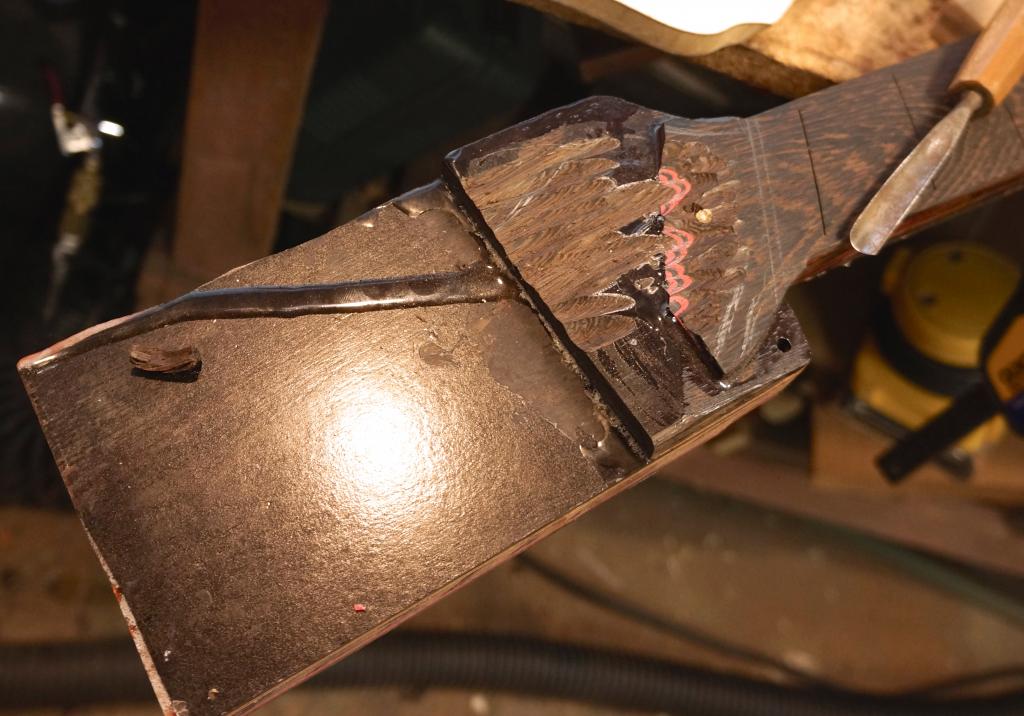
DSC00645_zps4836c042.jpg


I also started using the die grinder, with a mill and then with a sanding cylinder on low speed. Found the hidden truss rod rout!
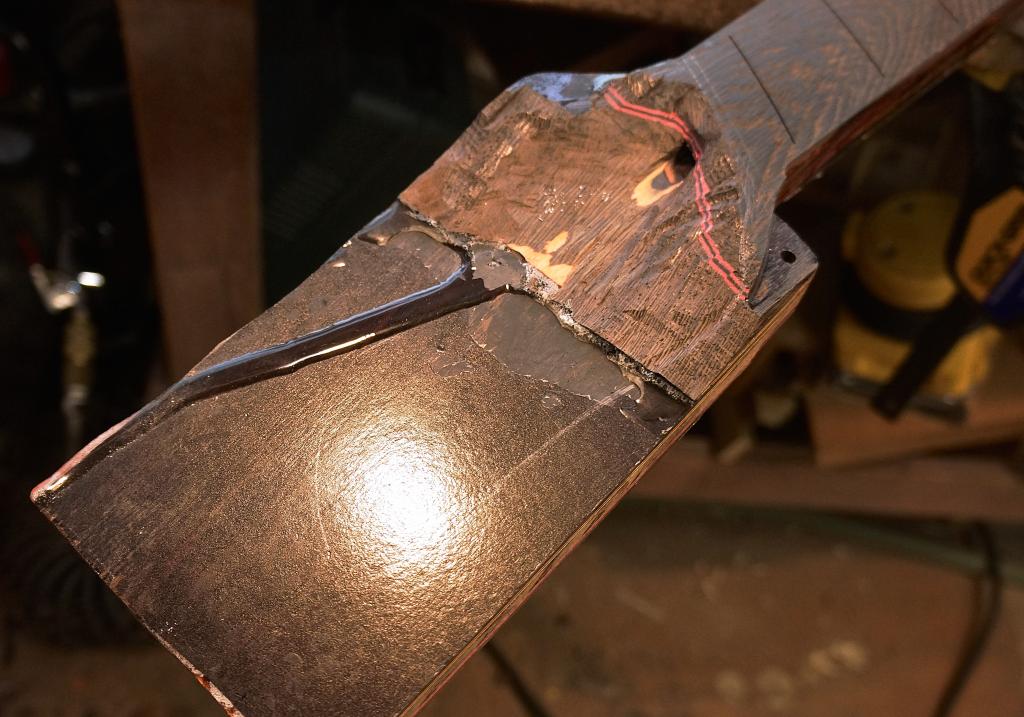
DSC00649_zps7a2d1f4e.jpg


I also used some scrapers. This is how I left it for the night. Some possibilities are presenting themselves as I work the wood.
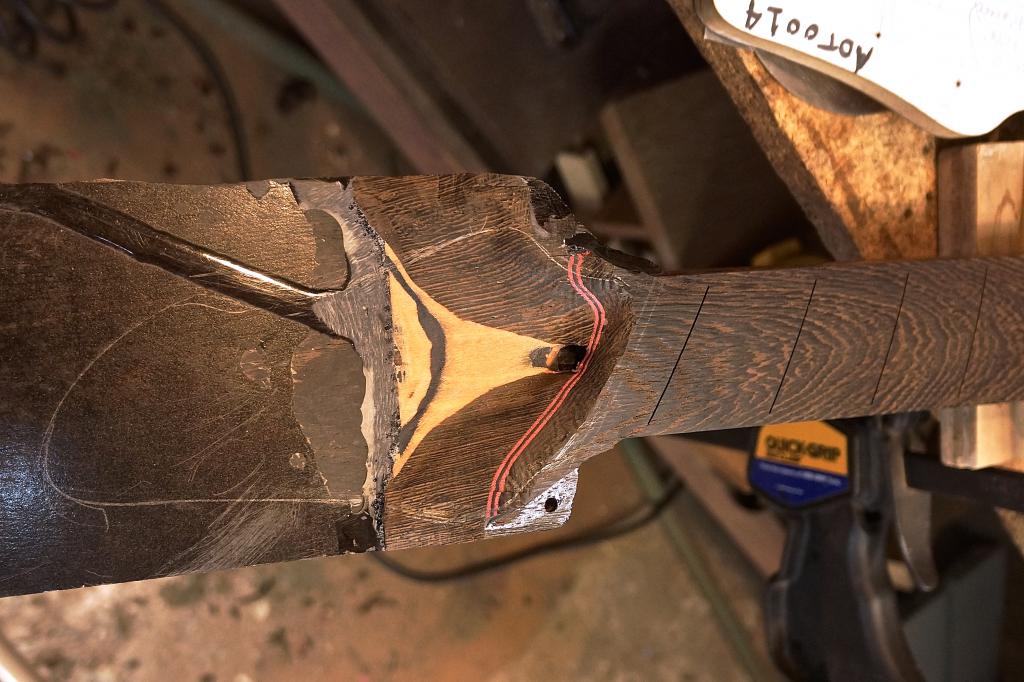
DSC00651_2_zps111a0efd.jpg


______________________________________________


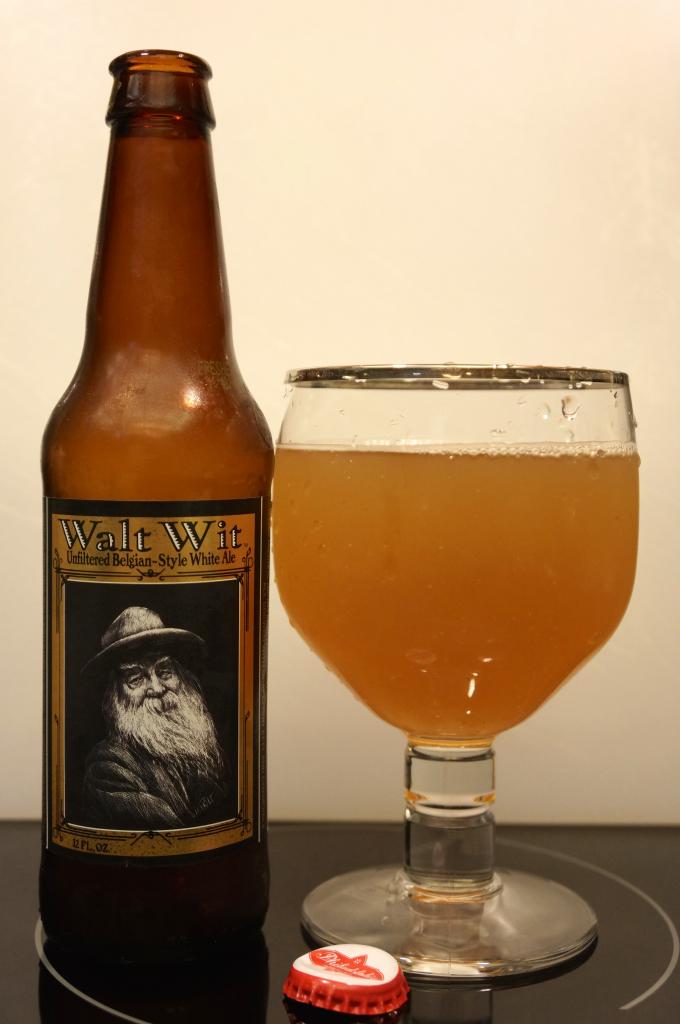
This was decent tasting. Not a good example of a Belgian-style white in any way, but not bad to drink.
DSC00652_2_zpsf1fc8996.jpg
 
  • Like
Reactions: Splods
Ah, they should have called it Malt Whitman.
Good call.


___________________________________________


Headstock work

Continuing with the headstock...

Carved back some more of the contours on the face of the headstock.

Made an outline of my HS template, which can be turned into a duplicate should I mess this one up too much while milling relief contours on its backside to make room for the HS front contours. The headstock was never in CAD.
DSC00655_zps54b1cf15.jpg


Mounted the template, and traced the outline and transferred the tuner positions.
DSC00662_2_zps8e327197.jpg


DSC00658_2_zps2c43968f.jpg


Bandsaw cut the outline. This was rather nerve-racking, supporting an entire bass while the headstock is going under the saw, perched on a spacer block in order to clear the neck tilt. Plus, I had to move the saw around 6-7 times in order to complete the cut due to the limited space for the body sticking out.
DSC00664_2_zps4ce7aae1.jpg

Note to self: next time, shape headstock before gluing on body wings, if possible.

After using the edge/spindle sander on the outline, and doing a bunch more carving with chisels, die grinder, and sandpaper, it now looks like this. I think more will be coming off the fingerboard transition, though. And the main face will receive edge contouring.
DSC00679_zps0358e96f.jpg


DSC00681_zpsaf91a3c9.jpg

I do not expect any Gibson headstock breaks if this one falls over.


___________________________________________


This was nice and robust, very roasty. And no west coast excessive hoppiness, despite it being from Oregon. Very nice.
DSC00677_2_zpsc17b19e5.jpg
 
Last edited:
Looks really cool, pj. I halfway expect to see a tiny football team run out of the tr access port.
Thanks. Hmm, yeah, a really tiny one...they'd better leave my truss rod alone...

Will there be an added headstock veneer, or will the laminations "simply" run out into the face?
No, the laminations will "simply" runout, as un-simply as that is. :) As will hopefully be appropriate, and you'll see below and to come.


____________________________________________


More headstock carve, tuner holes, rough heel carve

After seeing how some people here got a proper 14mm bit for their tuner holes, I decided to do the same. On the first build I used a 9/16" spade bit, then narrowed the holes with CA – both operations being a pain. I got a decent quality brad point bit off amazon. I have another Colt bit I liked so I chose this one.
DSC00686_zps143a87c8.jpg

It was reasonable in price. It turned out to be ground about .004"/.1 mm under 14 mm, so I still had to do a bit of file work after drilling. I got an extra set of hands to support the body while drilling, and the result was one hole with minor chipping on the exit side, and four holes perfect.

I also did some more shaping of the neck–headstock transition, and did carving on the perimeter. I'm pretty happy with the perimeter; the transition may stay or may have more work done on it. Here's a pic.
DSC00693_zps258b3152.jpg


I also started removing some wood from the back of the neck (leaving a flat for doing fretting), and did the rough carving of the neck heel, cutting into all the extra material I had put there with this in mind.
DSC00696_zpsbc85703f.jpg

I even used the dreaded belt sander for that. There was a tone of wood to remove.

The volute area hasn't been worked at all yet. It will be much nicer. I will should be able to fine something interesting but understated to do there.
 
Starting to look like proper bass! Rather a sudden thing, to me -- I know that it hasn't been, but between the last photos and this set, it's crossed some line for me. I'll be interested to see this one next to Storm King, to see how you handle the myriad remaining details to come before that, and then to hear how they compare. Appreciate the trip.
 
I hope you leave that heel pointed like that. It's gorgeous.
Thanks. You know, my original intent was to do more removal, and make something like a rib or tendon running up the back of the neck. The current state would be only a first step, limited by the fact that the belt sander won't let you put in any concavity—topographically, these surfaces are less complex, and could each be flattened out into a plane. But on the one hand, I'm finding from the headstock that concavities are difficult to create smoothly. I once saw a tool that was something like a half-egg covered in sandpaper, that mounted on a drill. That would be nice to have for this, but I don't know where I saw it. And on the other hand, this is looking pretty cool. So maybe I'll put in a little concavity in the end, just enough that it adds a little character without changing it too much, and without requiring ten hours' work. (Or twenty. Twenty is definitely too much. :)) Also, it depends on how how I finish the major facets on the body and headstock sides. Now they are pretty flat. If I keep them flat, with just some blending radius, I won't do much more on the heel; if I make then more convex, it would make design sense to make the heel facets more concave.
That concave headstock transition is interesting. I'm looking forward to seeing it with strings on it.
Me too! A bonus is that strings will help hide any remaining faults in execution, if there are any. SK1 had a cylindrical concave surface, just like a Fender. This one makes it compound. Of course the string grooves haven't been added yet; they'll cut into the big curve somewhat.

One downside is that there isn't as much room for the logo as there was on Storm King.
PJ your headstock is making my mind trip over itself :wideyed:
If it's because the pic is hard to interpret visually, let me know and I'll take another angle.
Starting to look like proper bass! Rather a sudden thing, to me -- I know that it hasn't been, but between the last photos and this set, it's crossed some line for me. I'll be interested to see this one next to Storm King, to see how you handle the myriad remaining details to come before that, and then to hear how they compare. Appreciate the trip.
Thanks. Yeah, there is a fuzzy line somewhere, but you always know when you're past it. Once the neck is tapered, the headstock mostly formed, and the body formed and free of projecting lumps and square areas, that helps a lot.
PJ- that looks really nice. I like the peghead shape and "runout" effect, and agree the heel area looks perfect and should be left alone. :)
Looking forward to audio of this, what with all the laminations and adhesive...
Thanks. Yes, I'm liking the heel right now. The current form was unexpected, and I'm glad I stopped or at least paused at this point. It needs at least some refinement and integration at the shoulders still.

As far as lamination and tone, I can say two things—first, that the neck beam rang like a great, well-dried piece of wood when it was still in its rectangular form; and second, that knowing how many layers there would be, I clamped the %^*#)%*#&$ out of this at all points so there's not a lot of epoxy between layers. I actually have put a bend in the beam of some of my smaller clamps, by tightening with pliers instead of by hand. As it turns out, the Acme thread on these things will let you generate a lot more force than the beams can handle, if you get more torque into them by using a better "handle".
I swear, this thread gets better every time I look at it. Whatever wizardry you've figured out to make that happen, PJ... Keep doing it. XD
Thanks.
 
Last edited:
If you dig the Session Black, try to find the Wasatch Devastator.
I'll have to look for that. The brand is starting to show up around here.
Great looking bass so far. Loving the wenge and red contrast at the bridge.
Yeah, I was hoping that would turn out as it did. It should look great with a finish on, and the saddles in place.


__________________________________________


Latest development #1:
The neck has a slight backbow, about a millimeter. Not sure what caused it. The woods were all equally acclimated when I put the fretboard on. I wonder whether uneven clamp weight / support had some role in it. I wish I had had a straight, steel beam to run down the front to clamp it to.

I tried clamping the neck in a forward curve for a few days, but it did not budge.

The truss rod is single-action, and must be removed and reversed to provide a forward bow. Some epoxy leaked into the nut area, so it will be a job to clear the epoxy and extricate it, if I go that way.

I am also considering clamping the face to either a straight or slightly forward-curved object, and hitting the back side with a heat gun.

Any thoughts are welcome. This needs to be straight so I can level the board, and then again to level the frets after they are installed.


__________________________________________


Latest development #2:
I got this trio of tools from Amazon.
IMG_7796_zps561543fe.jpg


The fret rocker looks good.

The diamond crowning file is fair -- it is not a perfect arc in section across the crown, it is a little segmented, so I will have to try it out to see what it does and whether I will need to roll it a bit on successive strokes. I also checked it by running it on a flat surface, and the diamond does run over the edges of the groove and cut the surface. So, it is not wood-safe at the edges of the groove. I'll have to see whether the frets are high enough for this not to be a problem, or else I'll have to do a careful pass over a grinding wheel to remove the abrasive spillover, and hope it doesn't just groove the wheel!

The other piece is a simple flat aluminum plate with sandpaper adhered to one side. It is intended for fret leveling. I'll have to decide whether it is long enough for that, though - it is 6" long. Does anyone have experience with using something that short?


__________________________________________


Latest development #3:
I got hold of a proper Oktoberfest beer, and did a casual tasting with whatever "Oktoberfest" beers I had around.
DSC00698_zps30dfdb47.jpg

Left Hand: They may call it a Märzen, but it is not really. It tastes good, but is too dark and malty for the style. Closer to a bock beer, with a slight sweetness on the exit.

Warsteiner: This one is a repeat. It is a German but non-München "Oktoberfest" that I liked it well enough before, but in this competition it could only rate a "meh." Something not quite right about it, including a bit of a bitter finish.
Hacker-Pschorr: This is the s***. Sent over from München for this tasting. Crisp, awesomely drinkable beer that you could, and would want to, have stein after stein of.
 

The other piece is a simple flat aluminum plate with sandpaper adhered to one side. It is intended for fret leveling. I'll have to decide whether it is long enough for that, though - it is 6" long. Does anyone have experience with using something that short?

I used a DMT duasharp whetstone the last time I leveled frets. IIRC they are also 6" long. It seemed to work OK, but ideally the surface could be slightly longer. Especially when working on the frets closest to the nut.

Edit: The duosharp is 8", not 6".
 
Last edited:

Latest posts