• TalkBass has been independent since 1998. Add your voice.
    Create a free account to reply to discussions, view embedded media, and browse with fewer display ads.
    Join freeLog in
    Want zero display ads or expanded classifieds tools? Compare plans.

Thunderbird Club

As long as we are discussing Triumph cars, my first car looked like this, only no front bumper, no rear view mirrors, and a black interior. And maybe a bit less shine. It it had the same long doors (no visible rocker panel) as this one. It sure was fun. From the factory, it had no outside door handles, no radio, nowhere to put a radio, no heater, no defroster, no windows, and a top that wouldn't stay on. It was the perfect car.

PAH, dead link. Let's try again.

1954-triumph-tr2

Needs more BRG

They are a great looking little car, almost a caricature sports car. The proud headlights are an appealing look to me on this and various other sports cars
 
So you actually drill into the neck plate? I thought you would drill into the wood just in front of the neck plate.
Actually you don't even have to drill into the neck plate if you don't want to. Just use the existing neck screw with your strap pin.
IMG_3057.JPG

(Yes I know the plate is on crooked, it came that way from the factory. Fortunately it functions just fine, in this case the cure would be worse than the disease, so it remains as a wart on an otherwise outstanding bass)


Note: you may find that the head of the neck screw is too large to fit down in the strap pin opening like it should. If that's the case, just chuck the threaded end of the neck screw up in a hand drill...
IMG_3058.JPG

...pull the trigger and touch the screw head edge to the concrete floor in your garage or driveway for a second or two (it won't take long, just do a little bit at a time) until it fits down in the strap pin recess.
 
Congrats on the Bird!! Regarding the rusty screws, I have noticed this on a few basses in my collection between Gibson and Epi Birds (as well as other brands). May just be related to the climate you live in as many of my Birds have come from all over the country.

Below you will find a guide to adjusting the 3 Point Bridge. This may help you get the Bird setup to your liking. Good luck!!!


3 Point Bridge Setup

1. Screw down the bridge evenly over all three screws till you have an action around the 15th and higher frets that is comfortable for you without any or too much buzz (some players don't mind a little buzz or even like it, that is a matter of taste). Keep the front stud a little higher for best string to saddle pressure. Retune the bass, don't worry about buzzing in the lower registers at this point.

2. Now you've got your bass retuned with a lower action at the high frets. Your lower frets will now either buzz (see 2a for the subsequent steps) or the action will still be too high even in the low registers (see 2b for the subsequent steps).

2a: Low Register buzzes: You need to loosen the truss rod. Take off the truss rod cover and insert an allen wrench in the allen nut (the cheaper Epis generally have allen nuts). Don't detune the bass for that, rather lift the A and the D string to the side to the slots of the G and E string to have room for turning the allen wrench. With the bass' butt resting on your toes (clean those sneakers!) and the strings/fretboard facing away from you, you - while standing up and looking down - will now turn the allen wrench <--- counterclockwise <---. Epi truss rods move easily (if noisily), turn it and immediately look to find out how the action of the bass has altered and buzzing has become less or disappeared. Don't be scared of overdoing it - it is impossible to break a truss rod by loosening it as you are releasing tension. That said, one or two "one third turns" counterclockwise should do it. sometimes you will need a few more of those to actually adjust the bass if the neck is too straight or even curved away from the fretboard.

2 b: Low Register has too much action: Same as 2a, except that you have too tighten the truss rod now which is done by turning the allen wrench ---> clockwise --->. You will also have to be more careful as you can break a trussrod by overtightening it. But Epi truss rods are hardy and can certainly survive one full turn or even more as your bass is probably a virgin as regards truss rod adjustment.

3. After a combination of either steps 1 and 2a or steps 1 and 2 b you should have a relatively or even totally buzz free bass with good to reasonable action. If there is still some persistent buzzing at some places then raise the bridge a little. Raising the front stud will raise all strings, raising the lower hind stud more the D and G string, raising the upper hind stud more E and A. No radical set ups please! (Like one stud real low and the other two very high.)

4. (optional) Is all buzzing just on one string (while the other strings are buzz-free) and you have to raise the bridge considerably to make it go away even though you could stay much lower if it were just for the other strings? Try this then: I assume that on your Epi too the saddles for the four individual strings do not all have the same height, but that there are two higher and two lower ones. If the persistently buzzing string is on a lower saddle, then exchange that saddle against a higher saddle.
Clear and concise. Thanks. I will bookmark that.
 
Actually you don't even have to drill into the neck plate if you don't want to. Just use the existing neck screw with your strap pin.
View attachment 3472918
(Yes I know the plate is on crooked, it came that way from the factory. Fortunately it functions just fine, in this case the cure would be worse than the disease, so it remains as a wart on an otherwise outstanding bass)


Note: you may find that the head of the neck screw is too large to fit down in the strap pin opening like it should. If that's the case, just chuck the threaded end of the neck screw up in a hand drill...
View attachment 3472919
...pull the trigger and touch the screw head edge to the concrete floor in your garage or driveway for a second or two (it won't take long, just do a little bit at a time) until it fits down in the strap pin recess.
Thanks GBassNorth. I really appreciate the direction and photos about this procedure!

However, I’m a little confused about the part where you insert the neck screw in the chuck. So, the neck screw goes directly into the chuck (by itself) and you touch it to a solid surface while rotating the chuck (clockwise or counter clockwise?). I’m picturing this procedure as messing up the threads on the neck screw, so this is where I’m getting miffed! Sorry... I’m not the most mechanically-inclined person.

Edit:

So are you essentially grinding down the head of the neck screw? I can see myself messin’ up the screw doing this. How “fool proof” of a process is this? Lol.
 
Last edited:
Bolt ons have a finish that is so tough you could tow the bass behind an oil tanker all the way to Japan. No problem. I wouldn't worry about corrosion much. Moving that button makes a huge difference. I do not know why any Thunderbird has the upper button anywhere except the neck heel. The aluminum neck plate is soft and easy to drill through when you relocate that button.

I am partial to Babicz bridges, but they are expensive. I like the way they look better then Hipshots. Shallowness is expensive at times. Hipshot replacement bridges also work well.

Welcome to being one of the chosen. It sounds like it was meant to be.
I don't recommend the Gaolee method of relicing. Salt water will get into the electronics and will need replacing.

As for replacement bridges, I am partial to the smooth curviness of the Hipshot. There is nothing wrong with the stock bridge, but I like the Hipshot and put one each on my Thunderbird, Midtown, JC, and EB-3. I like consistency.
 
Thanks GBassNorth. I really appreciate the direction and photos about this procedure!

However, I’m a little confused about the part where you insert the neck screw in the chuck. So, the neck screw goes directly into the chuck (by itself) and you touch it to a solid surface whole rotating the chuck (clockwise or counter clockwise?). I’m picturing this procedure as messing up the threads on the neck screw, so this is where I’m getting miffed! Sorry... I’m not the most mechanically-inclined person.
You can just stick the screw into your drill chuck as pictured, you don't need it to be very tight. It just has to hold the screw enough so that when you spin it with the drill it stays put while you wear the screw head down (enough to get it into the strap pin/button).
It's a pretty "informal" fit anyway, not like a machine screw into a threaded mate...
*I brought one of the neck screws and the strap button to my local hardware store and mated up to a slightly longer screw (Ahem) to make up the difference for the length of the strap button... you get me? But I spose this isn't necessary to make this idea work.*
Anyway, simple operation! Sounds like you're going to be thoughtful about it, have a run at it!
 
You can just stick the screw into your drill chuck as pictured, you don't need it to be very tight. It just has to hold the screw enough so that when you spin it with the drill it stays put while you wear the screw head down (enough to get it into the strap pin/button).
It's a pretty "informal" fit anyway, not like a machine screw into a threaded mate...
*I brought one of the neck screws and the strap button to my local hardware store and mated up to a slightly longer screw (Ahem) to make up the difference for the length of the strap button... you get me? But I spose this isn't necessary to make this idea work.*
Anyway, simple operation! Sounds like you're going to be thoughtful about it, have a run at it!
Thanks CB... yeah, I hear what you’re saying. So, you think the length of the neck screw is sufficient? I may just do what you did and take the strap button to the hardware store and find a screw (with a head) that fits nicely into the button... what do you think?
 
Thanks CB... yeah, I hear what you’re saying. So, you think the length of the neck screw is sufficient? I may just do what you did and take the strap button to the hardware store and find a screw (with a head) that fits nicely into the button... what do you think?
You may have to grind down the head anyway, it's a larger screw size than normally used for a strap button. It's really a simple operation, won't affect anything as far as it being a screw, doing its job.
Matching for the exact screw length may also be hard to do- I found one slightly longer and hand-filed the point of the screw down until it looked similar to the original in length and taper.
Nonetheless, a little compromise to this aspect won't do any harm. The screw threads will purchase the original hole in the wood enough to hold everything together even if you just use the original screw.
Try it with what you've got and see how it works for you, you can still get a longer screw after the fact.
 
Last edited:
Pontiac guys are REALLY weird about that stuff.

Kind of like us.....

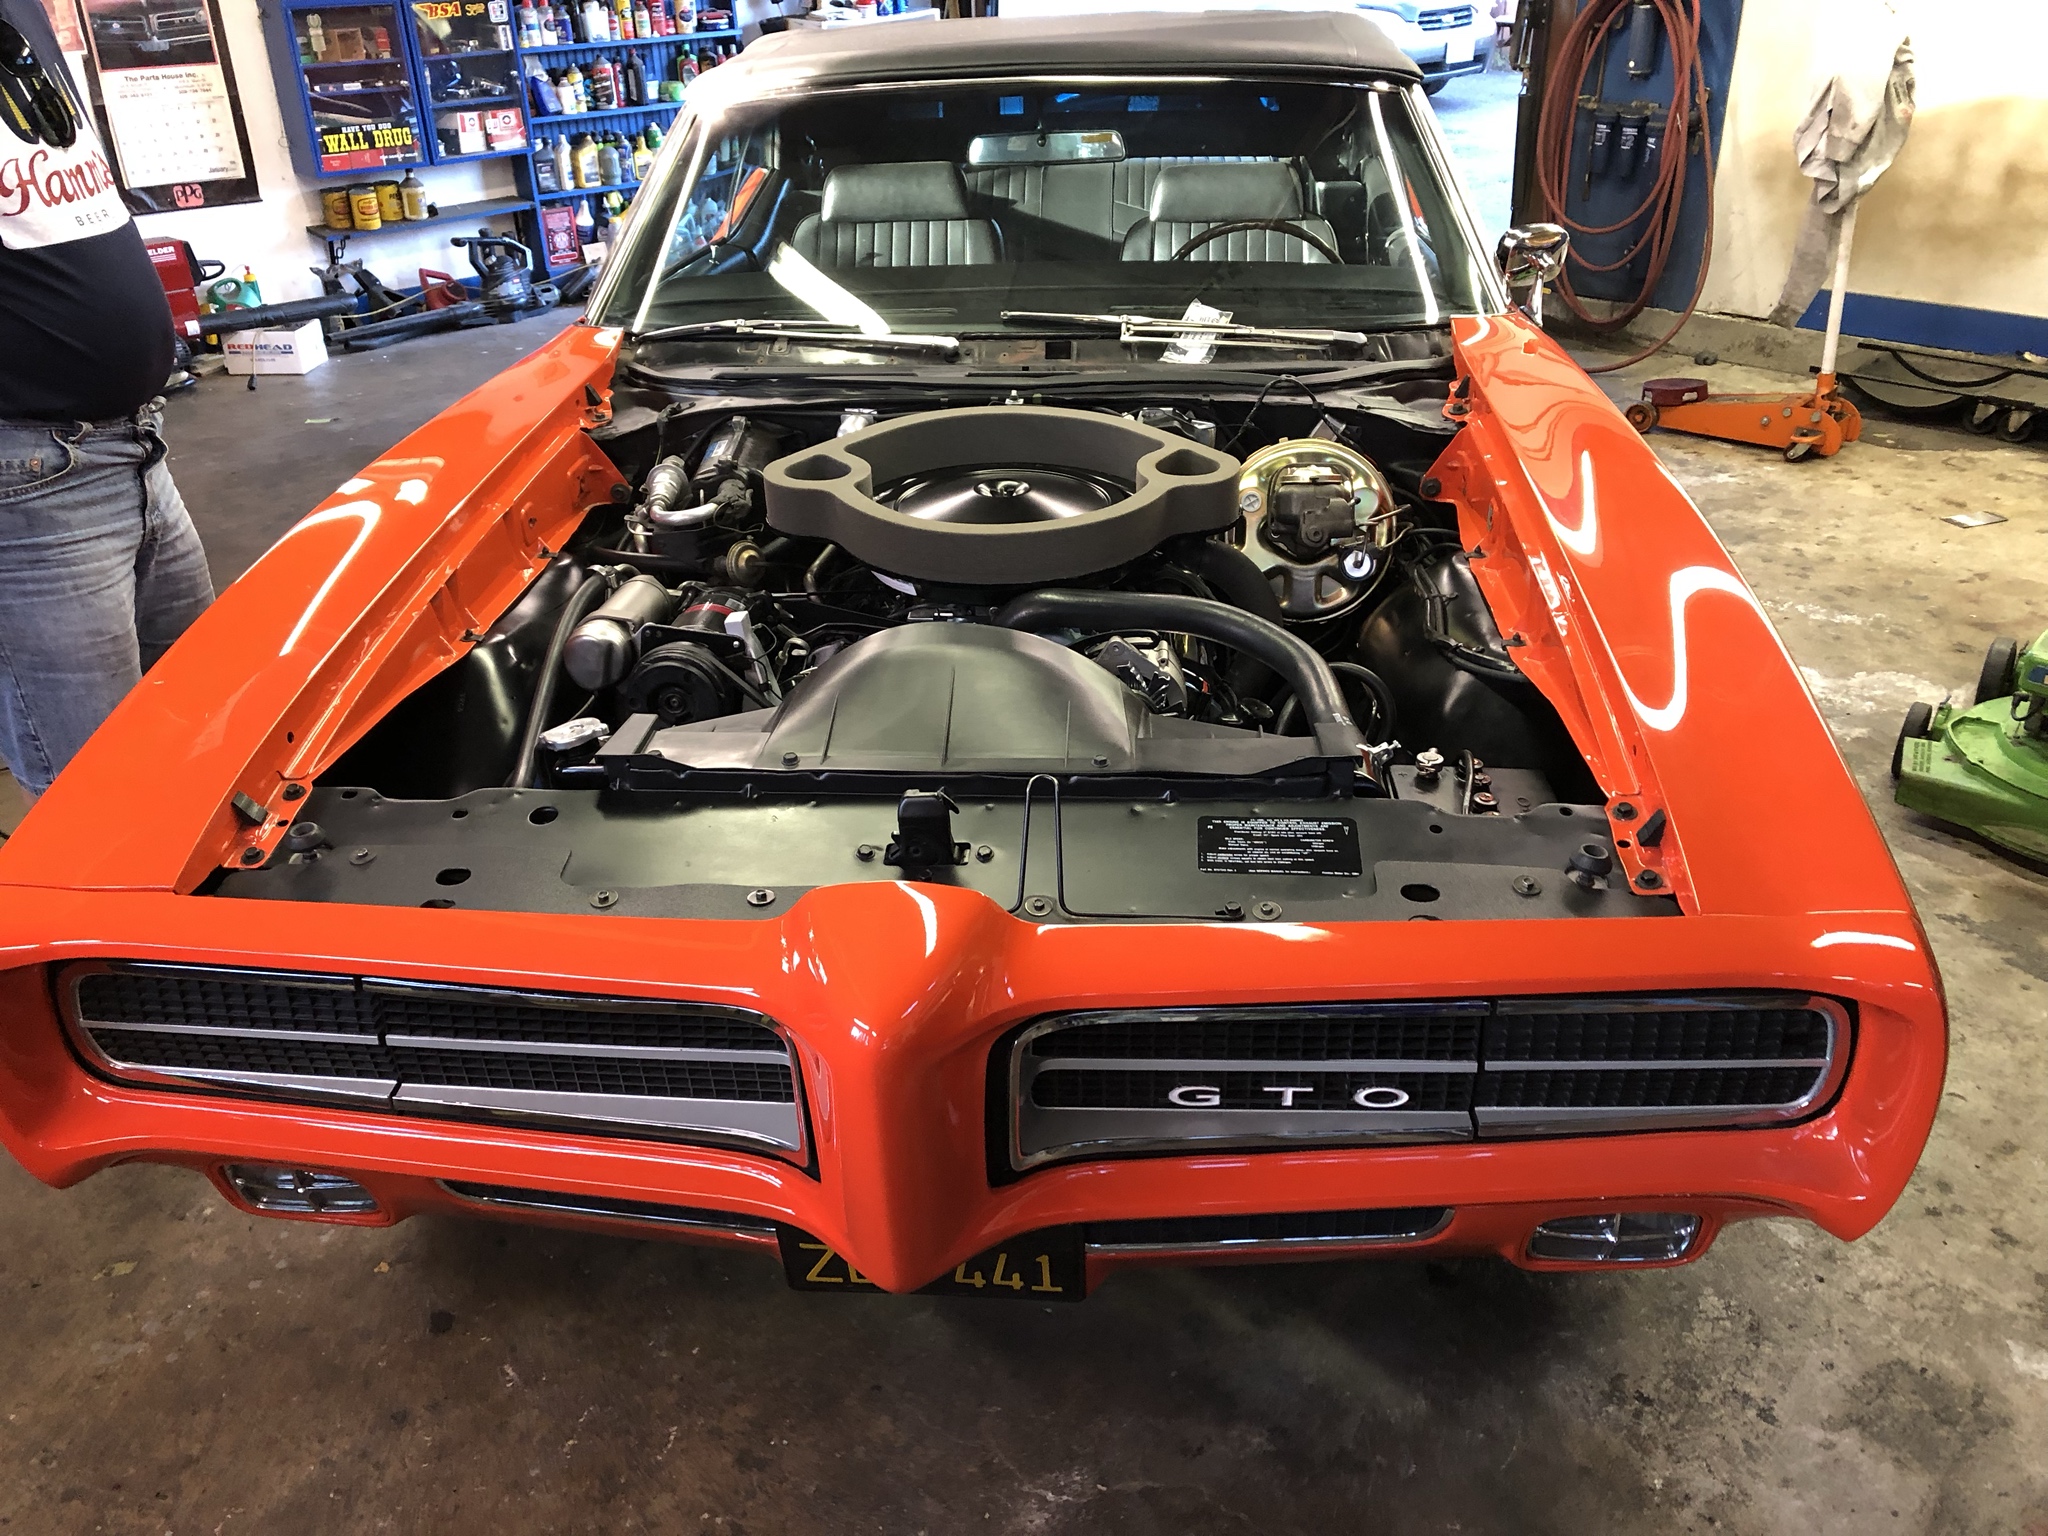
I posted this one a couple weeks back, my bestie model train buddy restored the engine compartment and a lot of small stuff on it. The cars was trailered to the national GTO show in Kentucky a couple week ago, it took a gold ribbon, this specific car is one of 5 built this way in terms of options/engine etc. I'll get a show of it at the show later.


YhrDNdB.jpg
 
Needs more BRG

They are a great looking little car, almost a caricature sports car. The proud headlights are an appealing look to me on this and various other sports cars

If I ever have one again, it will probably be green. That car was perfect. Unreliable as hell but no extraneous anything. It was the ideal car.
 
Actually you don't even have to drill into the neck plate if you don't want to. Just use the existing neck screw with your strap pin.
View attachment 3472918
(Yes I know the plate is on crooked, it came that way from the factory. Fortunately it functions just fine, in this case the cure would be worse than the disease, so it remains as a wart on an otherwise outstanding bass)


Note: you may find that the head of the neck screw is too large to fit down in the strap pin opening like it should. If that's the case, just chuck the threaded end of the neck screw up in a hand drill...
View attachment 3472919
...pull the trigger and touch the screw head edge to the concrete floor in your garage or driveway for a second or two (it won't take long, just do a little bit at a time) until it fits down in the strap pin recess.

The neck plate is crooked!

The @GBassNorth approach to bass set up:
[Invalid or Expired Link Removed]