Neck and Neck
Here is a guitar neck fixed in my neck routing jig. I just cut a 1/2" square channel for one of the steel bars. A $5 piece of steel from Home Depot will make two of these. I degrease it, and then scratch it up good on the belt sander. This is how the Martin company did truss rods many years ago, before it became impossible to market a guitar without an adjustable truss rod. I did some calculations, and this square tube turns out to be 37% stiffer and 12% lighter than a pair of 1/8"x1/2" steel rods ( like a Danelectro. ) It is also easier to install, with just one centered channel instead of two offset angled ones.
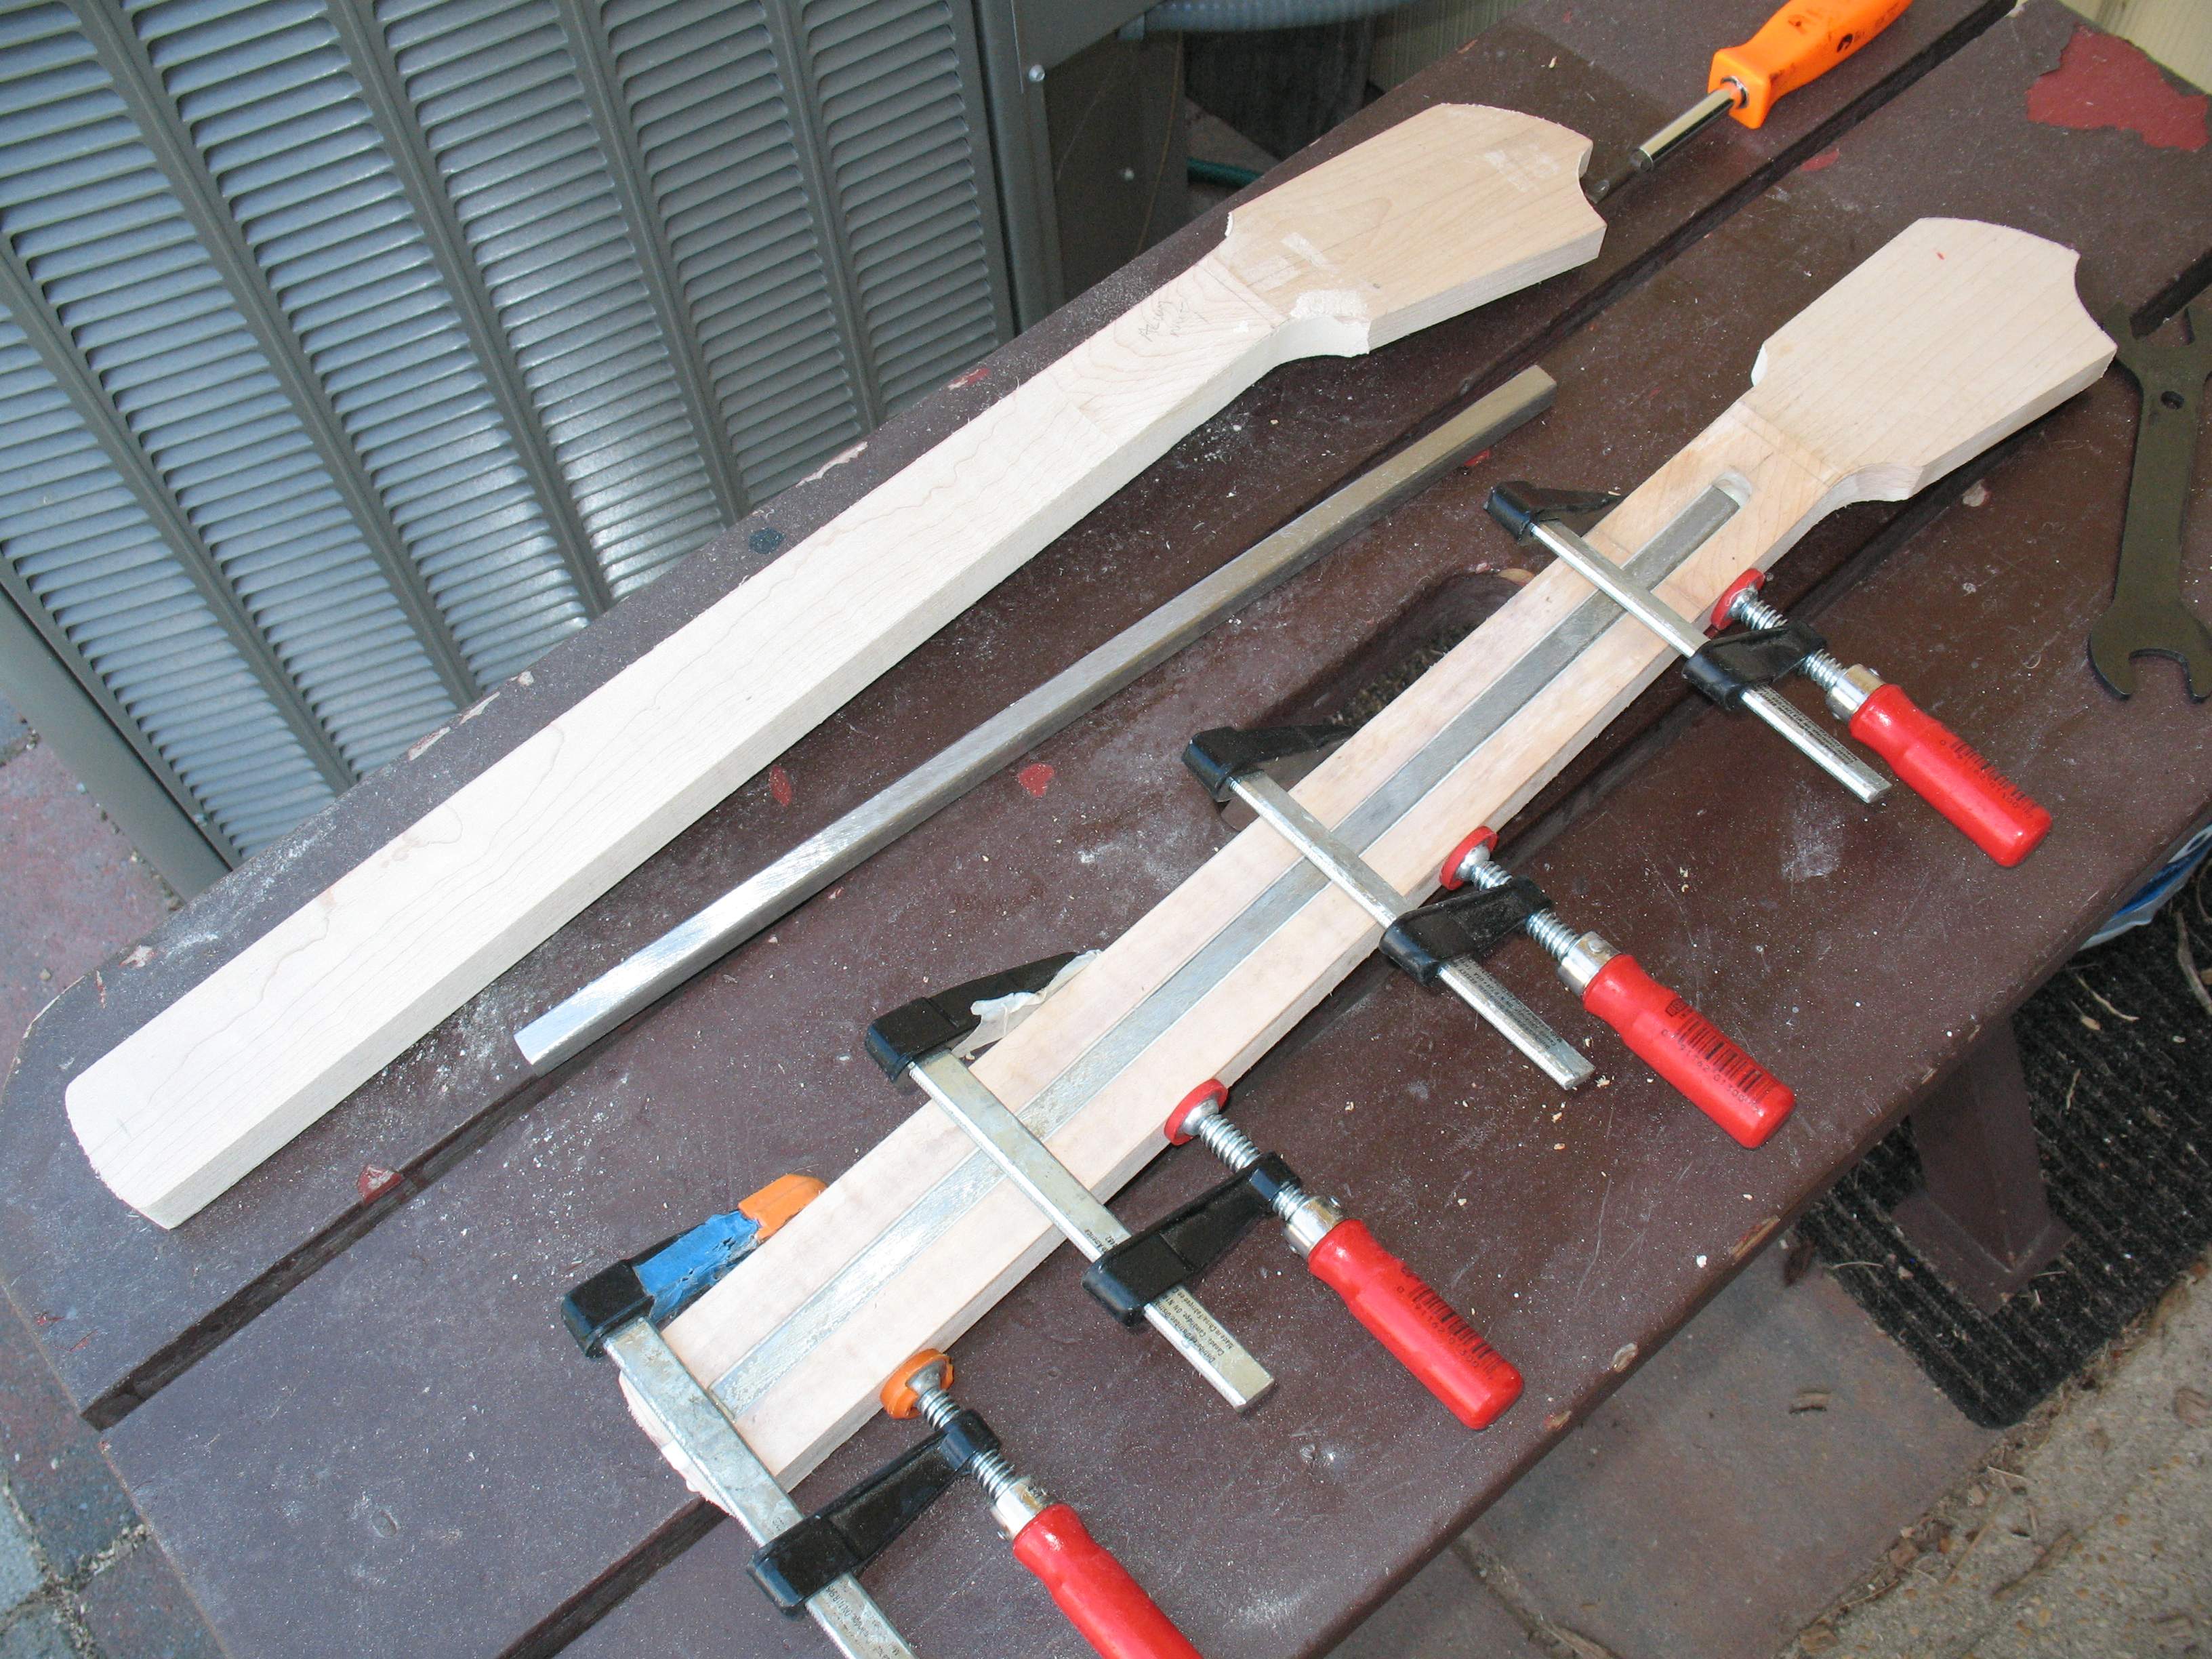
Here is the rod being glued in. I used regular wood glue. It will grab well enough at the scratched steel, and when the neck is done, the rod will be completely encapsulated in wood. No messy epoxy, this is good enough. Sixty years ago, Danelectro was building necks like this with hide glue, and it worked just fine. Many of those necks are as straight today as the day they were made. The clamps are there because the wet glue tends to swell the wood, causing the neck to cup. Once the glue is dry, it is no longer a problem, and this neck will stay dead straight until the wood rots away.
The bending stresses on a guitar or bass neck are actually quite small, the problem is that in the long run even the strongest wood will not withstand a bending force without deflecting. That is where the steel comes it - steel is hundreds of times stronger than wood, and will stay straight under these circumstances forever. I find that a guitar can be set up to play quite well with a dead straight neck, so that is how I build them. Any adjustment can be made by shimming the heel, and usually none is needed.
The strength of this neck is now essentially the strength of the steel bar. The greatest danger is making the back of the neck too thin, so that the rod pulls through the wood. As this is 3/4" lumber, I should have about 1/4" of wood behind the truss rod. I wouldn't want to make that any less than 1/8". I like chunky necks anyway.
For a fixed rod like this to work, it has to flex a tiny bit to generate the internal stresses that will resist the bending force. The resulting deflection is too small for me to measure. At the same time, it can't flex too much, so it really needs to be over-strong, and I don't think anything less than 1/2" will do. An adjustable truss rod can be pre-stressed. As none of these stresses come anywhere near the limit of the material, an adjustable rod can therefore be smaller than a fixed one, lending itself to a thinner neck.
However, construction requirements also come into play, so the height savings are less than you'd think. Most double-acting truss rods are about 5/16" in height. My best design is 3/8". The thinnest rod I've seen is a Rickenbacker, about 1/4". But Ric rods are only single-acting, and are notoriously delicate, such that they generally have to be installed in pairs. I would never build a truss rod like that.
The Audiovox basses will get more-normal adjustable rods, as a small amount of front bow is desirable on a bass. My experience is that a short scale bass must have a double-acting truss rod, as the string tension is not enough to guarantee that the neck will bow forward on its own, I have seen ones that need a little push.
For the basses, I am using standard Chinese double-acting truss rods that I shorten to fit. To do that, I saw most of the way through the rod, leaving just a tiny neck to keep the pieces aligned. Then I braze the two pieces together and cut away the excess, and finally grind the end smooth. It's much easier than building a rod from scratch, all you need is a standard acetylene torch and some high-strength silver solder, not the kind plumbers use.
Here are all the Audiovox necks, and a few of the pickguards that I've started to assemble. I am keeping the wiring deliberately simple. This design is pretty tight for controls, and I want to keep them out of the way so they don't get hit by accident while playing. The original 736 had just one big volume knob. I added a concentric tone and pickup switch, for a basic modern setup. The one on the left is a Fender Jazz bass stacked set; the middle one is straight Danelectro, and the one on the right is a hybrid.
Next up: mark out and drill 36 tuner holes. It is easier to do things batch-style like this. There is less setting-up, and it lets you get in a groove. But this seems like it is taking forever. I think I will concentrate on the two solid bodies, so I can finally have something finished.
These are coming along nicely, just about ready for final finishing. The decals are laser-printed on blank decal material and applied over a base coat of poly. They will get thickly overcoated with more poly, then polished smooth. You can get the material from a hobby shop or online, also available for inkjets.