• TalkBass has been independent since 1998. Add your voice.
    Create a free account to reply to discussions, view embedded media, and browse with fewer display ads.
    Join freeLog in
    Want zero display ads or expanded classifieds tools? Compare plans.

WBO 2022 - Luna's Last Opus

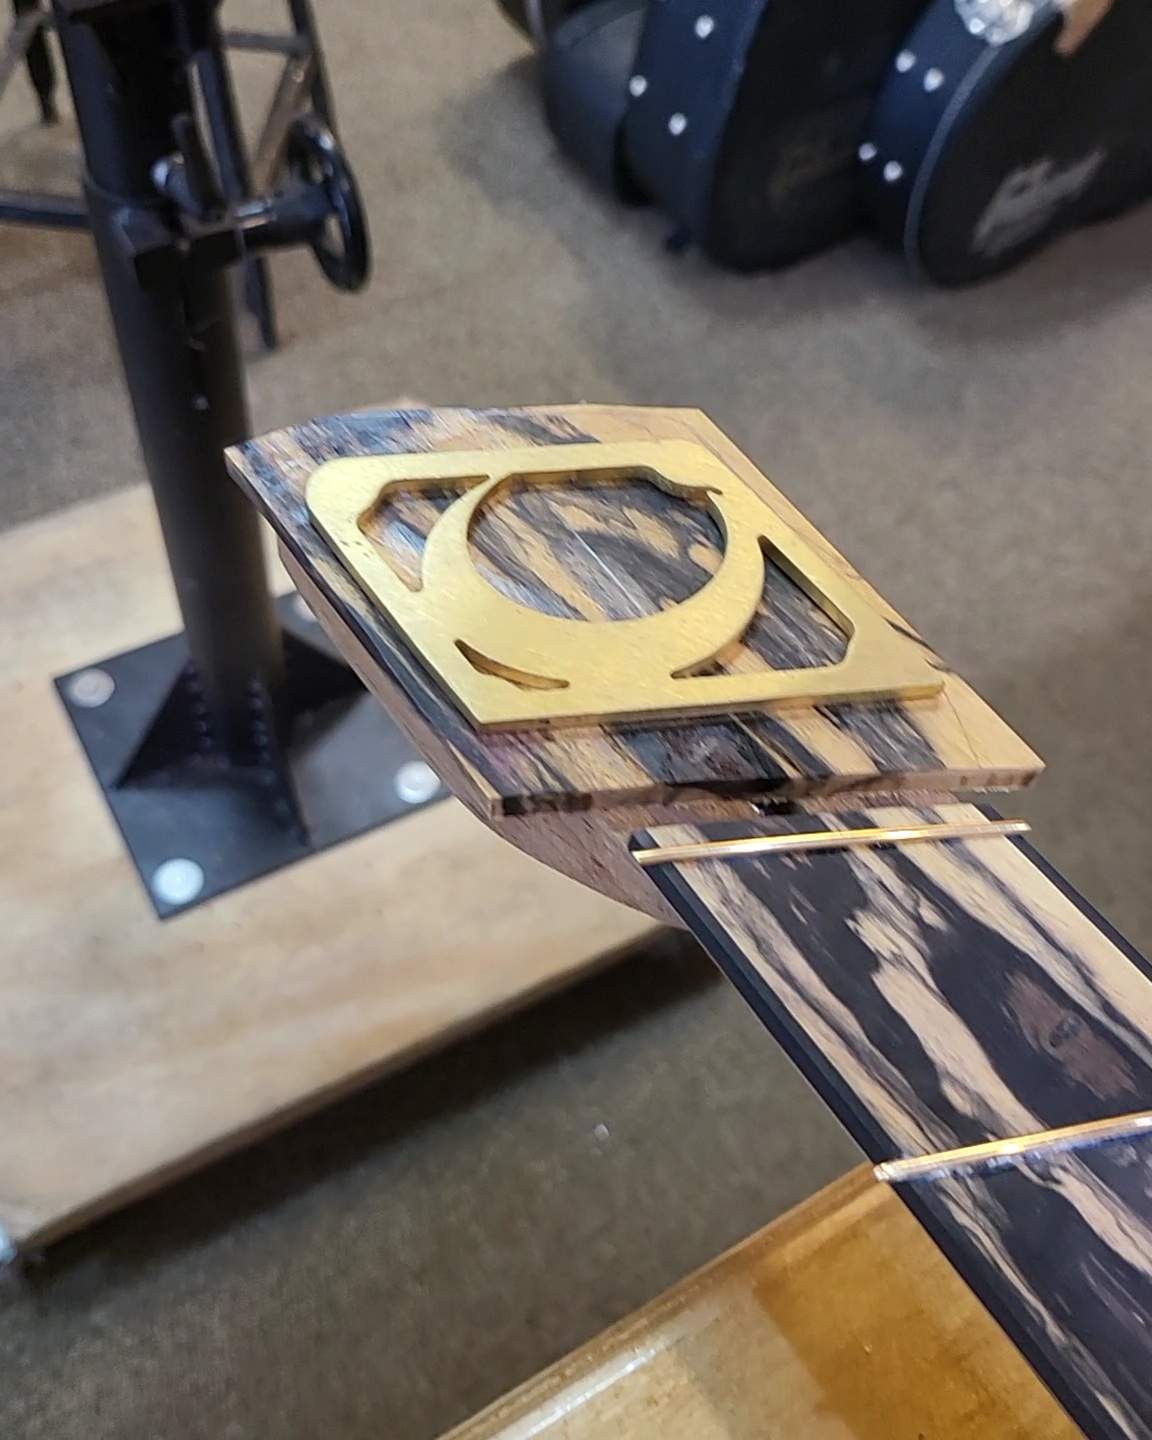
I need to cover up the trussrod channel at the "headstock" end, so the offcut from the fretboard is what I used. I left the gap there for the nut. This is an old pic from before I filed the fret ends down and cleaned up the fretboard. Just sizing things up here. In the end, there will be more room for the string locking piece.

VideoCapture_20230319-123147.jpg


Before I glued it up, it was thinned down to 1/8" and cut the shape out as close as I could on the bandsaw.

20230315_141241.jpg
 
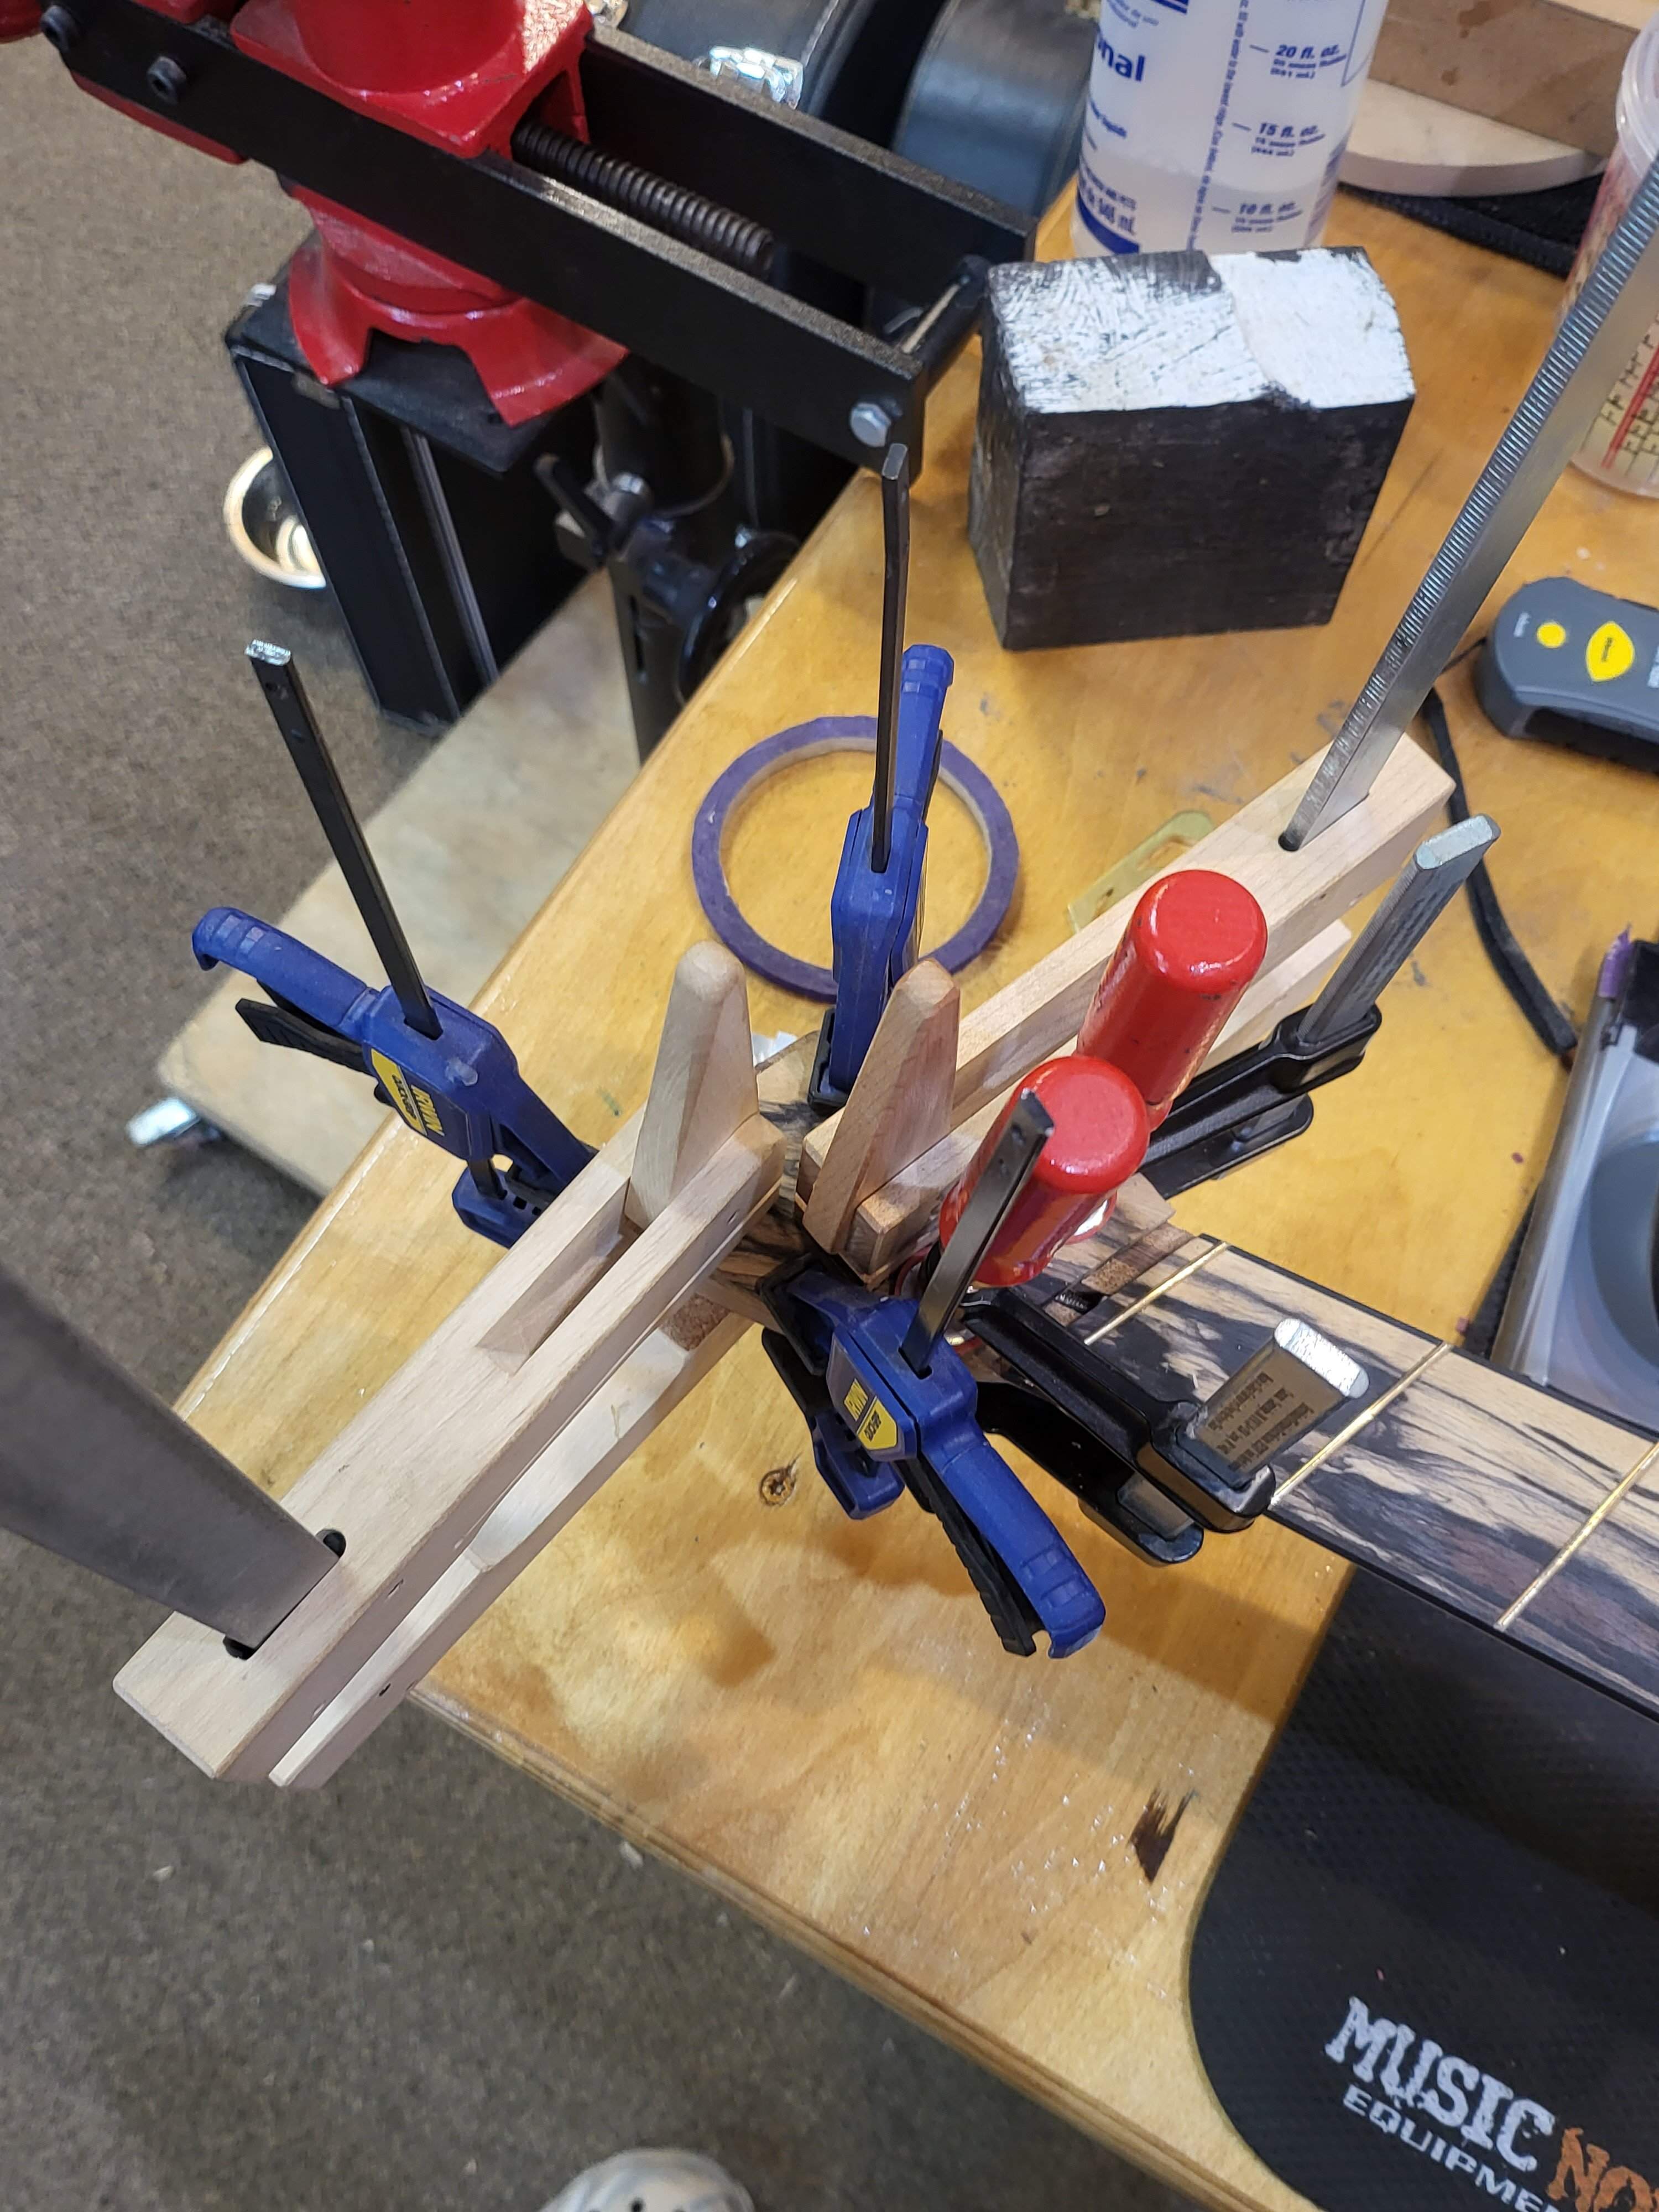
I got the headstock overlay sanded flush on the sides. In the end, I had to file the brass cover down at the corners to get everything matching perfectly. I also reduced the headstock length about 3/8" using the oscillating belt sander.

20230322_141652.jpg


A pair of countersunk screws will secure it.
20230322_141646.jpg


I spent some time getting familiar with this benchtop mill. I needed to make a template for the pickup ramp cavity.

20230329_145309.jpg


After spending an inordinate amount of time staring at my original pickup ramp template, I realized I just needed to round off the corners a bit to get a better match. I was gonna start from scratch so I'm glad it could be adjusted to fit.

20230329_165206.jpg


I'm happy to report that my first time using a mill without direct supervision was a success. The digital readout helped immensely, making it simple to ensure accurate cuts were being made.
 
Wouldn't it be nice if there were a few more hours in the day?
I'd be done with this build already...

It's been a couple weeks since I've been able to make it into the shop.
I discovered that my template I made using the mill was far from perfect, so a new set was made.

The router bit I used had a radius that was just slightly larger than the radius of the corners as I designed them. So while my pickup ramp template fit, the gap around the edges was not uniform.

Once I got everything sanded and filed to perfection, I broke out the double sided tape and router and got to work. It didn't take long.

VideoCapture_20230413-070810.jpg


And the end result:
20230412_163349.jpg
 
The pickup ramp/cover is nearly complete. The edges will get rounded over, and I may put a radius on the top to match the fretboard radius. I don't have a radius beam this wide however, so I'm open to suggestions on how best to achieve this.

20230712_155459.jpg


I'm pretty happy that the grain lines on it match up so well with the top. Especially considering this walnut set I used for the cover was from a different tree entirely.

20230712_155703.jpg


The sides for the cover were made from slices of purpleheart, with maple blocks in the corners to provide some strength and accept threaded inserts. (Forgot to get a pic). This was all very fiddly to clamp up with the weird angles involved. Pickup adjustment screws will come through the back of the bass.
 
Mark your centerline.
Mark the radius on the ends. (May require sacrificial blocks on each end to square up the piece - also to help clamp)
Use the radius marks to mark the edges.
Ensure you have enough wood thickness.
Use a plane to get close (assuming that the burl will hold up to any planing).
Use radius block in a side to side motion in addition to lengthwise.
When you reach the edge lines and centerline, you're done.

Your grain choice is outstanding, and matches the bass nicely!
 
Last edited:
Mark your centerline.
Mark the radius on the ends. (May require sacrificial blocks on each end to square up the piece - also to help clamp)
Use the radius marks to mark the edges.
Ensure you have enough wood thickness.
Use a plane to get close (assuming that the burl will hold up to any planing).
Use radius block in a side to side motion in addition to lengthwise.
When you reach the edge lines and centerline, you're done.

Your grain choice is outstanding, and matches the bass nicely!

Thanks for the compliment! And the guidance on adding the radius. Makes perfect sense
 
  • Like
Reactions: Videojunkie
I made some progress on the bridge hardware yesterday

Manual machining is slow work, or at least it is when you are new to it. Much of the time was spent figuring out the ideal order of operations. First step was to clean and square up the wide face of the aluminum stock for the tuning block cover.

5C0D56A2-5907-4257-83B3-47B50B69974F.jpeg


A fly cutter was used for this. Sketchy looking piece of tooling, but extremely useful.

I wanted the top and main tuner block to fit together seamlessly, so they were clamped together in the vise and an end mill was put to use:


7FD8E4A9-DB9C-428E-962C-902575022440.jpeg


Then flipped and the same operation was repeated:

ED9763C7-C19F-48BB-A18E-16A45594367F.jpeg


The ends will be trimmed later. First I needed to put a pair of of locating dowels and magnets in to lock in their orientation.

Again, the two pieces were clamped together in the vise. The holes for the locations pins would then be drilled through the bottom portion and partway into the top. First a center drill bit was used to ensure this tiny 3/32” drill didn’t walk on me.

Then a 3/8 end mill was used to make pockets for the neodymium magnets.

A556A30A-B12F-40C4-9E78-6B4442EF900B.jpeg


Here is where we left off:

7CF88731-A006-49ED-89AC-AC4FA2326850.jpeg
 
Made the string ball end retainers last week. We didn’t have a rotary table set up to fit this mill, so we had to improvise a way to cut a radius without it.

I suppose we could have done the radius with a bench sander/grinder. It would have certainly been less sketchy than the setup below, but this was quicker and easily repeatable to ensure consistent results. A pair of locknuts and a thrust washer on each side of the workpiece was necessary to keep everything in place (the setup in the pic below is of the test cut, a second nut was added below the piece after realizing this)

The mill was dialed in to simply swing the piece past the cutting head by hand, advancing the table a bit with each pass until the .5” radius was perfect.

IMG_0420.jpeg


IMG_0424.jpeg


The holes for the strings’ ball ends were drilled first, then slots were milled for the strings to exit the retainer. After the radius was cut in the mill, each piece was cut off on the bandsaw and filed flat. Then the next piece could have its radius cut in the mill.

IMG_0427.jpeg


And after some time with a file, here is the end result:
IMG_0431.jpeg


Only thing left is to drill and tap these pieces to accept the M3 x 0.5 threaded rod.
 
Got started on the other part of the bridge, that will carry the string saddles

IMG_0489.jpeg


IMG_0492.jpeg


still need to drill/countersink some mounting holes and radius the edges. Next I need to make the string locking block for the headstock end, which is still in the design phase. A set of knobs for the bridge and the controls still need to be made as well.

I’m planning to wrap this up by the end of the year. Only 2 years behind schedule :roflmao: it’s my first build and I don’t have much free time, so I don’t feel too guilty about this. A while back, I came to a point where I considered cutting some corners just to get it done sooner. I’m glad I didn’t, as this build will be all the more satisfying to own as a result.
 
Last edited:
I was ready to pull the trigger on a set of custom pickups from a well known manufacturer. I’ve grown familiar with their products over the years having played several bases equipped with their pickups and always loving the sound. Unfortunately I had an unsavory interaction with the person responsible for dealing with custom orders. After several attempts to contact this company (which is not a small company, mind you) via phone and email, with no response, I sent one last email asking if custom orders were still able to be placed.

Days later, I received this rather indignant response:

“Sometimes people get Covid. I'm just getting back to the office after a week and a half with it, and I'll get to your email along with the other 300.”

To be clear, I’m not upset that this individual was sick. I just feel that for such a large operation, there should be more than one point of contact and when people want to give you their business, don’t act like an a**hole in response, even if you got sick.

I will leave the manufacturer unnamed because this, hopefully, was an isolated incident and not their standard for customer service. But they have lost me as a customer either way.

Rant over.

I’ll be ordering a set of pickups from Lindy Fralin most likely. The shop I’ve been working out of is unfortunately shutting down; the owner will still be building guitars, but from his home workshop a few towns over. So this needs absolutely to be done before they terminate their lease, Jan 1. Time to kick things into overdrive.
 
IMG_0607.jpeg


These knobs and thrust washers are from the set of Nova hardware I purchased. The size is perfect but I don’t want to cannabalize this hardware set, and I would rather have bare aluminum over the black knobs. So, next week, I will fire up the lathe and make some knobs from 1/2” aluminum round stock.

The ball end retainers will drilled and tapped (after these pics were taken) to accept the M3 x 0.5 threaded rod. I will have to remake two of them, because somehow I managed to drill the hole at an angle on the last two. Luckily I have just enough material left for this.

IMG_0608.jpeg
 
Lots has happened since the last update, the shop has been shut down and moved into the owner’s private workshop. Which means work can finally recommence.

Shop got an upgrade after the move:

IMG_1449.jpeg


Willow isn’t very helpful but at least she’s cute.

IMG_0907.jpeg


The hardware is mostly complete (never got around to making knobs), just got to put the final touches on it. A recess was routed out to get the tuner block at the appropriate height and angle.

I also mounted a set of Dunlop recessed strap locks.

IMG_0911.jpeg


The string locking block is also complete; here is the result of many hours of machining and cursing:

IMG_1252.jpeg


Drilling these holes at an angle was a PITA. A center drill bit was used (very slowly) to start the hole. also, I had to do a little trigonometry to properly account for the hole spacing at an angle.

IMG_1374.jpeg


Ends were then trimmed on the bandsaw and after some sanding, this is what we have:

IMG_1500.jpeg


IMG_1498.jpeg
 
Last edited:
Bridge saddles were also machined, from a 1/2” square block of brass. I don’t have a good source for raw metal locally so McMaster Carr has been a godsend. Great prices, quick shipping and the size ranges are great, I can order the metal in sizes fairly close to the final dimensions. For hobby level work, this is perfect and saves me a ton of time.

IMG_1367.jpeg


For the string height adjustment, parts from an off the shelf bridge are being used for now.

IMG_1454.jpeg


IMG_1455.jpeg


IMG_1456.jpeg


IMG_1494.jpeg


After doing some measuring, I’ve determined that the final bridge mounting location will need to be much closer to the tuner block. Haven’t drilled mounting holes yet
 
I ended up having a custom set of pickups built by Lindy Fralin. They are both essentially just a 5 string P bass pickup. I called the shop to discuss options, and to my surprise, Lindy answered the phone! After a lengthy discussion about specs, we determined that they would need to get measurements of the cover to ensure a good fit. I didn’t feel comfortable putting this thing in the mail, so I made the ~1.5hr drive up to the shop.

The pickups have a 5% overwind over the standard value, putting the resistance at 10.5k ohms. I used a piece of flatwork from a bobbin that Lindy gave me to mark and drill holes, so that the pickup poles would be exposed.

2B7B682E-433B-4E4B-88C1-9E05248143D7.jpeg


I also thinned down the top of the cover to just over 1/16”, used a router on the inside of the cover because I like the grain pattern as it is…removing the amount of material I needed to had the potential for changing the pattern.

493B7AAA-F02C-449B-8179-A41181808398.jpeg


Before drilling the holes, I used some old strings and the flatwork to verify the pickup placement.

BD210B16-F792-4656-91C4-3800B1444DE3.jpeg