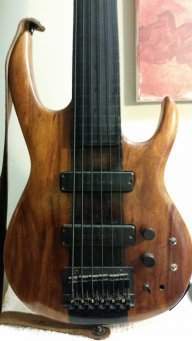
I'm seriously in love with the LED action.


TalkBass has been independent since 1998. Add your voice.
Create a free account to reply to discussions, view embedded media, and browse with fewer display ads.
Join free Log in
Want zero display ads or expanded classifieds tools? Compare plans.
I'm seriously in love with the LED action.
I used three different pics, scaled them to size and made a sort of average of them. The pics matched within a few millimeter. That's close enough for me.

I usually scale to the scale length -- If I know it's a 34" scale I scale for the distance between the 12th fret and the bridge to be 17", I'll usually cross check with something else on the pic that I know the size of, like a pickup etc.So to scale it to size did you just measure the bass outside dimensions and then scale the picture until it had those dimensions?

Some measure I know, for instance pickup width, string spread, scale length etc.So to scale it to size did you just measure the bass outside dimensions and then scale the picture until it had those dimensions?
I usually scale to the scale length -- If I know it's a 34" scale I scale for the distance between the 12th fret and the bridge to be 17", I'll usually cross check with something else on the pic that I know the size of, like a pickup etc.

for Pau Ferro! Nice photography too.
At this point the pickup is nice and fudgy, such a gooey centre but nice snap on the outside...

At this point the pickup is nice and fudgy, such a gooey centre but nice snap on the outside...


What's in my oven? This Dimarzio Area J pickup was badly microphonic out the box. This seems to happen a wee bit too often with Dimarzios in my experience.
I wax potted it today, but this softened the caulk holding it all together, and the coils set in a way that no longer matched the cover. Boo!
I cooked the pickup from cold up to 100 degrees C over ten minutes. At this point the pickup is nice and fudgy, such a gooey centre but nice snap on the outside... I then use the cover to reset the two coils back to their proper shape. Bon appétit!
I checked that the pickup still had a pulse, and the DC resistance gained a thousand ohms in the heat!
View attachment 3760670
That's one hot pu...
Amazingly it worked. Double amazingly it is no longer microphonic.
I figured that cooking the pickup had a 50% risk of killing the pickup. I measured the DC resistance before cooking it to make sure it was still alive.
For potting it I bought a cheap pillar candle from the local DIY shop and chopped it into cubes with a chisel. I then melted it down in a empty gluttony-sized Nutella jar I had kicking around. I dipped the pickup in for ten minutes or so and waited for the little rat-tail trail of bubbles to stop flowing from gaps in the pickup flatwork.
Dead simple!
It always feels good to pull something off!
It was better when I was a teenager, but the thrill is still there.

All the most commonly griped Ric flaws are pretty easy to fix, the body contouring easiest of all. Though I’m a sucker for a bound body edge, you pay for it in forearm wear. I think the change to a single DA rod is a positive, and the new V2 bridge is a partial improvement over the original. Ric seems to have given up on the Chickenbackers, which is probably smart. Anybody who buys one isn’t in the market for a genuine Ric anyway, yeah, it’s IP theft at its most blatant, but virtually unstoppable when the resources of a global superpower are behind it. Ric has better ways to spend its resources than pointless lawsuits that accomplish nothing, took them a while to figure that out. You can get a lot of the Ric vibe and tone going without directly copying the protected bits, though it’s not necessary for one-off tribute builds (like mine).