
I'm going to do a Ric-inspired build at some point, I know it. I just need to let it marinate in the back of my mental space until I feel like I've got it right. I definitely don't want a clone, just an "inspired by."

Enjoy the benefits of a premium membership!
Upgrade Account
-
TalkBass has been independent since 1998. Add your voice.
Create a free account to reply to discussions, view embedded media, and browse with fewer display ads.
Join free Log in
Want zero display ads or expanded classifieds tools? Compare plans.
You are using an out of date browser. It may not display this or other websites correctly.
You should upgrade or use an alternative browser.
You should upgrade or use an alternative browser.
What's On Your Workbench?
- Thread starter HaMMerHeD
- Start date
More options
Who Replied?

- Apr 18, 2008
- 16,004
- 1
- 31,699
- Disclosures
- I'm highly opinionated and extremely self-assured

The 4004 build?...Nobody informed would mistake my “inspired by” for the real thing...
That was AWESOME!!...



Your builds are quite a bit nicer than the "real thing" @ctmullins. Rics have a few easily fixed design and structural flaws, some of which are so "baked in" to the production that Ric won't change them, despite years of problems with them. I'd dispense with the double truss Rods first, I can't see any real advantage over a single modern DA rod and graphite stiffeners, a volute to strengthen the neck/headstock joint doesn't hurt either.
@dwizum PM me if you want any drawings as a point of departure.
@dwizum PM me if you want any drawings as a point of departure.
- Apr 18, 2008
- 16,004
- 1
- 31,699
- Disclosures
- I'm highly opinionated and extremely self-assured
Thank you @Fat Freddy.  I was and continue to be extremely pleased with that one!
And of course I have you to thank @Gilmourisgod, for helping me with some of the details, and for inspiration and camaraderie. *man hug*
I was and continue to be extremely pleased with that one! And of course I have you to thank @Gilmourisgod, for helping me with some of the details, and for inspiration and camaraderie. *man hug*

Off my workbench-
pickup ring / ramp / thumbrest
I was gonna shape it but I honestly think it looks sharp squared up, like a suit vest. Might make it a tiny bit smaller.
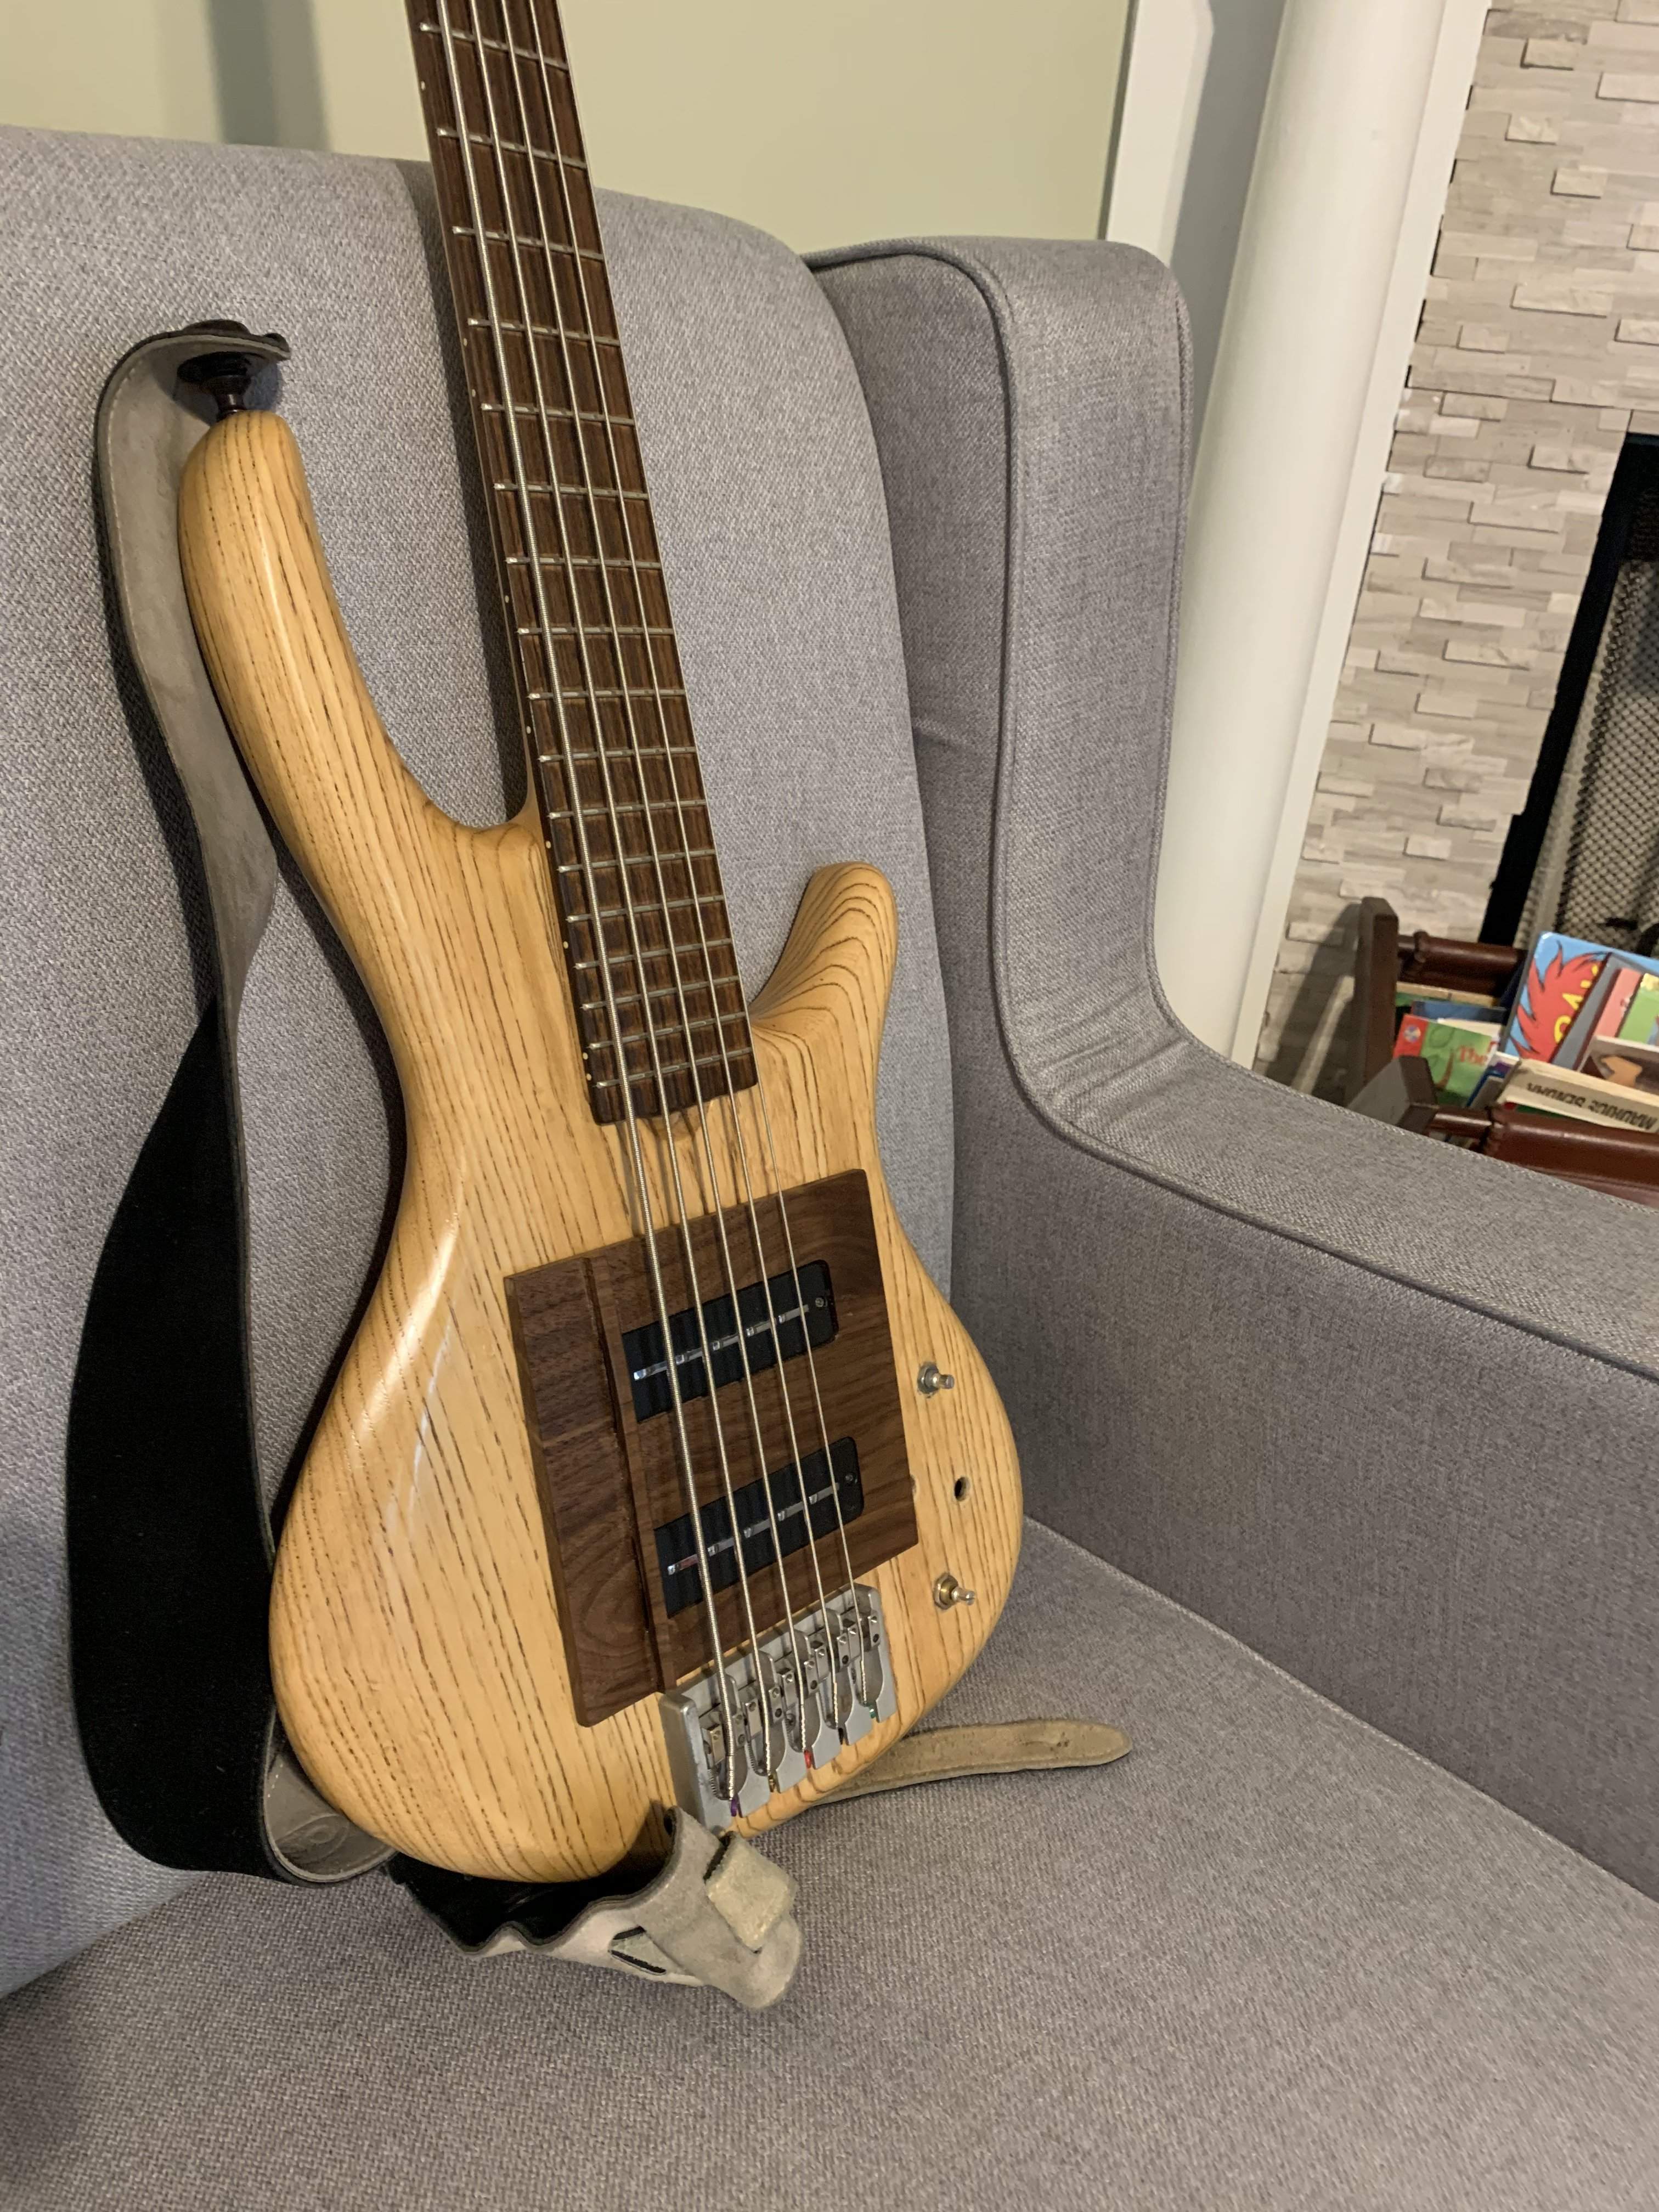
pickup ring / ramp / thumbrest
I was gonna shape it but I honestly think it looks sharp squared up, like a suit vest. Might make it a tiny bit smaller.

Nobody wanted to sell me a Warwick Fortress to replace my anchor-heavy bubinga Corvette so....
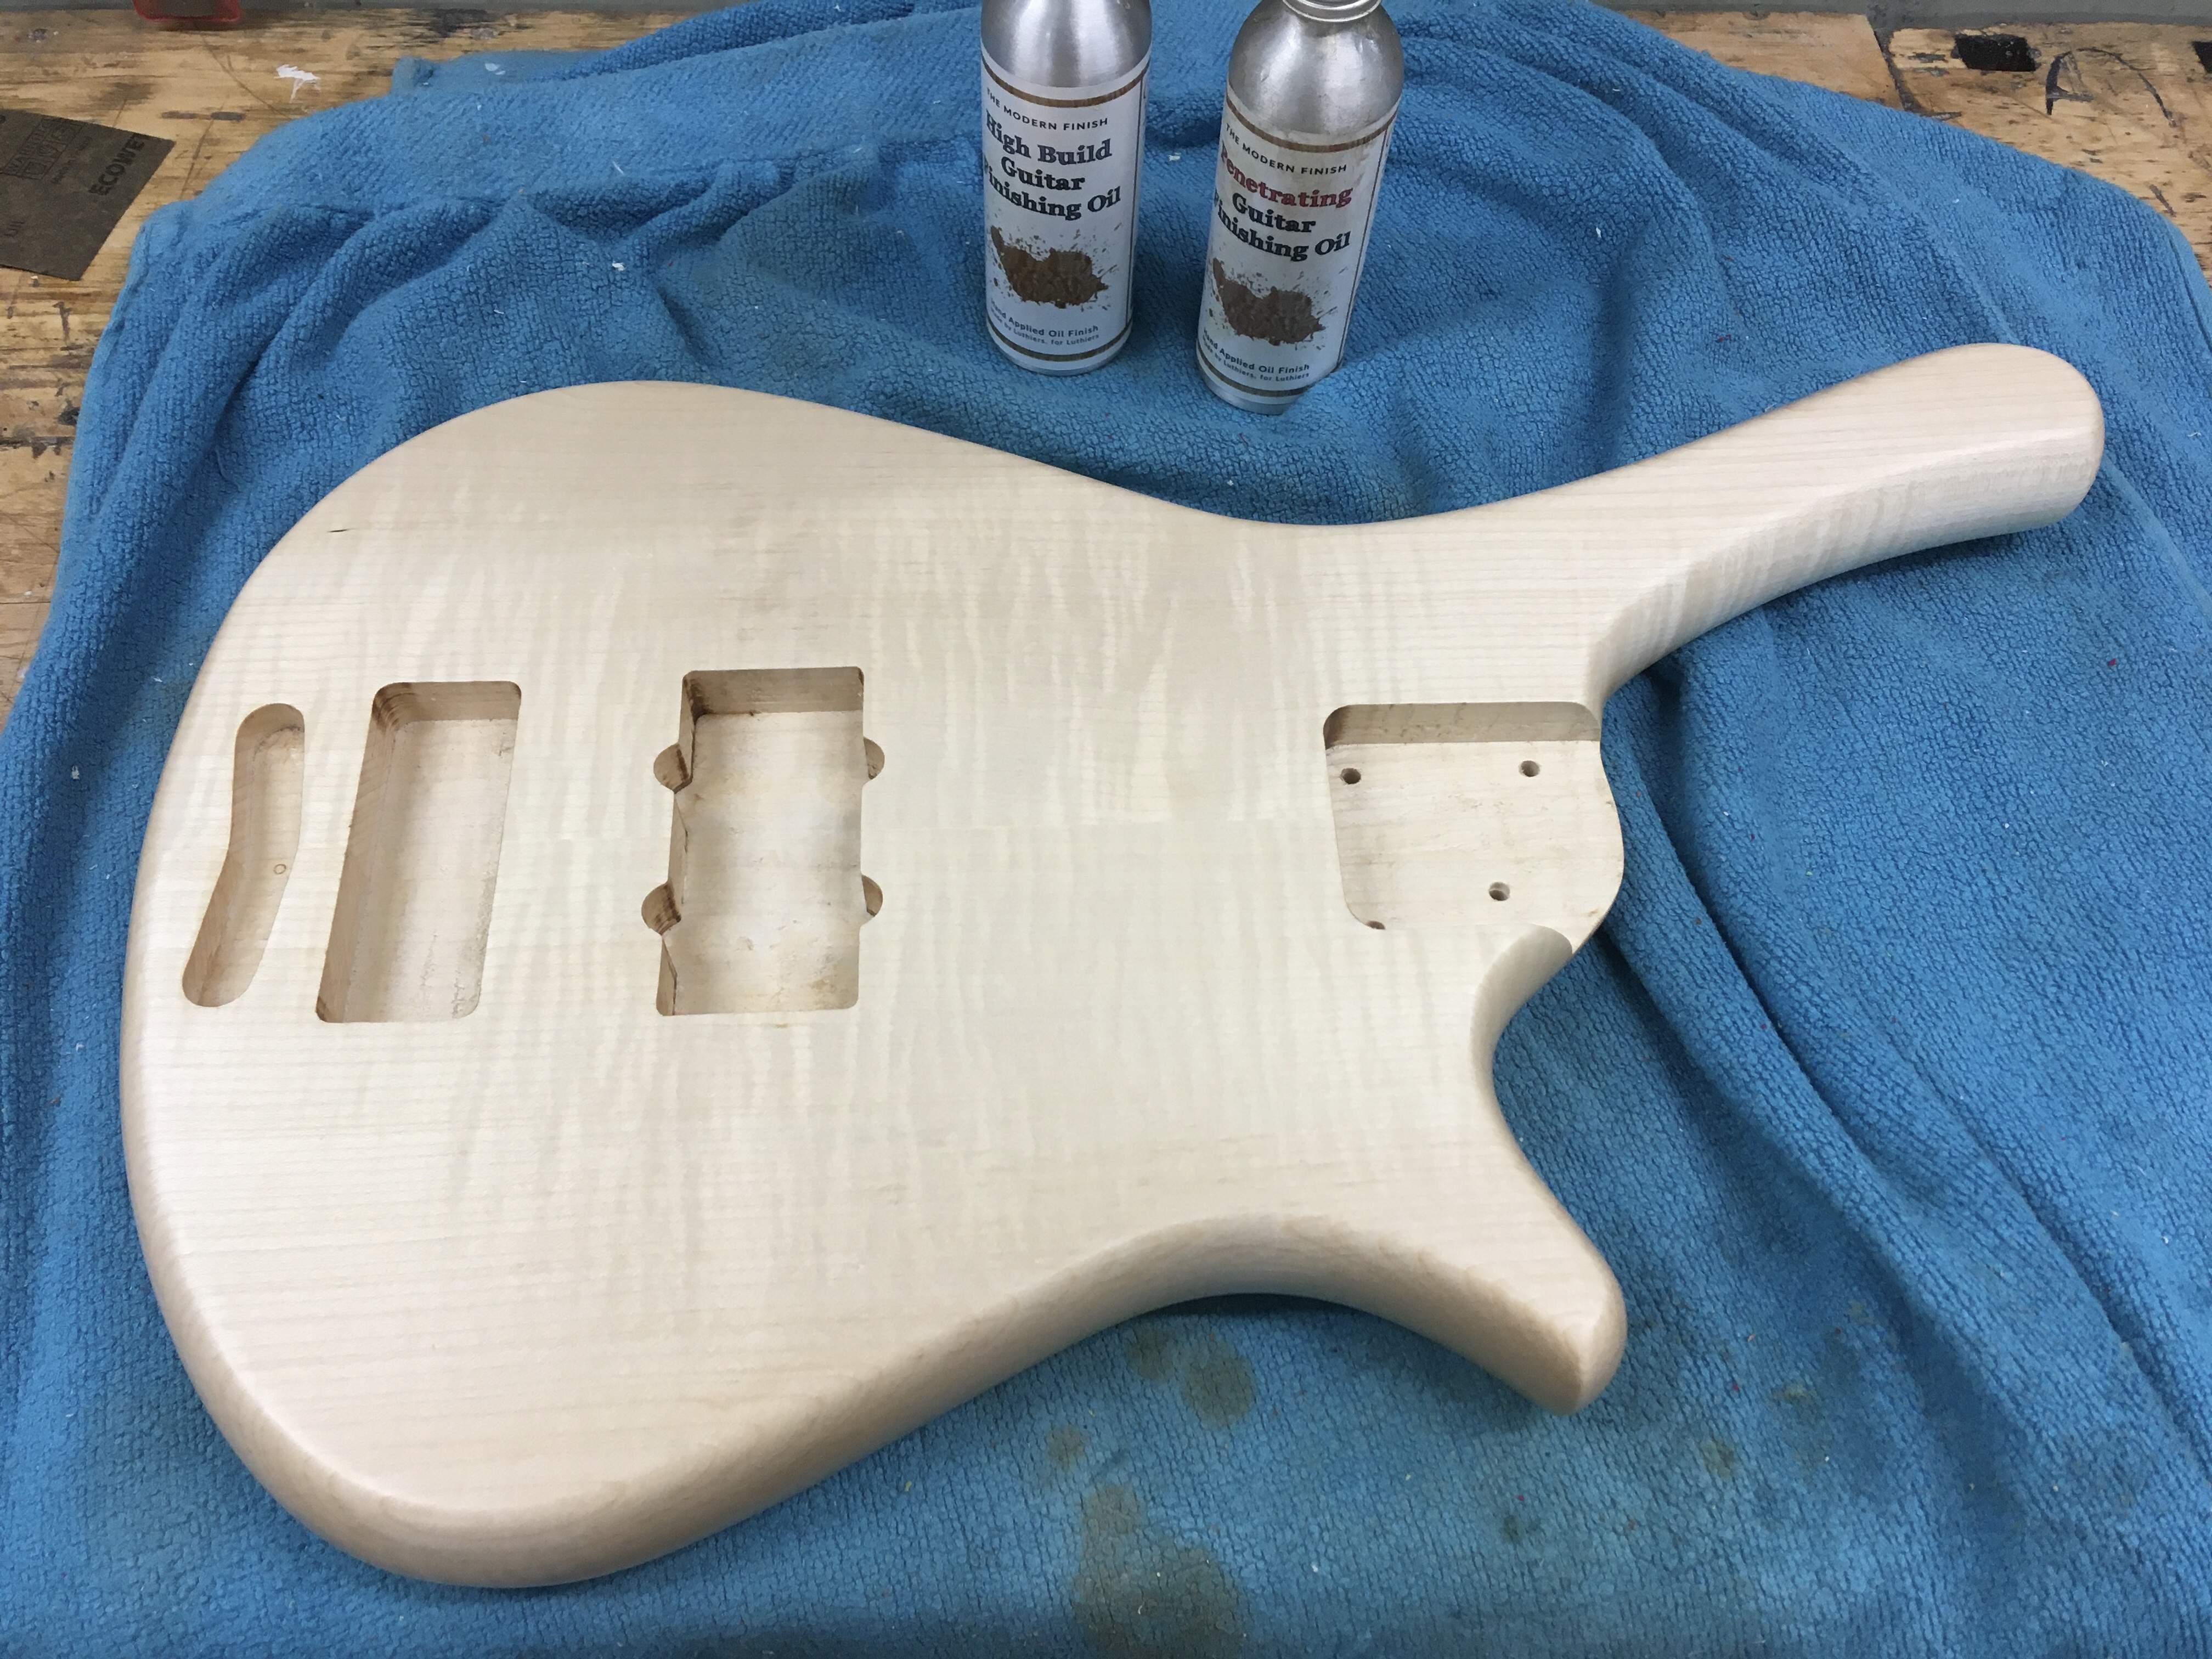
I had to make a replacement body. Now finishing with Crimson oil, hoping to get this bass assembled next weekend.
I had to make a replacement body. Now finishing with Crimson oil, hoping to get this bass assembled next weekend.

Wow, @MPU, that’s stunning. Fortress has long been my favorite Warwick shape. How did you do it without having an original to measure?

Nobody wanted to sell me a Warwick Fortress to replace my anchor-heavy bubinga Corvette so....
View attachment 3755318
I had to make a replacement body. Now finishing with Crimson oil, hoping to get this bass assembled next weekend.
Nice. Yeah I know what you mean about Corvettes being heavy, I worked on a Birch/purpleheart/mahogany one. Beautiful but one heavyweight to be sure.
New body is 800g lighter than the Corvette one. I hope that I can feel the difference on my left shoulder.Nice. Yeah I know what you mean about Corvettes being heavy, I worked on a Birch/purpleheart/mahogany one. Beautiful but one heavyweight to be sure.
I used three different pics, scaled them to size and made a sort of average of them. The pics matched within a few millimeter. That's close enough for me.Wow, @MPU, that’s stunning. Fortress has long been my favorite Warwick shape. How did you do it without having an original to measure?

I'm working on a Jerry Garcia "Tiger" themed guitar for the guitarist in the band I'm in. I do the same as MPU (though I'll bet in a less technical/accurate way) to make a copy of an instrument I've never seen. I've done this process with a few of my recent builds.
I find a pic or two, looking for one that is a straight on picture to avoid a parallax problem. I find a measurement I know (scale length is an easy one, but a shorter distance is better for accuracy), then find a multiplier for that compared to the scale in Keynote (I've also used Powerpoint).
To make that a bit clearer: when you draw a line in Keynote or Powerpoint you can see how long that line is. In this case the line that is the same length as the scale is 7.12 in Keynote, I divide 25.5/7.12 and come up with a 3.58 multiplier. So to get any dimension with this picture, I draw a line and multiply its length by 3.58 to get to the actual dimension.
Once I have the initial drawing done, I smooth everything out with french curves and alter things to my liking. My final instrument is never an exact copy. There are inevitably curves I don't like, or in this case a lower horn that looks out of place - this is a beautiful design, but that lower horn doesn't have to have that huge gap like it does, it just looks weird, just moving the horn in a little it looks a lot better. Once I get the outline on the wood, I'll change it again to adjust for wood grain.
This is the drawing I used for the Tiger, note these aren't the only dimensions I pulled off the picture, I moved some lines around as I was making my drawing.

I find a pic or two, looking for one that is a straight on picture to avoid a parallax problem. I find a measurement I know (scale length is an easy one, but a shorter distance is better for accuracy), then find a multiplier for that compared to the scale in Keynote (I've also used Powerpoint).
To make that a bit clearer: when you draw a line in Keynote or Powerpoint you can see how long that line is. In this case the line that is the same length as the scale is 7.12 in Keynote, I divide 25.5/7.12 and come up with a 3.58 multiplier. So to get any dimension with this picture, I draw a line and multiply its length by 3.58 to get to the actual dimension.
Once I have the initial drawing done, I smooth everything out with french curves and alter things to my liking. My final instrument is never an exact copy. There are inevitably curves I don't like, or in this case a lower horn that looks out of place - this is a beautiful design, but that lower horn doesn't have to have that huge gap like it does, it just looks weird, just moving the horn in a little it looks a lot better. Once I get the outline on the wood, I'll change it again to adjust for wood grain.
This is the drawing I used for the Tiger, note these aren't the only dimensions I pulled off the picture, I moved some lines around as I was making my drawing.

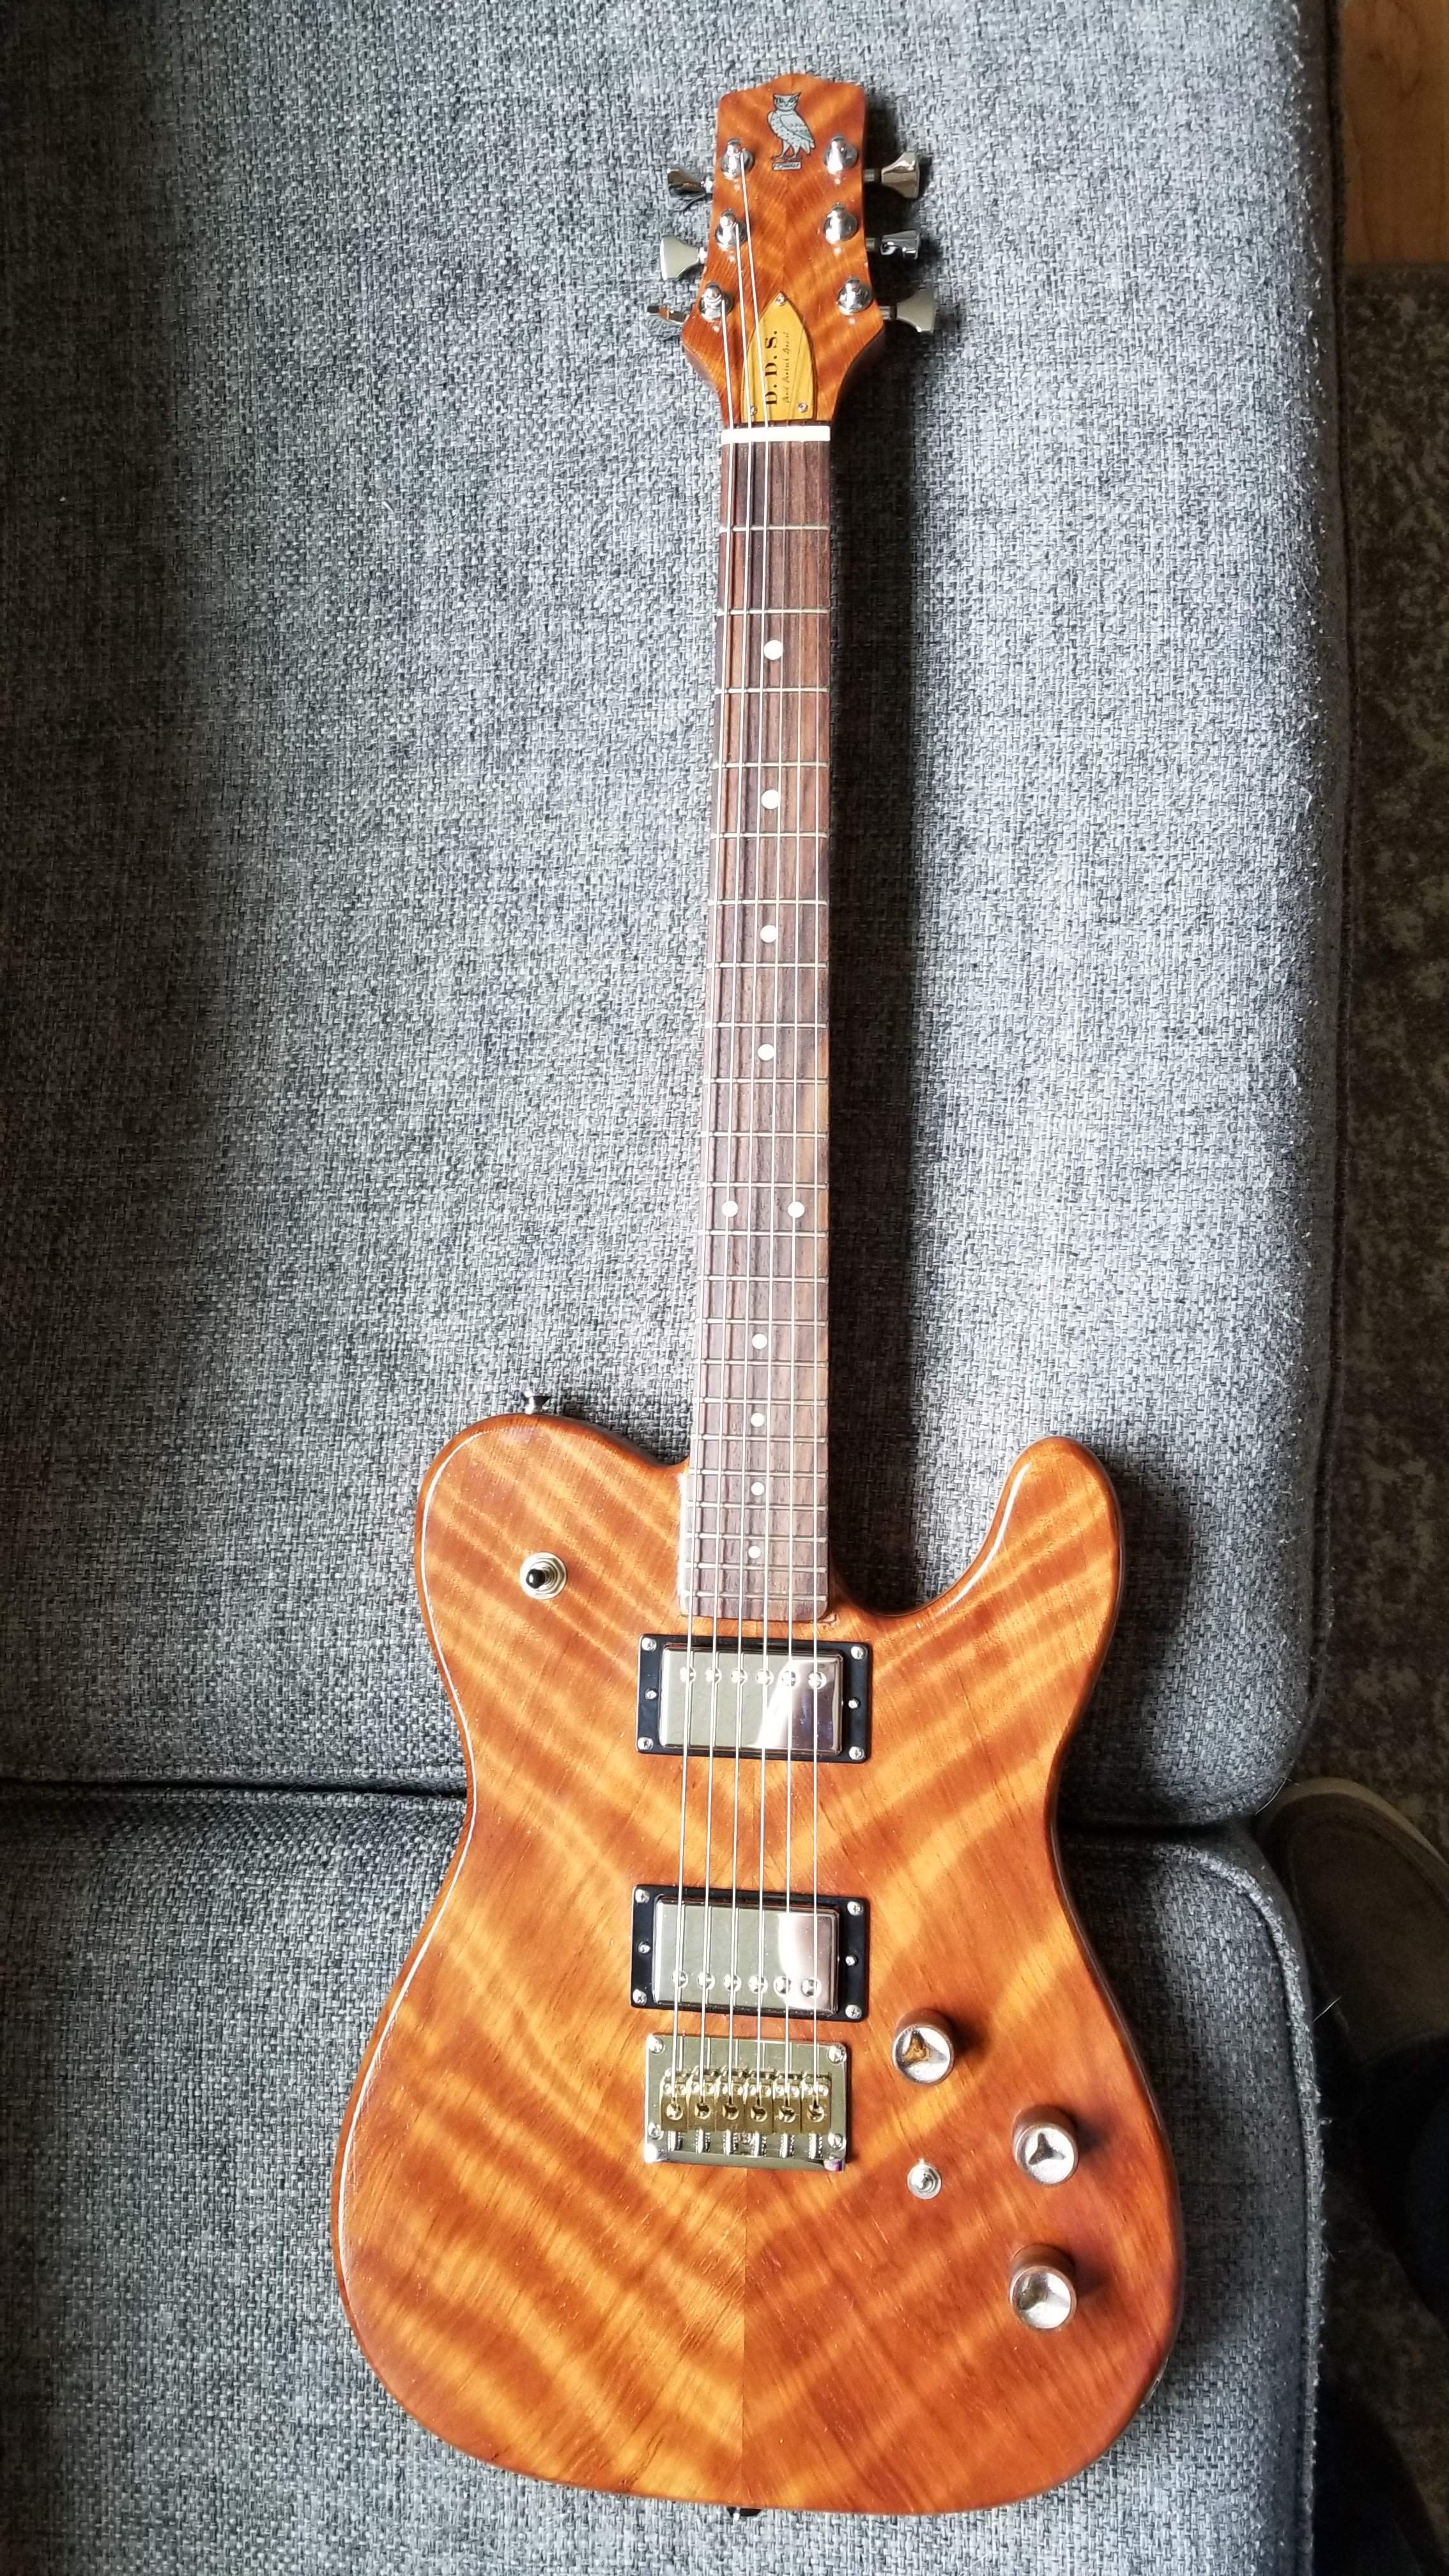
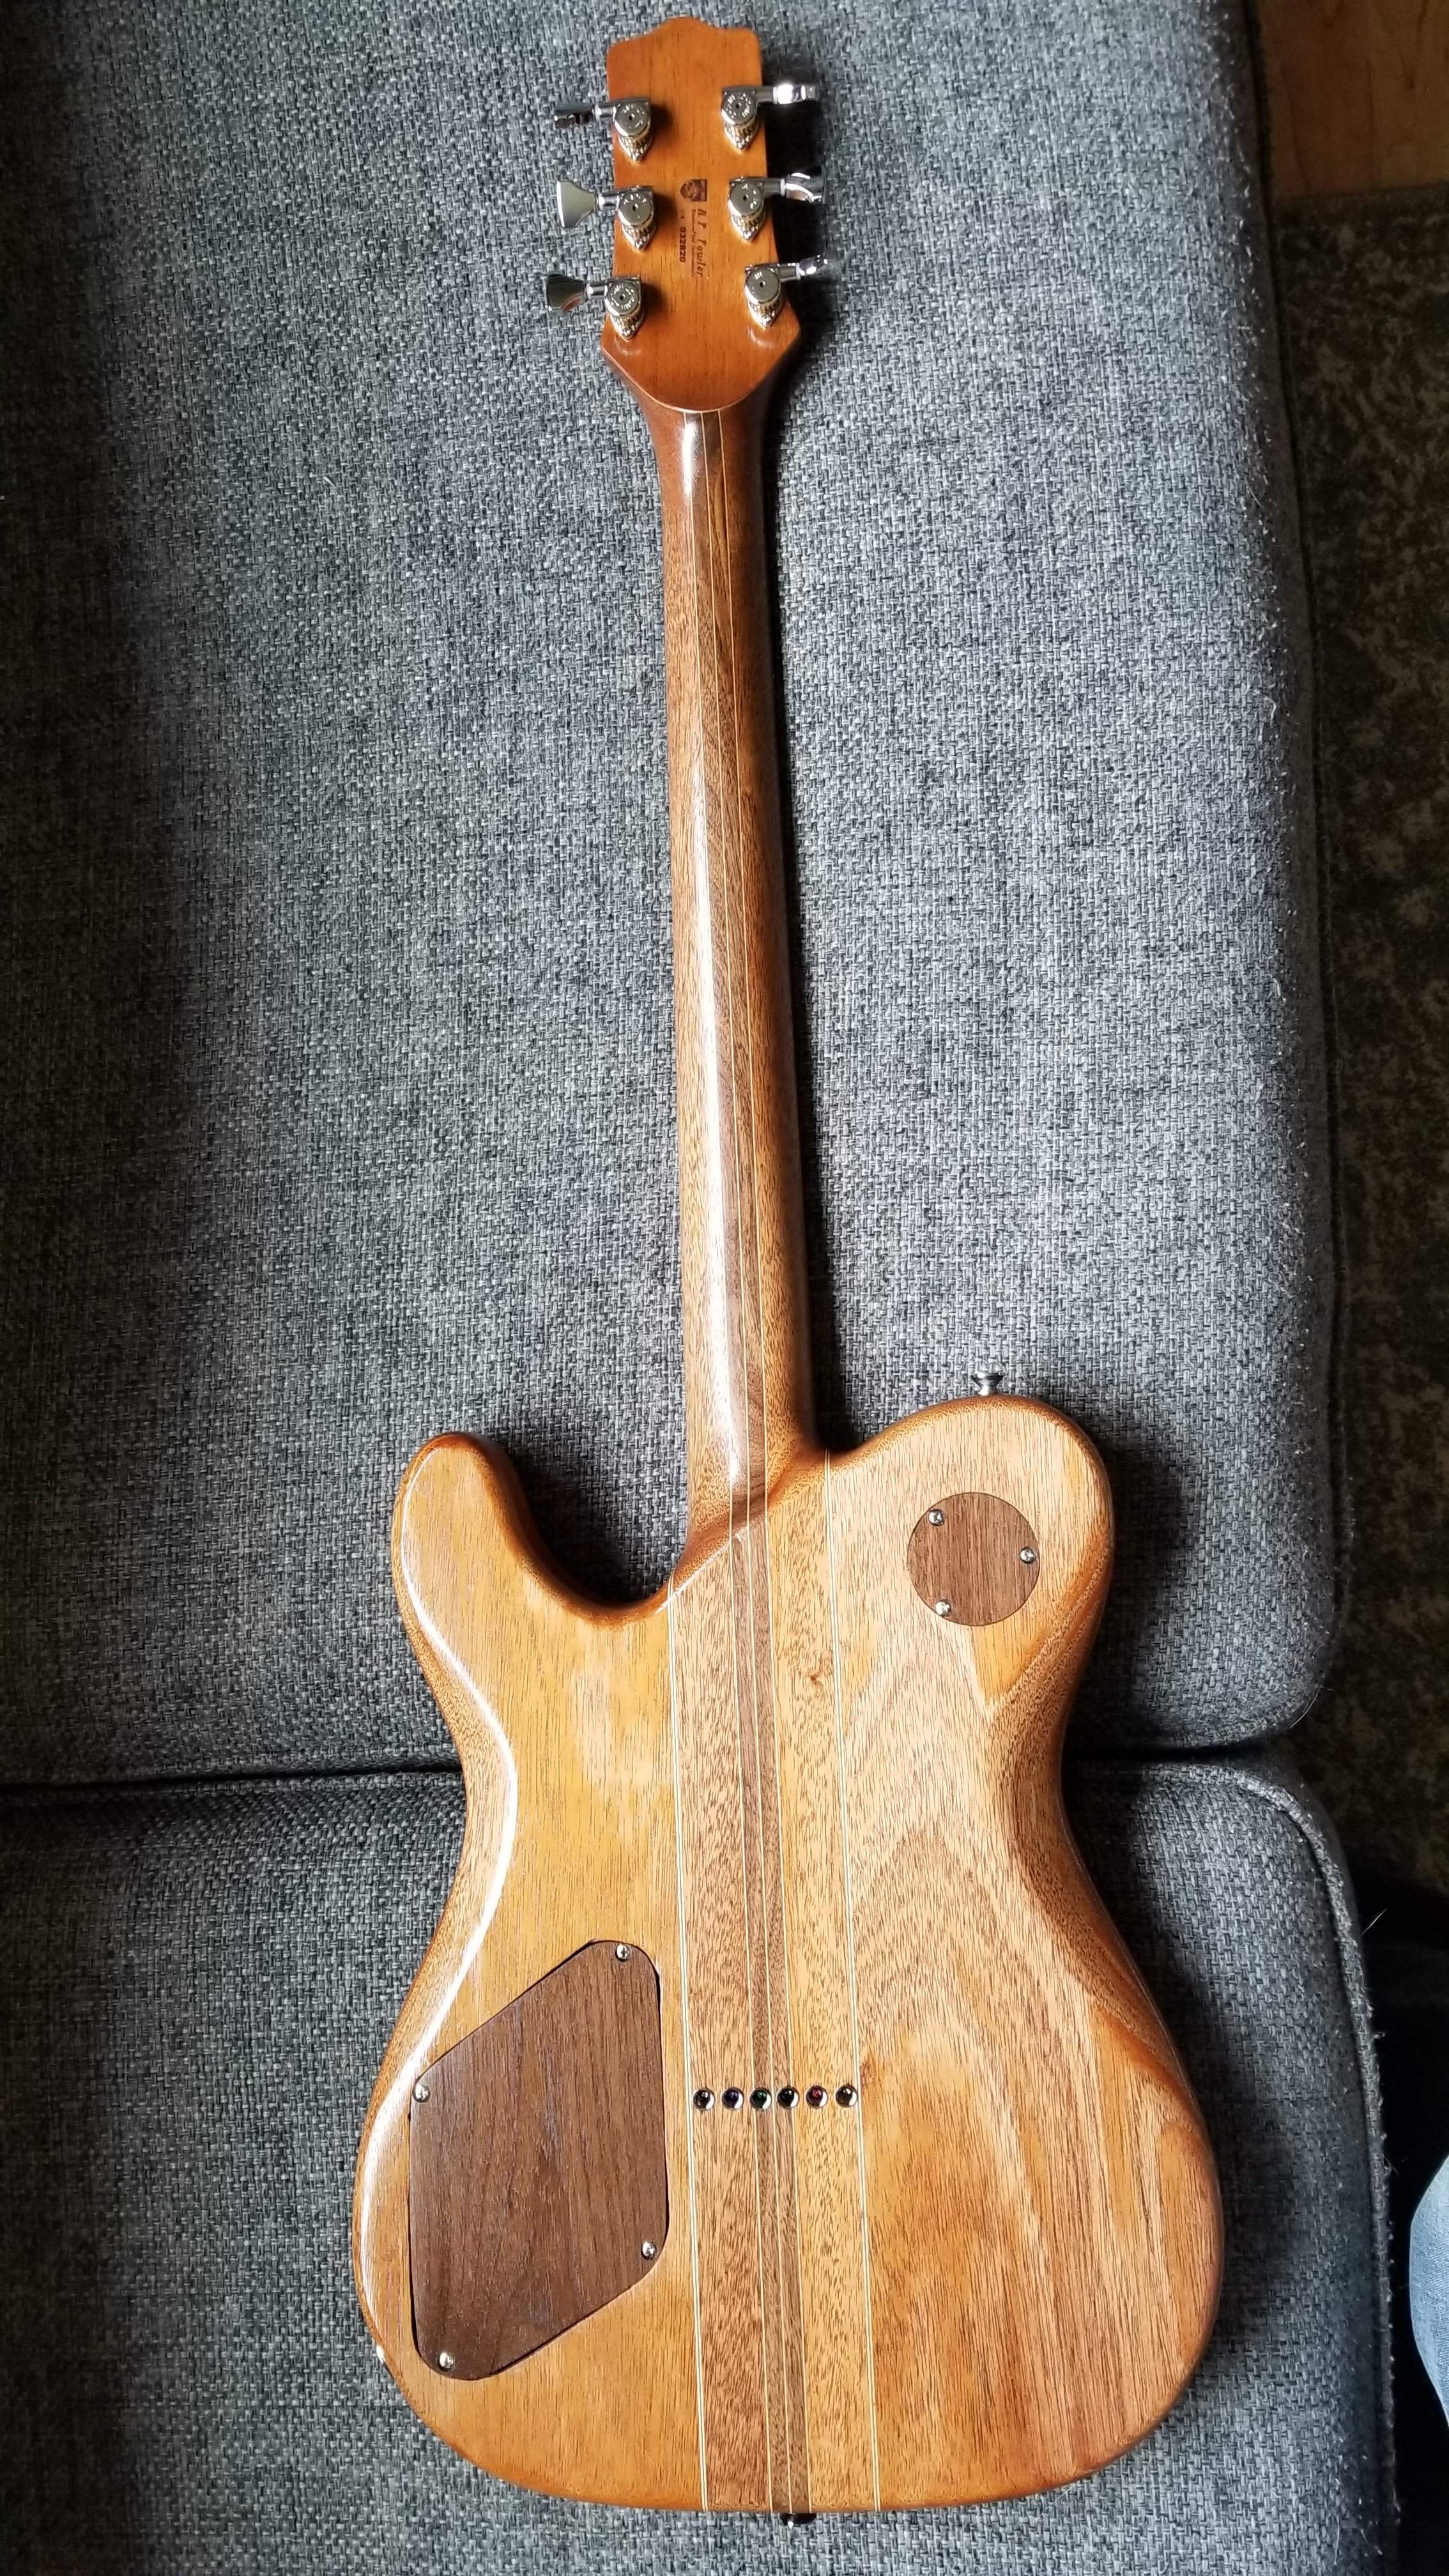
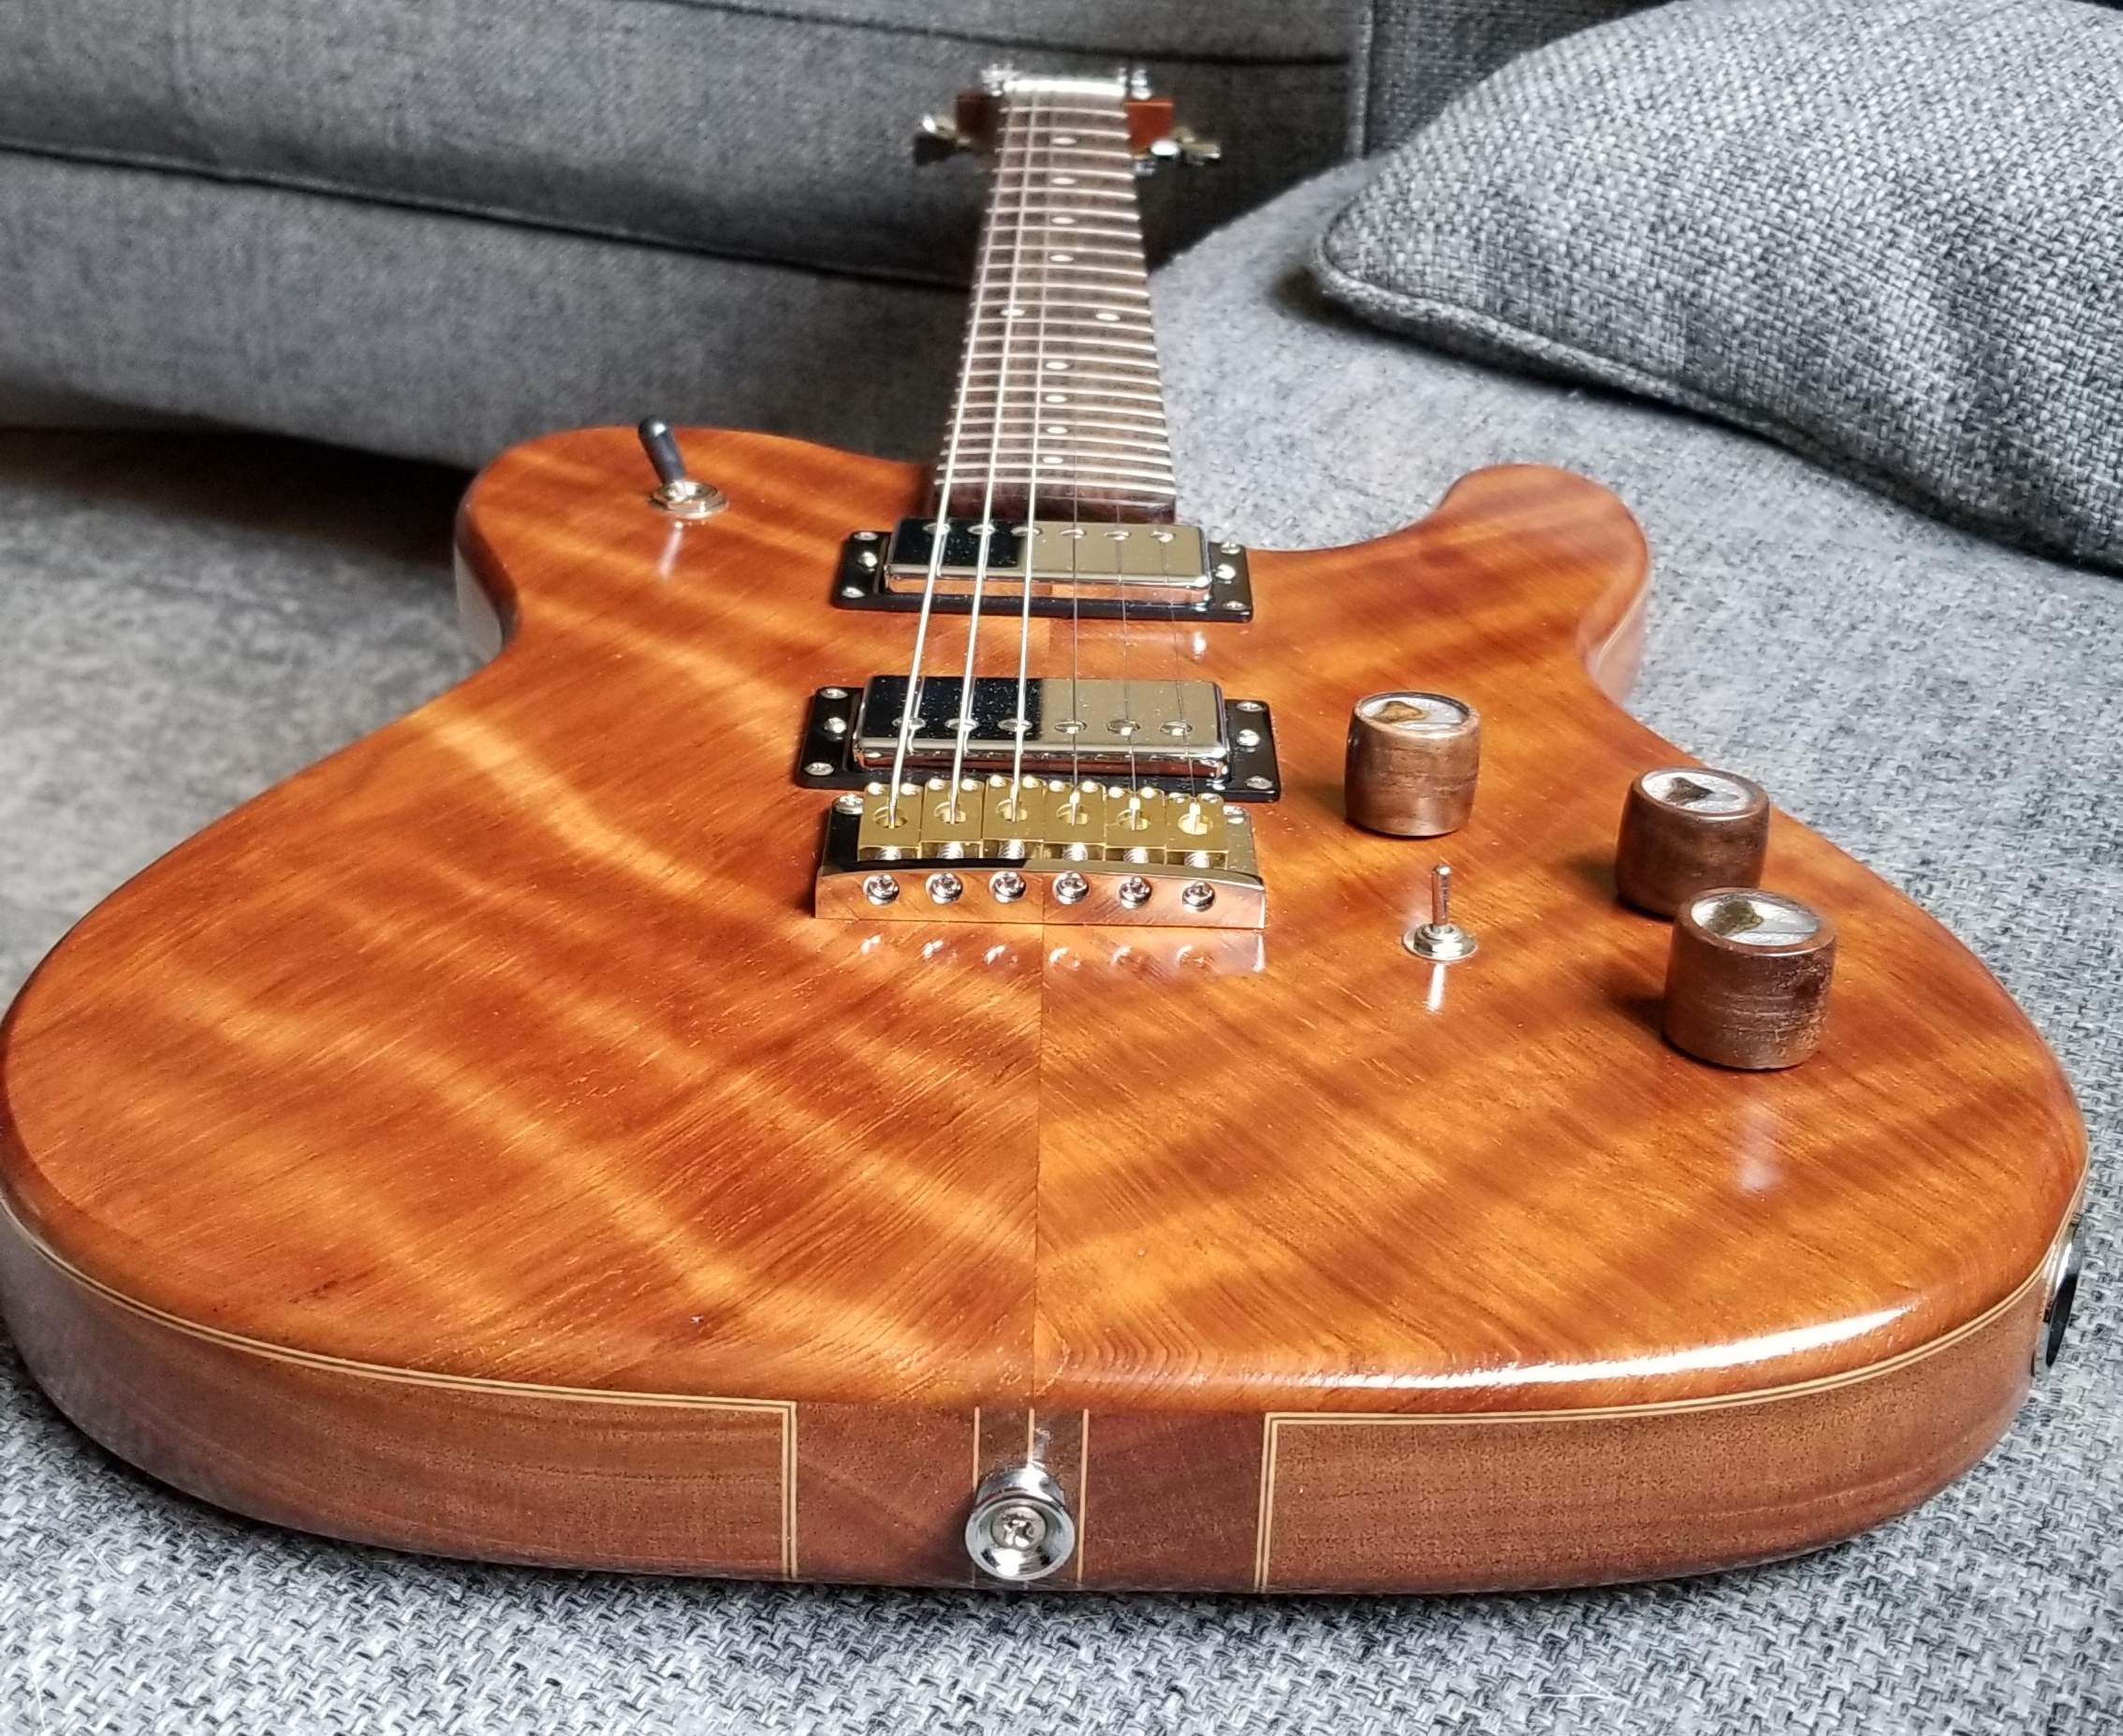
Not a bass here, but I finally finished this up yesterday. Knobs were the last thing off the workbench. This beauty is for my nephew, he's graduating from dental school and I wanted to make him this for a long time. Its chambered african mahogany with maple and walnut accents, flamed curley redwood top and headstock cap, and a rosewood fingerboard. Knobs are walnut with shark teeth embedded on crushed pearl. Hipshot open gear griplock tuners, Bare Knuckle holly diver pickups, one volume, two tones (.033 cap on the neck tone and .022 cap on the bridge tone), master series/parallel switch and three way pickup selector.
Last edited:
- Apr 18, 2008
- 16,004
- 1
- 31,699
- Disclosures
- I'm highly opinionated and extremely self-assured
Mmmmm, that's my kind of Tele! 
Maybe I should look around for a dental school....
Maybe I should look around for a dental school....
I use a similar process for copying body shapes, parallax free high res photo (or the best you can find) imported into Autocad. Same sequence, find a known dimension like scale length, bridge or pup width, etc as a scaling factor. I “trace” the image using curves, splines, or ellipses. Once you have a line drawing, you can “rubber band” parts around to change proportions. It works pretty well. I haven’t been able to use scale length, usually too much parallax in a view that shows body and neck. One source I’ve found for really high res photos for guitars they sell is Chicago Music Exchange.
That top Is amazing.
What finish does it have on it? I have found that redwood is a total sponge. I did my normal wipe on poly finish on the uke bass and it took maybe a dozen coats to stop sinking in - compared to maybe 2 or 3 coats on most hardwoods and 5 or so on softwoods. On the acoustic I just finished I did maybe 5 or 6 coats of shellac to seal it before putting on the poly and that worked great, much more even result. The shellac builds a lot faster and dries quick!
What finish does it have on it? I have found that redwood is a total sponge. I did my normal wipe on poly finish on the uke bass and it took maybe a dozen coats to stop sinking in - compared to maybe 2 or 3 coats on most hardwoods and 5 or so on softwoods. On the acoustic I just finished I did maybe 5 or 6 coats of shellac to seal it before putting on the poly and that worked great, much more even result. The shellac builds a lot faster and dries quick!
Pretty much how I do that as well. scale the flat on picture to fit on a single page, figure out the scale factor, cut the picture into 4 sections, blow each of those sections up to full scale then print those sections out and tape together. Then I trace over the "paste-up" using translucent Vellum paper. I usually make a mod here or there that retains the overall feel but may be easier to work with, etc. I then take the vellum to a place with large sheet copier and make copies of the vellum drawing to attach to MDF templates, etc.I'm working on a Jerry Garcia "Tiger" themed guitar for the guitarist in the band I'm in. I do the same as MPU (though I'll bet in a less technical/accurate way) to make a copy of an instrument I've never seen. I've done this process with a few of my recent builds.
I find a pic or two, looking for one that is a straight on picture to avoid a parallax problem. I find a measurement I know (scale length is an easy one, but a shorter distance is better for accuracy), then find a multiplier for that compared to the scale in Keynote (I've also used Powerpoint).
To make that a bit clearer: when you draw a line in Keynote or Powerpoint you can see how long that line is. In this case the line that is the same length as the scale is 7.12 in Keynote, I divide 25.5/7.12 and come up with a 3.58 multiplier. So to get any dimension with this picture, I draw a line and multiply its length by 3.58 to get to the actual dimension.
Once I have the initial drawing done, I smooth everything out with french curves and alter things to my liking. My final instrument is never an exact copy. There are inevitably curves I don't like, or in this case a lower horn that looks out of place - this is a beautiful design, but that lower horn doesn't have to have that huge gap like it does, it just looks weird, just moving the horn in a little it looks a lot better. Once I get the outline on the wood, I'll change it again to adjust for wood grain.
This is the drawing I used for the Tiger, note these aren't the only dimensions I pulled off the picture, I moved some lines around as I was making my drawing.
View attachment 3755388
I work in an architectural office, so I have use of a plotter than can do up to 48” width x any length plots, but it can be done as “tiles” on 8.5” x 11” with some registration marks. I used to do it on yellow trace.
My good old standby, Formbys tung oil, low gloss. The first coat was just on the redwood, I just kept adding until it was pretty well saturated (felt like half the bottleThat top Is amazing.
What finish does it have on it? I have found that redwood is a total sponge. I did my normal wipe on poly finish on the uke bass and it took maybe a dozen coats to stop sinking in - compared to maybe 2 or 3 coats on most hardwoods and 5 or so on softwoods. On the acoustic I just finished I did maybe 5 or 6 coats of shellac to seal it before putting on the poly and that worked great, much more even result. The shellac builds a lot faster and dries quick!
 ) waited fifteen minutes then wiped it down with a fresh cloth. Then the whole instrument got another coat every day until I thought it all looked even. I think it's got either 12 or 13 total after the initial coat on the redwood. But yea, that's the some thirsty wood, it's from a 100+ year old cut too, so it was very dry.
I had the same experience with my redwood top (I still have one in storage waiting for the perfect project, which I think I just found). I just kept pouring the Tru Oil on in the first coat until it stopped absorbing. I figured the more it absorbed, the stronger the wood would be. It was a lot of finish before it stopped absorbing.


