
Enjoy the benefits of a premium membership!
Upgrade Account
-
TalkBass has been independent since 1998. Add your voice.
Create a free account to reply to discussions, view embedded media, and browse with fewer display ads.
Join free Log in
Want zero display ads or expanded classifieds tools? Compare plans.
You are using an out of date browser. It may not display this or other websites correctly.
You should upgrade or use an alternative browser.
You should upgrade or use an alternative browser.
Double Bass Why hide glue?
- Thread starter unbrokenchain
- Start date
More options
Who Replied?

So it didn’t work. Seemed fine but as I was shifting the bass around at home it he FB popped right off. The glue hadn’t adhered at all to the pao ferro. It was totally clean. I also forgot to wipe it with lacquer thinner before glueing.
Try heating the fb up a little bit before you apply the glue? And steam will keep the glue from gelling before the pieces are contacting. Even though your first try failed, being able to try again without a massive cleanup/resanding effort is a testament to HHG.
I'll be gluing mine up on the Kay this week. Carbon fiber just arrived this morning!
Try heating the fb up a little bit before you apply the glue? And steam will keep the glue from gelling before the pieces are contacting. Even though your first try failed, being able to try again without a massive cleanup/resanding effort is a testament to HHG.
I'll be gluing mine up on the Kay this week. Carbon fiber just arrived this morning!
Yeah, it was gelling as soon as we tried to glue it. I’m thinking of doing a small fir shim strip epoxied. That way it’s strong but can still be undone by cutting it out. Not the simplest in that event but I’m sure this bass isn’t put together with HHG to begin with.
Thought I'd share some photos for an update.
Here's the bass before and after cf. Don't know why it turned the second one upside down..


The bass side insert fit like a glove, wondered if I even needed to use glue on that one (but I did for sure). I cut the one on the bass side just a little short, and although I ordered extra cf just in case, there's plenty of length into the heel so I'm just gonna wedge a small piece of wood in there to fill the gap.
James had advised me that hide glue likely wouldn't stick to carbon fiber and to use ca glue instead (for the inserts, not the fingerboard of course). Hoping that I could get away with it anyway, I decided to try a (very unscientific) experiment to try and compare the glues on cf. I sanded an old bridge that was lying around (I bought some adjusters years ago and they sent me a whole bridge) with 220, and glued on pieces of cf from an example off-cut that Condino had given me. Four "treatments," one just ca glue, one just hide glue with no surface prep to the cf, one with hide glue after sanding the cf with 220, and one with hide glue after sanding cf with 220 and rubbing it with fresh garlic. The glue was applied to the cf side each time and not the wood. No clamps, just squeezed it with my fingers and let it cure over the weekend. Then I pried each one off to see if the glue stuck to the cf or the wood side.


CA wins in this case unfortunately. It's the only one that stuck to both sides. So that's what I used to inlay the cf. It's not going anywhere, ever.
It's not easy to take a photo of the neck block, but here's one through the f-hole of one of the two lags into the neck heel.

I tried to use Condino's help minimally for this repair, both because his work is worth way more than I can afford (he is one talented dude), and to have the experience of doing it myself. I glued the block back together and added a ply at the button to square the pocket. He did the critical parts of setting the neck, gluing the shim on the fb, routing the channels on the neck for the cf, and I'm taking it from there after asking him a lot of questions.
It's just a Kay, and finish scratches are part of the expectation in these basses, but I'm still trying to do a little bit of touch-up work to blend in the button and bottom lips of the heel. None of the finish damage is from the current repair. Not sure how the ancient glue managed to dissolve the nc lacquer, but I think I'll just leave those dripmarks be.


All that's left is glue the fingerboard, carve a new nut and a bridge. !
Here's the bass before and after cf. Don't know why it turned the second one upside down..
The bass side insert fit like a glove, wondered if I even needed to use glue on that one (but I did for sure). I cut the one on the bass side just a little short, and although I ordered extra cf just in case, there's plenty of length into the heel so I'm just gonna wedge a small piece of wood in there to fill the gap.
James had advised me that hide glue likely wouldn't stick to carbon fiber and to use ca glue instead (for the inserts, not the fingerboard of course). Hoping that I could get away with it anyway, I decided to try a (very unscientific) experiment to try and compare the glues on cf. I sanded an old bridge that was lying around (I bought some adjusters years ago and they sent me a whole bridge) with 220, and glued on pieces of cf from an example off-cut that Condino had given me. Four "treatments," one just ca glue, one just hide glue with no surface prep to the cf, one with hide glue after sanding the cf with 220, and one with hide glue after sanding cf with 220 and rubbing it with fresh garlic. The glue was applied to the cf side each time and not the wood. No clamps, just squeezed it with my fingers and let it cure over the weekend. Then I pried each one off to see if the glue stuck to the cf or the wood side.
CA wins in this case unfortunately. It's the only one that stuck to both sides. So that's what I used to inlay the cf. It's not going anywhere, ever.
It's not easy to take a photo of the neck block, but here's one through the f-hole of one of the two lags into the neck heel.
I tried to use Condino's help minimally for this repair, both because his work is worth way more than I can afford (he is one talented dude), and to have the experience of doing it myself. I glued the block back together and added a ply at the button to square the pocket. He did the critical parts of setting the neck, gluing the shim on the fb, routing the channels on the neck for the cf, and I'm taking it from there after asking him a lot of questions.
It's just a Kay, and finish scratches are part of the expectation in these basses, but I'm still trying to do a little bit of touch-up work to blend in the button and bottom lips of the heel. None of the finish damage is from the current repair. Not sure how the ancient glue managed to dissolve the nc lacquer, but I think I'll just leave those dripmarks be.
All that's left is glue the fingerboard, carve a new nut and a bridge. !


Thanks for the kind words. It is a small town; 'gotta help out my neighbors....
A+ for setting up a control piece and testing out four different glue models and making an educated choice based upon your own problem solving.
A bit of clarity for the crusty crusty old grumpy crowd: the neck block was destroyed and in pieces. It was either banana peel the entire neck joint and rip the whole thing out (more time and $$$) or modest "fixing" attempt. All the pieces were glued back together with hot hide glue and the neck joint had a small internal corrective shim for a tight fit, then it was all put back together with hot hide glue. That would likely hold together fine. The lags were put in with a " ship in a bottle " method using a four foot long set of tools through the endpin hole. They are not the primary source, rather a bit of a backup insurance policy for a working bar gig bass that lives in the south where it will get an a$$kicking half the year from heat and humidity and sometimes brutal outdoor festival weather. They also make for a fantastic vectored internal clamp when gluing together that can be removed at any time. Again, play a summer tour in the south and then come back and have a conversation about their necessity. As my friend Arnold once called them "At times a necessary evil". Lets not forget that even Stradivarius occasionally used nails in his neck joints.....
The carbon fiber rods are long strand carbon fiber that is all bonded together with epoxy resin. It is tough, but not so user friendly getting other materials and adhesives to bond to it. I've done extensive testing on almost all of the epoxy commercially available and do keep the $100+ per bottle brand on hand here. Almost monthly, I see epoxy failures come to the shop from old repairs that have failed. I've also tested a few dozen of the modern CA glues available. The adhesion is equal or better with the CA and carbon fiber and the modern slow set versions are a lot easier and cheaper for someone still learning to use, plus you can buy a $9 bottle rather than $100 two part system and then have a huge amount leftover with no use for it while it gradually off gasses in your shop. Both are intended as non-reversible and permanent. Neither one is a product that I advertise or boast about, but there are times when they are of use and I feel appropriate.
Remember: it is an old student grade Kay with a lot of use and we just corrected some major lame a$$ prior failing repairs and brought it back to life for a very reasonable price for a working musician...
A+ for setting up a control piece and testing out four different glue models and making an educated choice based upon your own problem solving.
A bit of clarity for the crusty crusty old grumpy crowd: the neck block was destroyed and in pieces. It was either banana peel the entire neck joint and rip the whole thing out (more time and $$$) or modest "fixing" attempt. All the pieces were glued back together with hot hide glue and the neck joint had a small internal corrective shim for a tight fit, then it was all put back together with hot hide glue. That would likely hold together fine. The lags were put in with a " ship in a bottle " method using a four foot long set of tools through the endpin hole. They are not the primary source, rather a bit of a backup insurance policy for a working bar gig bass that lives in the south where it will get an a$$kicking half the year from heat and humidity and sometimes brutal outdoor festival weather. They also make for a fantastic vectored internal clamp when gluing together that can be removed at any time. Again, play a summer tour in the south and then come back and have a conversation about their necessity. As my friend Arnold once called them "At times a necessary evil". Lets not forget that even Stradivarius occasionally used nails in his neck joints.....
The carbon fiber rods are long strand carbon fiber that is all bonded together with epoxy resin. It is tough, but not so user friendly getting other materials and adhesives to bond to it. I've done extensive testing on almost all of the epoxy commercially available and do keep the $100+ per bottle brand on hand here. Almost monthly, I see epoxy failures come to the shop from old repairs that have failed. I've also tested a few dozen of the modern CA glues available. The adhesion is equal or better with the CA and carbon fiber and the modern slow set versions are a lot easier and cheaper for someone still learning to use, plus you can buy a $9 bottle rather than $100 two part system and then have a huge amount leftover with no use for it while it gradually off gasses in your shop. Both are intended as non-reversible and permanent. Neither one is a product that I advertise or boast about, but there are times when they are of use and I feel appropriate.
Remember: it is an old student grade Kay with a lot of use and we just corrected some major lame a$$ prior failing repairs and brought it back to life for a very reasonable price for a working musician...
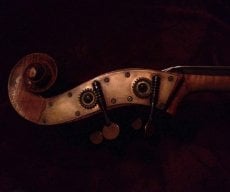
You’re a natural, unbrokenchain. Welcome.
I still woulda fit a new Engel block, but I’m obtuse.
I still woulda fit a new Engel block, but I’m obtuse.
Two seconds after we removed the neck I said, "Block is broke, Needs a new one, more $$$...."
Cool. Now I can tell everyone, "Take that broken up old POS firewood pile to Kungfusherriff to fix; He loves fixin' that $hit!"
You can read my PM for less than appropriate public comments about your suggested parts supplier!
Cool. Now I can tell everyone, "Take that broken up old POS firewood pile to Kungfusherriff to fix; He loves fixin' that $hit!"
You can read my PM for less than appropriate public comments about your suggested parts supplier!
Last edited:
The last time I was confronted with a Kay with a broken block, I bought a replacement from Tom Link for $40. It was yellow poplar, and the mortise had to be opened up significantly, but those were the only real obstacles.
No major problems getting the old block out, and the replacement fit the shoulders like a glove. Resetting the neck required a few minor shims but came out tight and right, far more solid than the two previous failed repairs that incorporated the cracked original crapwood sloppily fit block.
The bass sold immediately and the new owner hasn’t complained once in almost six years. Maybe Tom’s ability to CNC neck blocks has fallen off a cliff. I have no idea. All I know is what I saw for myself.
No major problems getting the old block out, and the replacement fit the shoulders like a glove. Resetting the neck required a few minor shims but came out tight and right, far more solid than the two previous failed repairs that incorporated the cracked original crapwood sloppily fit block.
The bass sold immediately and the new owner hasn’t complained once in almost six years. Maybe Tom’s ability to CNC neck blocks has fallen off a cliff. I have no idea. All I know is what I saw for myself.
Yeah a new block would have been the traditional way to go, and there's no reason that couldn't happen in the future on this bass if someone wanted to, but not something I was comfortable with myself at this point. I'm a pretty handy and careful guy but I just have basic homeowner tools and work on my instruments in my kitchen. Have taken the top off exactly one bass (documented somewhere in the archives) to repair the tailblock and was successful reinstalling it on the second try, but it was a CCB I paid $50 for and it wasn't a very pretty job. I also had help from friends and a lot of borrowed clamps. Not wanting to go there myself on this Kay with poplar inner ply that I traded a van to get, and not willing to drop as much on a pro repair as the bass is worth, I think this was the way to go.
As far as I'm concerned it's a very elegant repair, no need to defend it at all. Sturdy, reversible, and looks outwardly original other than the finish damage from the old failing repair. Whether the street value of the bass has gone up any is anyone's guess, but its previous condition was always a source of concern for me, so the practical value of the instrument has increased exponentially (or at least will have once it's set up and playing). Plus if I do decide to sell it, any new owner will have this thread to understand this part of its history, which is pretty cool.
My other Kay is a 40s M1 that I bought from James after he souped it up with mahogany neck and tail blocks, an awesome monster removable neck with a Kay scroll grafted on, magnetic trap door in the c-bout, re-arched top and all kinds of other stuff. To me it's a perfect example of blending tradition and practical ingenuity, and these old ply basses are an excellent platform for that kind of thing.
As far as I'm concerned it's a very elegant repair, no need to defend it at all. Sturdy, reversible, and looks outwardly original other than the finish damage from the old failing repair. Whether the street value of the bass has gone up any is anyone's guess, but its previous condition was always a source of concern for me, so the practical value of the instrument has increased exponentially (or at least will have once it's set up and playing). Plus if I do decide to sell it, any new owner will have this thread to understand this part of its history, which is pretty cool.
My other Kay is a 40s M1 that I bought from James after he souped it up with mahogany neck and tail blocks, an awesome monster removable neck with a Kay scroll grafted on, magnetic trap door in the c-bout, re-arched top and all kinds of other stuff. To me it's a perfect example of blending tradition and practical ingenuity, and these old ply basses are an excellent platform for that kind of thing.
If the repair holds, its good. My concern is that the mortise cheeks are doing a lot of mechanical work, and the wood is soft.
If the repair holds, its good. My concern is that the mortise cheeks are doing a lot of mechanical work, and the wood is soft.
Valid concern, though considering how long it survived in its previous state I'm way on the optimistic side. There is much more contact on all sides of the tenon, even if it's still the wonky poplar mortise with glued cheeks. One good way to find out though! Going to try and glue up the fingerboard this evening if I can get the house warm enough with this polar vortex artic blast whatever this year's term is. Brr! Don't know how you New Yorkers do it.

Don't know how you New Yorkers do it.
Well, like most things in life, it’s a trade off.
We may freeze our scones off and shovel to the point of cardiac arrest, but we don’t get hurricanes and all those poison snakes and creepy crawlers you folks below the Mason Dixon have can’t hang up here.
Don't know how you New Yorkers do it.
Practice, practice, practice!
Charlie is right. I’d add that my part of NY in the summer is a verdant paradise, and then we get the fall foliage. Everyone should see that once.
Got the fingerboard glued first try I think. Whew, I was ready for it to fail. Both sides pretty good and warm, rubbed some garlic on the fb side for good luck... None of the excess ooze had gelled when I clamped it, so hopefully I got a good joint there. Let it sit clamped overnight, and this afternoon I gave it a bit of torture to see if it was firmly attached. Seems good, a couple short (1" or so long, not a sheet of paper wide) gaps that I attribute to the neck being not perfectly flat (did my best with a sanding block, tried to put just the slightest concave to it). The fb shim side I did on James' crazy belt sander, so I know that side was flat. I rubbed some hide glue on the outside of the joint in these spots, and after sanding a little I can't tell where they were.

We chopped just a bit off the nut side of the fingerboard after gluing the shim (so there'd be a little room to sand the shim flush with the fb). To the neck it's about perfect at the nut and for a couple inches, but widens a little towards the bridge and overhangs the maple. I've got it sanded down almost flush for the unfinished portion of the neck, but not totally sure how to efficiently sand the edge of the fb up by the finished surface? Or would a pro luthier use a plane here?
Anyway, getting steadily closer to the setup rather than repair part..
Thanks as always to this community for great support!
We chopped just a bit off the nut side of the fingerboard after gluing the shim (so there'd be a little room to sand the shim flush with the fb). To the neck it's about perfect at the nut and for a couple inches, but widens a little towards the bridge and overhangs the maple. I've got it sanded down almost flush for the unfinished portion of the neck, but not totally sure how to efficiently sand the edge of the fb up by the finished surface? Or would a pro luthier use a plane here?
Anyway, getting steadily closer to the setup rather than repair part..
Thanks as always to this community for great support!
Got the fingerboard glued first try I think. Whew, I was ready for it to fail. Both sides pretty good and warm, rubbed some garlic on the fb side for good luck... None of the excess ooze had gelled when I clamped it, so hopefully I got a good joint there. Let it sit clamped overnight, and this afternoon I gave it a bit of torture to see if it was firmly attached. Seems good, a couple short (1" or so long, not a sheet of paper wide) gaps that I attribute to the neck being not perfectly flat (did my best with a sanding block, tried to put just the slightest concave to it). The fb shim side I did on James' crazy belt sander, so I know that side was flat. I rubbed some hide glue on the outside of the joint in these spots, and after sanding a little I can't tell where they were.
View attachment 3305678
We chopped just a bit off the nut side of the fingerboard after gluing the shim (so there'd be a little room to sand the shim flush with the fb). To the neck it's about perfect at the nut and for a couple inches, but widens a little towards the bridge and overhangs the maple. I've got it sanded down almost flush for the unfinished portion of the neck, but not totally sure how to efficiently sand the edge of the fb up by the finished surface? Or would a pro luthier use a plane here?
Anyway, getting steadily closer to the setup rather than repair part..
Thanks as always to this community for great support!
That looks nice and tight. I’ll try better heating and prep for my project and knock on wood.
I’m also wondering about sanding or planing the edges of the board. My neck is a bit of an hourglass shape so I’m thinking to just leave it a bit wide depending on how it feels. I don’t want to be pulling strings off the edge.
I’m also wondering about sanding or planing the edges of the board. My neck is a bit of an hourglass shape so I’m thinking to just leave it a bit wide depending on how it feels. I don’t want to be pulling strings off the edge.
I just tried out my hardware-store grade plane on it. Oh man, WAY better than sanding. Prob still have to do the fine tuning with the paper though I guess.
buy a scraper (just a small flat piece of steel) about 3" by5". Use it instead of a plane. You won't regret it. Less than $20.
Steven
Steven
Question here:
When redoing a HHG joint I read the old glue doesn’t need to be scraped away. I’m thinking to just do a basic rough scraping of it to get loose stuff.
What the Sheriff said. Steam is good too. One of the best properties of hide glue imo!
Well I lost patience and took the sawz-all to it.. not really. This part is tedious though for sure. But the neck/fb joint is smooth to the touch on both sides for the whole length now. Lost a little finish, not worried about it! I think the fb will match the shim much better after some oil.


