• TalkBass has been independent since 1998. Add your voice.
    Create a free account to reply to discussions, view embedded media, and browse with fewer display ads.
    Join freeLog in
    Want zero display ads or expanded classifieds tools? Compare plans.

Winter 2017 Build Off - Speak of the Devil

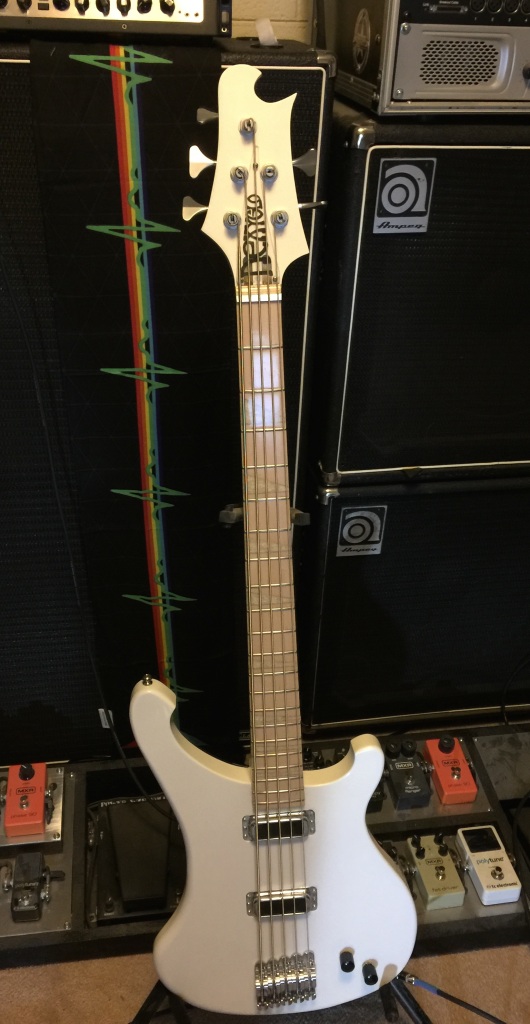
I just sprayed the 4004 fretboard (that had the triangle epoxy poured inlays) with the ProFinisher, and that seems to be holding up well. The ProFinisher allowed for a glossy finish on both the maple board and the inlays.
161gbwn.jpg


I used 60 grit sandpaper to start leveling the inlays. But you're right - it builds up quick so every few strokes, the sandpaper and fretboard surface needs to be cleared.
 
I know that you know most of these tricks already. I just write them out in detail for all the others who are reading along, and thinking of trying something similar on their own projects.

I'm having very good results with the ProFinisher so far too. There are a few tradeoffs with it, as compared to Varathane and the other WB finishes, but I like it. I'm just finishing up polishing out two red/black sunburst Scroll Basses done with ProFinisher. I learned a few new things about the process of dry sanding and buffing it out over the last few days. I'll post about them over on the WB finishes thread.

Quick caution note: Do Not wipe the ProFinisher with raw denatured alcohol. It actually seems to soften it and take away some on the cloth. However, wiping with a 50/50 water and alcohol mix seems fine. Huh?? Target warned about this with their finishes, too. But I don't remember having any such problems wiping the Varathane with straight alcohol.
 
I know that you know most of these tricks already. I just write them out in detail for all the others who are reading along, and thinking of trying something similar on their own projects.

I'm having very good results with the ProFinisher so far too. There are a few tradeoffs with it, as compared to Varathane and the other WB finishes, but I like it. I'm just finishing up polishing out two red/black sunburst Scroll Basses done with ProFinisher. I learned a few new things about the process of dry sanding and buffing it out over the last few days. I'll post about them over on the WB finishes thread.

Quick caution note: Do Not wipe the ProFinisher with raw denatured alcohol. It actually seems to soften it and take away some on the cloth. However, wiping with a 50/50 water and alcohol mix seems fine. Huh?? Target warned about this with their finishes, too. But I don't remember having any such problems wiping the Varathane with straight alcohol.

I'm happy to have you write out your tricks, whether or not I know them. It's an honor to have you here on the forum, and I really appreciate your input on my build. I look forward to your insights on the Profinisher.
 
It must be bad compressor day. Keith Horne's little Husky mini-compressor (aka the BuzzBomb) self destructed today, in a decorative display of blue sparks and smoke from the back end of the motor. On my list for tonight's night shift is to extend the air line manifold plumbing from the large hall compressor over to Keith's shop.

Each of us brought our own compressor when we moved our shops in here. And we all hate the racket of having our own compressors running inside our own shops. So, we located a nice big fairly quiet Dayton compressor and installed it in an alcove off the main hall. Then I've been installing black iron pipe up and down the hall, with lots of tees and ports. Then each of us taps hoses into that manifold to bring air into our shops. It works well, much quieter for everyone. My own big compressor is also wired and plumbed into the circuit as a backup.

Most of us Luthiers don't use a lot of compressed air. I primarily need it for spray painting. I have a few air-powered tools, but I don't really like them. Our biggest air consumer is Mike Lipe. He has a big Italian pin router that has a pneumatic system to raise and lower the spindle.
 
Last edited:
By the way, most of the little BuzzBomb style compressors use "oil-less" style compressor pumps. The pump has a rubber diaphragm in the cylinder, rather than a piston with rings and oil and stuff. When one of those oil-less compressors runs, but won't up much pressure, it generally means that the diaphragm has a hole in it. The most common failure of those pumps. But for many of them, you can get a replacement diaphragm kit. And it isn't very difficult to install. If you've got the warranty, then it's their problem. If not, the BuzzBombs can be fixed in many cases.

But not Keith's. It melted the back end of the motor. I think sawdust got into it and shorted the commutator. We took it all apart. I saved the little tank; Keith saved the regulator and pressure gauges. The motor and compressor went in the trash. May it rest in pieces.
 
By the way, most of the little BuzzBomb style compressors use "oil-less" style compressor pumps. The pump has a rubber diaphragm in the cylinder, rather than a piston with rings and oil and stuff. When one of those oil-less compressors runs, but won't up much pressure, it generally means that the diaphragm has a hole in it. The most common failure of those pumps. But for many of them, you can get a replacement diaphragm kit. And it isn't very difficult to install. If you've got the warranty, then it's their problem. If not, the BuzzBombs can be fixed in many cases.

But not Keith's. It melted the back end of the motor. I think sawdust got into it and shorted the commutator. We took it all apart. I saved the little tank; Keith saved the regulator and pressure gauges. The motor and compressor went in the trash. May it rest in pieces.


I've been around for one or two motors letting their magic white smoke out. An entertaining light show and there's nothing like that smell of burning plastic.:D:rollno:
 
  • Like
Reactions: mapleglo
That's a pretty good idea. There's a few on eBay for sale. This one is going for $115.00.

r28dw8.jpg


I might just wind my own, but I like the aesthetic on the T-40's.

...just snagged it :bassist: I agree, very cool design. Looks like I'm building a(nother) TeiscoT40bird


 
Have you decided on an overall color scheme yet? My suggestion is brown wood and dark red trim. Like, natural brown wood with a dark red burst around the perimeter. Brown and dark red is a color combination that you don't see very often; kind of earthy with some fire.
 
Have you decided on an overall color scheme yet? My suggestion is brown wood and dark red trim. Like, natural brown wood with a dark red burst around the perimeter. Brown and dark red is a color combination that you don't see very often; kind of earthy with some fire.

I'm still thinking about it but I like the brown to red burst. I've never done a burst but perhaps it's time to try.
 
So I'm on my way home, and I'm passing by Bloody Basin Road.

4v2xx2.jpg


And there at the intersection of Bloody Basin and 13th, there's this odd looking fellow. He comes up to me and says that I'll be needing a gig bag for that bass I'm building. A Jackson will do it. So he takes my twenty dollar bill and it vanished in the air. In it's place, I'm holding this gig bag.


292abvb.jpg


Very strange.
 
Finished the radius.

radiusdone.jpg


There a few areas that had some air bubbles in the inlay. On the 4004, I just sanded most of that away. The depth of the inlay on this fretboard is pretty shallow, so I think I may just fill some of that in with some small dabs of epoxy. I'll sand to 320 grit before I do that, then recut the fret slots. Then I'll be ready to hammer in the frets, lay on a few coats of clear ProFinisher, and start on some fretwork.
 
On those pinholes, make sure that you get all the dust out of them before you fill them with epoxy. I'm not sure why, but if you try to put the epoxy over the dust, you get visible scars. That inlay should look great when it's all polished up.

That gig bag is cool, and appropriate. Strange things do appear when you start messin' with Devil Basses.
 
I spot filled the air bubble holes on the inlay this morning.

zodg7d.jpg


I figured I'd do that before sanding further, as the fill spots would need to be sanded anyway. I ended up cleaning them out with a pick, then a pin, and blowing out the dust with a can of compressed air.

Since I had to mix up some epoxy to do that, I knew I'd have quite a bit left over, so I poured the remainder on the pickup cover.

2irlpco.jpg


It's pretty thick, so I'll be able to sand through any air bubbles. The epoxy will protect the engraving, I think, and add a nice glossy finish after sanding and buffing.
 

Latest posts