• TalkBass has been independent since 1998. Add your voice.
    Create a free account to reply to discussions, view embedded media, and browse with fewer display ads.
    Join freeLog in
    Want zero display ads or expanded classifieds tools? Compare plans.

Winter 2017 Build Off - Speak of the Devil

Thanks for the tips, Bruce. I ordered a softer wheel which should arrive this week. I guess I'll use it with the variable speed drill, or I'll just use my hand held HF buffer, which also is variable speed. A few more coats of color today, and I can start with the clear. In the mean time, I can start buffing out the body. Though I may wait until I'm done painting. My shop is small, and once I throw up saw dust or buffing particles in the air, they tend to stick to wet painted surfaces, even with my exhaust fan going.
 
  • Like
Reactions: GKon
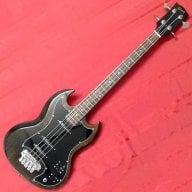
Yes, not many people have the courage to build a Devil Bass......Over the years, several people have contacted me, asking me to make up accurate drawings and templates from an Ampeg Devil Bass for them to build from. I refused, which made a few people mad. I believe that if you want to build your own version of an iconic instrument like a Devil Bass, then you need to put your own ideas and soul into it, using the original only as an inspiration. Like Nexy is doing. She'll own it....and it will own her.
 
OK, back on track. I realize now, that I should have just stripped the entire neck and refinished it, instead of trying to fix the small areas. Each time I fixed one area, I messed it up on another, and so on. In the end, I would have saved time, and it would have come out better, had I just stripped the entire thing and refinished. Again, live and learn. It's not perfect, but I'm at my wits end with the color.

refinneck.jpg


The back of the headstock is now darker than it was, but it is what it is. I'm good with it. One coat of clear, many more to come.
 
Thanks everyone!

So I did a little level sanding yesterday on the body, and it's not quite there. Once again, the lack of proper prep rears it's ugly head during finishing. So I sanded it a bit with the 600 grit Autonet, and I'm laying down another eleventy hundred or so coats of clear, along with the clear on the neck.

Watching that Caswell Buffing System & Solarez UV cured Polyester YouTube posted by @Means2nEnd is becoming quite enticing.
 
I was going to wait until tomorrow, but I started wet sanding.

wetsanding1.jpg


I was working on a new truss rod cover for my 4003, which I coated with clear at the same time as this project, and that seemed to work out ok.

customtrc1.jpg


I think the concern may be that it won't take a high gloss polish when it's still curing, but it seems to sand smooth. I won't be ready for polish for several days, so I think I'm ok. Wet sanding takes me days.
 
Nexy;

I've successfully dry sanded and buffed out the ProFinisher as soon as 4 hours after spraying the final top coats, on rush job repairs. No real problems. But it seems to sand and buff easier after 24-48 hours. So, I normally just wait a day or two on a full finish.

Have you tried dry sanding only, followed by the 3M Super Duty compound yet?
 
  • Like
Reactions: mapleglo
Nexy;

I've successfully dry sanded and buffed out the ProFinisher as soon as 4 hours after spraying the final top coats, on rush job repairs. No real problems. But it seems to sand and buff easier after 24-48 hours. So, I normally just wait a day or two on a full finish.

Have you tried dry sanding only, followed by the 3M Super Duty compound yet?

I'm assembling parts for a buffer that works at a slower speed. I'm hoping to get that together in a day or two. If successful, I'll try the 3M Super duty compound. After a couple of hours of wet sanding today, I'm ready for it :P
 
Some more headstock design inspiration for you. Add some holes and 3-D shaping. It isn't that hard, and it can be very effective visually. These are several of the necks I built for the Rockit Guitar project/company about 10 years ago. Some teardrop holes and hand shaping made these really stand out.

View attachment 1019498
I love these.
 
Dry sanded to 2000. I think I'll try that 3M Super Duty compound next.

2000.jpg


There's a few areas that I sanded through - I think I did that during the clear coat phase, and just didn't notice until now, and a few dots on the top that didn't seem to take the color - weird. I'm forging ahead though - I *will* enter this contest on time. I'm hoping I'll be polishing and then assembling this weekend.