• TalkBass has been independent since 1998. Add your voice.
    Create a free account to reply to discussions, view embedded media, and browse with fewer display ads.
    Join freeLog in
    Want zero display ads or expanded classifieds tools? Compare plans.

Winter 2017 Build Off - Speak of the Devil

See...right there.
That's what pisses me off the most about that place...and why I mentioned talking to Stacy.
A few of the kids who are either occasionally at the front desk, or even when they are on the floor as DC's.... they have a tendancy to sorta make up their own versions of the rules as they go along.
But it is only because they do not have a full grasp of all the policies in place.
I will ask Jon for you.
Because I remember someone saying that weekend activation only was ok.
Ok....so..um...sorry. No weekday dormant status available.
I guess I/we heard that from one of the... .."unqualified to answer such questions'' ...kids who work there.
And if you think about it...it kinda makes sense....well ...or not... depending on your perspective.
 
  • Like
Reactions: GKon
Ok....so..um...sorry. No weekday dormant status available.
I guess I/we heard that from one of the... .."unqualified to answer such questions'' ...kids who work there.
And if you think about it...it kinda makes sense....well ...or not... depending on your perspective.

I'm over it. I called and confirmed my "dormant" second month, which I'll activate sometime this summer, when it's 120 degrees in my garage. In the mean time, I reserved a laser machine for this Saturday at 9:00 AM sharp for cutting up this leather:

leather.jpg


I'll cut the flame pattern into the black, and glue the red behind. I asked about the sewing machines there - yeah, you need to take a class. I started going off on the receptionist - I'm 60 years old, and have been using sewing machines since I'm five. Yeah, that's over half a century. And I apparently need to take a class for "safety" purposes. Well, the leather is pretty thin, I may be able to use the machine I have here at home. Or spray glue. I'm hoping this leather is strong enough for use as a strap. It's pretty thin.

I don't expect cutting the leather will take the entire 2 hours. I'm thinking of making a new truss rod cover for my Rickenbacker. I can cut a piece of maple, and laser etch the Ric logo into it, and use it for my Mapleglo. Maybe I'll make a few extras. And maybe I'll make a few spares out of clear plexi. For personal use, of course.

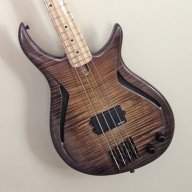
I'll let the clear on the devil bass cure another day, and then try to sand it with the 1000, and then 2000 grit Abralon.

abralon.jpg


The body and neck have at least 20 coats of clear, and are feeling pretty smooth.

body.jpg


I also ordered an 8" bench buffer from eBay. Though I'm thinking I may just leave this as a matt finish. Or satin (satan) as the case may be...
 
Since you bought the Abralon 2000, try that first. If your coats are on there pretty smooth, that may be all you need. No sense putting 1000 grit scratches in there if you can level it with 2000.

Hand sanding, long strokes, in line with the grain. Light pressure, not smashing down the foam. Keep a (clean) bench dust broom handy to brush the white dust off the Abralon. Sand it just enough that it looks like a nice even matte (satin, Satan) finish. The grit lines are hiding any roughness. Then you can start buffing.

Remember to thoroughly shake the 3M Super Duty compound. I squirt a little blob of it into a small tray or bottle cap, then dab a soft (clean) cloth into it. A light wipe on the surface is all you need. It doesn't take much. Work a small area, like 4" x 4" at a time. Wipe a bit on, go over it with the buffer until it's gone, repeat, repeat. It may take two or three times to get the scratches out and bring it up to a gloss.

You can also use the Abralon right along with the buffing. If you buff an area and it shines up but still looks rough, stop buffing and wipe off the excess compound. A couple of light strokes with the Abralon on the rough area, and carry on with the buffing. You'll find that the edges and perimeters and curved surfaces are easy. The big flat areas are harder.

There are gradations between matte and high gloss. I've found that the Super Duty compound alone will take it up to what I call Low Gloss. It's a nice level of shine for many instruments, like a 20 year old finish. Shiny, but not bright white shiny.

For High Gloss, after the Super Duty, buff it with one of the regular rubbing/polishing compounds.

For satin, I just go over it with #0000 steel wool after the Abralon.
 
Had to go to the 1000 grit Abralon. All the little sanding imperfections that I didn't address before painting rears their ugly head. I usually seal grain with epoxy, which I did not do on this body, figuring maple wouldn't need it. Now I'm a little sorry I didn't. At this point, I'm not going back, but will likely do a matt finish. Funny thing about aging vision. I didn't see the imperfections before I pulled out the spray gun. Now I see them as clear as the river Styx.

1000abralon.jpg


There's a bit more to do at 1000 grit before I go to the 2000 grit. Some of the flame is showing up though. Unless that's ripples in the surface.

The bench buffer allegedly arrives tomorrow, just in time.
 
Ouch! Never used a buffing wheel on a guitar yet, that makes me wary. I've watched a lot of the guitar factory tour videos, and they always wax poetic about how experienced the buffing people are, they seem to keep the guitar moving very fast and with a light touch. At least its an isolated area that can be re-touched, still feel your pain.
 
It's all a learning experience. It could be that the cotton wheels that came with the buffer are too stiff. Maybe they need to be wool. At least I didn't try it first with the body.

edit - you know, if I had half a brain, I would have painted up a test piece along with the neck and body, and tried it out on that first.

Live and learn.
 
Last edited:
It's all a learning experience. It could be that the cotton wheels that came with the buffer are too stiff. Maybe they need to be wool. At least I didn't try it first with the body.

edit - you know, if I had half a brain, I would have painted up a test piece along with the neck and body, and tried it out on that first.

Live and learn.

You need flannel unsewn buffs, those sewn cotton ones are for polishing metal. I use them for brass, nickel silver, and stainless steel.
In any case you're going to want to do anything but wide flat surfaces by hand IMO.
 
  • Like
Reactions: mapleglo
You need flannel unsewn buffs, those sewn cotton ones are for polishing metal. I use them for brass, nickel silver, and stainless steel.
In any case you're going to want to do anything but wide flat surfaces by hand IMO.

Geeeeeez, who knew? There is SO much to learn. The devil is in the details - for sure and for certain!
 
Geeeeeez, who knew? There is SO much to learn. The devil is in the details - for sure and for certain!
There's at least six different rouge compounds for the various kinds of metal...sometimes it's difficult to know which is best.;)
 
  • Like
Reactions: BassHappy
Has anyone tried the foam pads like these from Stewmac?
[Invalid or Expired Link Removed]
They have ones at HF that look identical, but could be junk for all I know. They are designed to be chucked into a variable speed cordless drill, which seems like it could be more forgiving run at slower speeds.
 
Just got back from the Tech Shop.

strap1.jpg


Cut out the leather. I figure I'll glue it up, see if it needs stitching as well. Should make an interesting strap. And while I was there, I made a new truss rod cover for my Ric.

mapletrc.jpg


I'll try one with the logo filled in with the epoxy/pearl mix, and leave the other as is. Should look nice on my Mapleglo Ric.
 
Just got back from the Tech Shop.

View attachment 1066176

Cut out the leather. I figure I'll glue it up, see if it needs stitching as well. Should make an interesting strap. And while I was there, I made a new truss rod cover for my Ric.

View attachment 1066180

I'll try one with the logo filled in with the epoxy/pearl mix, and leave the other as is. Should look nice on my Mapleglo Ric.

Nice VERY nice on both - really all fronts!
 
Last edited:
  • Like
Reactions: mapleglo
About the buffing: Aargh. I'm sorry that I didn't step in quickly enough to warn you!

Unfortunately, that buffer is not suitable for buffing out paint finishes. It spins at 3450 rpm, which is way too fast. Plus, as the others have mentioned, those wheels are too stiff. With that combination, it will instantly apply too much heat to a small spot, and melt the paint right off. As you found out.

Even with softer wheels, 3450 is too fast. One of my bufffers is switchable between 1725 and 3450, and I've experimented with buffing at 3450 using 6" unsewn cotton wheel. Moderate success, but it was scary. Too easy to dwell a bit long and start melting the paint. And it wasn't really speeding things up. The faster the wheel spins, the more the centrifugal force holds it out in a circle. So, the contact area is less. Slower speed with a softer wheel and a bit more pressure buffs a larger area with less heat buildup.

What I recommend is to use 6" x 1/2" wide unsewn cotton or flannel buffing wheels, spinning at anywhere from 500 to 1200 rpm. That's a safe range that works quickly with minimal risk. It's still possible to burn through at sharp edges, but you have to try pretty hard.

The simplest way to get that speed range is with a handheld variable speed electric drill. Ideally, one with a keyless chuck. With a couple of wheels mounted on the little 1/4" shaft arbors, you can quickly swap them back and forth as you work around the instrument.

If you want to do stationary buffing (bench mounted buffing wheels, handholding the instrument) then you need to rig up an arbor shaft with pillow block bearings, with a belt drive and pulleys to get the speed down to around 1000 rpm. If you want to use larger wheels, like 8" or 12", then the shaft speed has to go even lower. More like 500 rpm for 12" wheels.

I get my buffing wheels from McMasters, but there are many other sources. Here's an 8" dia x 1" wide unsewn cotton wheel on Amazon as an example of the type of wheel that you want.
Extra Thick Loose Cotton Buffing Wheel, 8" (80 Ply) - Power Rotary Tool Buffing Wheels - Amazon.com

This is the type of arbors I prefer:
Heavy-Duty 1/2" Threaded Arbor Mandrel 1/4" Long Shank - Fits Wheels Discs to 1" Thick - Taiwan - Power Grinder Accessories - Amazon.com

The buffer that you bought is actually fine for polishing metal. As you are getting more into making your own custom metal hardware, you'll use it. For buffing aluminum parts, I normally use sewn cotton wheels (which are on there now) and just the black Emory compound. If you really want to get into metal polishing, you can use the various grades of compounds. But for generally shining up aluminum parts, Emory alone is fine.
Amazon.com: Enkay 140-BL 1-Pound Black Emery Compound, Carded: Home Improvement

One accessory that you should eventually get for your metal buffer is a Finishing Wheel. This is a semi-hard wheel that's halfway between a grinding wheel and a Scotchbrite wheel. It's semi-hard and porous, made for deburring, rounding edges, and smoothing scratches out of metal parts. A tremendous time saver when making metal parts. I use mine many times every day. They're not real cheap, but they will last many years. They are available in different grades and sizes, which can get confusing, but here's an example:
Amazon.com: 3M DEBURRING WHEEL GENERAL PURPOSE WHEEL 6x1x1 9S-FIN # 64900 CLEANING FINISHING (E 13) NOVELTOOLS: Arts, Crafts & Sewing

 
As an Amazon Associate, TalkBass may receive commissions from qualifying purchases made via links on this site.