• TalkBass has been independent since 1998. Add your voice.
    Create a free account to reply to discussions, view embedded media, and browse with fewer display ads.
    Join freeLog in
    Want zero display ads or expanded classifieds tools? Compare plans.

Winter 2019 Build Off - The Carl Factor

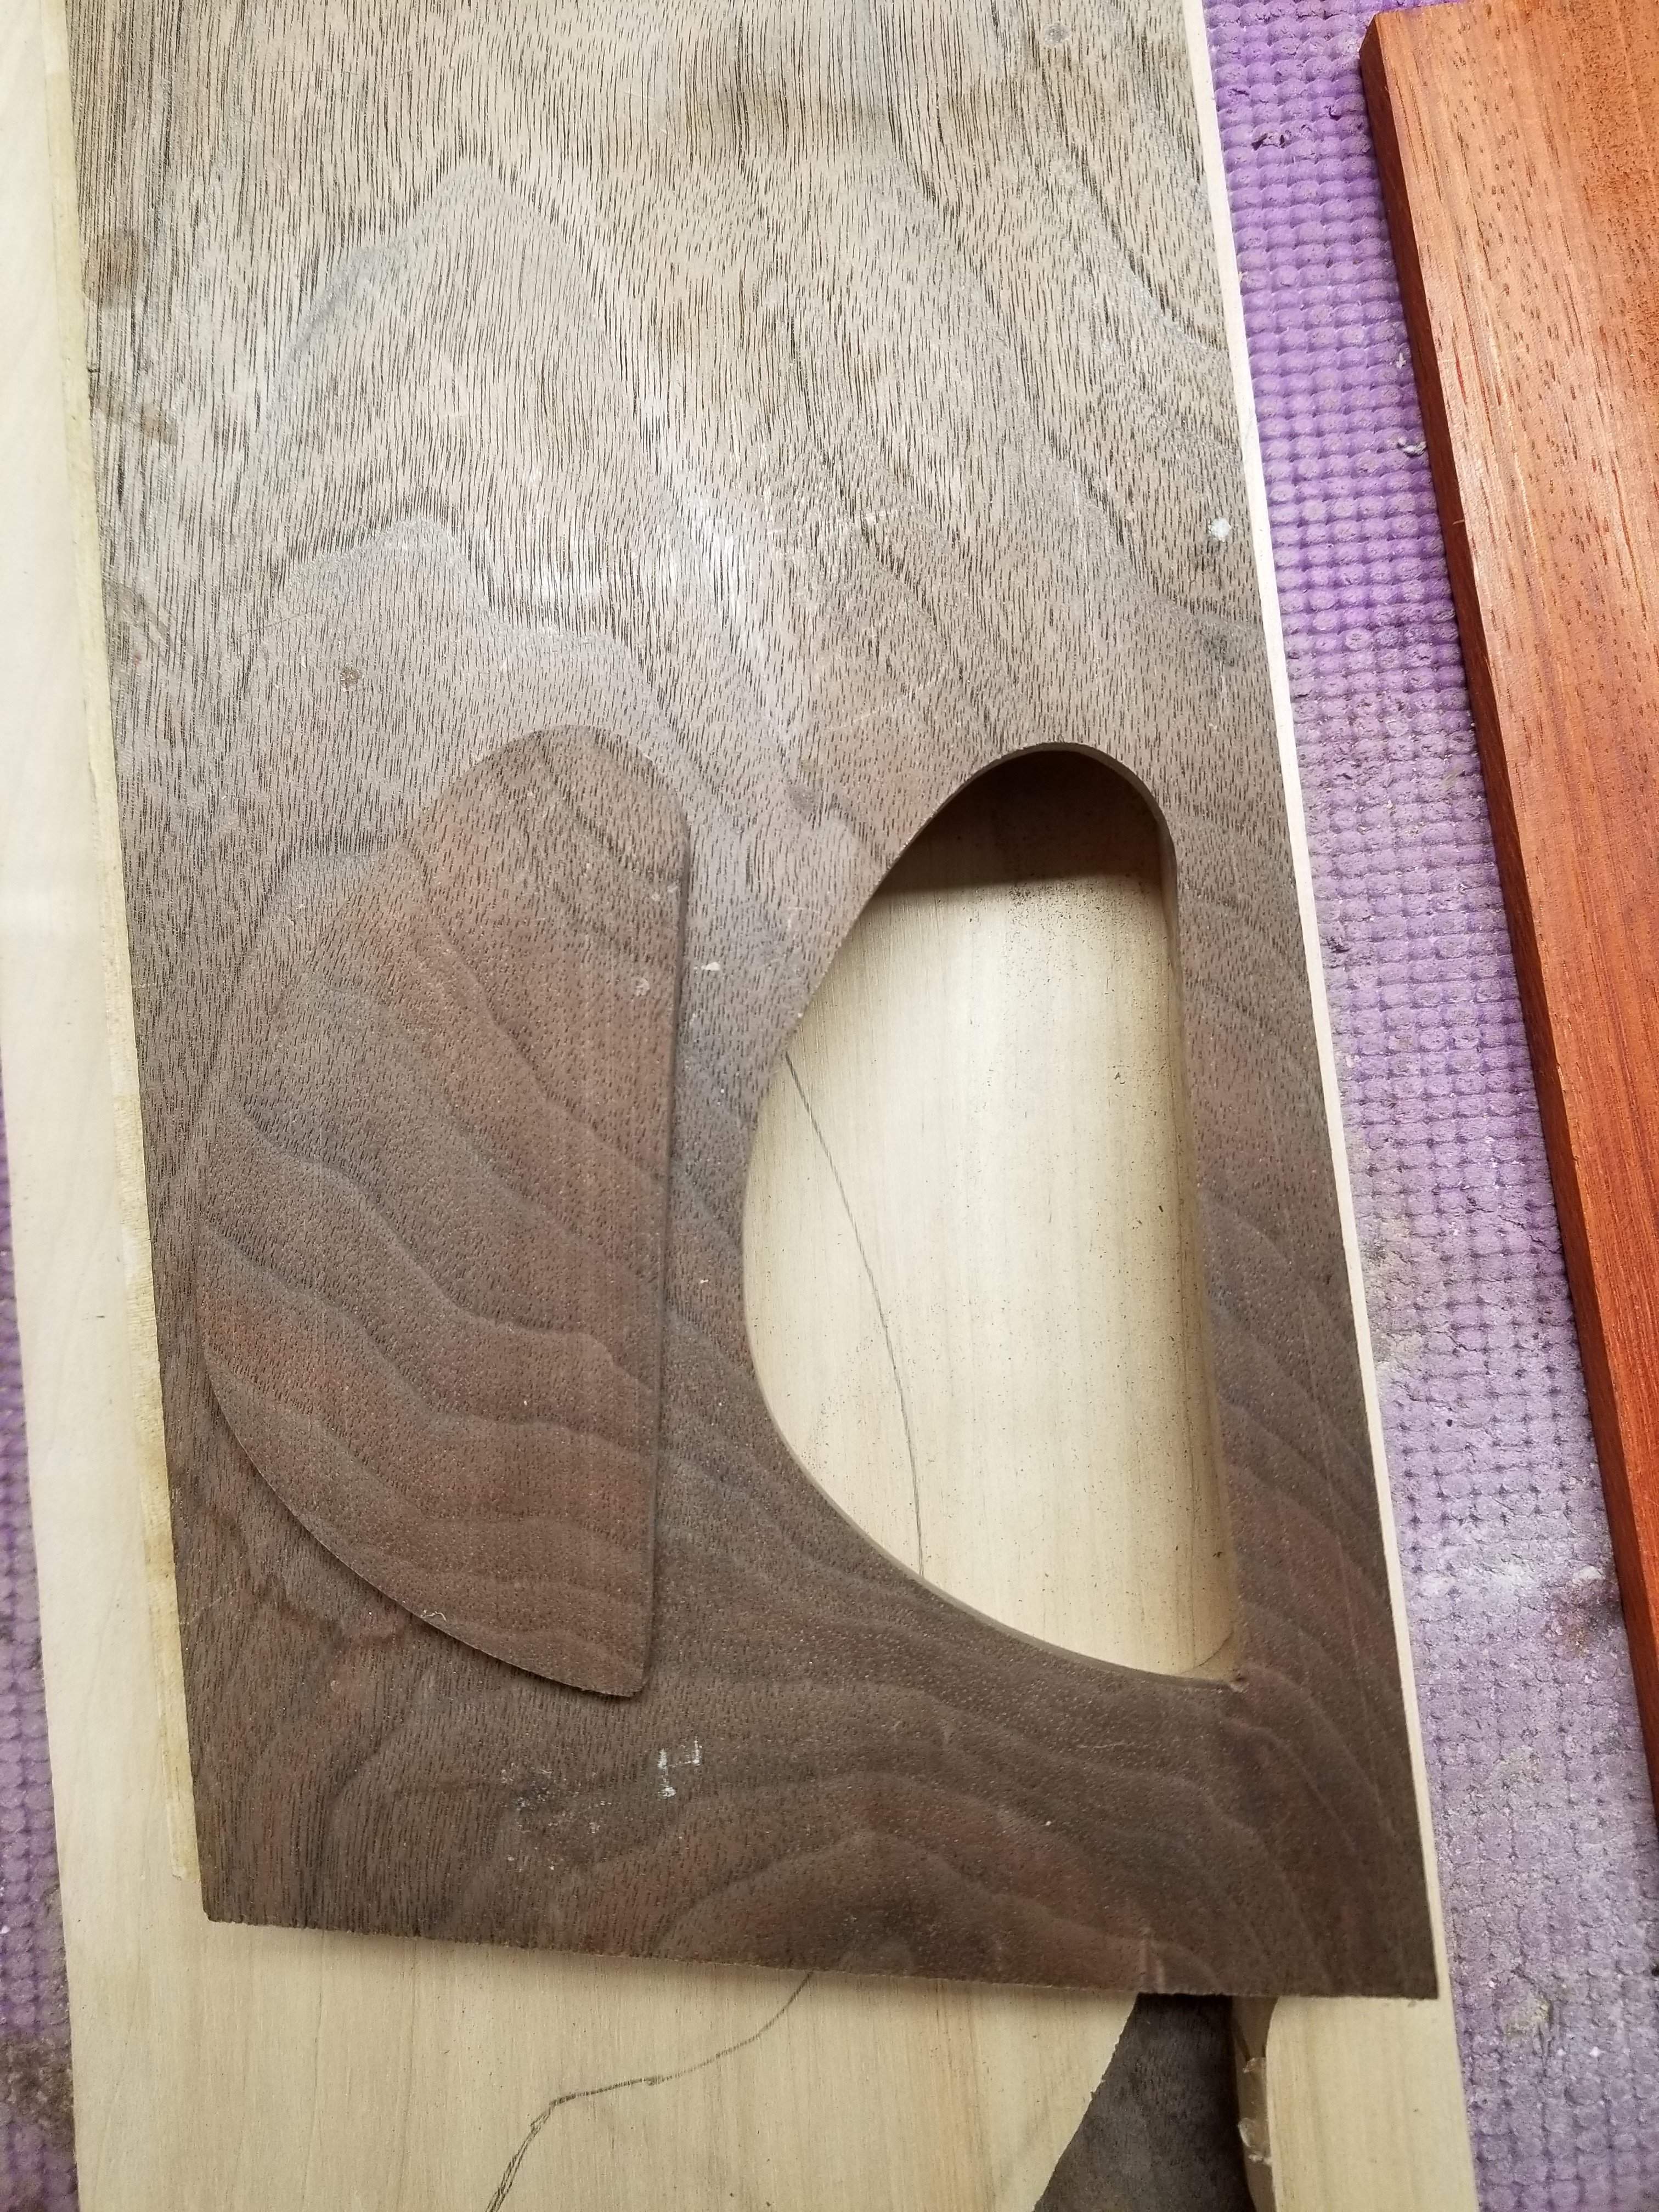
I got the control cover cut out, I'm getting good at this now, this one is the smoothest I've done, and the last one before this was the smoothest before that.
20181228_113133.jpg

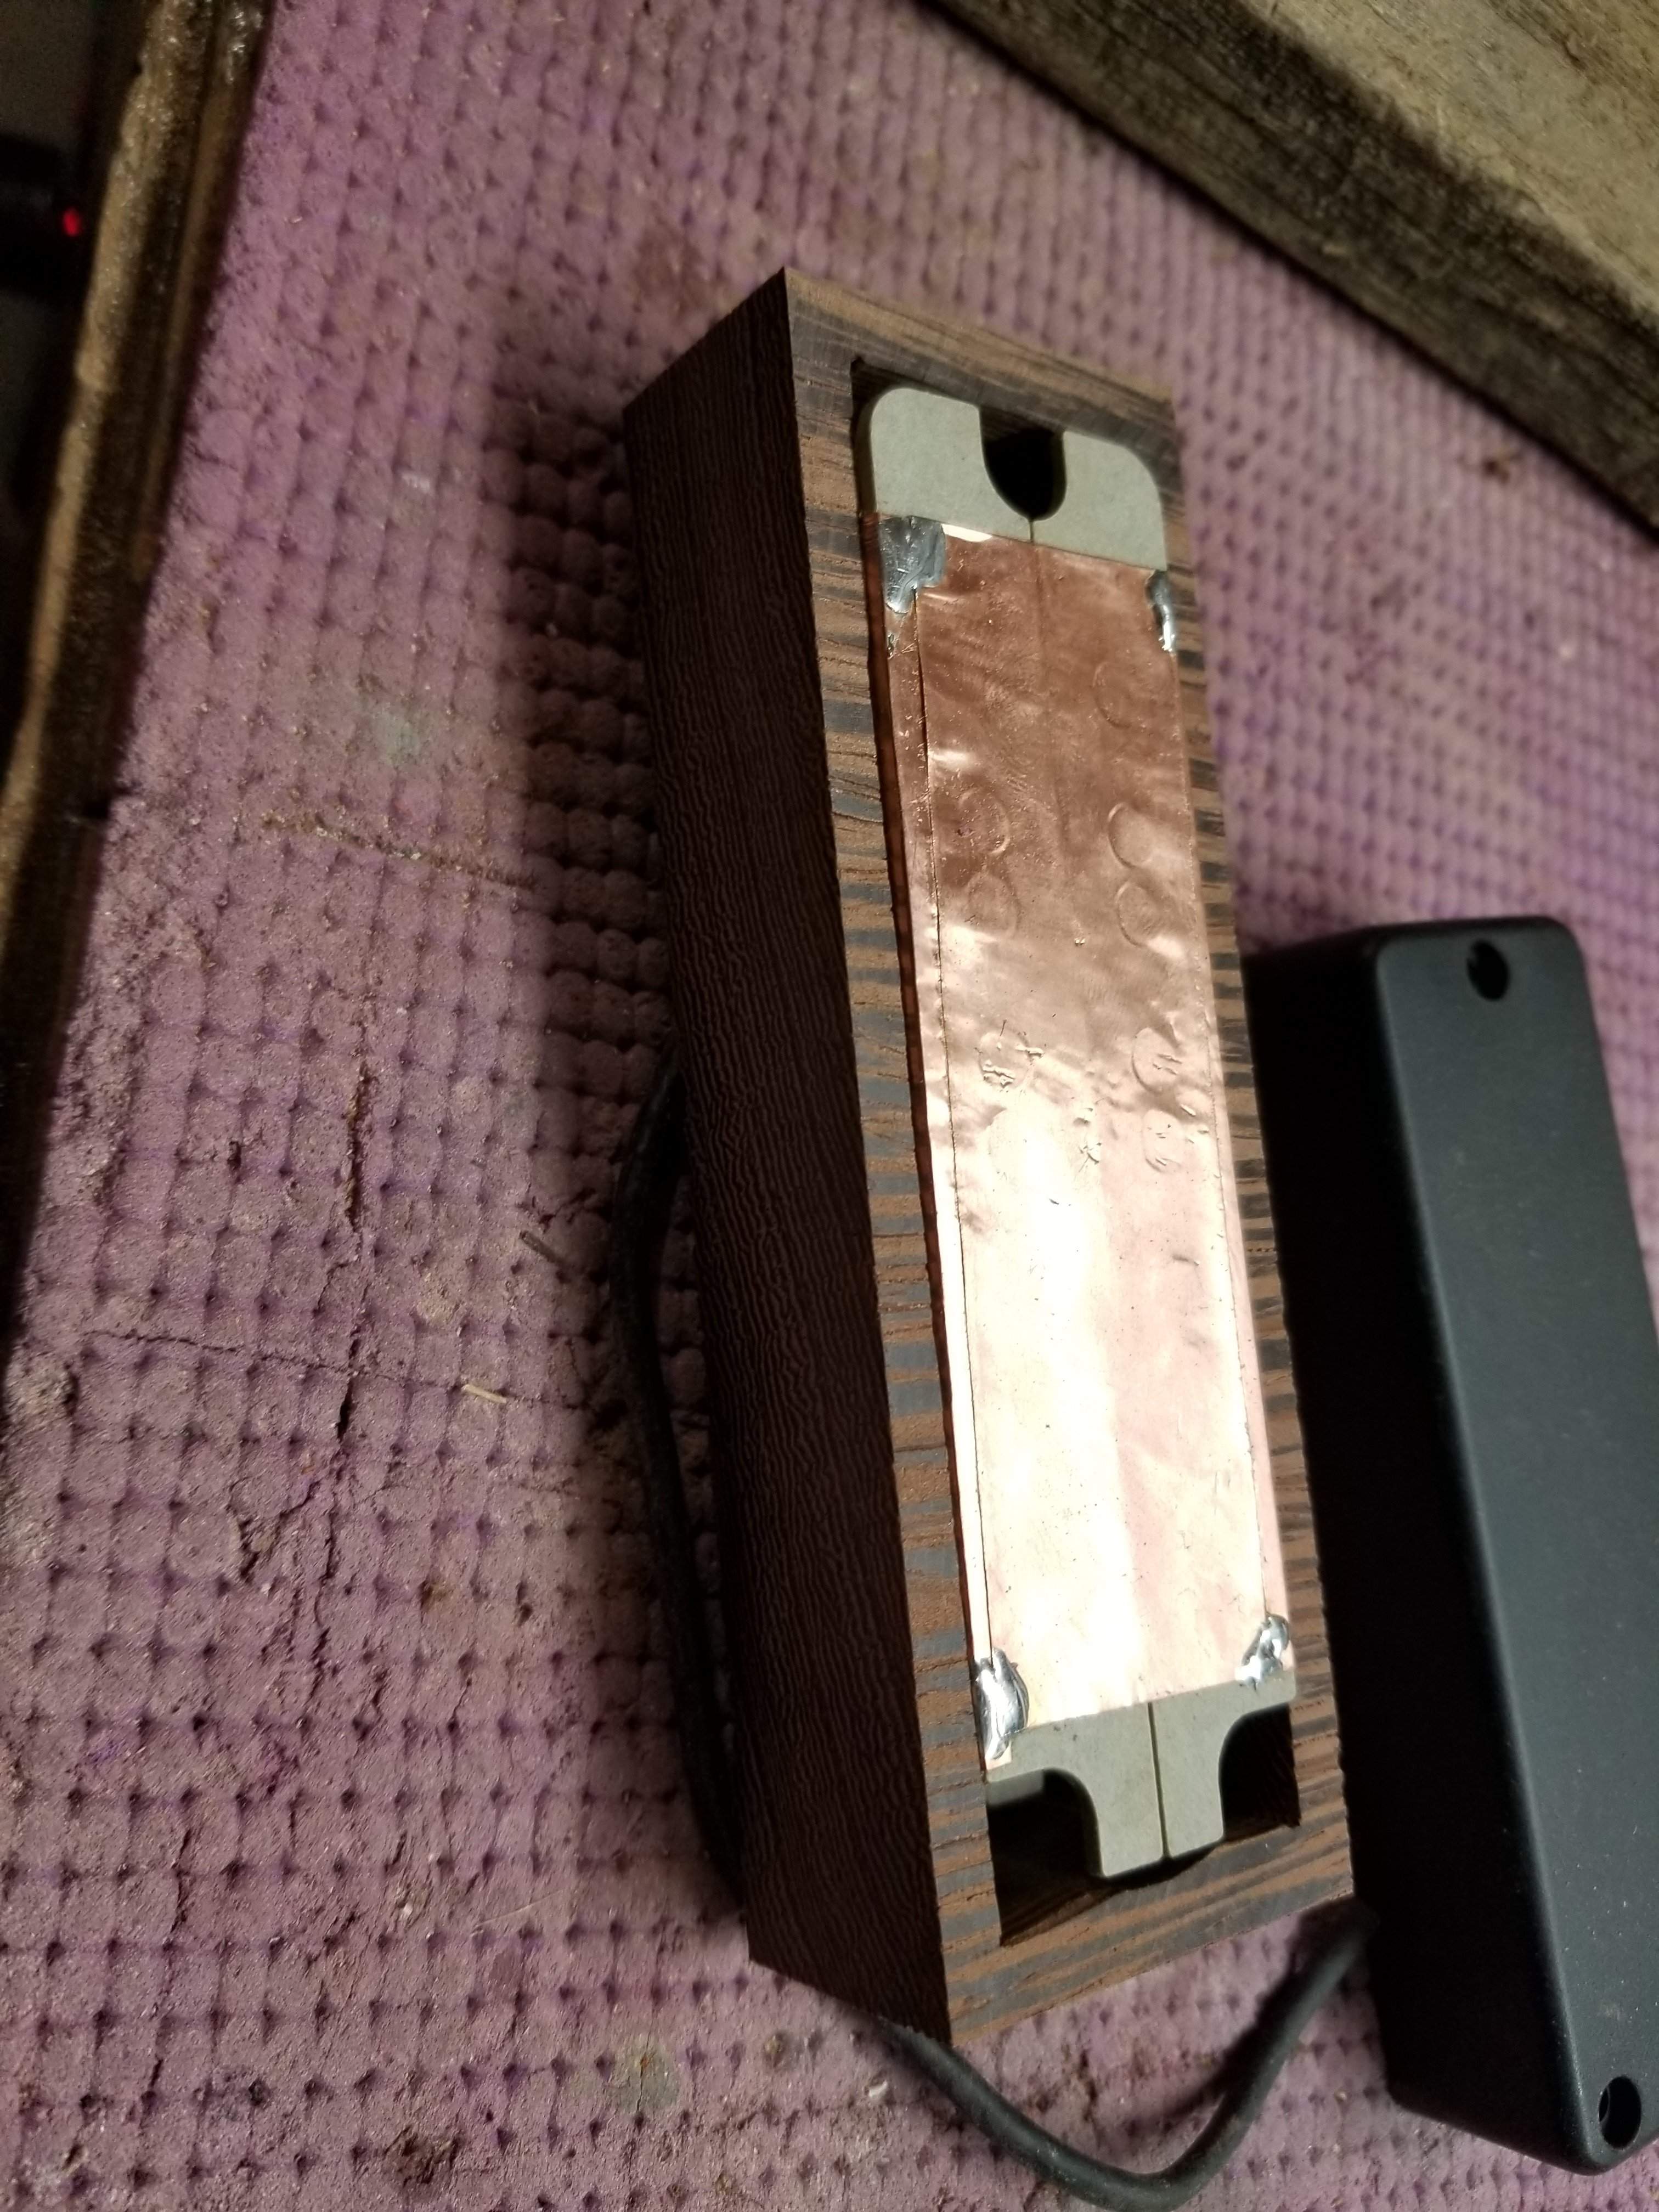
and I started working on the pickup covers. This is v2, v1 exploded because the sides were too thin. I'll put a top on this that is a combination of wenge, maple and padauk, I think. The challenge is going to be making a second one that is exactly the same dimensions.
20181228_121719.jpg
 
I got the control cover cut out, I'm getting good at this now, this one is the smoothest I've done, and the last one before this was the smoothest before that.
View attachment 3262967
and I started working on the pickup covers. This is v2, v1 exploded because the sides were too thin. I'll put a top on this that is a combination of wenge, maple and padauk, I think. The challenge is going to be making a second one that is exactly the same dimensions.
View attachment 3262968

Nice looking cover. What is your process? When I make wooden pickup covers I drill and chisel the cavity first and then cut and sand it to size. The helps keep the size consistent and keeps them from exploding when you just nearly finished working on them. I have never tried it but making a filler blank the same size as the pickup would be helpful to provide support for final shaping if you want to go really thin with the wooden cover.
 
Nice looking cover. What is your process? When I make wooden pickup covers I drill and chisel the cavity first and then cut and sand it to size. The helps keep the size consistent and keeps them from exploding when you just nearly finished working on them. I have never tried it but making a filler blank the same size as the pickup would be helpful to provide support for final shaping if you want to go really thin with the wooden cover.
For the cover, it's pretty simple. I route the control cavity out of the core wood, then glue the back on (if there is one), then before I glue the top on I drill a pilot hole in the back, and cut it out using a scroll saw. The scroll saw my dad has doesn't have any pins in the ends of the blades, so you can drill a tiny hole, which is only slightly larger than the kerf of the blade. I'll fill what remains of the drill hole with a splinter of wood, but that's almost not necessary. This gives me a perfect match to the hole and only smaller by the kerf of the scroll saw, which is a perfect gap. Prior to doing them this way I would make a cover manually to fit the hole I cut, it worked, but it took forever, and of course the cover doesn't match the back wood.

I've done pickup covers before, but the grain in wenge is so coarse that it splinters really easily on those thin walls, I got them done (see below).
 
Another couple hours this afternoon, I was thinking while working "what if this was my job, how much I would enjoy going to work", of course things are a lot different when you're doing things for fun than when you've got to pay the bills.

I got the pickup covers done. I went with a wenge top and two padauk stringers on the top and bottom. Well my wife actually came up with the idea. I think they look great.
20181228_131605.jpg

I glued the tops together with CA glue and I hardly swore at all. I only stuck my fingers together once, but to the wood thousands of times.
20181228_140859.jpg

They are pretty dang close to exactly the same size, once the glue is fully dry I can cut a little off each end, they're a bit longer than they need to be.
20181228_155623.jpg

I took the neck blank out of the clamps and use the hand plane to take off the wenge/padauk overhang. Wow that worked great and much less stress than trying to run it through the table saw or whatever.
20181228_151243.jpg

Then I added tiger maple strips that will go between the wings and the neck. They are just a bit proud of the front and I'll use the hand plane to bring them in.
20181228_154146.jpg

Once that glue is dry I can finalize the positioning of the wings. I have the body shape drawn on them, but the maple strips will push it out a bit, so I'll need to adjust for that. I saw those stringers in a Carl Thompson bass, so I figured I should add them here, they weren't part of the original plan.

I cleaned up the shop a bit and got my tablesaw connected to the dust collection system. I had a little time left and was trying to think of something to do, so I started looking at control cavity layout. This is unheard of in a Jisch build, usually I start working this out as I'm jamming everything into the tiny cavity swearing at myself for not planning better. I routed a pocket for a 9v and the preamp, so cool that Audere makes the preamp the same size as a 9v battery, if you plan correctly, it's nice and compact.
20181228_163235.jpg

I bet I got a solid 9 hours in the shop today, so great.
 
This is looking really good. I’ve been thinking of making a pocket like that to take the batteries - I’ll be interested to see your solution for keeping it in there.
The tension of the wires should hold it in, but I should try to design something more definitive before I put the top on. Also I'll have to figure out how to keep glue out of that pocket.
 
Last edited:
I pulled the neck blank out of the clamps. It looks good, I planed down the front and back with the hand plane, loving that tool.
20181229_074621.jpg

I then had to finalize the neck cut out on the top. It seems like I haven't done this in a while. I cut the hole big with scissors then taped in pieces of paper, that way the hole is perfect. It's much more accurate than cutting with scissors.
20181229_080824.jpg

I taped it onto the top and traced it. I found that the lower bout looked small so I redrew it. I'll let it sit for a bit and come back and look at it again before I commit to cutting the top. Once the top is cut I'll trace it onto the body and cut them out before I glue them up. I'll have to see to what degree I cut them out. I'll likely just cut big and bring it in once everything is glued up. Of course some of those tight cuts on the upper horn would be far easier before it's glued to the neck.
 
Really the only important cut here is for the neck pocket. I took it slow and sanded out to the line. I sand at an angle with the bottom flared out, then when the bottom fits I work my way up until it all fits. I had to keep track of the back end too, to make sure the middle of the joint matched up with the middle of the neck joint. As I get it close I make pencil marks where the wood hits and sand those spots.
20181229_120305.jpg

Once I had that cut out I cut the rest of the body.
20181229_120251.jpg

Then I transferred that to the body wood. I'll cut that out this afternoon. It looks like I have to plane down the body wood a touch otherwise I'm going to lose a lot of the wenge on the back.
20181229_121104.jpg
20181229_121022.jpg
 
Next up pickup cover holes. I cut them in the top with my scroll saw. I cut close to the line, then used a file to make it perfect. I'll have to expand the holes a bit to allow for freer movement of the covers, but it's a good starting point.
20181229_143456.jpg

Once I got the holes in the top done, I transferred their locations to the wings and neck blank. The neck blank I cut on the bandsaw (as the hole goes all the way across the blank) and used the router on the wings. I make the holes in under the top bigger than the ones in the top so there isn't any binding later on.
20181229_151937.jpg

and with the pickup covers in place and all the way down in the holes.
20181229_151957.jpg

Once I was happy with the routes I glued the lower wing on.
20181229_153524.jpg
Then I started working on the fingerboard. My intention is to put binding on it. The binding will be thin strips of padauk and wenge, if all goes well. I've never done binding before, it's not a big deal except I'll have to figure out how to make a perfectly sized fingerboard leaving room for the binding with a glueable edge. Usually I cut the fingerboard a little big, glue it on and either sand or use a router to bring it in. I'll probably just make something for the table saw.

I also marked fret locations on the back of the board using a utility knife, once you lose the square edges that becomes problematic, and I've found that pencil marks can easily get wiped off. I plan on putting fret markers on the side of the binding.
20181229_162331.jpg
 
Before going to bed last night I glued up the bass side wing, all looks good. I put a piece of fuzzy velcro inside the battery compartment, that should hold the battery in there just with pressure, but I could stick the loop side on to the battery if I needed more (I doubt I will). I also blocked off the battery compartment with tape so glue doesn't get in there, it wouldn't take much to make it too tight for the battery.
20181230_072047.jpg

And just as I had glued everything up I realized I forgot to make an indentation in the control cavity for the jack. I'll have to do the ship in a bottle thing once everything is together. Dang it. I would have been so easy to do (and look the jack is RIGHT THERE in my face). Oh well, I've done it before. I test fitted the top and could easily get contact all the way around just with finger pressure, so time to glue up.

I'll take the five yard penalty for illegal use of clamps. Surprisingly I still have a few stragglers that didn't get used, I didn't have to use any of my pipe clamps :roflmao:.
20181230_074253.jpg

I guess I'll work on that fingerboard this afternoon, but it's off for a mountain bike ride with friends this morning!
 
I couldn't help myself from working on the body. I cut it close with the bandsaw then moved to the oscillating drum sander to finalize the curves. Of course the inside of that top horn is crazy. I was able to get some of it done with a smallest drum, but I couldn't get all the way in there. I cut a little away with my scroll saw (this is entirely too thick for the scroll saw, but I got a couple of cuts in).
20181230_164318.jpg

There are no gaps in any of the glue ups, which is pretty dang cool.
20181230_171434.jpg

I drew some contours, this will look cool when it's carved
20181230_171454.jpg
20181230_171444.jpg

I also planed down the wenge on the back, it was about 1/32nd proud of the other back wood.

I also enlarged the pickup cover cavities, they are tight, but not too tight. I'll probably need to do this one more time to make room for the finish.

This is the plan for the binding, I'm not 100% sold on it yet.
20181230_172618.jpg

I also worked out the carving needed for the tuners. It ends up the baseplate needs to be recessed about .1", then I'll need to carve out underneath it so you can get your fingers on the knobs.
 
I got some work done on the fingerboard. I don't like lines on fretless boards, but the wenge fingerboard is interesting. Hmmm.

Here's where I'm at now:
I glued up the binding, I suspect these will be throw aways, I figured out better ways to do each step after I did them poorly, but who knows, maybe I'll get lucky
20181231_080316.jpg
and I roughed in the fingerboard
20181231_080321.jpg

Off for another ride.