

Enjoy the benefits of a premium membership!
Upgrade Account
-
TalkBass has been independent since 1998. Add your voice.
Create a free account to reply to discussions, view embedded media, and browse with fewer display ads.
Join free Log in
Want zero display ads or expanded classifieds tools? Compare plans.
You are using an out of date browser. It may not display this or other websites correctly.
You should upgrade or use an alternative browser.
You should upgrade or use an alternative browser.
More options
Who Replied?

Fretting is my least favorite part of the job.
I'm not a fan either.
I fret not


Ok, see how I said up there /\ that the bridge was not symmetrical? Apparently I know that now, and I knew it at some point in the past, but at the moment when I routed for it I must have had a lapse or something. I don't know, but I routed as if it was symmetric, so the centerline of the strings was off by over a 1/4". I figured it out after I routed the neck pocket, I got a really nice pocket, but when I stood back everything looked crooked and off center.
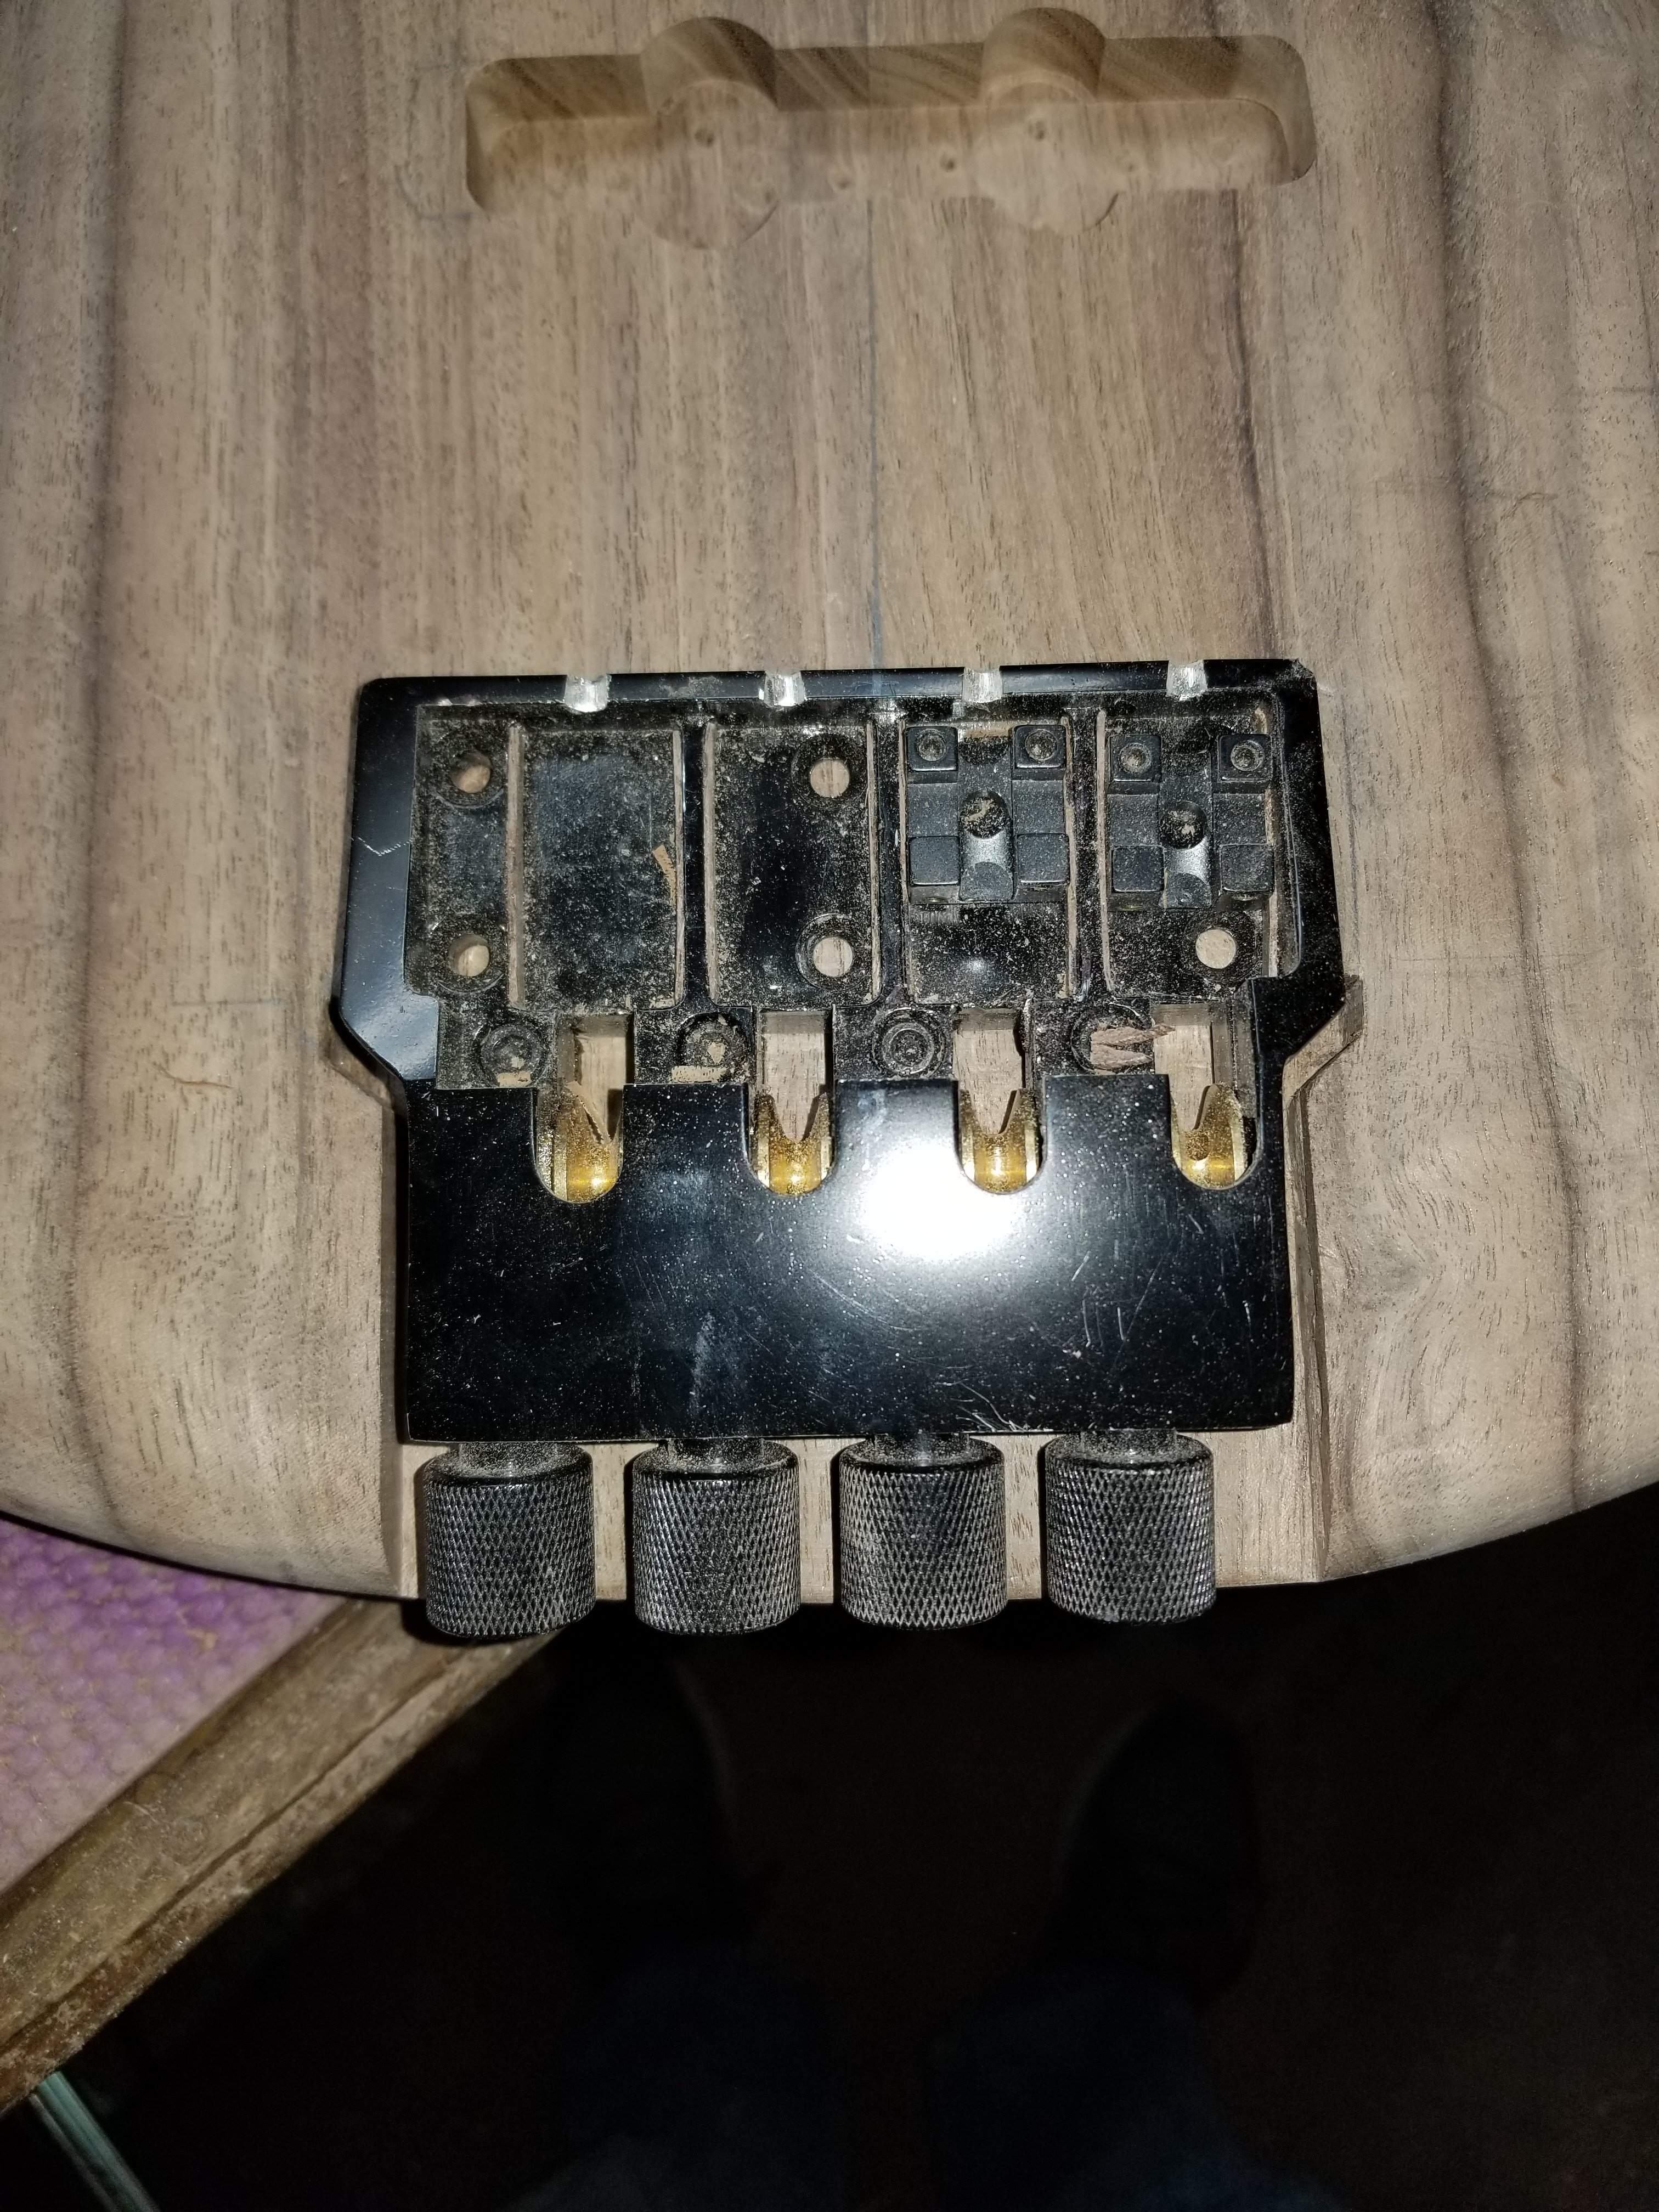
Heart sinking moment.
My first inclination was to just keep going and ignore it, which is what I did. After doing the heel transition and holding the neck up to the body it was obvious this was not a good way forward. I decided I had to deal with it. I moved the bridge over by twice the amount it was off. I'll fill in the voids with some contrasting wood, or maybe the cutoff from the fretboard, it should look nice and no one except me and you will know why I did that.
I routed the neck pocket again, luckily it was off to the treble side so I had material there, now it looks straight
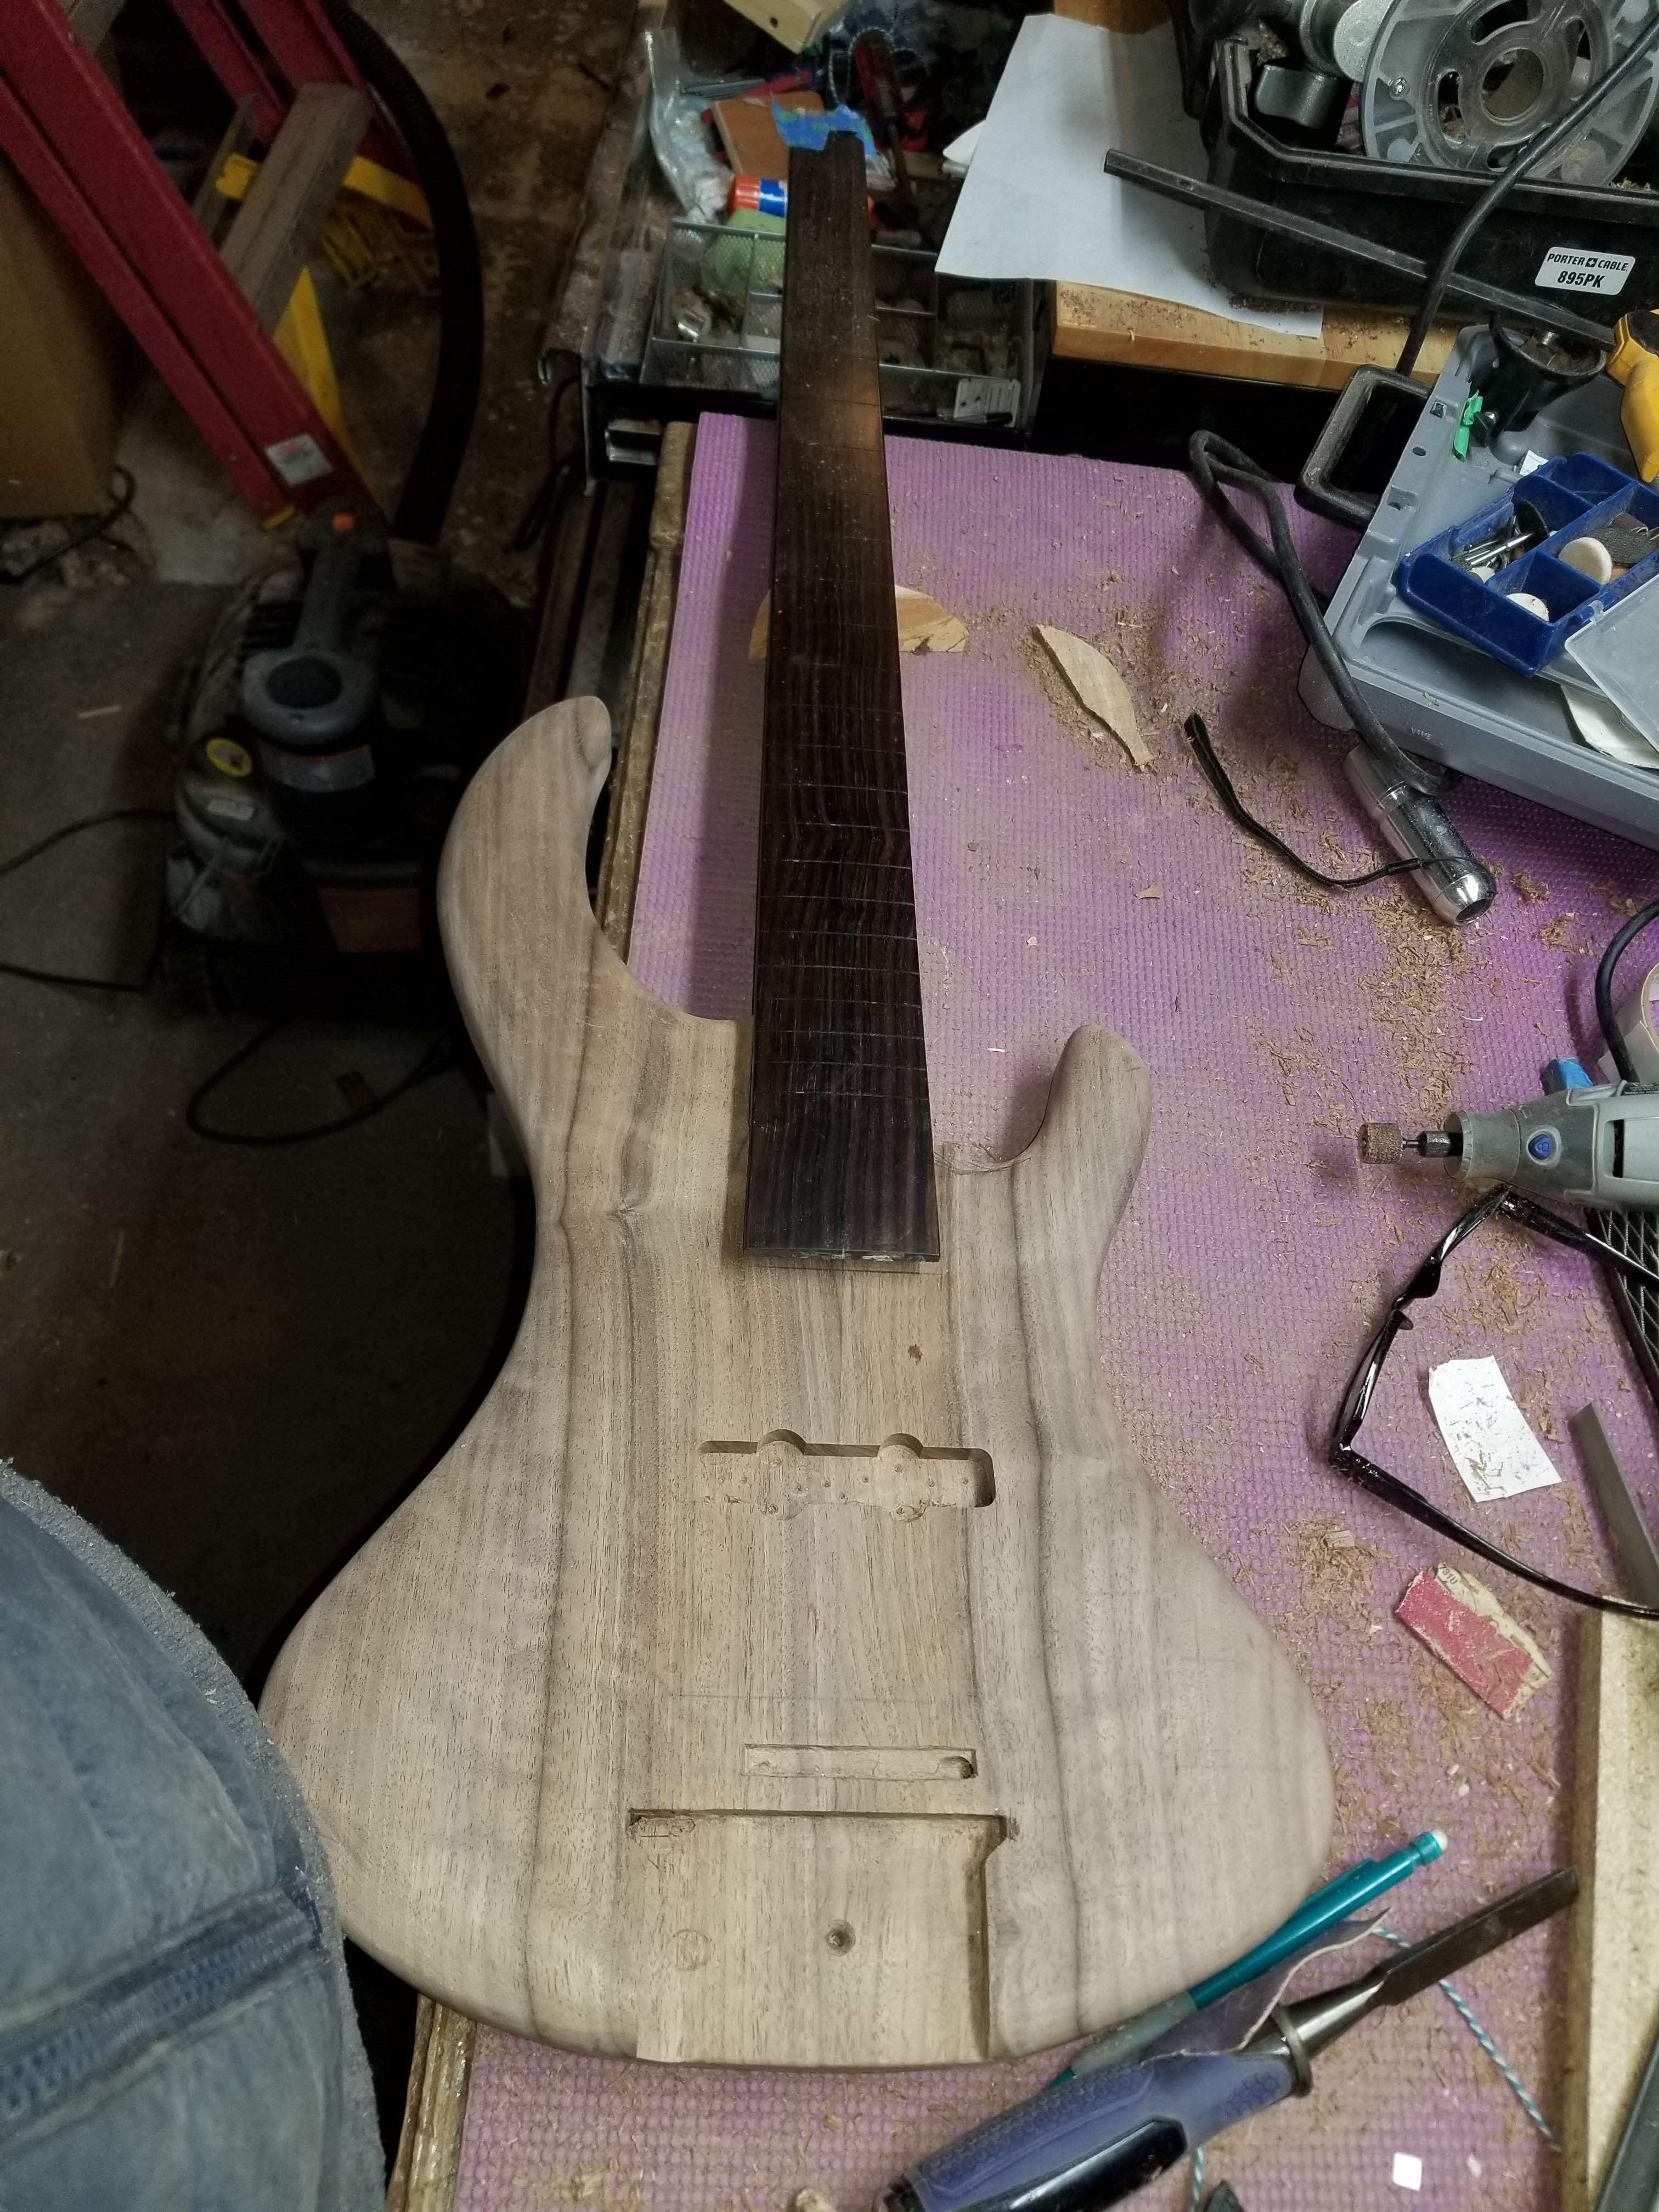
I'll make a wooden cover for the pickup, I think, I haven't figured that out yet. Onwards and upwards, I guess it's good I made such great progress in the beginning, I might need it!
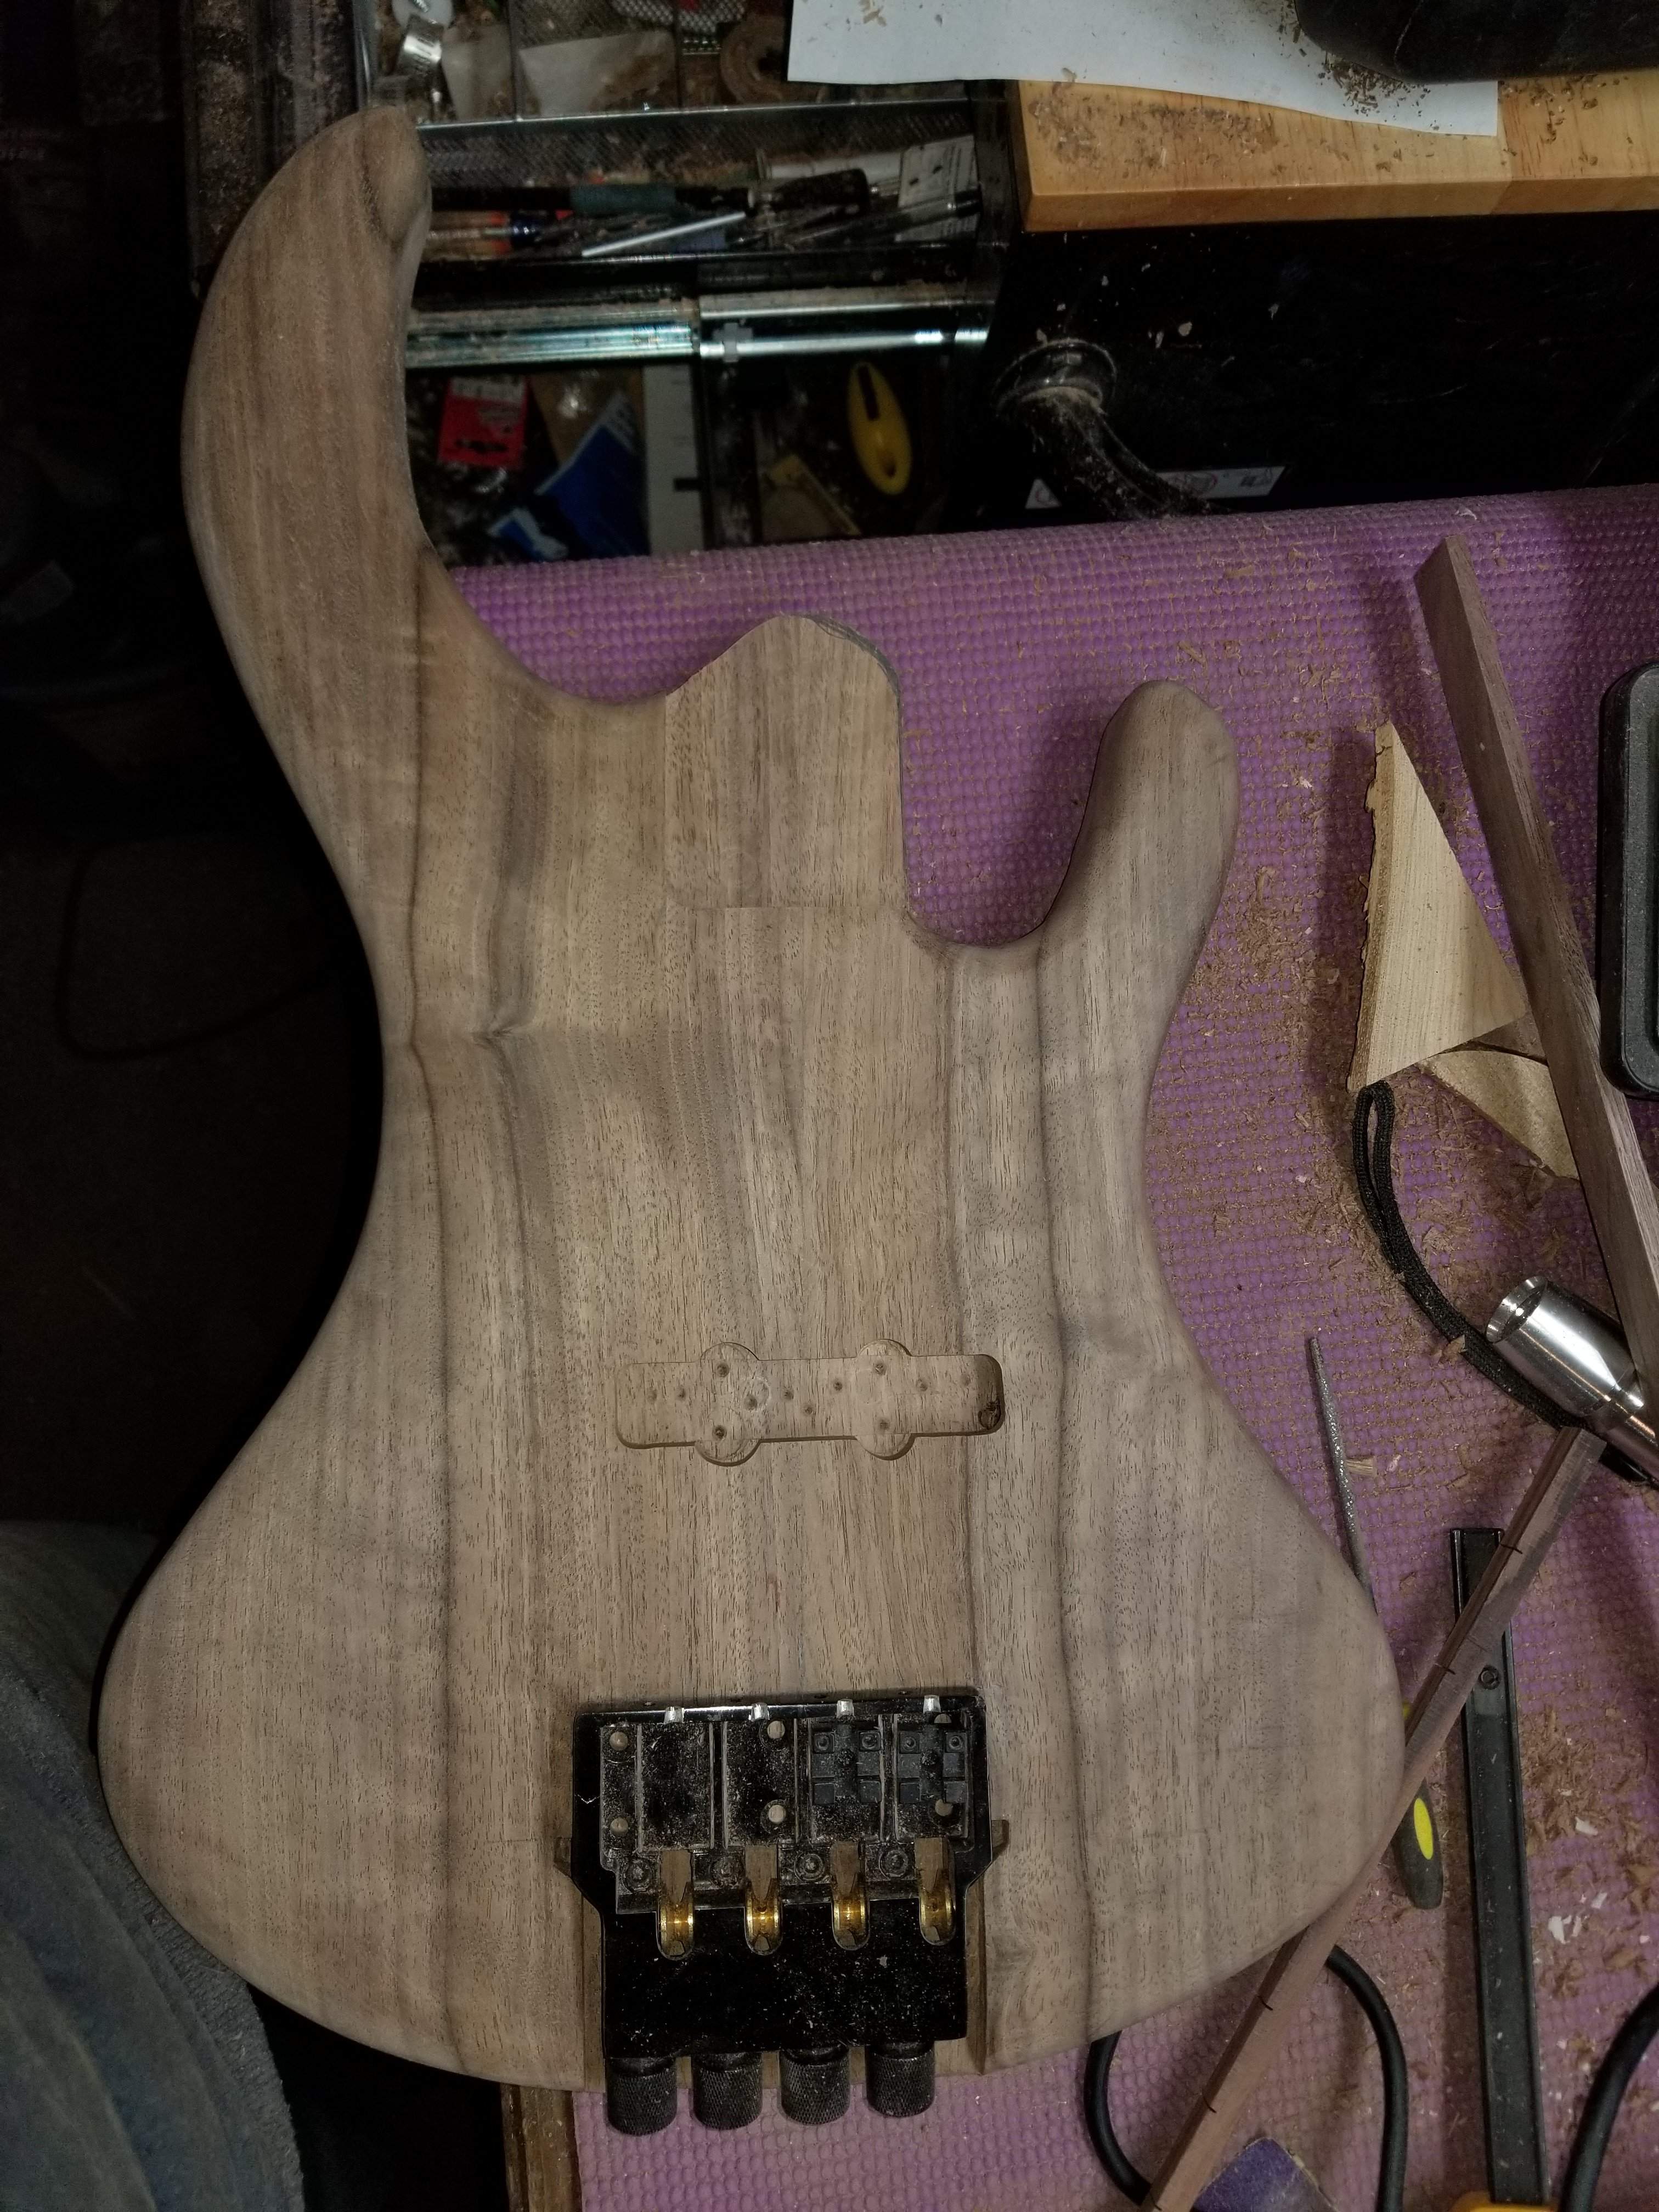
Heart sinking moment.
My first inclination was to just keep going and ignore it, which is what I did. After doing the heel transition and holding the neck up to the body it was obvious this was not a good way forward. I decided I had to deal with it. I moved the bridge over by twice the amount it was off. I'll fill in the voids with some contrasting wood, or maybe the cutoff from the fretboard, it should look nice and no one except me and you will know why I did that.
I routed the neck pocket again, luckily it was off to the treble side so I had material there, now it looks straight
I'll make a wooden cover for the pickup, I think, I haven't figured that out yet. Onwards and upwards, I guess it's good I made such great progress in the beginning, I might need it!

Tell me to mind my own business but how about buying it a new bridge?.....Ok, see how I said up there /\ that the bridge was not symmetrical? Apparently I know that now, and I knew it at some point in the past, but at the moment when I routed for it I must have had a lapse or something. I don't know, but I routed as if it was symmetric, so the centerline of the strings was off by over a 1/4". I figured it out after I routed the neck pocket, I got a really nice pocket, but when I stood back everything looked crooked and off center.
View attachment 2866889
Heart sinking moment.
My first inclination was to just keep going and ignore it, which is what I did. After doing the heel transition and holding the neck up to the body it was obvious this was not a good way forward. I decided I had to deal with it. I moved the bridge over by twice the amount it was off. I'll fill in the voids with some contrasting wood, or maybe the cutoff from the fretboard, it should look nice and no one except me and you will know why I did that.
I routed the neck pocket again, luckily it was off to the treble side so I had material there, now it looks straight
View attachment 2866890
I'll make a wooden cover for the pickup, I think, I haven't figured that out yet. Onwards and upwards, I guess it's good I made such great progress in the beginning, I might need it!
View attachment 2866891

I think I have a good solution, but I'll keep that in mind if things don't go well here.Tell me to mind my own business but how about buying it a new bridge?.....
I think I have a good solution, but I'll keep that in mind if things don't go well here.
 ...
...
Sometimes building is such a head game, I get really invested in these things. I'm disappointed that I made that mistake, I just have to move on I suppose. I think if I said "I'm going to create a cool border around the bridge" in the first post no one would know the difference. Oh well. I have to get this out of my head and move on.
I'll get outside today and burn some calories, that always helps.
I'll get outside today and burn some calories, that always helps.

Sometimes building is such a head game, I get really invested in these things. I'm disappointed that I made that mistake, I just have to move on I suppose. I think if I said "I'm going to create a cool border around the bridge" in the first post no one would know the difference. Oh well. I have to get this out of my head and move on.
I'll get outside today and burn some calories, that always helps.
I think half of building is creating innovative solutions to the mistakes we make, such that in the end, it either disappears, or looks like it was designed that way.
Ok, let's say goodbye to this pity party and get back to work.
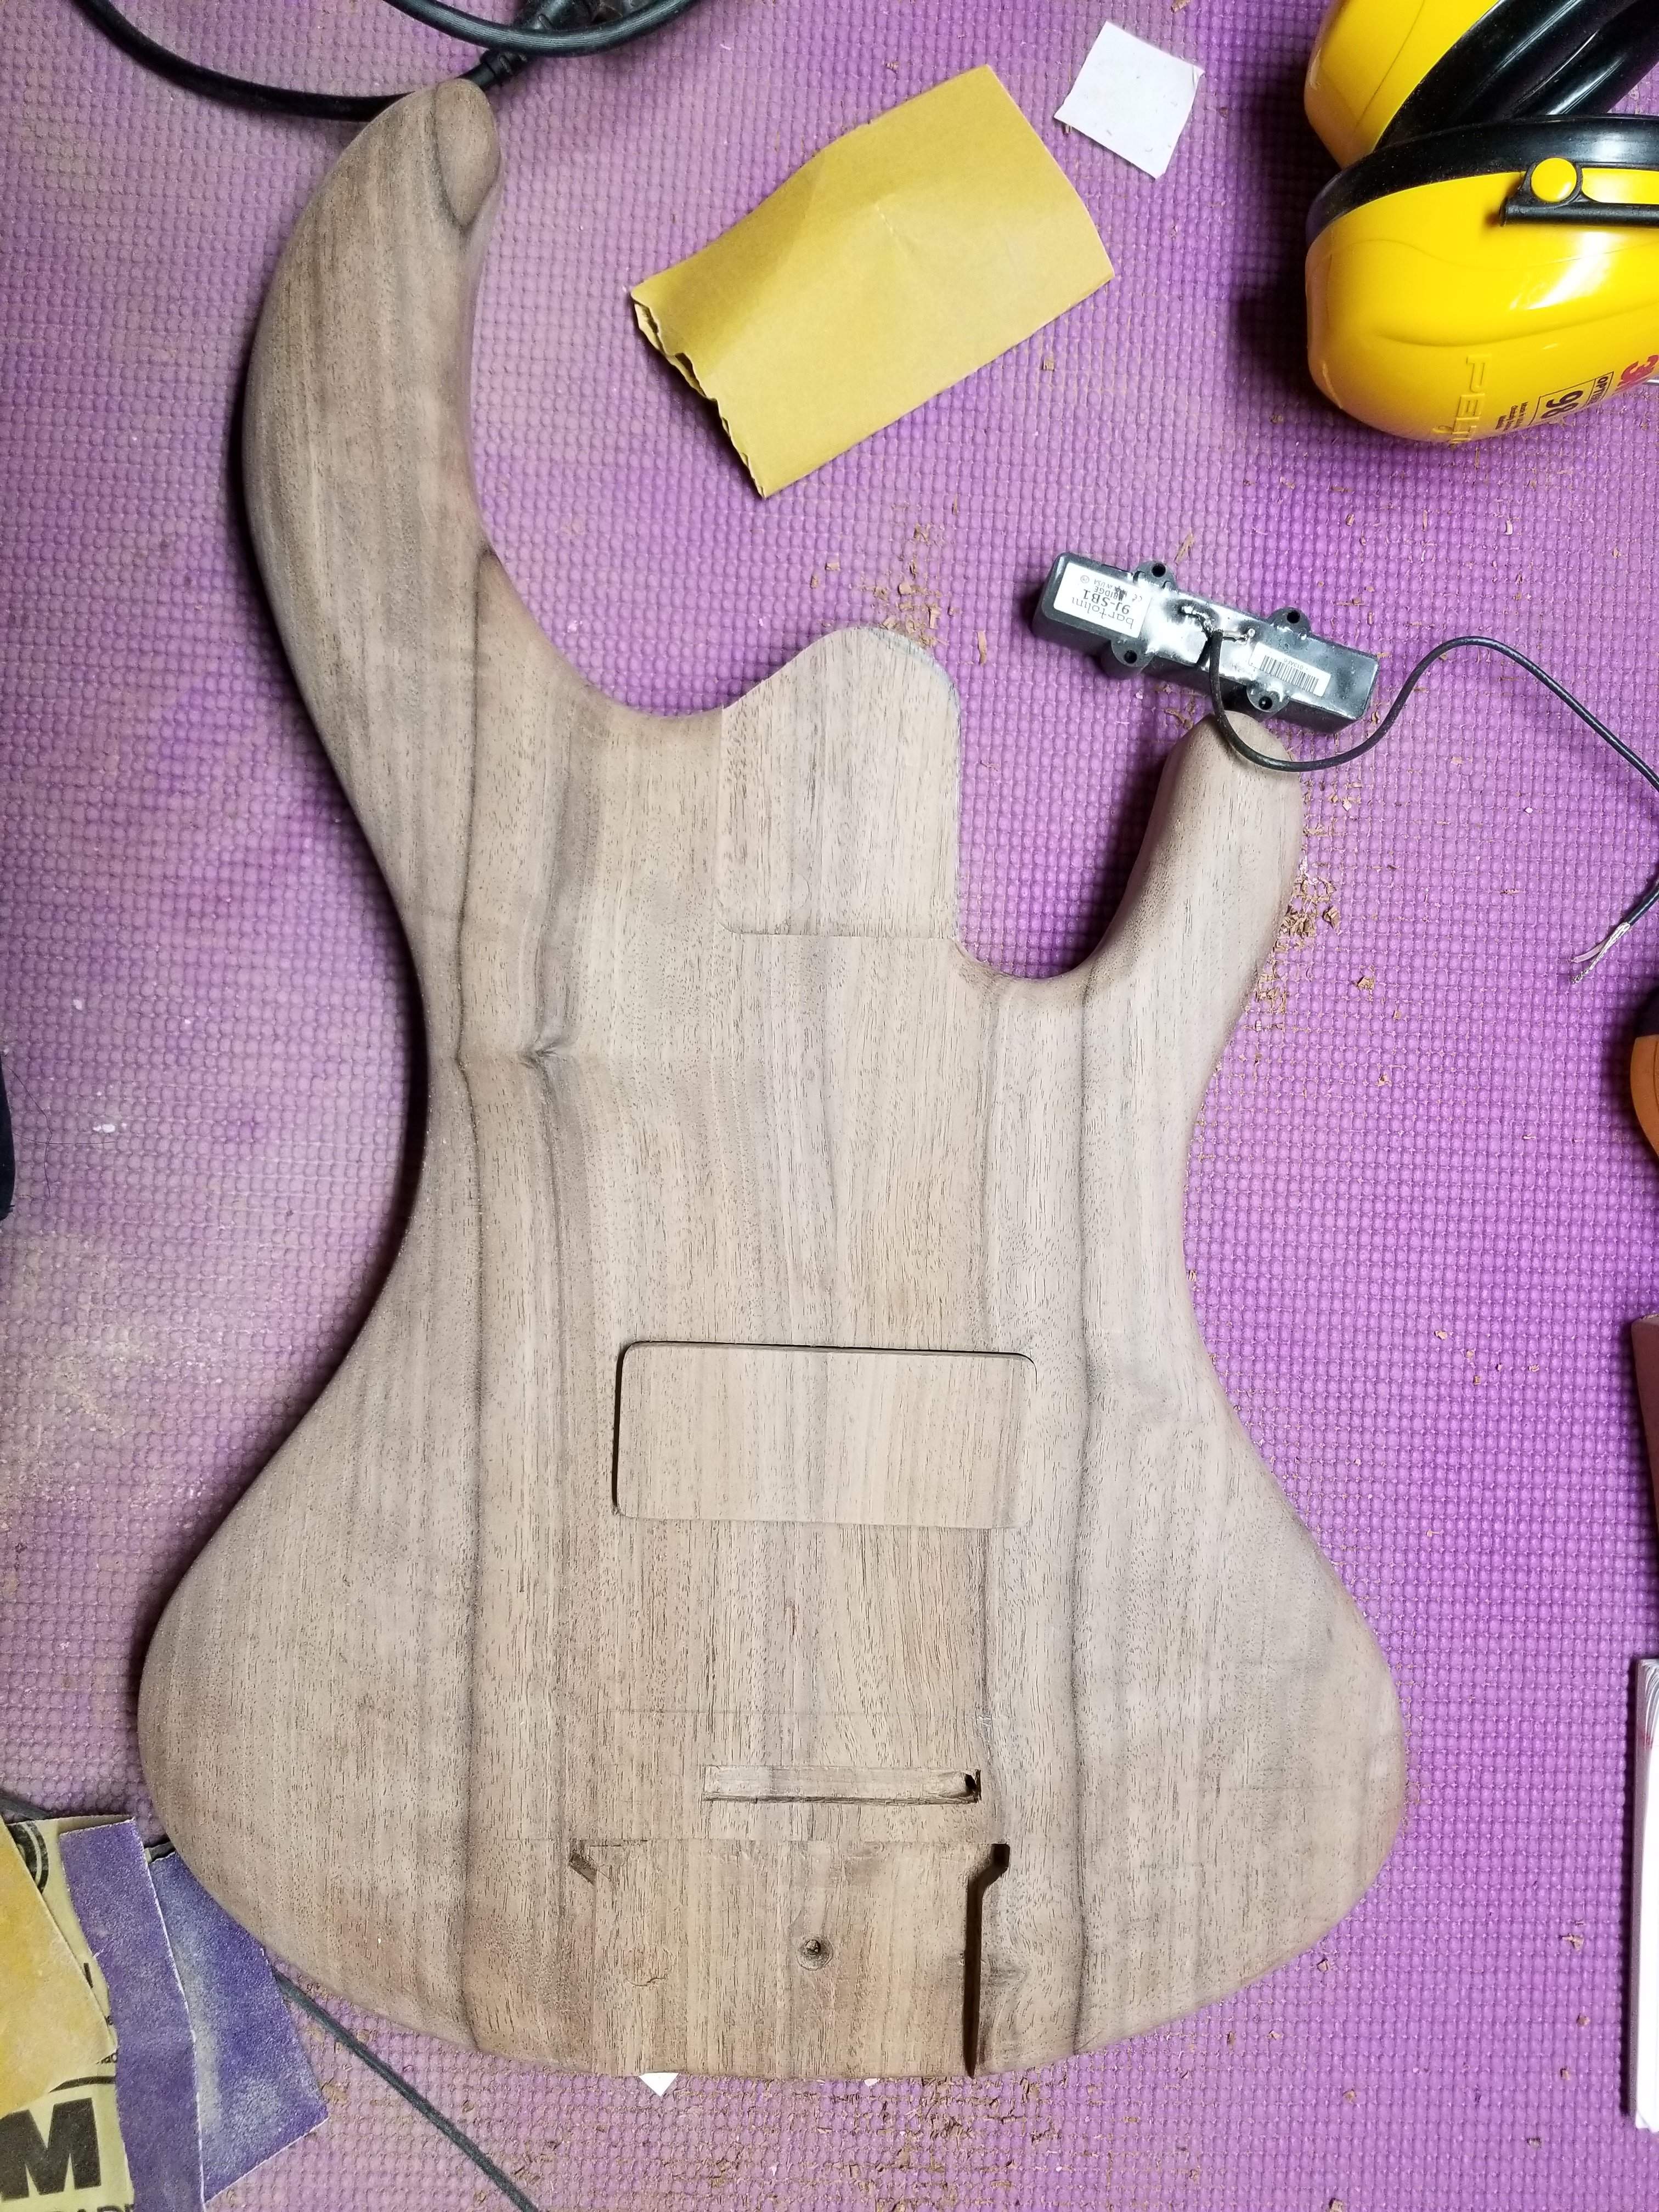
I've never done a pickup cover, but that's the best solution here, I can make the route for the cover centered, then offset the pickup inside the cover.
I figured everything out, six different times just to be sure and found the one cutoff from the top that was big enough. I started by routing the inside of the cover, I figured I would take this block of wood, route the inside for the pickup and done.
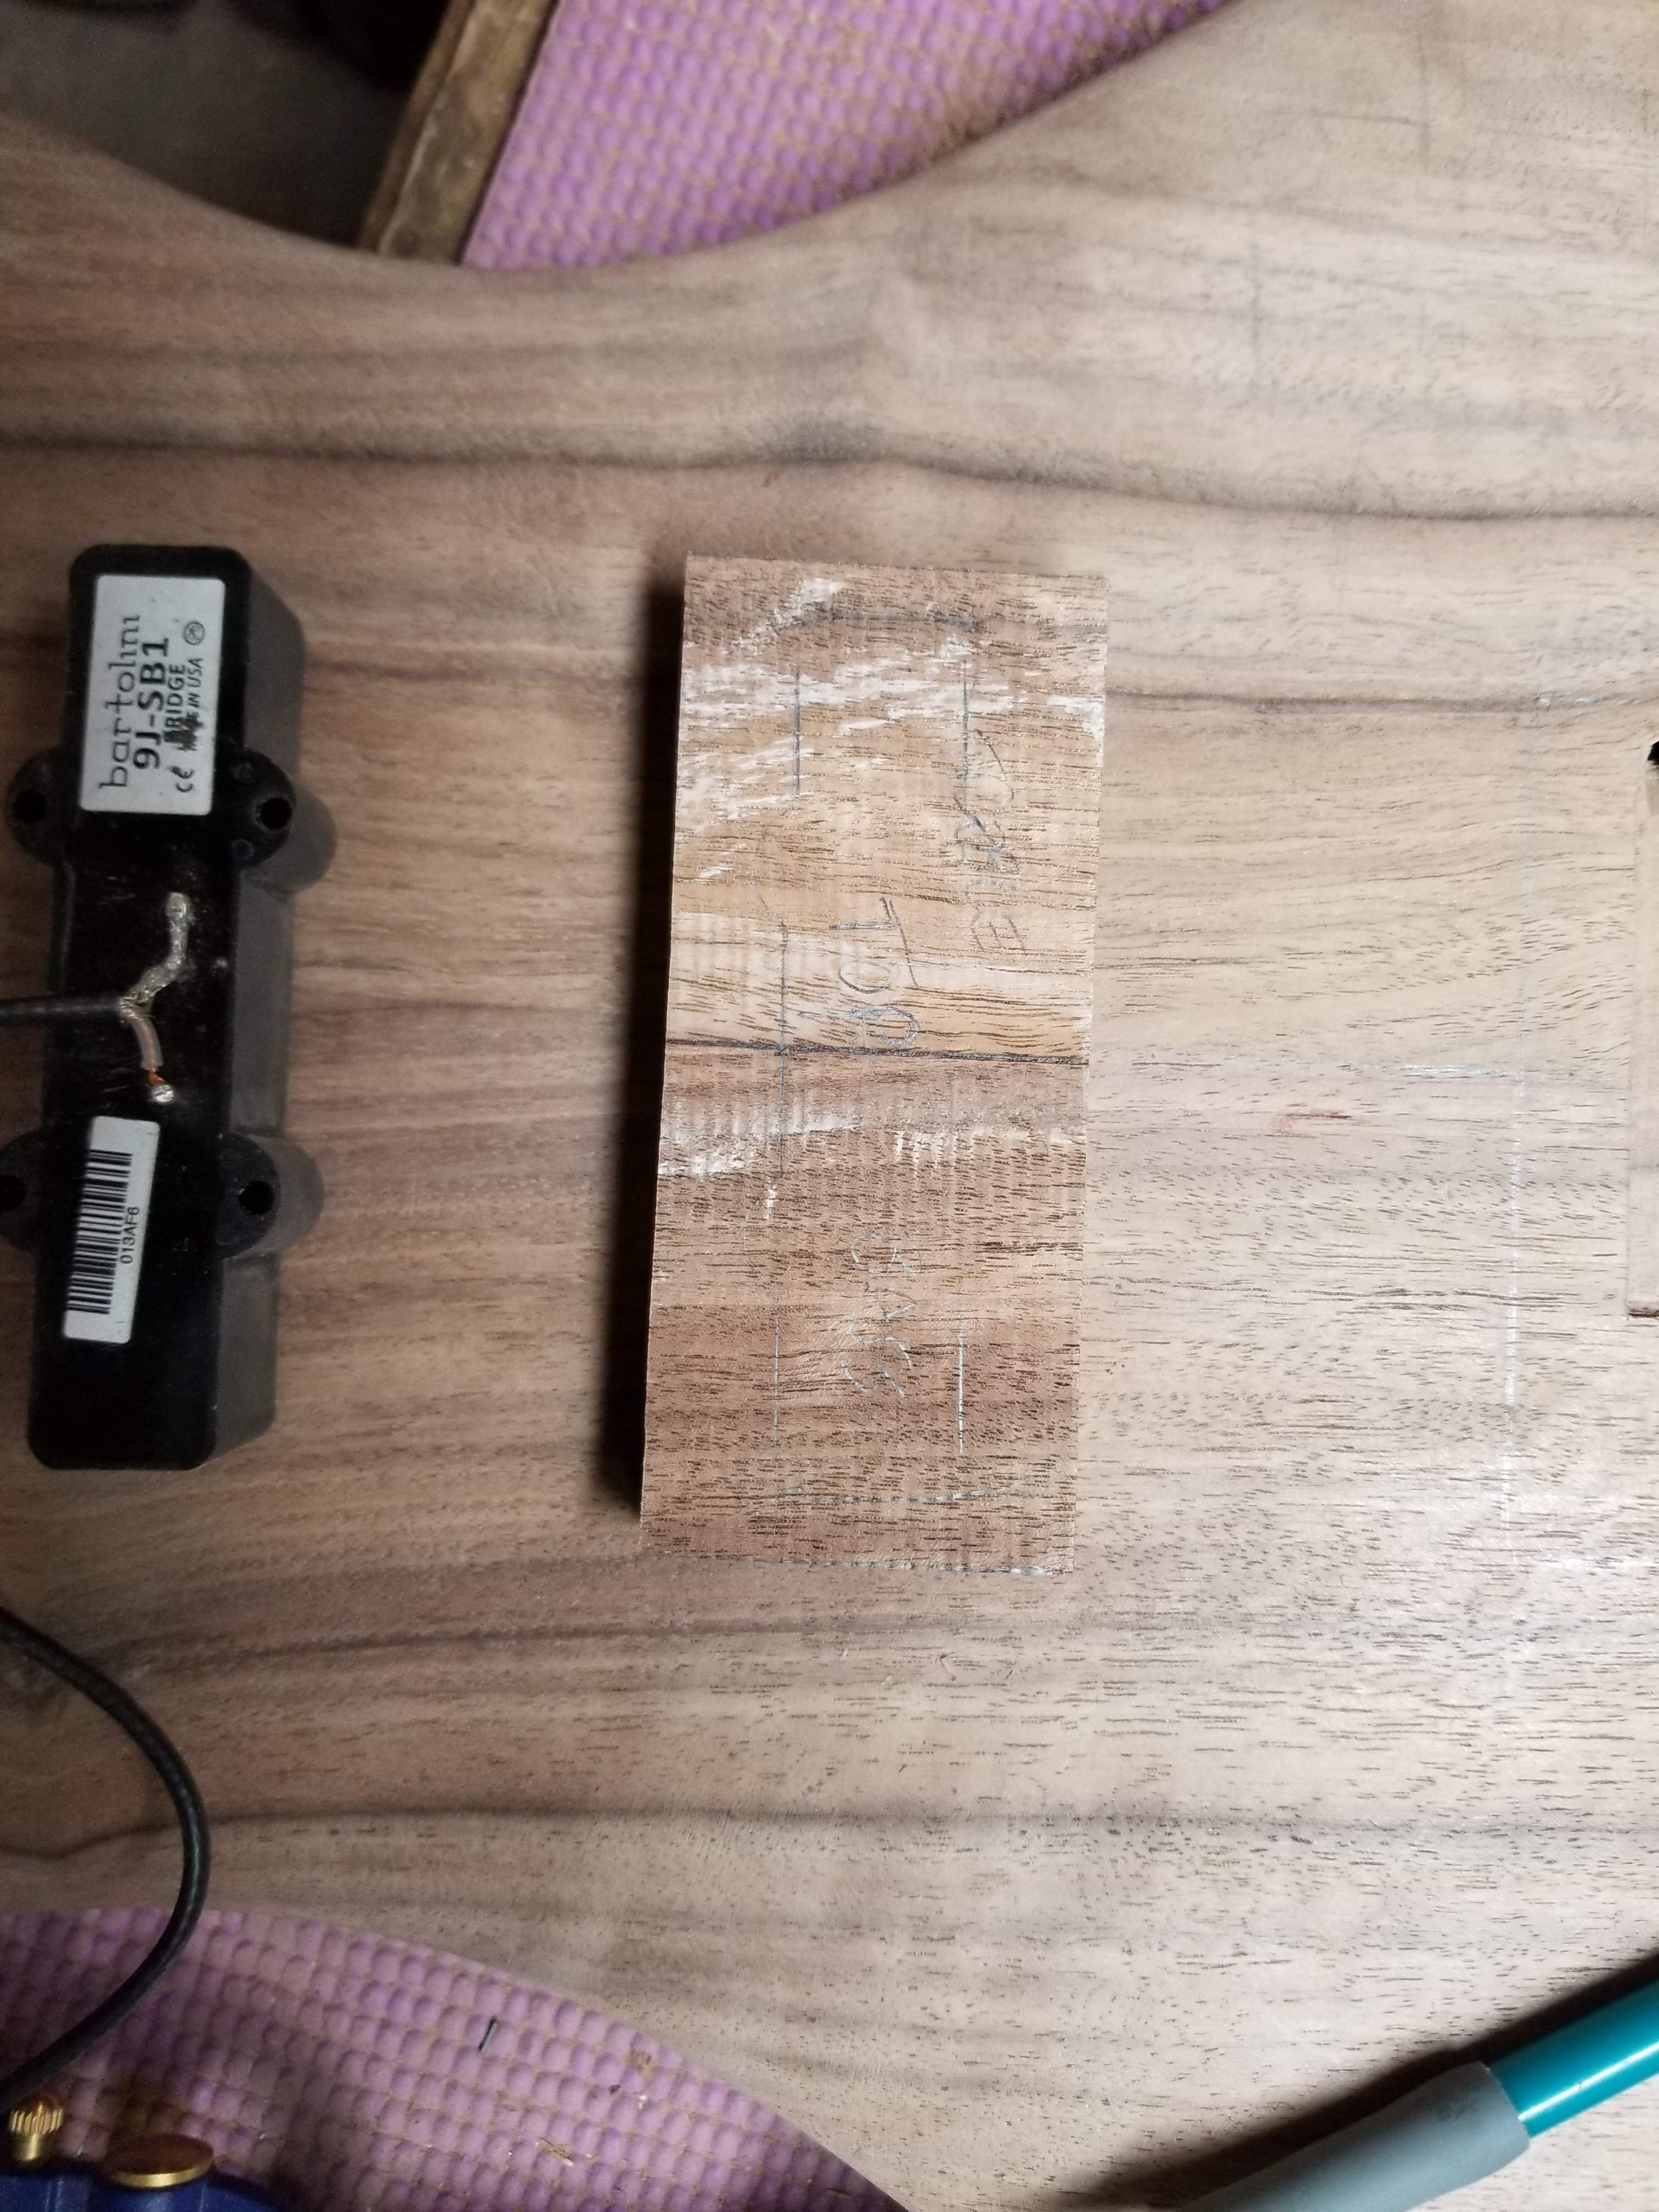
I ended up going through the front of it when my router was set too deep. Luckily I had shaved off the top just before doing this, so I had another piece to use as the cover (and it's just barely big enough).
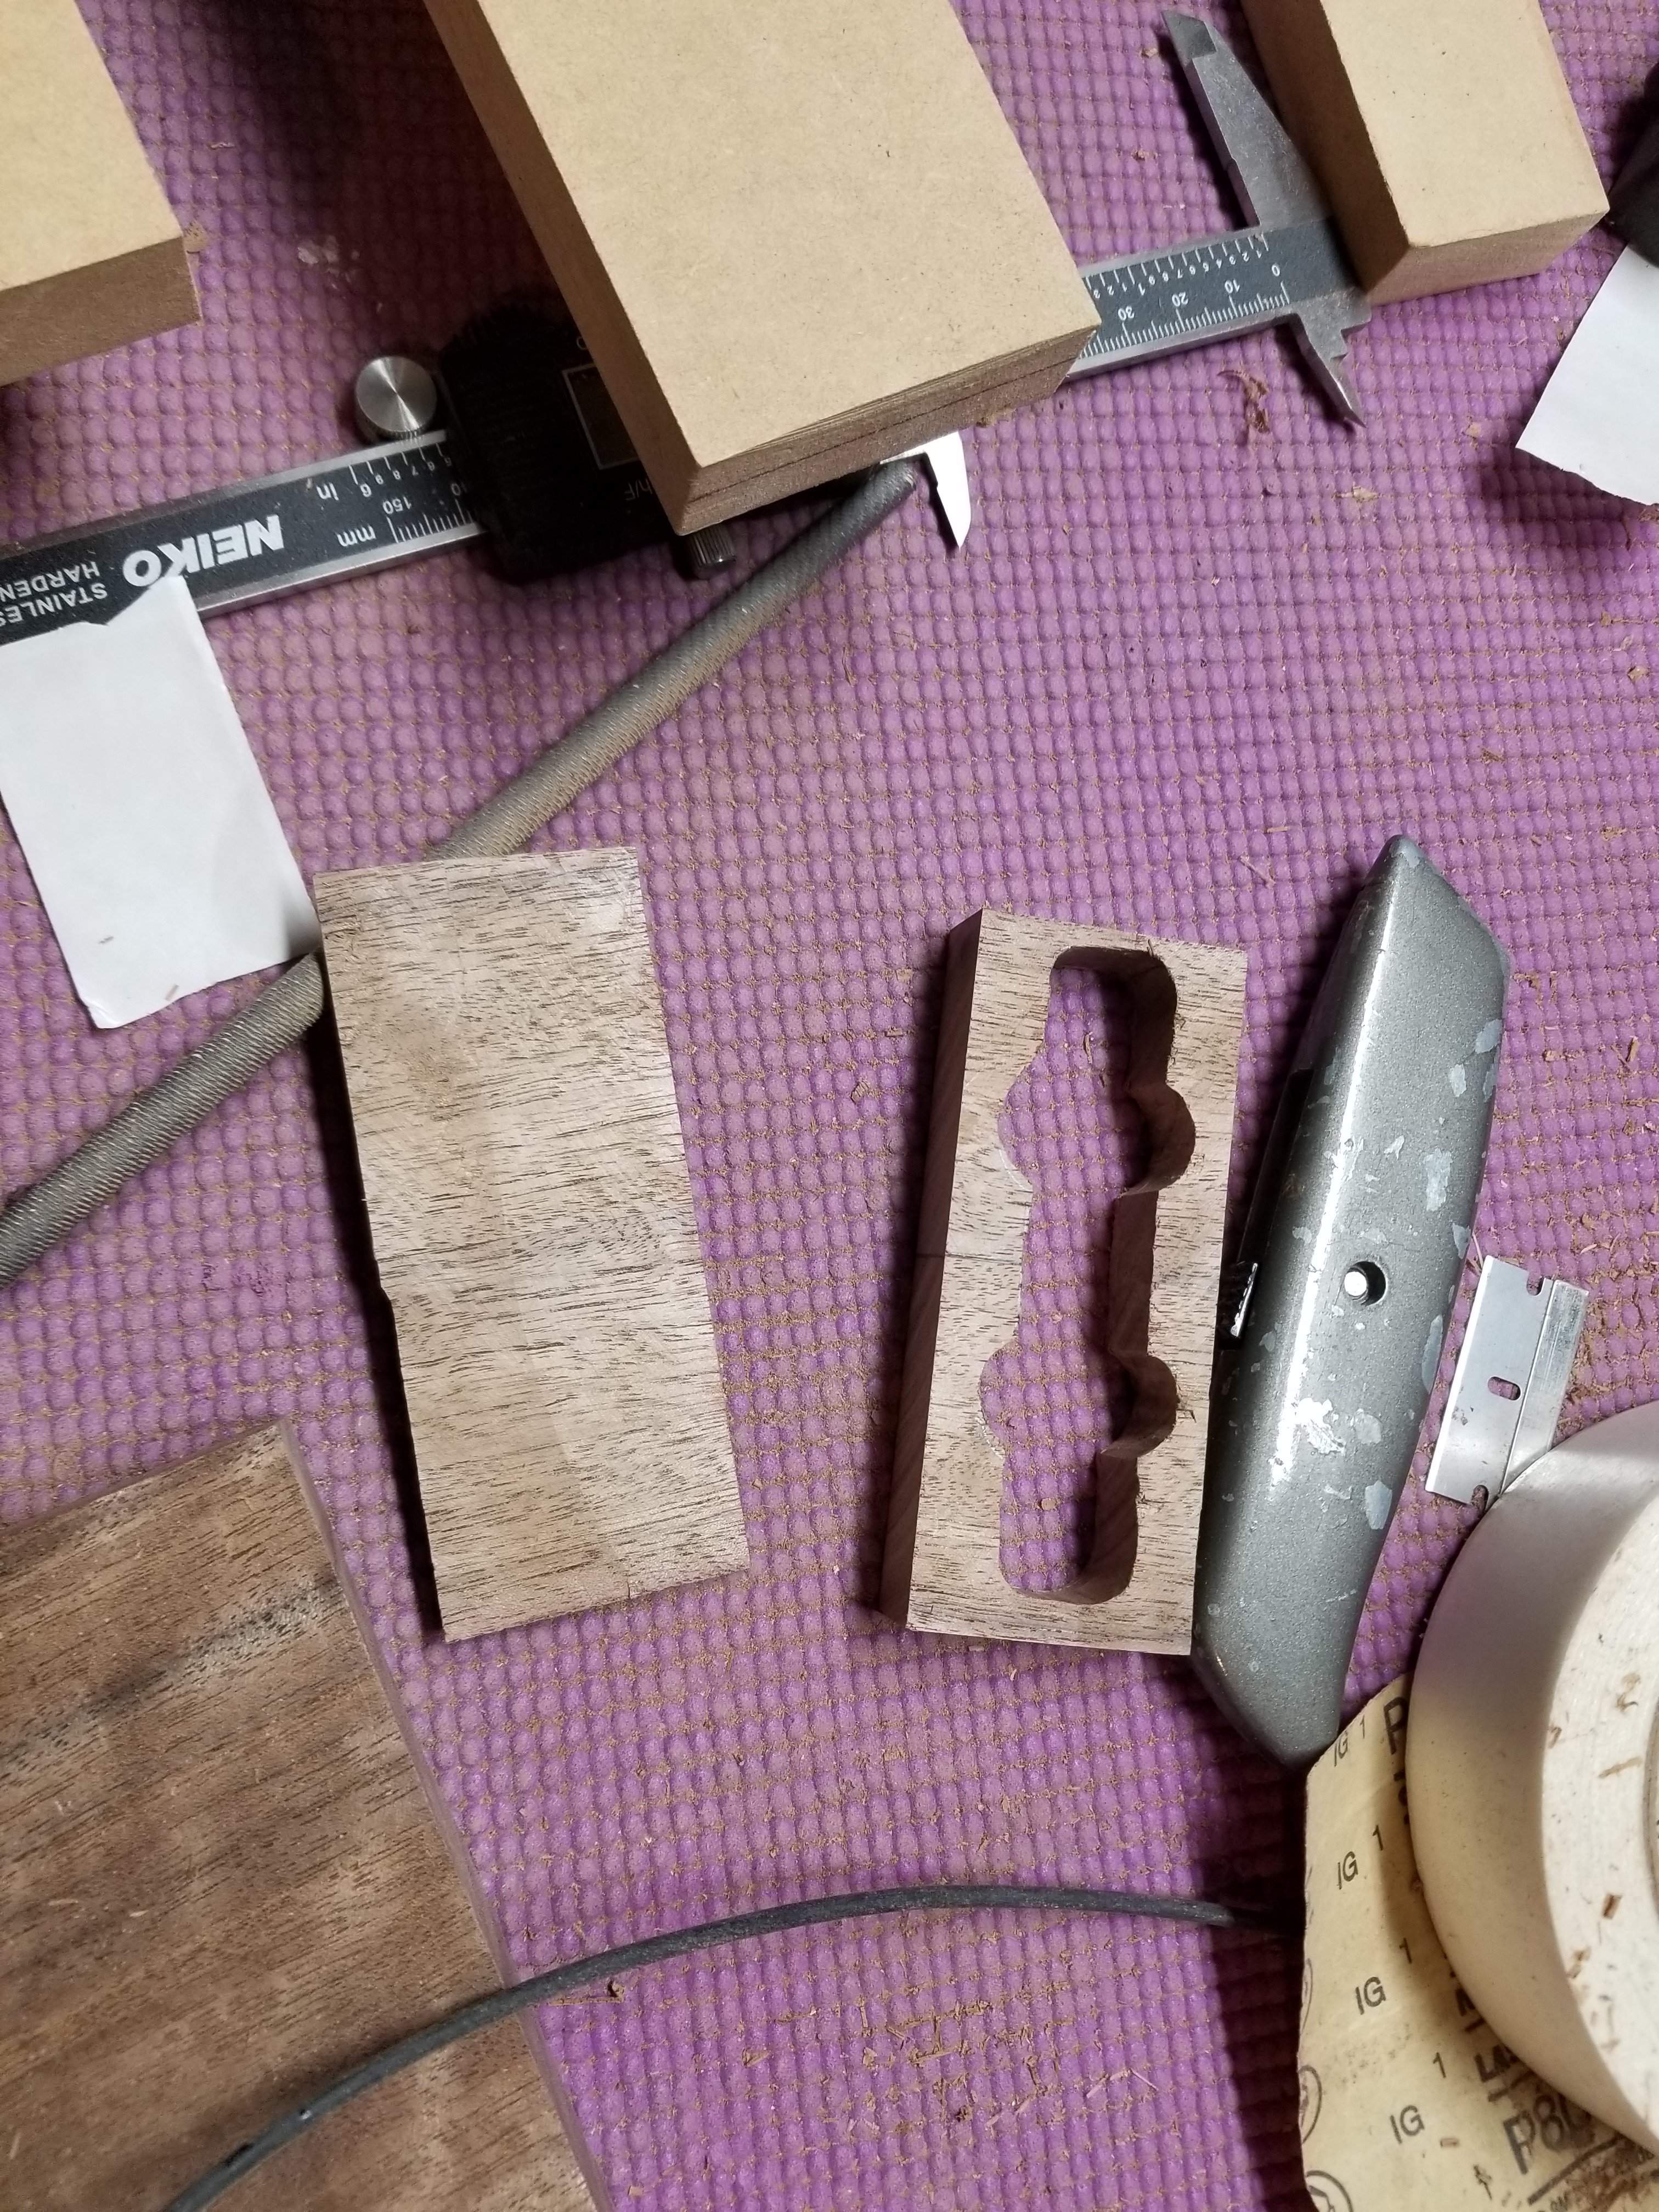
After I got that done I routed the body for the cover
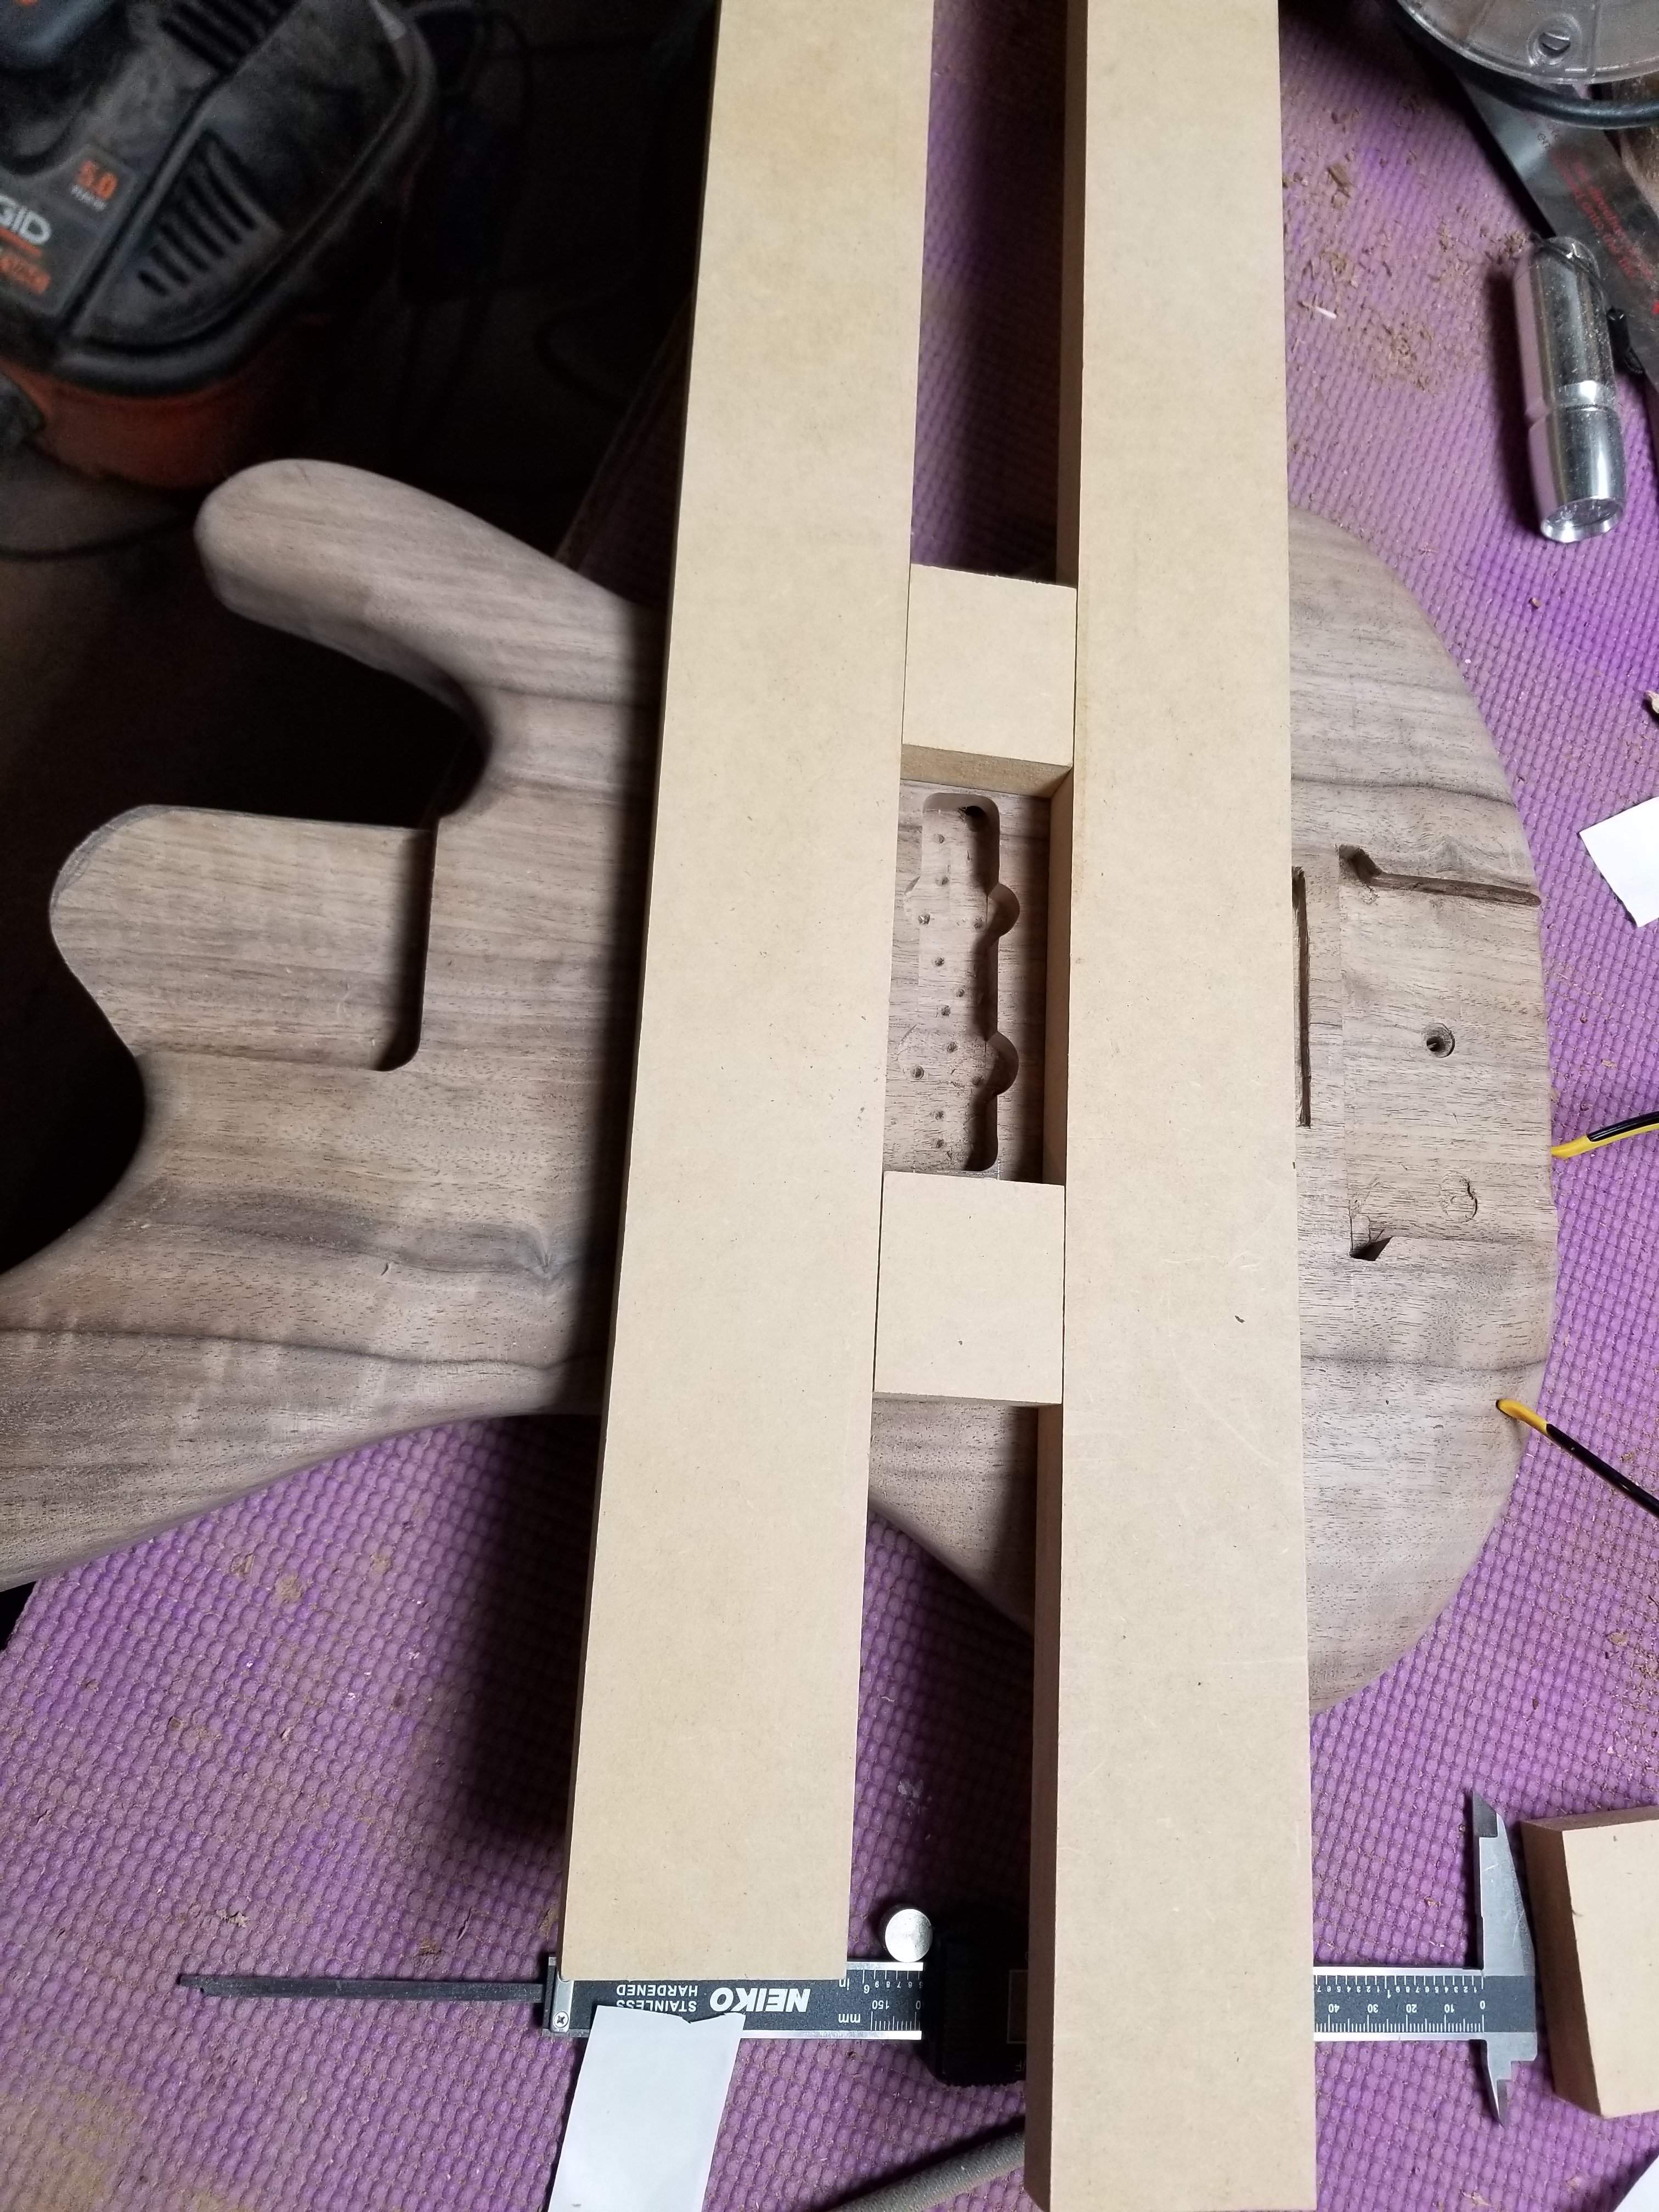
Then I rounded the corners on the over on the cover to fit. In thinking about it now, I can route the hole under the cover much bigger, it doesn't matter if the pickup is loose inside there. In fact it's going to be pretty hard to get that pickup screwed into the body in exactly the right spot, so I will have to make that hole bigger, no big deal, that's much easier than making the hole smaller.
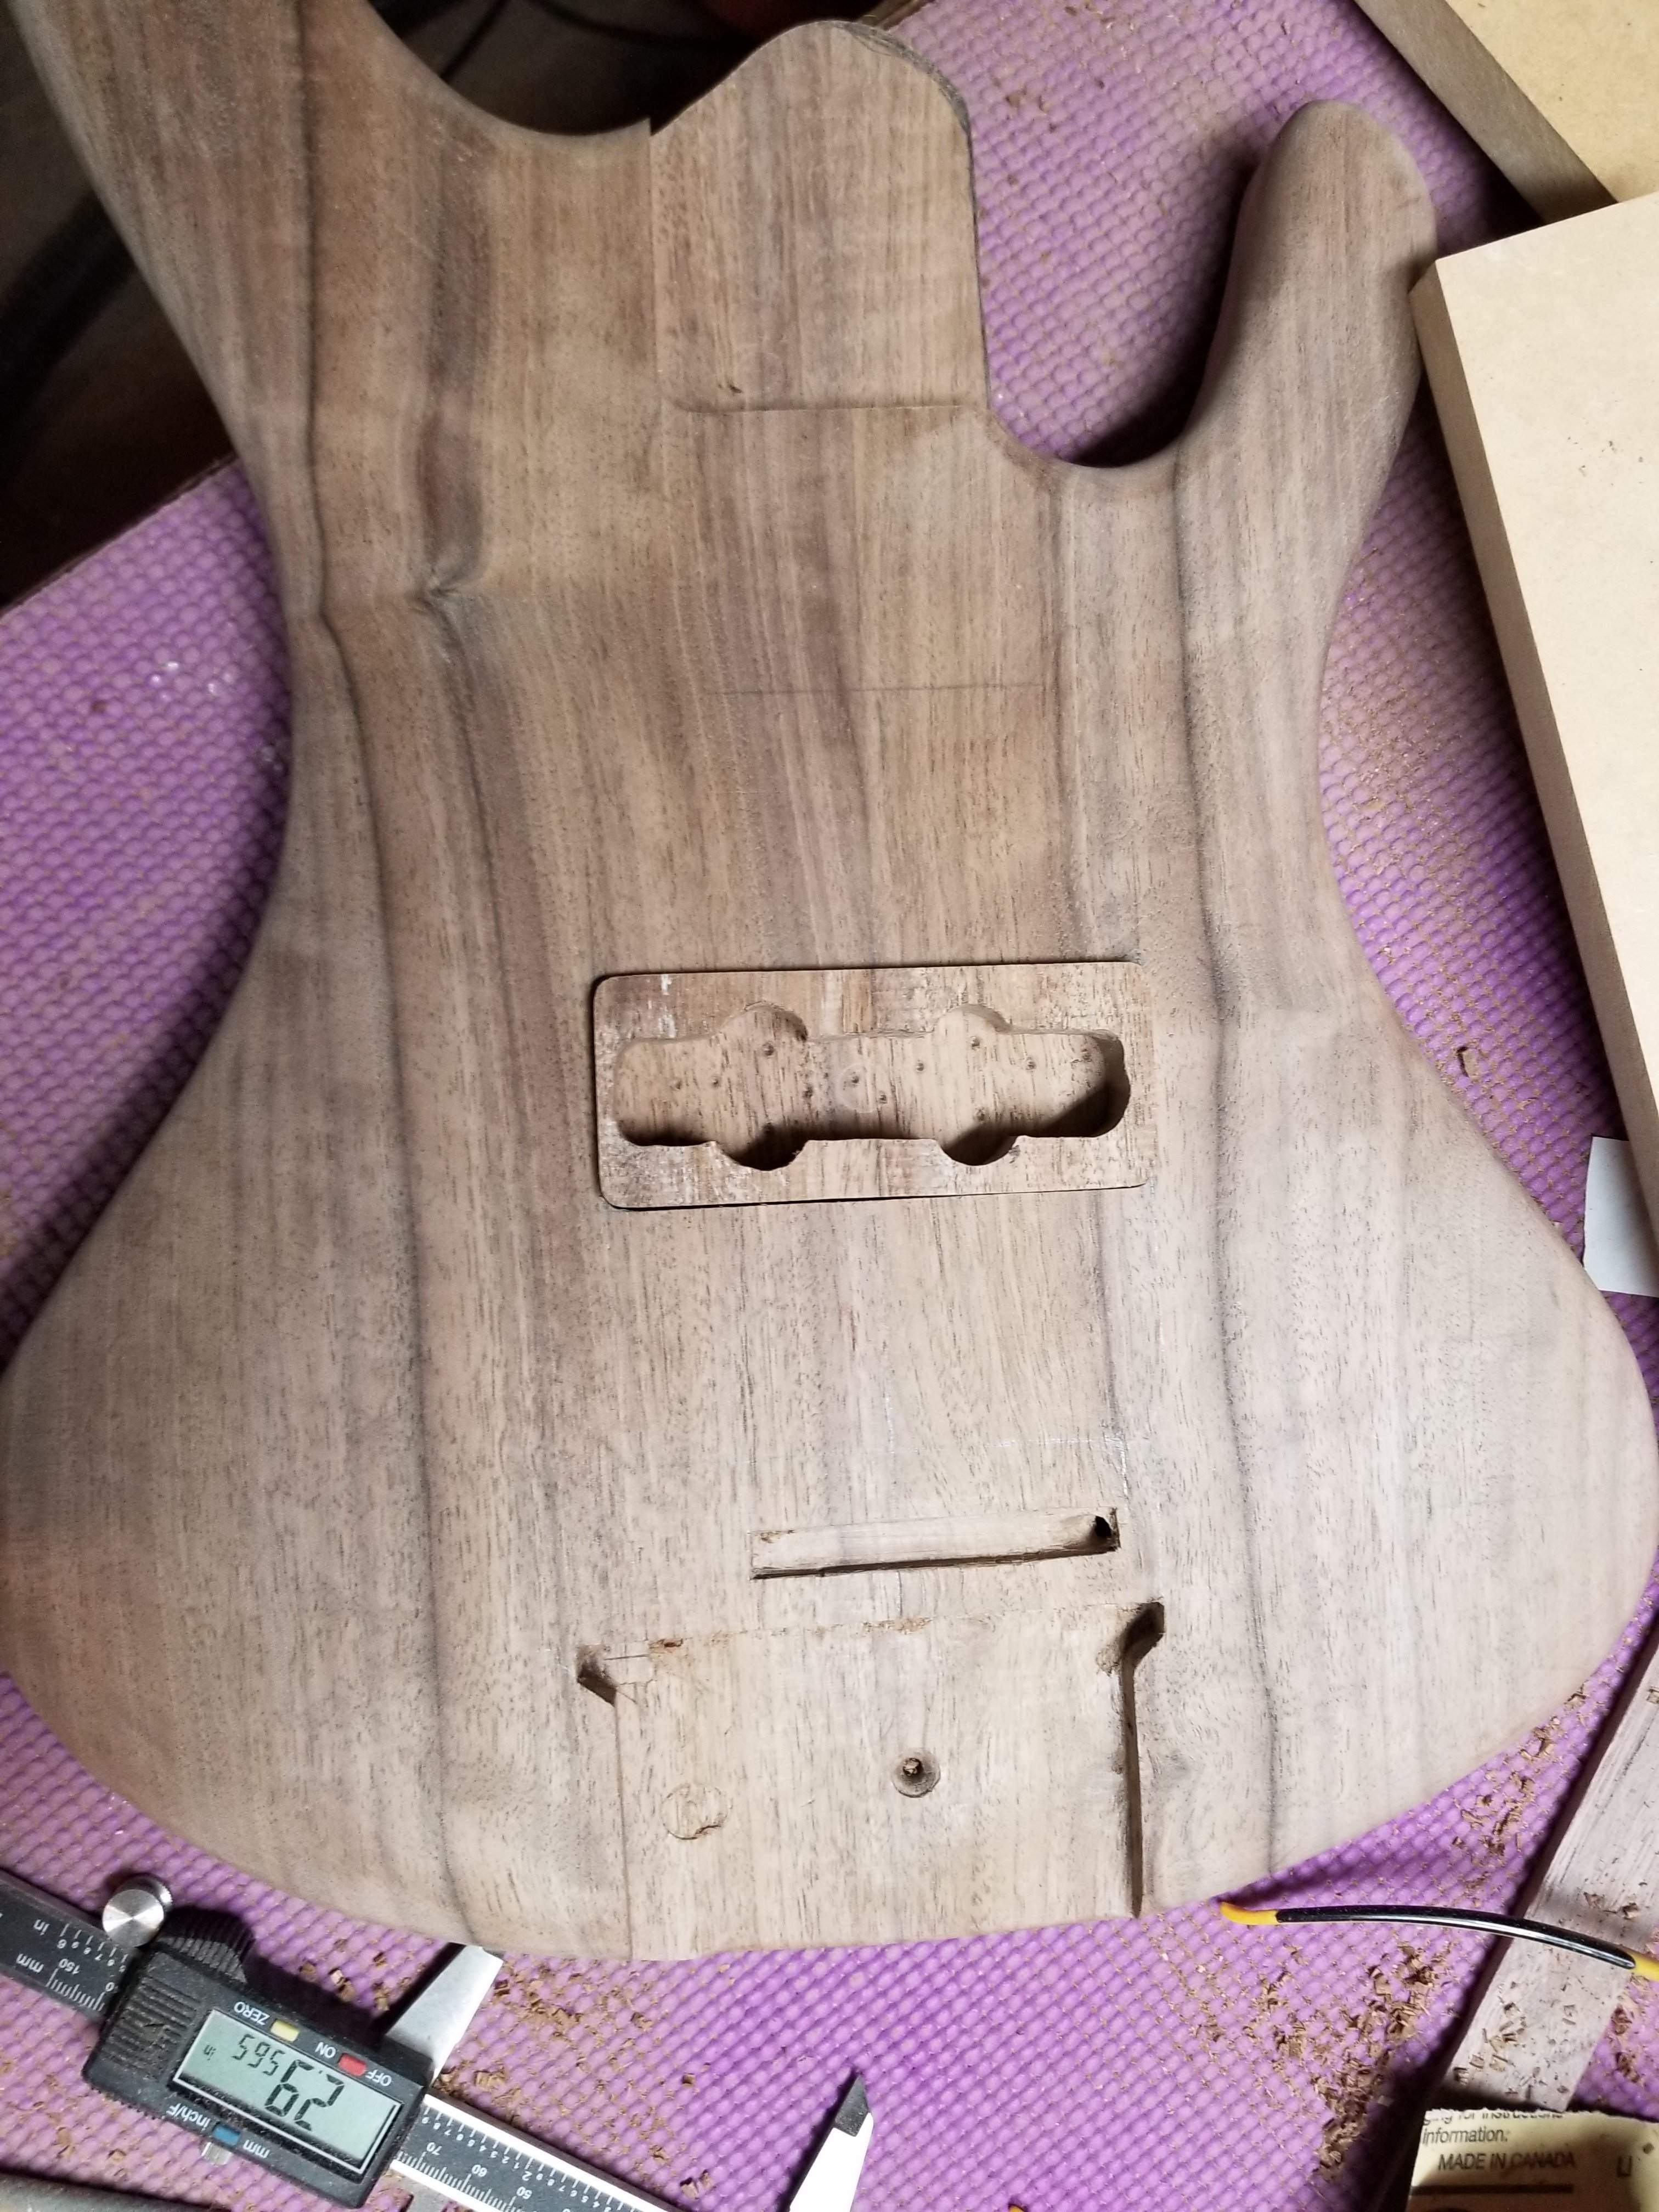
The cover is not a perfect match because it's from further down the board, but it should be close enough to look good.
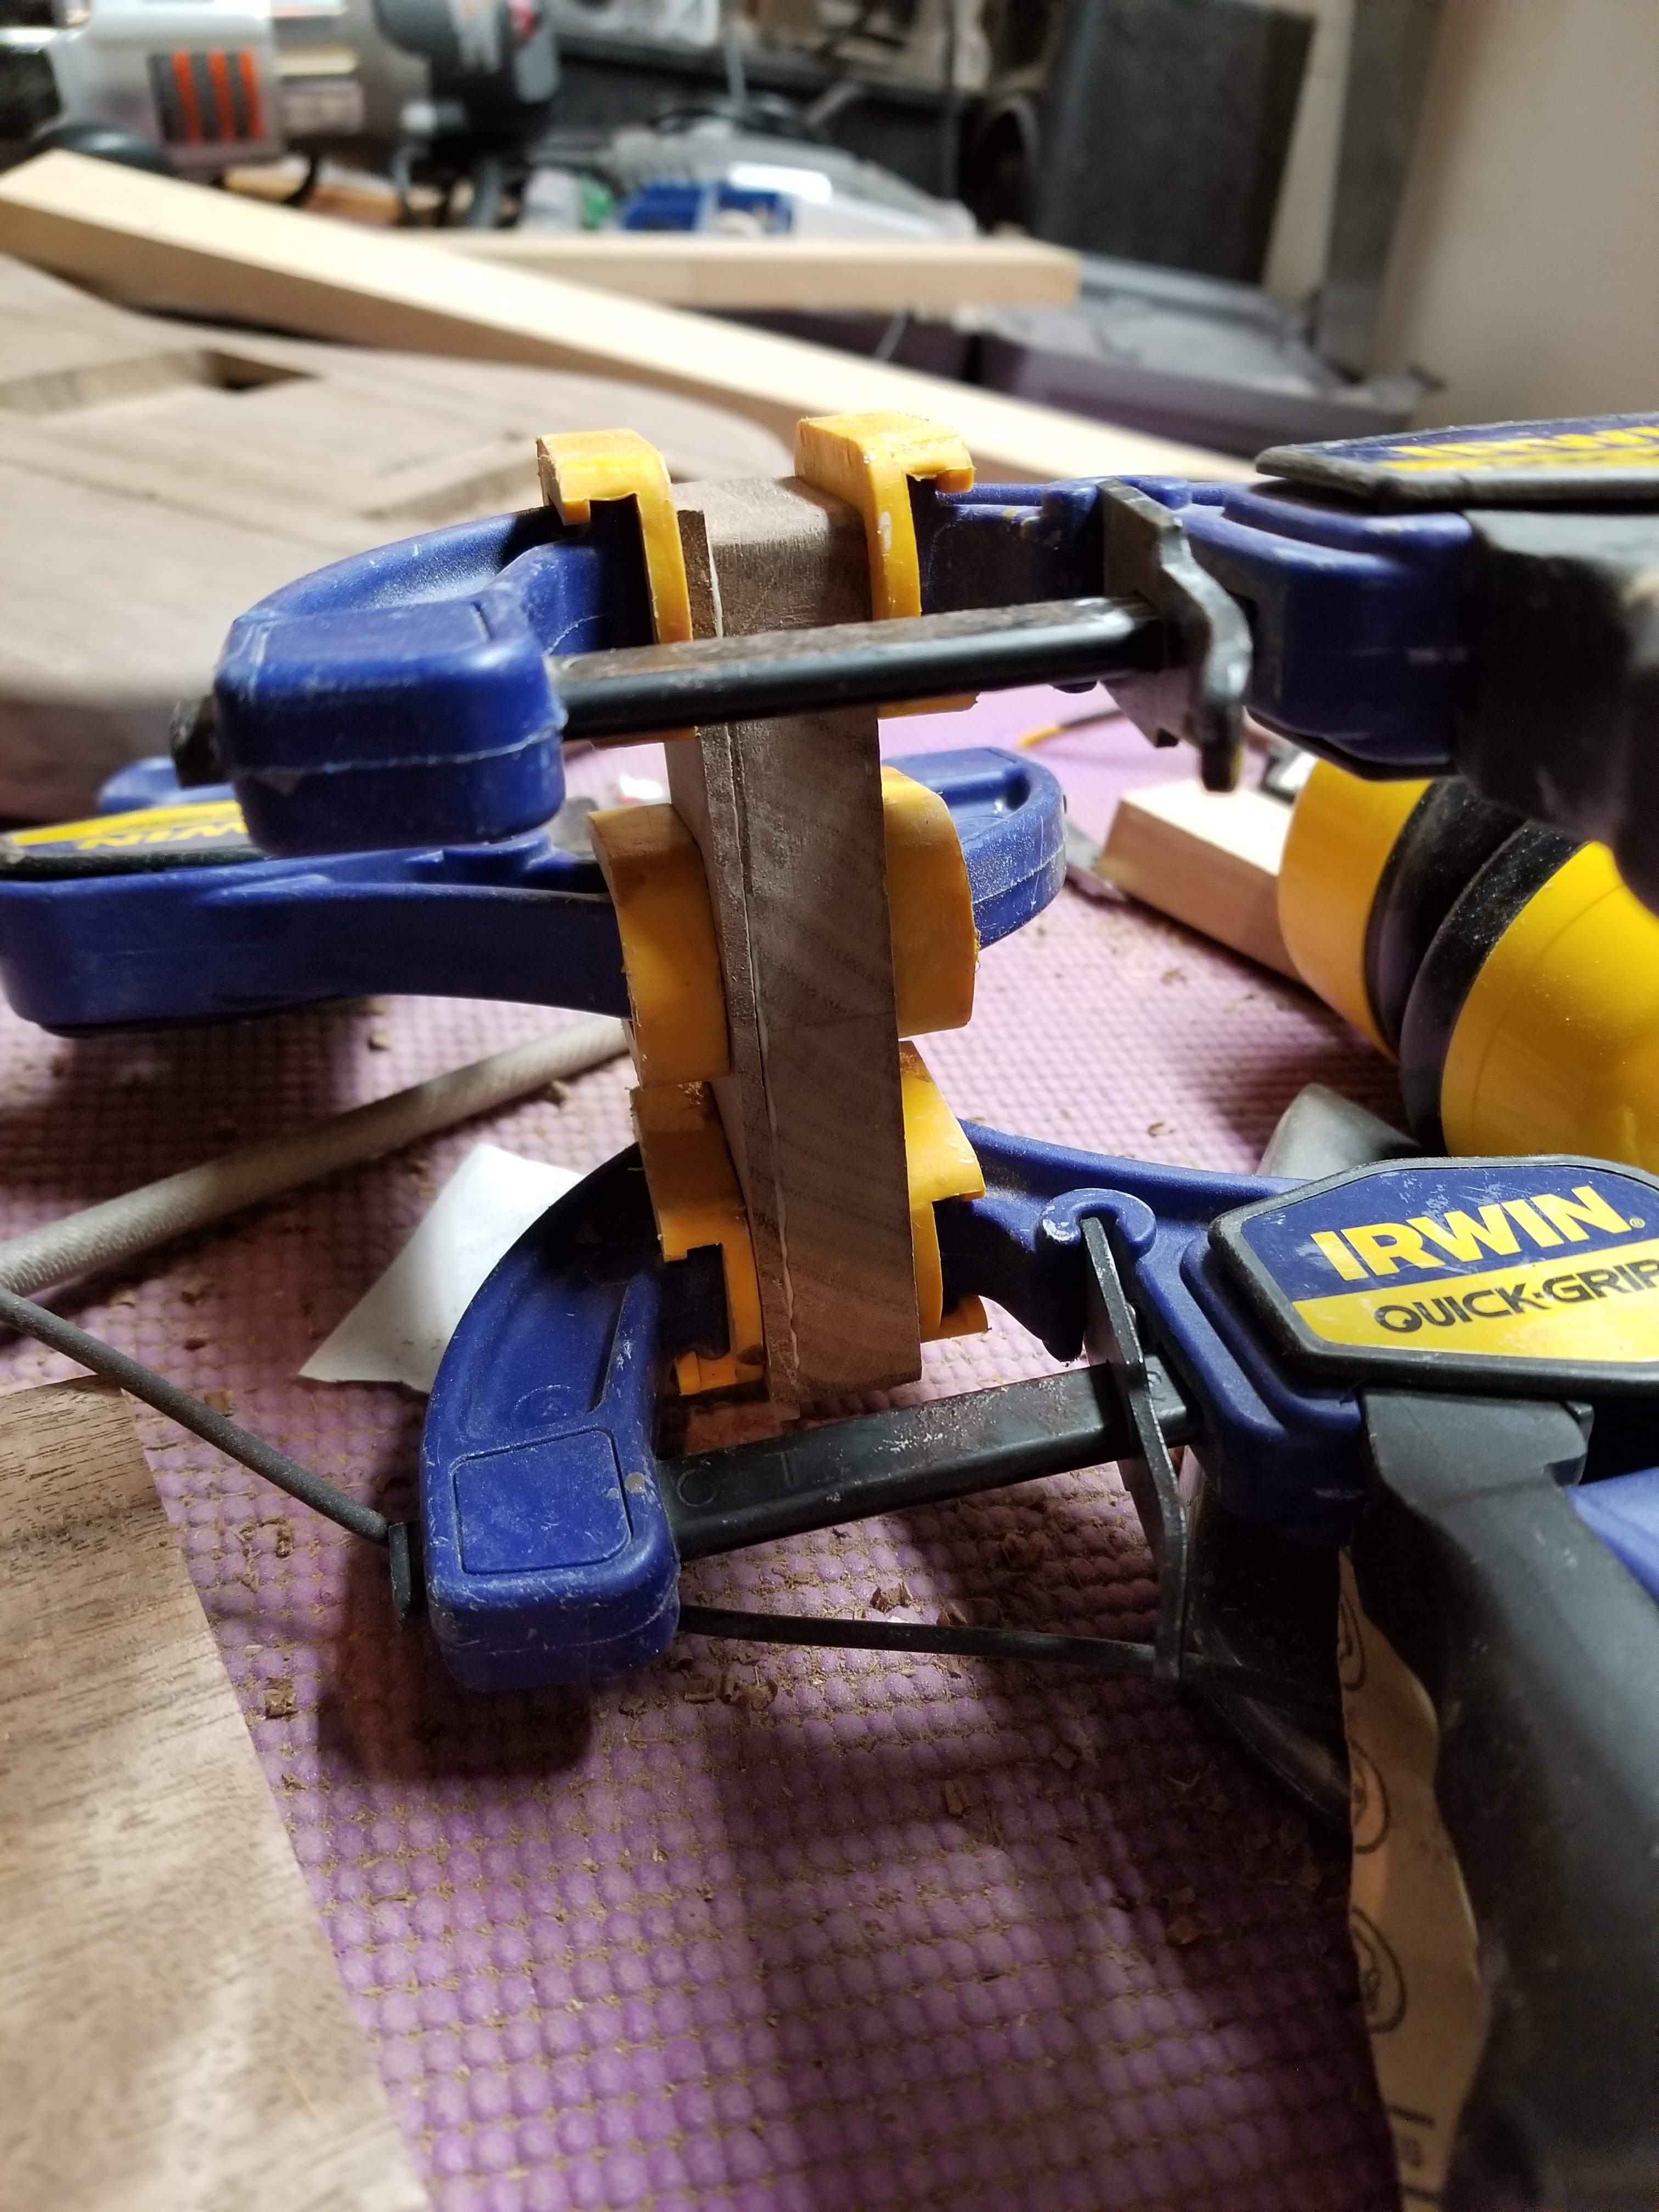
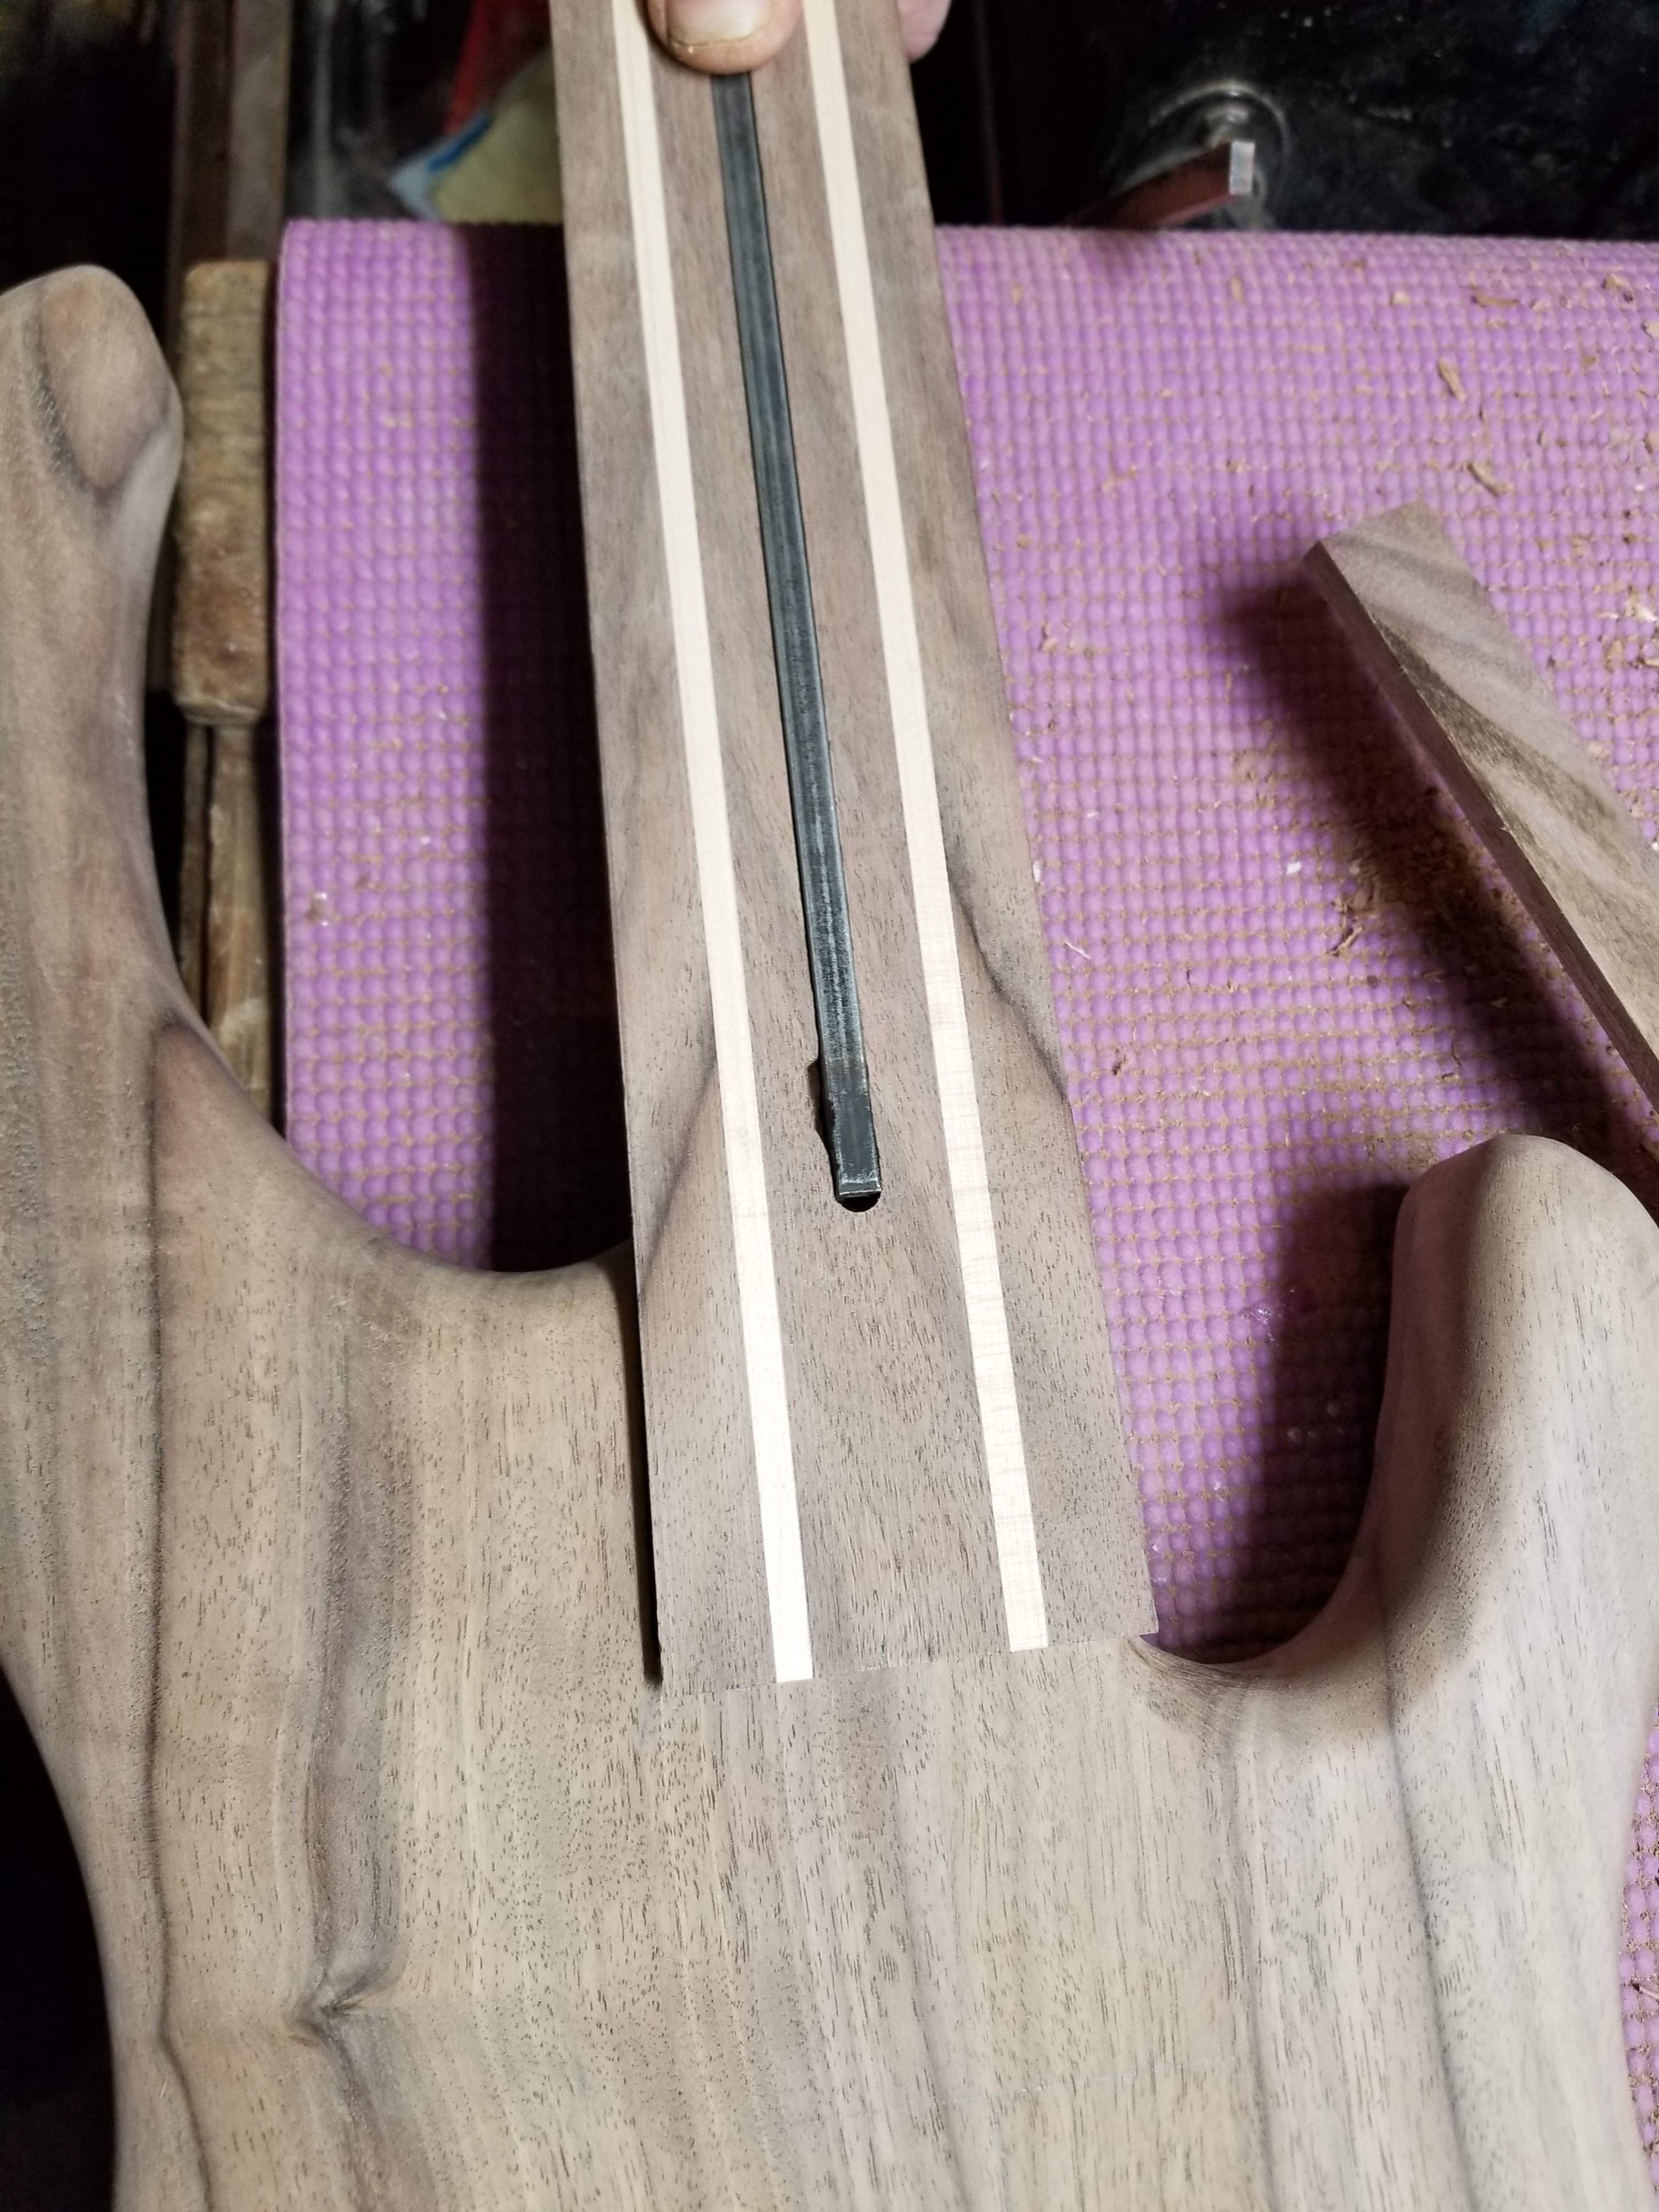
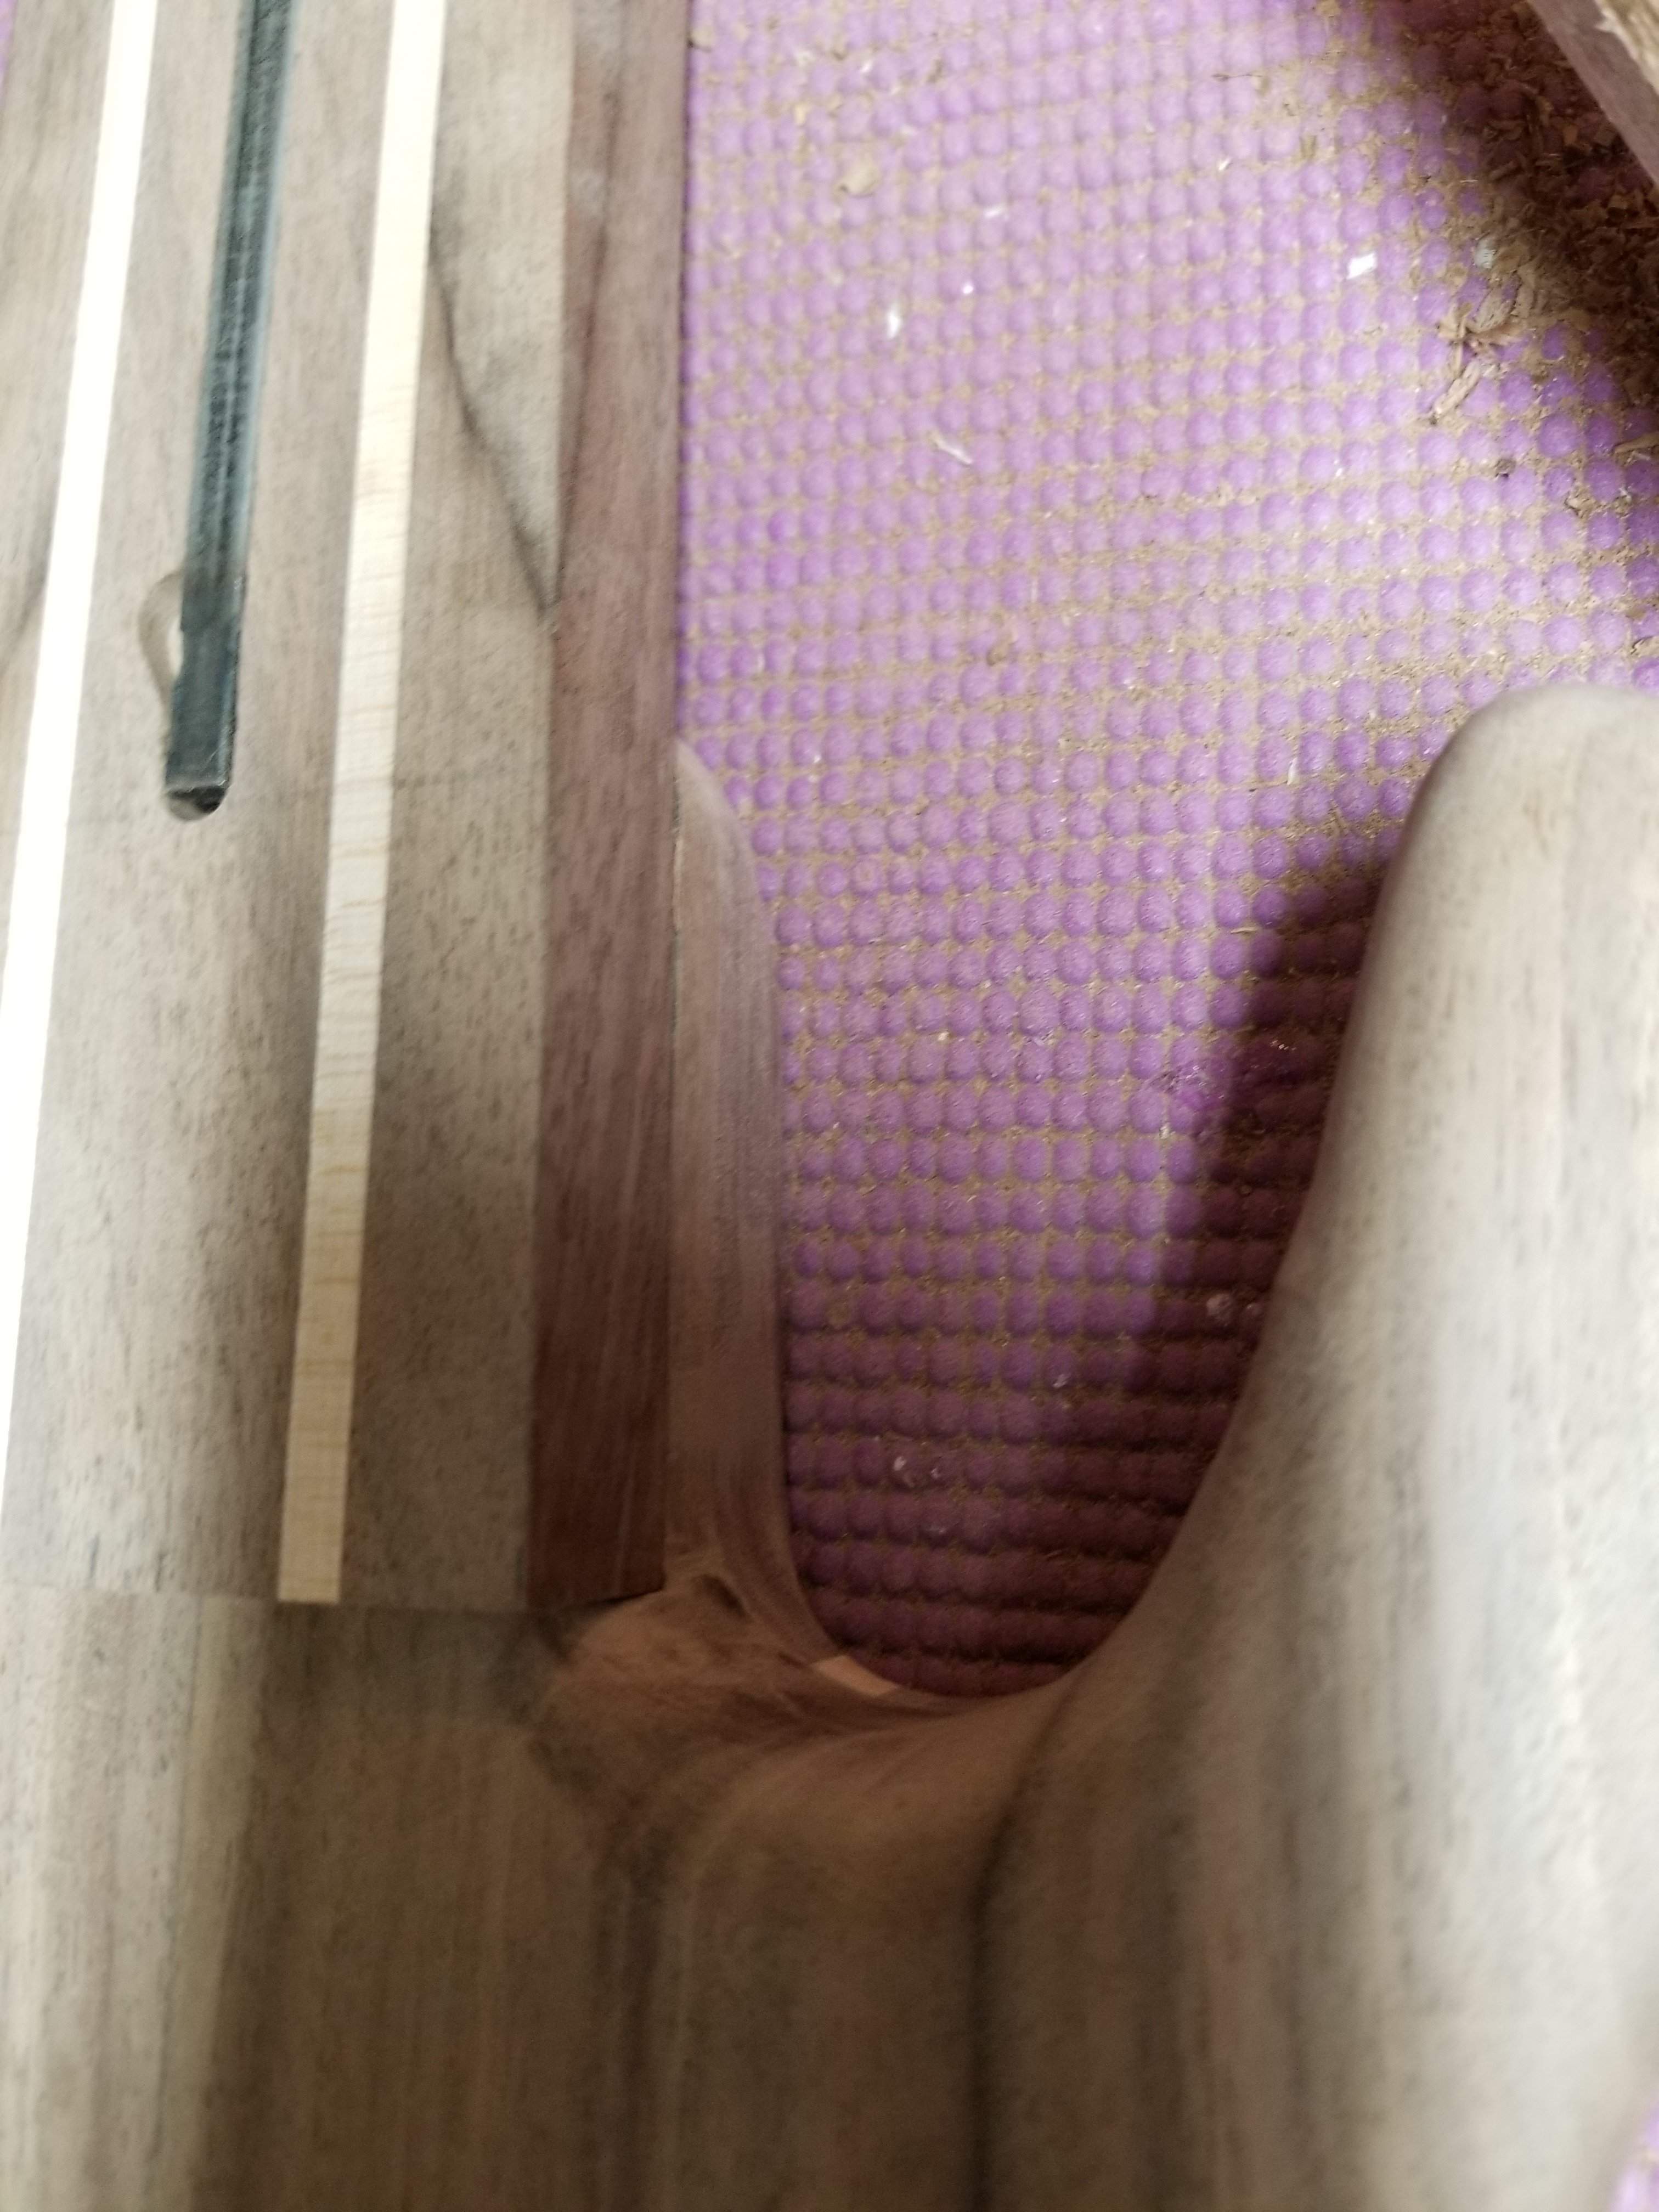
The other thing I'll need to fix (and it's really minor) is the round over on the bottom edge of the treble side of the fretted neck. Prior to moving the neck to the bass side this was in the neck pocket, since moving it over it's exposed. I radiused the bass side of the fretless neck and it looks great - perfect fit and it looks much better with the treble side not radiused. I'll glue a piece of wood on there, it will be visible, but considering where it is you'd have to be looking for it to see it (I hope).
I might get a bit more time this afternoon, but the temps are up to 19F today, I just got some new ski boots, time to get outside.
Maybe the name of this bass was prophetic - I am going to do everything twice.
I've never done a pickup cover, but that's the best solution here, I can make the route for the cover centered, then offset the pickup inside the cover.
I figured everything out, six different times just to be sure and found the one cutoff from the top that was big enough. I started by routing the inside of the cover, I figured I would take this block of wood, route the inside for the pickup and done.
I ended up going through the front of it when my router was set too deep. Luckily I had shaved off the top just before doing this, so I had another piece to use as the cover (and it's just barely big enough).
After I got that done I routed the body for the cover
Then I rounded the corners on the over on the cover to fit. In thinking about it now, I can route the hole under the cover much bigger, it doesn't matter if the pickup is loose inside there. In fact it's going to be pretty hard to get that pickup screwed into the body in exactly the right spot, so I will have to make that hole bigger, no big deal, that's much easier than making the hole smaller.
The cover is not a perfect match because it's from further down the board, but it should be close enough to look good.
The other thing I'll need to fix (and it's really minor) is the round over on the bottom edge of the treble side of the fretted neck. Prior to moving the neck to the bass side this was in the neck pocket, since moving it over it's exposed. I radiused the bass side of the fretless neck and it looks great - perfect fit and it looks much better with the treble side not radiused. I'll glue a piece of wood on there, it will be visible, but considering where it is you'd have to be looking for it to see it (I hope).
I might get a bit more time this afternoon, but the temps are up to 19F today, I just got some new ski boots, time to get outside.
Maybe the name of this bass was prophetic - I am going to do everything twice.
Yeah, I considered angling everything, I am happy with how it looks now, I think it was the right move.
I have this same bridge on my stumpy bass (profile pic), it works great, holds the strings well and stays in tune. The knobs are not super easy to turn, there's just not a lot of leverage, but for someone who plays bass and has at least some finger strength it shouldn't be a problem. I just mention that as a con, it's not that big of a deal.
The one thing I'll be doing differently on this one is I'll make some wooden wedges to hold the string in the tuner - when you loosen the strings to the point where you'll be able to swap the neck, the strings will come out of the holes in the tuners and getting them back in with string wraps is problematic. I know this from when I was working on my stumpy and taking the strings on and off.
I have this same bridge on my stumpy bass (profile pic), it works great, holds the strings well and stays in tune. The knobs are not super easy to turn, there's just not a lot of leverage, but for someone who plays bass and has at least some finger strength it shouldn't be a problem. I just mention that as a con, it's not that big of a deal.
The one thing I'll be doing differently on this one is I'll make some wooden wedges to hold the string in the tuner - when you loosen the strings to the point where you'll be able to swap the neck, the strings will come out of the holes in the tuners and getting them back in with string wraps is problematic. I know this from when I was working on my stumpy and taking the strings on and off.
I think I might have an idea how to solve the issue. The friend that taught me how to build instruments, always said something I think its brilliant: "Dont hide your mistakes. Turn them into a centerpoint of your art piece". In short, how can you turn this into something that looks like it was meant to be there?
The idea I have is to expand the cavity more and add a block piece the same size as the routing. This new piece of wood should be maybe the same type as your fingerboard or at least different from the body. I think you will see what I mean if you look at this youtube video.
If you do that same ting around your pickup cover, you now have something unique and it adds a LOT to your design.
The idea I have is to expand the cavity more and add a block piece the same size as the routing. This new piece of wood should be maybe the same type as your fingerboard or at least different from the body. I think you will see what I mean if you look at this youtube video.
If you do that same ting around your pickup cover, you now have something unique and it adds a LOT to your design.
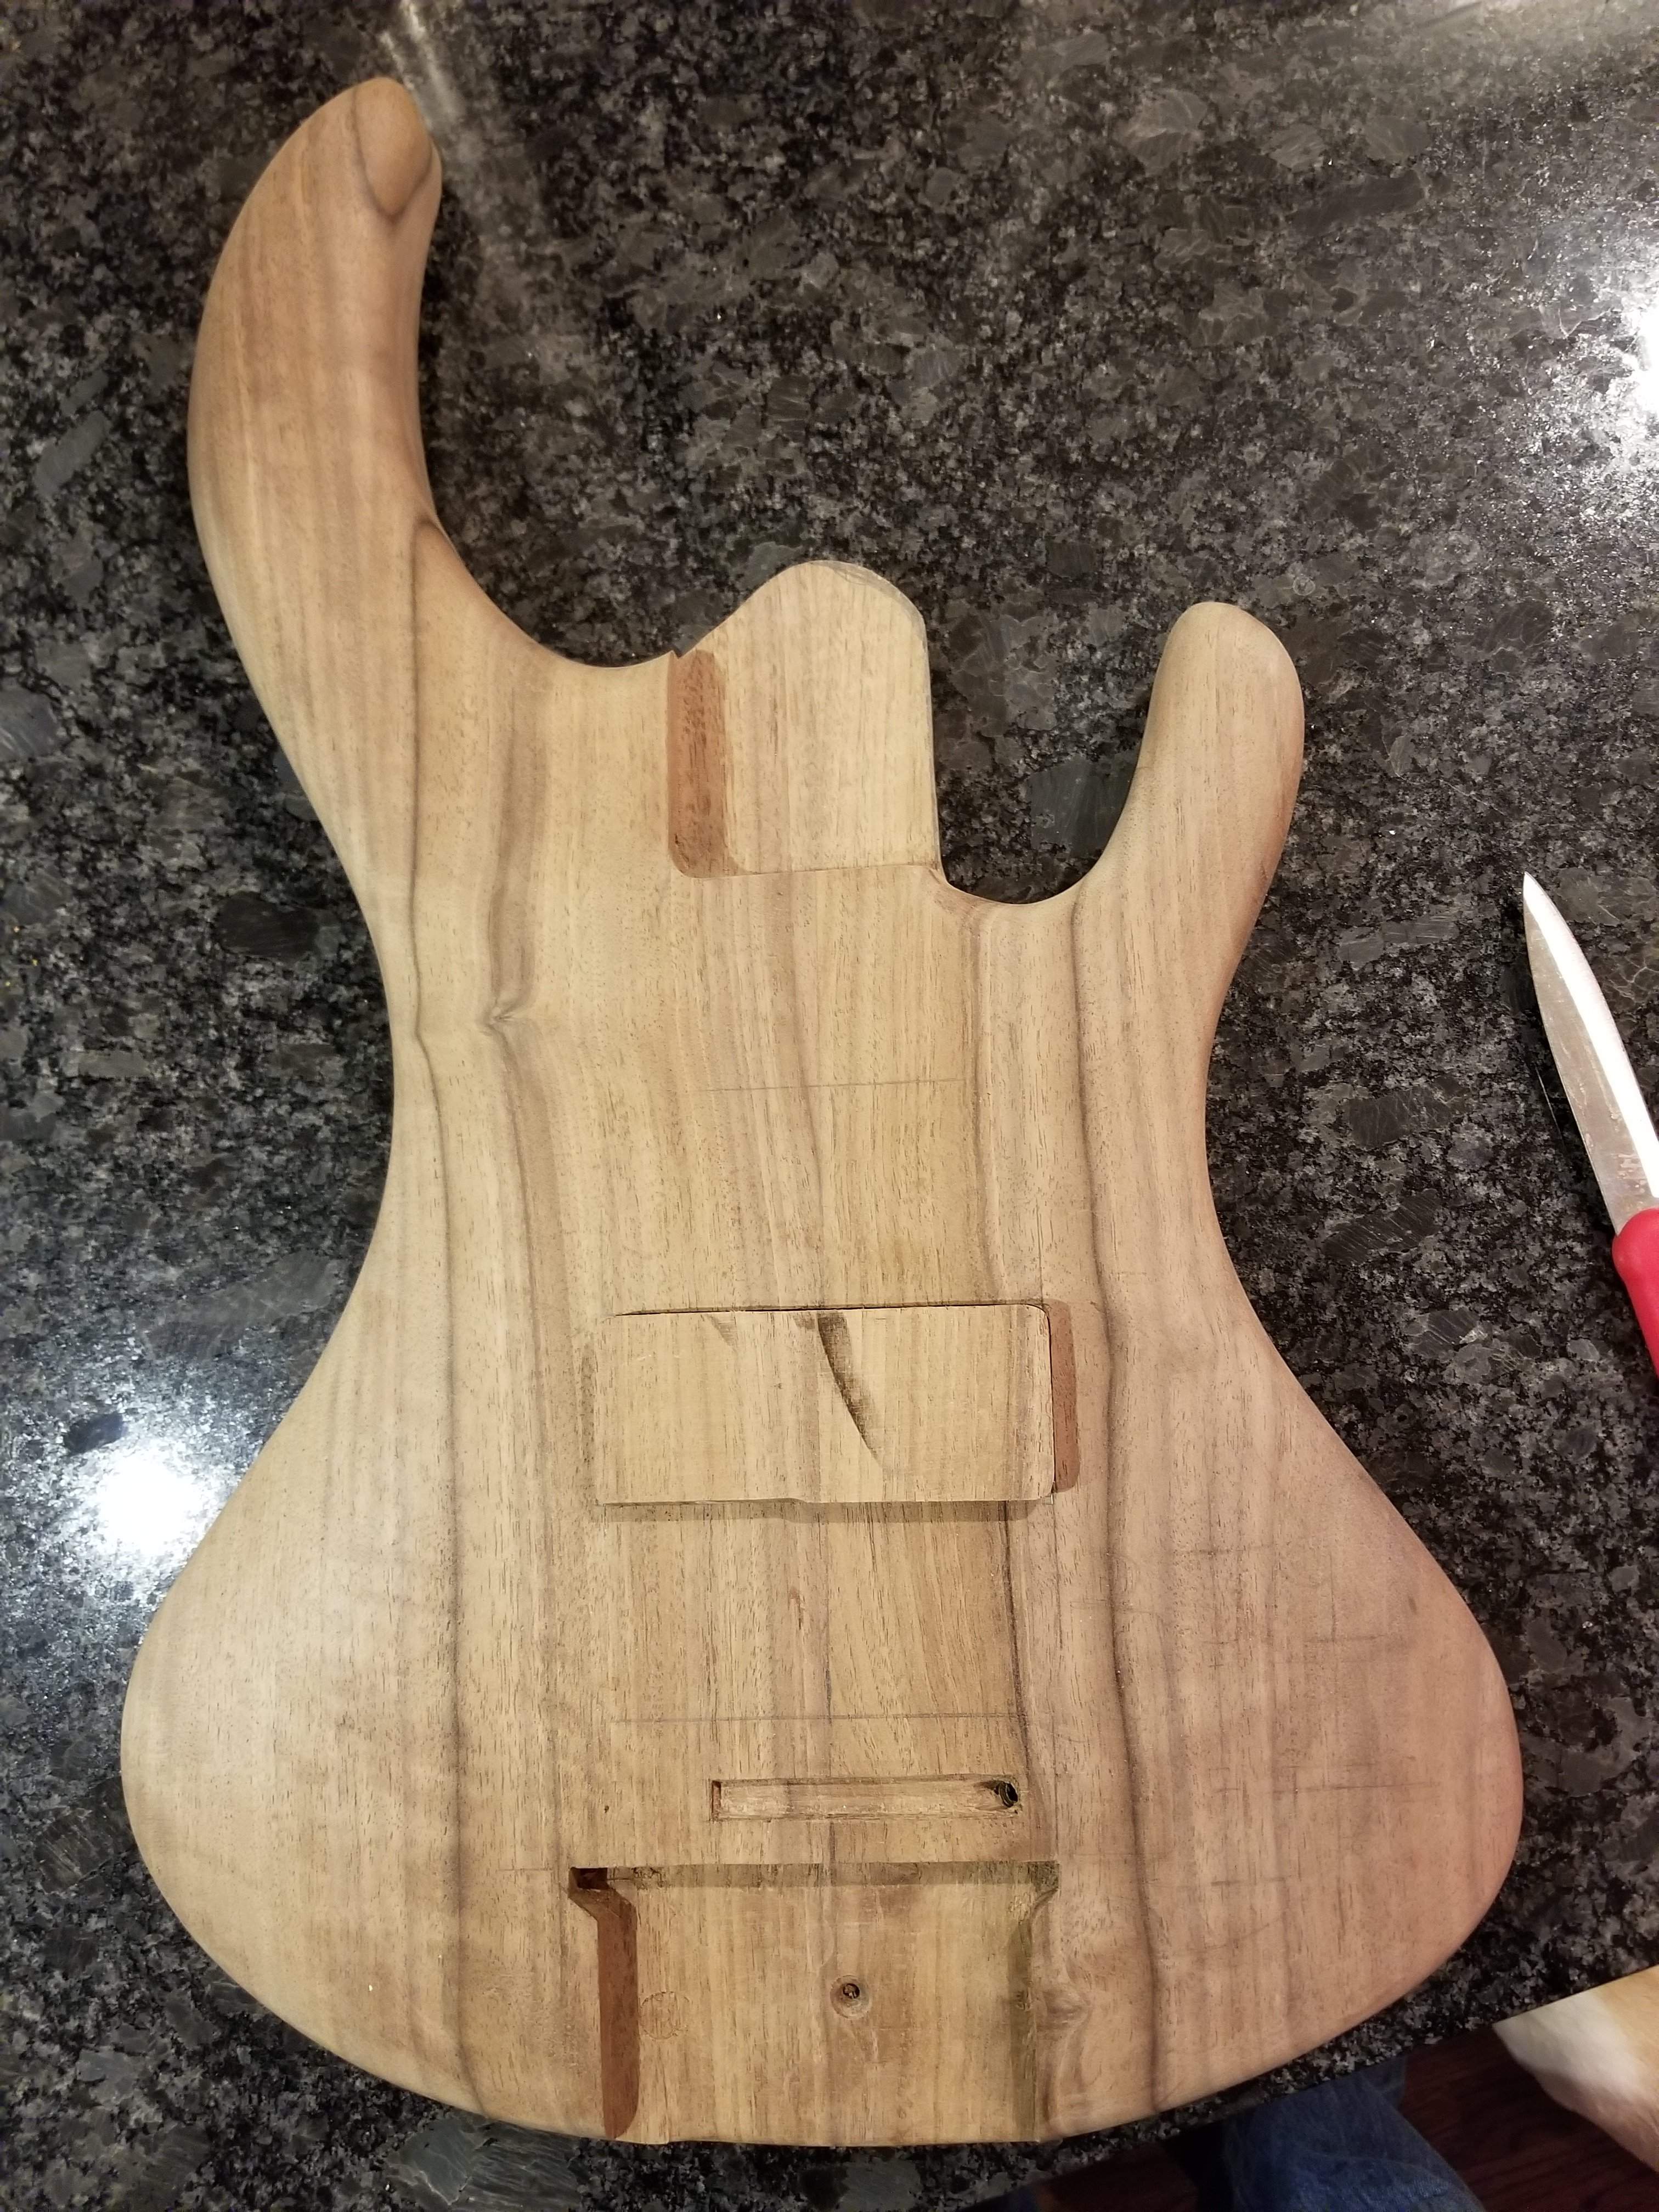
I pulled the cover out of the clamps, looks great, this is a good solution. Of course it needs some sanding, that's a saw mark on the face of it. The piece on top was used to test a roundover bit, I see a small bit of the roundover left, I'll sand it so it's all the same all the way around, I know it looks like it's different sizes, it's not, it's just the chamfer.
Thanks. The fretboard that's on its way here is 5/16" thick, the one that I have installed (that will be fretted) is 1/4" thick, so theoretically if I sand the radius carefully I shouldn't need to shim the fretboard. If I do, I can plane wood over my dad's in his sanding planer.
I'll look into that drill press fret arbor, sounds like a good idea.
I'll look into that drill press fret arbor, sounds like a good idea.
Thanks for the ideas. I've got abalone for side dots on this one. I'm putting fret markers in, but only on the side of the board. I'll probably use maple, but I'll see, the last board didn't have enough contrast. Gray plastic might be a good alternative.
It's not perfect by any stretch, I guess if it bugs me I can always make another out of a contrasting wood. I was thinking about inlaying a stripe of maple across it, but considering that there's not any other maple showing on the front, that's probably not a good idea.That's a really nice match with the pickup cover!
I sanded the cover down, it looks pretty awesome. I am proud of how it looks, if I can make the space around the bridge look equally good, this will be an improvement, not a mistake. I had to make the pickup cavity a bit deeper as well.
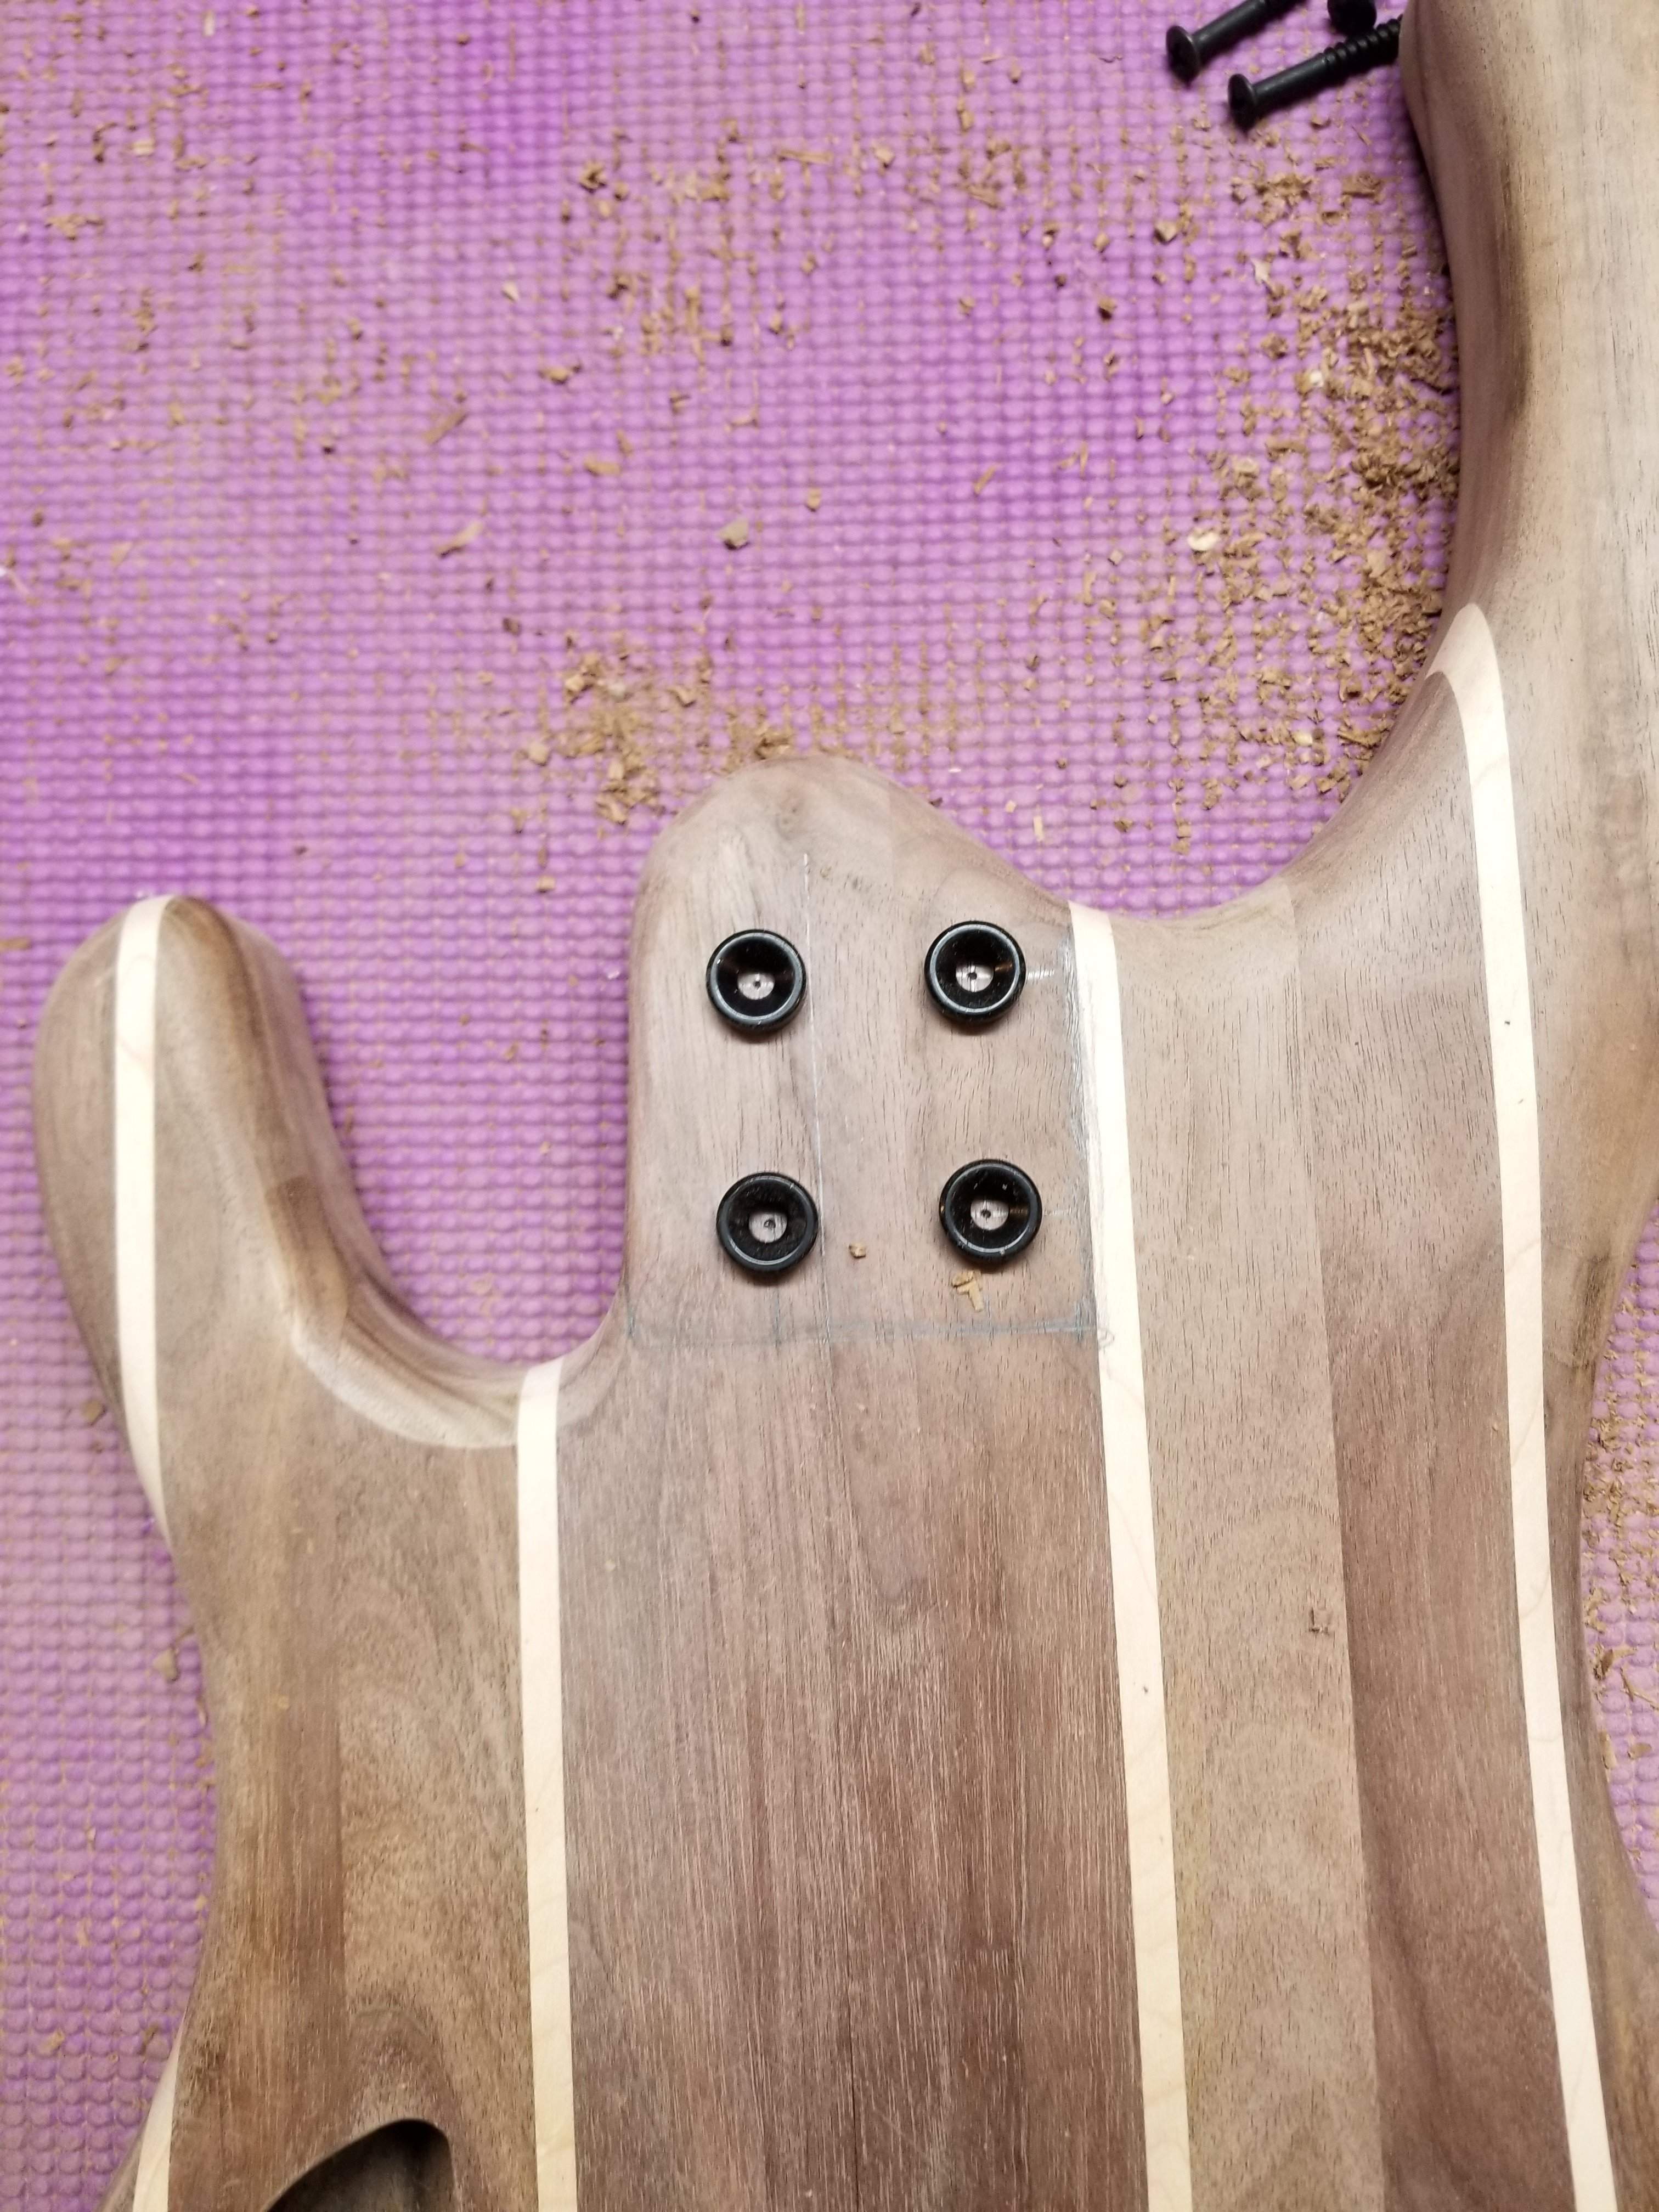
I got the ferrules lined up and marked for the bolt on neck, I'll probably adjust the top edge of the transition a bit. It's a bit awkward right now.
I'll have to think about what's next here I suppose I can get the bridge mounted, get the intonation points figured out then drill for the piezo wires.
I got the ferrules lined up and marked for the bolt on neck, I'll probably adjust the top edge of the transition a bit. It's a bit awkward right now.
I'll have to think about what's next here I suppose I can get the bridge mounted, get the intonation points figured out then drill for the piezo wires.

Maybe a w
How about a similar cover for the bridge?I sanded the cover down, it looks pretty awesome. I am proud of how it looks, if I can make the space around the bridge look equally good, this will be an improvement, not a mistake. I had to make the pickup cavity a bit deeper as well. View attachment 2868519
I got the ferrules lined up and marked for the bolt on neck, I'll probably adjust the top edge of the transition a bit. It's a bit awkward right now.
View attachment 2868520
I'll have to think about what's next here I suppose I can get the bridge mounted, get the intonation points figured out then drill for the piezo wires.
Whoa, that's a pretty good idea!How about a similar cover for the bridge?
I found a piece of wood that will match well. I'll cut it out and see how it looks.


