• TalkBass has been independent since 1998. Add your voice.
    Create a free account to reply to discussions, view embedded media, and browse with fewer display ads.
    Join freeLog in
    Want zero display ads or expanded classifieds tools? Compare plans.

Winter Build Off 2022: 5 String Fretless Neck Through

I don't have a bandsaw and honestly don't really care for almost everything. The one thing I really miss is the ability to resaw large boards (ex: 14" figured one piece tops). Unfortunately a saw that can do that is big and expensive so not an option for my garage. For everything else I can do the work with other tools I already have. For example, I taper necks with a router sled which is far more precise than a bandsaw.
 
Pardon my sidetracking amateur question, but what is the minimum size bandsaw (generally speaking) necessary to pull off some of these neck shaping cuts?

I think the others have answered this question pretty thoroughly. In a nutshell, most any band saw will get you through any cuts involving the neck. Tapering the length, cutting to thickness, headstock outline etc.

I have a Laguna 14|12 band saw. It's a 14" band saw with 12" of resaw capacity (it actually has more than 13" of resaw capacity). I really enjoy that extra height as it has comes in handy when bringing blanks down to thickness. It also allows me to buy all of my stock either rough cut or in billets and cut it down myself, which in theory is cheaper. :rolleyes: (Now I just buy too much wood)

But at any rate, I'd trade a couple inches of that resaw capacity for more room in the throat of the saw. There are times on a 14" saw that you just can't squeeze that extra swing/clearance... and I end up backing all the way out of the cut and coming back in from the other direction. I'm pretty certain that I'll always keep this saw as it is well made, has fantastic guides and has been trouble free... but I will buy another saw that is at least 19", if not larger, at some point. That way I can set up one for resaw operations, and the other with a smaller width blade for tighter curves.
 
You got it, Tim. Good thing you called dibs! :laugh:
I absolutely love the Laguna tools. I think as far as "bang for your buck" they are the best thing on the market. I know a lot of people will rail on me for preferring the Laguna table saw over a SawStop, but I'm okay with that. Bang for the buck, the Laguna wins hands down. My dream lathe is also the Laguna 24|36. Given my choice and considering my budget, I'd probably have an entire shop of Laguna tools; the 24|36 lathe, the 14|12 bandsaw, the F3 table saw, the JX|8 jointer, the PX|16 planer, the 25x2 drum sander (which is just a rip off of the old SuperMax drum sander) and the B|flux dust collector. That's my dream shop right there. :cool: Well, and enough space to put all that. :roflmao:
But seriously, bang for the buck, that's an awesome collection of tools.
 
I absolutely love the Laguna tools. I think as far as "bang for your buck" they are the best thing on the market. I know a lot of people will rail on me for preferring the Laguna table saw over a SawStop, but I'm okay with that. Bang for the buck, the Laguna wins hands down. My dream lathe is also the Laguna 24|36. Given my choice and considering my budget, I'd probably have an entire shop of Laguna tools; the 24|36 lathe, the 14|12 bandsaw, the F3 table saw, the JX|8 jointer, the PX|16 planer, the 25x2 drum sander (which is just a rip off of the old SuperMax drum sander) and the B|flux dust collector. That's my dream shop right there. :cool: Well, and enough space to put all that. :roflmao:
But seriously, bang for the buck, that's an awesome collection of tools.

You know what I'd really like? The budget to buy all of that. :D

But I agree with you for sure, I'll buy more Laguna tools when I can. I'm very happy with their quality, value and customer support.
 
Buying my 14" band saw was a real tipping point for me. It was like, "I guess I'm really going to build guitars now" because the outlay of money and garage space were considerable. Up til then I could have still decided to let the bass-building itch go unscratched. Once the bandsaw arrived, it was on.
At this point, my process is somewhat built around it, I don't know how I'd build a bass without it now.
 
Buying my 14" band saw was a real tipping point for me. It was like, "I guess I'm really going to build guitars now" because the outlay of money and garage space were considerable. Up til then I could have still decided to let the bass-building itch go unscratched. Once the bandsaw arrived, it was on.
At this point, my process is somewhat built around it, I don't know how I'd build a bass without it now.

Yeah, I can't believe that I waited as long as I did to buy a band saw. I use it all the time, it's so versatile.

I'm currently contemplating selling my table saw. The table saw is a great tool to have, but I just don't find myself using it as much now that I don't make furniture much any more. I can break down stock on the band saw and also with a skill saw on a guide... The truth is, a wide jointer would be far more useful to me than the table saw, and occupy a similar footprint. So, yeah, I'm also eyeing the Euro styled jointer planer combos in the 16" size. Somebody should probably tackle me and bring me back to my senses. :eek:
 
I have a modest 12" bandsaw. For general cutting, its great. But for ripping / re-sawing there is little advantage between my band saw and table saw. My bandsaw is good for about 160mm throat depth / depth of material. My table saw can do 80mm in a single pass. So If I accurately measure, cut and flip the material I also get 160mm. If I want to taller stock...I can do my 160mm cut and then use a hand saw to cut the middle portion. Not as neat but very "do-able". However, I do get band saw envy when I see someone posting an image of a dude neatly ripping a thin veneer off a big lump of stock.
 
Last edited:
I've adopted using the band saw at work and planing everything with the router sled.
You can get by with a jig saw, router and circ saw w/guide.
Although, I do have a portable table saw that's great for doing a rough square up on boards. It's small enough and used infrequently enough that it could be stashed in a cubby or under a bench/table.
But if I had to chose between a new purchase of a big table or jig saw, I'd go with the big jig saw.
 
  • Like
Reactions: SlingBlader and GMC
I've made a little progress this week. I'll break it up into a few posts to get caught up.

I cleaned up the inside corners of the headstock using chisels and files. I left the template in place to use for reference.
clISgiG.jpg


yVmDVzG.jpg


Ka2qJgC.jpg


And there it is. :)
kwVifTE.jpg
 
Qüïmsgëfääërdën ÏÏ (rëvïsïtëd) Dïë Fïngërböärd Märkïngs

I kicked around a bunch of ideas in my head for position markers... truthfully I should have probably done full lines to give myself the best chance possible to play in tune. In the end, I decided to go with a mix of small lines on the bass side at every position and dots on the fingerboard from 12-24 in between the D and G strings. I think F Bass does a very similar layout. I'll also be doing some additional side dots at the usual positions.

Using the scored fret positions that I made earlier for reference, I used my fret saw to cut slots for the bass side markers. I set the depth stop all the way up as this seemed like a pretty good depth of cut. I tried to keep the slots as plumb and square as possible, but this is actually harder than it looks. I need to figure out a jig to do this more consistently.
B8dc1FG.jpg


Trying to backlight the board so that the little slots show up better on camera.
DVcfQMz.jpg


Next, I drilled the holes for the face dots.
F2Slh6P.jpg


Here are the assemblies that will become the face and side dots.
487wAAA.jpg


I'm using .020 white PVC binding for the bass side position markers. Here I've inserted little pieces and wicking in acetone to weld them into the board.
0uhHqGQ.jpg


Position markers in place. I left them overnight to set up.
EWi41XU.jpg


The next day I trimmed the markers flush with a chisel plane.
nVgraNf.jpg


There we go, looking tidy. :D
vNN9d1t.jpg


LjJ9VzS.jpg


The board will get radiused next. The dots will not be installed until after the board is glued to the neck.

More soon.
 
Qüïmsgëfääërdën ÏÏ (rëvïsïtëd) Thë Rädïüsïng

A little more progress was made this weekend. I decided on a 12" radius for this board, so I got everything set up and got to work.

I think I'm one of the few here in LC that use radius router bit on my boards. I usually get a number of questions about this procedure, so I'll try to show some good detail about the process. I originally bought these bits from Amazon and they are the SJE brand. I don't think those are available any longer, but Yoniko has them available on Amazon at very reasonable prices.

The first step is to mount the board to a stable and square fixture. (of course I didn't take a before picture, but you can look at the after picture as it is still mounted) The fixture is just 2 layers of plywood that are glued and screwed together and square in all dimensions. I also have a centerline scribed along the long faces for easy alignment when mounting boards.

The fingerboard can be routed with or without slotting the board first, it's up to you. I've had no problems with tearout either way. It goes without saying that the board should be very flat and true before you attempt this.

Next, the bit is mounted in the router table (a table is a necessity, don't do this with a handheld router) and the bearing is removed from the bit. I position the top edge of the cutter at, or just slightly below the centerline of the board. My fixture and board is only on far side of the bit for alignment purposes. :thumbsup:
HH5WaG0.jpg


Bring the fence forward and lock one end. Adjust the cutter for a very small depth of cut. Note that because my board is already tapered, only the wide end will get cut on the first couple of passes. The fence will control depth of cut, I do not use the bearing at all.
e32aWg5.jpg


Hold the fixture with good downward pressure to keep it square to the table and use gentle pressure against the fence. Feed the first edge slowly, then flip the entire fixture end-for-end and feed the other side. Here is the end of the board after the first pass on both sides... just nipping off the corners.
M7uvGtF.jpg


Loosen one end of the fence and move it over a little to reveal more cutter. You can move the straightedge higher on the fence to get a feel for which area of the board will be cut.
zqIC8iH.jpg


After another pass.
iiOFMPg.jpg


And done. I snuck up on this in 4-5 passes, just moving the fence tiny amounts for the last few cuts.
cLLPpqo.jpg


And here is the whole board.
o5eZpM0.jpg


The process usually leaves a small ridge in the center of the board. That will get removed later. I'll glue the board in place, install face dots, thickness the neck, etc. before I true the face of the board. :D
 
I've seen that radius method with the router bits a few times. I think if I had a real router table I'd probably go that route....:cautious: But since my router table is a small Black & Decker benchtop setup that I have to clamp down to keep from walking all over the bench and it's kind of anemic in the power department, I'm holding off on that for now. But I've seen guys do it on the back of necks too and it makes me jelly of just how quick and simple it looks.

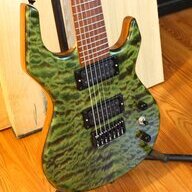
Also, that top is bonkers! :jawdrop: :drool: