• TalkBass has been independent since 1998. Add your voice.
    Create a free account to reply to discussions, view embedded media, and browse with fewer display ads.
    Join freeLog in
    Want zero display ads or expanded classifieds tools? Compare plans.

Winter Build Off 2026 - 18 Years in the Making

20260405_183632.jpg

On with the pickup rings. I chose to try to use the plywood core with a thick wenge veneer. First I made the veneer. I used an old wannabe fretboard that I practised slotting on a long time ago. Router planing for the win.
20260405_185520.jpg

One of the nice things on quartersawn wenge is how easy it is to hide gluelines. Not glued here though.

I sanded the veneers lightly on the routing fixture which doubles as a down draft table.
20260405_185018.jpg

I cut one of those veneers to pieces on the crosscut sled. And sanded the glue surface on the plywood core flat.
20260405_190655.jpg

20260405_191601.jpg

The it was time to glue the veneer pieces on the frame. It was a bit tricky but I got them there quite nicely. The other one needed a bit of clamping as the longitudal strips started to cup.
20260405_193254.jpg

After about half an hour I removed the clamps and cleaned the excess glue from the inner surfaces with a chisel. Then I let them dry for 2-3 hours.
20260405_200003.jpg

They came out okay I think. I trimmed the edges on the crosscut sled.
20260405_215339.jpg

20260405_215439.jpg

One of them had a couple of small voids where the wenge had splintered. I glued some other splinters there to balance it out.
20260405_220005.jpg

All in all it seems to work so far. I would not call this an effective production method though.

I plan to drill the corners to a matching radius with the plastic cover, then chisel and file the excess. And after that, it's time for a little sanding and binding.
 
Last edited:
I've been slowly working on the pickup rings this week. I realised I needed the bridge pickup ring to have 12 mm (1/2) binding. That's not available anywhere I have seen. So I made some from two strips of 6 mm abs.
20260407_211302.jpg

For the three pieces I used three different methods. First one I just butted the two pieces against each other and flooded the seam with acetone. For the next one I used binding cement (dissolved abs clippings in acetone). And for the last I brushed the edge of one strip with acetone before butting the two against each other.

They all resulted in a usable end product. I'd say the first method was the least succesful as the acetone dissolved the back surface as well. This resulted the most scraping needed.

The two other worked fine. The binding cement gave a better end result but brushing one edge with acetone was really fast and hassle free.
20260407_205732.jpg

I used a paint? scraper to flatten the surfaces. Thanks Ibridenstine for the tip.
20260406_213313.jpg

As mentioned before I drilled the corners of the pickup ring on the drill press. It went nice 7 times of 8. The one time I forgot to move the sacrificial sheet under the ring between holes. Which resulted in a little tearout. Which I believe will be sanded off.
20260406_214043.jpg

After This I sawed the cross grain with a small japanese saw and pared the rest with a chisel.
20260406_214540.jpg

The test fit showed the need to flatten the inside edges of the ring so it wouldn't look too sloppy against the flat side of the pickup cover.
20260406_220249.jpg

I'm still convinced this is not a method for mass production. Or maybe for even just the two. A milling solution would've been my first choise if I had that available. The other effective solution could be to cut the pickup hole first to a bigger sheet, maybe with a collar and a 4 or 5 mm bit. And saw the outside afterwards.

If I ever make more of these I'll try something else. It might be sooner than later If I can't get these to look as sharp as I'd like.
 
Last edited:
On with the pickup rings. So much to do!

I brewed more binding cement in glass jar overnight. This was maybe thursday. Friday evening I gathered all the ingredients and did the binding on the bridge pickup ring.
20260411_193754.jpg


Notice the carefully manufactured stick de ápplication. I flooded the wood surfaces with the abs-acetone brew and gave it a blue tape wrapping.
20260411_194438.jpg

20260411_195826.jpg


I also did a test piece to find out how the abs cement works with the 8 mm cab binding. There were no explosions, smoke or even slight bubbling in the corner joint there.

Yesterday I removed the tape, after which the pup ring looked like this:
20260412_095427.jpg

20260412_095442.jpg


A few minutes on the 120 grit sanding block and we have this:
20260412_122611.jpg


Some of the binding cement has found it's way in the pores in wenge. I think I can get enough of it out with a needle or the tip of an exacto knife.

Couple of corners needed some filling. So I did that.
 
Today I checked the test piece I did with cab binding and abs cement. All had cured nice and hard. I leveled the top and sides on a sanding block.
20260412_183526.jpg


The seam is visible. Part of it might be because the the cab binding has a bit fuller and warmer colour to it. But I don't think that line would bother me. And I believe it would get less visible after it's finished.

Because there were no other issues I just went with the abs cement. I did however just do the short sides, planning to trim their ends flush with the sides before gluing the longer strips in.
20260412_193444.jpg


I also test fitted the bridge pup ring with the chrome cover. Yes, before doing the binding on the neck one. Anyways I think this might be the way to go. I need to get two chrome covers with no magnet holes. These pickups don't have adjustable pole pieces.
20260412_182116.jpg


I bet those chrome covers fit nicely in the same shipment with the hipshot tuners...
 
Even. More. Pickup rings.

Or just the two, but... oh well. The neck pickup ring had cured nicely, even with the unorthodox abs-cab mix. It cleaned up neatly with a chisel.
20260413_203632.jpg


I glued the longer strips again with the abs cement. I was not planning to use it as a pore filler, but that's what happened here.
20260413_204359.jpg


If I were to do more of these I would seriously consider pore filling before binding. Or at least using a less visible glue and the white cement just for the corner joints.

I wanted the open pore look on these like the other parts. But white plastic in the pores is maybe slightly worse than clear filler...

Oh, almost forgot. I learned that the acetone-abs cement can't be used to fill bigger voids in one go. There will still be a void after the cement has cured. This is propably due to the acetone evaporating fast on the outside, creating a hard shell. And if the shell doesn't collapse as the acetone evaporates from the inside, there has to be a void of some sort. Either a bigger one or lot's of smaller bubbles.

I saw both today in the bridge pickup ring. I'll try filling in smaller steps with maybe a thicker paste.
 
Last edited:
Ladies and gentlemen, we have chrome.

20260424_210744.jpg


20260425_101855.jpg


The (hopefully) last part shipment showed up yesterday. And of course a test fit was in order. It was mostly good.

20260425_102032.jpg


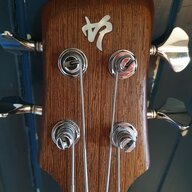
The peghead is quite small, which I knew, but the tuners made that obvious. Lining them up in a visually pleasing manner is tricky. And the tuner holes don't line up that nice with the neck laminates.

But I bet that won't bother me much in the long run. Gotta pay more attention to that in future builds though.

But these are seriously nice tuners. I might redo the knobs sometime. For weight savings and maybe looks as well. But they are fine for now.

20260424_210714.jpg


The schaller pot knobs are nice. I bet they won't last that shiny for long.
 
The tuners came packed interestingly. The packaging wasn't Hipshot's but instead they had Warwicks parts department's info on them. No matter, nice tuners still.

20260424_210121.jpg


The Schaller swithch knob was nice, but didn't quite fit the switch I have. Either different pitch or different thread all together. It turns maybe a full and a half turn before stopping. Which is propably enough to hold it for years to come. But it won't go as deep as it should.

I would've bought a Schaller switch but they didn't have any. I might try to modify the thread on the switch or try and locate a different one.

20260425_102536.jpg


The pickup covers were shiny and all but little deformed. The long sides are notably convex and the bottom edge turns outwards.

20260425_102259.jpg


They are also a little shallow. And these Yamaha pickups are quite high. So the bottom edge on the cover won't reach the brass base of the pickup. But I think this is not that difficult to fix. Maybe with a small soldered brass plate in between.

20260425_102350.jpg


20260425_102510.jpg
 
Last edited:
It's pretty obvious at this point that I won't finish this in time for the build off. It would've been tricky even without the early spring we got. And now there's just too much to do outside.

But I'm completely fine with that. I like outside. What's great about this build off thing is it got me started. And I think this will be finished some time in the near(ish) future. At least near on the timeline I'm working on.

I'll keep reporting the progress here. In too much detail as per usual. But for now I'm gonna grab some heat treated radiata pine and go build some dock ladders.
 
Ok then. The ladder thing is done and waiting for installation. So I stole a little time for the guitar.

20260616_184417.jpg


20260616_184347.jpg


I used the old neck routing template to adjust the router fixture. The inclinometer is there just to document the angles for future reference.

20260616_184511.jpg


I was honestly a bit surprised how close to halfway I had gotten the neck rotation compared to the slope on the top.

20260616_185248.jpg


20260616_185830.jpg


I used blue tape to help in keeping the pickup ring steady. And some rubber sheet pieces to seal the rest of the vacuum surface.

I used a spiral bowl bit on the router. This one has a small 3 mm radius (1/8). And yes, I think it's okay to run flush trim bits without a guiding template. A little weird, sure, but okay.

20260616_190332.jpg


20260616_191339.jpg


I took a few shallow passes. The pickup ring stayed securely in place. Even though I was a bit worried about possible heat issues, there were no problems in routing the plastic on fairly high speed.

20260616_192555.jpg


Here's a test fit. It seems I did not design the cutaway for this large pickup rings. I can fit it here, but it will be very close to the edge. Oh well...

Anyways I'll do the other one the same way. I'm still not convinced these prototypes will make it to the final assembly. There's just too many little imperfections. But we'll see.
 
Right. There was something a bit off with the fit of the neck pickup ring. I didn't think much of it. Until I started planning the work on the other one. You know, to see how high it should be and so on.
20260622_204310.jpg


And there it is. The slope is towards the bridge. Which is not quite how it should be. And if I turn it around, it doesn't fit the angle of the top.

So the routing operation, although seemed to go nicely, was a failure. In hindsight it's obvious: routing the ring upside down reversed one angle, but not both. For someone who prides himself in spatial ability and being able to visualize complex relations, I can be pretty dimwitted sometimes...

Oh well. It fits nicely the plywood side up.
20260622_204534.jpg
 
Happens to all of us, that’s how we learn and improve.

The next set of rings will go better. Just keep working till you get them to match with at you're envisioning.

Here’s how I look at it… this instrument has taken this long to get to the point it’s at. Why compromise on anything at this point ? If it takes more time to get it right, so be it. Ten years down the road you want to be able to look at it and say “yep, I’m glad I took the time to do that”.

Looking great so far !
 
This is as far as the prototype batch one goes. There's just too many little things that went south and are too much of a hassle to fix.

Which means I'll be making more pickup rings. Yay. This time a little narrower and with less operations.

I decided to make a single face veneer for both rings and glue it on a plywood substrate. First I jointed one edge of one of the veneers I made earlier.

20260625_182716.jpg


Then I checked it was big enough, marked the center and cut it on the crosscut sled.

20260625_183410.jpg


20260625_183450.jpg


Then I checked the grain pattern mirrored:
20260625_183708.jpg


And parallel, with the right side flipped over:
20260625_183733.jpg


I decided to go with the latter, and glued the veneer together:
20260625_184605.jpg


After about half an hour figuring out how the kid's electric drum set should be adjusted, I wiped and scraped the excess glue and glued the veneer on the plywood substrate. This time with clamps.
20260625_191615.jpg


After another half an hour adjusting the drums I removed the clamps and cleaned the overflown titebond from the table and the workpiece. Or at least I hope I cleaned the table too...

20260625_200004.jpg


Anyways this is where it's at. Pictured here with the drum chair height adjustment screw, which needs to be retired.

I should be able to turn this into two pickup rings. So stay tuned for even more pickup ring stuff...
 
Happens to all of us, that’s how we learn and improve.

The next set of rings will go better. Just keep working till you get them to match with at you're envisioning.

Here’s how I look at it… this instrument has taken this long to get to the point it’s at. Why compromise on anything at this point ? If it takes more time to get it right, so be it. Ten years down the road you want to be able to look at it and say “yep, I’m glad I took the time to do that”.

Looking great so far !
Thanks. And don't worry, I'm not in a hurry with this one. Never was and won't definitely start now.
 
  • Like
Reactions: Dark Horse
Yesterday I removed the cover from the other pickup with the new old soldering powerhouse. There was quite a bit of solder between the center polepieces and the pickup cover.

20260702_194704.jpg
20260702_195036.jpg


Thankfully it had done no damage and wasn't hard to dig out. And the backplate screws were still in full operating condition.

20260702_195230.jpg

20260702_195302.jpg


I got it back together and measured the resistance for both. They read 12.3 and 12.9, so they're pretty hot. I was hoping for a little less. But we'll see how they actually work.

20260702_200921.jpg
 
If you set them really low - like flush with the pickup ring on the neck pickup and only barely higher on the bridge, you may find that they’re okay. It’s amazing how much even really hot pickups clean up when you get them far enough from the strings.

Yeah. I have high output active humbuckers on two guitars. But I had a different setup in mind for this one. Anyways I'll put these on and see how it works. They can always be replaced.
 
Yesterday evening I installed the covers on the pickups. I made little pieces of some thin brass offcut I had. I cut it with some tin snips and straightened with a couple of hammers using the bigger as an anvil.

20260704_210140.jpg

20260704_210626.jpg


Then I scraped the chrome from the spots that would get soldered. I used one of the diamond needle files, which was nice for the job. This might be the first time I've ever used that set. And I've had it for 10-15 years.

20260704_210904.jpg

20260704_212352.jpg


I then brazed the lugs inside the cover. This turned out to be tricky. The first time the solder didn't stick, so I had to redo the filing. Then I had all of them pointing too much outward, so I had to realign every single one.

I held the plate in needle nose pliers and used the antique soldering iron. It generates a lot of heat, but the insulation on it isn't great and the shaft heats up significantly.

20260704_223507.jpg


After the lugs fit reasonably I used a clamp with wood cauls to hold the cover in place and locking pliers to squeeze the lugs closer to the pickup base plate.

This was a little easier. But the first pickup got heated so much a little molten wax flowed out. And I scratched and dented the covers some. Hopefully not badly in any visible spot

20260704_224213.jpg


After they had cooled down I took a knife and whittled some of the excess tin off. These ain't pretty. But only I and the internet will ever know.

