
Razor blade then sandpaper? Dremel mini cutoff wheel then sandpaper?So now that I got all those slivers of wood glued in here, what's the best method of trimming them so it doesn't just break out?

Enjoy the benefits of a premium membership!
Upgrade Account
-
TalkBass has been independent since 1998. Add your voice.
Create a free account to reply to discussions, view embedded media, and browse with fewer display ads.
Join free Log in
Want zero display ads or expanded classifieds tools? Compare plans.
You are using an out of date browser. It may not display this or other websites correctly.
You should upgrade or use an alternative browser.
You should upgrade or use an alternative browser.
Winter Buildoff 2022: Still A Diva
- Thread starter TerribleTim68
- Start date
More options
Who Replied?

Flush cut trim saw.
I have both of these. I'd pick the DeWalt style for that. The HF saw leaves little marks from the side of the kerf.
Or a razor blade. But a nice flush cut makes it super easy with less chance of a slip.
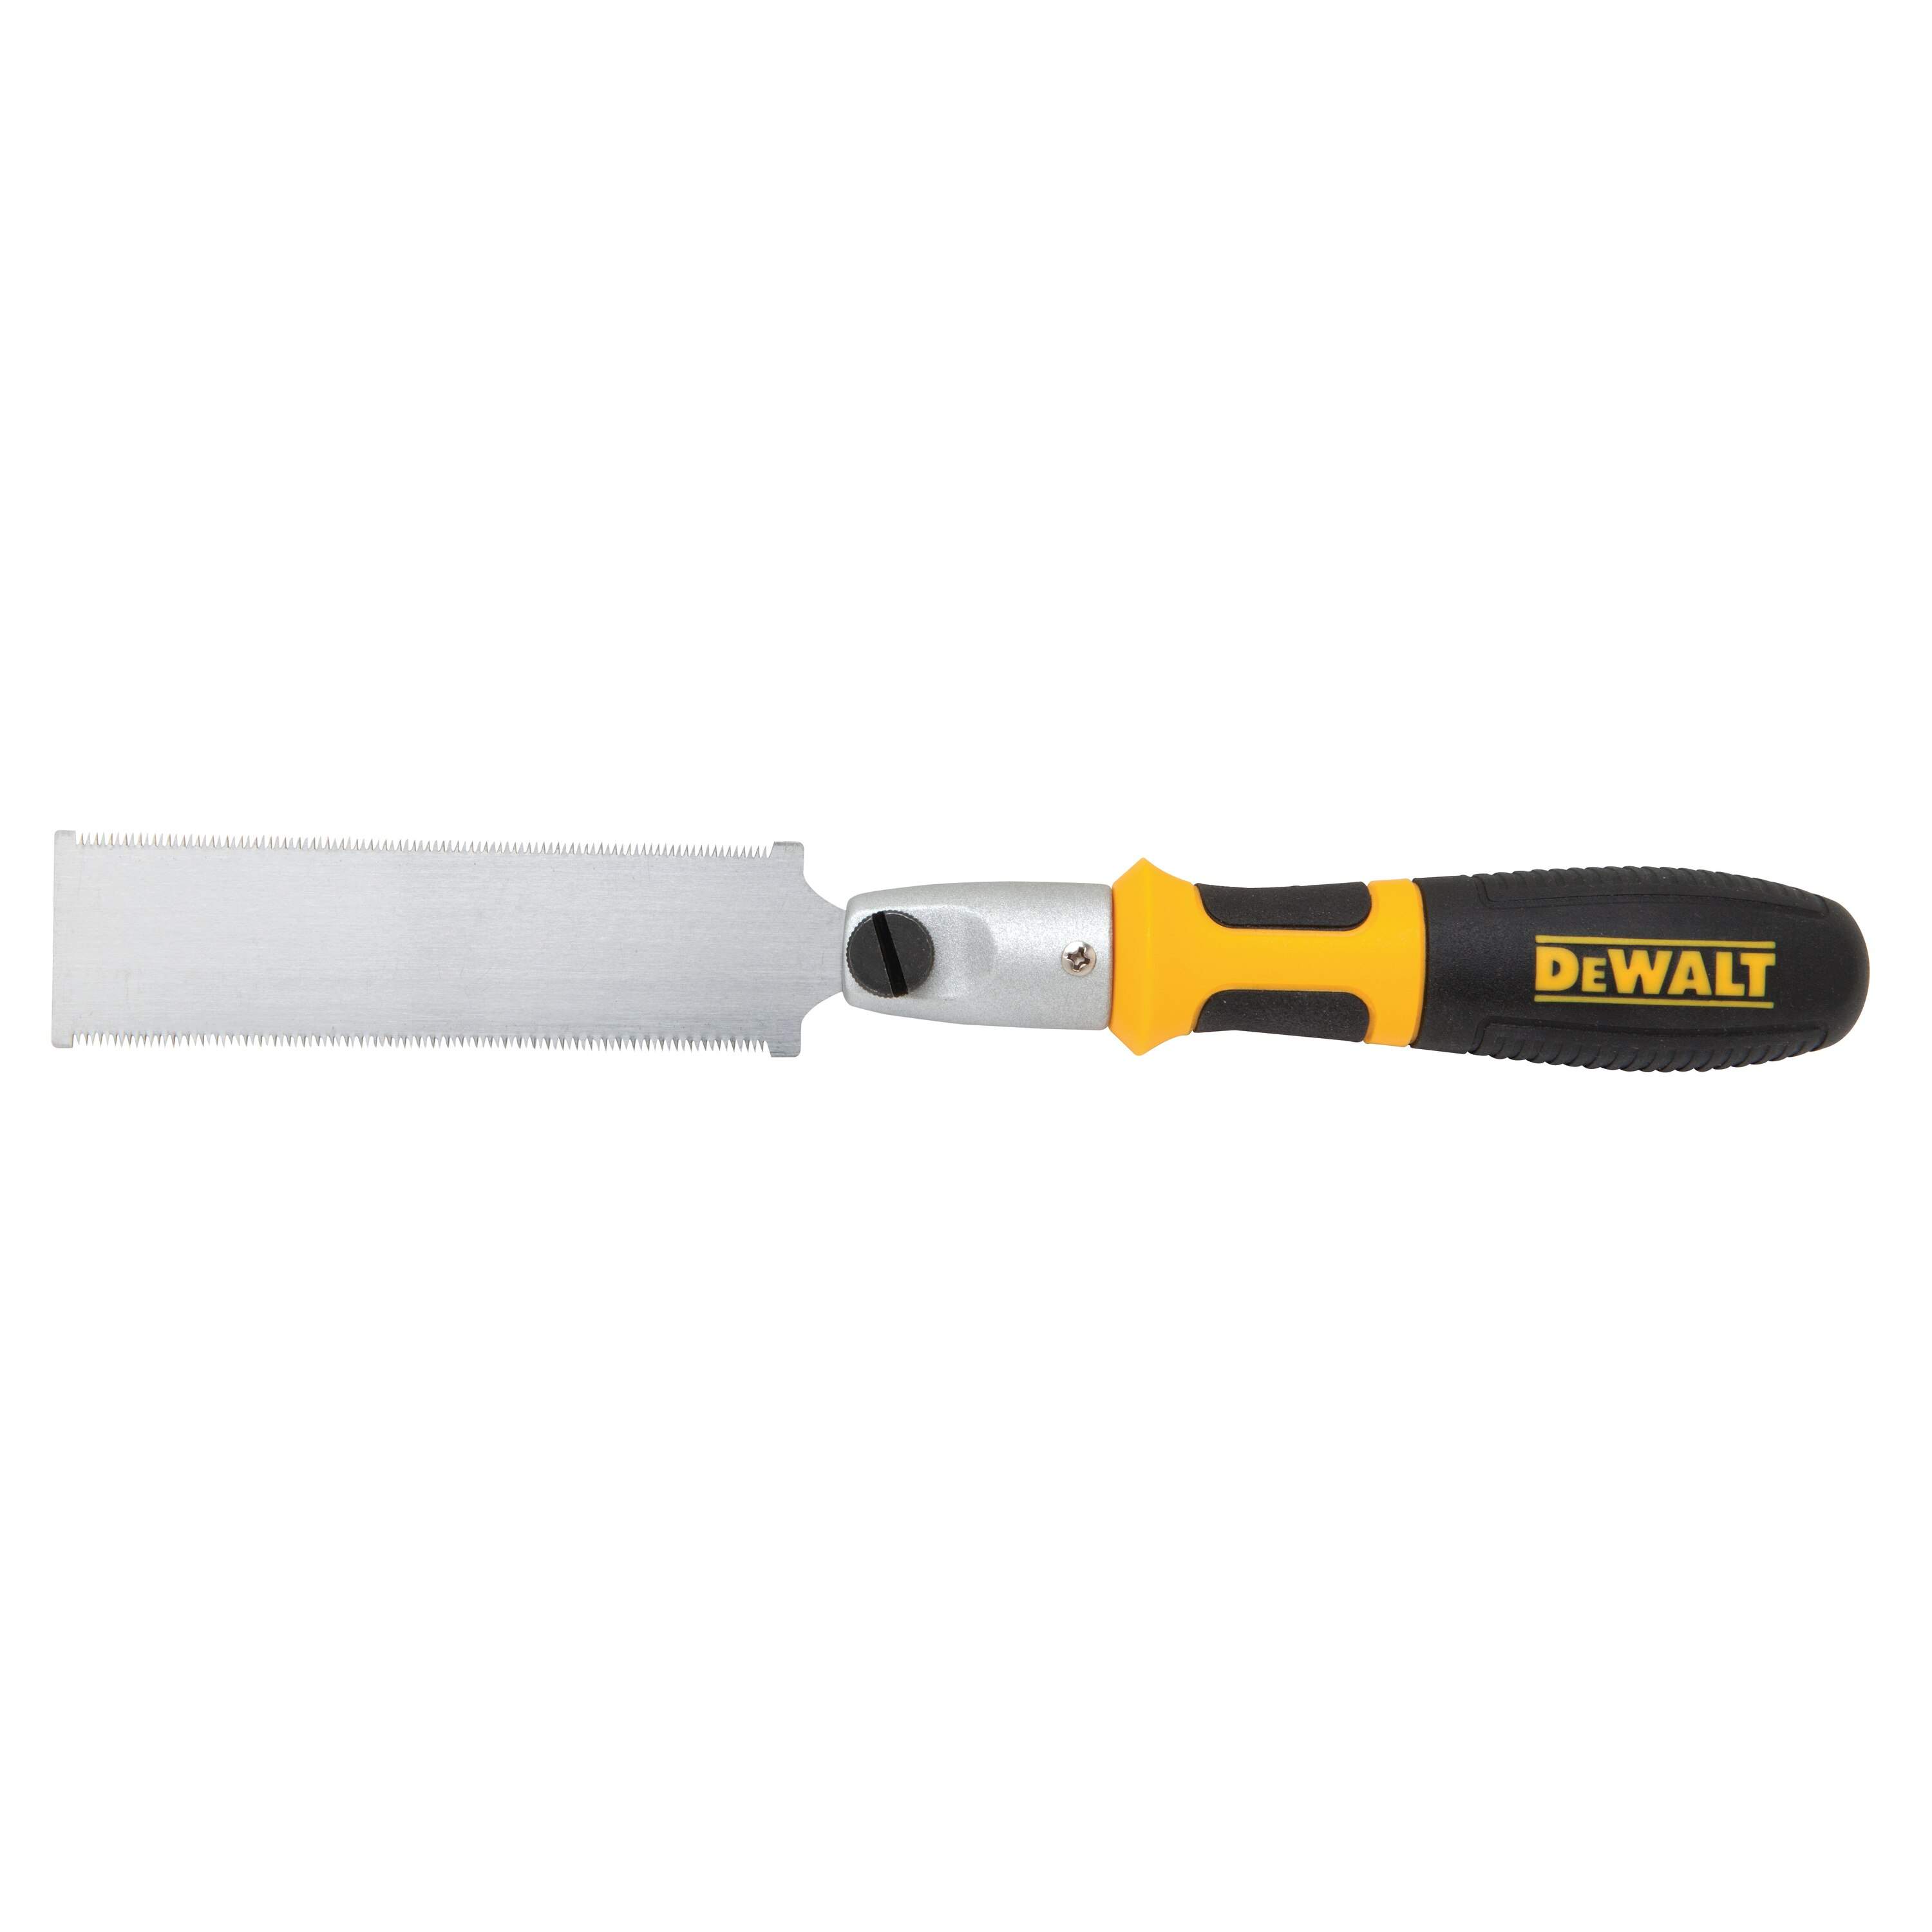

I have both of these. I'd pick the DeWalt style for that. The HF saw leaves little marks from the side of the kerf.
Or a razor blade. But a nice flush cut makes it super easy with less chance of a slip.

Are you talking trimming the top/bottom so they're flush to the original piece, or something else?

I'd have used it as a horizontal boring drill for this job, methinks. Lay the work down flat on the table and drill into the side of it, flatways... One of the "tricks" that make it better than the average drill press, IMHO.get the ShopSmith converted over to a drill press

Yeah, just trimming them off flush to the fretboard blank so I can start radiusing it.Are you talking trimming the top/bottom so they're flush to the original piece, or something else?
You know, I thought about it.I'd have used it as a horizontal boring drill for this job, methinks. Lay the work down flat on the table and drill into the side of it, flatways... One of the "tricks" that make it better than the average drill press, IMHO.

You could probably just use the fret saw and just leave a hair sticking up. The fret saw should make a fine enough cut that it won't tear them up or take much pressure to cut them.

That kind of tearout/shredding nightmare is why I've more or less given up on template routing stuff like bodies and headstocks. When it goes wrong it's pretty violent. I've settled on the Robosander for all that kind of work. It's slow and tedious, but no risk of destruction, shrapnel, or tearout, all of which has happened to me. Plus it can be chucked into a cordless drill as a mini-drum sander, which hadn't occurred to me until Mapleglo did it.
Ha! Same experience with the HF "flush cut" saw which isn't... flush. I used to have a superb one made by Veritas that finally wore out. I should probably suck it up and get another one.I have both of these. I'd pick the DeWalt style for that. The HF saw leaves little marks from the side of the kerf.
Or a razor blade. But a nice flush cut makes it super easy with less chance of a slip.
I could swear I had at least 2-3 pics somewhere. I checked the phone again and 2 laptops and this is the only other one I could find.I'm pretty sure I found a couple decent back pics that show the contours, but they're on the laptop at work, I think. The one you posted is probably one of them. I have this one on my phone. You can probably mess with it in Photoshop or something to see it better.

Last edited:

Lessons In Hiding Your Mistakes -
I think everyone will agree that building bass guitars (or any guitar for that matter) is basically an exercise in hiding all the parts where you messed up. This fretboard is one of them. As @RichterScale mentioned, the best plan here is to just find some scrap offcuts that the grain will sort of match up the best and glue them on. This is why you do not throw away any tiny little scrap until you are done with the build. I found some offcuts that looked like they might work, ran the ol' #5 over the edges to get them mating up as best I could, threw some glue at it and in the clamps it went -
View attachment 4526943
Okay, let's let that sit while I deal with other things.
It's A Fretless, Buuut...... -
I'm not a fretless player, never even tried one. So I'm gonna need some help here in the old "where the heck is that note again?" department. Let's add some position markers, shall we? So, funny story. A couple years ago I purchased these boxes of laminate scraps from a guy who was otherwise gonna toss them. -
View attachment 4526946
View attachment 4526945
View attachment 4526944
I think I gave him $10 for all this or something like that. I know it wasn't much, and at the time my wife said "Why? What are you gonna do with it?" I don't know, but I feel like it might come in handy at some point. It's been sitting on the top shelf ever since, aside from using a small bit of it for some turning blanks I glued up with stripes in them and one Celtic knot blank I glued up as well. But hey, what a perfect opportunity to use some of it here! Oh, and check out all that flame maple looking stuff! The box was marked curly maple, but it looks like flame to me! We should definitely use that!
So, the first step is to tape my fretboard print out on this fretboard blank and then we have our positions located. This is why when I made the drawing, I put frets on the drawing. Then we can take the little saw and cut some angled slots that cover the side and a bit of the front -
View attachment 4526942
After cutting the slots, we need laminates to go in there. Yes, the slots are not that clean, I'm aware. I'm hoping that the laminates and glue will hide any issues and that the major areas of break out will basically go away as I radius the board.
Obligatory shot of all the little laminates in a pile, along with a glue bottle. Let's do this! -
View attachment 4526941
View attachment 4526940
Probably way too much glue, judging by the amount of drips on my floor, but whatever.
I'll let this dry until tomorrow before I try to figure out how best to trim them before we start radiusing the board.
Now, Where Were We? -
So it took me a couple solid hours to work on the position markers. That other fretboard section should be ready to work with now, right? The glue bottle says "ready to unclamp in half an hour" and I've seen people say that you can work with it after a couple hours, we should be good to go, right?
Let's grab our little template we made earlier (yes, I like templates), grab a few supplies and do "The Trick" -
View attachment 4526939
Then we can throw the little Amana pattern bit in the router table and flush trim this thing, right? Right?
I guess not. My router table basically said "Yeah no, I don't think so bruh!" -
View attachment 4526937


What The Actual...... -
So yeah, that was fun. Mostly I'm just happy I could retrieve all the...parts.
Not cool man, not cool. I thought we were good to go, I even asked. I don't know what the deal was, I probably fed it the wrong direction or something. Anyways, let's give it a good slathering of glue, press it all back together, wrap some tape around it and try to recover from this one -
View attachment 4526932
I'm gonna just walk away at this point. I'll come back tomorrow and untape it and see what we've got. I set out this morning thinking "I'd like to get the fretboard sorted today", clearly that didn't happen. But looking back, I did get a lot done. It just all went very, very slowly. that's enough fun for one day.


How much are you trying to rout off? Not to teach you how to suck eggs etc but I would draw round your template and then bandsaw (or jigsaw) as close to the line as you dare before sticking your template on and routing. Ideally you are taking off less than 1mm with the router.
Yeah, I get all that. I'm just not that good at it.How much are you trying to rout off? Not to teach you how to suck eggs etc but I would draw round your template and then bandsaw (or jigsaw) as close to the line as you dare before sticking your template on and routing. Ideally you are taking off less than 1mm with the router.
 I get as close to the line as I feel comfortable doing, which probably leaves 4 to 5 mm left for the router. I know it's more than advised, but you guys that zip your bandsaw all over the place within 1mm of the line clearly have more talent and a batter bandsaw than me. I'm just not on that level.
I feel you. Not having a band saw has provided me with expert level of doing all of the things all of the hard ways so farYeah, I get all that. I'm just not that good at it.

Still Fretting Over This -
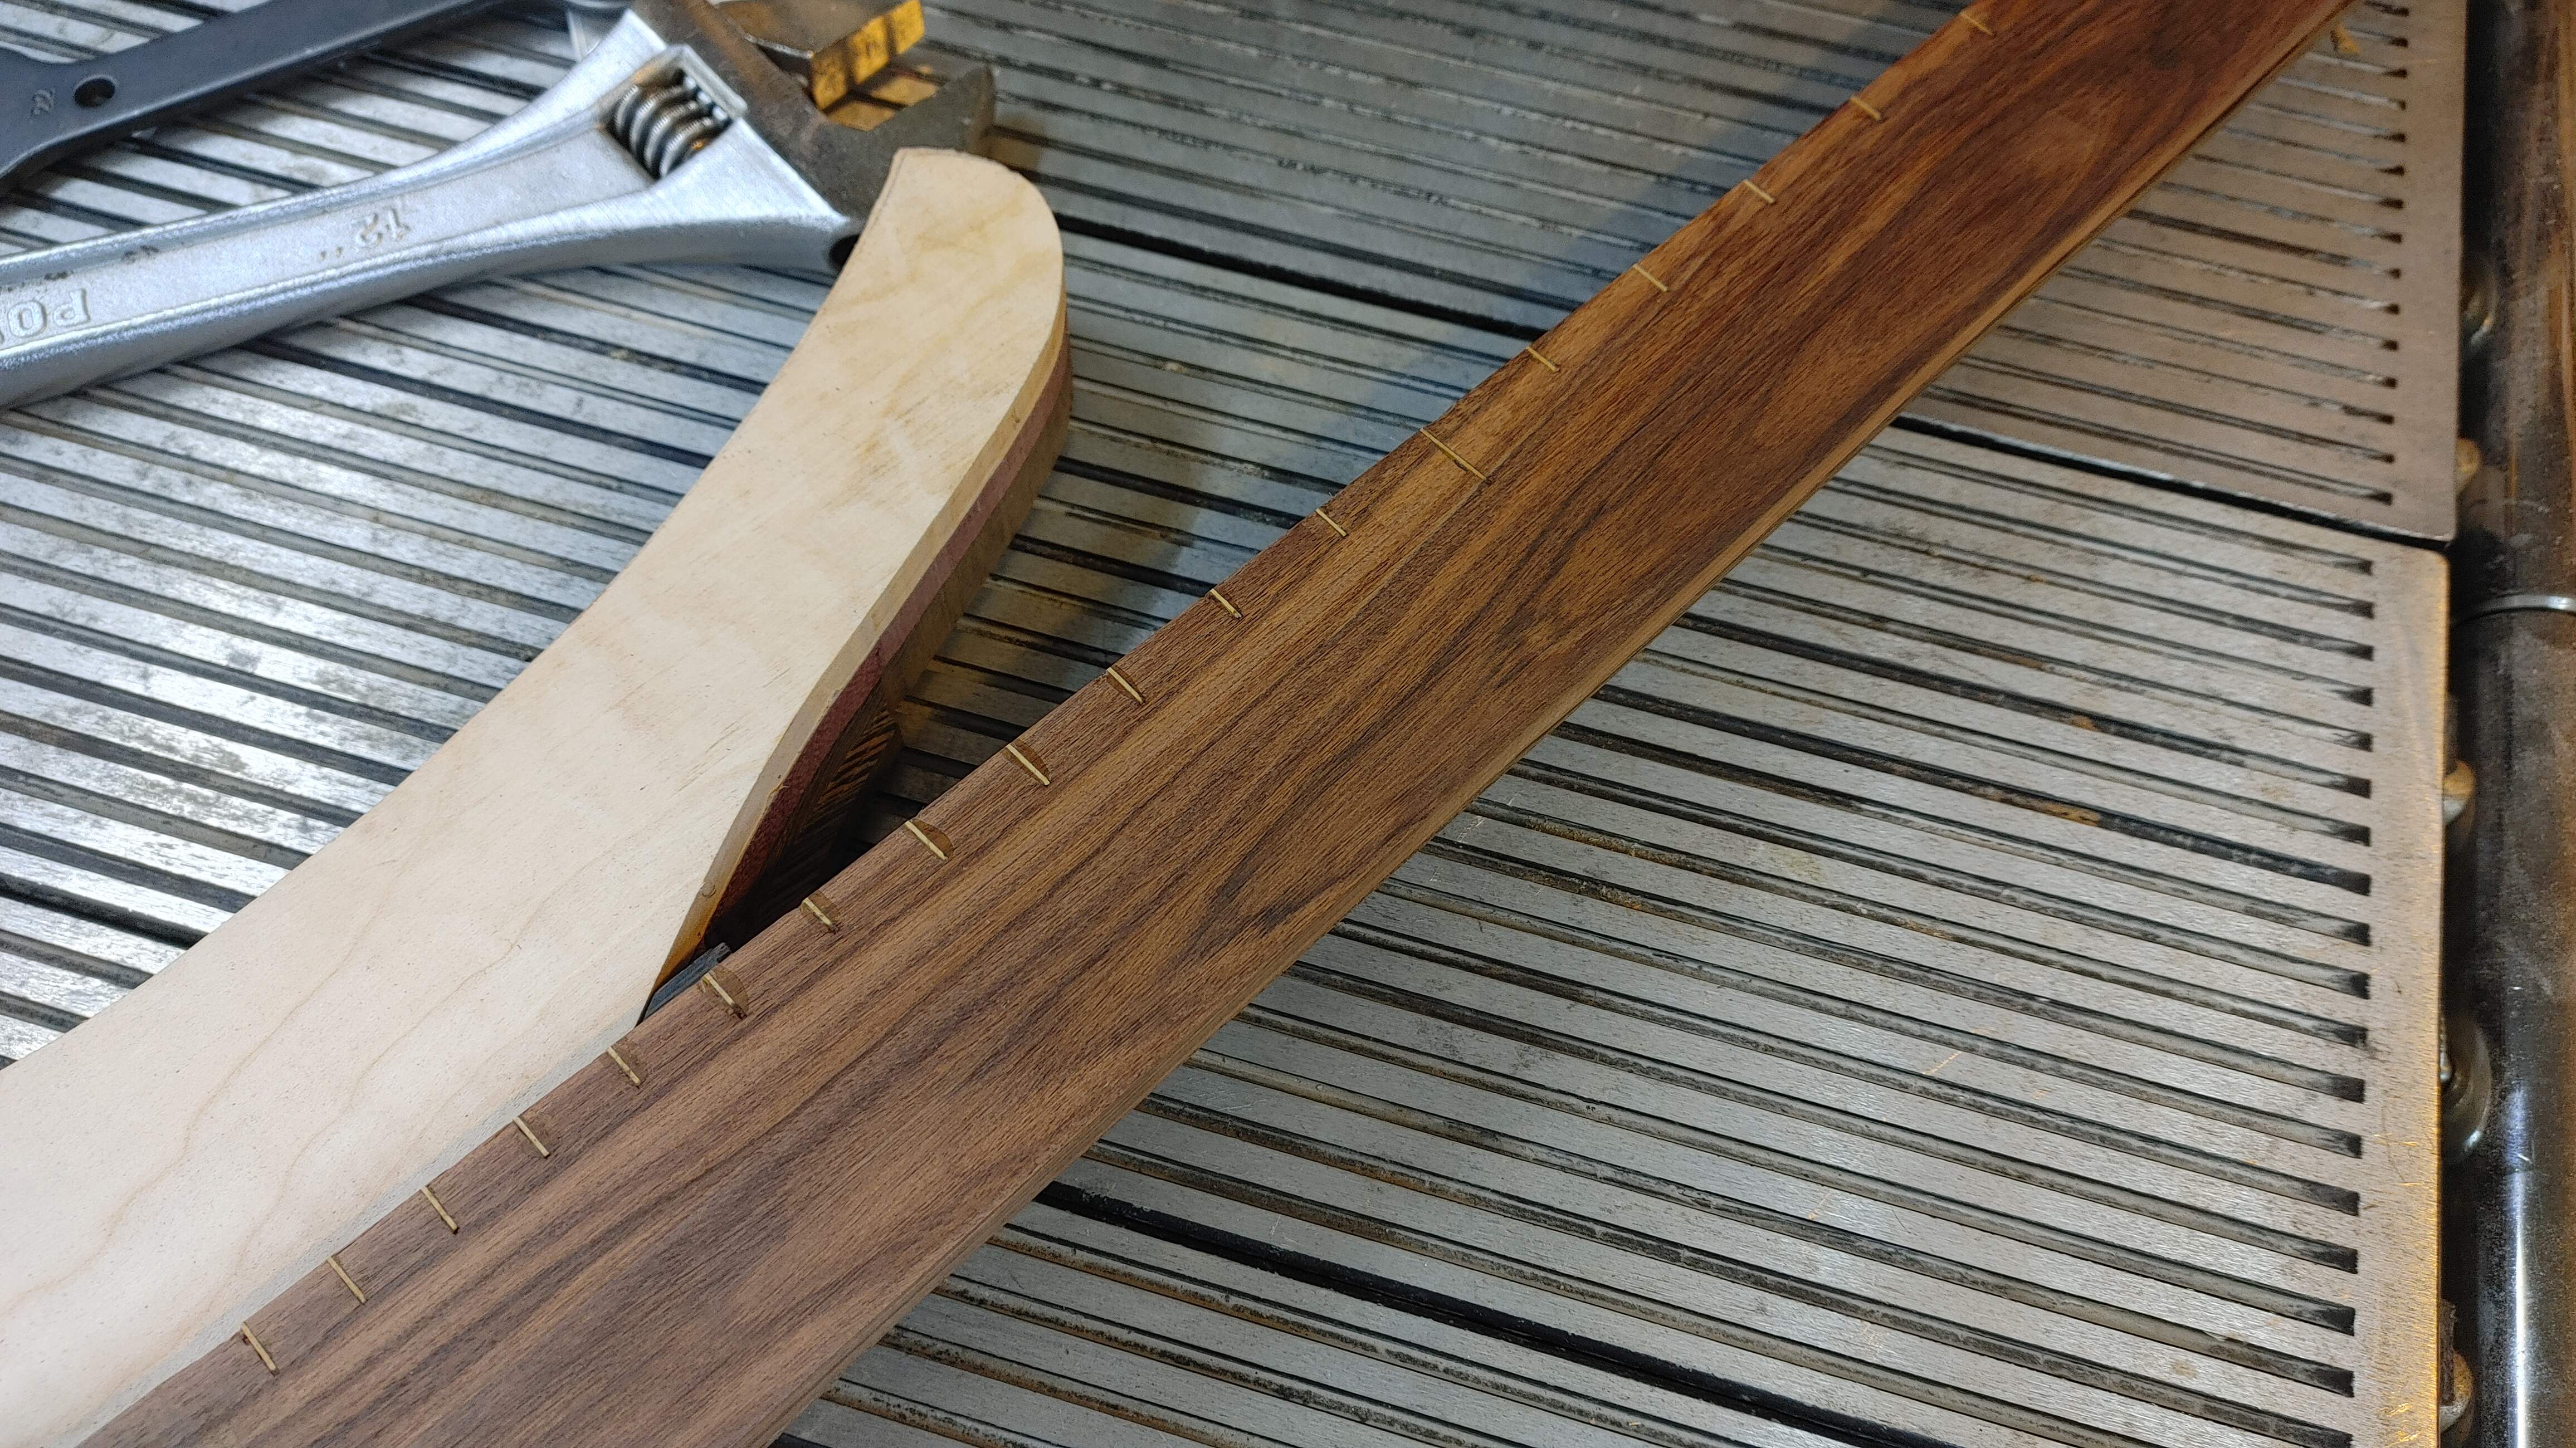
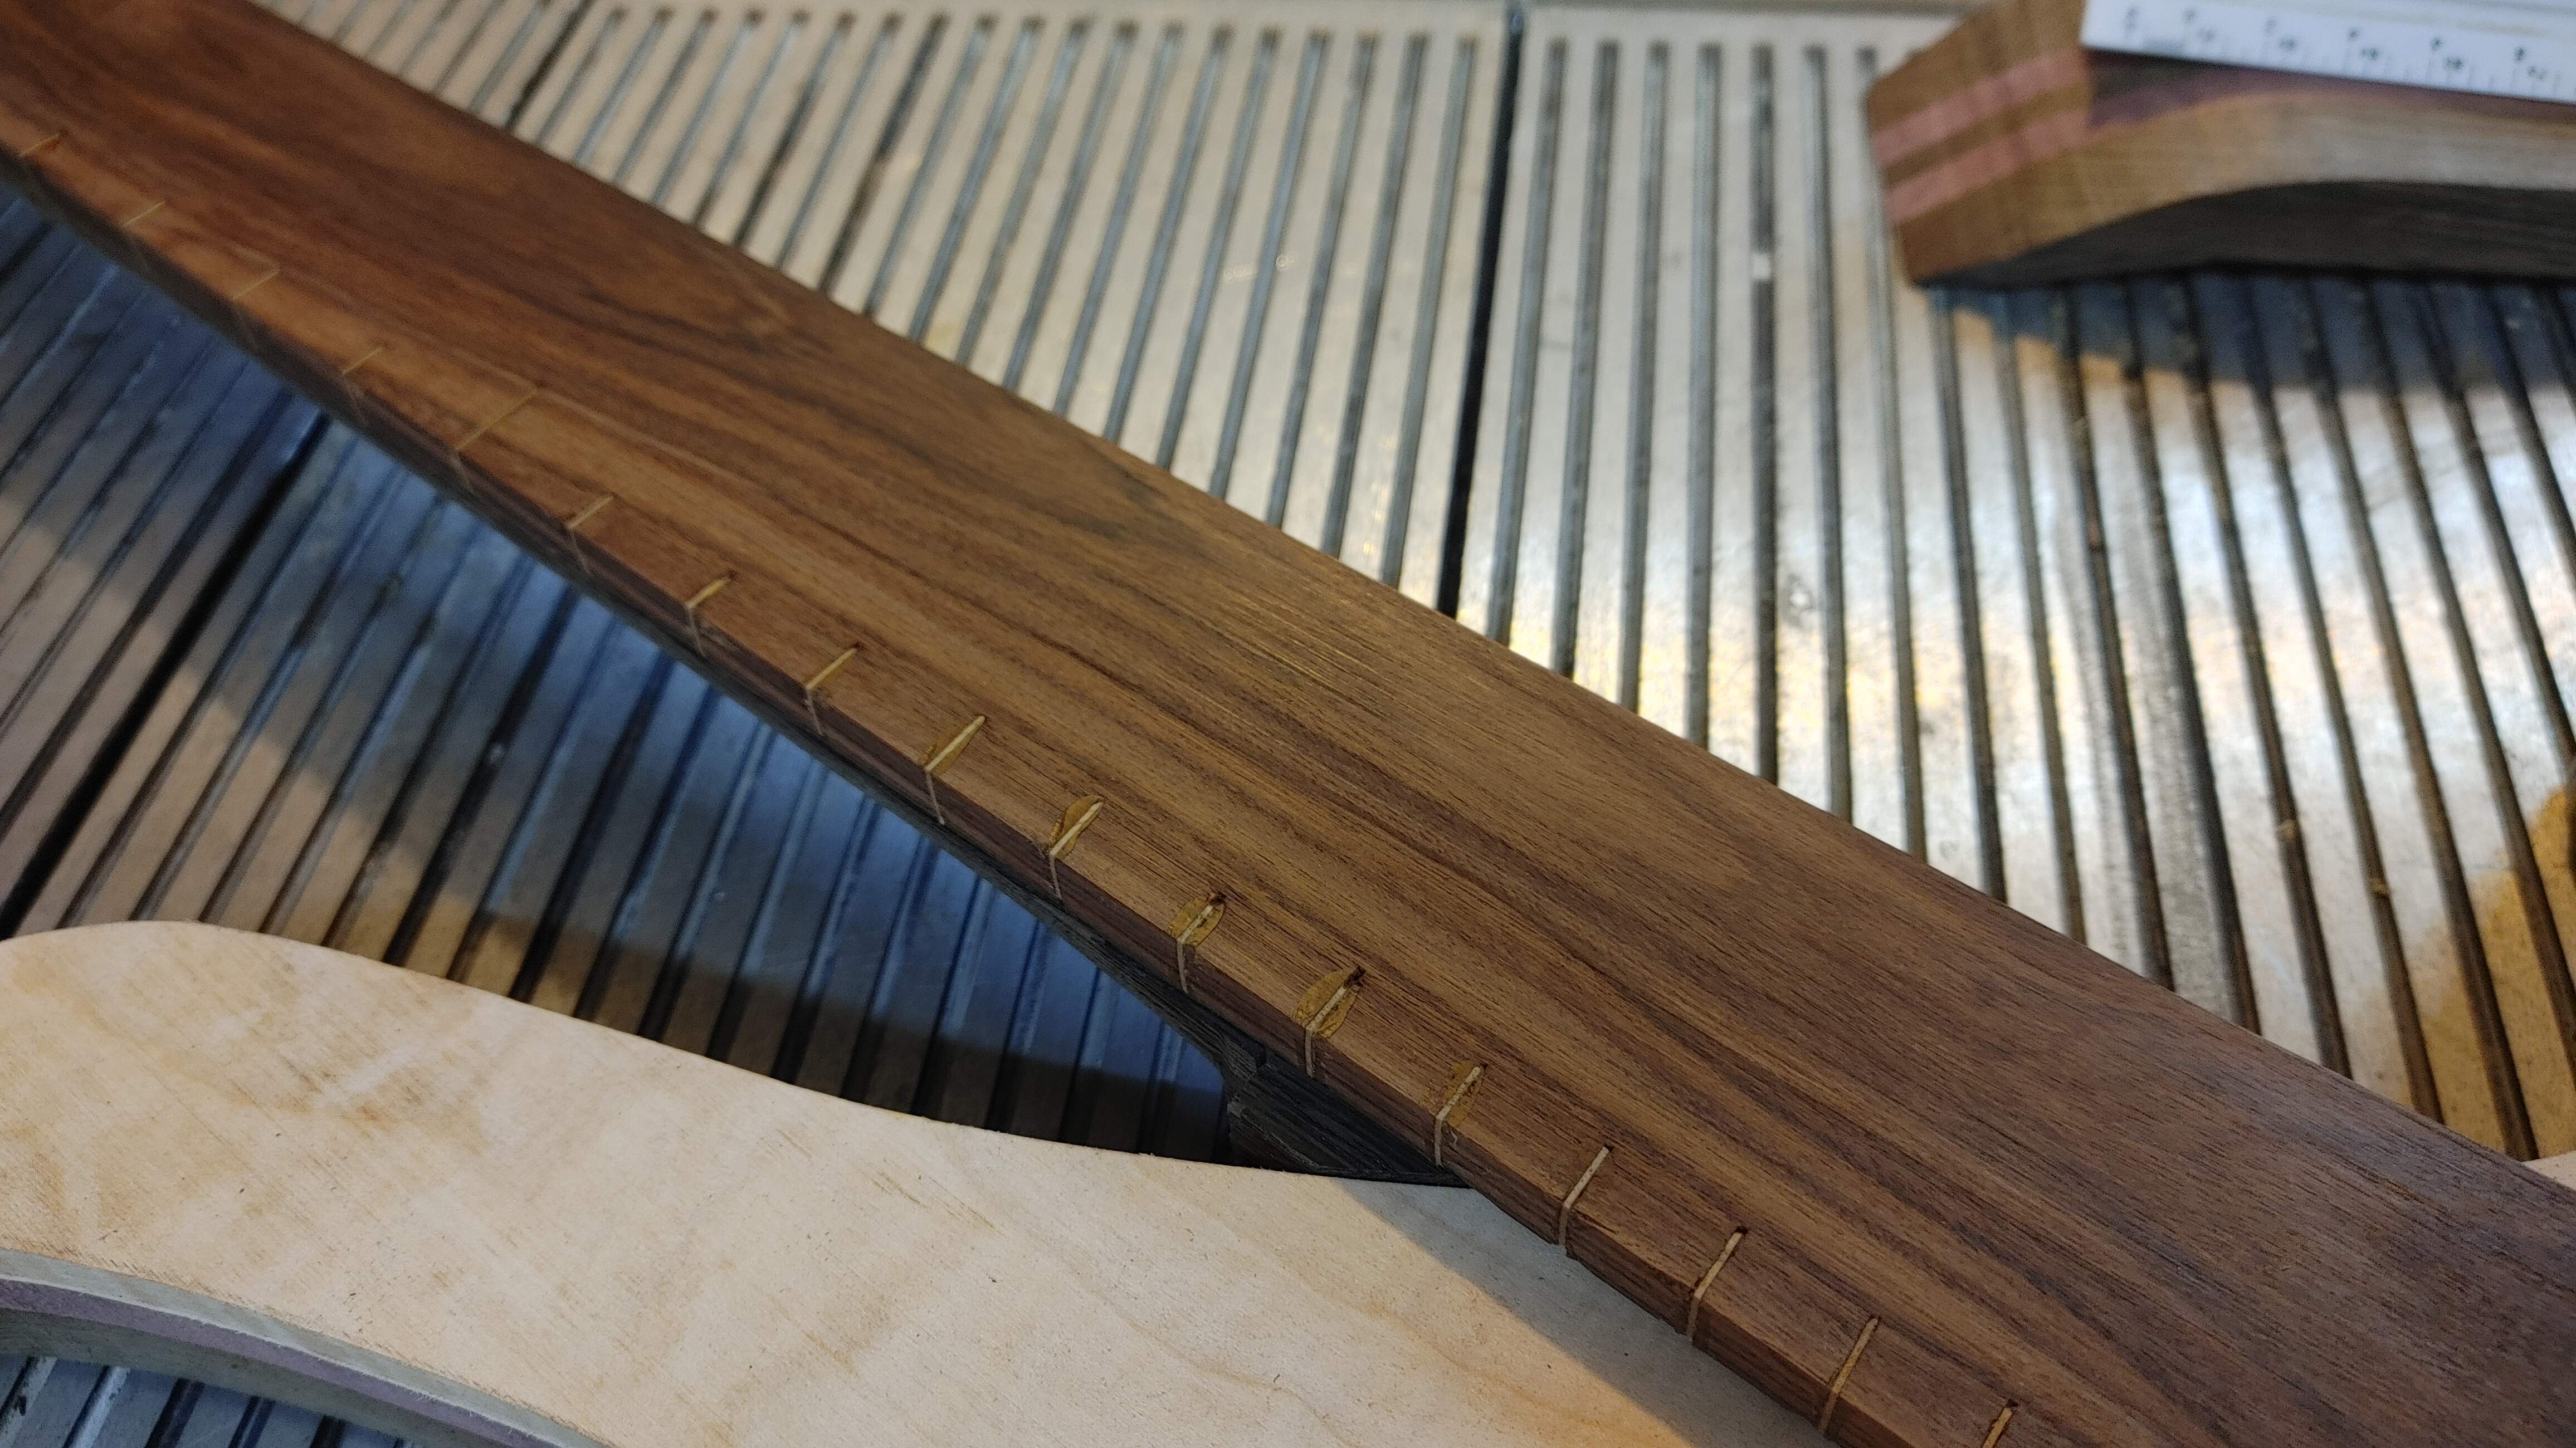
So I trimmed the position markers the best I could. I tried a multitude of different methods. The fret saw just mangled them. The razor knife wasn't much better. I had the most luck with a pair of scissors, trimming them close, and then disk sanding the rest down enough that I could then get a block sander on it and then eventually my #4 hand plane. It's subtle, which was what I wanted -
I left the twelfth fret marker a little longer -
Buuuut.......
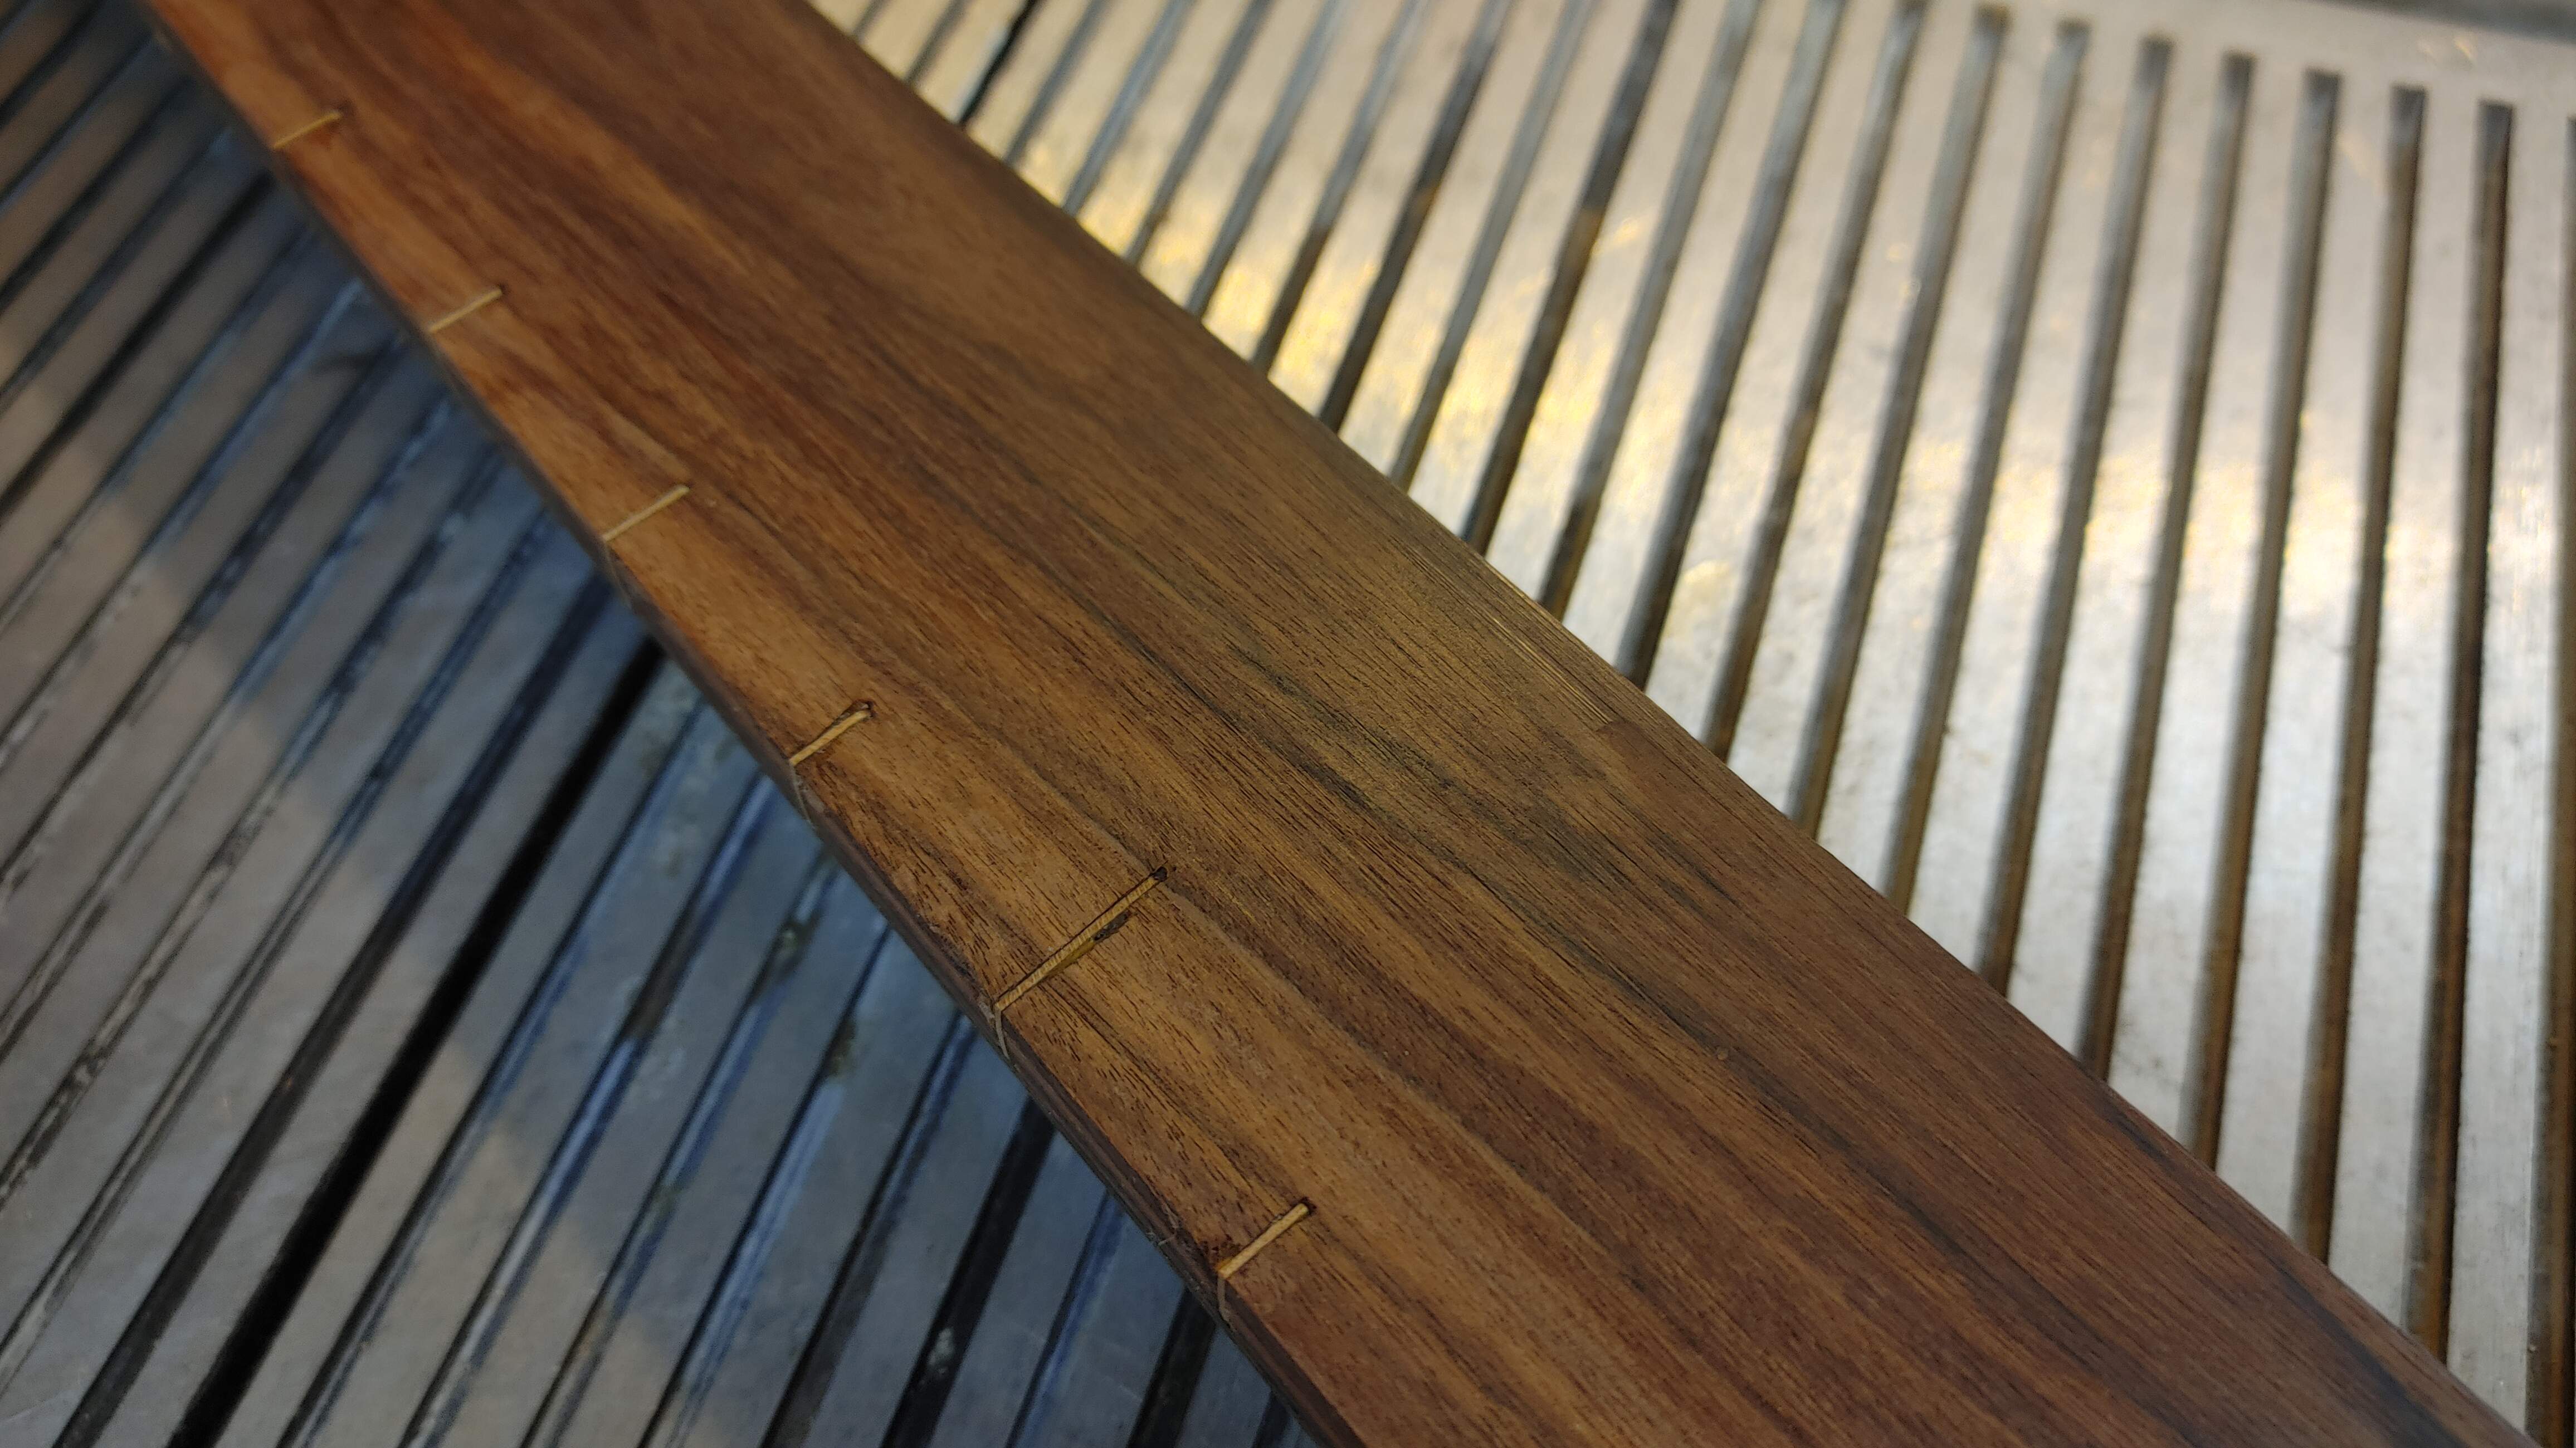
Yeah, so this was why I was asking so many questions about how best to trim these off. the fret saw just absolutely mangled them, they are so fragile that they just break into a million little shards. So now I've got a couple that the very tips broke off down below the surface, and I'm left with this -
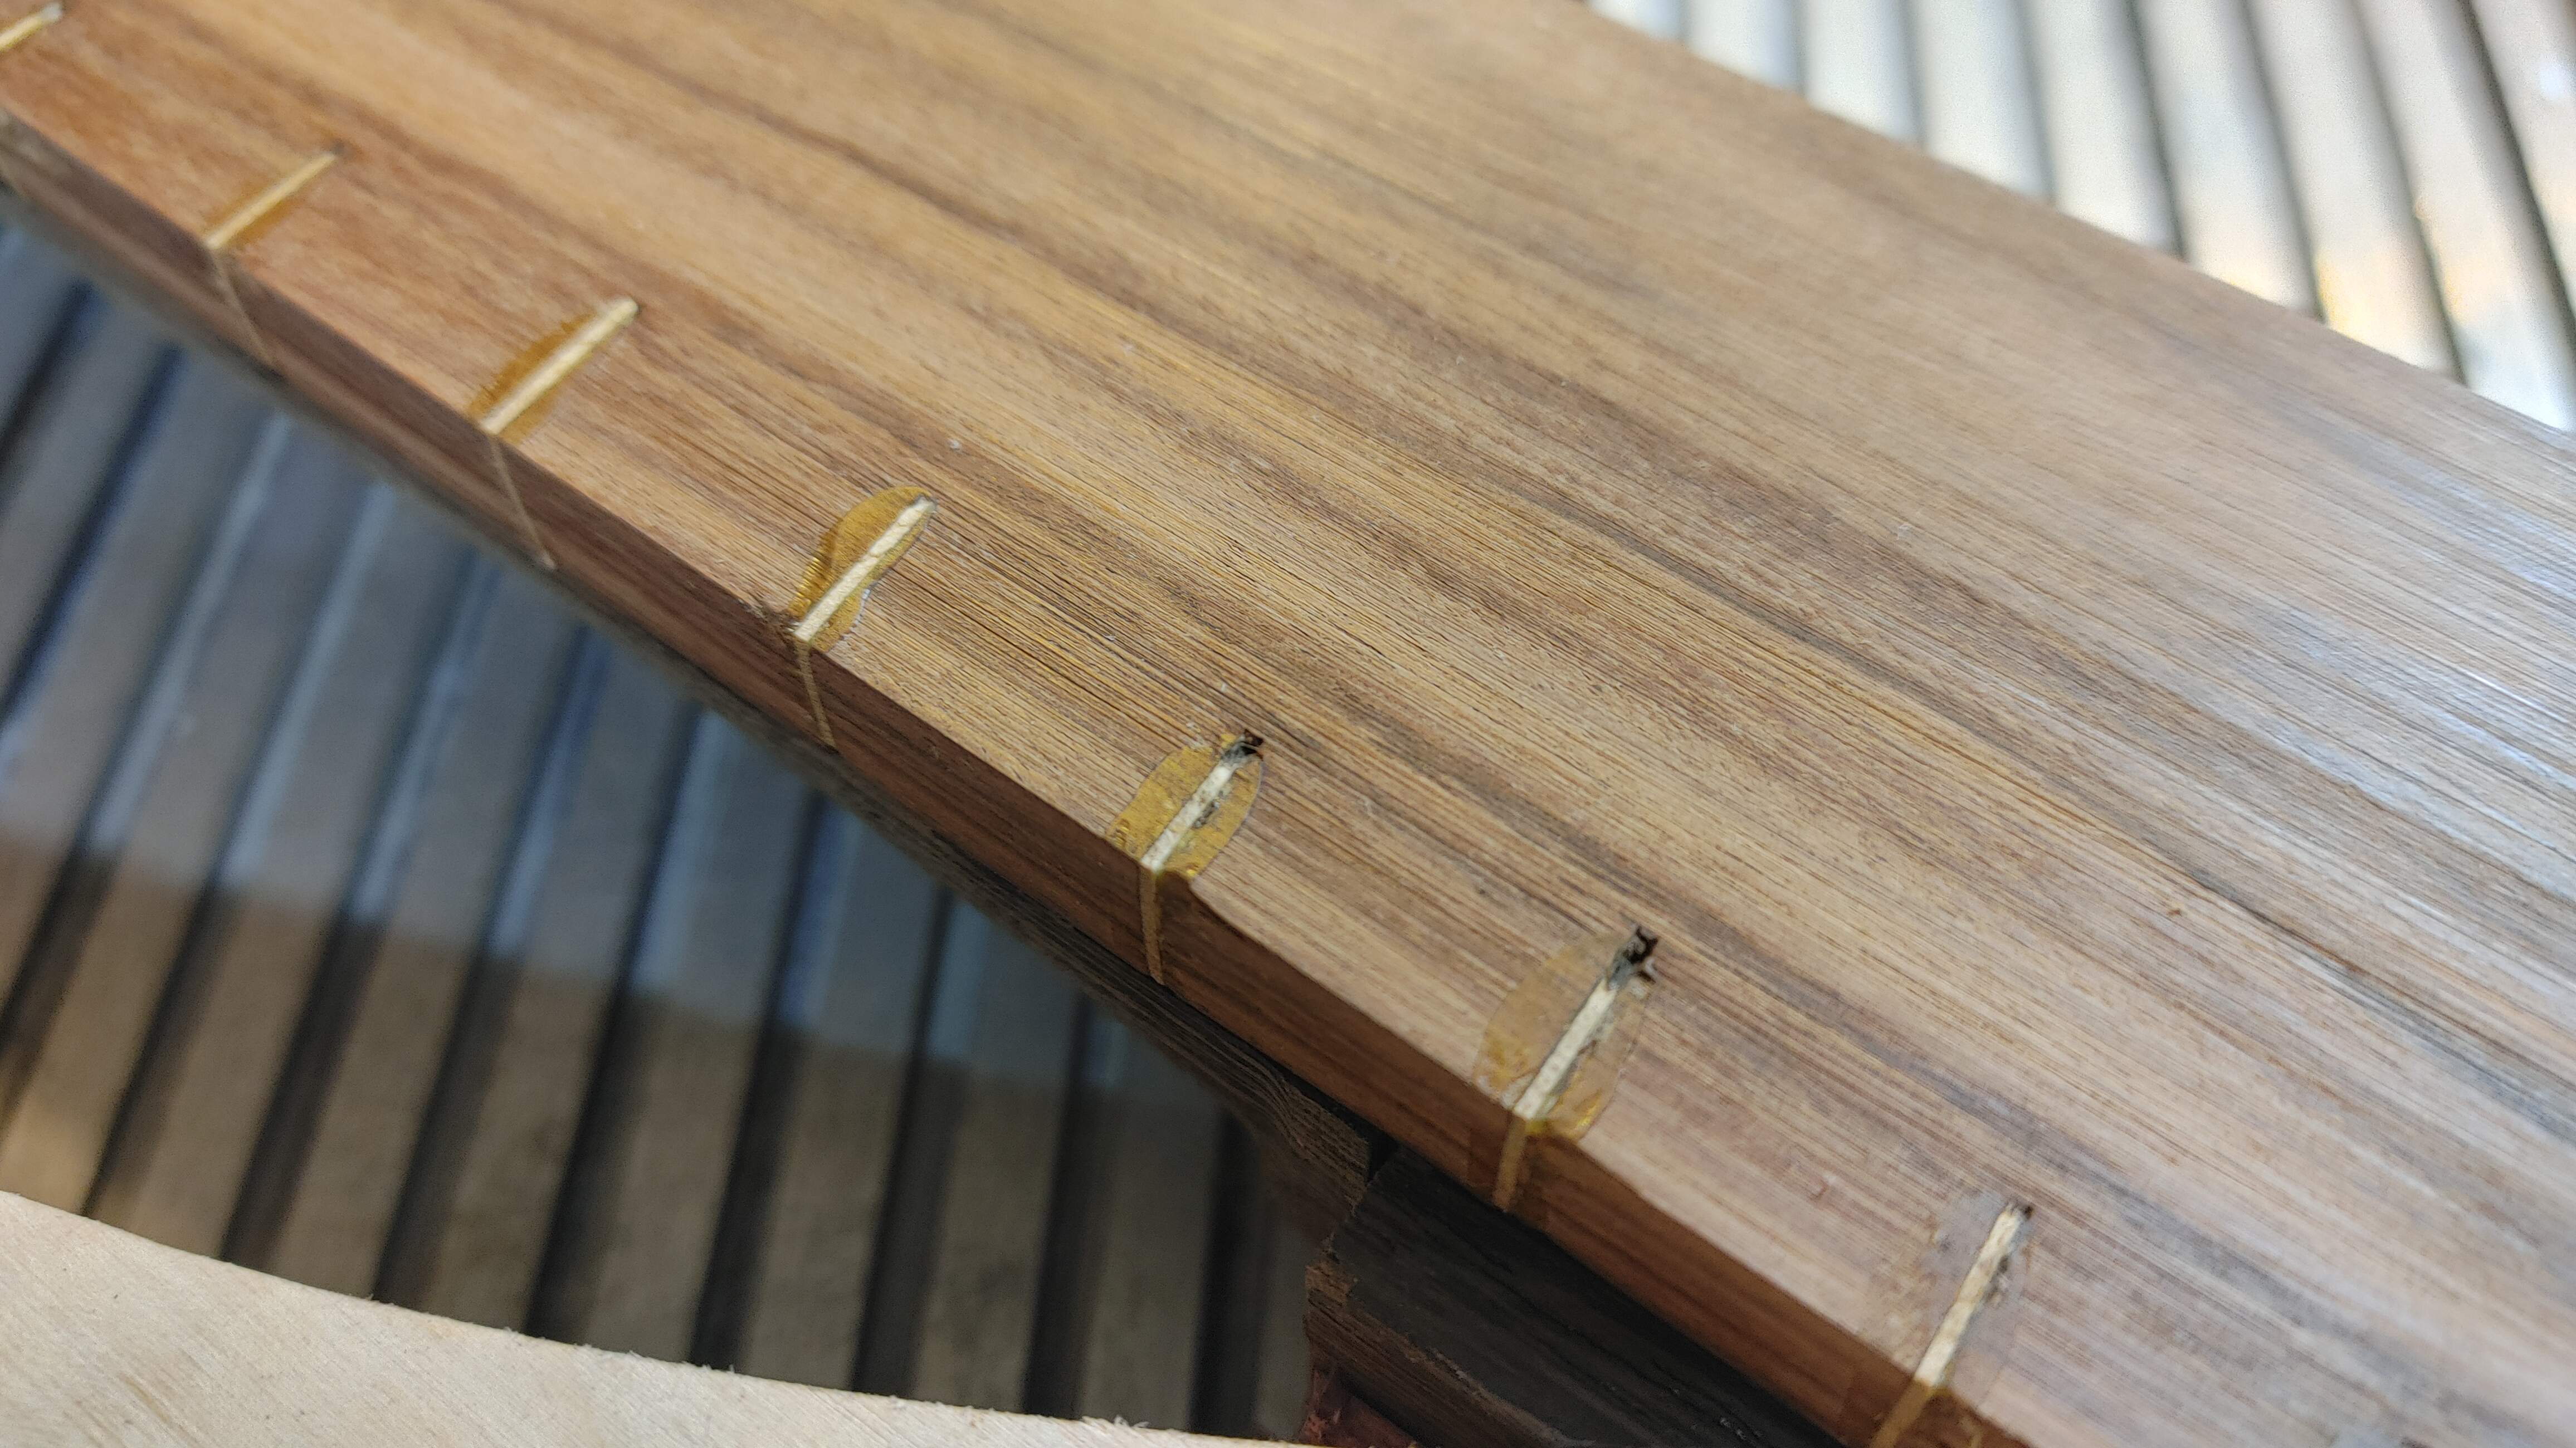
I really don't know how to fix that.
I'm not sure if it goes too deep to just try to radius this board off below that point or not. Maybe it'll go away in radiusing, maybe it won't. I'm not even sure how to tell.
I do know that I'll be building some sort of radius jig like @dwizum has, as soon as I can get some free time to do that. I like that design a lot, I just need to build it for my big DeWalt, because it's the only router I have. I could really use a smaller handheld trim router.
So I trimmed the position markers the best I could. I tried a multitude of different methods. The fret saw just mangled them. The razor knife wasn't much better. I had the most luck with a pair of scissors, trimming them close, and then disk sanding the rest down enough that I could then get a block sander on it and then eventually my #4 hand plane. It's subtle, which was what I wanted -
I left the twelfth fret marker a little longer -
Buuuut.......
Yeah, so this was why I was asking so many questions about how best to trim these off. the fret saw just absolutely mangled them, they are so fragile that they just break into a million little shards. So now I've got a couple that the very tips broke off down below the surface, and I'm left with this -
I really don't know how to fix that.
I'm not sure if it goes too deep to just try to radius this board off below that point or not. Maybe it'll go away in radiusing, maybe it won't. I'm not even sure how to tell.
I do know that I'll be building some sort of radius jig like @dwizum has, as soon as I can get some free time to do that. I like that design a lot, I just need to build it for my big DeWalt, because it's the only router I have. I could really use a smaller handheld trim router.
The markers look good other than the tear out. I think I'd clean the missing spots out with an exacto knife, make maple dust and glue slurry, then spackle the voids.
That's a good idea. Thanks.The markers look good other than the tear out. I think I'd clean the missing spots out with an exacto knife, make maple dust and glue slurry, then spackle the voids.

Oops, this was not a good recommendation. I know you didn't use it, but I was actually thinking you were trying to get the profile of the sides of the neck blank to match the sides of the existing fretboard. Duh.I'd probably use a file

For the thin fret marker strips, I probably would have carefully trimmed them close with an exacto and then sanded them down to final dimensions.


