
If you cut an 8.5 XTender fretboard off at the first fret, you can use it like an 8 XTender fretboard!

Enjoy the benefits of a premium membership!
Upgrade Account
-
TalkBass has been independent since 1998. Add your voice.
Create a free account to reply to discussions, view embedded media, and browse with fewer display ads.
Join free Log in
Want zero display ads or expanded classifieds tools? Compare plans.
You are using an out of date browser. It may not display this or other websites correctly.
You should upgrade or use an alternative browser.
You should upgrade or use an alternative browser.
Winter Buildoff 2022: Still A Diva
- Thread starter TerribleTim68
- Start date
More options
Who Replied?

So, this is pretty crude and the lighting was terrible, but my template comes out to...Tim, when you get a minute, can you do me a solid and tell me what these 2 measurements are? I wanna see if I'm in the ballpark. Both my foam mockups turned out much different in size.
View attachment 4519873
So it's basically 20" "long" by 13" "wide". Keeping in mind that I based this all off a scaled photo in AutoCAD. I took the most top down photo I could find, scaled it based on the scale length and traced over that. So it's a rough estimate at best. Hope it helps.


I'd stick with xtenders for measurements, they're more reliable. 

It does, a lot.Hope it helps
I came up with roughly the same thing.

But you already said 4", so to save Bruce the work, it's 1:1.I'm sure Bruce could quickly whip up an Xtender-to-imperial conversion ruler for shop use.
Finally Back In Action -
After a very long week, I'm finally back up and running. After spending a couple days sick after Christmas, I then had to get all caught up on the work load at the day job. Having basically taken a 5 day weekend left kind of a mess to clean up upon my return. Luckily, it is the holiday season, so most of our clients are out anyways. It could have been way worse. So let's get back to work!
One Step Forward, Two Steps Back -
During my half sick stupor last weekend of trying to push through and get something accomplished, I screwed up and started shaping the neck before I had dealt with tapering it first. I just wasn't thinking very clearly and totally spaced it. So, I'm glad I stopped where I did, having only put the two initial facets in the neck. It was basically still very blocky, which means I could still work it the way I wanted to.
I decided to create a template that I could use for both the fretboard and the neck taper. My thinking here was, I can use this template to pre-shape the fretboard off the build and then just drop it on at the last minute, plus it'll have the added bonus of working as a neck taper template too -
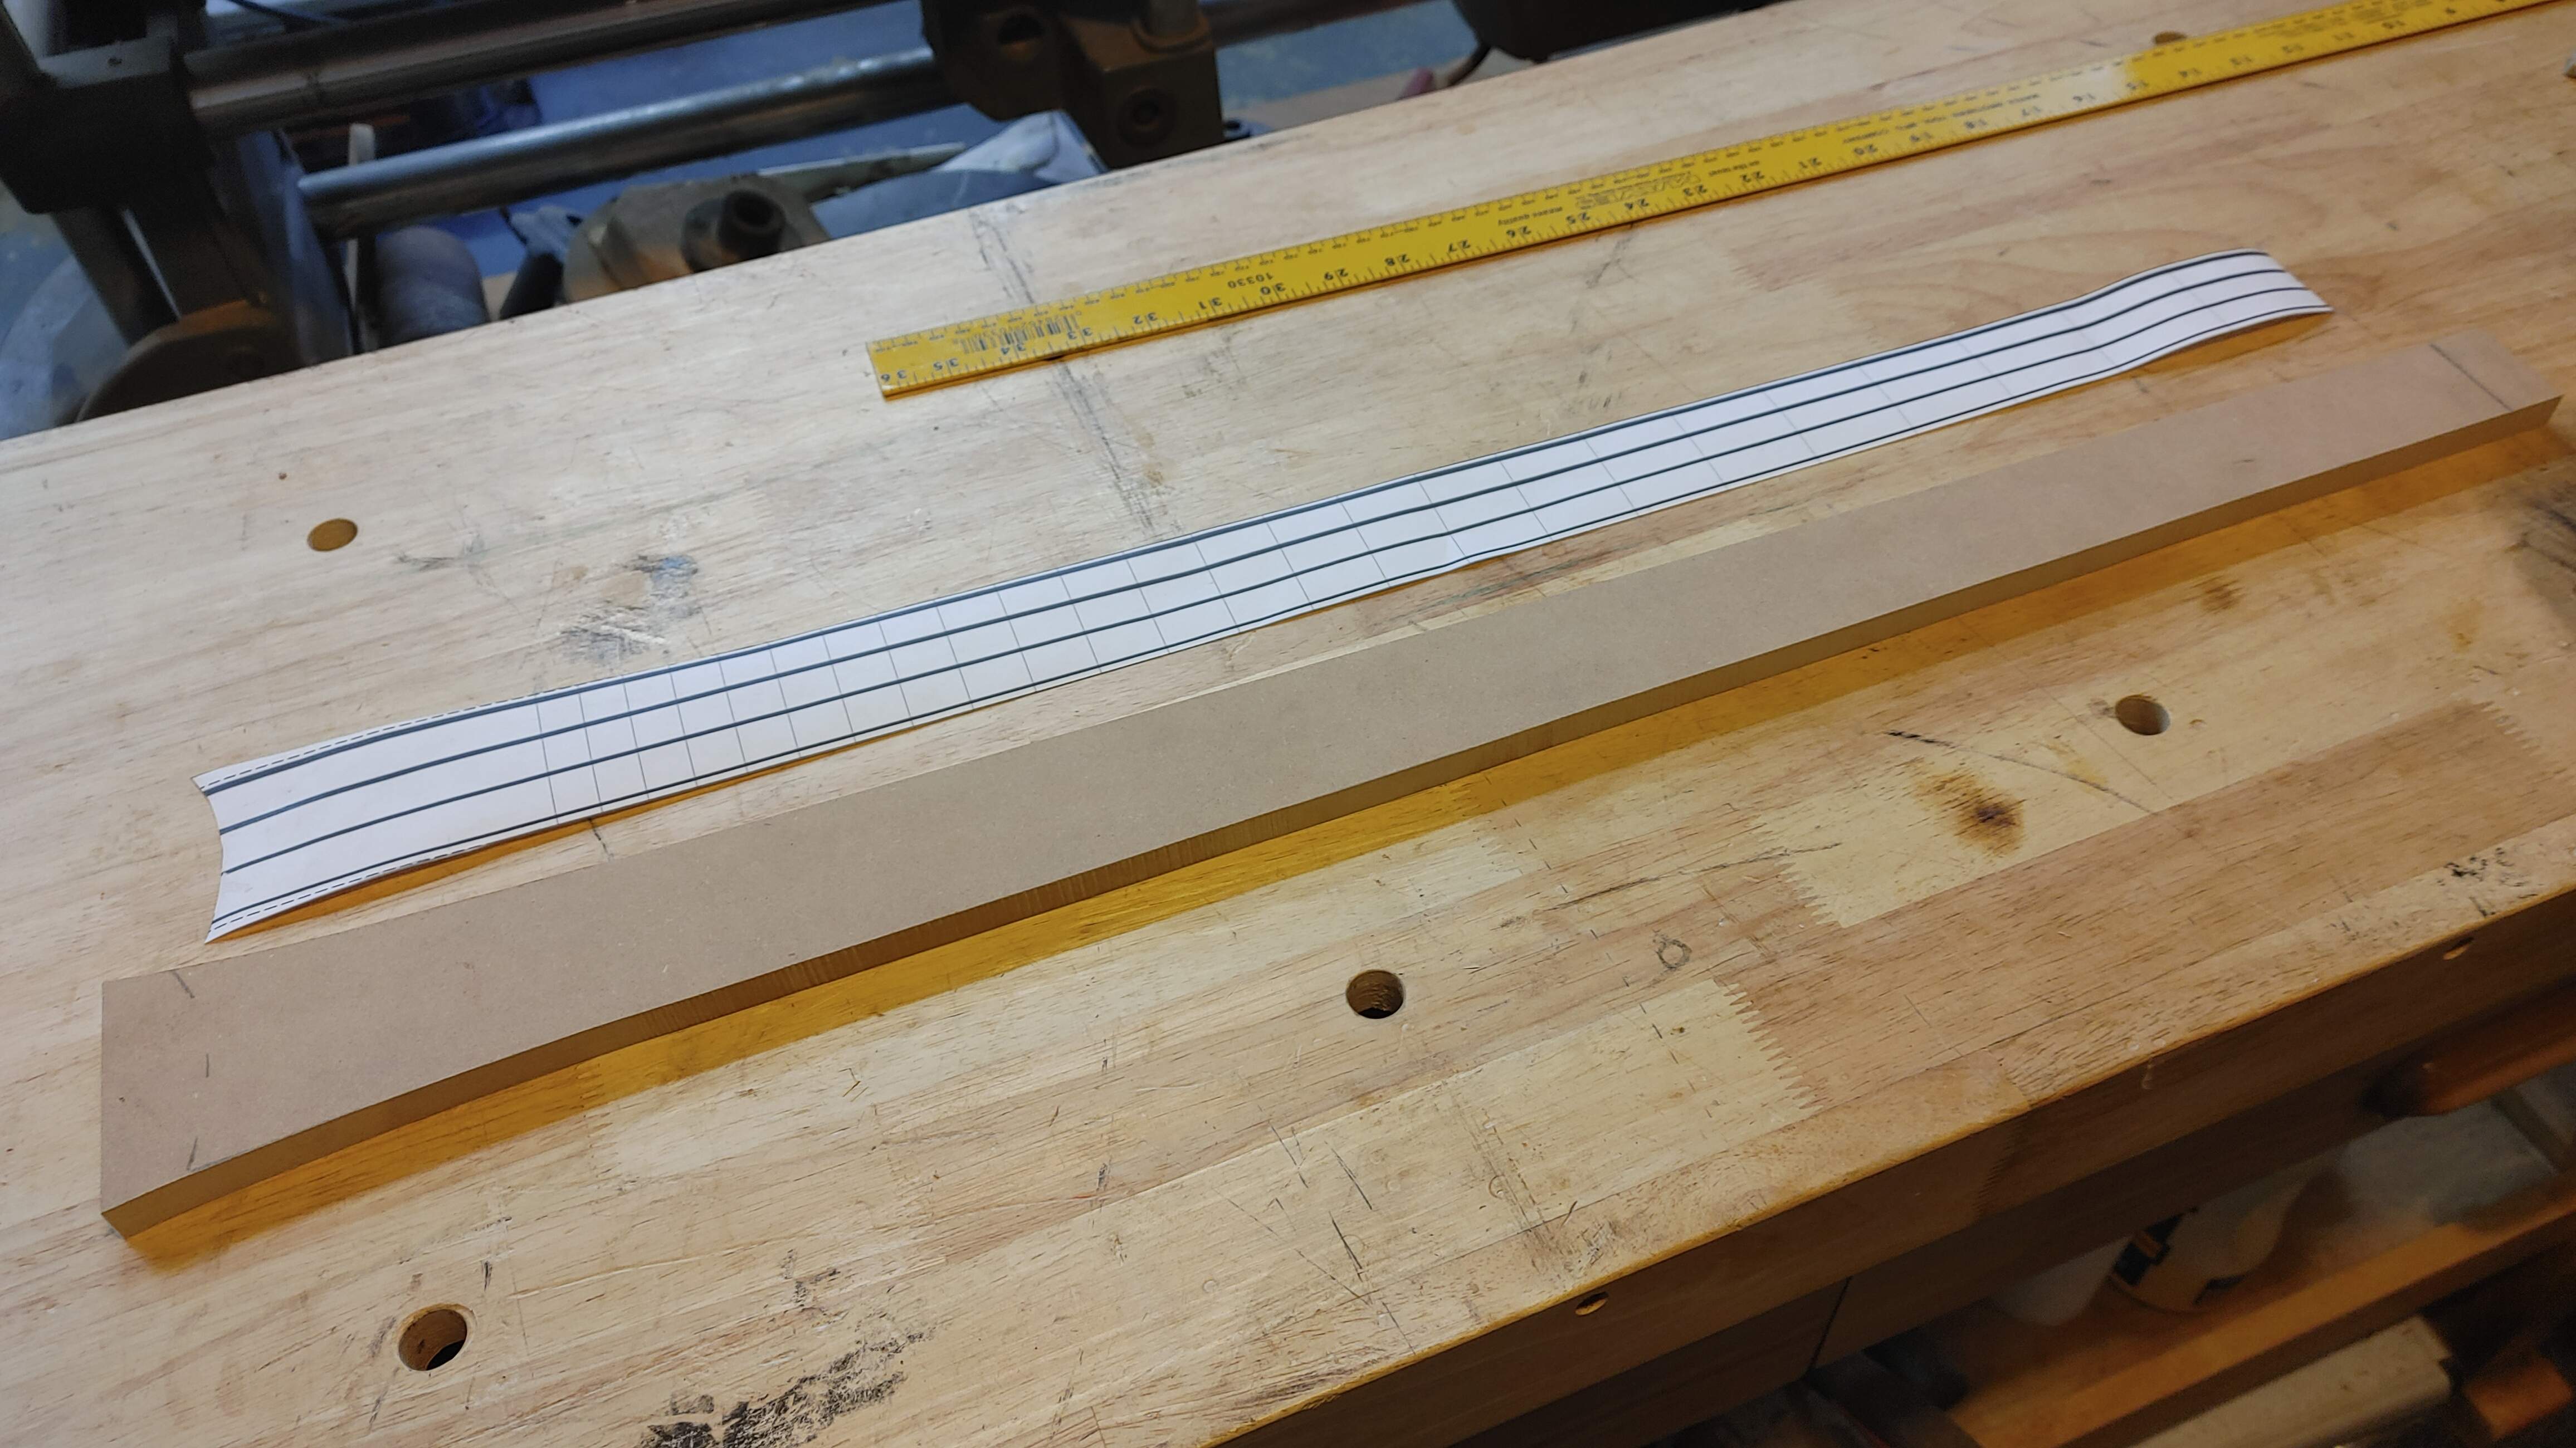
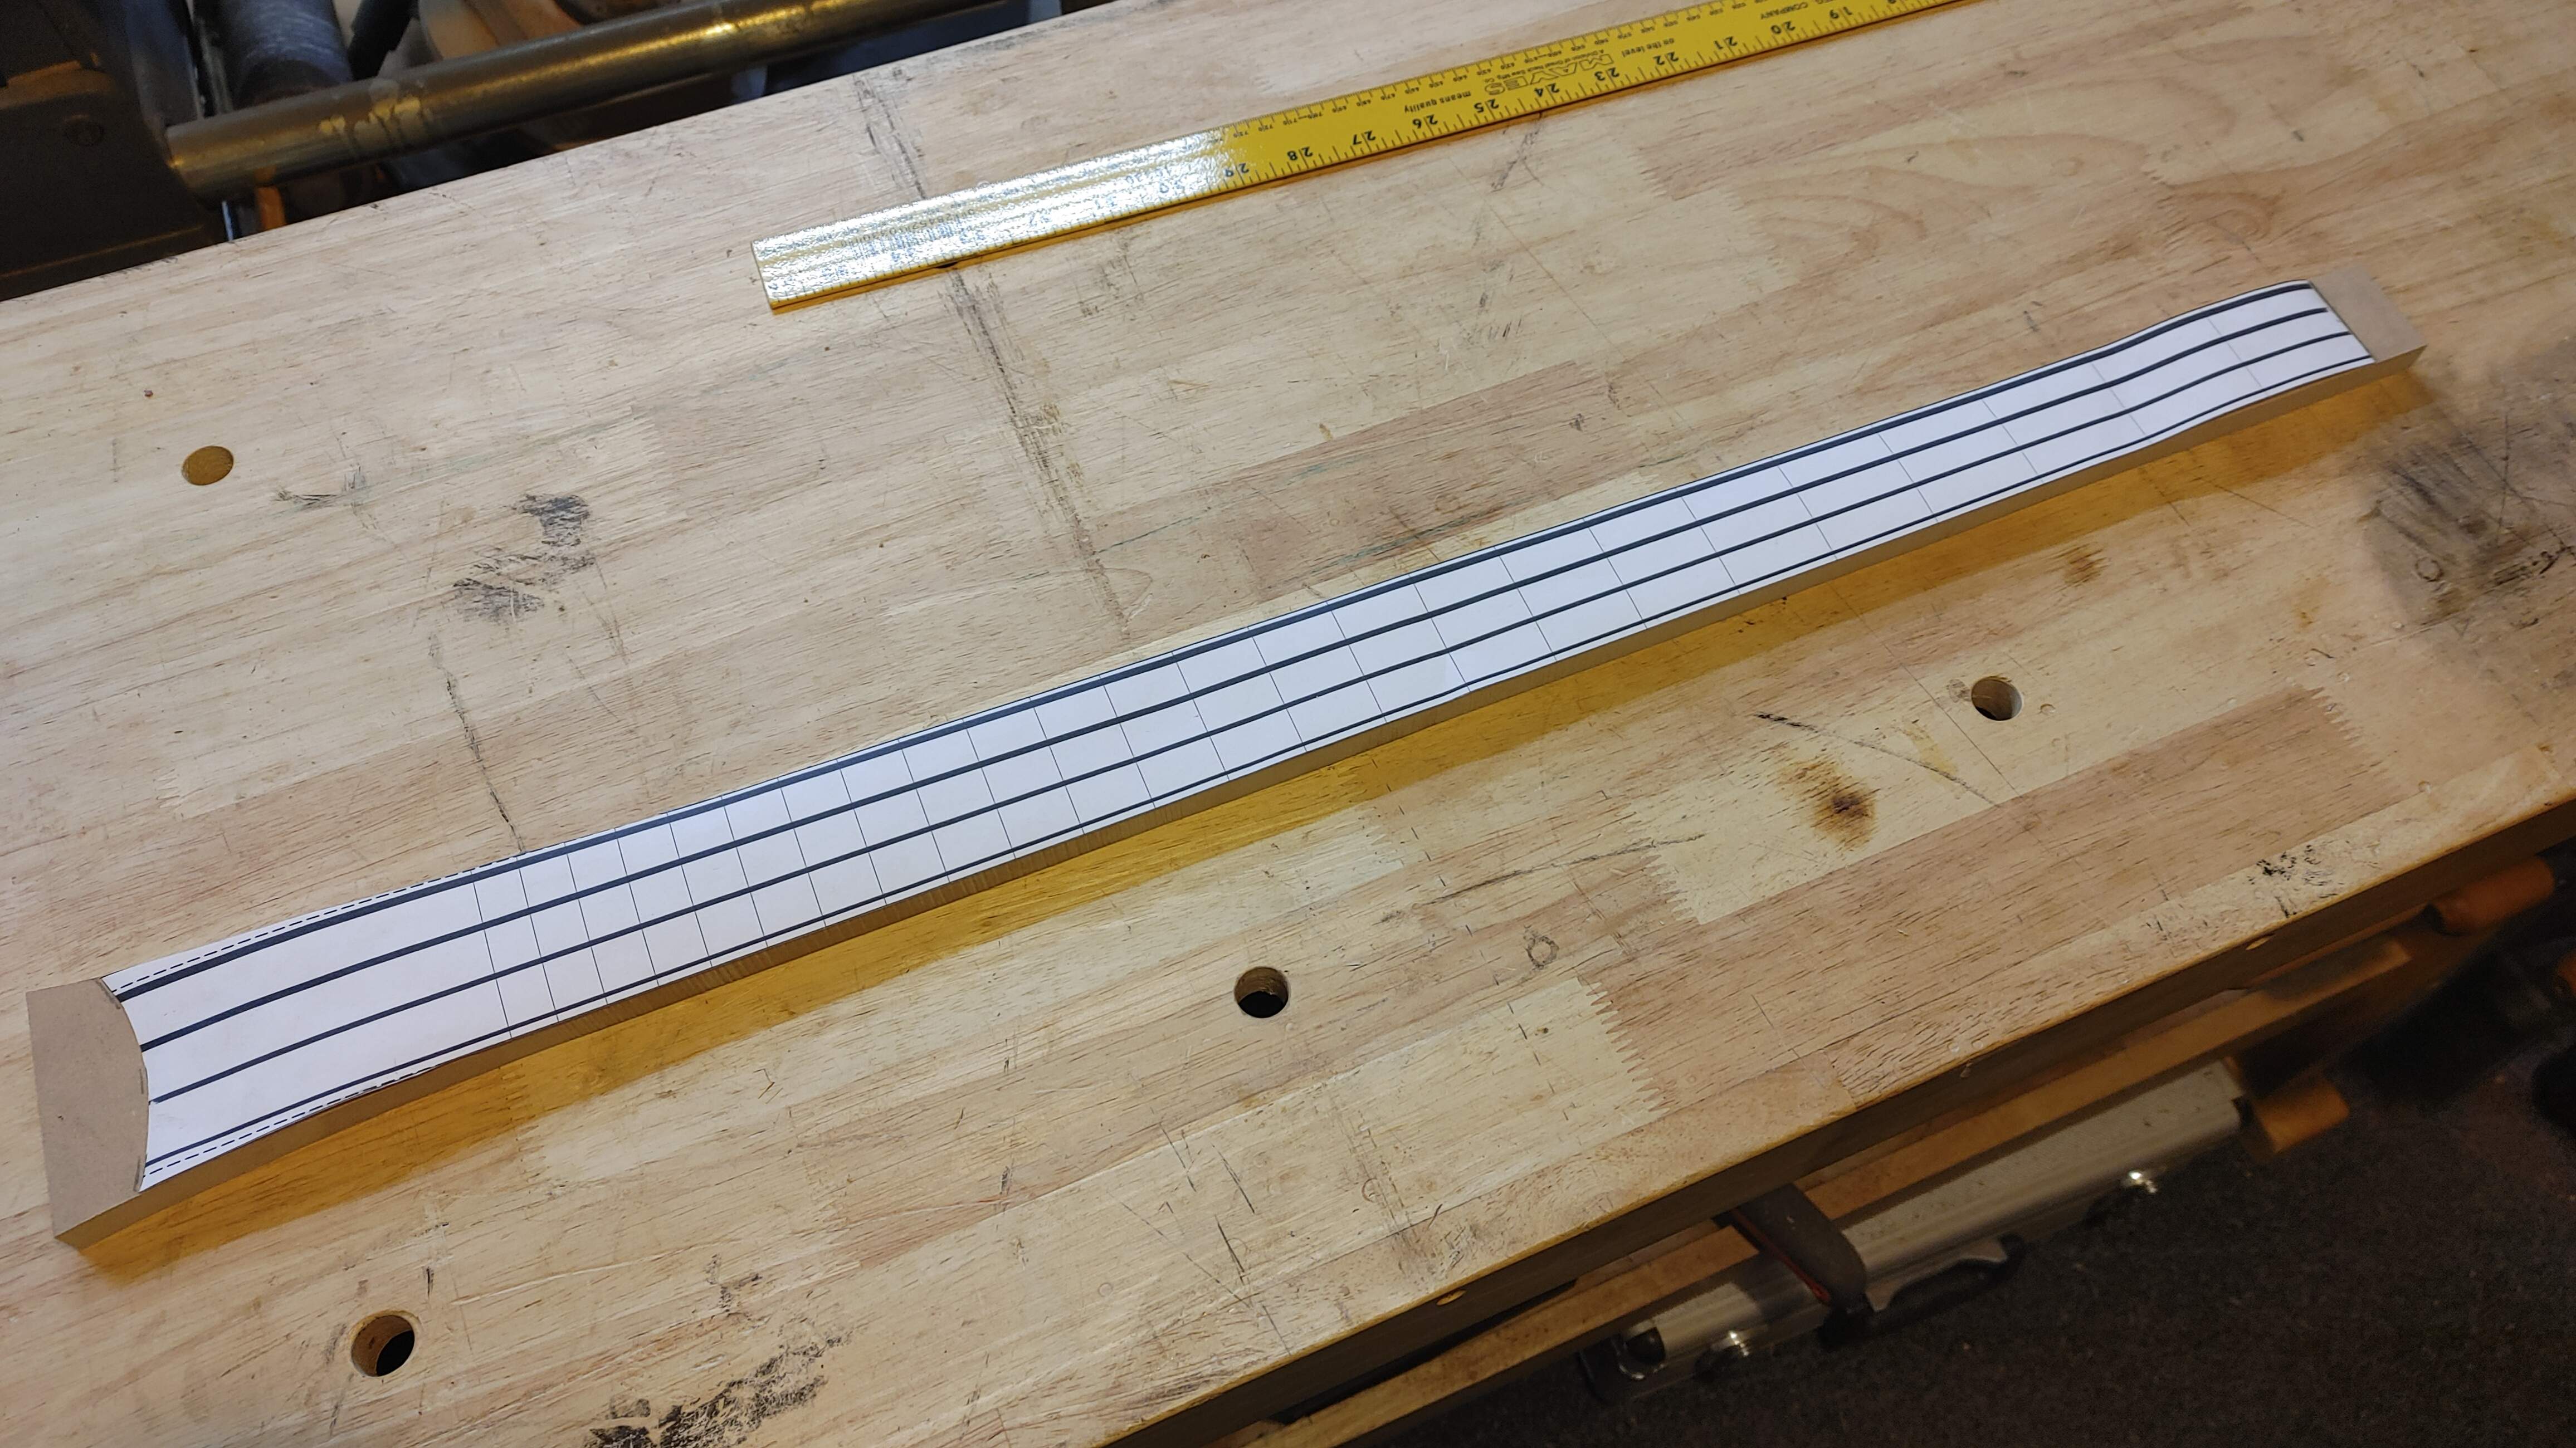
From there, we can clamp it to the neck and break out the router. I used my little Amana pattern bit that I bought for doing pickup and control cavities, figured it should work just fine. -
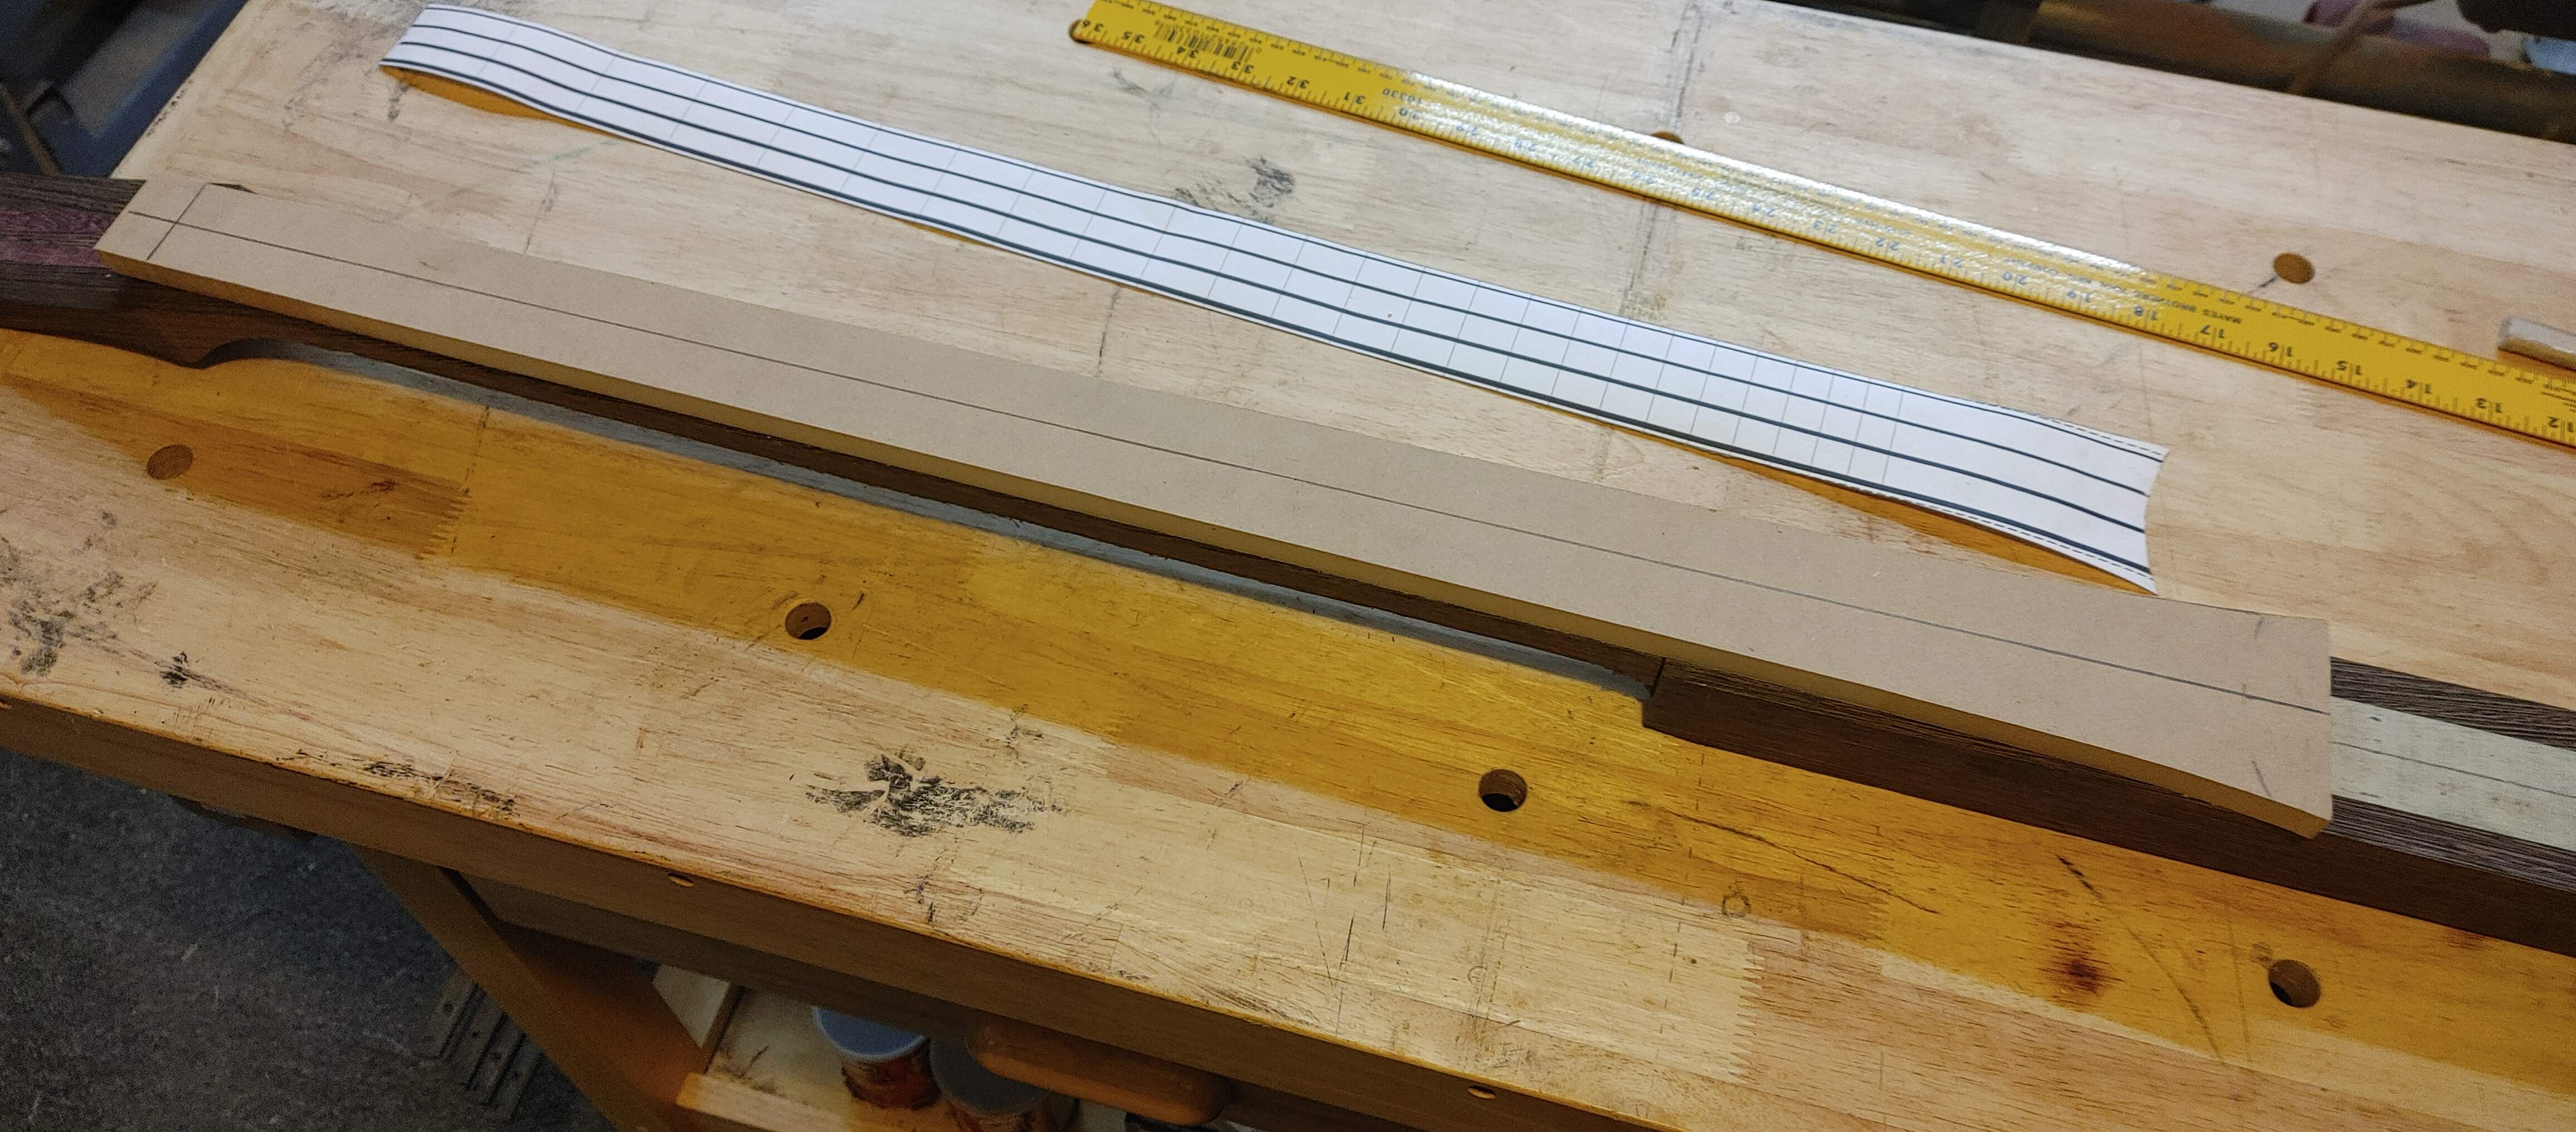
Here's a shot of template clamped up, the router ready to go and my Uvex face shield. If you guys don't have one of these Uvex face shields, I highly recommend it. I purchased it for woodturning, but I tend to wear it for a LOT of stuff, especially when I use my router. That stupid router just has no dust collection, so it just sucks. I can hook a hose to it, but the little port inside it just doesn't pick up anything at all, so the shield is nice. The shield is anti-fog (sort of, I give it a solid b in that department) and you can replace it if it gets all scratched up without needing to buy a whole new unit. It was also affordable (in my world), I think I'm in it like $40 from Rockler -
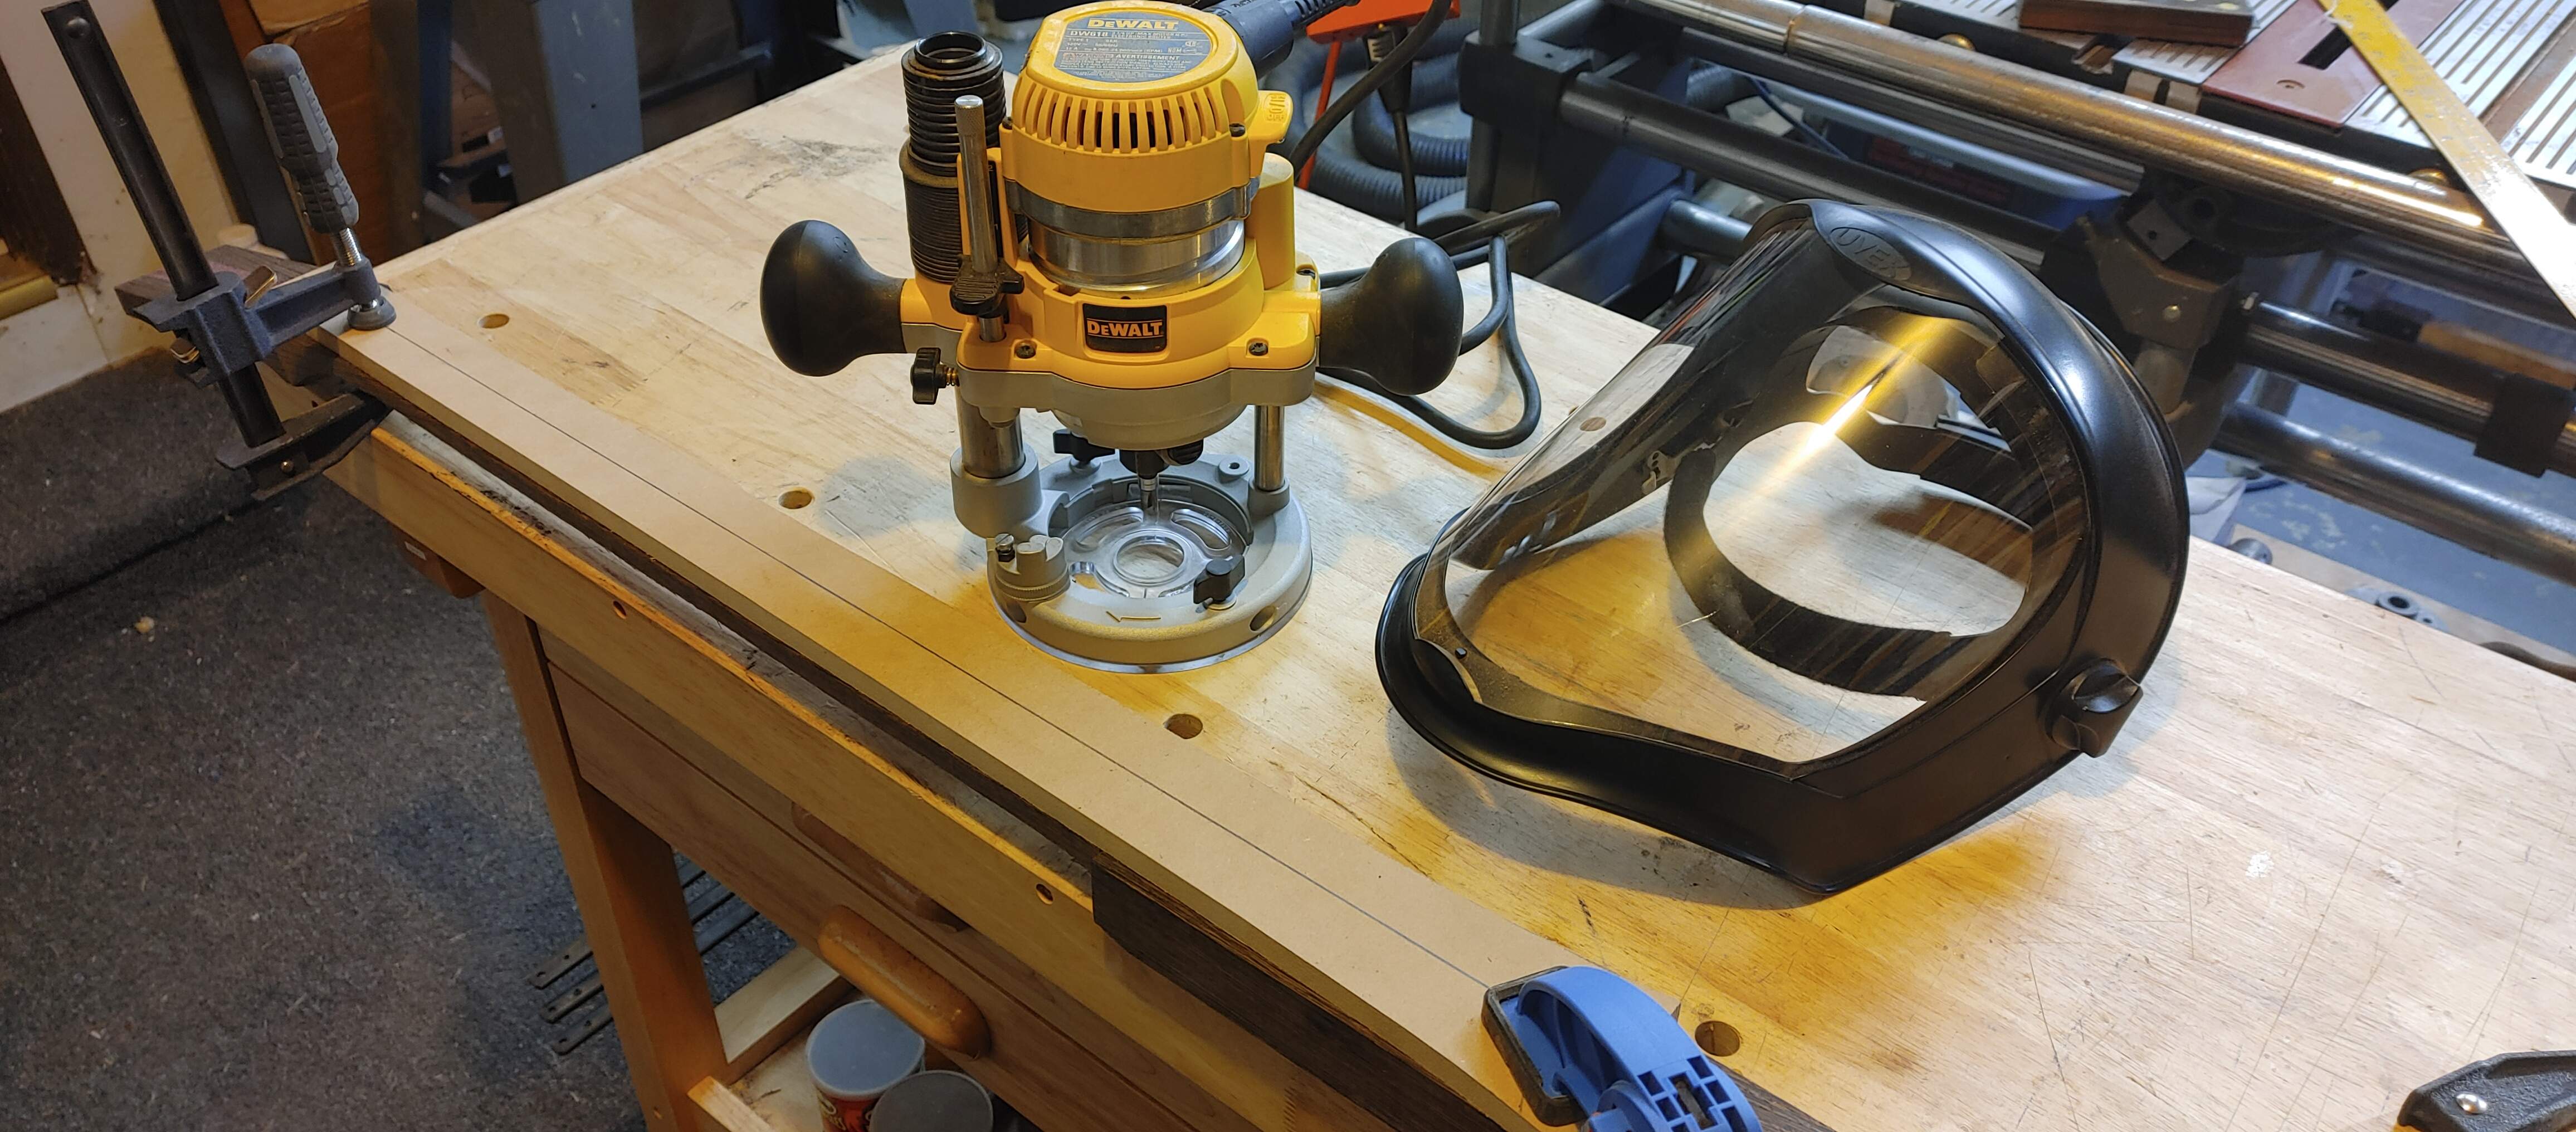
My process (certainly not the correct one) was to clamp the template on at each end, run the router as far down each side as I could before the clamp at the headstock interfered (the clamp at the body end was out of the way and also clamping it to the bench), then move that clamp toward the middle of the neck and finish the routing. My bit is kinda short, so I had to make the first pass, then remove the template and make one more pass. It worked. Little sketchy, but it worked.
Now Where Was I? -
Oh yeah, carving a neck. Back to the "Neck Carving Jigerator 5000". After a couple hours of Shinto and half round rasp action, then some quick scuffing with some sandpaper so I can touch this wenge without feeling like you went to war against a porcupine (seriously, pick a softer, more workable wood, trust me), we have something looking kind of like this -

It's got a decent profile for now. We'll fine tune it as we go, but this gives me something that I can start focusing on other thing now, like the body!
Girl Look At That Body -
I figured why not go ahead and route the shape in that top while I was at it. So, toss the little Amana pattern bit in the router table so we can get after this top. My thinking was that at some point I will then be able to use this top as the pattern for the wings after this all starts coming together. I could be wrong, we'll see. So anyways, let's break out a few things and perform "The Trick" -
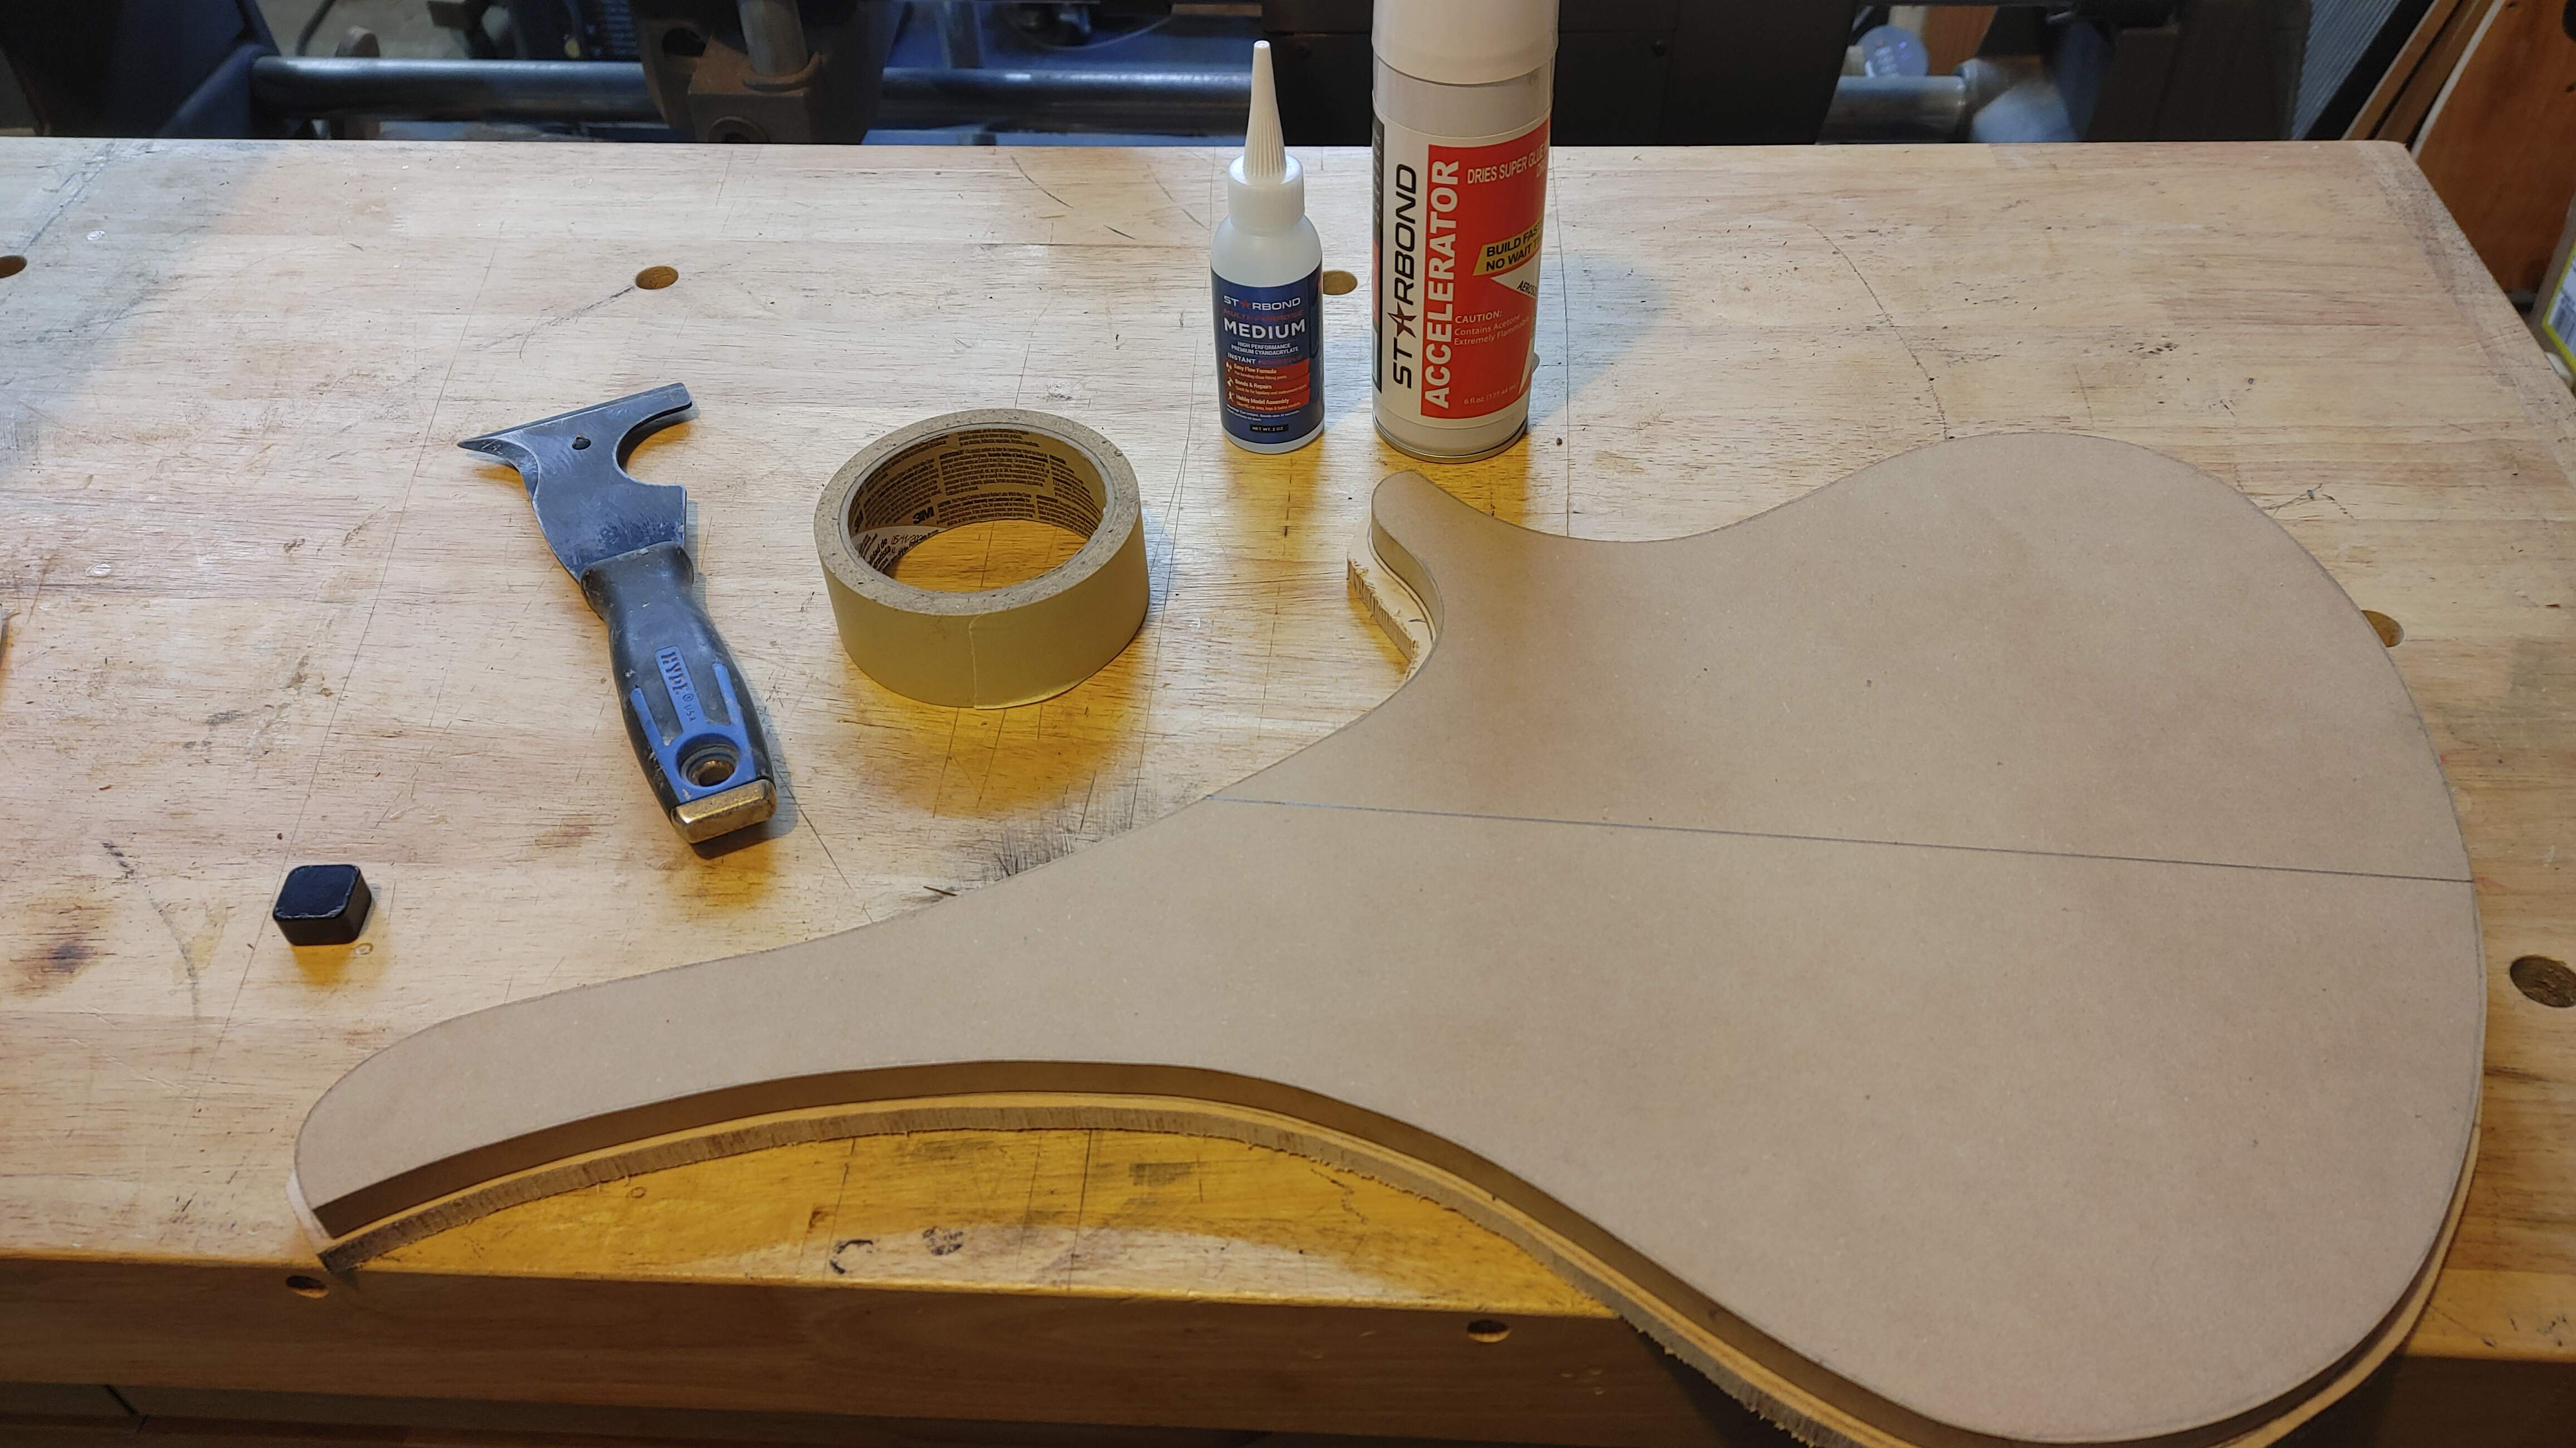
Yes, we all know the trick. After a quick run through the router table, we can start laying things out to see what we've done -
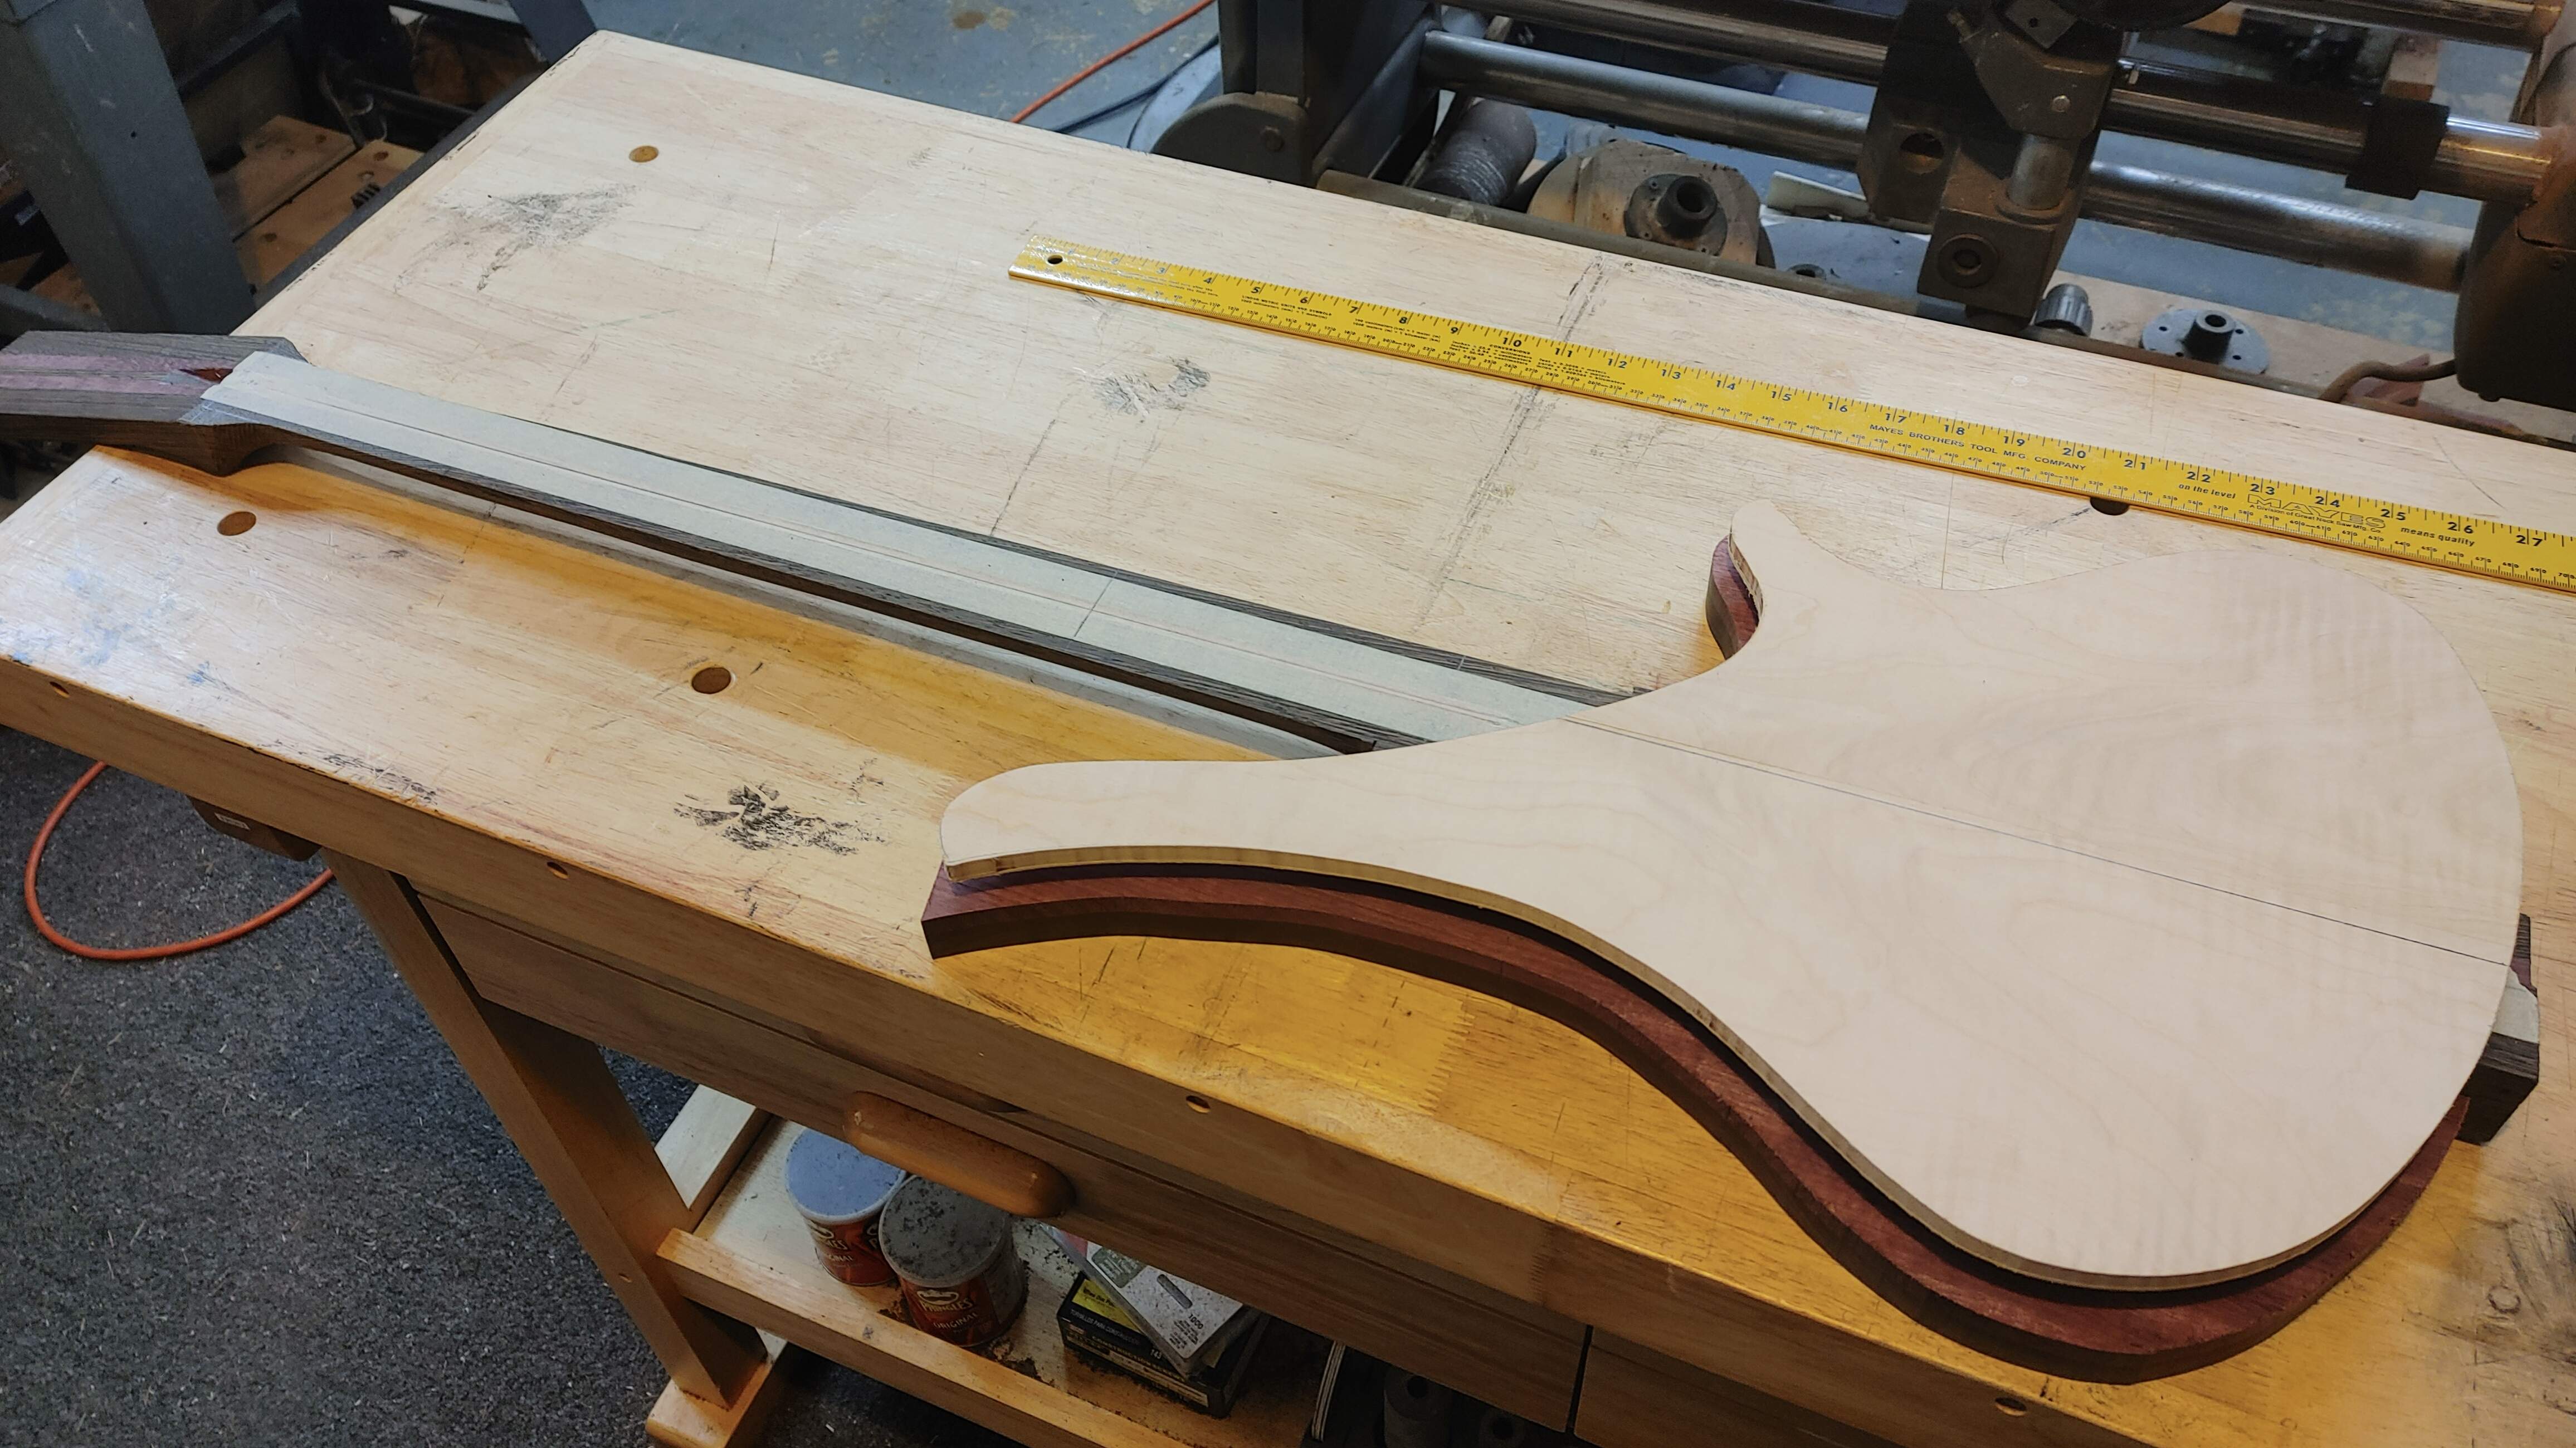
Okay, Here's Where Things Get Fun -
So, I want the top to flush out so that the fretboard runs right down onto the top. That means we need to recess it into the neck blank. I made a lot of marks, broke out the marking knife and scored the line too, we're getting serious here. I think the best way to do this would be to build a router sled. But I don't really have what I need to do that, nor did I feel like doing it. Let's take a more...drastic approach, shall we? I've got the big ol' honking bit for doing slab flattening. You know, the one you'd use with a router sled. Let's juts put it in the router with a fixed base, set the depth to the same depth as the top (minus a hair, for "safe measure" ) and get jiggy with it! P.S. - This is one of those "Do as I say, not as I do" moments. -

Yeah, that doesn't look freaky at all! Juts go slow and use your steadiest hand. You do have a steady hand, right? A little cleanup with the chisels at the end and then a quick pass or five with the shoulder plane to square it all up, I ended up with something resembling this -
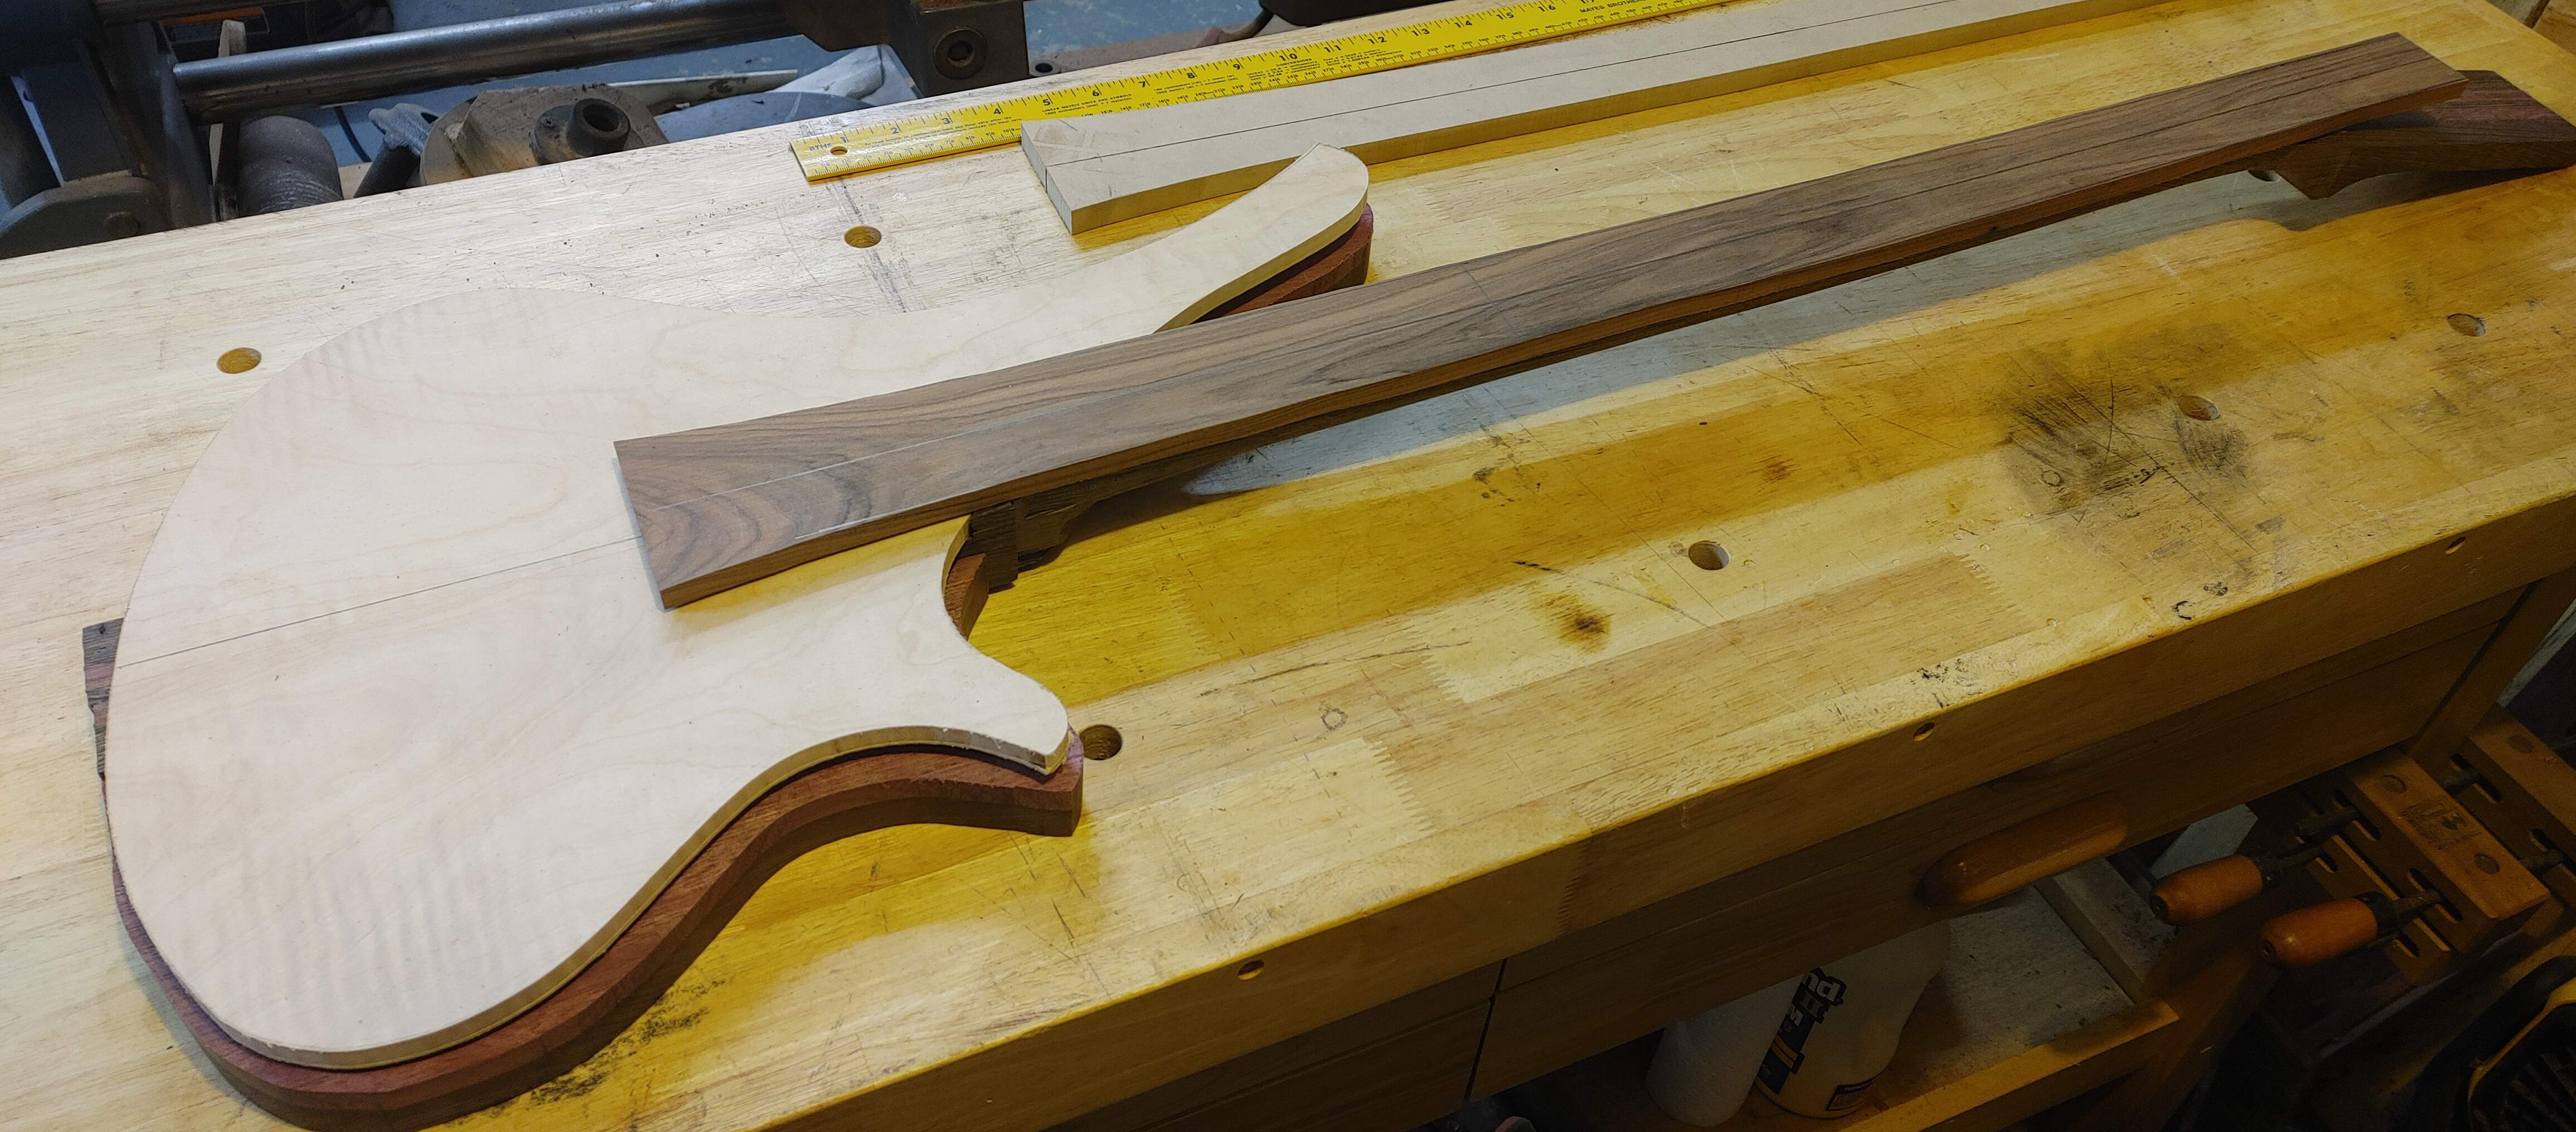
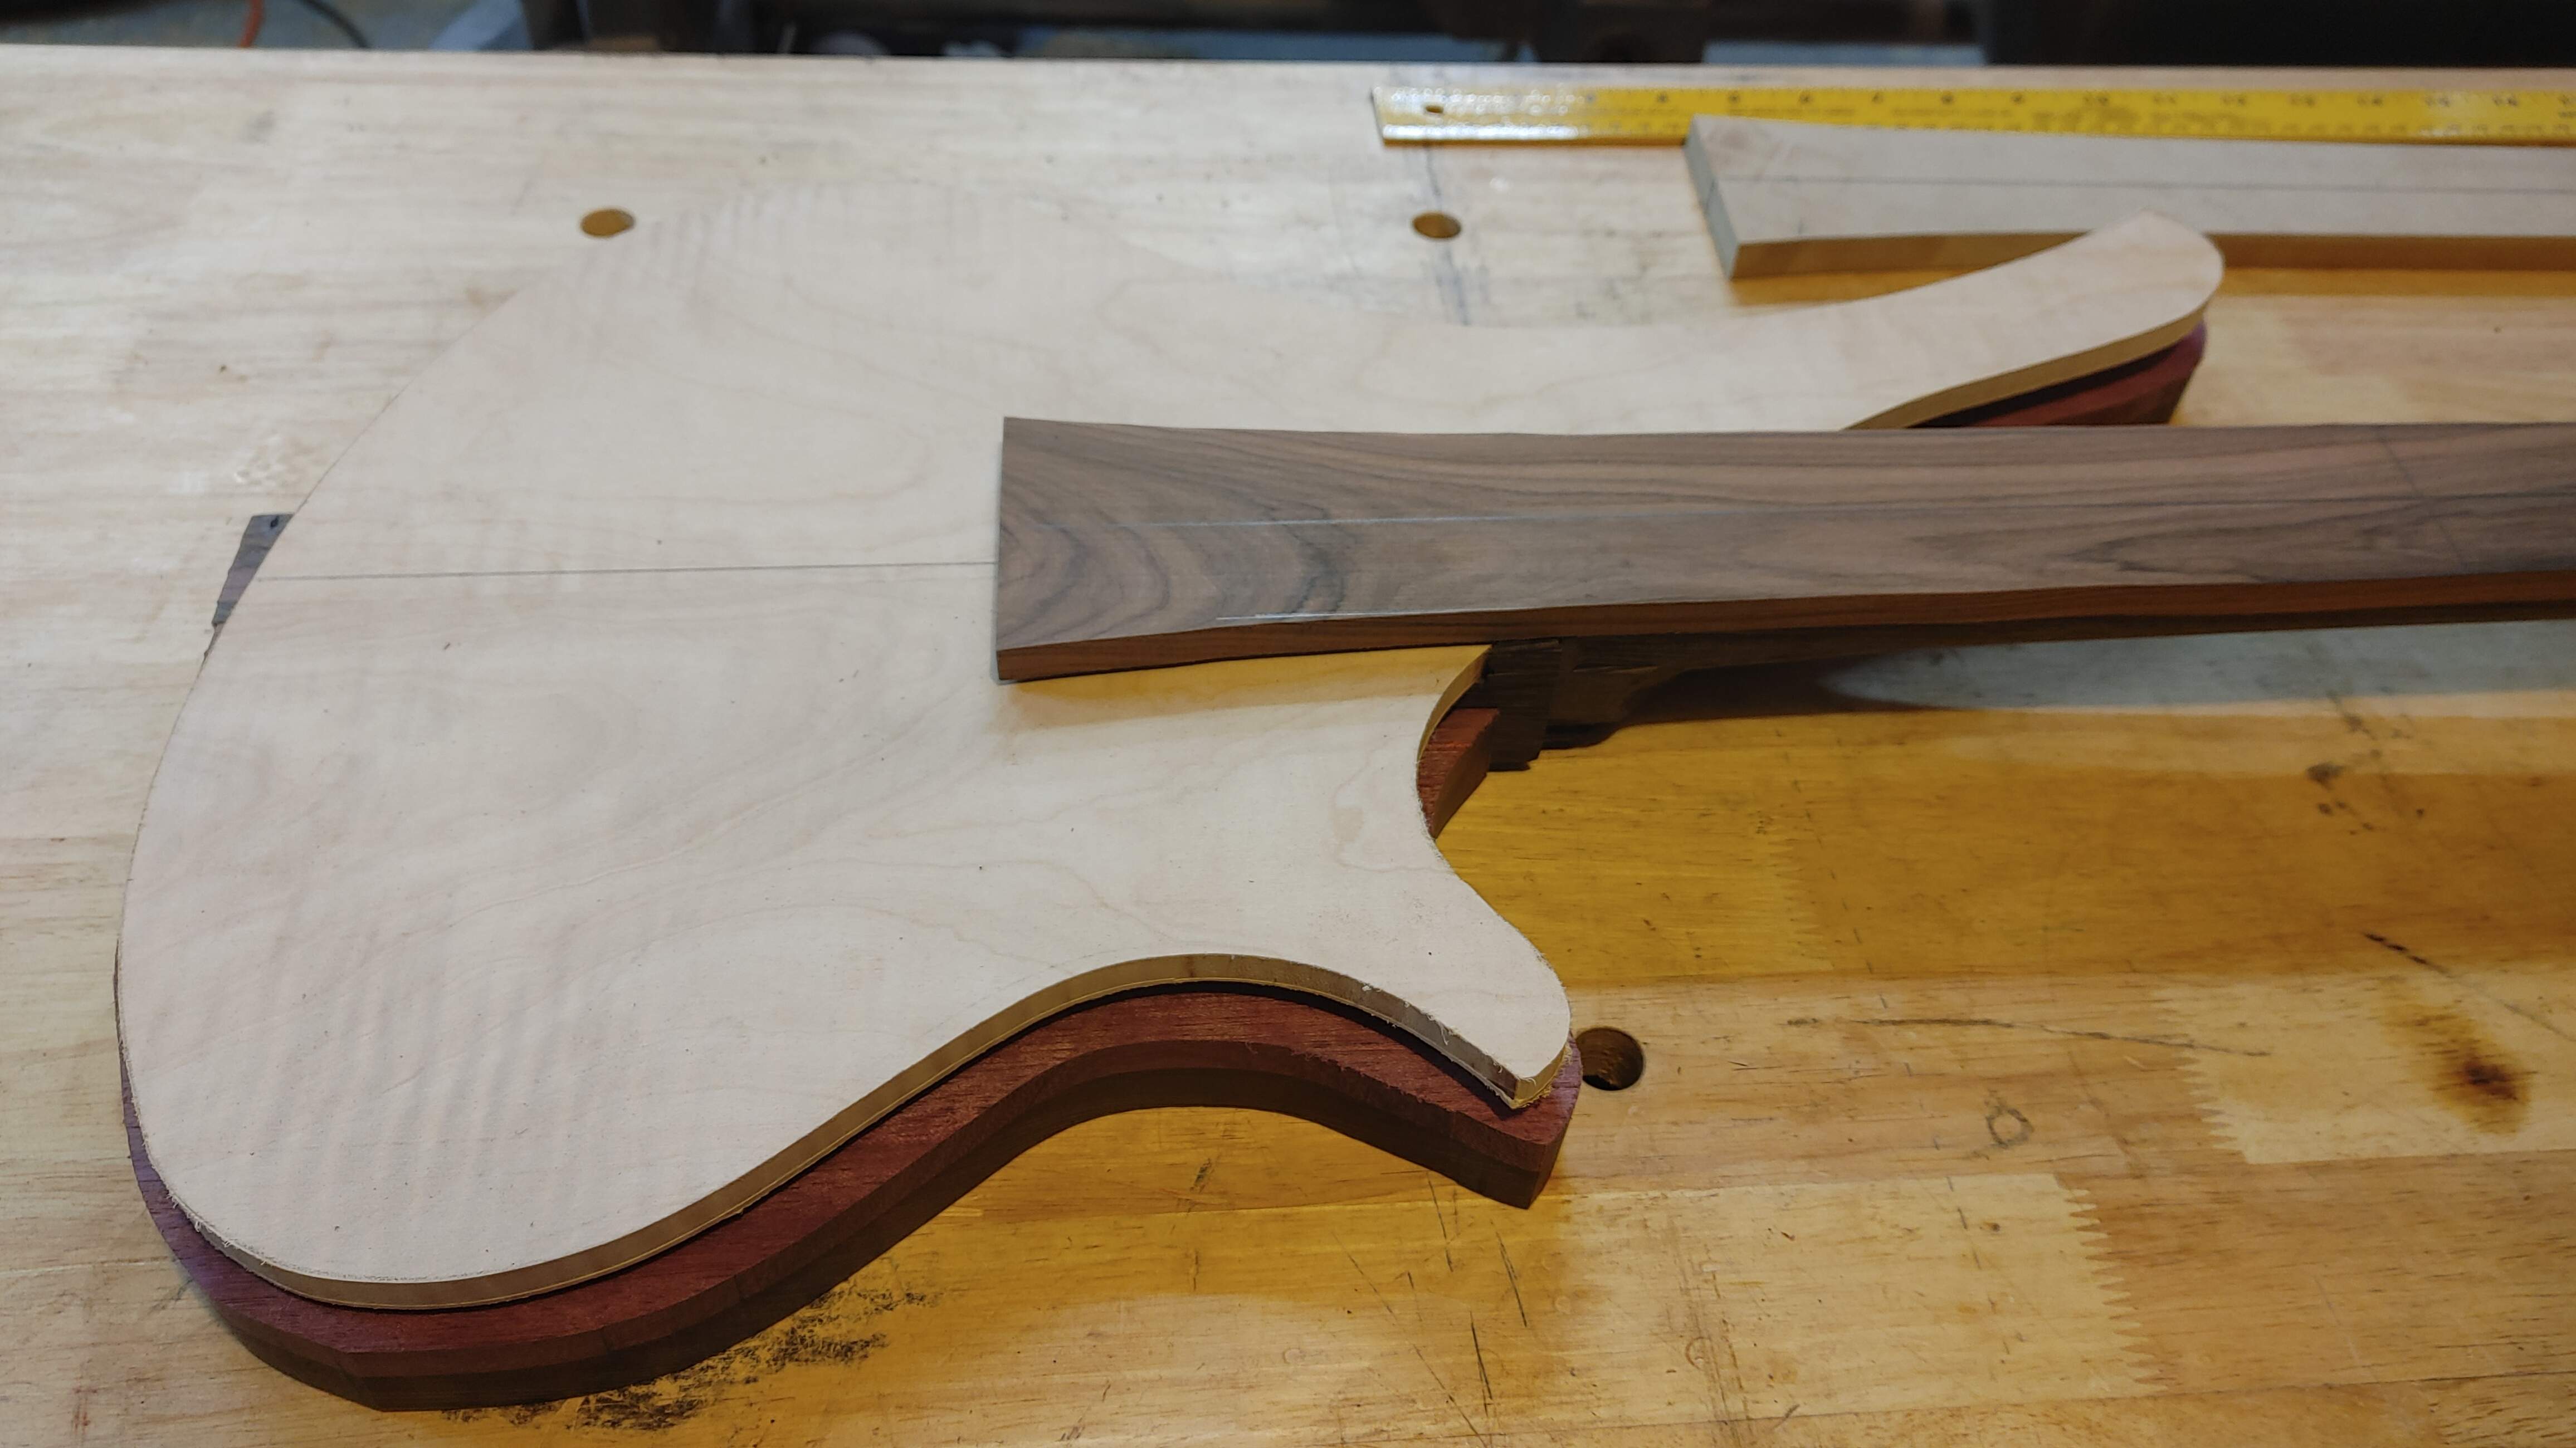
Yeah man, that'll work. Not a bad day's effort. I've got a neck that's pretty much carved, I've got a top that's shaped, I've got the neck blank recess sorted and I've got a template to shape that fretboard.
Next Steps -
I need to figure out how I'm gonna dowel these body wings on now that I have the neck blank recess sorted and I can actually figure out exactly where the body wings will live. I don't currently have any dowels or anything like that, so I gotta think on it a bit. There's still a lot of snow and ice on our streets, so a trip to the harbor to get some freight may not happen this weekend, we'll see. Luckily, the wife sees where I am and knows where I'm trying to get to, and she knows I'm gonna be pushing to start buying things for this. But basically, until I figure out how to dowel these wings, I'm kind of parked. I'd like to get then doweled so I can start shaping the neck heel and then start working into routing the shape on the wings and routing the wiring channel and so on. For some reason, my brain keeps telling me to deal with the body first, then the headstock after the body is all together. I don't know why, it just is. But, I could switch direction and start working on the headstock if need be. I can also shape that fretboard and start thinking through my markers, getting it radiused and so on. I'll hold on the pickup route curve until I have the pickup and make a template for that. I want to have the fretboard glued on and then route for the pickup like you would any other build.
So there you go, we're back in action over here.
We're doing things the completely crazy way, but we're doing things none the less!
After a very long week, I'm finally back up and running. After spending a couple days sick after Christmas, I then had to get all caught up on the work load at the day job. Having basically taken a 5 day weekend left kind of a mess to clean up upon my return. Luckily, it is the holiday season, so most of our clients are out anyways. It could have been way worse. So let's get back to work!
One Step Forward, Two Steps Back -
During my half sick stupor last weekend of trying to push through and get something accomplished, I screwed up and started shaping the neck before I had dealt with tapering it first. I just wasn't thinking very clearly and totally spaced it. So, I'm glad I stopped where I did, having only put the two initial facets in the neck. It was basically still very blocky, which means I could still work it the way I wanted to.
I decided to create a template that I could use for both the fretboard and the neck taper. My thinking here was, I can use this template to pre-shape the fretboard off the build and then just drop it on at the last minute, plus it'll have the added bonus of working as a neck taper template too -
From there, we can clamp it to the neck and break out the router. I used my little Amana pattern bit that I bought for doing pickup and control cavities, figured it should work just fine. -
Here's a shot of template clamped up, the router ready to go and my Uvex face shield. If you guys don't have one of these Uvex face shields, I highly recommend it. I purchased it for woodturning, but I tend to wear it for a LOT of stuff, especially when I use my router. That stupid router just has no dust collection, so it just sucks. I can hook a hose to it, but the little port inside it just doesn't pick up anything at all, so the shield is nice. The shield is anti-fog (sort of, I give it a solid b in that department) and you can replace it if it gets all scratched up without needing to buy a whole new unit. It was also affordable (in my world), I think I'm in it like $40 from Rockler -
My process (certainly not the correct one) was to clamp the template on at each end, run the router as far down each side as I could before the clamp at the headstock interfered (the clamp at the body end was out of the way and also clamping it to the bench), then move that clamp toward the middle of the neck and finish the routing. My bit is kinda short, so I had to make the first pass, then remove the template and make one more pass. It worked. Little sketchy, but it worked.
Now Where Was I? -
Oh yeah, carving a neck. Back to the "Neck Carving Jigerator 5000". After a couple hours of Shinto and half round rasp action, then some quick scuffing with some sandpaper so I can touch this wenge without feeling like you went to war against a porcupine (seriously, pick a softer, more workable wood, trust me), we have something looking kind of like this -
It's got a decent profile for now. We'll fine tune it as we go, but this gives me something that I can start focusing on other thing now, like the body!
Girl Look At That Body -
I figured why not go ahead and route the shape in that top while I was at it. So, toss the little Amana pattern bit in the router table so we can get after this top. My thinking was that at some point I will then be able to use this top as the pattern for the wings after this all starts coming together. I could be wrong, we'll see. So anyways, let's break out a few things and perform "The Trick" -
Yes, we all know the trick.
After a quick run through the router table, we can start laying things out to see what we've done -Okay, Here's Where Things Get Fun -
So, I want the top to flush out so that the fretboard runs right down onto the top. That means we need to recess it into the neck blank. I made a lot of marks, broke out the marking knife and scored the line too, we're getting serious here. I think the best way to do this would be to build a router sled. But I don't really have what I need to do that, nor did I feel like doing it. Let's take a more...drastic approach, shall we? I've got the big ol' honking bit for doing slab flattening. You know, the one you'd use with a router sled. Let's juts put it in the router with a fixed base, set the depth to the same depth as the top (minus a hair, for "safe measure" ) and get jiggy with it! P.S. - This is one of those "Do as I say, not as I do" moments. -
Yeah, that doesn't look freaky at all!
Juts go slow and use your steadiest hand. You do have a steady hand, right? A little cleanup with the chisels at the end and then a quick pass or five with the shoulder plane to square it all up, I ended up with something resembling this -Yeah man, that'll work. Not a bad day's effort. I've got a neck that's pretty much carved, I've got a top that's shaped, I've got the neck blank recess sorted and I've got a template to shape that fretboard.
Next Steps -
I need to figure out how I'm gonna dowel these body wings on now that I have the neck blank recess sorted and I can actually figure out exactly where the body wings will live. I don't currently have any dowels or anything like that, so I gotta think on it a bit. There's still a lot of snow and ice on our streets, so a trip to the harbor to get some freight may not happen this weekend, we'll see. Luckily, the wife sees where I am and knows where I'm trying to get to, and she knows I'm gonna be pushing to start buying things for this. But basically, until I figure out how to dowel these wings, I'm kind of parked. I'd like to get then doweled so I can start shaping the neck heel and then start working into routing the shape on the wings and routing the wiring channel and so on. For some reason, my brain keeps telling me to deal with the body first, then the headstock after the body is all together. I don't know why, it just is. But, I could switch direction and start working on the headstock if need be. I can also shape that fretboard and start thinking through my markers, getting it radiused and so on. I'll hold on the pickup route curve until I have the pickup and make a template for that. I want to have the fretboard glued on and then route for the pickup like you would any other build.
So there you go, we're back in action over here.
We're doing things the completely crazy way, but we're doing things none the less!

Nice progress! Ive been doweling up neck.and body blanks very early on, when everything is still rectangles, thats the only way doweling jigs work well. If you still have straight 90 degree edges on the neck beam and body wings, it should work. The self centering jigs work as described, so if the pieces arent the same thickness, you have to get creative with shims. The HF jig looks identical to the expensive one I bought years ago.
How does that face shield fit over ear muffs, glasses, and/or a respirator mask? That's the challenge I've had, finding one that works with all the other junk on my head...
Ive been thinking about a face mask too. I have a 3m respirator, but it fogs my glasses up immediately. Ive realized im quite allergic to cocobolo, and mildly allergic to wood dust in general.
The face mask works fine with my glasses, no issues at all. I have to take any hat or beanie off, the part on top of your head is basically the same as a welding helmet, if you’ve ever wore one of those. I often wear ear buds and glasses and this mask works great. But yeah, you aren’t gonna be wearing a hat of any sort with it.
Yeah, doweling while still rectangles would have been super smart. Shows the level of experience.Nice progress! Ive been doweling up neck.and body blanks very early on, when everything is still rectangles, thats the only way doweling jigs work well. If you still have straight 90 degree edges on the neck beam and body wings, it should work. The self centering jigs work as described, so if the pieces arent the same thickness, you have to get creative with shims. The HF jig looks identical to the expensive one I bought years ago.


I think I’m gonna use Nexy’s method and just drill the neck blank with a drill press, all the way thru, and then use that to locate the holes in the wings and then somehow hold the wings in the offcut part (that I kept for a clamp caul) and then drill the wings. But, I gotta get a doles first.
Yeah, yeah, yeah, I know I have a lathe and every piece of wood is a dowel if you spin it fast enough. But have you ever tried to make a dowel perfectly straight for any length of time?
I've made lots of dowels and rods over the years by drilling a hole the size of the dowel you need in steel, then put a rough-shaped "dowel" in your drill, spin it up fast and jam it through the hole you cut in steel. It pushes right through and you get a rough dowel in the size of your drilled hole. Might be more of a challenge to make something thicker than your drill chuck can fit. 
Might be more of a challenge to make something thicker than your drill chuck can fit. 
You shouldn’t need really thick dowels for this. They’re for alignment not structural. I’ve seen Roy Underhill make dowels using @Beej technique except turning them close to size then just hammering the wood through the steel plate.
This is kind of the idea but you can just use regular steel for a once or twice use. It’s not a bad idea to start with slightly bigger holes and work to the size you want.
This is kind of the idea but you can just use regular steel for a once or twice use. It’s not a bad idea to start with slightly bigger holes and work to the size you want.
If the dowels are a little snug, I'm wondering what would be a good way to get the wings back apart without damage from pulling or prying. Just stick one side in a cork lined wood vise and pull?
I was wondering if it would work to make a duct tape strap and sandwich it in between, to help pull it apart later. But then there would be a tiny gap. Not sure how much that would matter for initial rough shaping.
I was wondering if it would work to make a duct tape strap and sandwich it in between, to help pull it apart later. But then there would be a tiny gap. Not sure how much that would matter for initial rough shaping.
That's hilarious - I learned that technique as a young carpenter, taught to my by an old dog who knew all the tricks. It never occurred to me that it might be a product one could buy.You shouldn’t need really thick dowels for this. They’re for alignment not structural. I’ve seen Roy Underhill make dowels using @Beej technique except turning them close to size then just hammering the wood through the steel plate.
This is kind of the idea but you can just use regular steel for a once or twice use. It’s not a bad idea to start with slightly bigger holes and work to the size you want.
Yeah, I've seen that method a few times on the Tubes. Just seems easier to just buy some dowels.

Dowels, Pins & Other Assorted Fasteners -
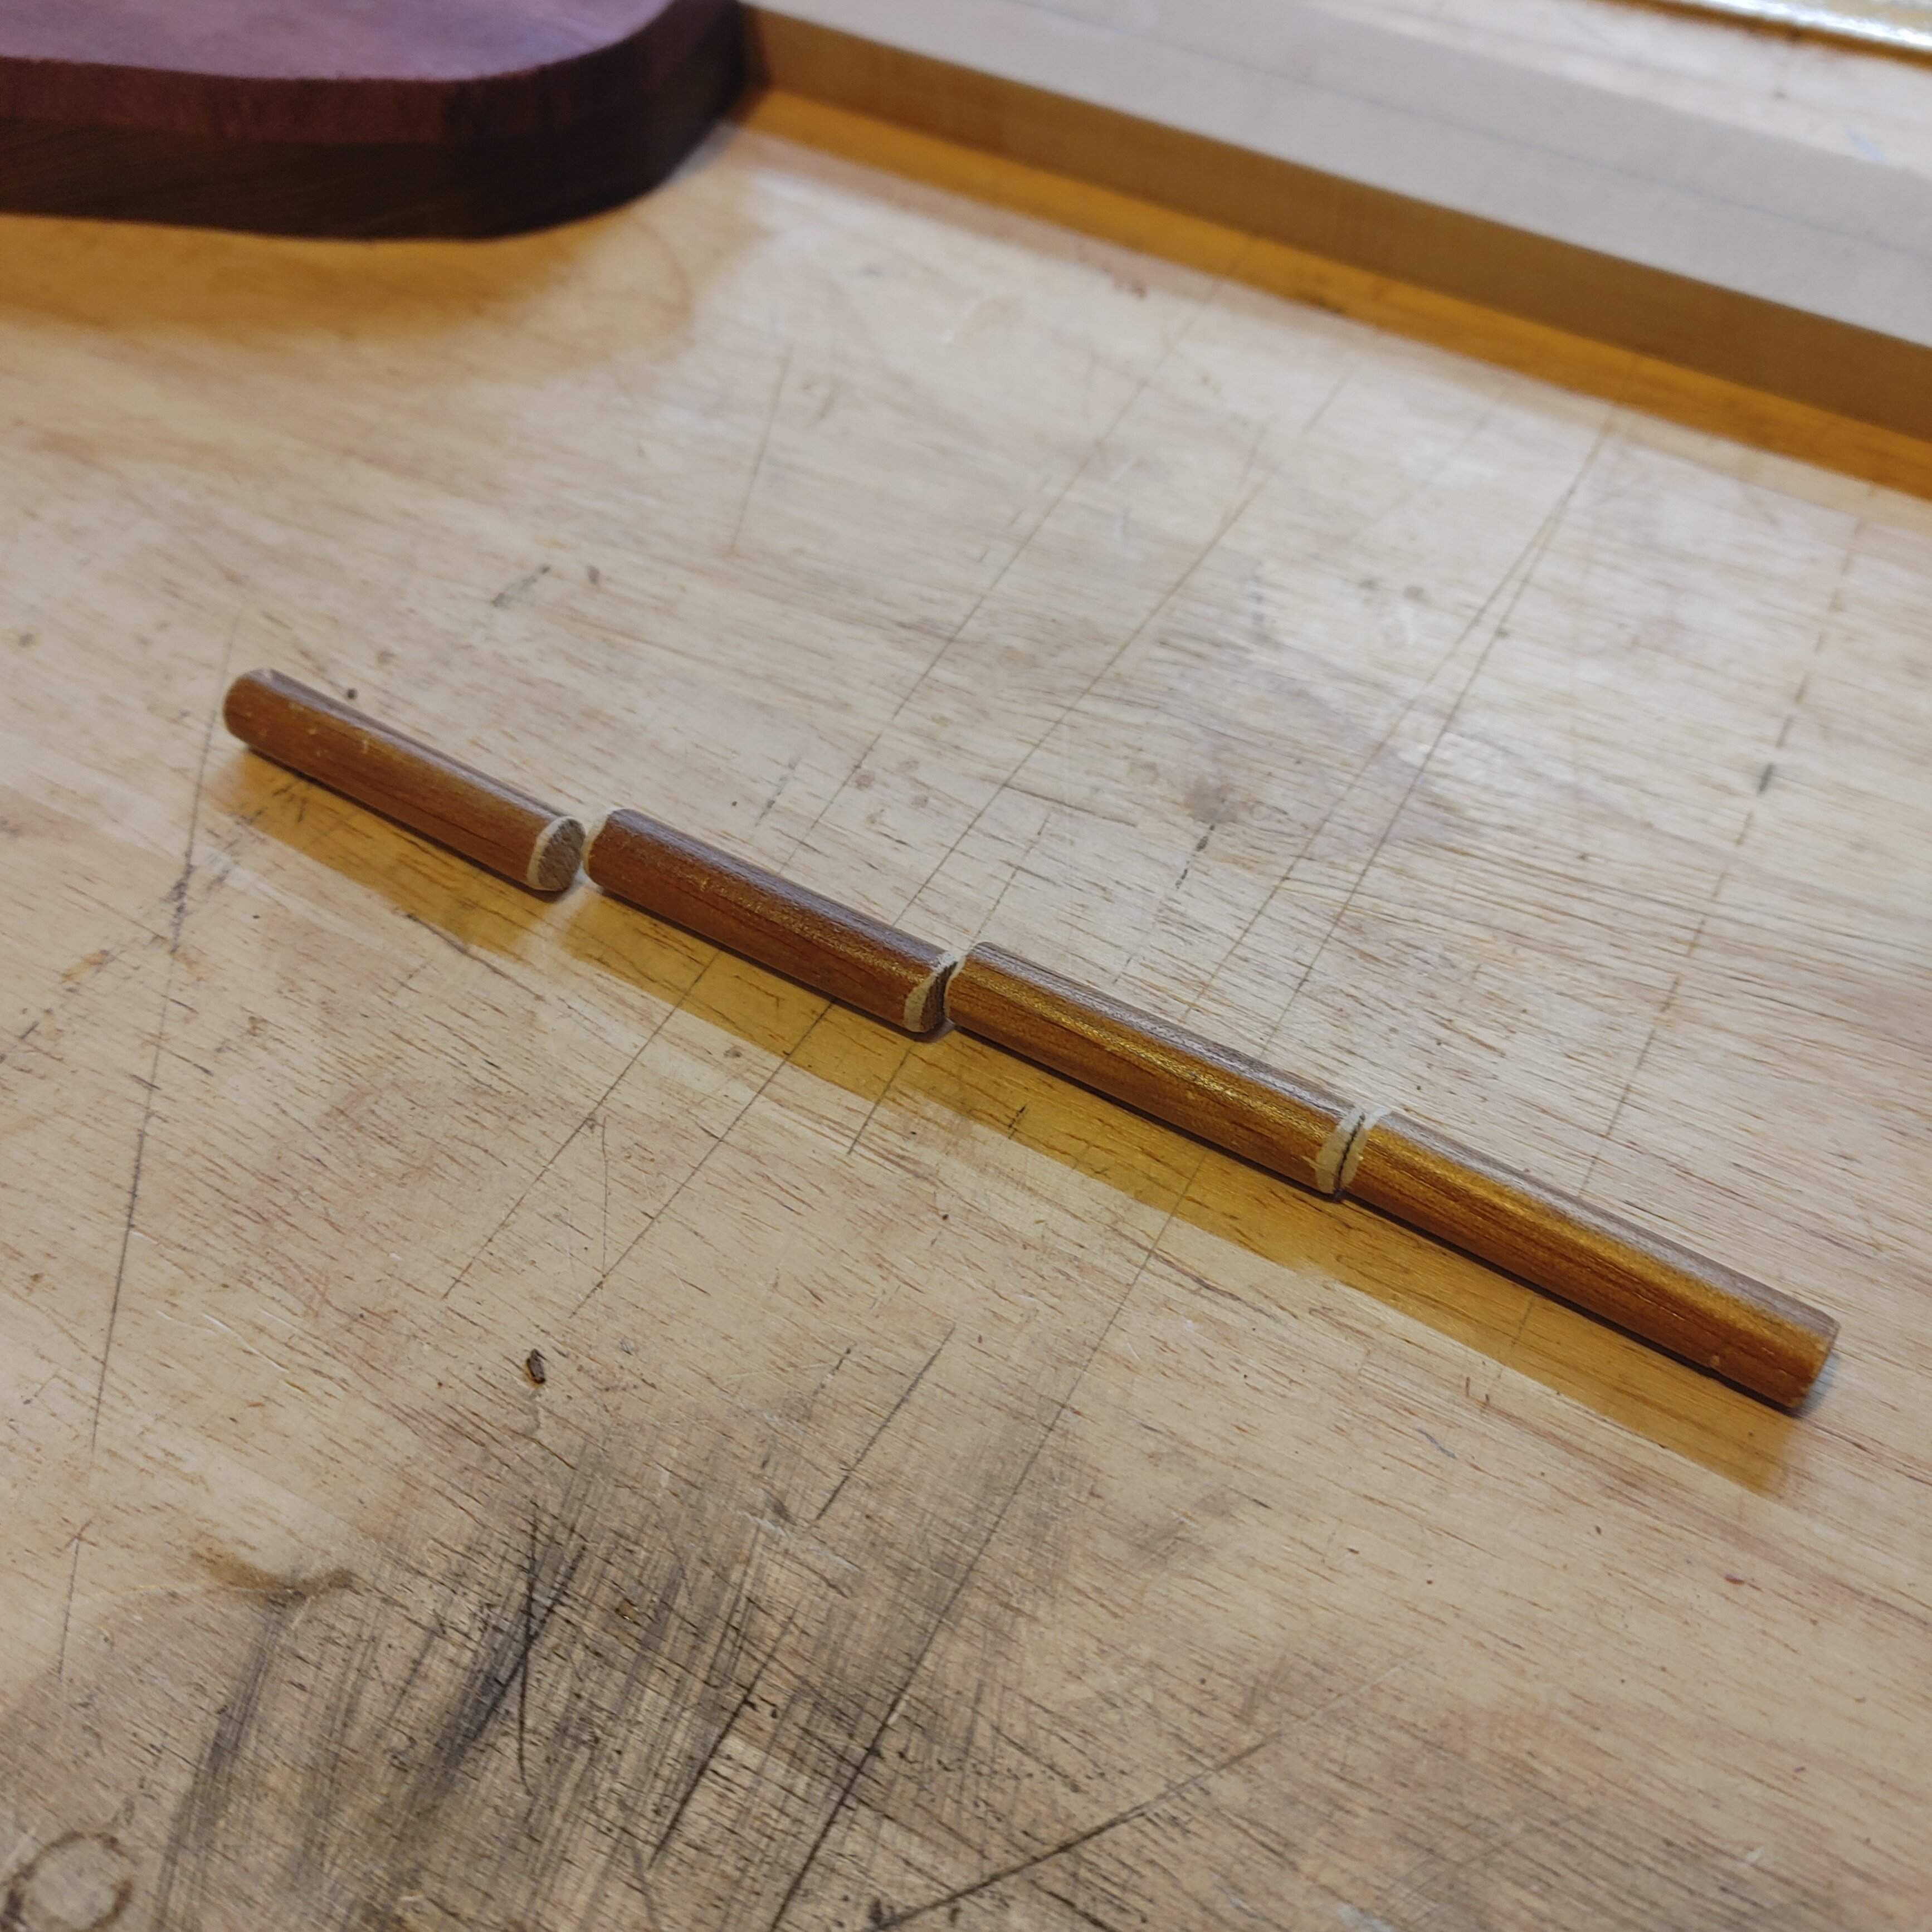
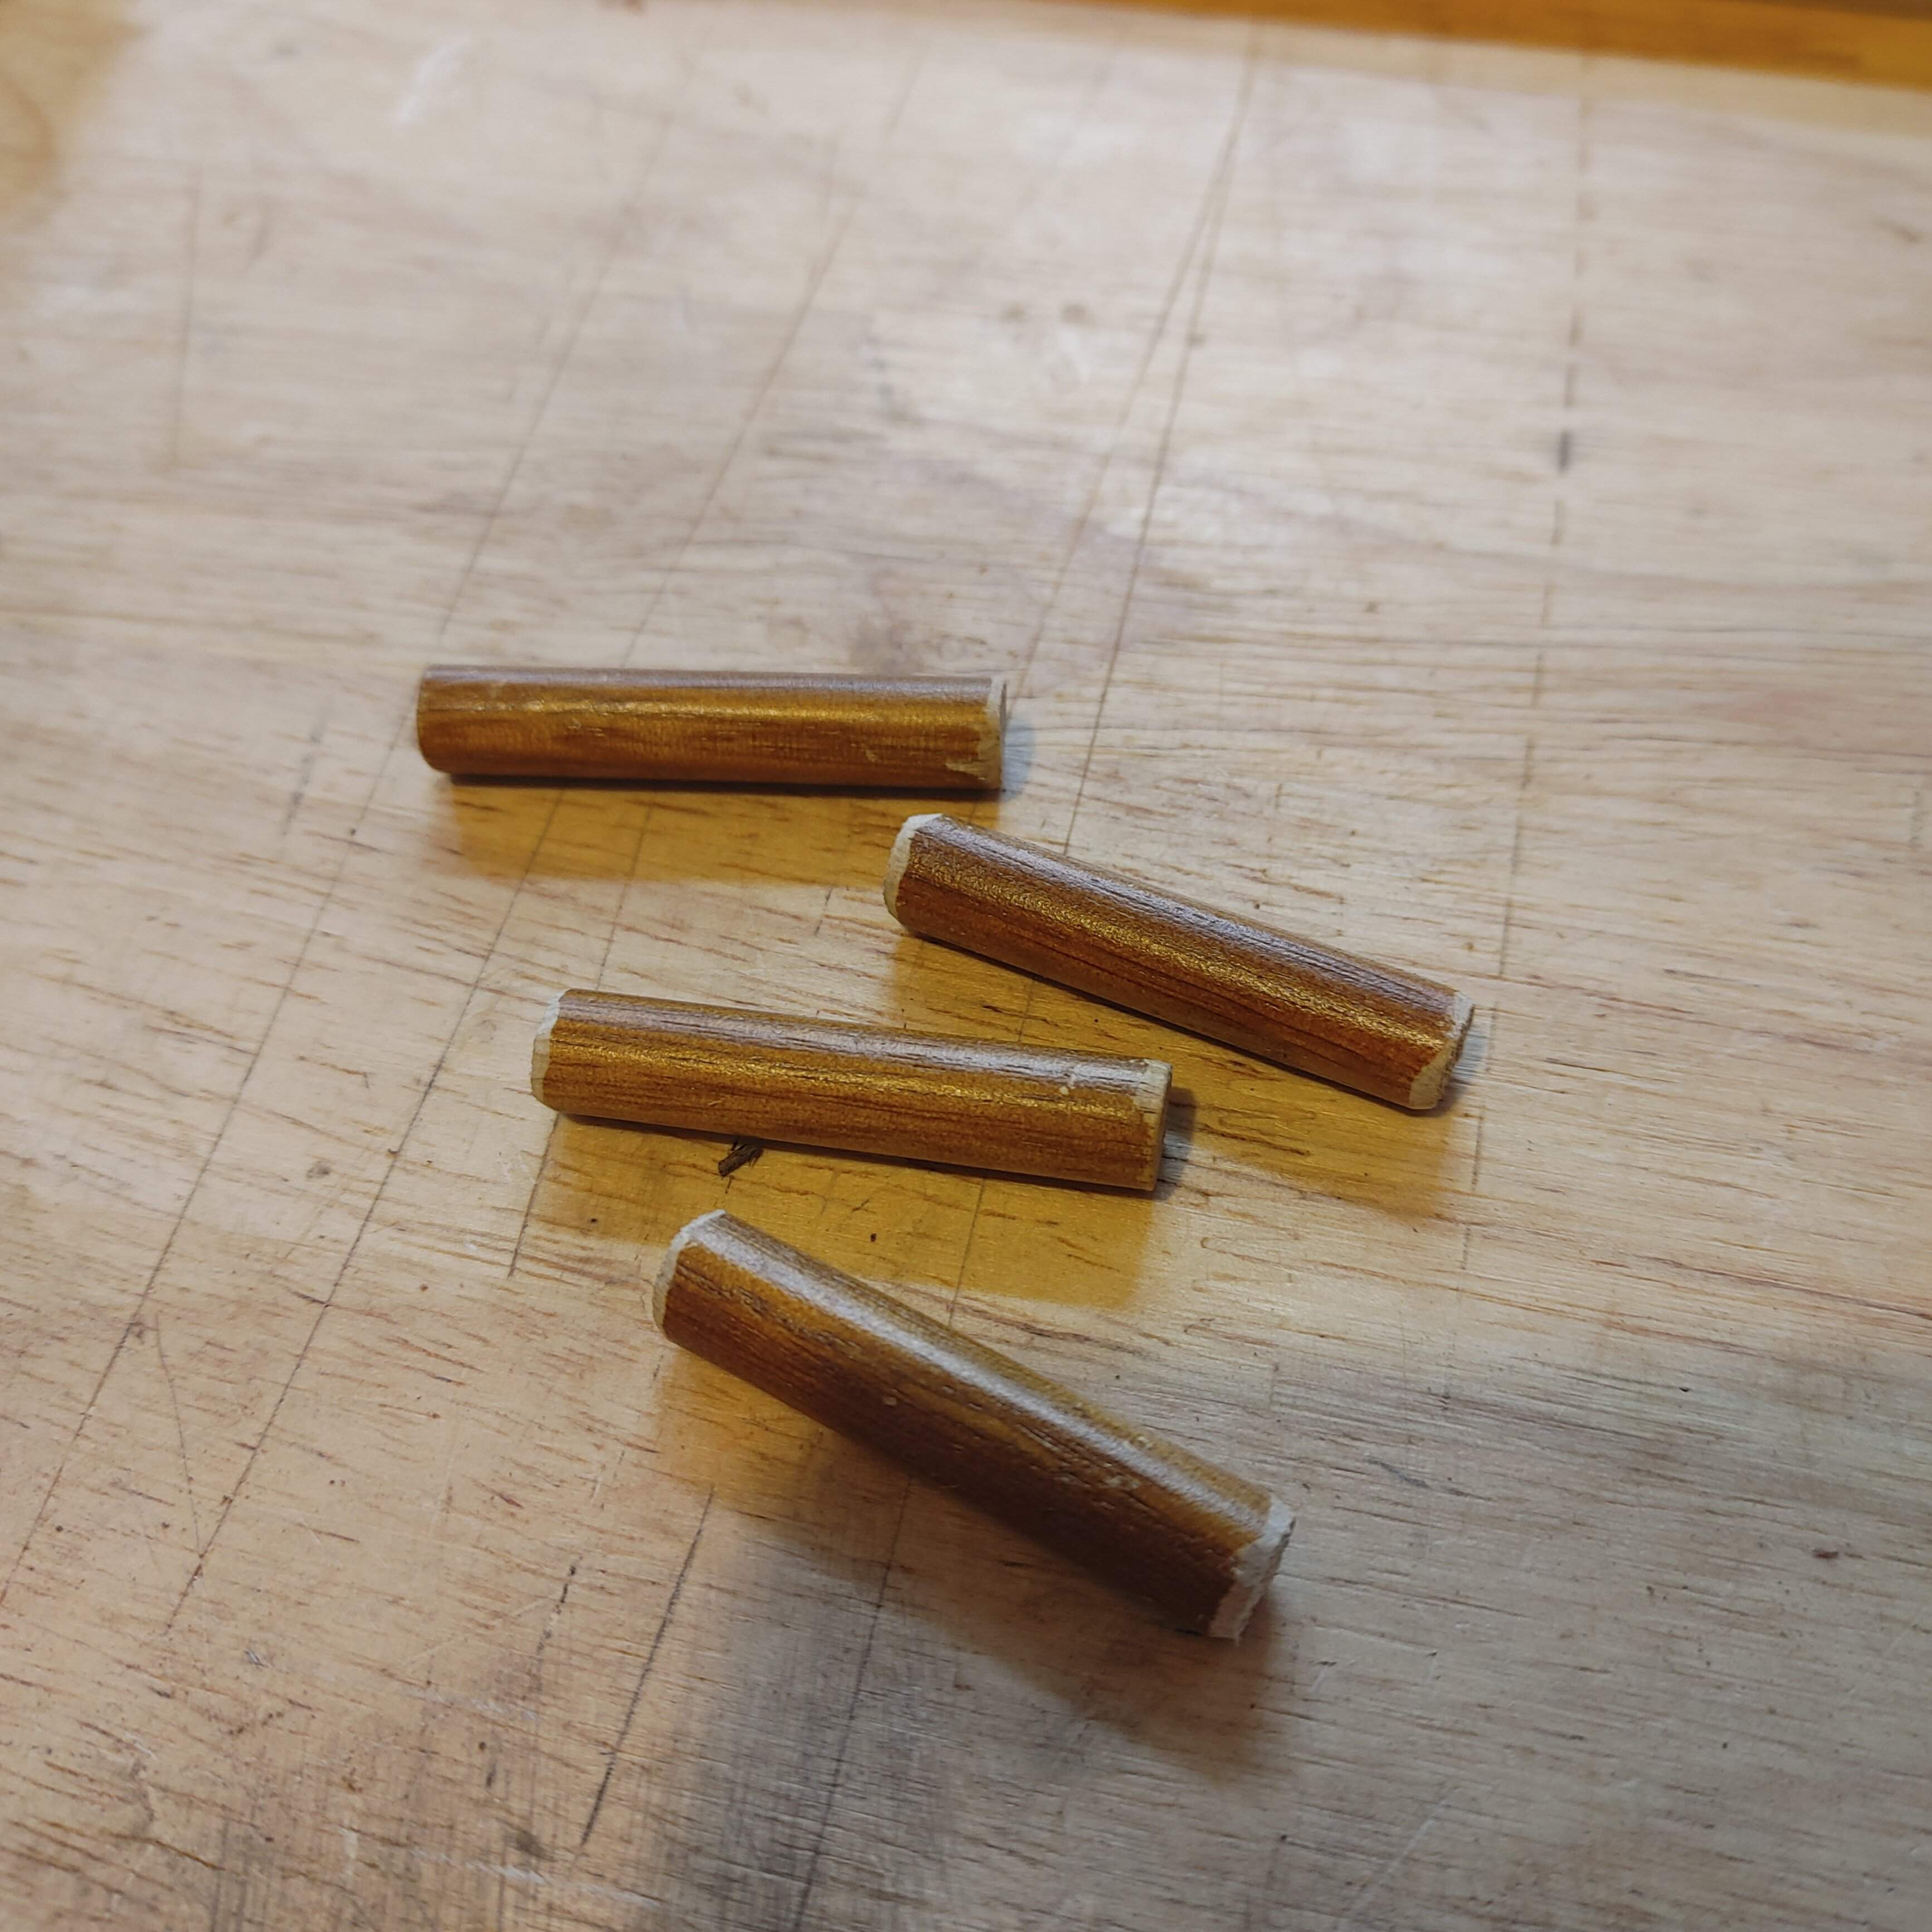
So I was kind of cleaning up the garage a bit, putting things away (I know, I'm odd. I like to put things away after every "step" ) and I noticed that grandpa had this dowel looking piece of wood in his scrap wood. I'm not even sure what it is, I just know it was round and about 7" long (that's what she said) and was calling out to me "Tim, aren't I a dowel?" Why yes you are little piece of wood! And if I do some quick, community college math I think I can split this thing into four equal length dowels of roughly 1-3/4" long! To the band saw with ye! -
Dowels Need... Dowel Holes -
So let's get the ShopSmith converted over to a drill press and make sure we're all lined up here -
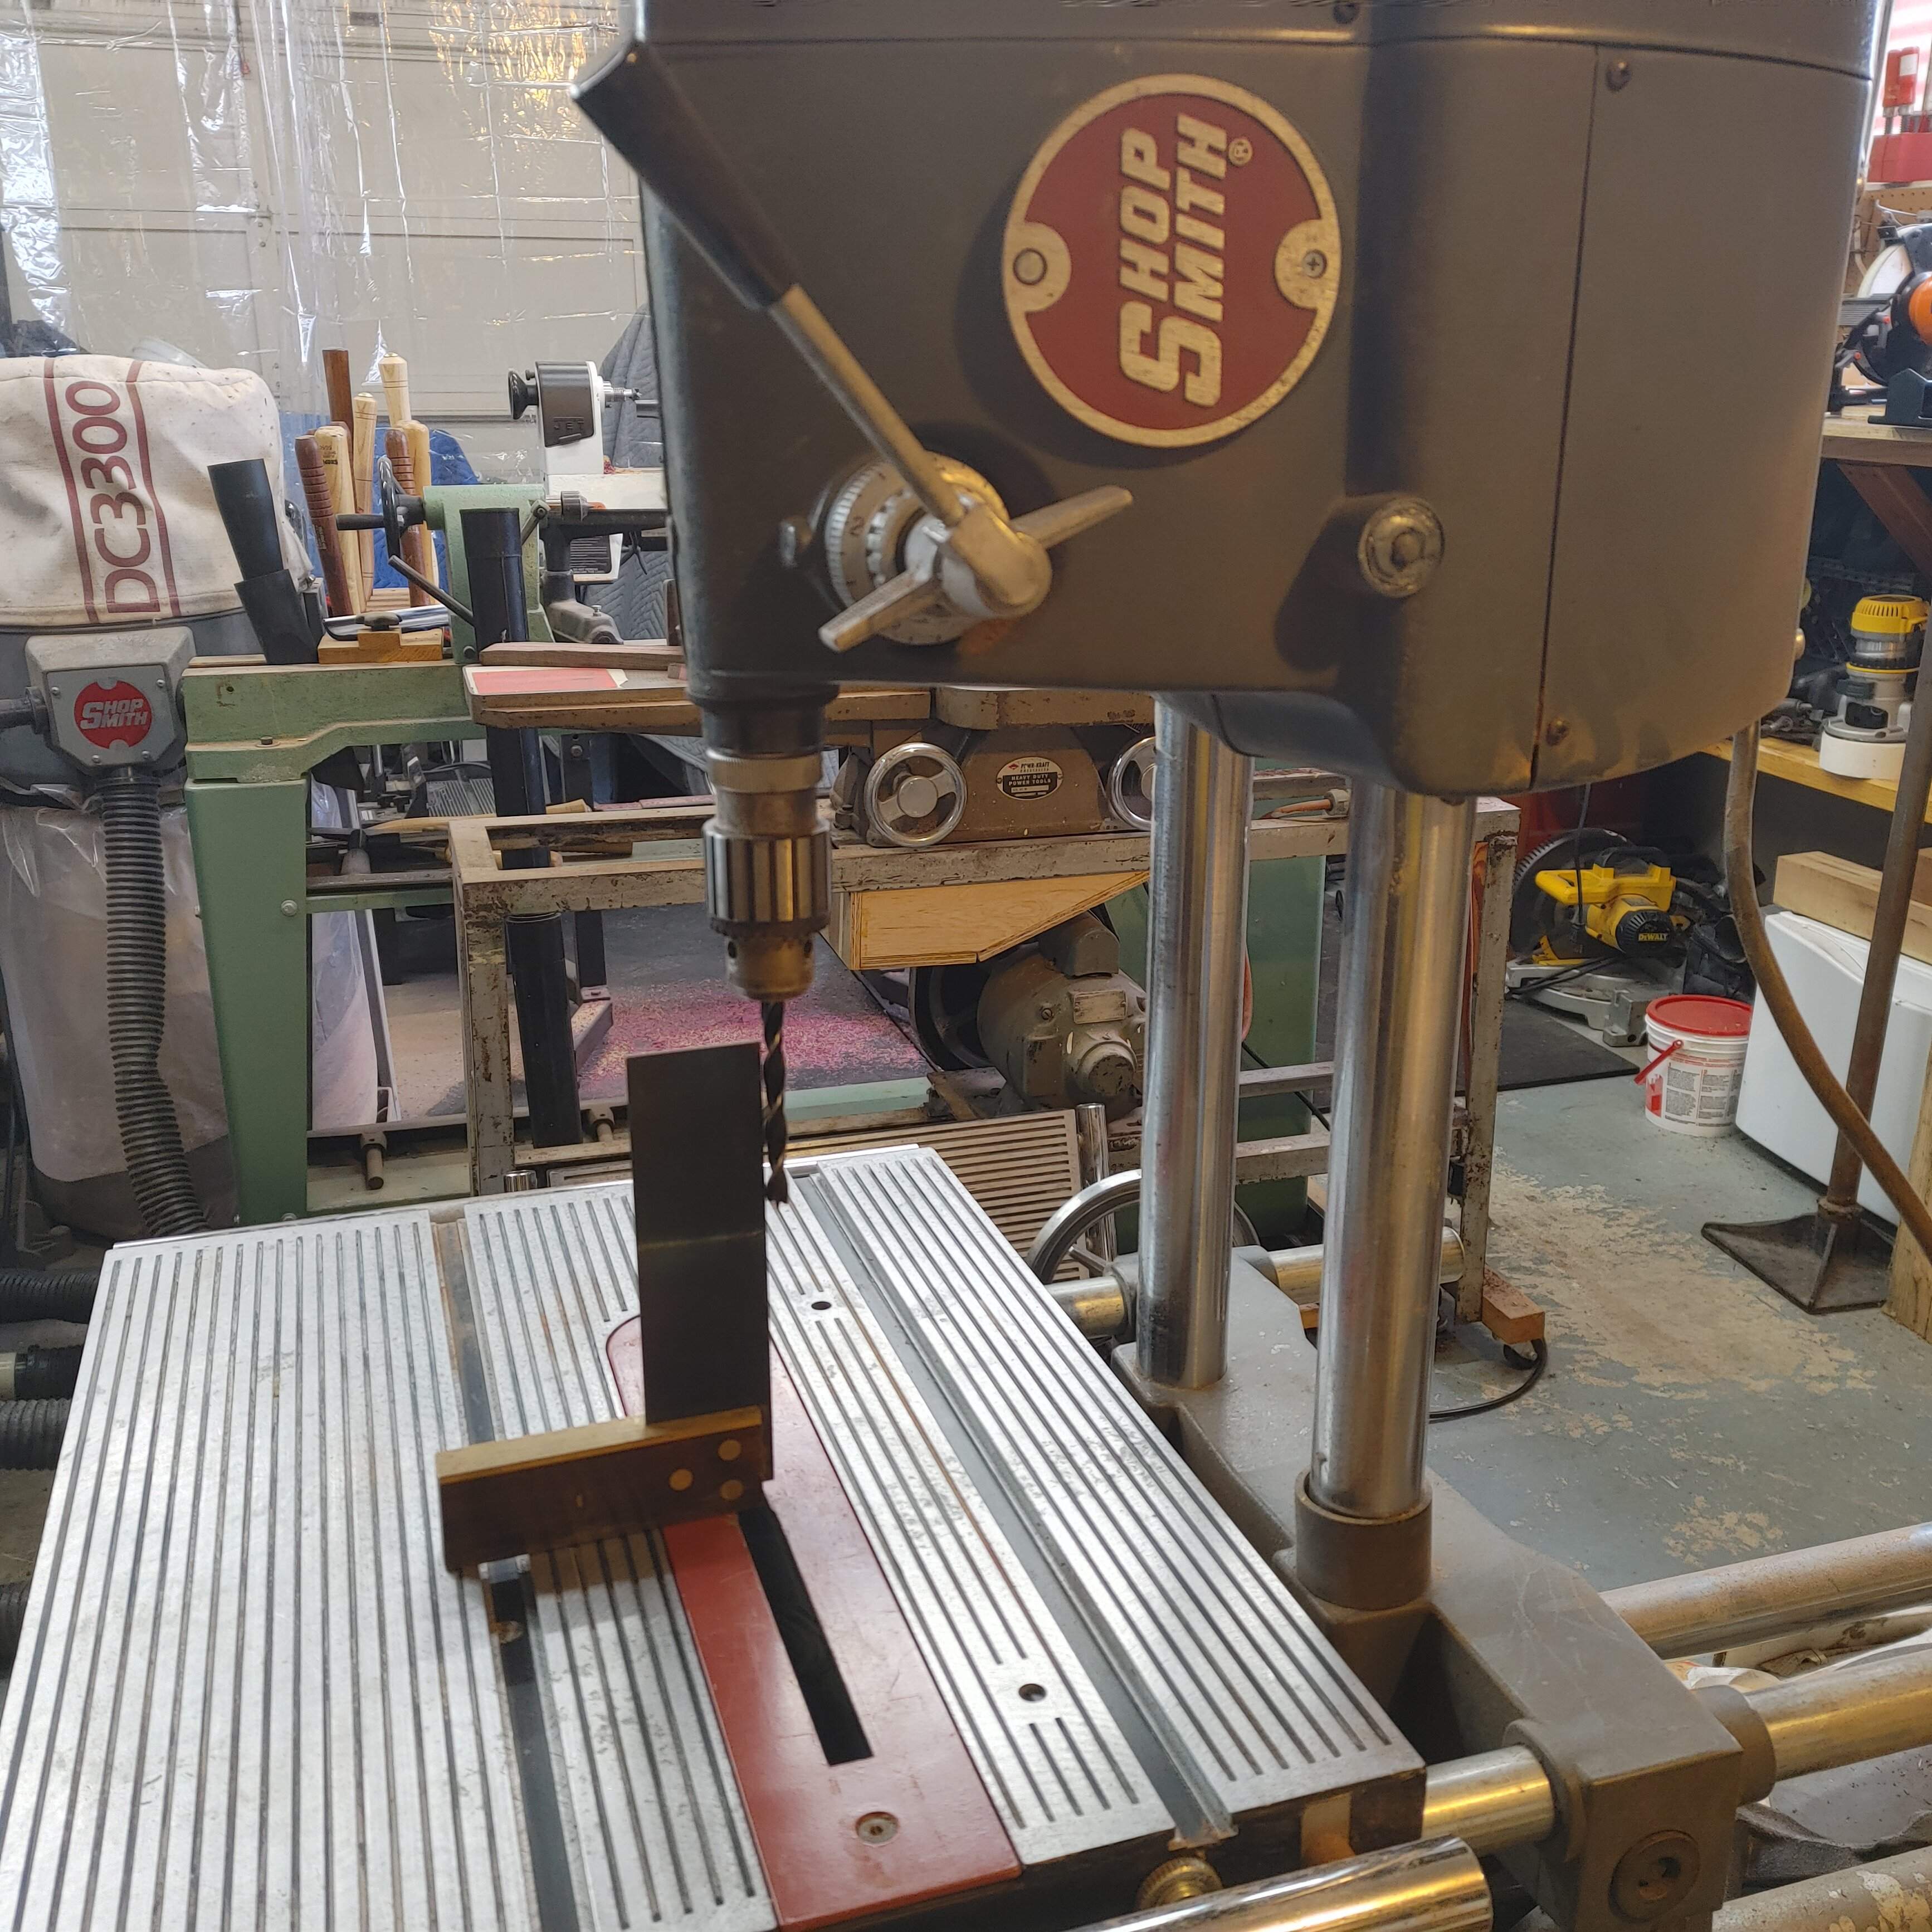
Looking good to me homey! Time to punch this sucker right in the.....wait.....I just need to drill some holes. Calm down man. First step is to clamp the neck blank in this silly vice I bought back during the COVID lockdown, it was one of those "pick up on the porch, just leave the money under the mat" things, I think I gave like $10 for this one and a small bench vice. Hey, I'm finally actually using it for the first time! Money well spent! Take that wife who says I spend money on things I'll never use! -
-
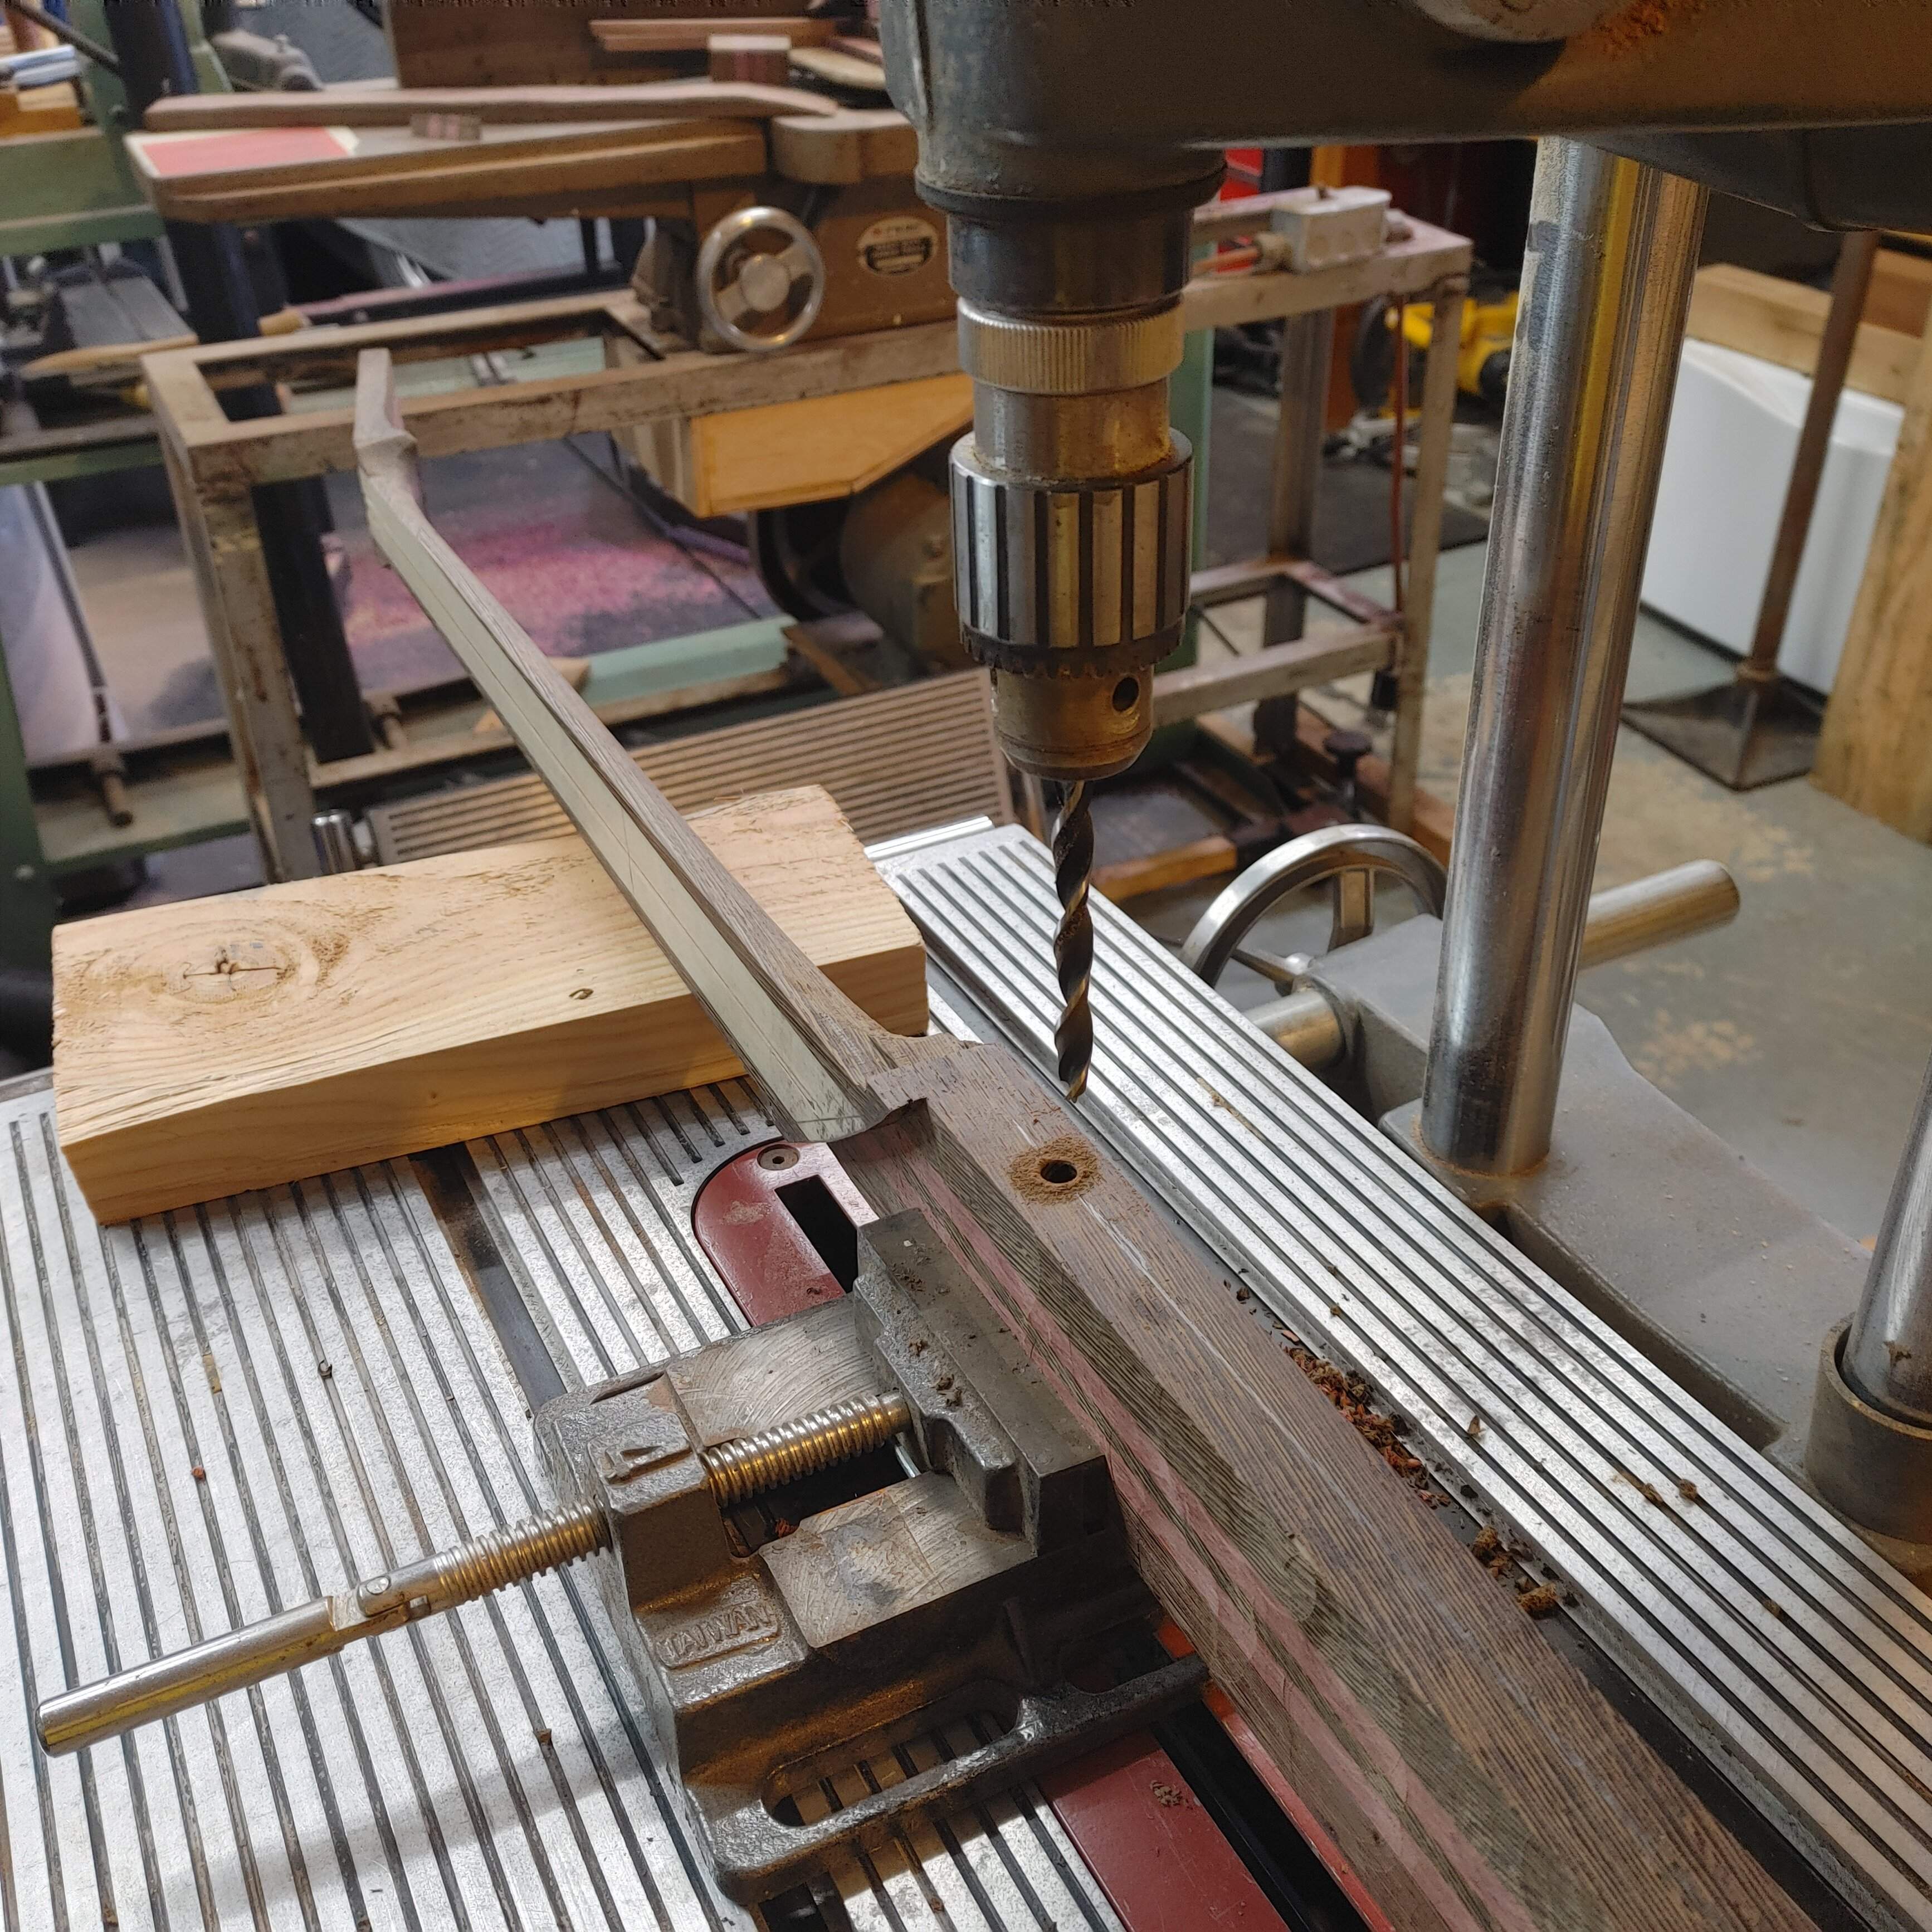
I drilled two holes all the way through the neck blank, positioned where I knew they would be the most spread and still be within both body wings ('cause that one body wing is way shorter than the other one). From there, we need to somehow transfer that hole location to the wing. The cool thing about a ShopSmith is that it's a really quirky machine. Sometimes the quirkiness of it has advantages that you don't see at first. One of them is that the drill chuck literally comes off. Soooo.....let's just take it off with my brad point bit still in it...go over to the bench and use it in the neck blank hole to mark the hole location on the body wing -
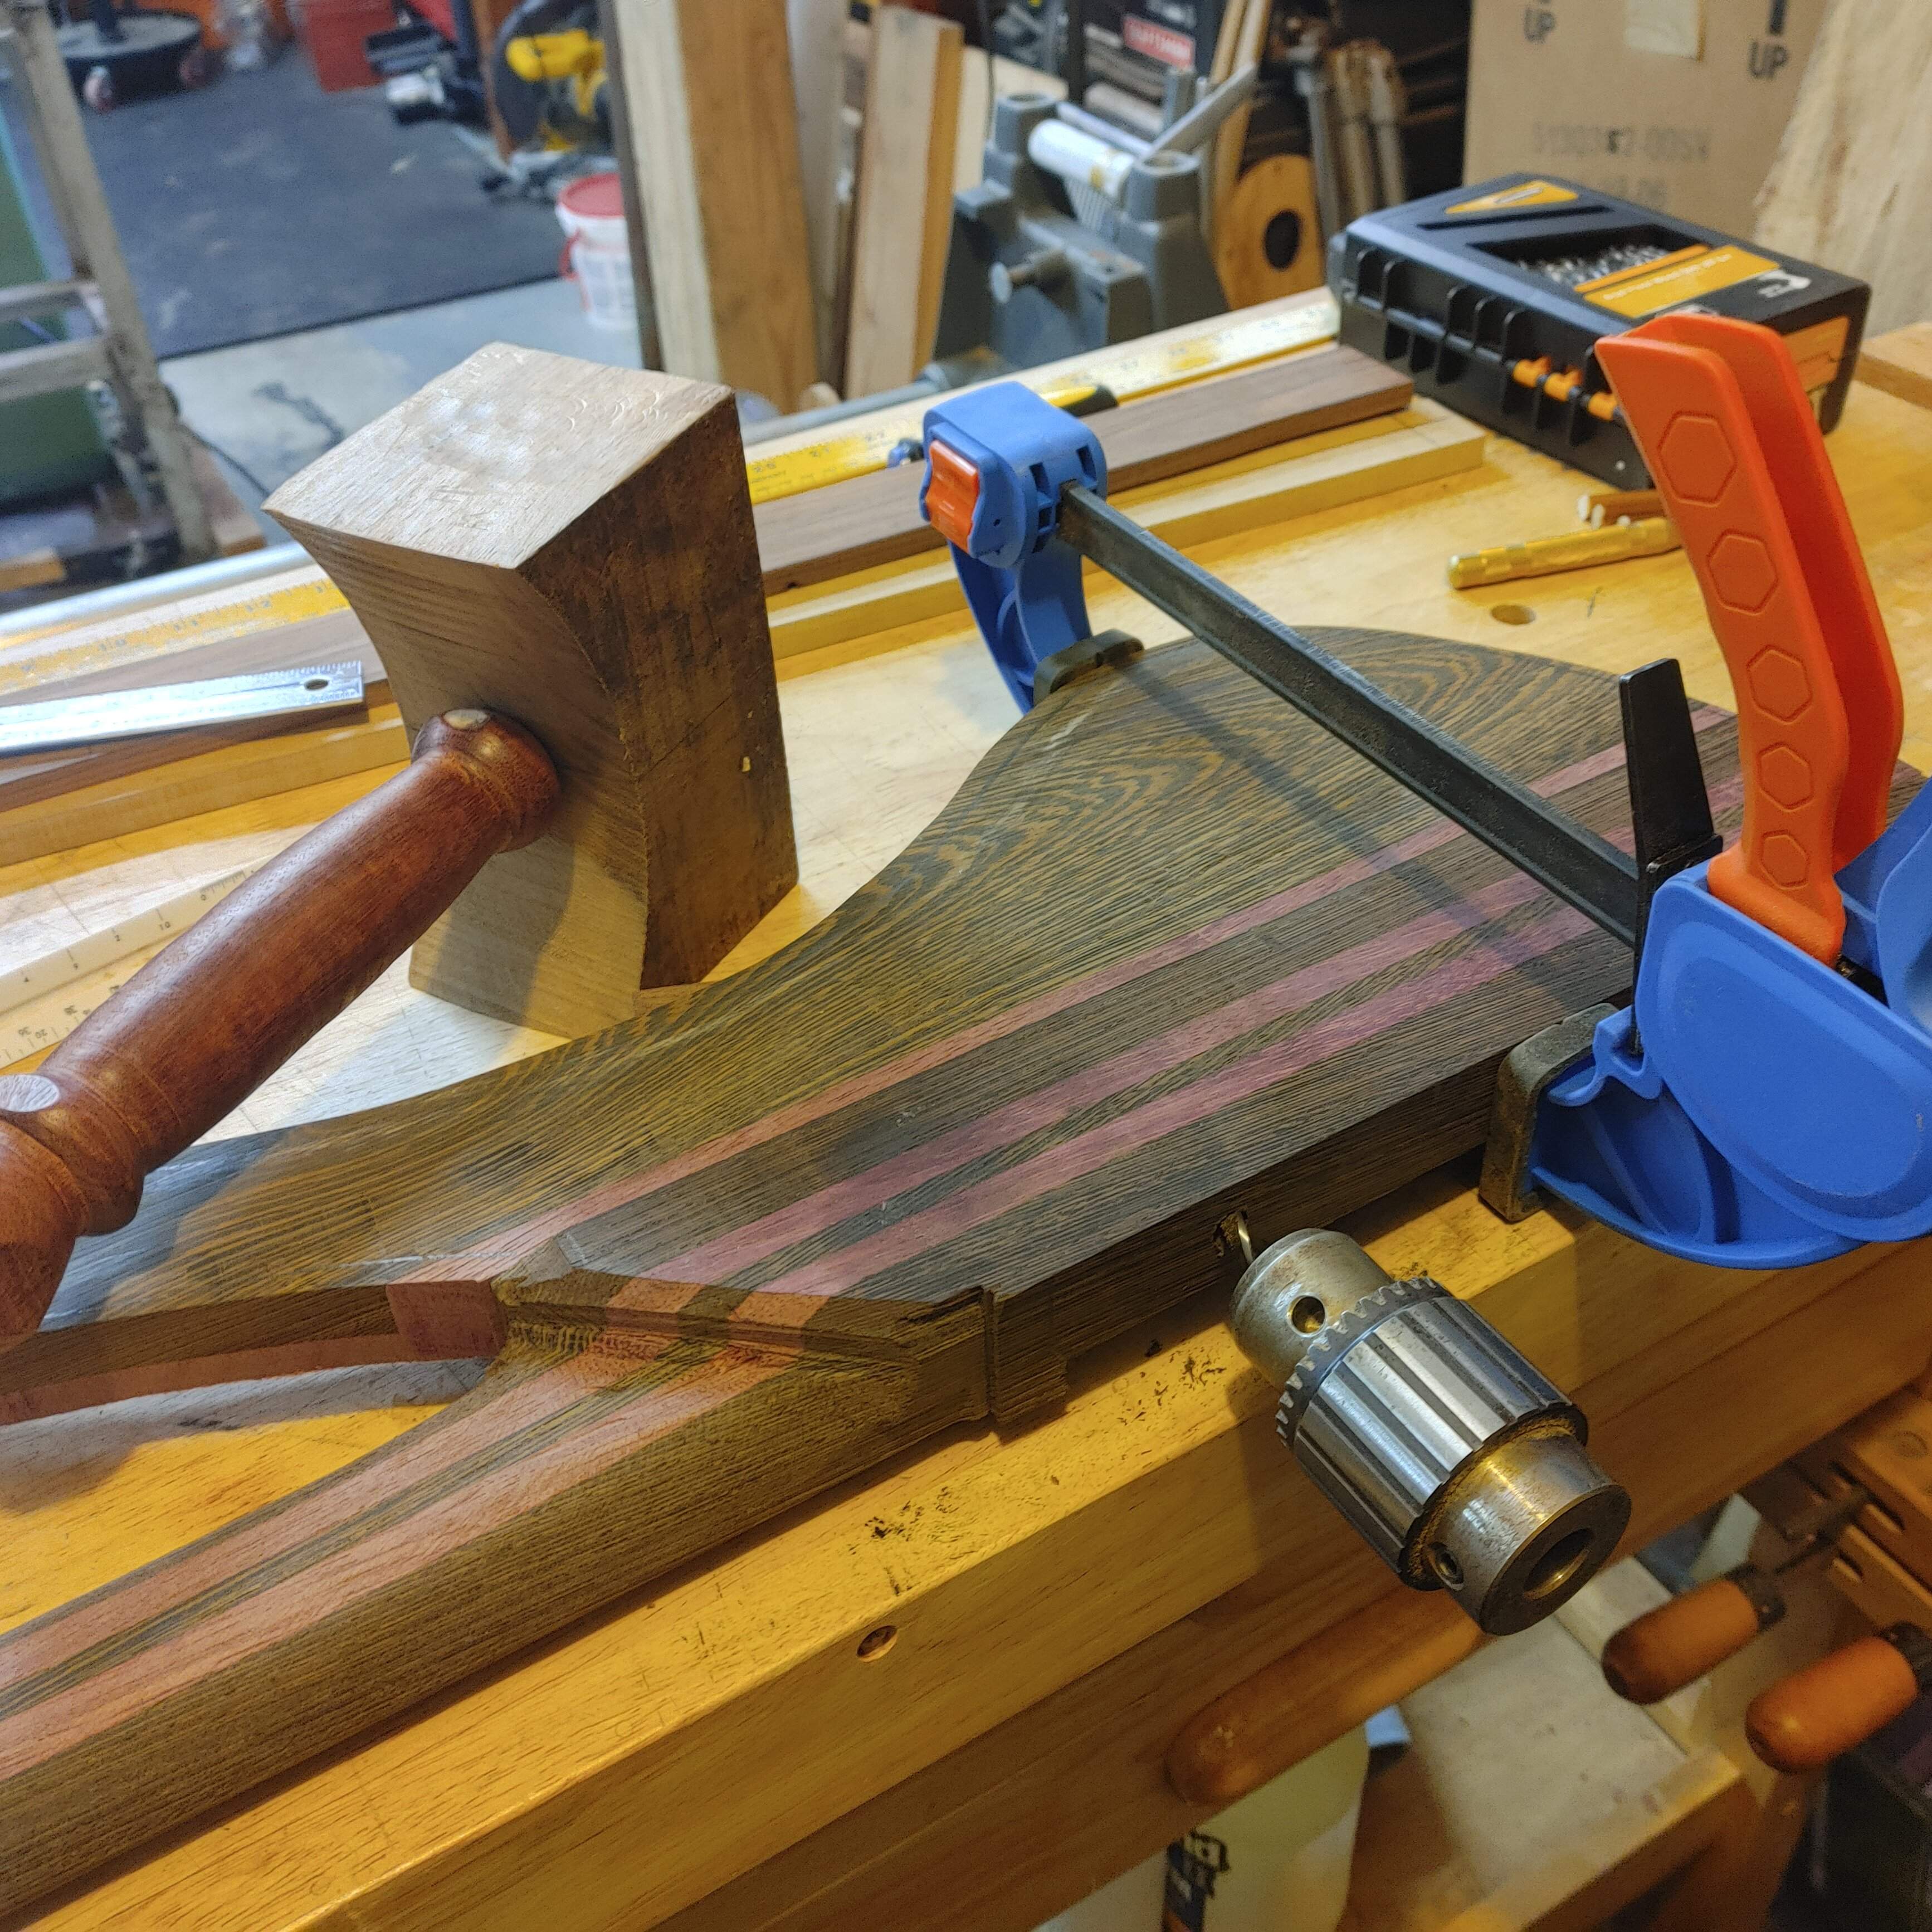
That's right, just stick it in the hole, whack it with that Thor hammer I made last year and head back to the drill press! Put the chuck back on the drive, go find that wing offcut, clamp that in the vice and we can then drill the hole in the wing -
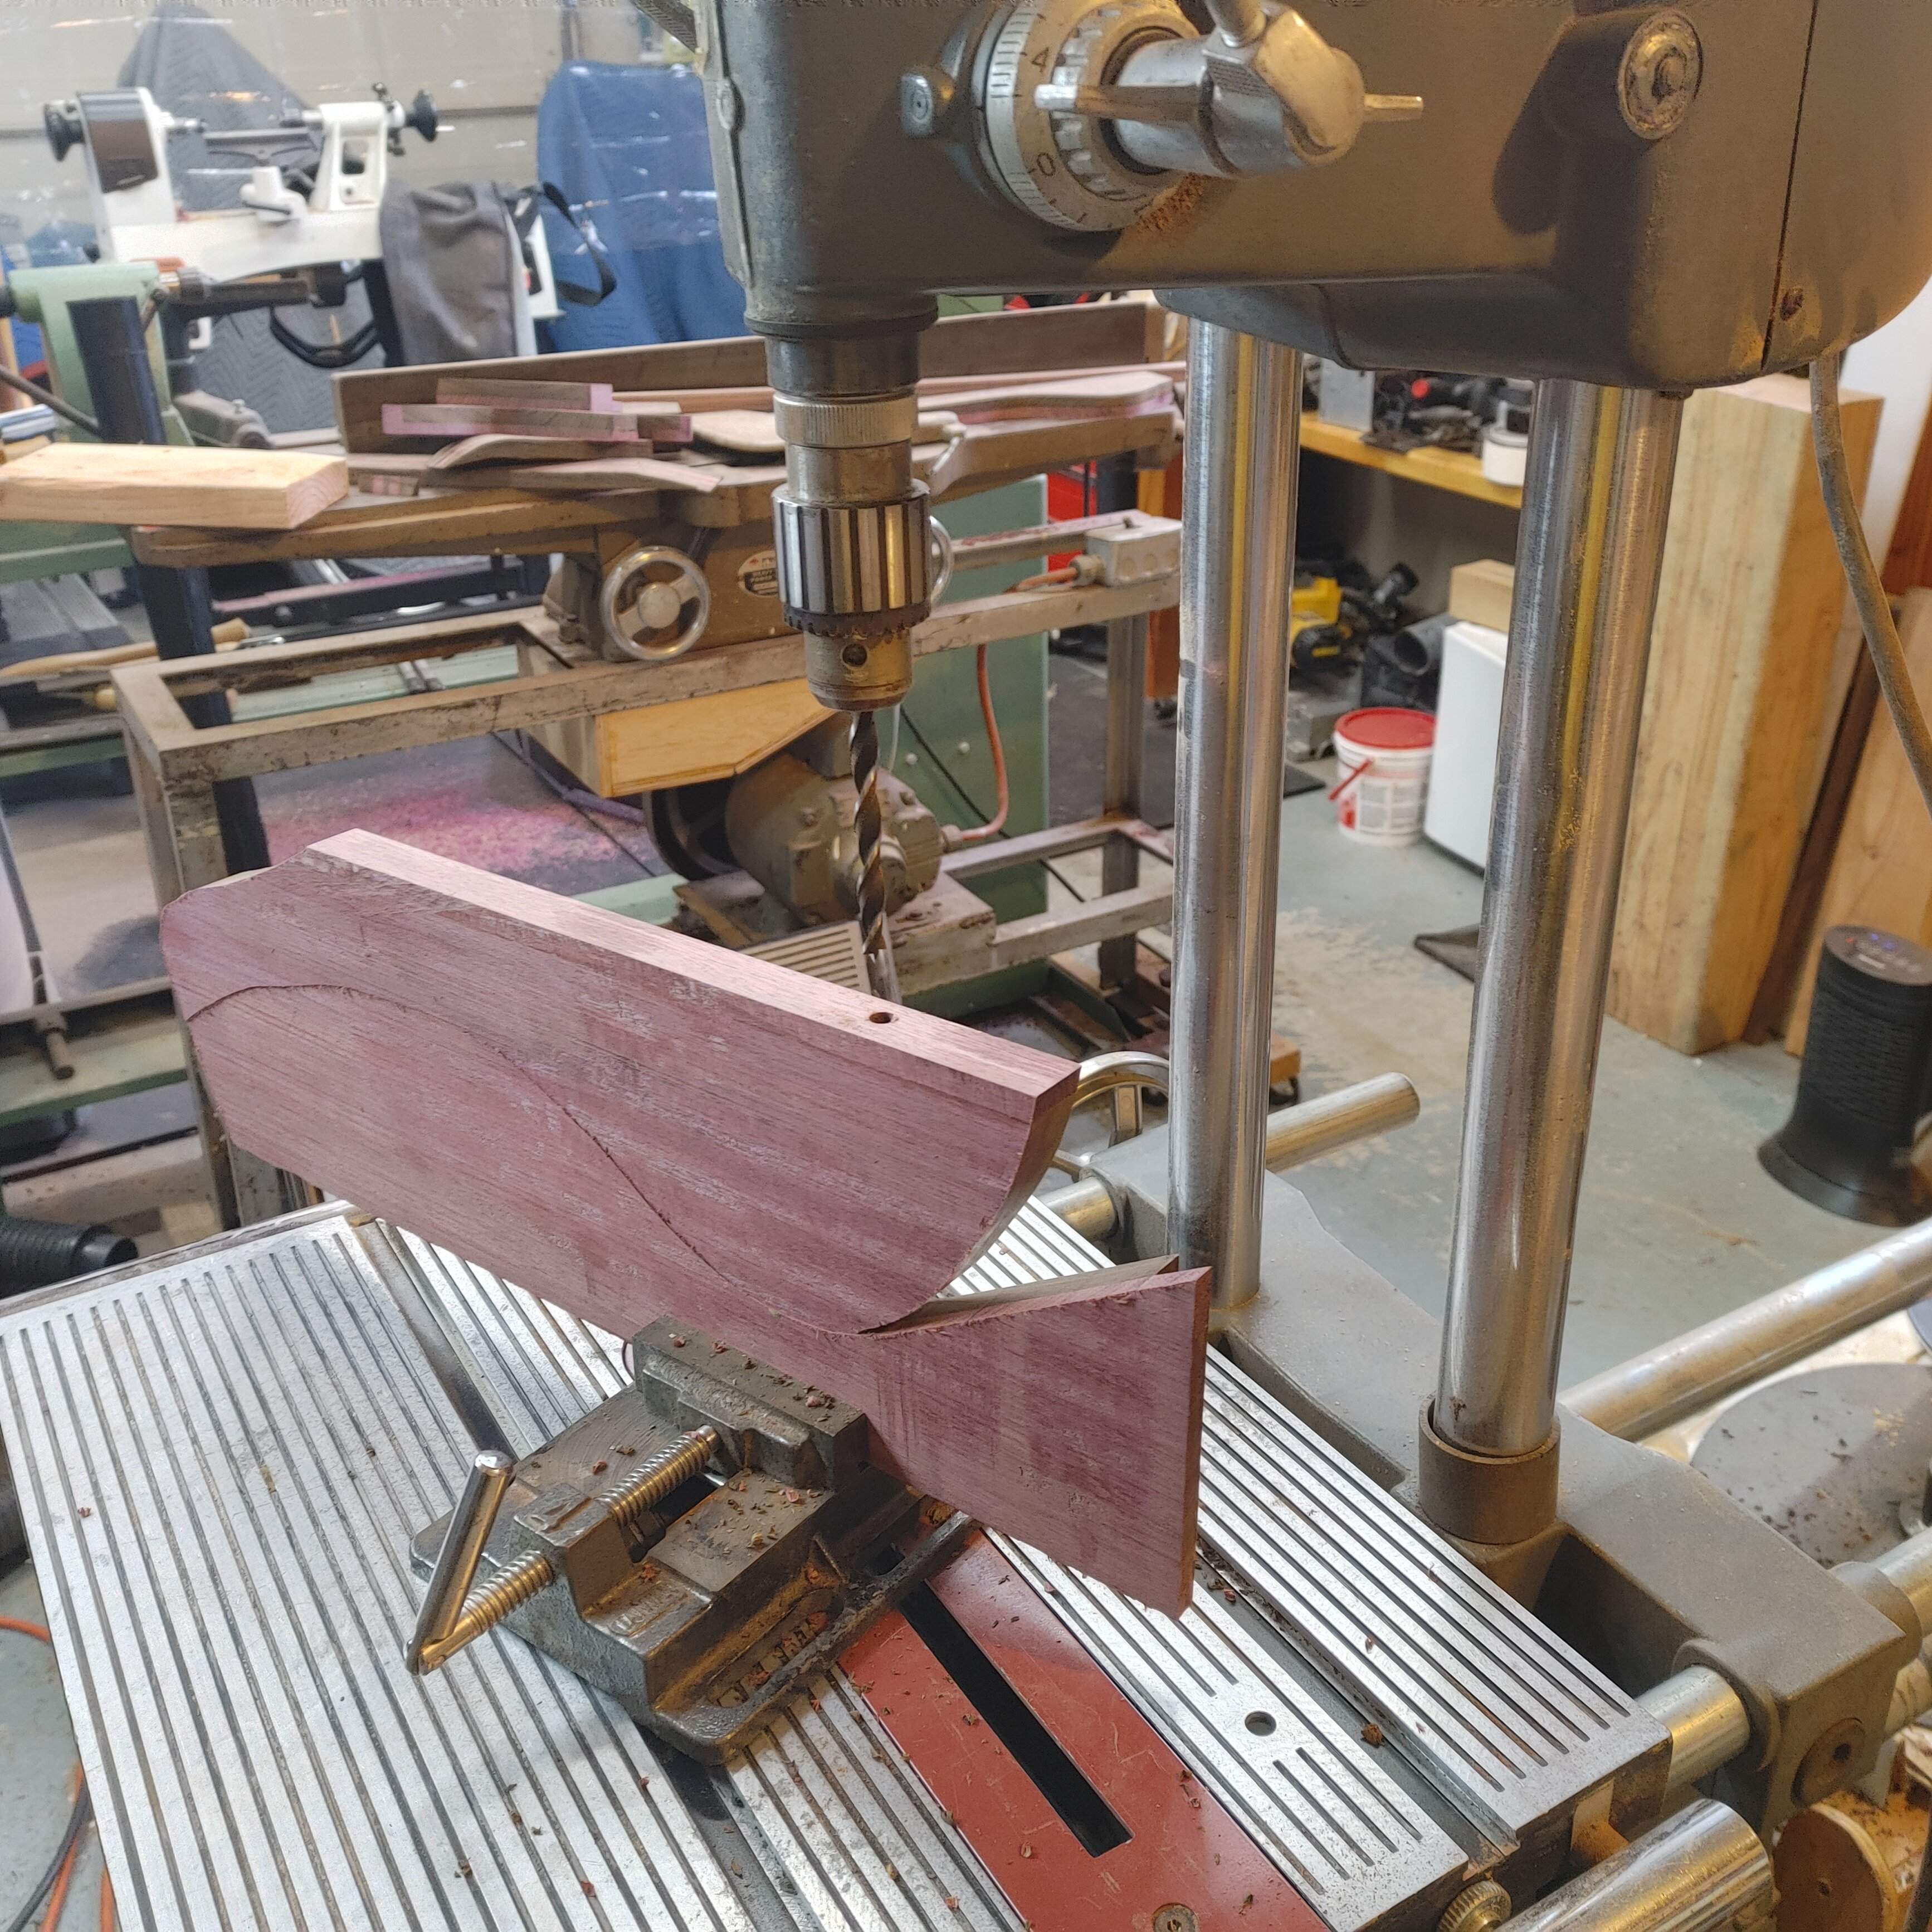
I just held it steady with my hand, mostly the offcut was just to hold it straight and parallel and give me something to brace against. It worked really well, no scary moments. Do that a few more times and BAM! We've got wings pinned! -
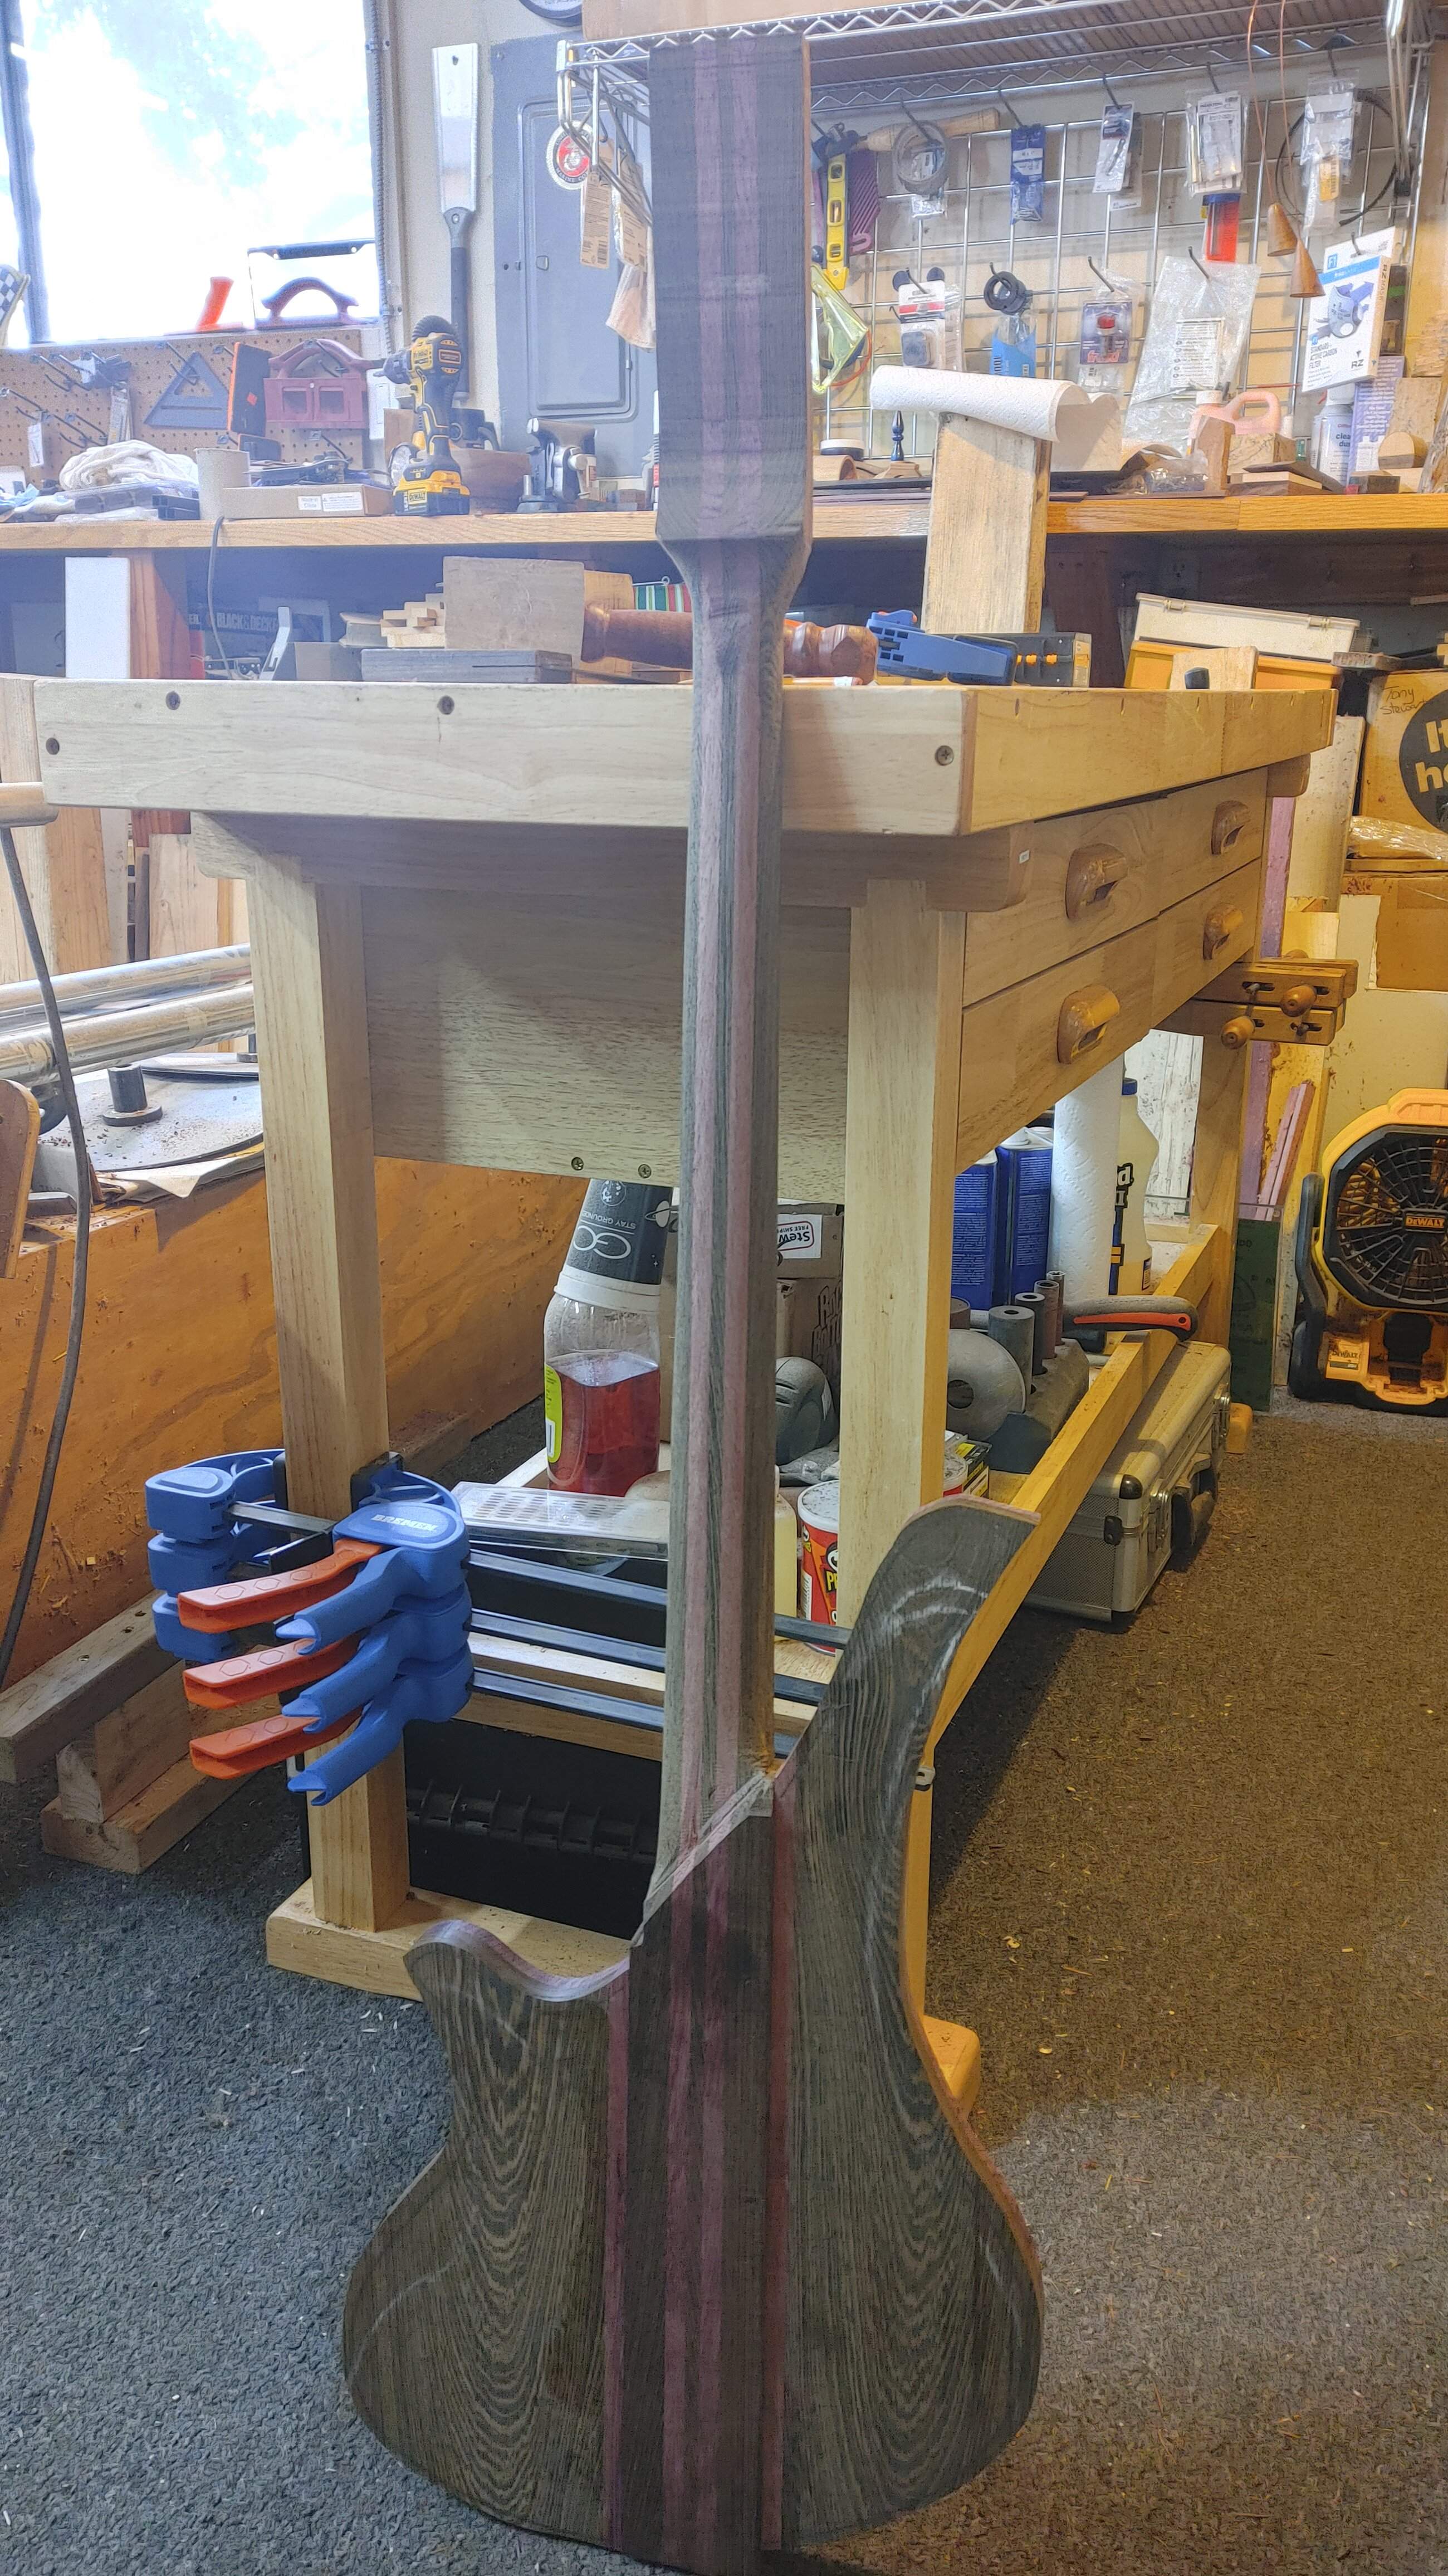
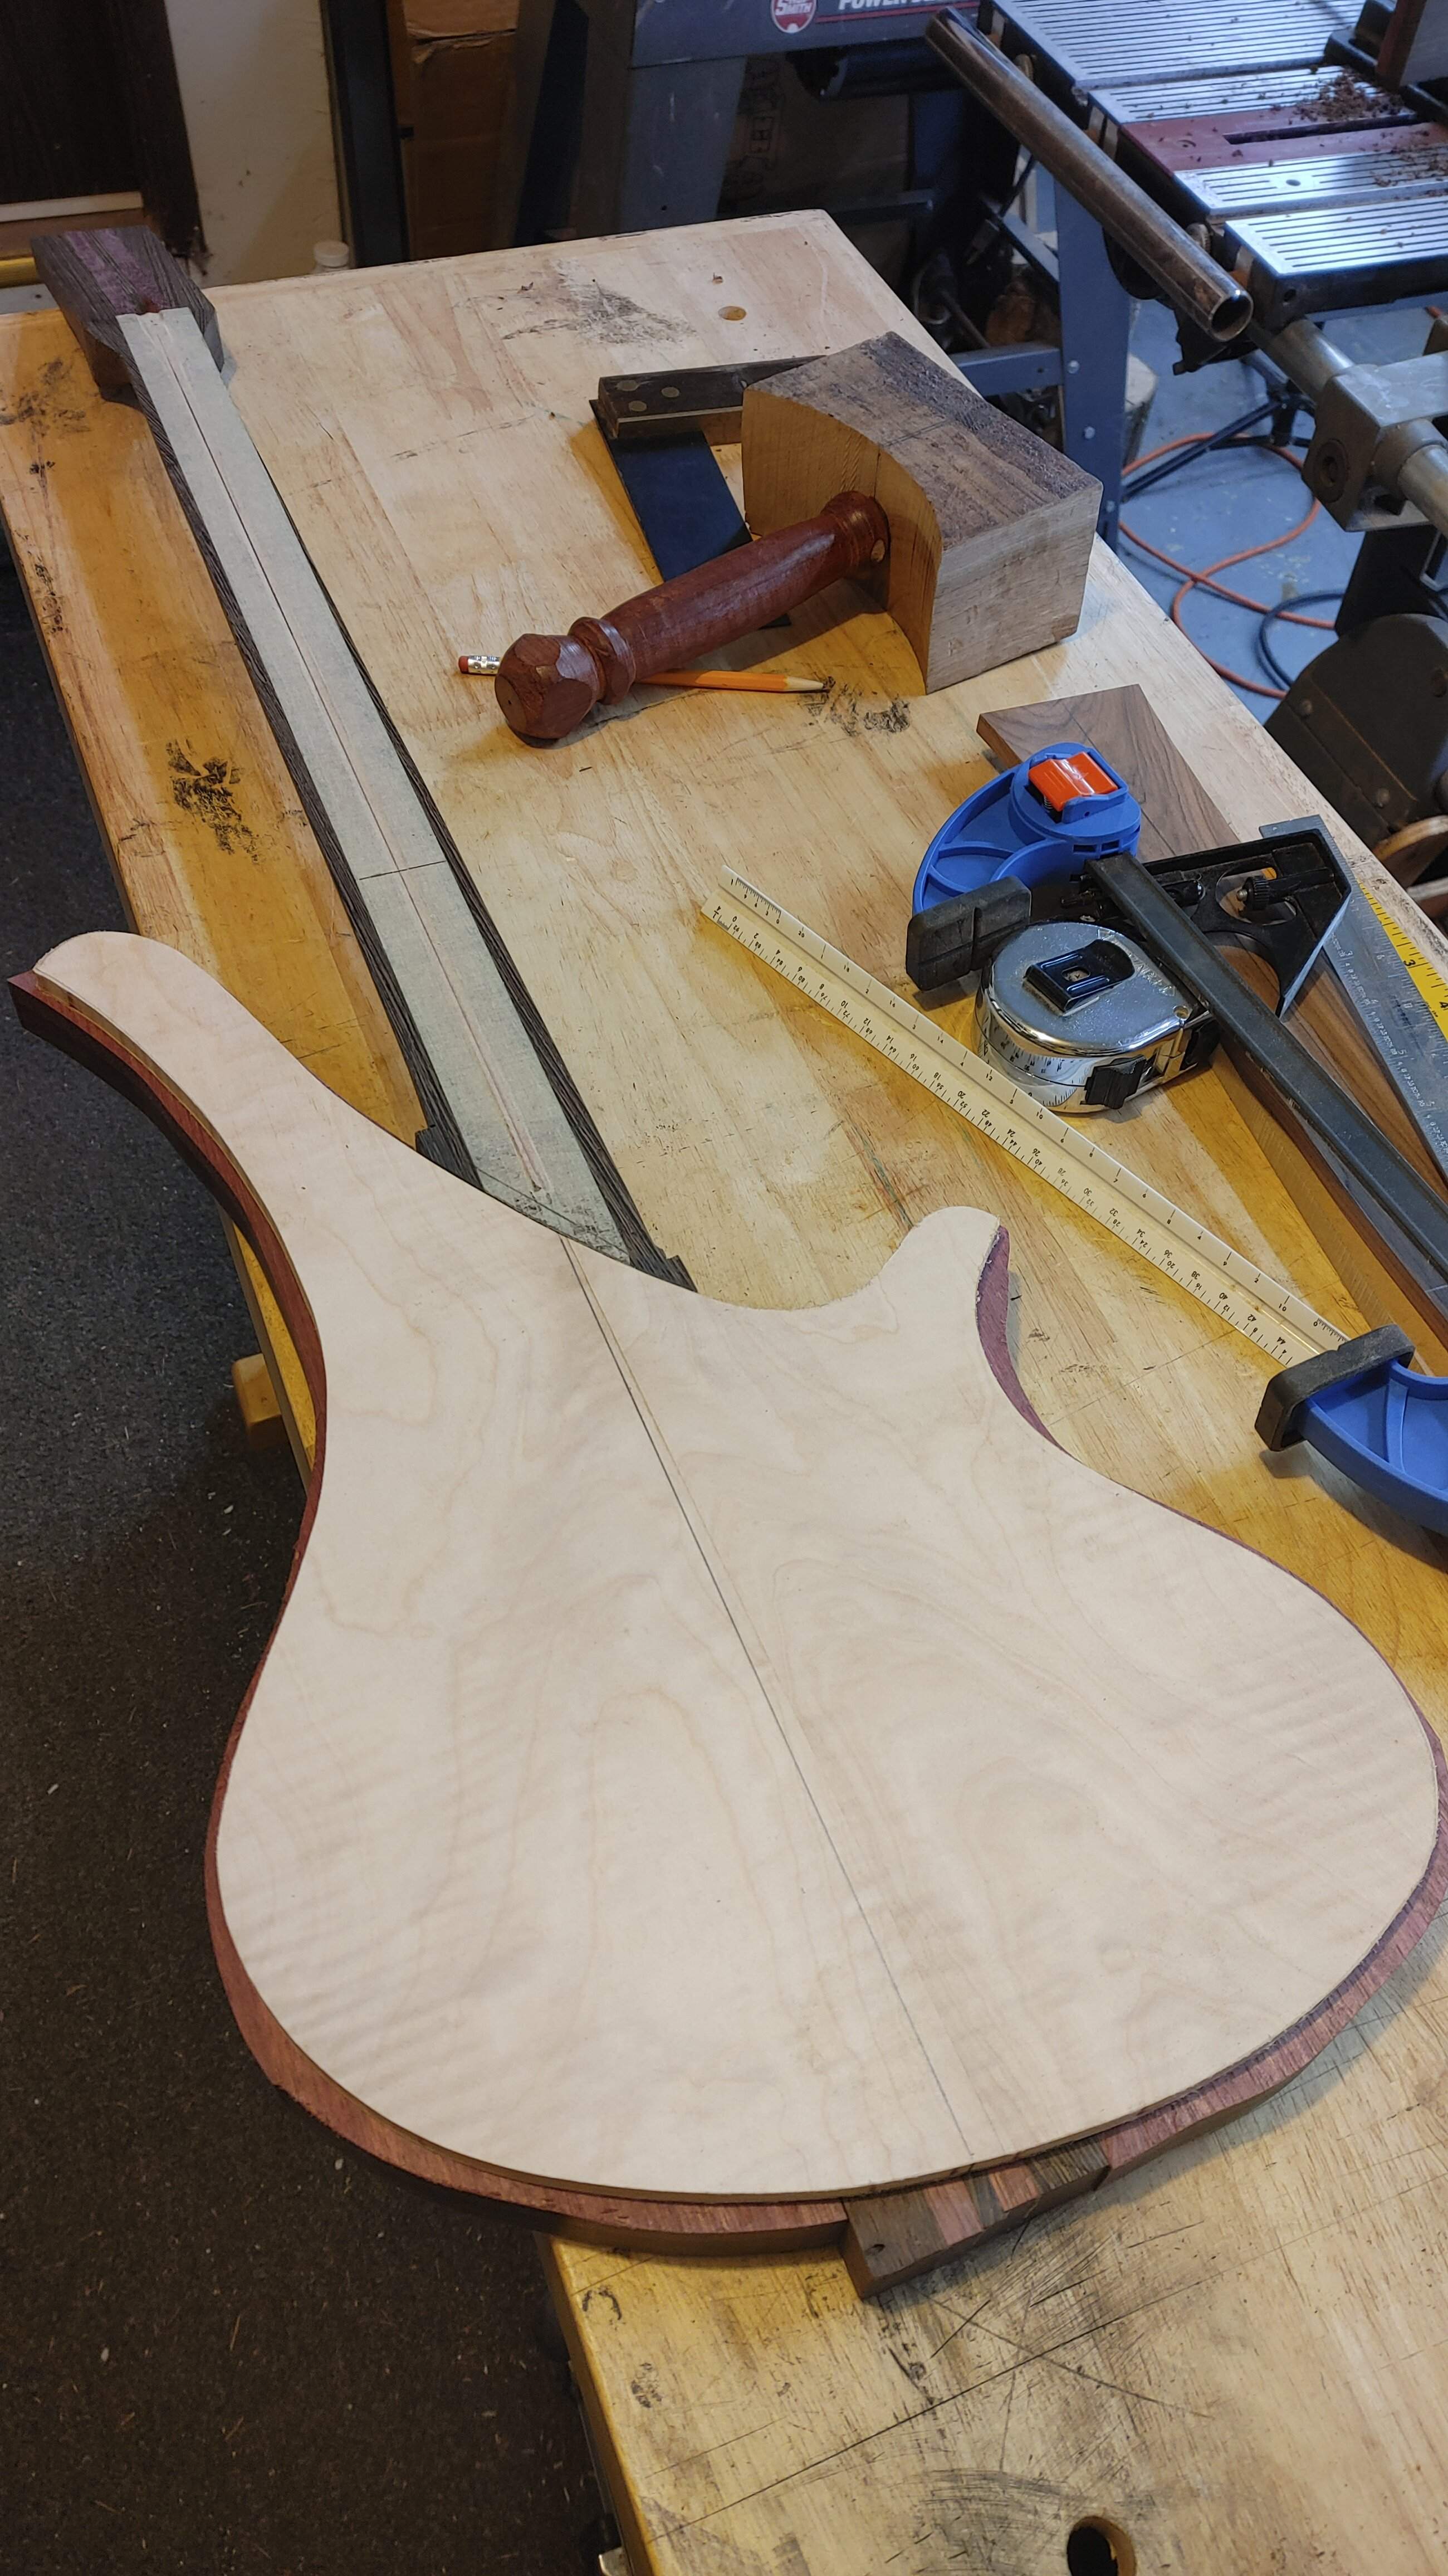
It was stupid cool to be able to hold it in my hand as a somewhat full "thing" and really feel how this thing is gonna...feel. Obligatory shot of the front side at this point -
Fretting Things Again -
Well, not really, who needs frets anyways? Not me, I know that! I can barely play a bass with frets, so let's just skip that whole thing. But, I got that fretboard template, and I kinda feel like we should shape that thing so we can lay it on here and see what it looks like. Sooo...get out the supplies again and do "The Trick" -
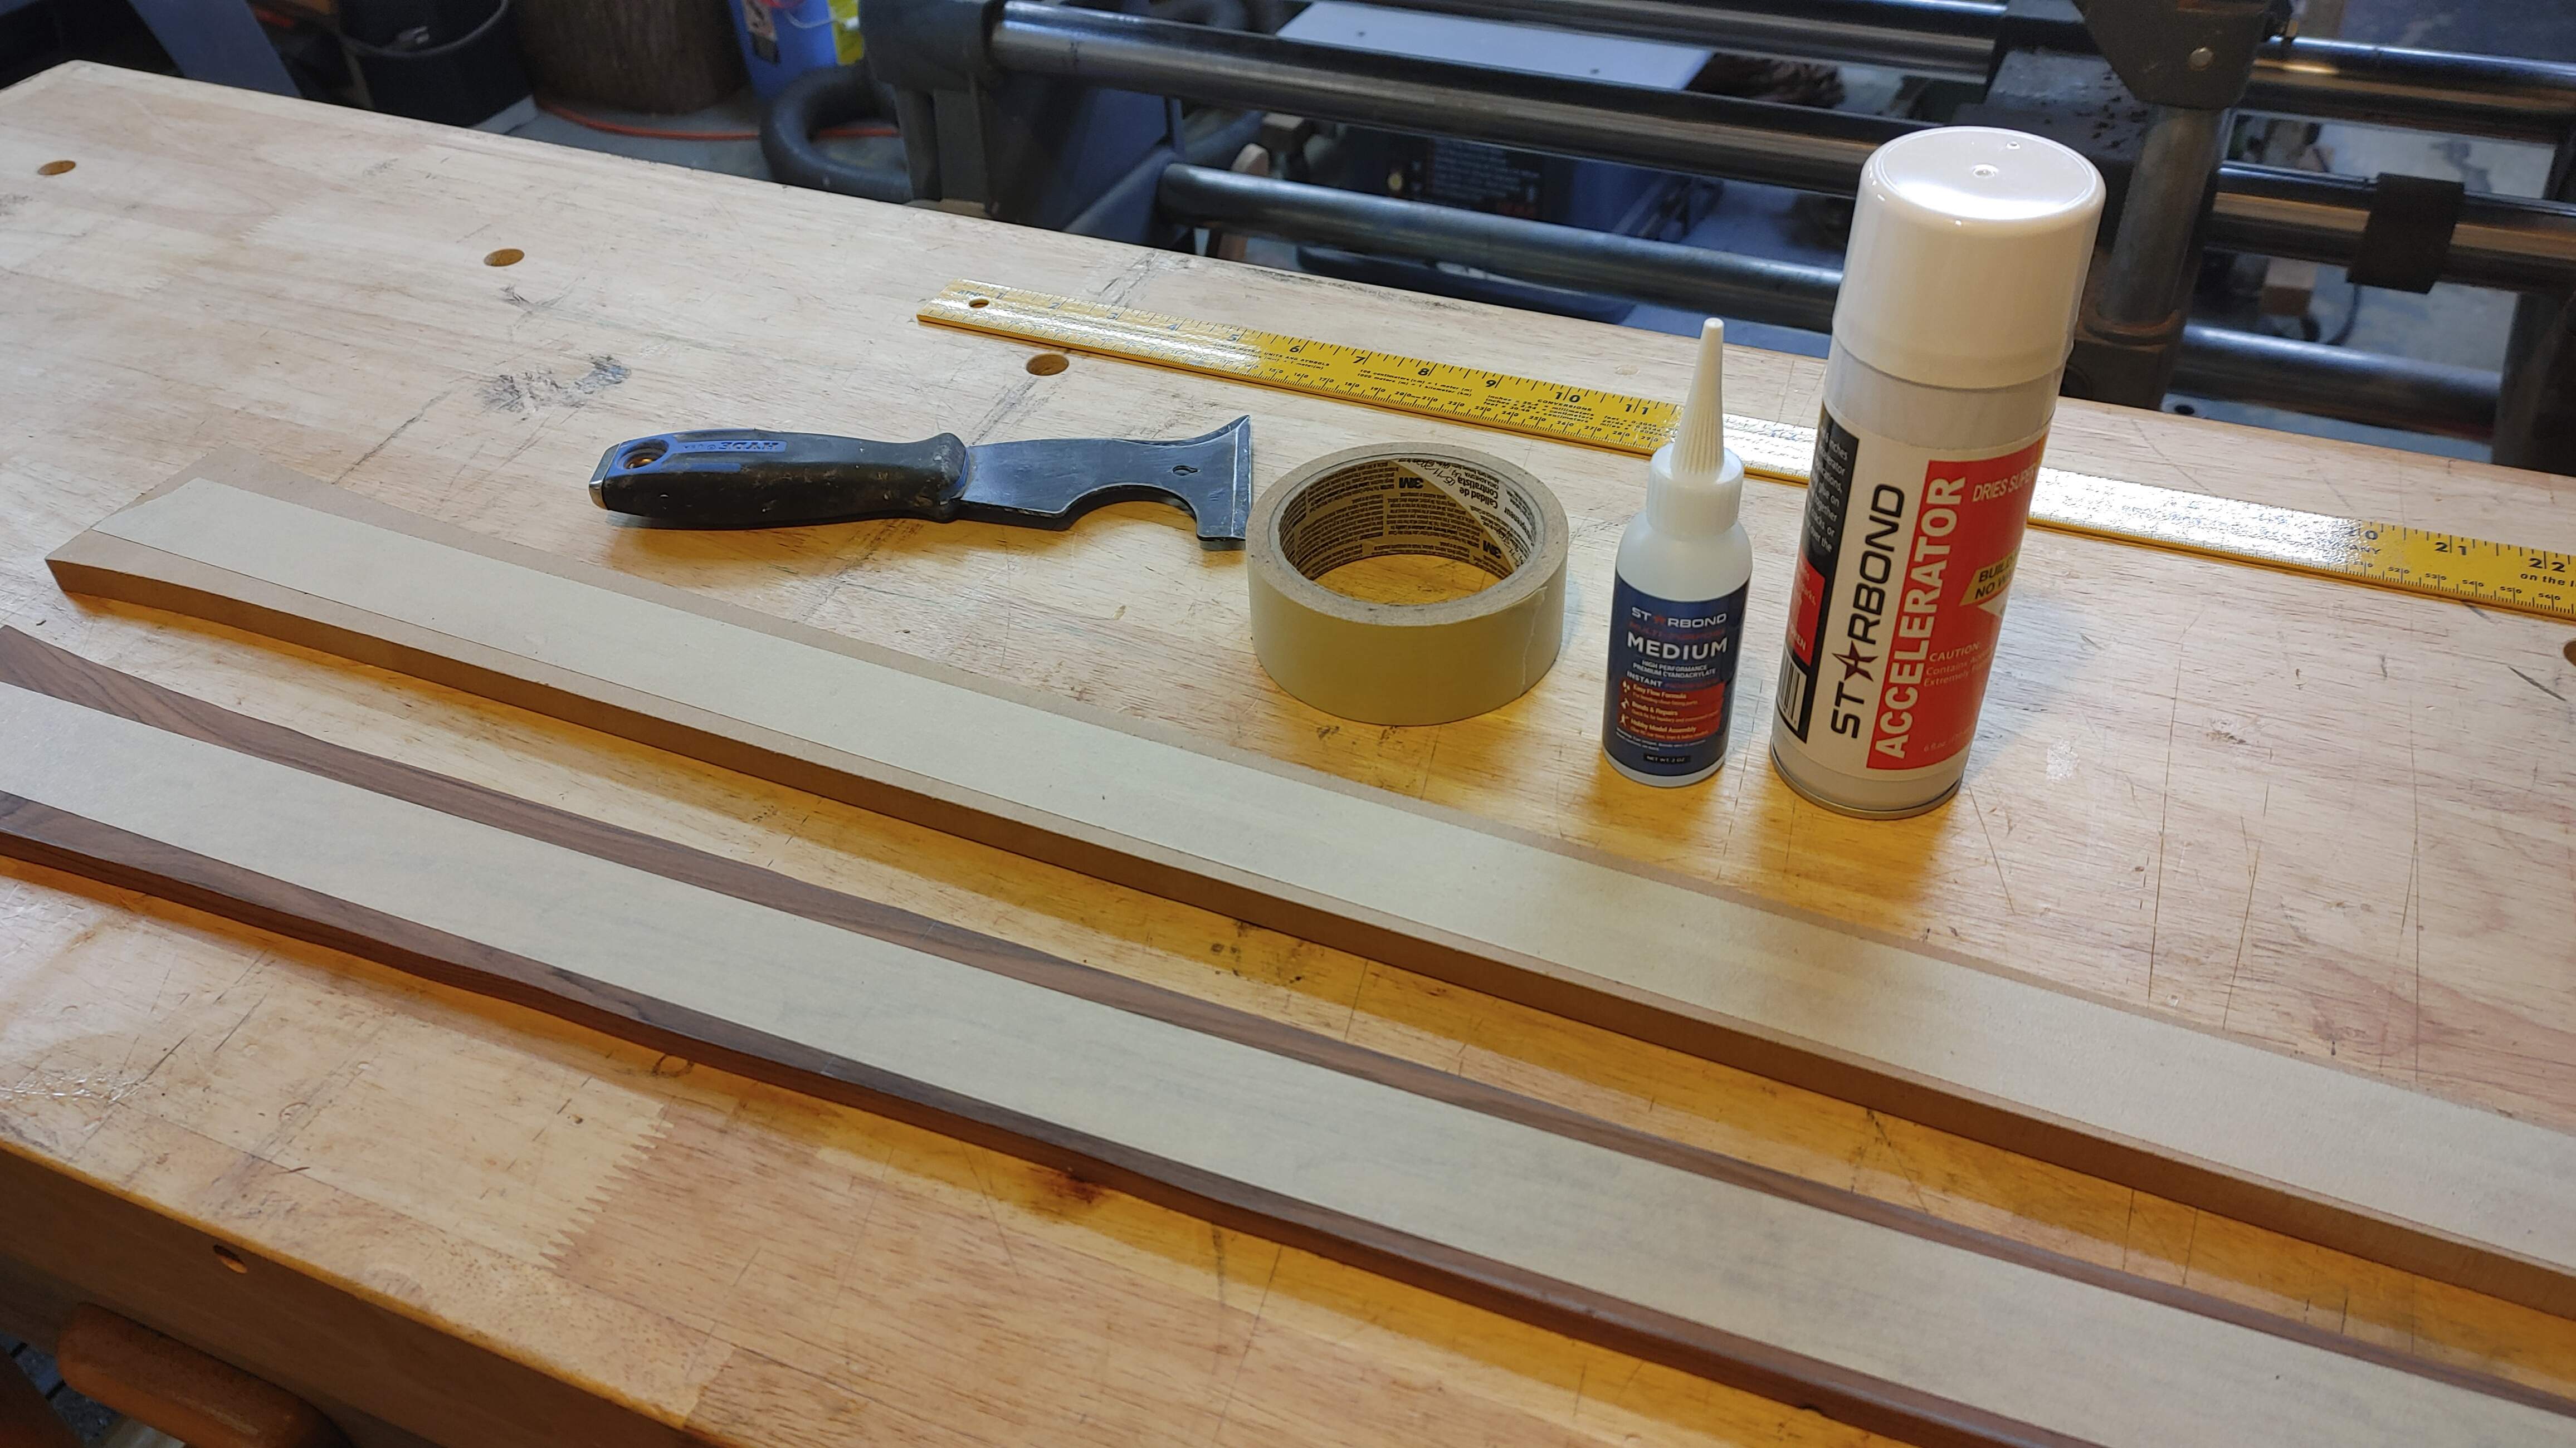
Then toss that little Amana pattern bit in the router table. This time I can use the fence on it, so maybe we can use some dust collection. It ain't great, but it is way better than nothing at all. After a quick trip through the router table and some clean up to the shop, we had something like this -
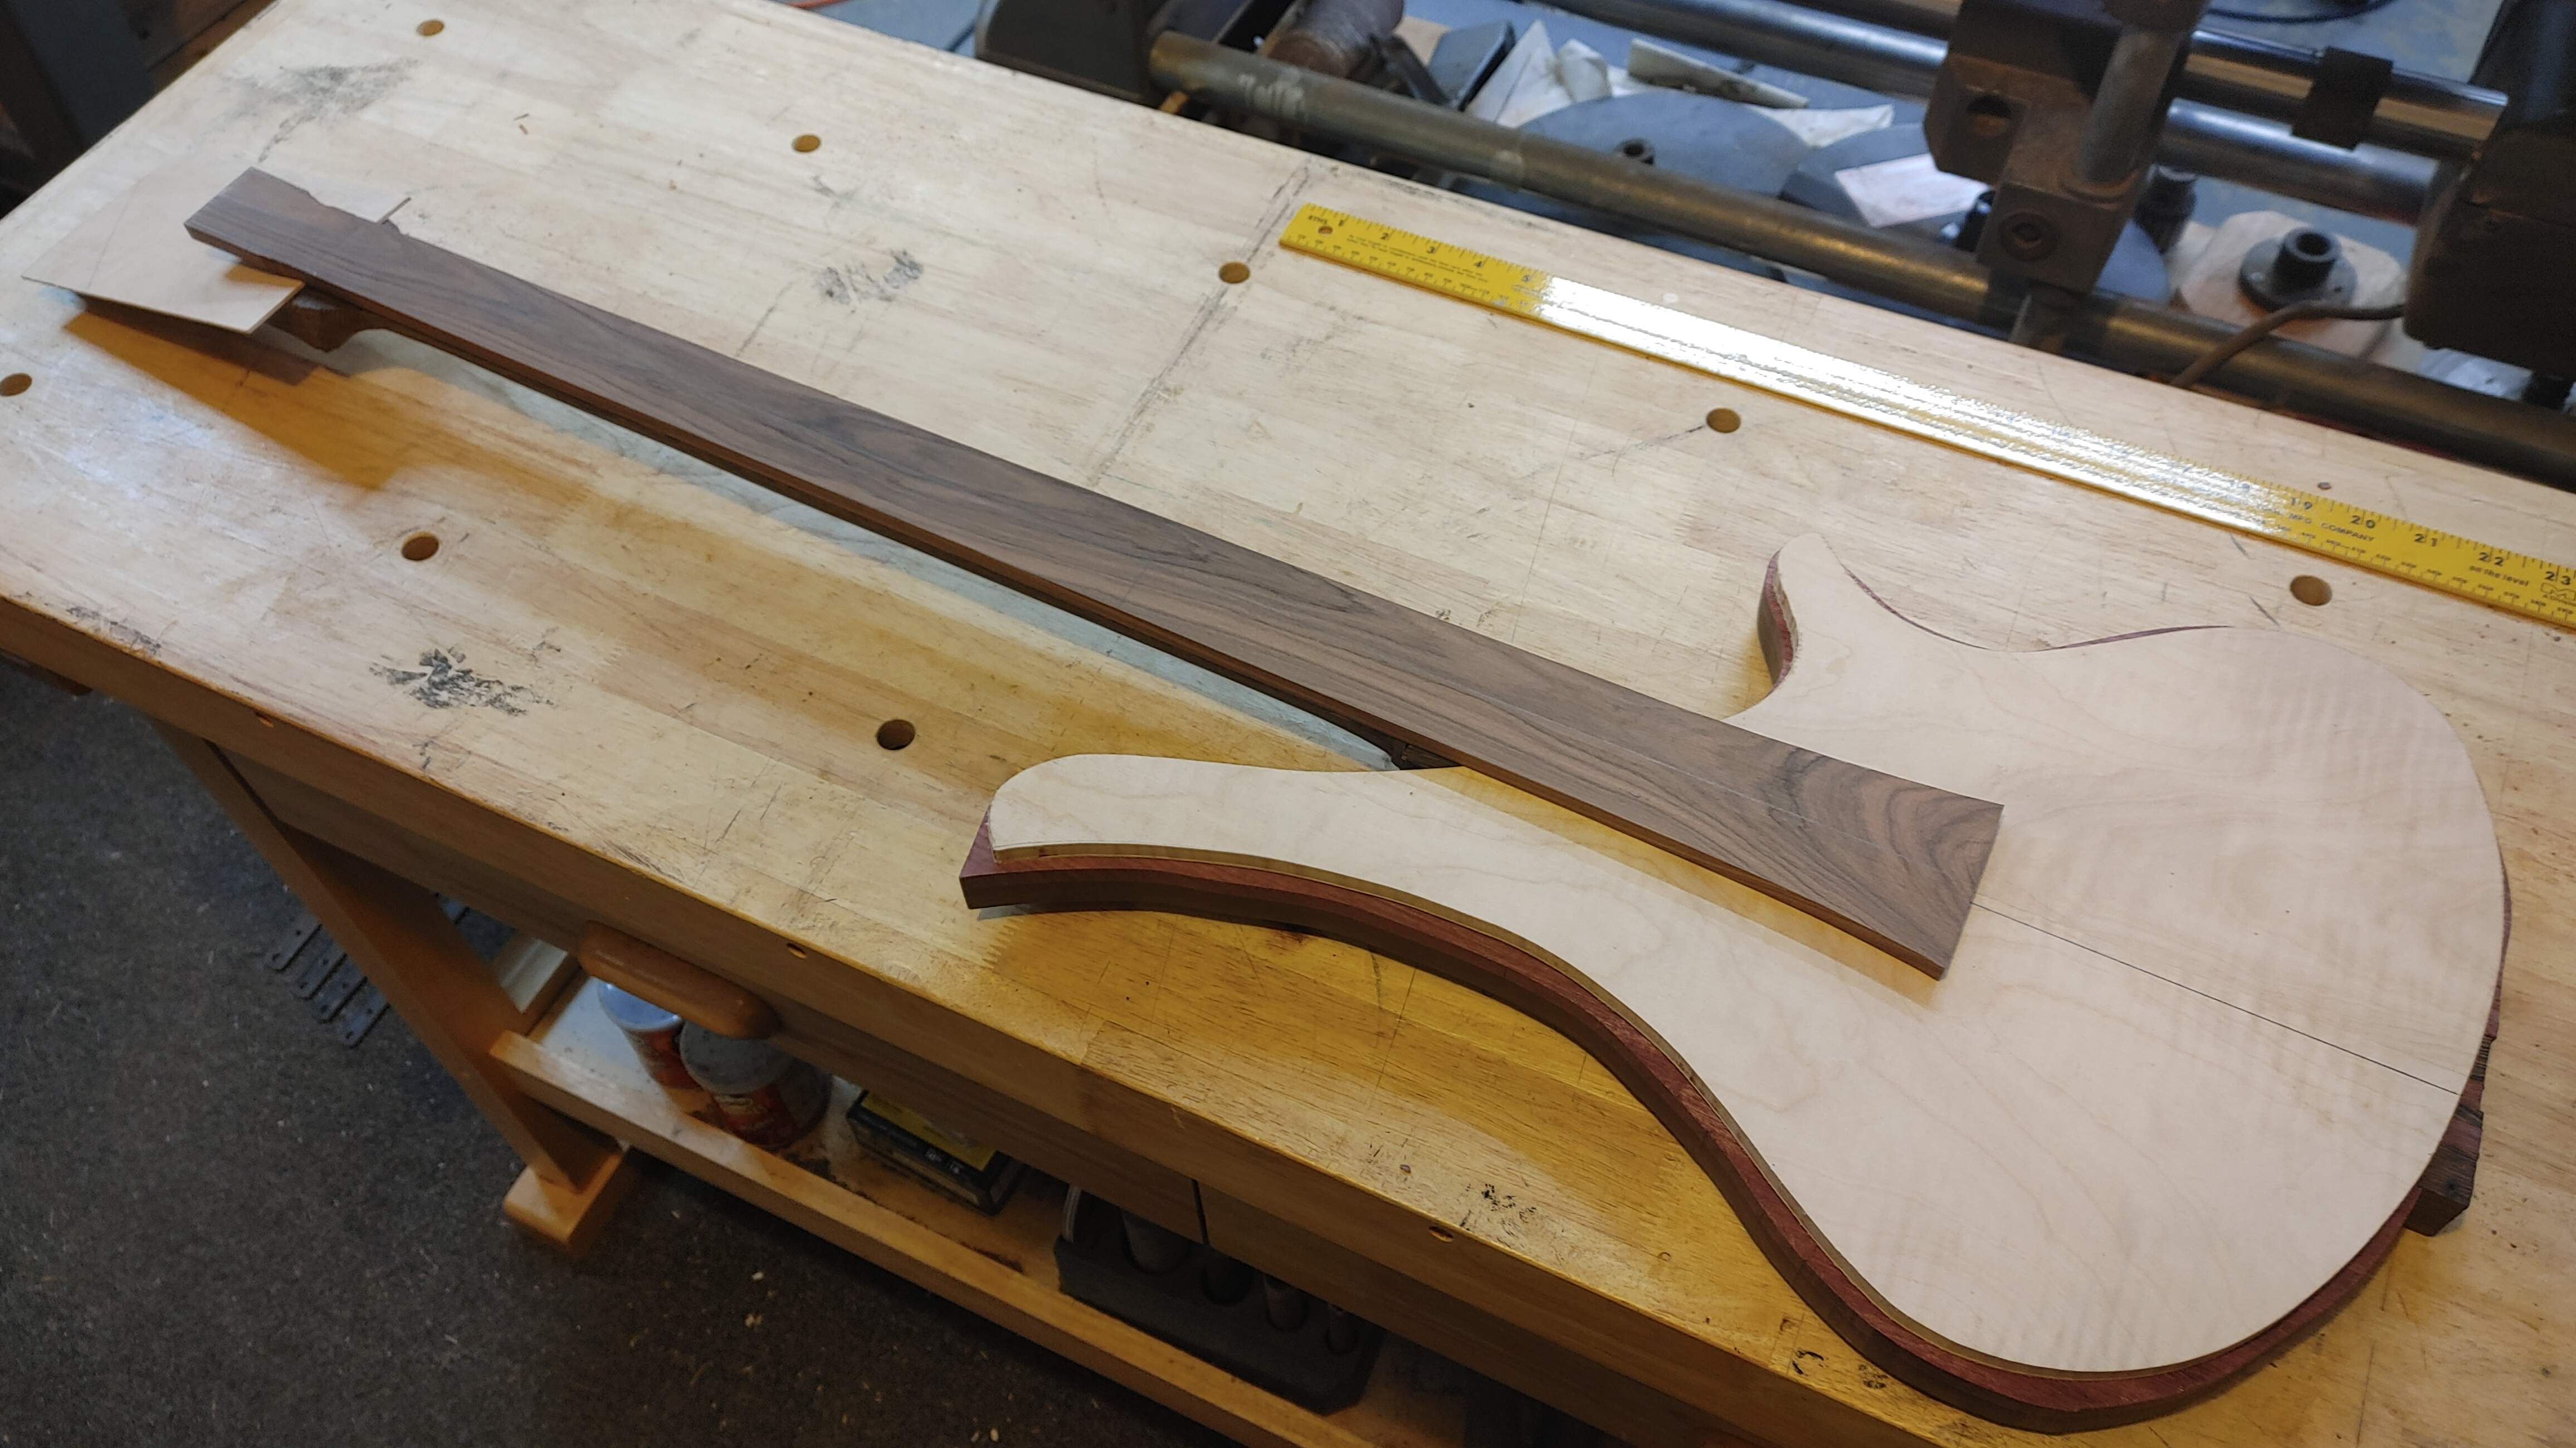
Holy cow, that is starting to look cool. I also tossed that little offcut of the flame maple that I resawed on the headstock just to get the overall "vibe". I'm seriously digging it. Yes, I left the headstock long up there. I haven't decided exactly how I'm gonna do the nut yet, so I'm leaving extra meat there to have options. Let's not paint ourselves in the corner just yet.
Getting Overzealous -
While we're making all this headway, why not route the body wings? I mean, I don't like to brag, but getting ahead of myself is kind of my specialty here. So I got out all the stuff and once again performed "The Trick" to fasten the wigs on and the top to all of that. Let's flush those wings, shall we?
Can I just say, I don't like this step. Mostly because I haven't figured out the best way to do it yet. When I did this step on Lucifer it was one of the more scary moments and also introduced a couple problems I later had to fix (or hide). My method was this ginormous Whiteside 1/2" bottom bearing flush-cut bit. It was free, let's get that straight right off here. I actually have three of those bits, all free. It has straight cutter blades on it and only two of them. It's one of these mama-jamas right here -

And man it does not like me! With only two "teeth" it gets very VERY grabby. In a hand-held plunge router it is violent! It'll jerk the router right out of your hands if you aren't paying attention. I don't like this thing. Plus, the bearing is on the wrong end for use in a plunge router situation. Did I mention I don't like it? But, it's what I've got, so we need to figure out who to make use of it. I clamped the body to my bench with a portion of it hanging off the end and went to work. Man, violent! Especially on that end brain at the end of the neck blank! Seriously violent! Also, my neck blank isn't flushed off to the thickness of my body wings yet. You can see it in some of my previous pics. It's got this sort of Thunderbird-esque raised area right now. I'm undecided on whether or not I'm leaving it or flushing it off. I can't decide to be honest. Part of me digs it. Part of me says make it smooth. Regardless, it's in the way of the router! So I routed as much as I could, using the body top facing down so the bearing could ride against it like a template, then I swapped everything over to the little Amana pattern bit. It is 1/4" shank, which meant swapping out collets, all that. And then I came back with the little Amana pattern bit and cleaned up everything from the top side, using the body top as the template again. the Amana bit isn't long enough, nor will my plunge base plunge that far, so we got most of it. I'll clean up the remaining bit once I take the top and wings all back off. But for now, let's just admire it -
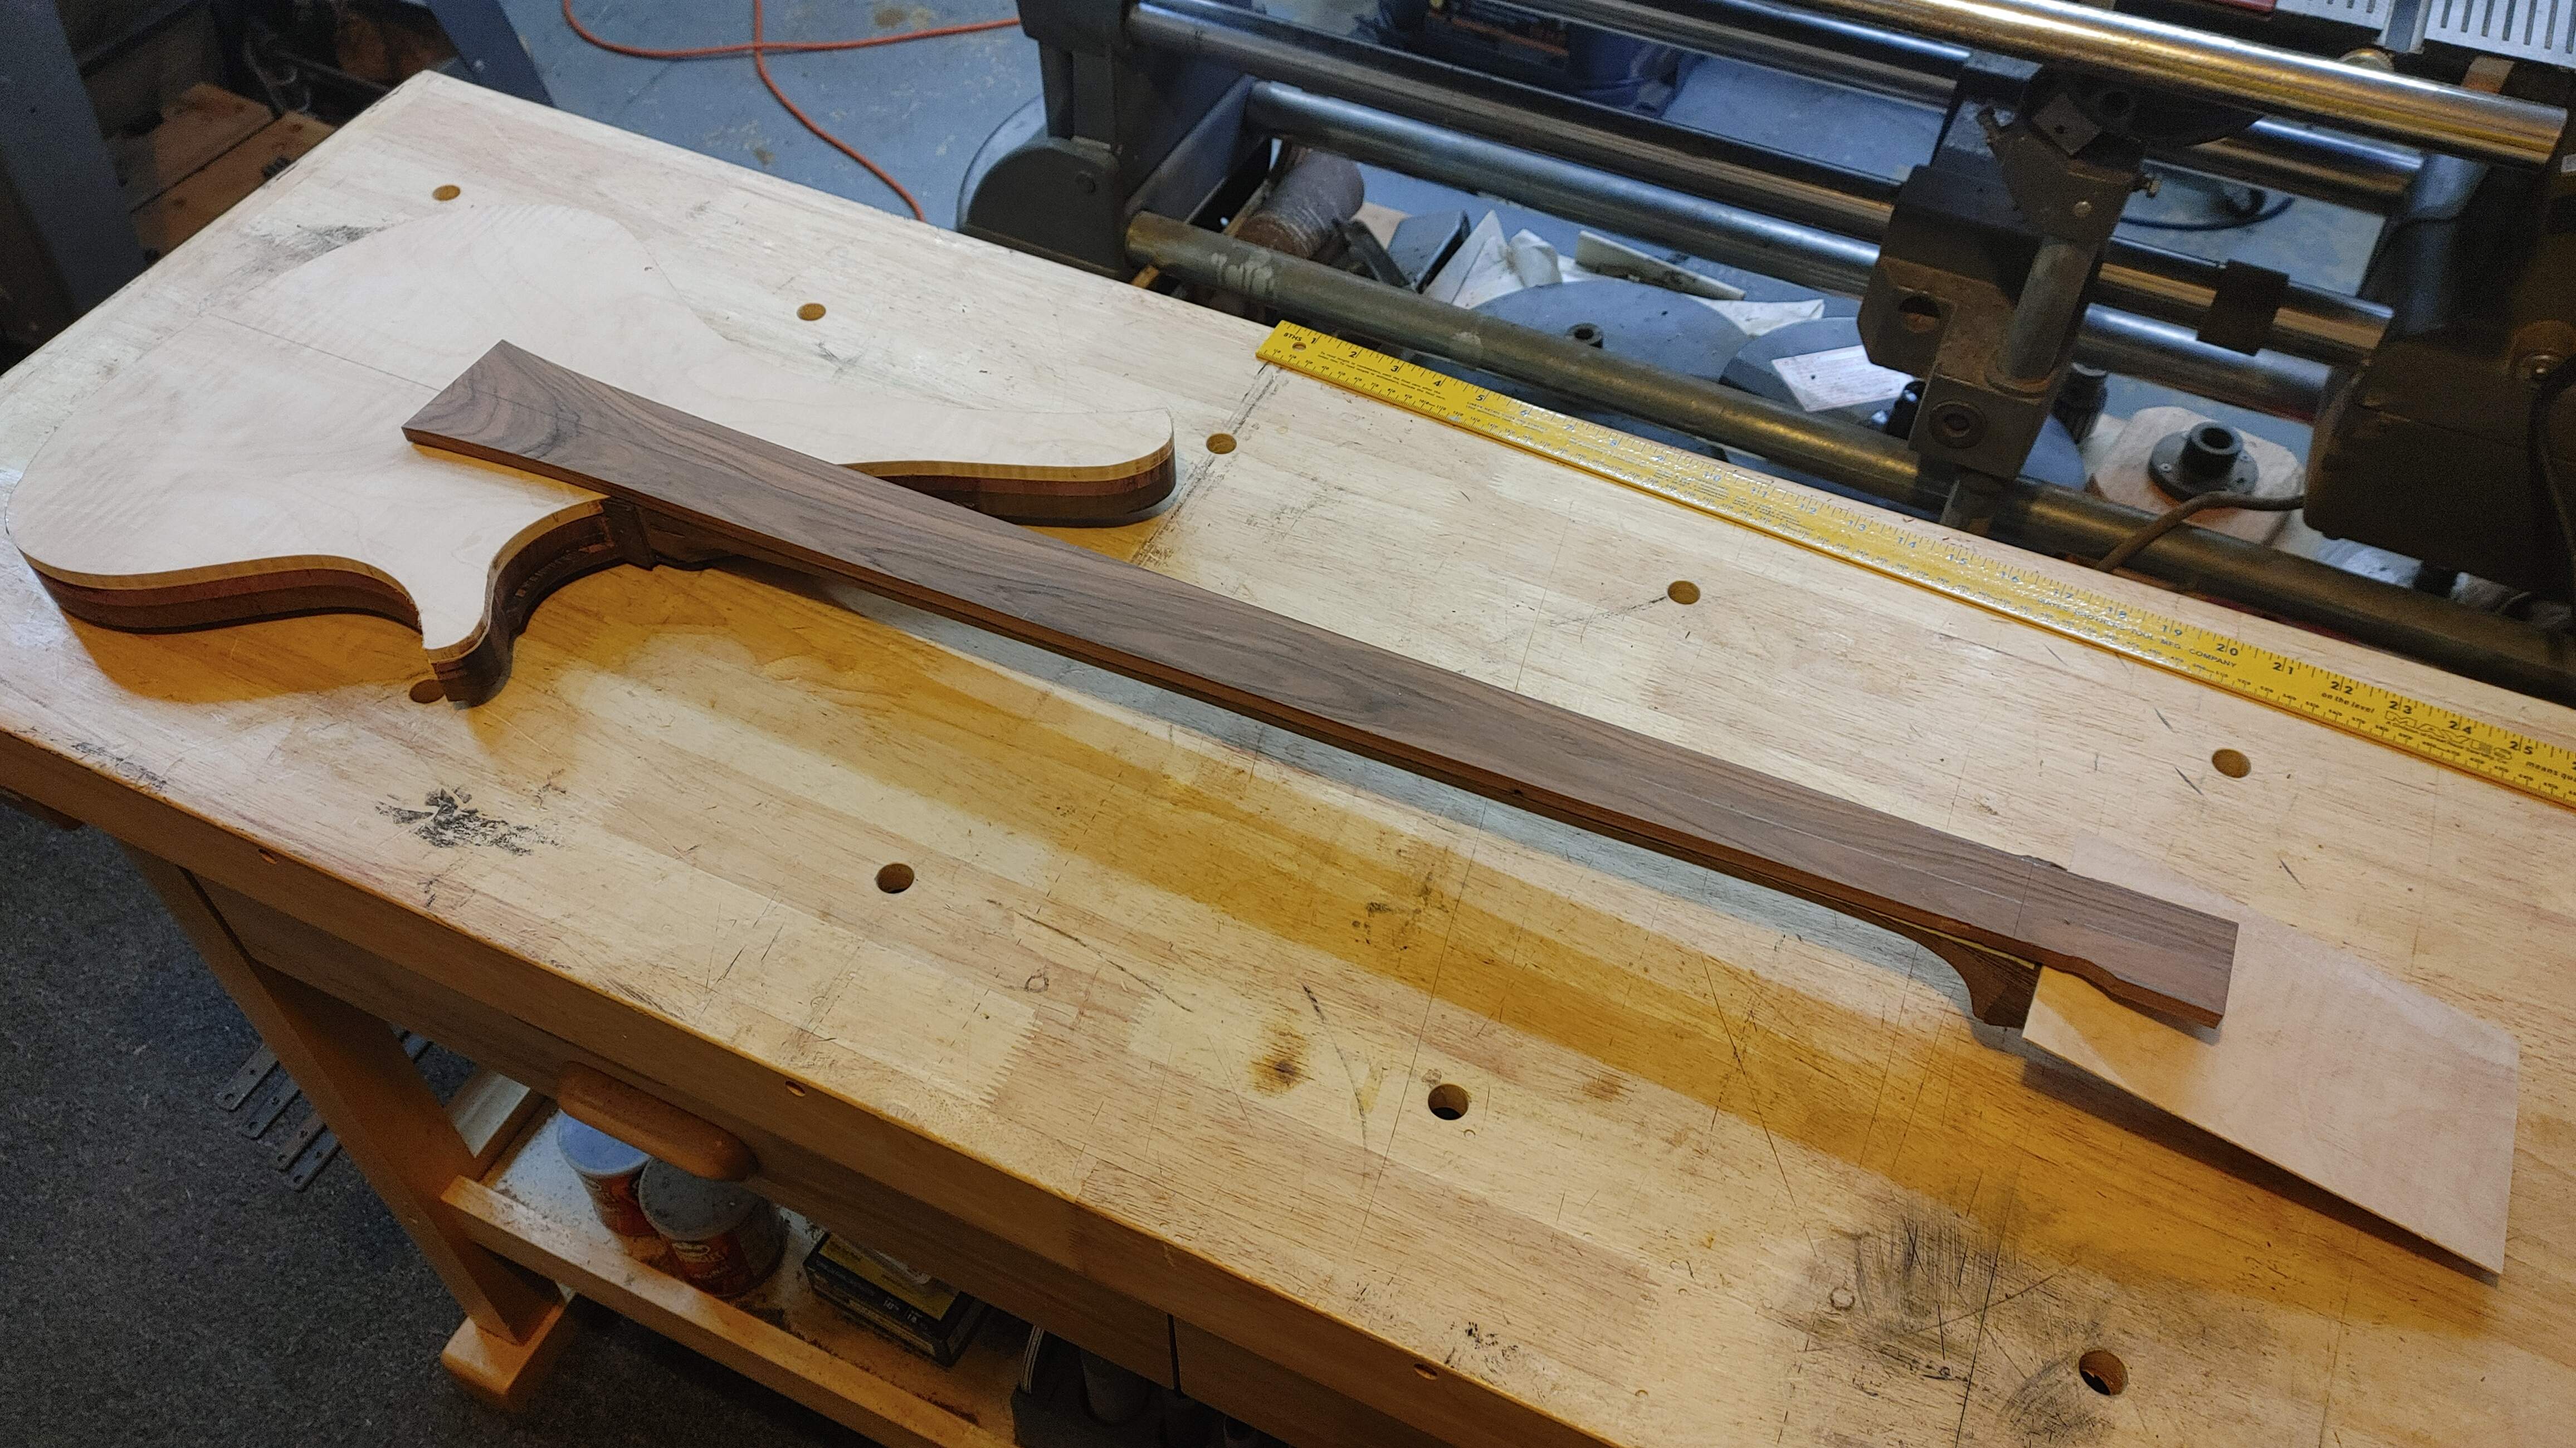
Yeah man, it's really looking like a thing. Is this now a BSO? Did I just make my second ever BSO? I mean, I'm not even close on that headstock, but still....
I have a ton of work to do at the neck heel and wing transitions and we're gonna have to focus on that headstock at some point. But wow, it's kind of a thing! I better start ordering parts. I need the pickup, and some tuners, and I'm gonna have to make a bridge of some sort, we'll need a jack, and probably a pot. Good lord, I better place some orders!
HONEY! I PUT SOME THINGS IN THE AMAZON CART!!!!
So I was kind of cleaning up the garage a bit, putting things away (I know, I'm odd. I like to put things away after every "step" ) and I noticed that grandpa had this dowel looking piece of wood in his scrap wood. I'm not even sure what it is, I just know it was round and about 7" long (that's what she said) and was calling out to me "Tim, aren't I a dowel?" Why yes you are little piece of wood! And if I do some quick, community college math I think I can split this thing into four equal length dowels of roughly 1-3/4" long! To the band saw with ye! -
Dowels Need... Dowel Holes -
So let's get the ShopSmith converted over to a drill press and make sure we're all lined up here -
Looking good to me homey! Time to punch this sucker right in the.....wait.....I just need to drill some holes. Calm down man. First step is to clamp the neck blank in this silly vice I bought back during the COVID lockdown, it was one of those "pick up on the porch, just leave the money under the mat" things, I think I gave like $10 for this one and a small bench vice. Hey, I'm finally actually using it for the first time! Money well spent! Take that wife who says I spend money on things I'll never use!
-I drilled two holes all the way through the neck blank, positioned where I knew they would be the most spread and still be within both body wings ('cause that one body wing is way shorter than the other one). From there, we need to somehow transfer that hole location to the wing. The cool thing about a ShopSmith is that it's a really quirky machine. Sometimes the quirkiness of it has advantages that you don't see at first. One of them is that the drill chuck literally comes off. Soooo.....let's just take it off with my brad point bit still in it...go over to the bench and use it in the neck blank hole to mark the hole location on the body wing -
That's right, just stick it in the hole, whack it with that Thor hammer I made last year and head back to the drill press! Put the chuck back on the drive, go find that wing offcut, clamp that in the vice and we can then drill the hole in the wing -
I just held it steady with my hand, mostly the offcut was just to hold it straight and parallel and give me something to brace against. It worked really well, no scary moments. Do that a few more times and BAM! We've got wings pinned! -
It was stupid cool to be able to hold it in my hand as a somewhat full "thing" and really feel how this thing is gonna...feel.
Obligatory shot of the front side at this point -Fretting Things Again -
Well, not really, who needs frets anyways? Not me, I know that!
I can barely play a bass with frets, so let's just skip that whole thing. But, I got that fretboard template, and I kinda feel like we should shape that thing so we can lay it on here and see what it looks like. Sooo...get out the supplies again and do "The Trick" -Then toss that little Amana pattern bit in the router table. This time I can use the fence on it, so maybe we can use some dust collection. It ain't great, but it is way better than nothing at all. After a quick trip through the router table and some clean up to the shop, we had something like this -
Holy cow, that is starting to look cool. I also tossed that little offcut of the flame maple that I resawed on the headstock just to get the overall "vibe". I'm seriously digging it.
Yes, I left the headstock long up there. I haven't decided exactly how I'm gonna do the nut yet, so I'm leaving extra meat there to have options. Let's not paint ourselves in the corner just yet. Getting Overzealous -
While we're making all this headway, why not route the body wings? I mean, I don't like to brag, but getting ahead of myself is kind of my specialty here.
So I got out all the stuff and once again performed "The Trick" to fasten the wigs on and the top to all of that. Let's flush those wings, shall we?Can I just say, I don't like this step. Mostly because I haven't figured out the best way to do it yet. When I did this step on Lucifer it was one of the more scary moments and also introduced a couple problems I later had to fix (or hide). My method was this ginormous Whiteside 1/2" bottom bearing flush-cut bit. It was free, let's get that straight right off here. I actually have three of those bits, all free. It has straight cutter blades on it and only two of them. It's one of these mama-jamas right here -
And man it does not like me! With only two "teeth" it gets very VERY grabby. In a hand-held plunge router it is violent! It'll jerk the router right out of your hands if you aren't paying attention. I don't like this thing. Plus, the bearing is on the wrong end for use in a plunge router situation. Did I mention I don't like it? But, it's what I've got, so we need to figure out who to make use of it. I clamped the body to my bench with a portion of it hanging off the end and went to work. Man, violent! Especially on that end brain at the end of the neck blank! Seriously violent! Also, my neck blank isn't flushed off to the thickness of my body wings yet. You can see it in some of my previous pics. It's got this sort of Thunderbird-esque raised area right now. I'm undecided on whether or not I'm leaving it or flushing it off. I can't decide to be honest. Part of me digs it. Part of me says make it smooth. Regardless, it's in the way of the router! So I routed as much as I could, using the body top facing down so the bearing could ride against it like a template, then I swapped everything over to the little Amana pattern bit. It is 1/4" shank, which meant swapping out collets, all that. And then I came back with the little Amana pattern bit and cleaned up everything from the top side, using the body top as the template again. the Amana bit isn't long enough, nor will my plunge base plunge that far, so we got most of it. I'll clean up the remaining bit once I take the top and wings all back off. But for now, let's just admire it -
Yeah man, it's really looking like a thing. Is this now a BSO? Did I just make my second ever BSO? I mean, I'm not even close on that headstock, but still....
I have a ton of work to do at the neck heel and wing transitions and we're gonna have to focus on that headstock at some point. But wow, it's kind of a thing! I better start ordering parts. I need the pickup, and some tuners, and I'm gonna have to make a bridge of some sort, we'll need a jack, and probably a pot. Good lord, I better place some orders!
HONEY! I PUT SOME THINGS IN THE AMAZON CART!!!!
Oh yeah, one other thing I kind of hid in that post, because why spoil the moment?
I had one big chip out from that nasty, evil Whiteside bit -
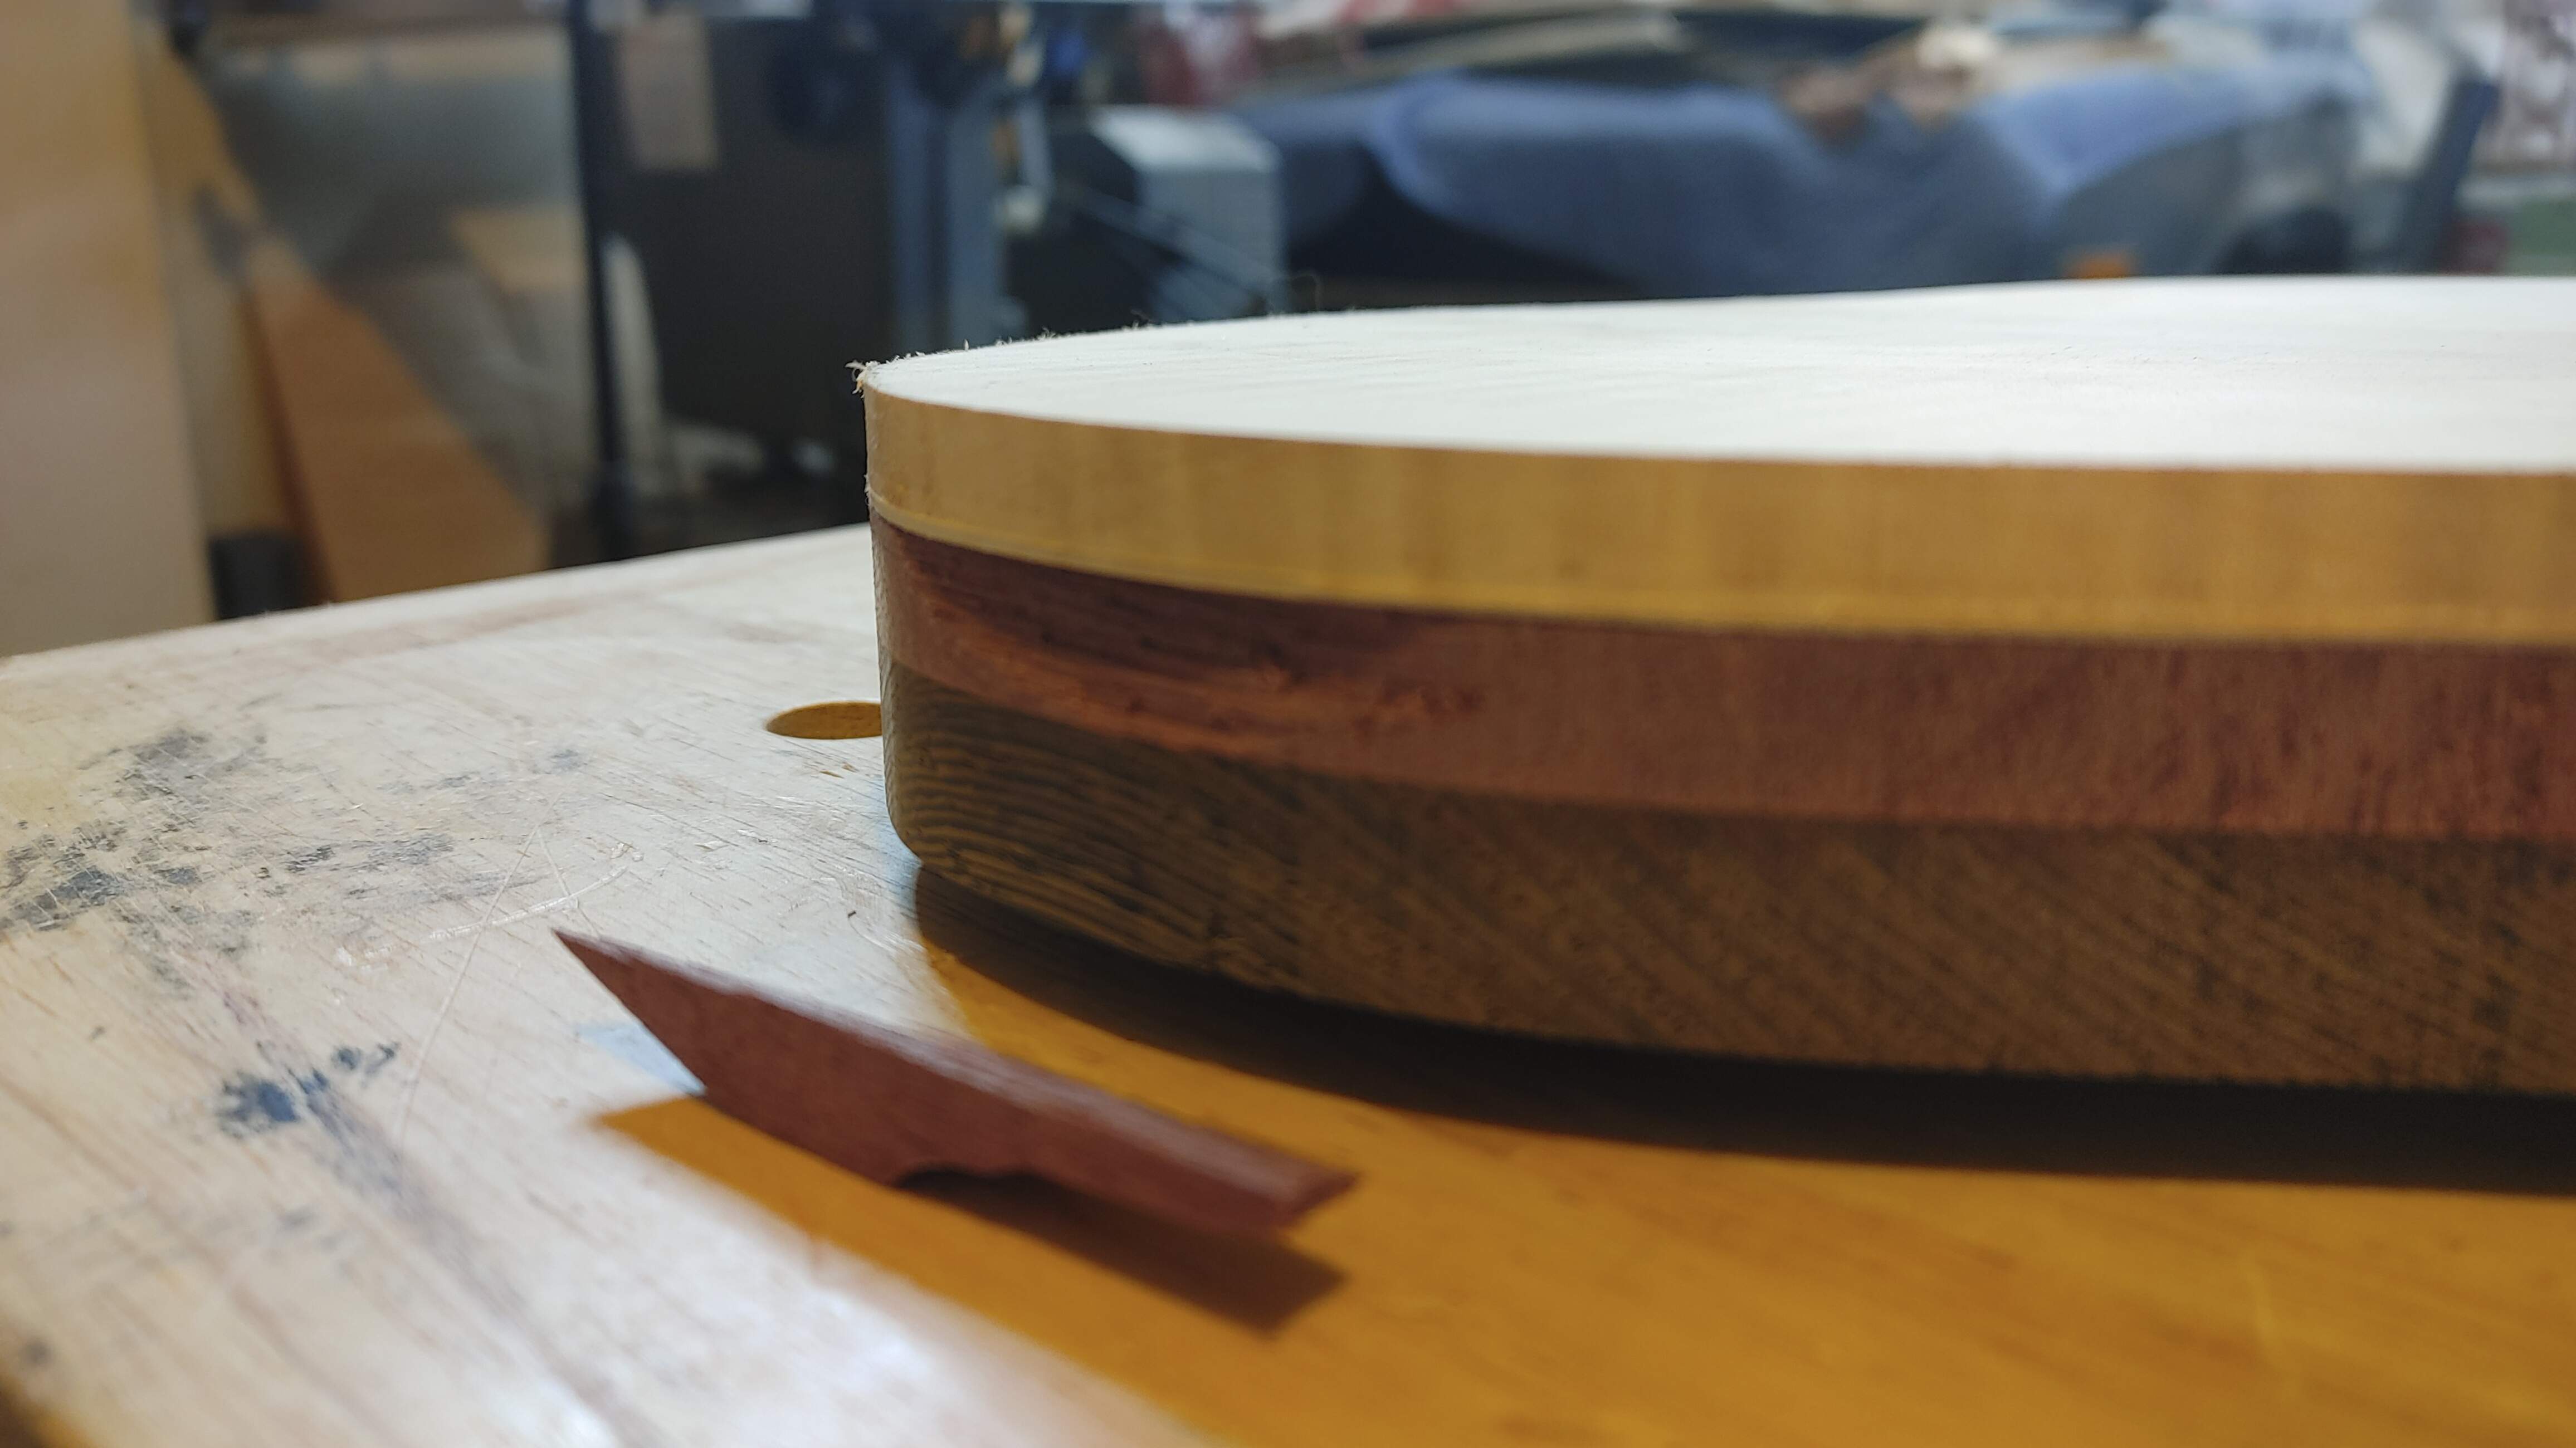
Luckily, the chip landed right on my shoe, so I saved it and we will just glue it back in and then flush it up with the more user friendly Amana bit later on. Yeah......
I had one big chip out from that nasty, evil Whiteside bit -
Luckily, the chip landed right on my shoe, so I saved it and we will just glue it back in and then flush it up with the more user friendly Amana bit later on. Yeah......
Some things I'm still debating -
Fore Arm Carve: I really don't like the Marleaux fore arm carve on the Diva. To me it jut looks odd. I will either put a more Fender style bevel on it or just a very subtle bevel. I can't decide if I want to carve deep enough to get into the purpleheart underneath, exposing some of that, or if I want to just stay out of it. I'm not a huge fan of those Kiesel carves that go deep into the second layer, so we'll see how I'm feeling when I get there. But to me, this just looks like...too much -


Radius Edges: I want to put a round-over on this one, I just can't decide how big a round-over. Again, do we get aggressive and take the round-over just short of the purpleheart? Ordo we just put a small round-over on it?
Belly Carve: Marleaux puts a small belly carve on them. I have a slightly larger belly, so I gotta think about this one. I suspect that fore arm carve paints them into a corner with regards to the belly carve somewhat. This may be the only picture of the back side of a Diva in existence -

A lot of decisions to make still.
Fore Arm Carve: I really don't like the Marleaux fore arm carve on the Diva. To me it jut looks odd. I will either put a more Fender style bevel on it or just a very subtle bevel. I can't decide if I want to carve deep enough to get into the purpleheart underneath, exposing some of that, or if I want to just stay out of it. I'm not a huge fan of those Kiesel carves that go deep into the second layer, so we'll see how I'm feeling when I get there. But to me, this just looks like...too much -
Radius Edges: I want to put a round-over on this one, I just can't decide how big a round-over. Again, do we get aggressive and take the round-over just short of the purpleheart? Ordo we just put a small round-over on it?
Belly Carve: Marleaux puts a small belly carve on them. I have a slightly larger belly, so I gotta think about this one. I suspect that fore arm carve paints them into a corner with regards to the belly carve somewhat. This may be the only picture of the back side of a Diva in existence -
A lot of decisions to make still.


