• TalkBass has been independent since 1998. Add your voice.
    Create a free account to reply to discussions, view embedded media, and browse with fewer display ads.
    Join freeLog in
    Want zero display ads or expanded classifieds tools? Compare plans.

Yet another first build post

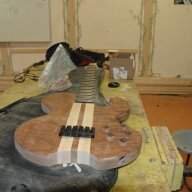
I'd suggest drawing a target line on the wood, to give you something to sand back to. It can save you from overshooting somewhere else along the curve. In fact, my approach would be to draw a target line, and another line about 1/16" - 1/8" past it, offset to it, that will remain after the shaping is done.
 
By the time I got PJ's note I had already done much as suggested and had drawn a line and also marked the break point.

Its funny, when looking at the curve form the side of the bass it looked nice, and the 'break point' only showed up looking at it from the bottom. Its a good lesson to me to change my perspective a few times before I am content with my work.

I have decided that I am going to build some new pickup covers. I can do better than the ones I have made so far. I have some ideas I want to try and I have honed my skills a bit since my first attempt.

Moving on to neck work I built a new jig to do straight scarfs and I made my cut.

Picture001.jpg


Then I glued it up. Everybody has seen many of these sorts of pics on these pages, but here is mine.

Picture002.jpg


I used toothpicks to keep it aligned and it worked well.

Picture003.jpg


Now I need to build a jig to router plane my headstock down so that I can laminate on some rosewood and birdseye to match the body.

Picture004.jpg


any suggestions on how thick the laminates should be? I'm thinking less than the body lams as the overall thickness is of course much less.

of course I also have to route recesses for my truss rod and two CF pieces too.

Picture005.jpg


Unfortunately all this will have to get work until I get home after my March break trip out west.
 
hardly got enough done to report on, but I did turn some maple down to act as the ends for my new pickup covers. I am thinking that this will give me a more uniform final product that I will be more pleased with. Lots more to do, but it was something at least.

I also tried using my fingerboard radiussing jig to smooth out my scarf joint a bit and thin my headstock in preparation for veneering it and it worked well.

IMG_0258.jpg


however, I think that I am going to make a specific jig for making scarf joints and another for router thicknessing.

Do any of you guys ever find yourself making so much stuff to make stuff that you never seem to get around to actually making stuff? That is sure how it felt last weekend.
 
I guess for a first build I should expect a few gotcha's - well, I just experienced one.

When I made my scarf cut on my neck my table saw blade, even fully extended, didn't make quite it all the way through my neck blank, necessitating me to use my handsaw to finish the cut.

Of course the kerf of my handsaw is much narrower than my tablesaw blade so I needed to finish it off.

I was lazy and didn't build my scarf joint jig at that point and figured that I would just very carefully sand it down.

You all see where this is going don't you.

My spidey senses were tingling and when I did put my 13 deg jig together I wanted to use it to just clean up my headstock before I laminated it to match my body. Of course I was out almost 4 deg. I don't understand how my sanding could have been out that much given that I started out good (I know as I have checked my saw jig and it is good). Anyway, I was looking with dismay but took heart in the fact that I made my neck blank extra, extra long for 'just in case' I had enough wood to just glue it on the thin bit of the headstock to beef it up, then thickness sand it back down to where I really wanted.

Just this afternoon I figured that I would follow microsoft's example instead and call this 'bug' a 'feature'. Now I think I will laminate in some contrasting veneers and make it look like this is what I wanted all along. If it comes off the way I hope it will look like a diagonal stripe through the side of the headstock from about the nut to the back of the headstock at the very top.

Wish me luck :)
 
Got a bit more done. I glued the standard wings on the headstock, thinned them to fit the headstock thinning that my mis-aligning forced me into.

IMG_0270.jpg


I selected a birdseye maple/ebony/birdseye maple combo for my 'feature'

IMG_0271.jpg


and then glued them on

IMG_0272.jpg


I had initially thought to put them on the top but I have subsequently changed my mind and put them on the bottom instead. After this I will glue on my excess neck piece the properly thicken the headstock and then I will have to put wings on that and I will be back to where I expected to be last weekend - but with one important lesson on scarf jointing learned!
 
I finally got around to upgrading my scarf joint jig. It works so much better now that I have polypropylene on it. I was also surprised that despite being fairly careful cutting and screwing accurately my test cut didn't turn out a square cut. After truing everything up though it works very well.

Lessons learned every time I spend time in my shop. Go figure :)

IMG_0278.gif


so here we are, all ready to sand down the first attempt at headstock covering, from before discovering the 'feature' that my previous miscalculation afforded me.

IMG_0279.gif


Next time I'll clean it up and sand down that bird'seye veneer and then glue it up. Then I guess more wings and a new headstock cover and, and, and . . .
 
Well, it hardly seems worth reporting, but I got my 'feature' sanded down to not much more than a veneer, but now at least I can work with it. I got another piece of maple glued on to bring it up to thickness, I got some really nice bird's eye glued on as wings and finally I got the top sheet veneers glued again.

Seems sort of redundant to post a pic of something that you have not only seen a million times elsewhere, but also here once before too . . .

IMG_0285.jpg


after this I will thickness sand the back of the headstock, build a caul to clamp the veneers there and then veneer the back before moving on to truss rod and carbon fiber
 
Hi all, it seems like ages since I have had a chance to get anything done, but there have been back to back business trips. . .

Ah well, its new tool day for me :) :) :) a new (to me) drum sander.

IMG_0316.jpg


my first job is to thickness sand my headstock in anticipation of deciding which tuners to go with.

IMG_0318.jpg


As I see it I currently have 4 choices, and many options beyond that.

I can go black with clover leaf tuners

IMG_0313.jpg


black with shaller tuners

IMG_0312.jpg


chrome hardware

IMG_0315.jpg


or gold hardware

IMG_0314.jpg


It looks like each set of tuners I have is slightly different so I am finally going to have to decide which way I go before I finish thicknessing, carving the volute, laminating the back cover on the headstock and just generally carrying on.

What combination would you suggest given my bird's eye/rosewood wood combination?
 
Black with the Schallers!

Just seeing this thread now, but really nice work! Is it the Wood Source that you check out when you're in Ottawa? It's ice to see some more Canadian guys doing some building on here; you should definitely take a couple minutes and check out fretless_guy's build if you haven't already!
 
slowly but surely getting stuff done.

I got the last bit of the headstock that wouldn't fit through the drum sander thicknessed and I learned the joys of a shinto!!!

IMG_0335.jpg


I also got my volute more or less figured out and that had been bugging me for a while

next step I believe is routing TR and CF channels

Doesn't anybody else have any opinions on hardware colour?
 
It has been another long while since my last post. This is for a bunch of reasons, some of which are far more valid than others. Work has been really busy lately, but more importantly I am at the stage in both my builds where I need to route the truss and CF rod channels and quite frankly it has scared me.

I just yesterday finished my jig to lick this one though so I am a happy camper.

IMG_0348.gif


I still haven't found the few minutes to actually commit to my first routes with this jig but it will happen soon.

Of course, I have also been distracted by my entry into the 3 wood challenge, and also by my latest 'thing' - pen making.

IMG_0347.jpg


Its actually taught me tons about lathe work and how I will use it for knob creation when the time comes.
 
thanks, I've practice clamped and it looks good. Hopefully I'll have time tonight. That will be a major milestone for me. The only other thing that scares me as much is routing my pickup cavities, but I can put that off for a while because I still haven't got my covers made so I have a good excuse :)