• TalkBass has been independent since 1998. Add your voice.
    Create a free account to reply to discussions, view embedded media, and browse with fewer display ads.
    Join freeLog in
    Want zero display ads or expanded classifieds tools? Compare plans.

YoshiBass #2: A Headless Xmas Tree

Lads, in the end I forked out the £50 for the ABM headpiece :dead:. I didn't want to jeopardise this build with my crappy homemade headpiece... It was a brilliant R&D project totalling £3.99, which produced a viable product, but for this one I'm going with the pro bit of kit to match the 5 ABM single headless tuners. Once this arrives I can get it installed and then figure out the neck shape/width (waiting to see what string spacing the headpiece has before I cut the neck shape out). Then it's full steam ahead!

Also, my pickup arrived: a Nordstrand MM5.4. Delicious :thumbsup:! Looks like an absolute beauty; I cannot wait to get this rigged up. Anyone aware of how noisy this badboy is? Does it require shielding in the routed pickup cavity and electronics cavity? And does it require a grounding wire to the bridge? (the emg P6 I use don build 1 required none of this)

What? Pics or nothing happened? Ok, here you go...

Here's a pic of a rough "setup" featuring one of the 5 bridges and the pickup. The white line on the ebony fretboard is where it'll be cut. The wood at the top where the aluminium prototype headpiece (RIP) will be sawn off (shame as it looks great, maybe for another model eh). The white marks where the neck joins the body show the position of "fret" 24 and 26...as you can see, it's going to be cut bloody deep! And I suspect the pickup will be moved a little closer to the neck joint - any recommendations on positioning from the bridge for a MM pickup on a fretless?
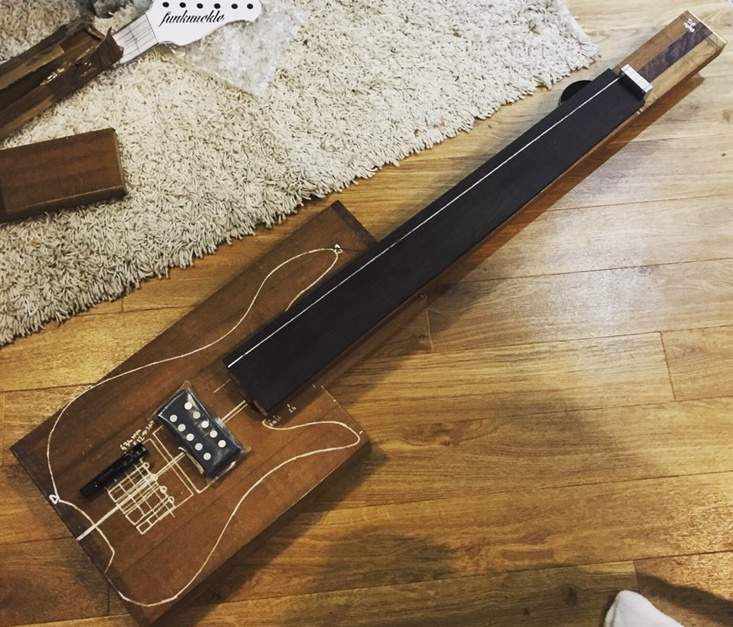
initial-setup.jpeg
 
Ha, I didn't think of that!

I saw someone's build where they had piece of copper run underneath all of the bridges, if there is space between your bridges you will see it and I wouldn't want to do that. Alternatively you could just drill a hole for each wire back to the control cavity and join them all together and connect them to ground there (that's what I would do). Yeah it's six opportunities to make a mistake, but it's only six holes. You could try putting everything together and seeing if you have noise problem before committing to the holes too. The problem there is you could pick up RF signals that the grounding would eliminate and if you're not around RF right now you would not have that variable.
 
I didn't think about it until I posted the question! That said, I suppose all of the strings may be connected at the headpiece. It's brass, with some kind of coating that may conduct 'lecky. If not, maybe a copper wire up at that end to connect the strings, and then a single grounding piece on one of the saddles?

I like super small string spacing, so there may not actually be a gap between them after all, just trouble shooting for the sake of it!

And as for the 6 holes... I'd risk having none before I risked drilling all those holes! Of all the tools I fear, the power drill is the most. I wish I had a pillar drill. Oh how I wish!
 
Progress is going slow but steady on this. I am, in tandem, building a 6 string guitar for my brother...mostly to purposefully slow down bass development in the hopes I end up with a better thought out and more attention to detail axe.

Here's some progress to keep you in the loop.

I glued the ebony fretboard on, cut it out, and finally planed the edges flush - looks wonderful!
IMG_1764.JPG

I still need to plane the ebony board down a bit as it is currently about 12mm thick!

I also drilled the holes for the headpiece (AMB) and loose-attached it for getting neck width/pocked alignment right. The extra bit between the nut and the headpiece is mostly to accommodate the truss rod turny-bit. In retrospect, I wish I set the rod access at the heel and could've had the headpiece almost flush with the nut. One for the next build I suppose. This bit will be finished - i may even glue on a piece of ebony over it to create a continuous board look.

IMG_1771.JPG


And here's a mock up. My friend reckons that 99% off guitar making is laying things out on the floor and staring at them. In my case he is quite correct indeed.
IMG_1770.JPG

The strips of wood between PU and heel are to raise the strings as the neck pocket was not routed at this point. That white "marker" is a chalk pen which I strongly recommend!

Since these photos were taken, I have took the neck to the correct width, cut out the bass body (keeping the flat edge at the top and bottom though for later use) and routed the neck pocket. I've also got everything marked out for drilling in the bridges.

I am very excited about this build. The Nordstrand MM pickup looks awesome and completes the beefy robust and somewhat alien-weopon look I wanted (and I know it will sound great). Actually, in this photo it is off on an angle that looks very cool. I might do that, as opposed to the perpendicular initial plan - any thoughts on how it could affect tone? Should I angle the higher poles towards or away from the bridge?

I really love how compact this axe is too: it will fit in a guitar case!
 
Looking good! Yeah, I think you should angle the pickup with the B-string side closer to the bridge than the G-string side. Fattens up the skinny strings a bit and adds clarity to the beefy strings. :)
 
Looking good! Yeah, I think you should angle the pickup with the B-string side closer to the bridge than the G-string side. Fattens up the skinny strings a bit and adds clarity to the beefy strings. :)
Sounds good. I've attached the center tuner (ABM single headless tuners) and once I've put on the other 4 I'll figure out how much anglin' I can do while still getting great coverage over both poles.

FYI it's going to be EADGC!

This weekend my plane sharpening stone should arrive, so I'm hoping to whittle down the monstrous fretboard. Once that's done I can shape the entire neck (favourite part!) and get going.

By the way, the walnut body is really thick, about 2inches or maybe a bit more. I am thinking of taking advantage of this and trying to put in a warwick-style contour into the body to house my growing beer belly. This photo kind of shows what I mean:

wozzas.jpg


Anyone ever done this? Any tips or thoughts? I have a router, but have no workshop beyond a wooden pallette that I clamp stuff to while working.
 
Looks sweet man!
Hope this helps, I built this one without a workshop:
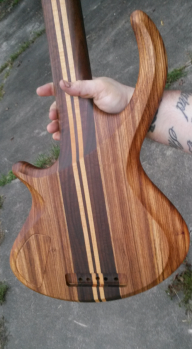
Back.jpg


What I did was I made a very simple router jig to cut the sides of the wengé center at a slight angle.
This sketch sort of expains what I did hopefully
Knipsel (Small).JPG


Then, when I glued the pieces together I used two dowels on each side to prevent the parts from sliding under the pressure of clamping and I used a threaded screw (don't know the English name) to bolt it together in the spot where my pickups and control cavity were going to be. This way I ensured that the wouldn't fold up when I put pressure on the clamps. Like this:
2015-06-21 13.38.45 (Medium).jpg
 
I have cut out the body shape and attached & drilled the neck fastenings. I have drilled the bridge screw holes (redrilled after the first bodged attempt...I am cursed at drilling accurately, oh dear).

I have routed the pickup hole, and drilled its wiring to the routed cavity box, and routed a cut-out for access to the tuning pegs. Here's a peek (note that the neck doesn't sit that high at all!)

IMG_2093.JPG


Electronics cavity needs to be deeper, and also bringing a bit closer to the edge...

IMG_2096.jpg

I made the overall "curve" by planing the top sides, and routing a series of depths in the back, then levelling them out with a handplane. It's a work in progress, but going in the right direction! I sanded it into a more natural curve which I haven't photod yet.
IMG_2095.JPG


I have sharpened my plane (using various grits of sandpaper) and planed down the enormously thick ebony fretboard. After that, I sanded it even flatter. Wow, very messy - oily ebony! I felt like a chimney sweep!

Here's an up-to-date mockup (everything screwed in and attached) for your eyes only. It's coming along great!

IMG_2098.JPG


Also, I just got my Aguilar OBP3 so will get that installed next week after a holiday. Looking forward to working on the control layout and finally hearing this thing sing...!