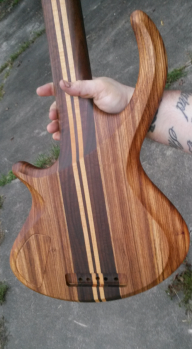
Awesome video, thanks! Looks like exactly the kind of finish I want for this axe. I won't be doing the finish for some time, but I'll get these questions out the way well in advance...
The step between layer 2 and 3 confuses me a bit: why scuff it and make it cloudy and then put another coat on that scuffed layer? seeing as it's transparent, wouldn't you want every layer nice and smooth/clear?
In the video he mentions end grain typically requires double the coats of the top etc. Do you find the same? Do you wet sand in between end grain layers as he mentions?
Could this be applied to the ebony board too? OR is that a tremendously stupid idea (with roundwounds)?
Any tip/equipment recommendation for hand buffering? Maybe find someone's poodle!
And another quick question - do you put this into the neck pocket, or avoid that area completely? I assume I should plug up all screw holes too!
Hey buddy! Glad the video helps. I wish youtube was around when i was starting out, it would have made my life MUCH easier.
Good question regarding the scuff sanding. The reason is that oil-based finishes like this are typically slow drying, and unless you're set up with a REALLY good spray booth, it's just about impossible to apply these kinds of finishes without little airborne dust particles settling on the surface.
So, the scuff sanding allows you to knock off these particles while still leaving protective oil over the top of the wood. Don't worry about it appearing cloudy though, because the shine will come right back up when you apply the next topcoat.
I definitely use the wet sanding technique on both end grain and porous topwoods - it helps build a slurry that is slightly thicker than the oil itself, and helps seal up open grain that would otherwise simply drink up thinned finish product. I remember doing a top wood of movingui that required probably two or three wet sanding stages before the pores were all sealed up.
It's really helpful when finishing to use a desk lamp on your workbench that you can point across the surface at any angle, because it can come in handy to see low spots or end grain that isn't fully sealed up. These areas are typically matte in appearance relative to the rest of the finished wood, so you know you have to hit those areas with more finish before you can proceed to buffing.
I would't put Tru Oil over ebony. I can't remember if you were planning this thing to be fretless or not, but assuming it will be, you should be ok with a raw unfinished ebony fingerboard ASSUMING you're using
nickel strings only. It will still show some wear over time, but nickel won't chew up the wood. I've really liked DR Sunbeams (nickel rounds) on fretless, incredibly warm sounding and well suited for natural unfinished boards.
Hand buffing, start working out those arms now my friend.

The trick to buffing out a finish is that you are going to use a progressively finer set of sandpaper to create a progressively finer scratch pattern. My own finishing strategy for a nice medium glossy shine is generally 400, 600, 800, 1000, 1200, 1500, 2000 and then compound and wax. That's right, it's like 10 sanding steps going from medium coarse to ultra fine. Lots of elbow grease! But worth it in the end. A high gloss finish is just a surface that has been sanded with a scratch pattern so small that it appears unblemished to the eye. Getting to this stage is why the rubout is so complex and time consuming.
Just be careful you don't linger too long in any one spot or you'll get the dreaded witness lines and have to recoat the entire thing, and start the curing process over again.
One last pointer which I suggested to someone else recently - I've learned that it's
always better to use a coarser grit with lighter pressure than a finer grit with heavy pressure. This is where witness lines typically rear their ugly head…when you're using something ultra fine like 1000 grit and pushing down really hard to smooth out the surface. Next thing you know, you've got a nasty white crater that will only go away with more topcoats.
Lonnybass


 But looks cool, i'd make the lights change colour to refelct xmas lights & such. Would be cool if it could be painted to change colour everytime like lights hahaha. But then i'd go blind i'm sure xD
 I didn't really see the point in leds on the lovely fretless board, and even thought it would be distracting, I plan on doing a 6 string fretted twin which will have lights and pzaz, don't you worry.