• TalkBass has been independent since 1998. Add your voice.
    Create a free account to reply to discussions, view embedded media, and browse with fewer display ads.
    Join freeLog in
    Want zero display ads or expanded classifieds tools? Compare plans.

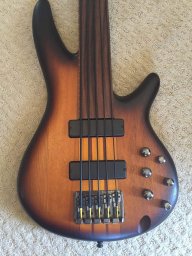
5 string buckeye burl/mahogany neck through

I prefer the front page of the black and white version. The picture itself is really nice and fits well in B/W. The color version is too cluttered, and looks a bit more "static". The only drawback of the B/W version is that the logo doesn't stand out enough. Maybe do that in color? (Teal with black outline?)

The pictures inside the catalog should be in full color. It should show off the product in all it's glory. Especially since one of your focus points is using nice woods. Let the subject speak for itself. :)

I'm not a huge fan of the picture on page 3/4. The tree is a bit distracting. If the tree were to the far left it would be great, but now the tree and the guitar is fighting for attention.

Apart from that it looks really nice. :)


(All this is my opinion, and I may not know what I'm talking about. ;) I don't intend to sound harsh.)

Personally i would still use the black and white picture. Especially since the next couple are desaturated. But I'm definately no pro marketing guru! It looks good either way.

In this old lady's opinion, I think the new color version is perfect. Yes, there's something to be said about the feeling of black and white photos, no question about it. But for me, the color really pops, even though they are de-saturated. To me, it catches the eye better, and has enough allure to make me want to turn the page and see more.


How about this?

Invalid Link Removed
 
Today was one of those days where I spent most of the time setting up jigs and tools and not enough time actually using them.

Since the neck isn't level on either side, I decided to chip off the glue squeeze out with a chisel, then I figured out which side of the neck laid down without wobbling, then taped that side down to a 4' long piece of mdf, then taped my two mdf straight edges up against each side to help keep it in place. I did it this way to be able to get the whole length level even after having to move it to reach the second half.

The neck isn't taped down in this picture, so ignore the gap underneath it.

tumblr_nk5hth1OL61qi8q1ao3_1280.jpg


tumblr_nk5hth1OL61qi8q1ao2_1280.jpg


tumblr_nk5hth1OL61qi8q1ao5_1280.jpg


I only had time to level one side of the neck, so I'll have to do the other side another day, along with thicknessing the headstock and doing the scarf joint.

I also cut the bridge block, truss rod cover, and headstock into blocks that I'll shape as soon as I get a chance. I need to cut them all to thickness first and I think that'd be easier to do when they're shaped as blocks.

Ignore the outline of the headstock, I'm going to move the shape down to fit on the block because there was a bandsaw mark that was too deep to sand out on the glue side that I wanted to avoid.

tumblr_nk5hth1OL61qi8q1ao4_1280.jpg


These came in the mail today. Epoxy and strings came in this week too.

tumblr_nk5hth1OL61qi8q1ao1_1280.jpg


He changed his mind about using the glow in the dark powder, so I got the powdered turquoise.
 
I got that inlay epoxied in. I'm nervous to see how it looks when sanded. As always, the route is over sized, but the rosewood should be dark enough to make it look good with the epoxy/sawdust mix.

tumblr_nkecsvaqxh1qi8q1ao1_1280.jpg


I filled in the holes for the dots with the epoxy since most of them ended up too deep. I think I'll re-drill them after radiusing the fretboard (when I do the other dots) because I'm not sure how much thickness of the inlays will be sanded through at the first fret, so if I drill them after radiusing, I can make the outside ones deep enough.


High quality clamping system to keep the inlay down.

tumblr_nkecsvaqxh1qi8q1ao2_1280.jpg


I wanted to drill the pilot holes for the pots and switch, but with everything fitting in so tightly, I couldn't think of how exactly to mark on the front of the burl where to drill so everything lands in exactly the right spot.

tumblr_nkecsvaqxh1qi8q1ao3_1280.jpg


Maybe I'll need to mark where the holes go on the inside of the cavity, drill from the inside through to the front. I guess if I only do the pilot holes that way and have the burl against a board, then there shouldn't be too much risk of tearout. Then I can finish drilling the holes to full size from the other side. [I just thought of this right now, otherwise I would have already done it]
 
  • Like
Reactions: vmabus and mapleglo
Looks great Lisa! I used to have the same struggle with control cavity layout - now I blueprint everything ahead of time to take the guesswork out of the equation. Here's a shot so you can see how I lay out the cavity and pots in advance and use it to create the templates and pilot holes.

IMG_0967_zps24d61b90.jpg
 
  • Like
Reactions: lbridenstine
Fantastic work! On my current build, I'm looking to do the same sort of magnetic cover, but with a large magnet in the middle that will hopefully remove the cover by sticking a screwdriver or piece of metal to. I haven't done any tests yet, but do you believe that six magnets in the body and steel circlets in the cavity cover may be enough to hold it in place? Thanks!
 
I took off the blocks and wax paper so this can get some air. It looks like it all laid down good.

tumblr_nkfve8vYA11qi8q1ao1_1280.jpg


I'm definitely going to need to re-cut the first fret slot. The epoxy over the nut slot is just a film over the top and not actually filling it in, luckily.

Looks great Lisa! I used to have the same struggle with control cavity layout - now I blueprint everything ahead of time to take the guesswork out of the equation. Here's a shot so you can see how I lay out the cavity and pots in advance and use it to create the templates and pilot holes.

I did pretty much the same as LonnyBass. Then used pilot holes to drill out the holes for the controls.

Good call, guys. I should start doing that too. That's one thing that I leave off of my full scale drawings for some reason.

Fantastic work! On my current build, I'm looking to do the same sort of magnetic cover, but with a large magnet in the middle that will hopefully remove the cover by sticking a screwdriver or piece of metal to. I haven't done any tests yet, but do you believe that six magnets in the body and steel circlets in the cavity cover may be enough to hold it in place? Thanks!

Do you mean that the large magnet in the middle won't be magnetized to anything inside, but will magnetize to something you put over it to pull the cover off? That's an interesting idea.

As far as how many magnets will hold it, it depends on the strength of the magnets. The ones I put on this bass are really strong and I don't think there's any way this cover will fall off. It's actually kind of hard to take the cover off because I put too many magnets. It sounds like for your idea, you would need the middle magnet to be stronger than the ones holding it on, so you might want less, but at the same time, they need to be able to hold it on still.

But have you though about this... what if that larger magnet magnetizes to your belt or the button on your pants or something while you're holding the bass?
 
But have you though about this... what if that larger magnet magnetizes to your belt or the button on your pants or something while you're holding the bass?
Wholely inappropriate (but hilarious) humor springs to mind.

I wouldn't worry too much about induced fields unless you're right under the strings; a steady state magnetic field won't induce any current into the circuitry.
 
He changed his mind about using the glow in the dark powder, so I got the powdered turquoise.

Hey Lisa

Was wondering about the turquoise luminosity treatment. Thinking of using it as fretboard dots on the side of the fingerboard. Did you - or he - decide against it for artistic or technical reasons?

just wondering. Seems like it would work fine as fretboard side markers, at least I am hoping.
 
Last edited:
Hey Lisa

Was wondering about the turquoise luminosity treatment. Thinking of using it as fretboard dots on the side of the fingerboard. Did you - or he - decide against it for artistic or technical reasons?

just wondering. Seems like it would work fine as fretboard side markers, at least I am hoping.

He wanted the turquoise because it is more "natural" than the glow powder. I think the glow powder would work for side dots, but it does have to be charged with light and only lasts for a certain amount of time before it needs to be charged again.
 
He wanted the turquoise because it is more "natural" than the glow powder. I think the glow powder would work for side dots, but it does have to be charged with light and only lasts for a certain amount of time before it needs to be charged again.

Thanks Lisa

I have been exploring the powders and some of them glow for 10-12 hours. Certainly long enough to get you through a two hour set. I have LED's on my main basses and this seems like a decent alternative. And it comes in a rainbow of colors. The only thing is - they say it only lasts 12 years. So that is a drawback for sure. I wonder what happens after 12 years, if it discolors or just stops being luminescent....
 
Thanks Lisa

I have been exploring the powders and some of them glow for 10-12 hours. Certainly long enough to get you through a two hour set. I have LED's on my main basses and this seems like a decent alternative. And it comes in a rainbow of colors. The only thing is - they say it only lasts 12 years. So that is a drawback for sure. I wonder what happens after 12 years, if it discolors or just stops being luminescent....

I didn't know about the 12 years thing. I would assume it stops illuminating around that point. That's too bad.