

Enjoy the benefits of a premium membership!
Upgrade Account
-
TalkBass has been independent since 1998. Add your voice.
Create a free account to reply to discussions, view embedded media, and browse with fewer display ads.
Join free Log in
Want zero display ads or expanded classifieds tools? Compare plans.
You are using an out of date browser. It may not display this or other websites correctly.
You should upgrade or use an alternative browser.
You should upgrade or use an alternative browser.
5-String Fanned Hybrid Headless
- Thread starter Dave Higham
- Start date
More options
Who Replied?
I have a Hohner B2A (Steinberger copy) so I measured that.
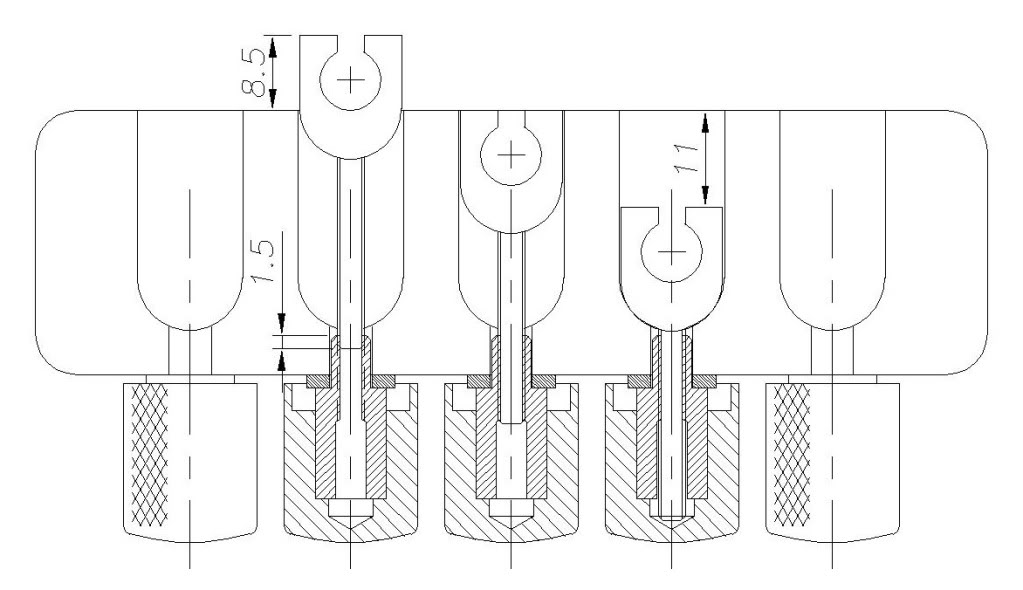
The amount of travel needed to tune the E string up to pitch is 3mm and for the G string it's 3.5mm. That's from where you can put the ball end into the hole in the string anchor by just pulling on the string a little, to fully tuned. Not much is it?!
On the Hohner, only the G string anchor is completely covered when tuned, and at that point it has another 6.5mm of possible travel before it bottoms out. The other anchors stick out progressively more when tuned but these are double ball-ended strings so this could vary with different makes of string.
I'll be using normal strings so there'll be a bit of trial and error involved when stringing up for the first time but, of course, I'll be trying to get all the anchors in the same position when up to pitch.
As you can see from the drawing, I only have 1.5mm of thread engaged when the anchor hole is fully exposed, but that's just to get the ball-end in there. When the anchor is completely hidden I have 10mm of thread engaged and still have 11mm of possible travel if required (which I'm sure it won't be).
Thanks!

I guess I have over thought this by miles. I tested this on one of my basses just now. After loosening the string 8mm it was very loose.
I'm going for a clamping system as well, so if the string stretch too far i can simply cut it and reattach.
*Heads back to the drawing board.*

I have a question regarding your drawing.. What keeps the knob attached to the bridge ? I understand the string tension will be enough to hold the knob against the nylon washer against the bridge, but when there are no strings, can the knob be pulled back with the threaded rod and the string anchor ?
Just a random question that hit my head..
Just a random question that hit my head..
I have yet to see a thread that involves some one making their own hard ware. You sir are very good.

when there are no strings, can the knob be pulled back with the threaded rod and the string anchor ?
Yes, they can, until the string anchor reaches the end of the slot. The Steinberger ones have a spring on the threaded rod which pushes the anchor forward, keeping the knob and washer in contact with the block. If I can find any springs of a suitable size that don't take up too much room, I'll put some in there.
I have yet to see a thread that involves some one making their own hard ware.
I'm certainly not the first. Marko Ursin (MPU) made something very similar, which is what set me to thinking about making my own (credit where credit's due). I'd include a link to his, but I can't find the thread. Are you there Marko?

Here I am. Yes, I made something very similar but out of aluminium. Other than material mine was just like yours.
Like this.
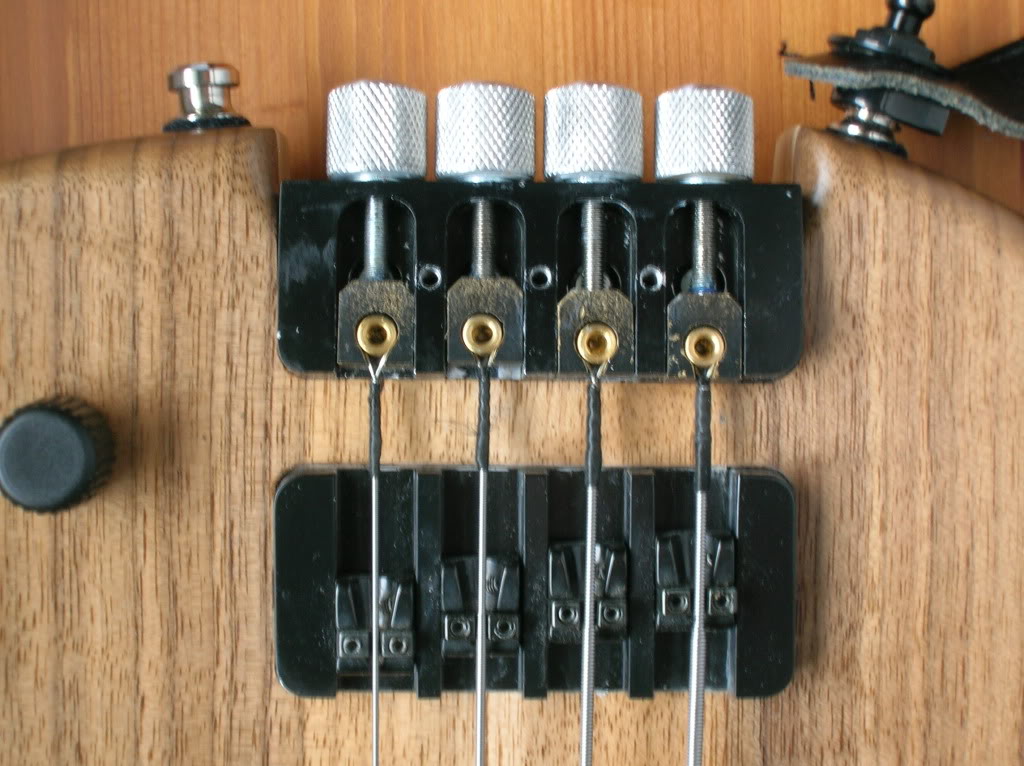
Like this.

Yes, they can, until the string anchor reaches the end of the slot. The Steinberger ones have a spring on the threaded rod which pushes the anchor forward, keeping the knob and washer in contact with the block. If I can find any springs of a suitable size that don't take up too much room, I'll put some in there.
Yup that would be cool. I think springs from them really cheap pens which have a push mechanism to expose the tip would be of the right-ish size..And if i'm not wrong, they are the kind that won't rust..
another silly question, why do most headless basses have two strap buttons at the bottom..?? to not let the bass rest on the tuner knobs when you casually keep it down ?
Said I was going to start on the body but Ive changed my mind again.
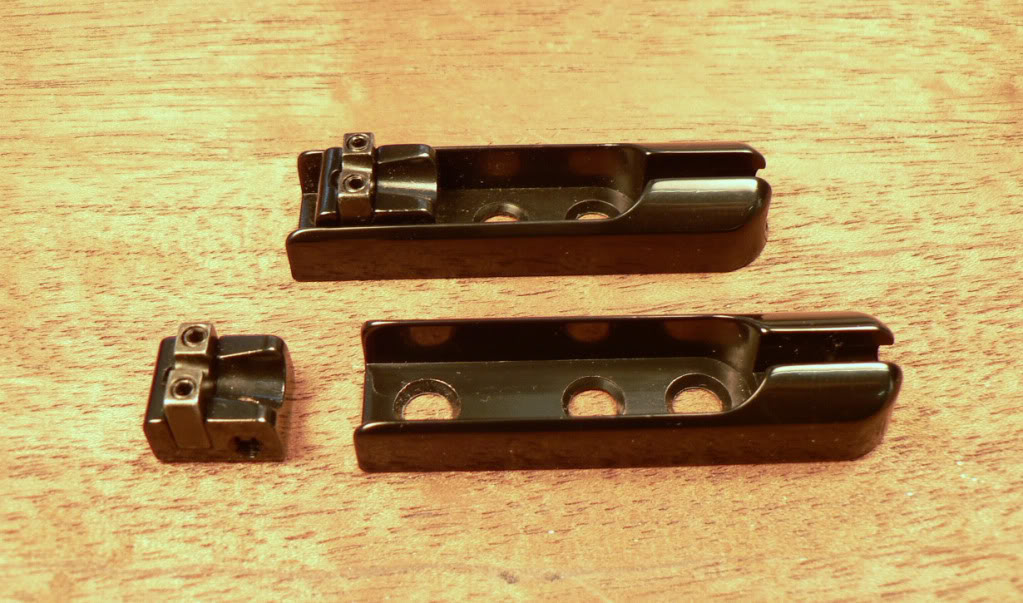
As some have asked about the bridge Ill do that next. I bought these cheap ABM copies on eBay. Ok, theyre made from what we used to call monkey-metal (zinc alloy) not bell brass but Im only going to use the saddles and theyre actually quite nicely made and finished. They came from Bezdez in Canada.
http://www.ebay.co.uk/itm/6-STRING-...101?pt=Guitar_Accessories&hash=item335889831d
I actually bought some others from a Chinese seller which were a lot cheaper but they were rubbish; badly finished, corners polished off, saddles stuck in the slots, etc.
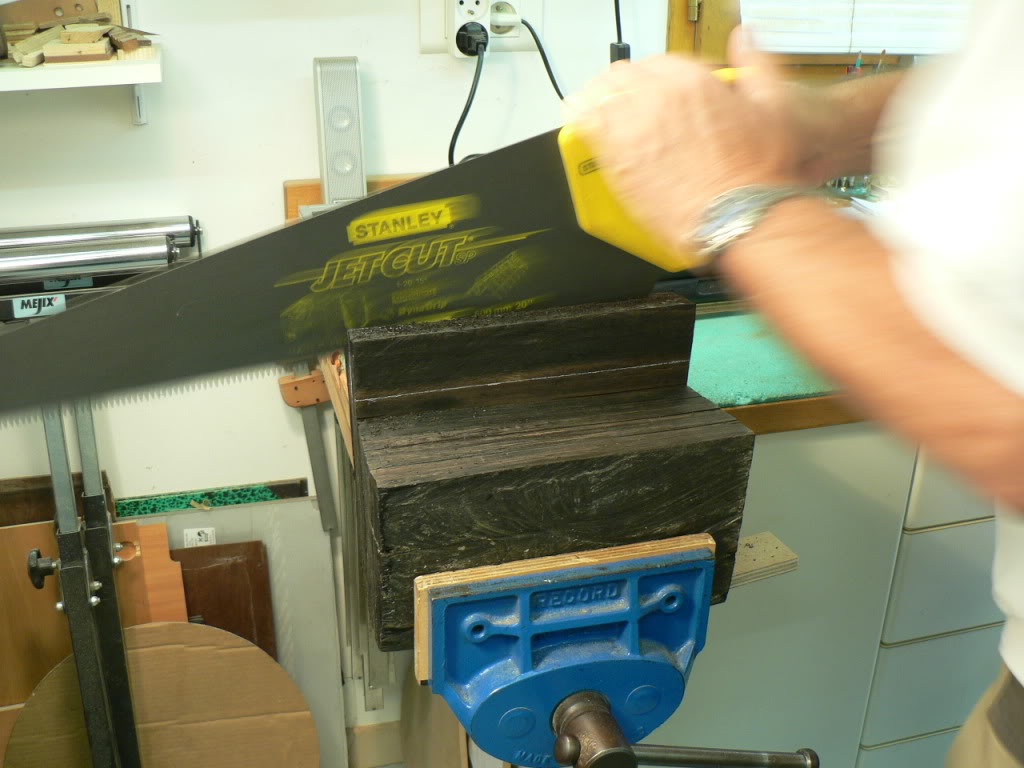
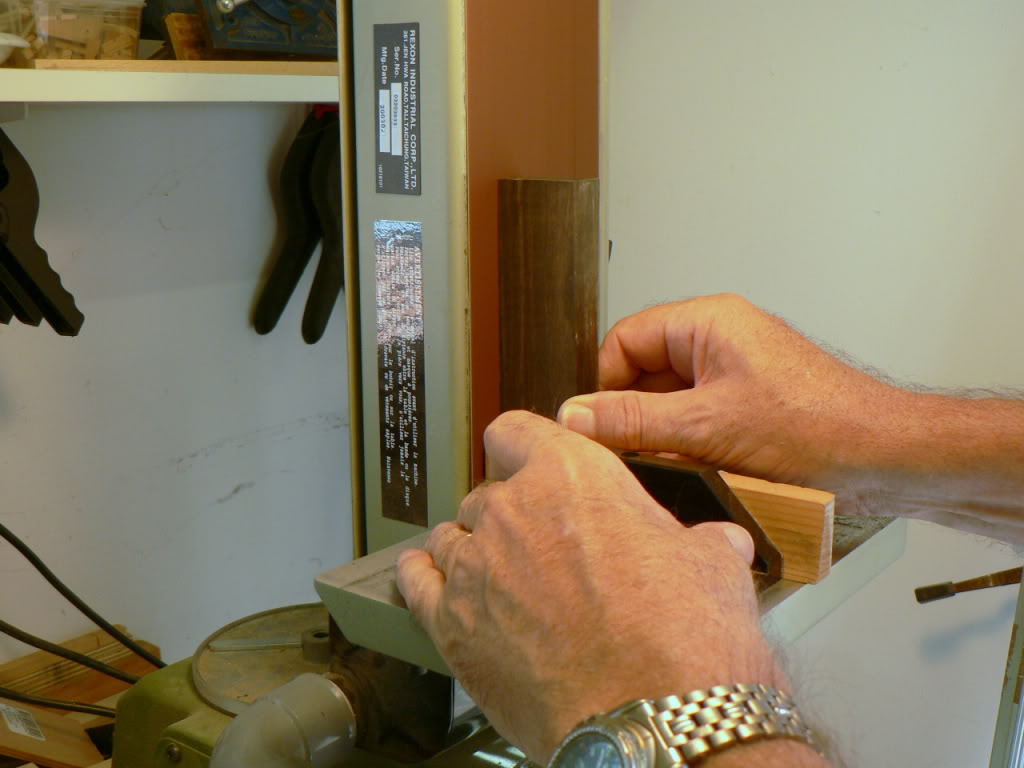
So first I need another piece of ebony, which means cutting another slice off this stonking great lump. I had to resort to traditional methods for this as I dont have anything else that would cut it. Heres an action shot.
Then I cleaned up and squared the four faces on the belt sander.
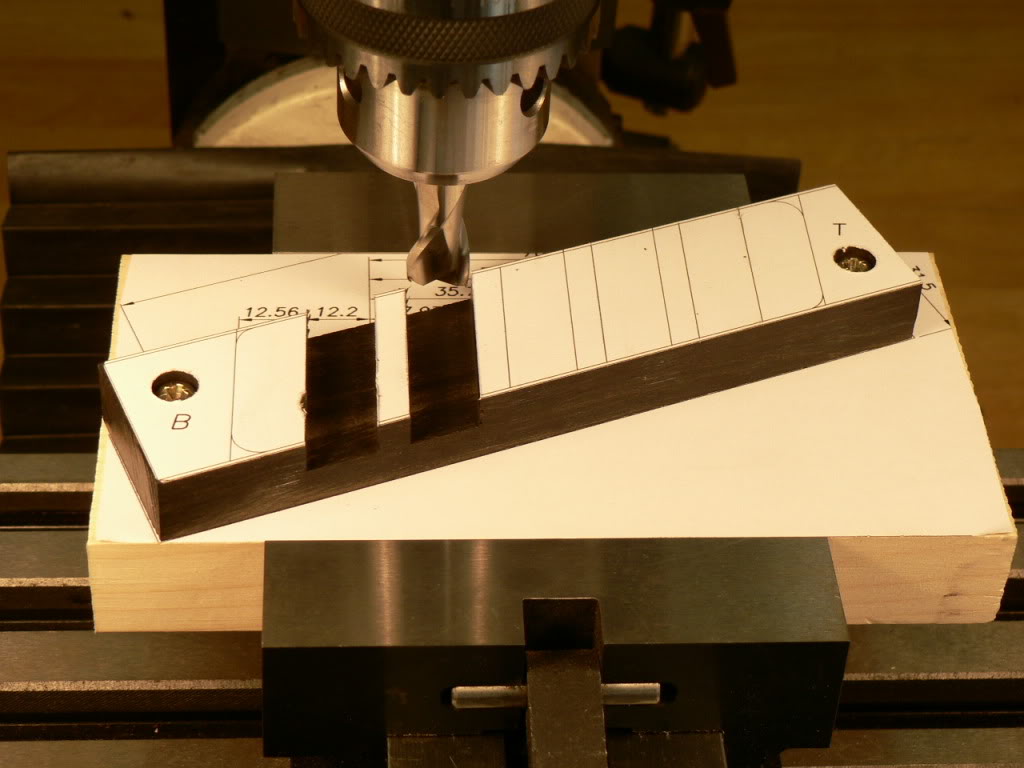
Heres the bridge block screwed to another piece of wood at the correct angle for milling the slots.
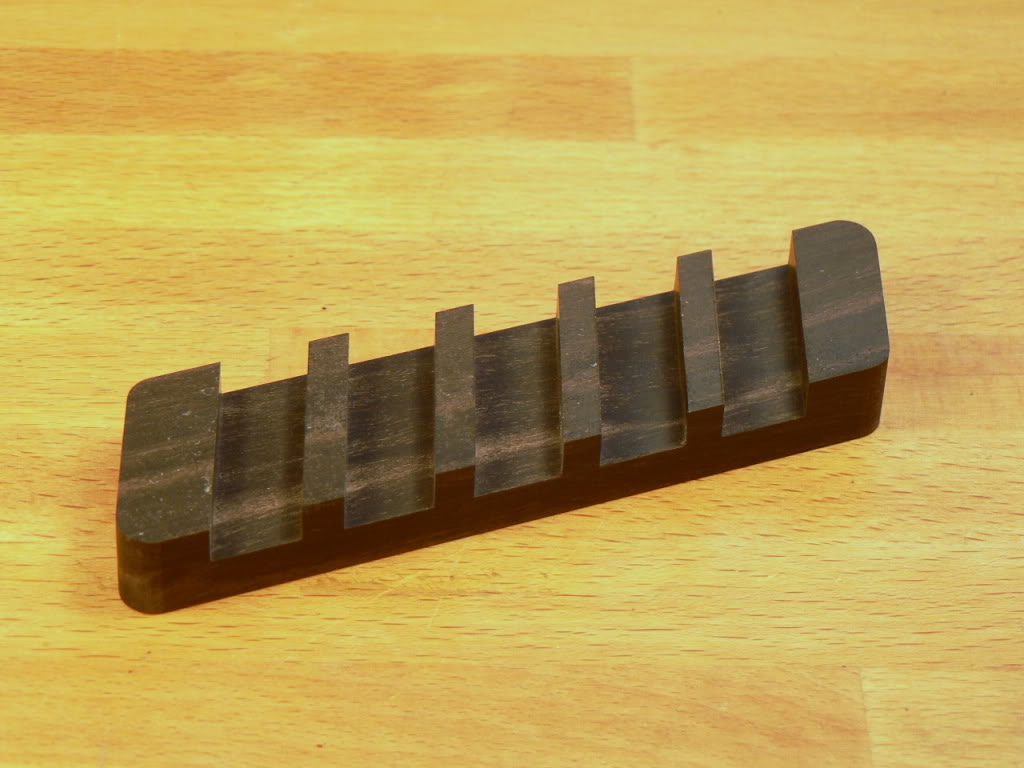
And here it is with the slots milled, the ends trimmed and the corners radiused.
Top edge radiused
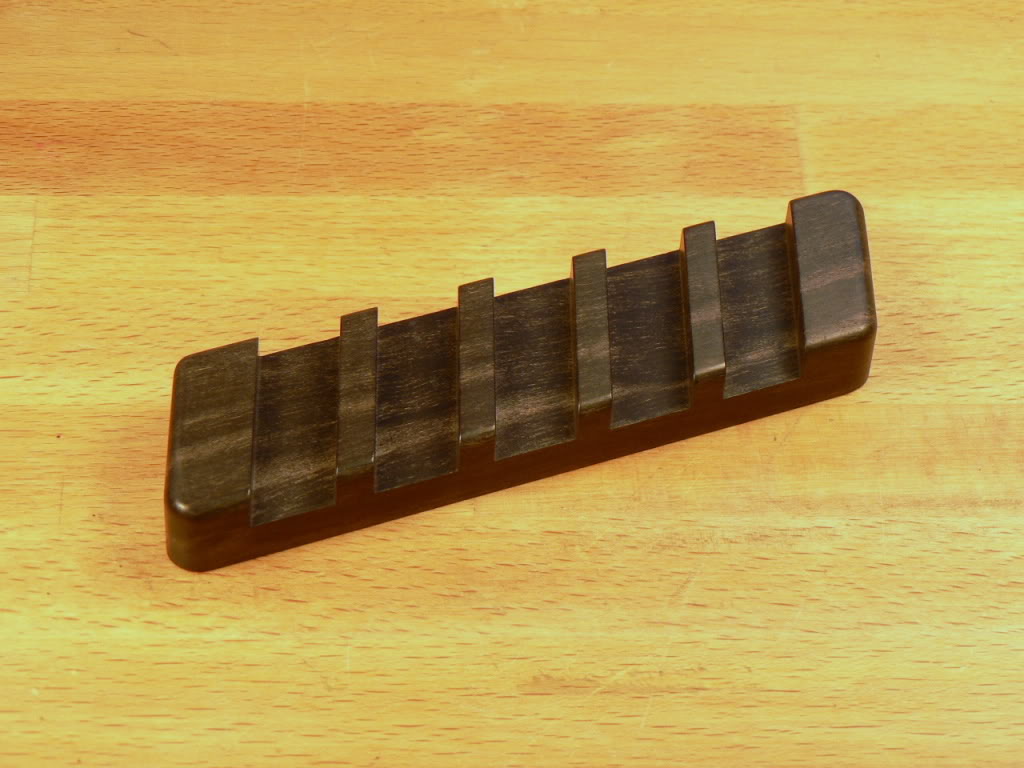
And this is what it should look like with the saddles in place. The colours look a bit weird in these photos. The streaks in the ebony look mauve on my monitor, but theyre grey really and with a bit of finish theyll turn brown. I prefer ebony to have a bit of colour in it; makes it look less like black plastic.
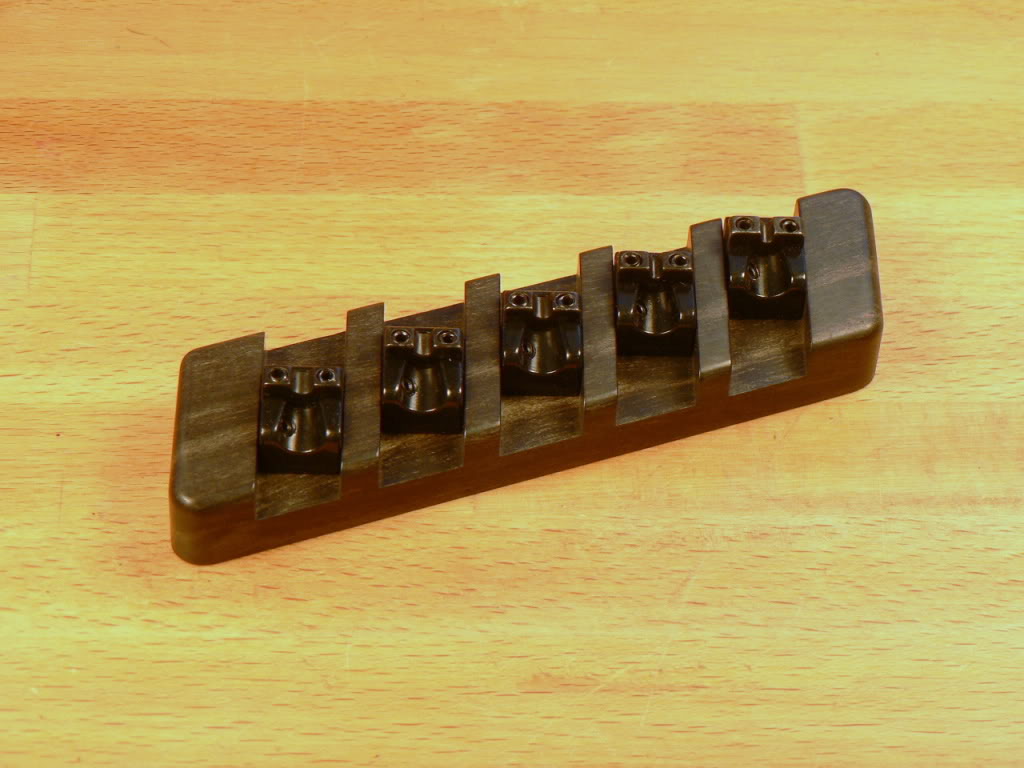
Back soon.
As some have asked about the bridge Ill do that next. I bought these cheap ABM copies on eBay. Ok, theyre made from what we used to call monkey-metal (zinc alloy) not bell brass but Im only going to use the saddles and theyre actually quite nicely made and finished. They came from Bezdez in Canada.
http://www.ebay.co.uk/itm/6-STRING-...101?pt=Guitar_Accessories&hash=item335889831d
I actually bought some others from a Chinese seller which were a lot cheaper but they were rubbish; badly finished, corners polished off, saddles stuck in the slots, etc.
So first I need another piece of ebony, which means cutting another slice off this stonking great lump. I had to resort to traditional methods for this as I dont have anything else that would cut it. Heres an action shot.
Then I cleaned up and squared the four faces on the belt sander.
Heres the bridge block screwed to another piece of wood at the correct angle for milling the slots.
And here it is with the slots milled, the ends trimmed and the corners radiused.
Top edge radiused
And this is what it should look like with the saddles in place. The colours look a bit weird in these photos. The streaks in the ebony look mauve on my monitor, but theyre grey really and with a bit of finish theyll turn brown. I prefer ebony to have a bit of colour in it; makes it look less like black plastic.
Back soon.

very nice!!!
can you tell me the dimension of the bridge block? (how high is it and how deep do you route for the saddles?)
I'm planning on doing something similar but I'm worried about what dimensions would make it stable...
can you tell me the dimension of the bridge block? (how high is it and how deep do you route for the saddles?)
I'm planning on doing something similar but I'm worried about what dimensions would make it stable...
This block is 13.5mm thick and the saddle slots are 6mm deep. But the dimensions depend to some extent on the geometry of your instrument, i.e. the height of the fingerboard above the body and the neck angle (if there is one) and the position of the tuners. In my case the slot depth of 6 mm means that the grubscrew in the side of the saddle for locking it in position will be covered. The block will be partially recessed into the body but you need an accurate drawing to determine how much. That's where CAD becomes so useful.
Oh, and as it's the first time I've done this, there might be something I've overlooked.
Oh, and as it's the first time I've done this, there might be something I've overlooked.
Well, I think its about time I revived this thread. After spending half of August and September in the UK it took me a while to get going again and although Ive made some progress Ive been a bit lethargic about writing it up. So here goes.
Now I need to make a start on the body.
I bought the top wood about 7 or 8 years ago from Larry Davis but got distracted by another project each time I should have started on it. Its figured maple and about 7/8 thick.
The other body wood is alder from a French supplier and is in one piece. The alder was about 11/4 thick so I had to make a router sled to take it down to 7/8 but Im afraid I didnt take any photos of that.
As half the body is maple and I want to keep the weight down as much as possible Ive decided to hollow it out wherever possible. So here I am, making a start with a Forstner bit.
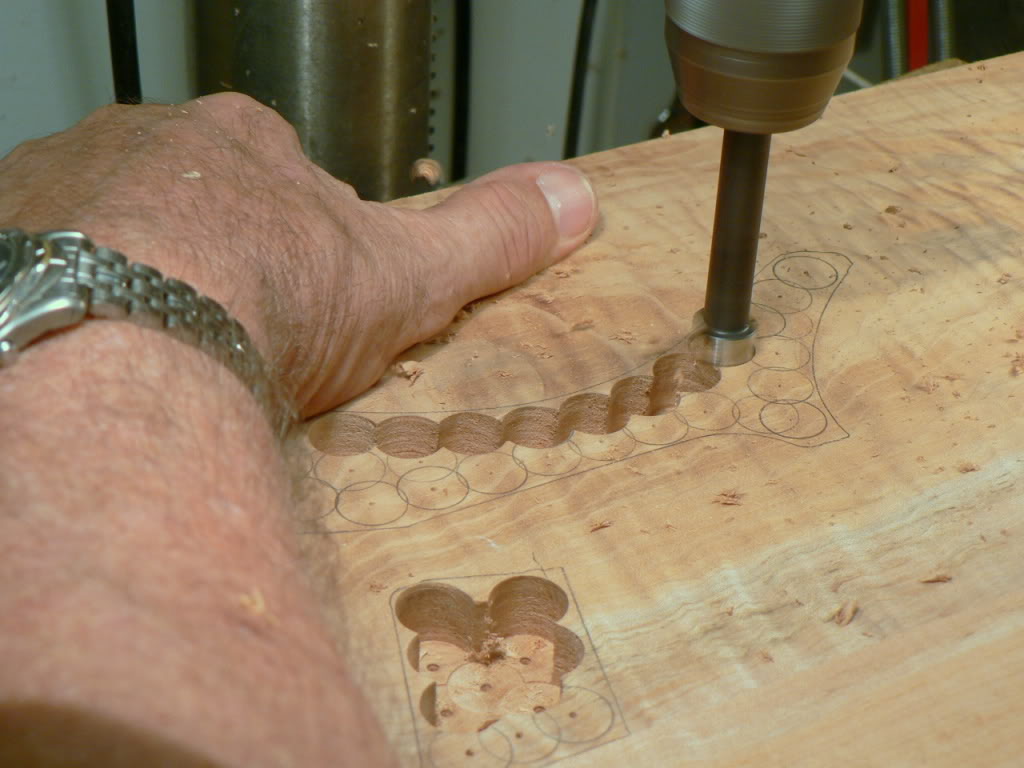
Then cleaning up with the router.
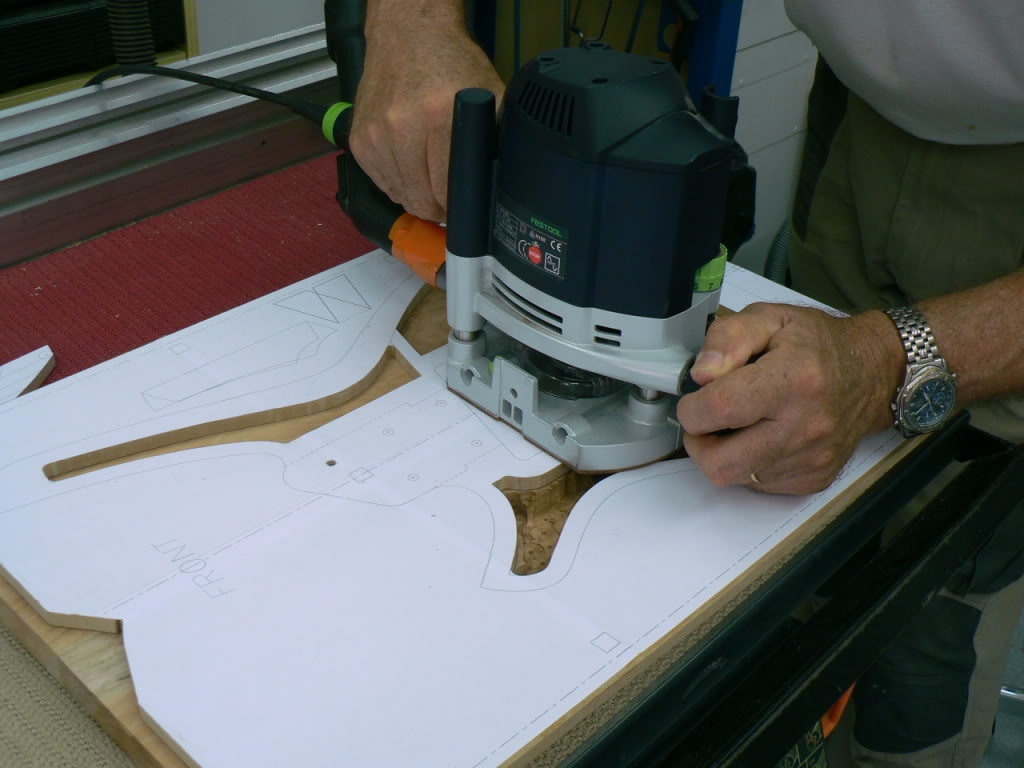
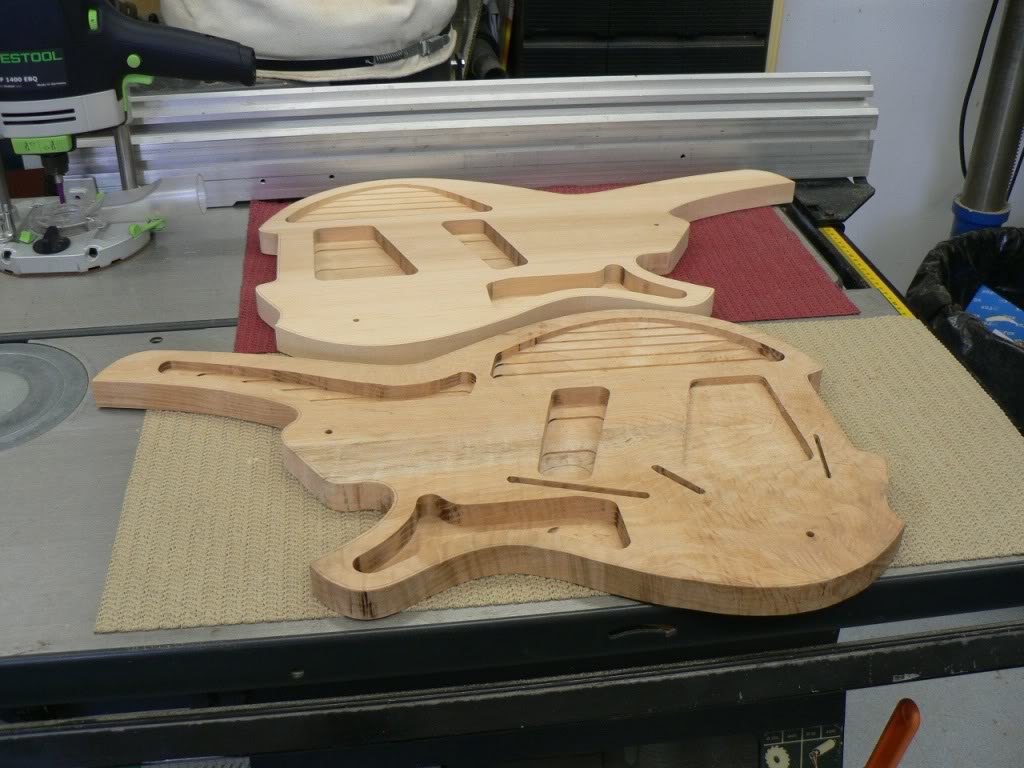
Here the cavities have all been routed.
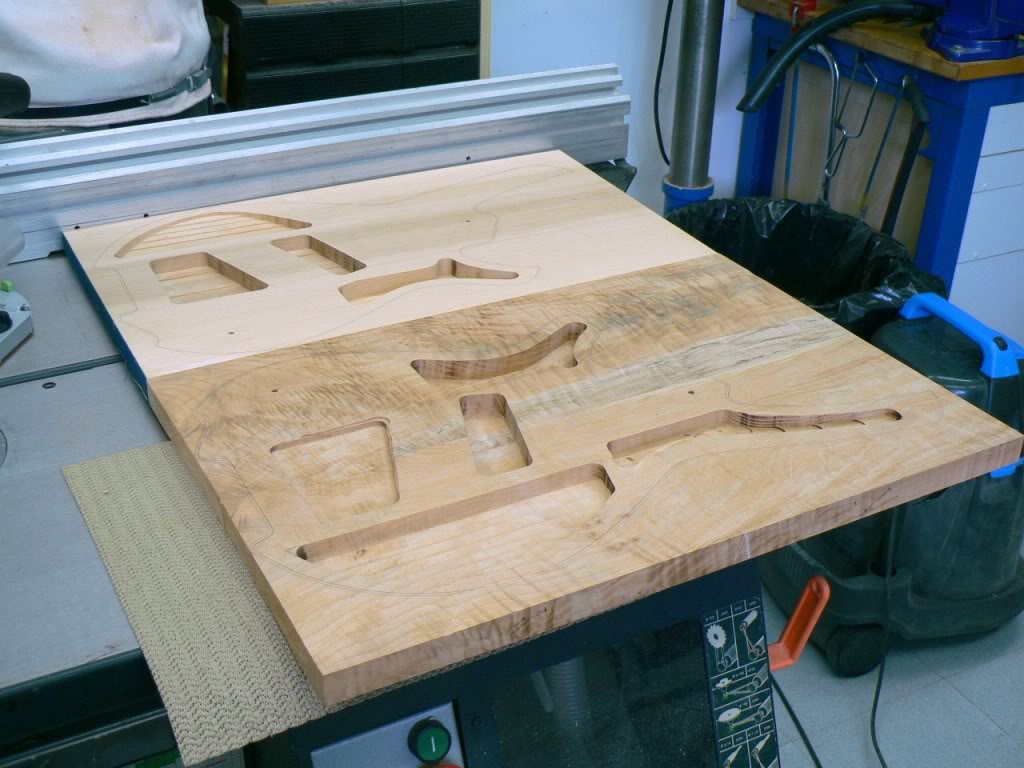
And the body profile cut out leaving about 2 to 3 mm extra all round. As you can see here the cavities vary in depth to allow for the carving on the outside of the body. I hope I got my calculations right!
So heres a photo of just about every clamp I own.
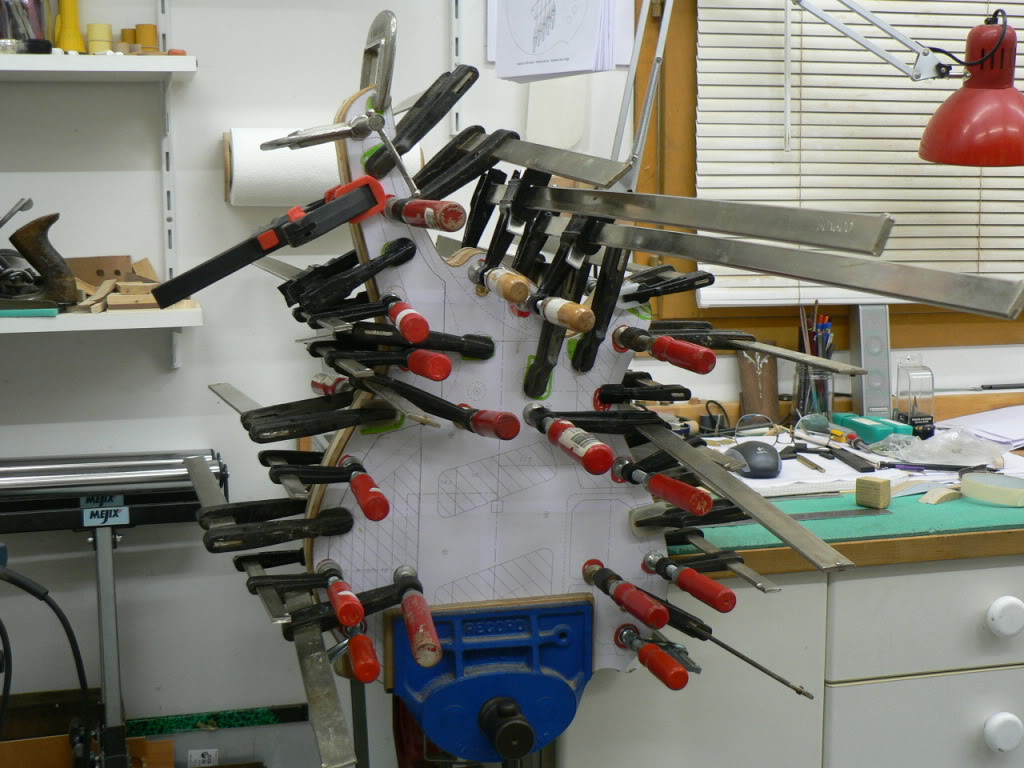
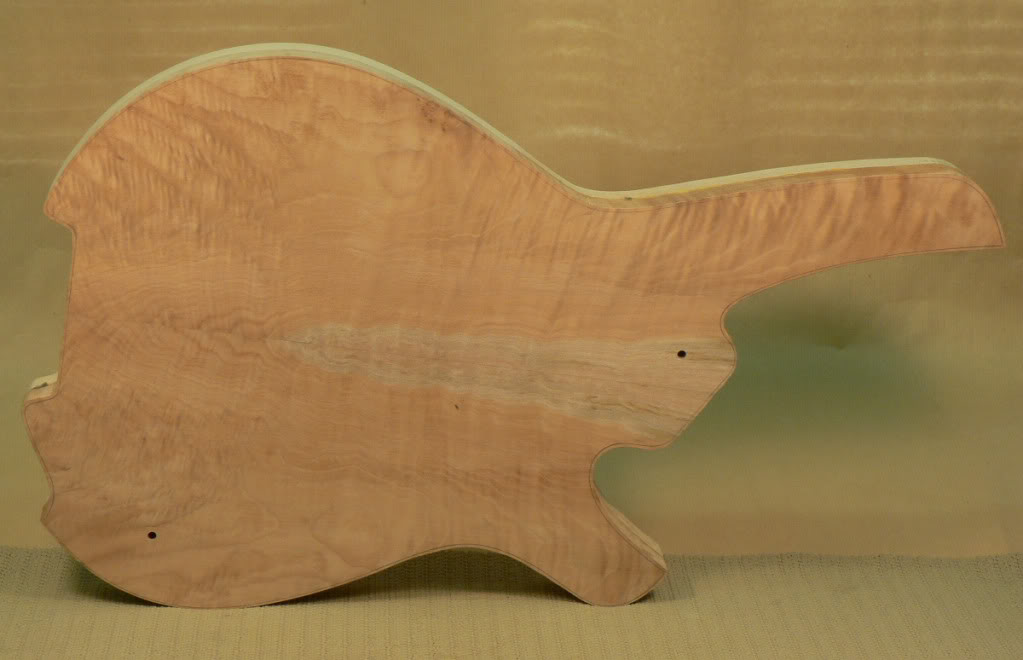
And this is what it looks like now.
So then I took one of the off-cuts and sliced it up. These are some of the slices.
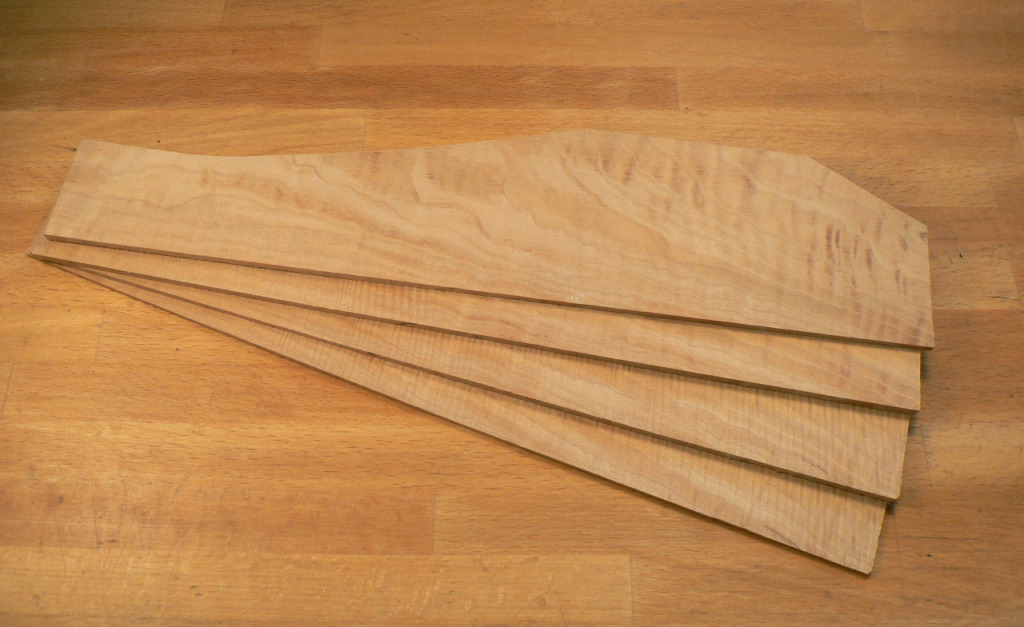
Heres a book-matched pair. I only have a small bench-top band saw and the blade wasnt new so it wasnt very happy about cutting 3 thick maple. You can see theres some ripple in the surface due to the blade vibrating. Its a shame really; because the more surface you have to sand off to get rid of the ripples, the less perfect the book-match becomes.
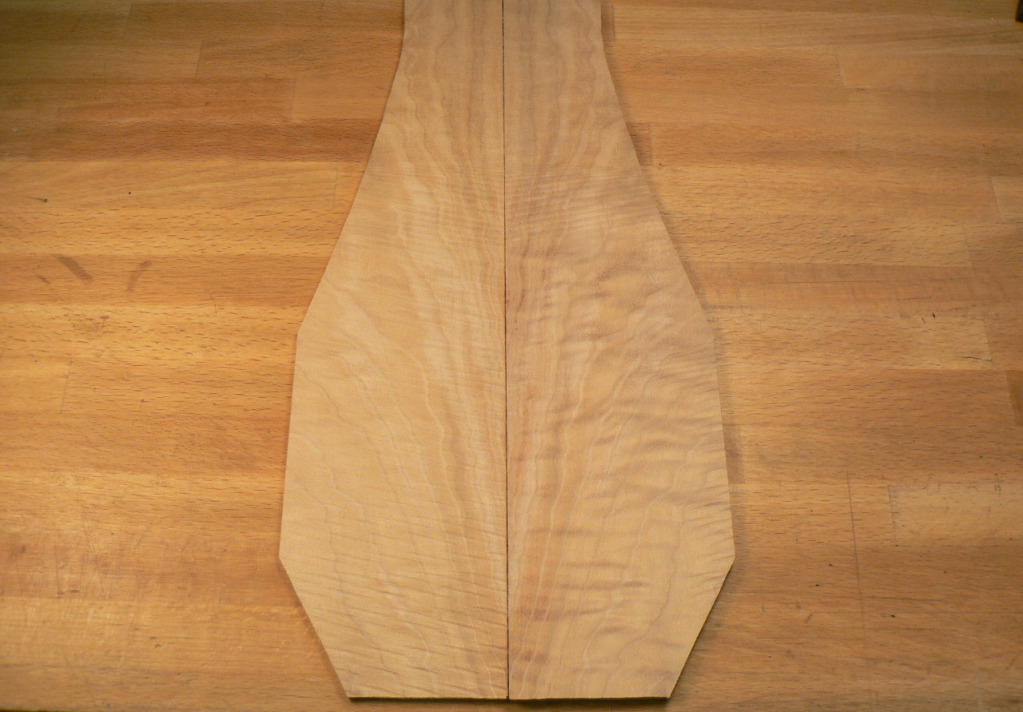
However, after jointing, gluing up, sanding and wiping with alcohol to show up the figure, this is what it looks like.
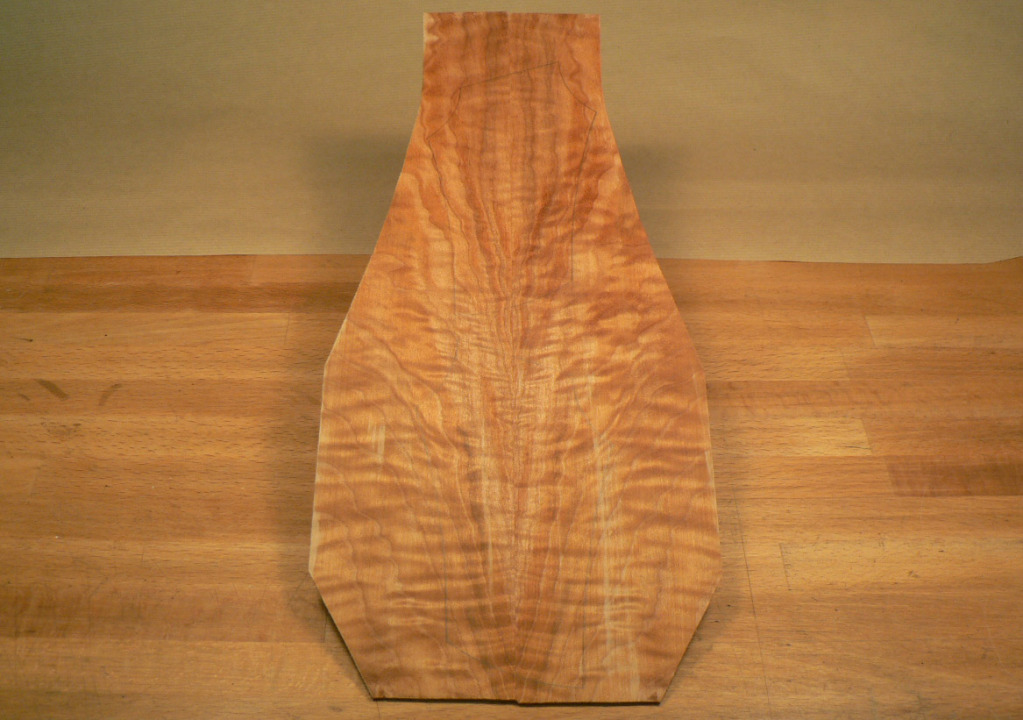
Thanks for looking.
Now I need to make a start on the body.
I bought the top wood about 7 or 8 years ago from Larry Davis but got distracted by another project each time I should have started on it. Its figured maple and about 7/8 thick.
The other body wood is alder from a French supplier and is in one piece. The alder was about 11/4 thick so I had to make a router sled to take it down to 7/8 but Im afraid I didnt take any photos of that.
As half the body is maple and I want to keep the weight down as much as possible Ive decided to hollow it out wherever possible. So here I am, making a start with a Forstner bit.
Then cleaning up with the router.
Here the cavities have all been routed.
And the body profile cut out leaving about 2 to 3 mm extra all round. As you can see here the cavities vary in depth to allow for the carving on the outside of the body. I hope I got my calculations right!
So heres a photo of just about every clamp I own.
And this is what it looks like now.
So then I took one of the off-cuts and sliced it up. These are some of the slices.
Heres a book-matched pair. I only have a small bench-top band saw and the blade wasnt new so it wasnt very happy about cutting 3 thick maple. You can see theres some ripple in the surface due to the blade vibrating. Its a shame really; because the more surface you have to sand off to get rid of the ripples, the less perfect the book-match becomes.
However, after jointing, gluing up, sanding and wiping with alcohol to show up the figure, this is what it looks like.
Thanks for looking.
Now I can go back and finish the tuner block cover.
Although I dont have any photos of the process, I then milled out a shallow recess in the cover about 1.5mm (1/16) deep and glued in a piece of the book-matched maple body wood.
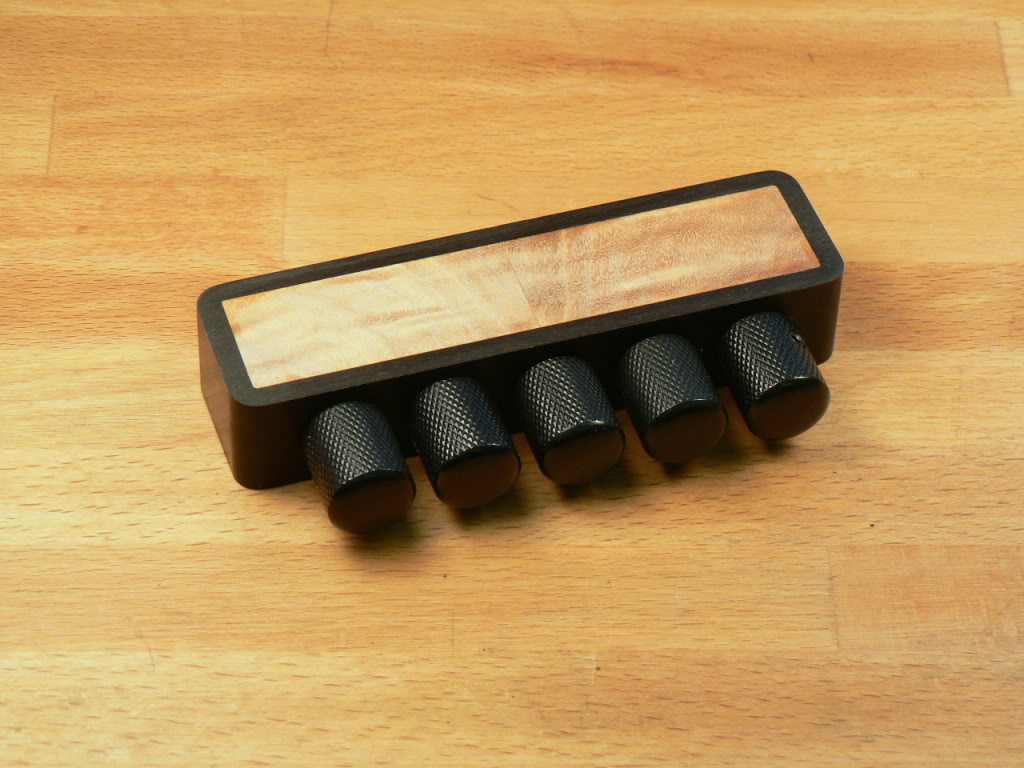
The final operation was to plane and sand a 3mm radius round the top edge of the cover.
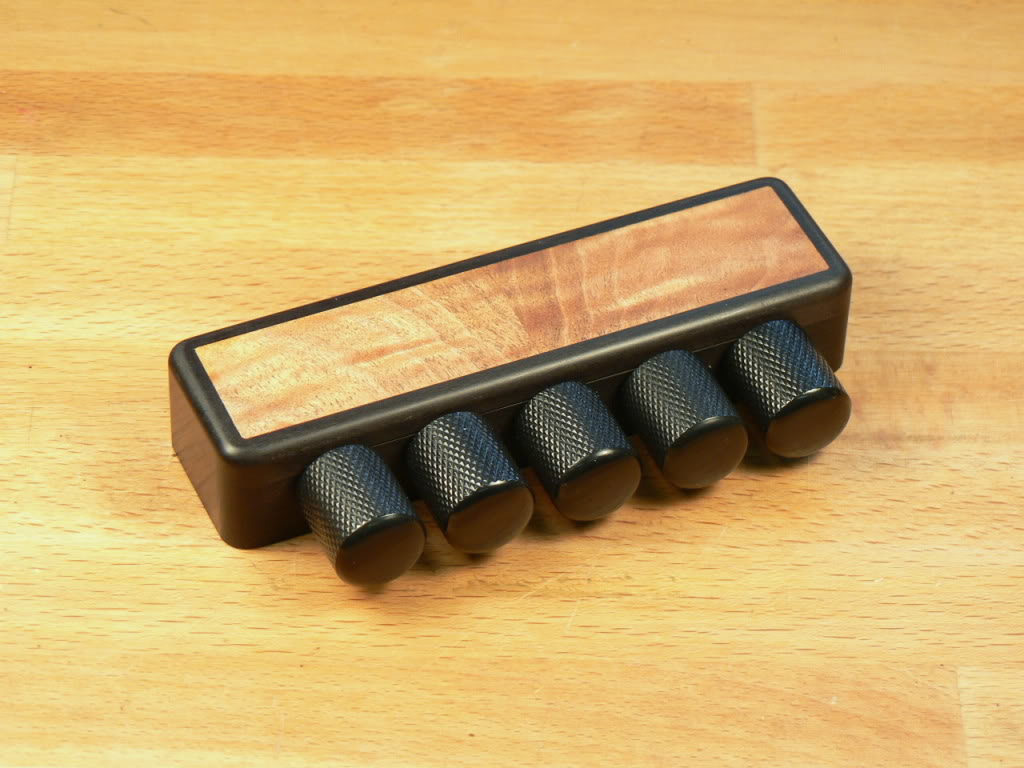
Now to make a start on the pickup covers.
Although I dont have any photos of the process, I then milled out a shallow recess in the cover about 1.5mm (1/16) deep and glued in a piece of the book-matched maple body wood.
The final operation was to plane and sand a 3mm radius round the top edge of the cover.
Now to make a start on the pickup covers.

Thank you jmorbita and HammerHed. (I wish people would use a signature with their real first names.)
Here's the next installment.
The first step was to cut another piece off that lump of ebony (see post #50) and transform this into 4 strips each with a small rebate along one edge.
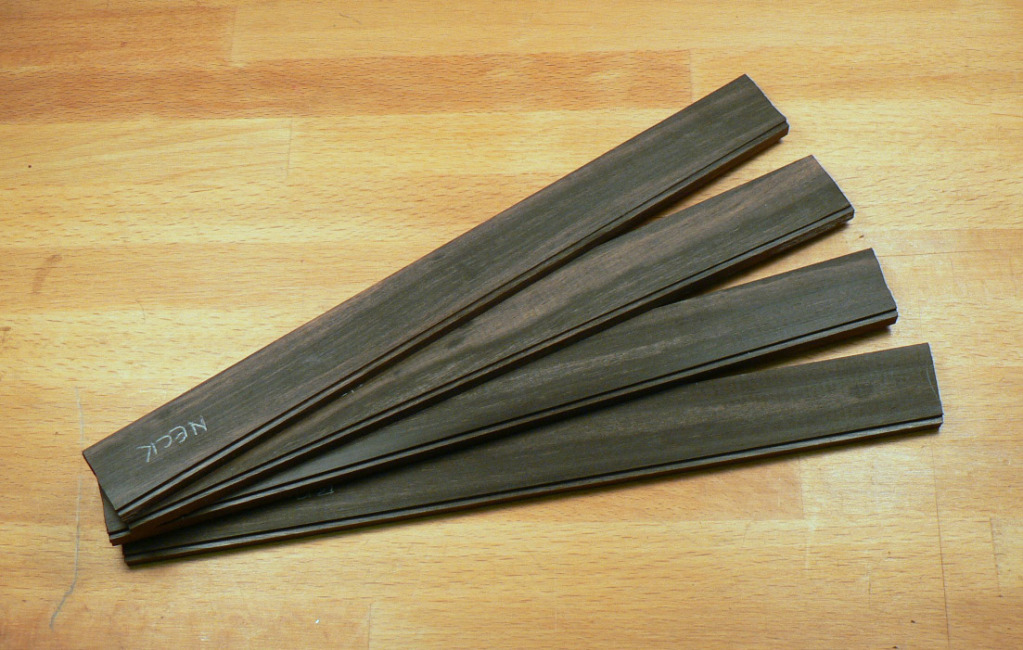
Each strip was cut into over-size lengths and the ends bevelled one corner at a time to create a mitre joint.
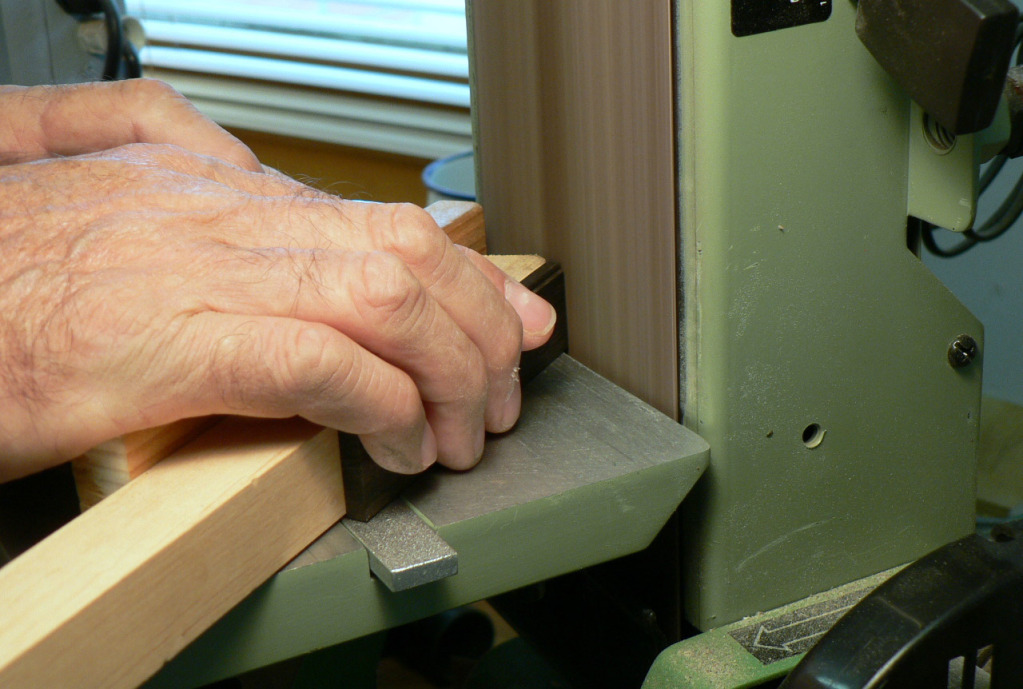
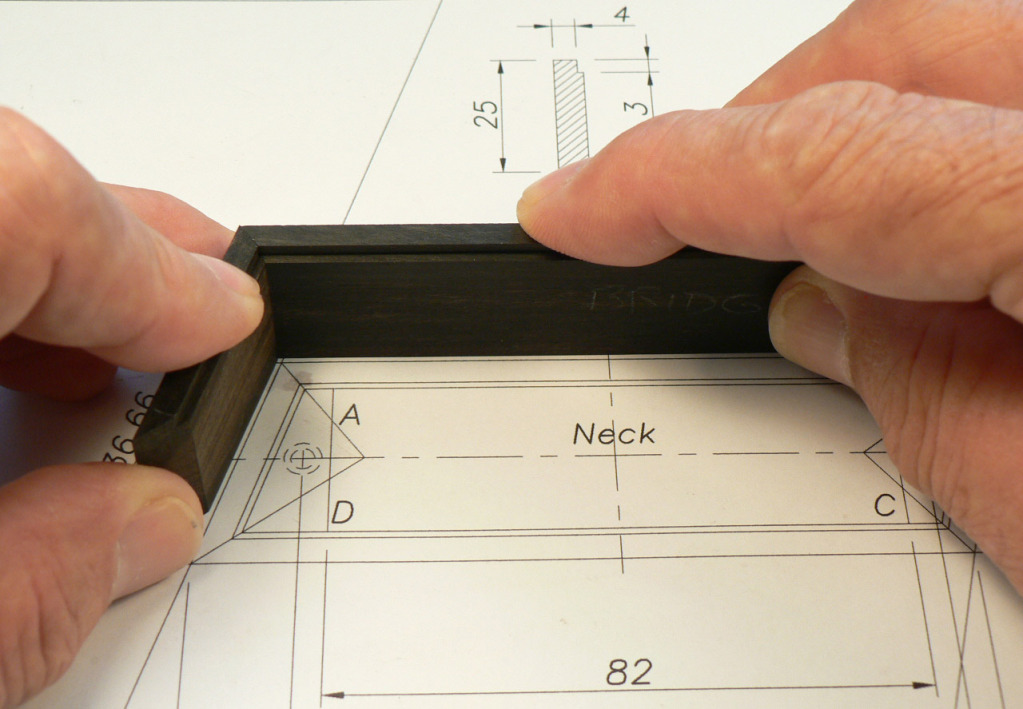
To make sure my mitred corners were accurate I checked them on a print of the drawing. I designed the pickups to follow the progression of the fanned frets and the ends are parallel to the outer strings; so, not only are the pickups different lengths, none of the corners have the same angle. As the French say: why make it easy when you can make it complicated? Once the first corner was done, I started on the next corner but leaving the length over-size. Once I got the angle right I could then reduce the length of the piece between first and second corners to its correct length and start on the third corner, etc., etc.
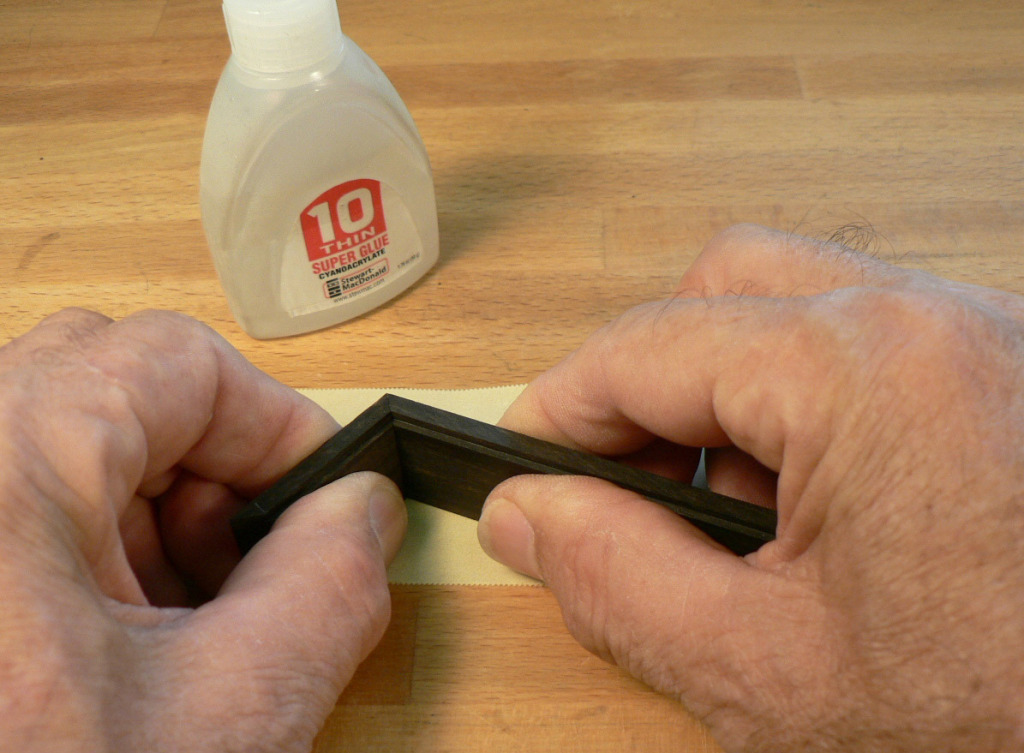
I then simply super-glued the pieces together. If you have perfectly mating surfaces it makes a surprisingly strong joint. I know this because of the effort it took to get one apart when I got the angle wrong.
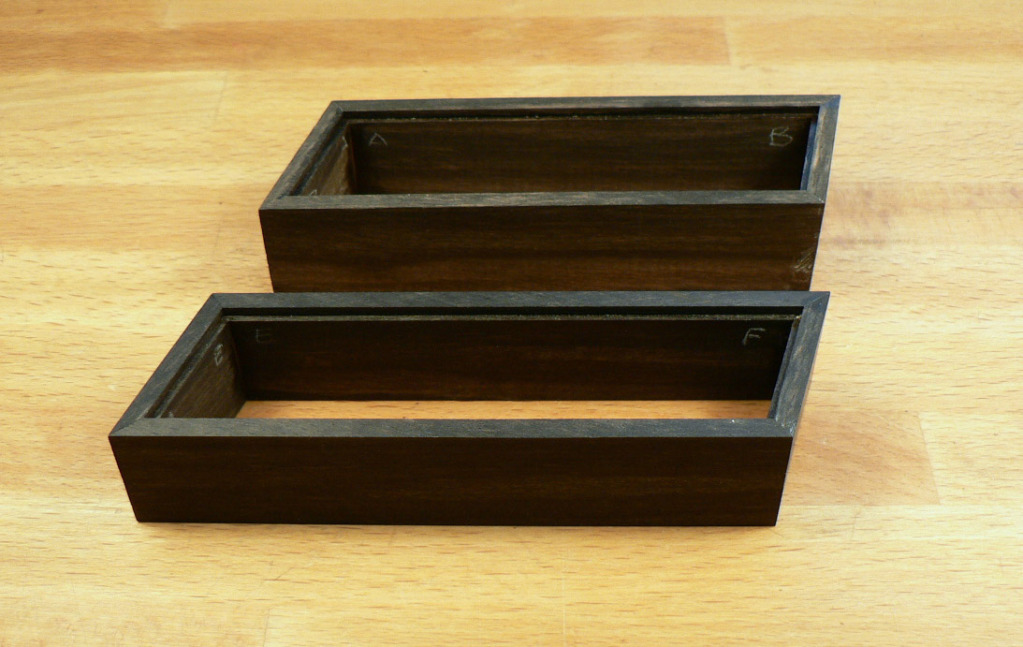
Here are the two frames glued up.
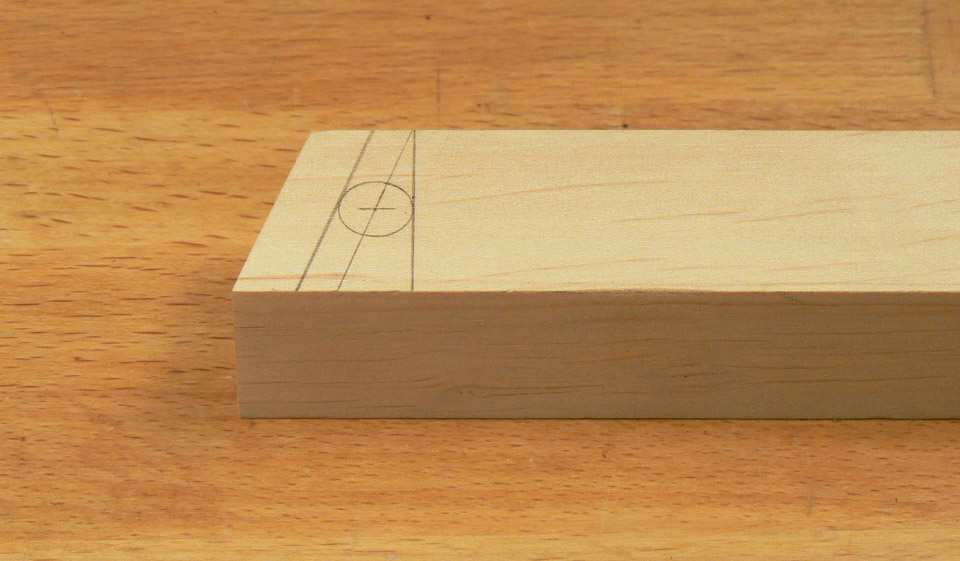
Although the shape of the covers follows the progression of the fan and the spread of the strings, the pickups themselves only need a rectangular space which allows me to glue in reinforcement at each end. I made these from an off-cut of alder from the body. After sanding the block until it just slid into one of the pickup covers, and the end until it matched the angle, the shape of the block was drawn onto it leaving some spare at the end.
Then a hole for a brass threaded insert was drilled all the way through.
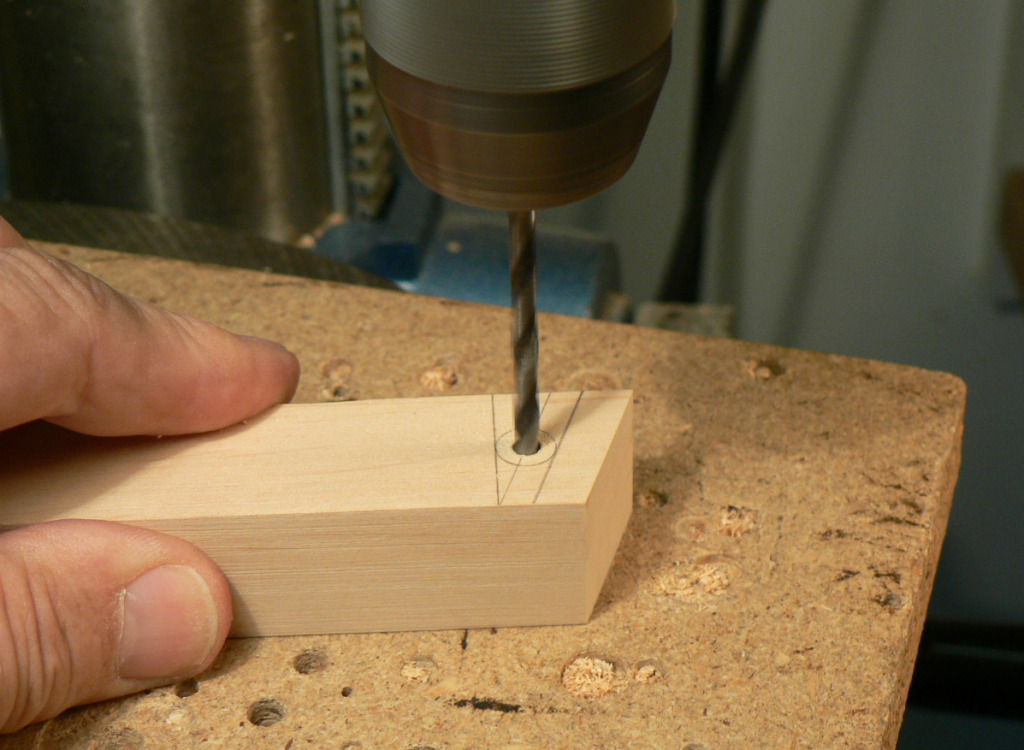
These inserts dont screw in. Theyre actually made for soft plastics and are just pressed in. The easiest way is to use one of the screws with the head cut off.
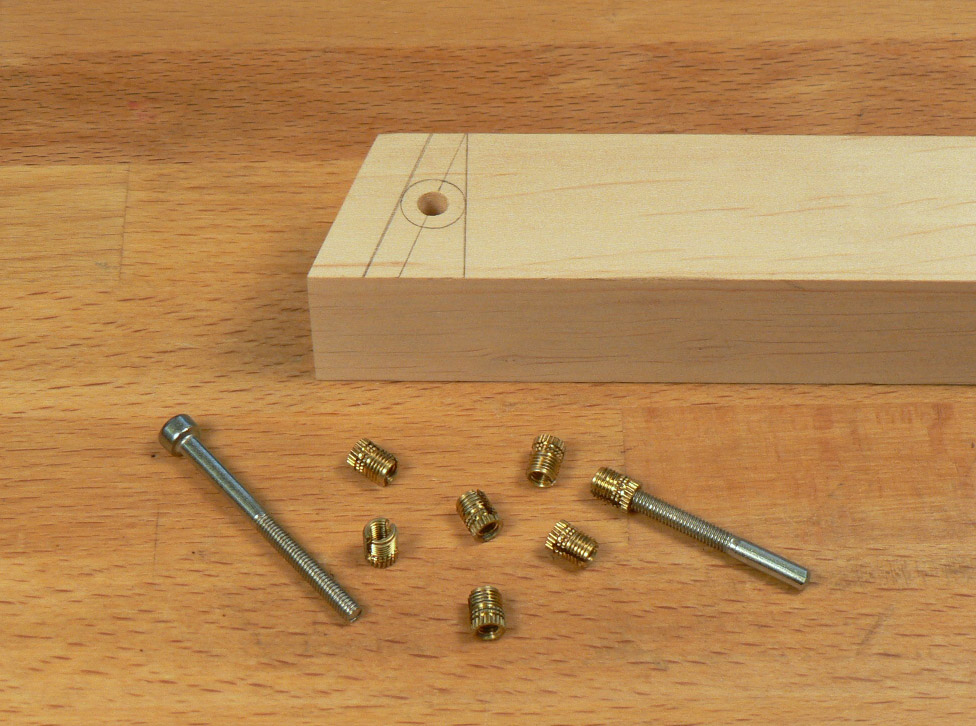
Screw the insert onto the screw thread and fix the thread in the drill chuck.
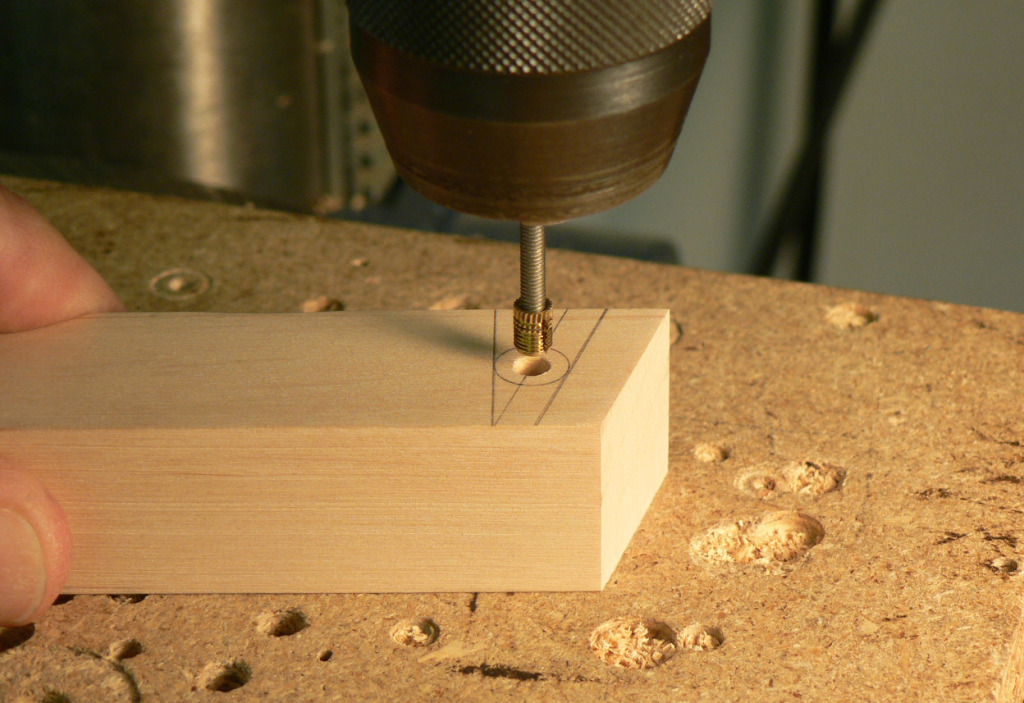
And press! The surplus was left on the end to prevent the wood from breaking out at this point (which it did on the first trial piece!). I also wicked a drop of thin CA around each insert.
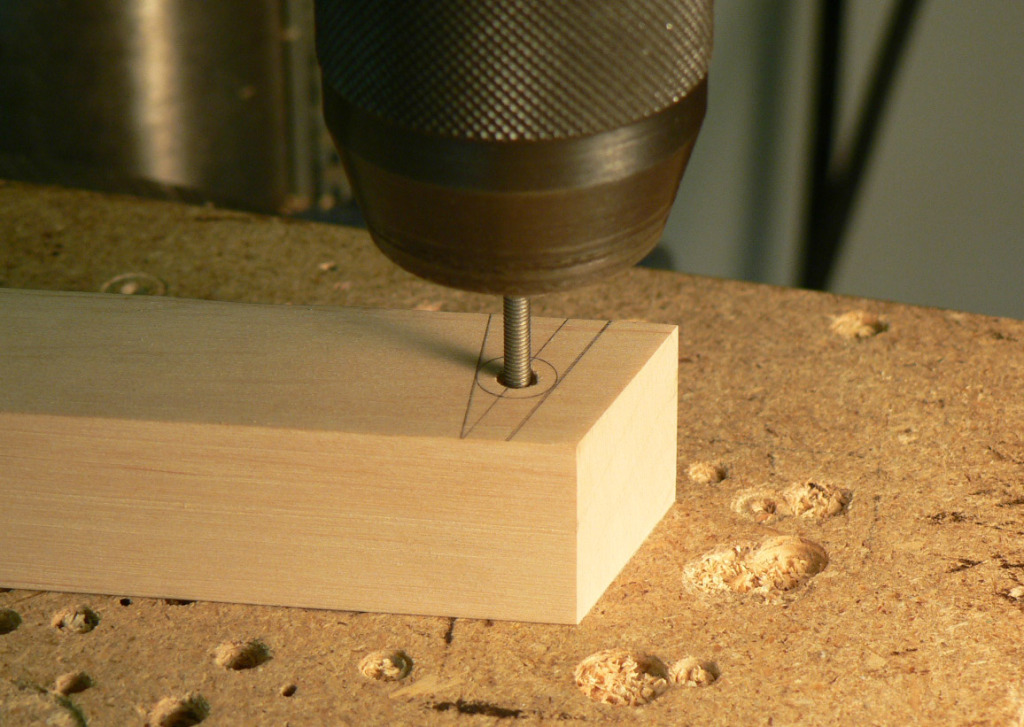
The surplus is then cut off and the end sanded and the piece cut off.
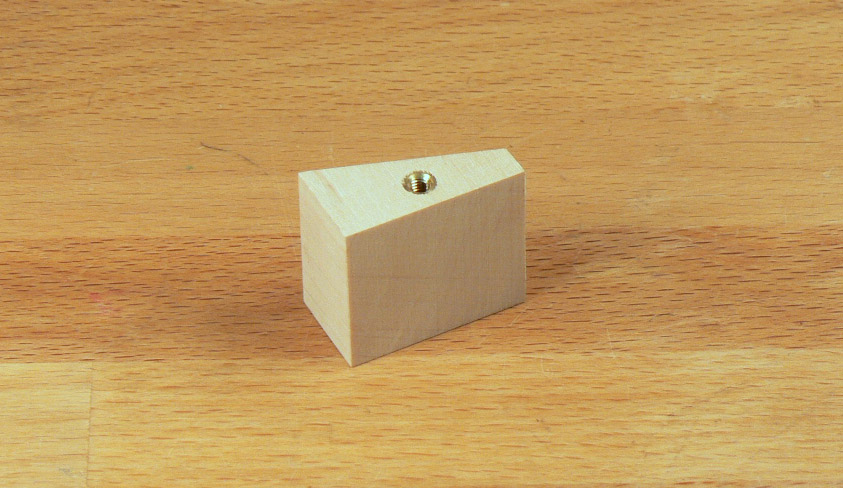
At this point I cut and fit another piece of the book-matched top wood into the rebate in the top of the covers, but I forgot to take any photos. The blocks were then glued in place, again using CA.
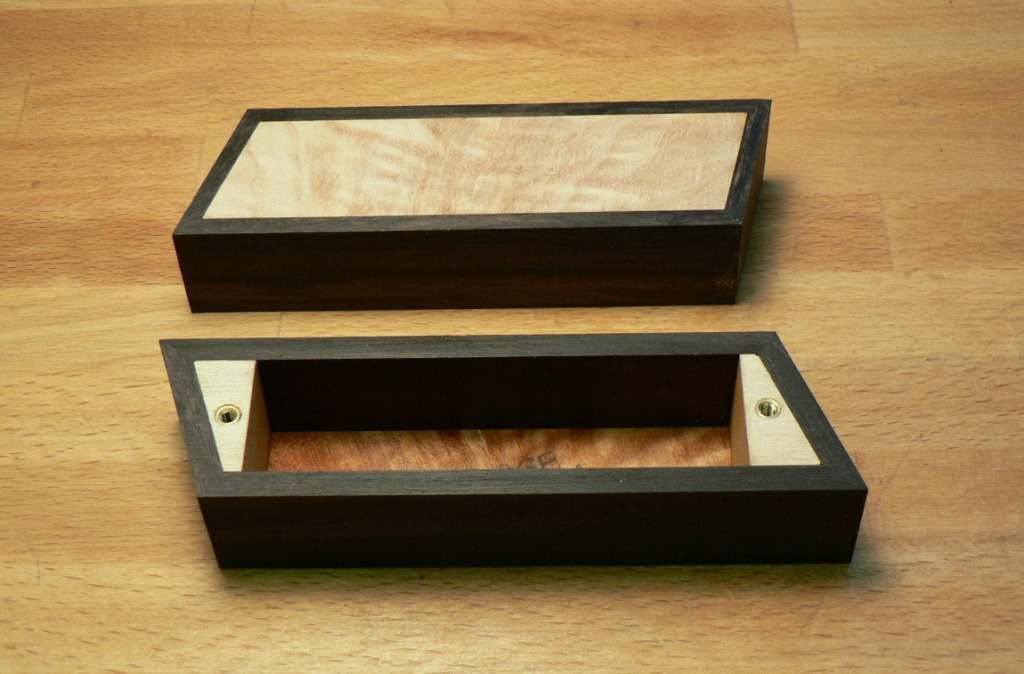
After that I sanded a 3mm radius around all the corners and put several coats of Liberon finishing oil on them. When that had had time to harden I sent them off to Aaron Armstrong to have pickups made and fitted, and this is what they looked like when they came back.
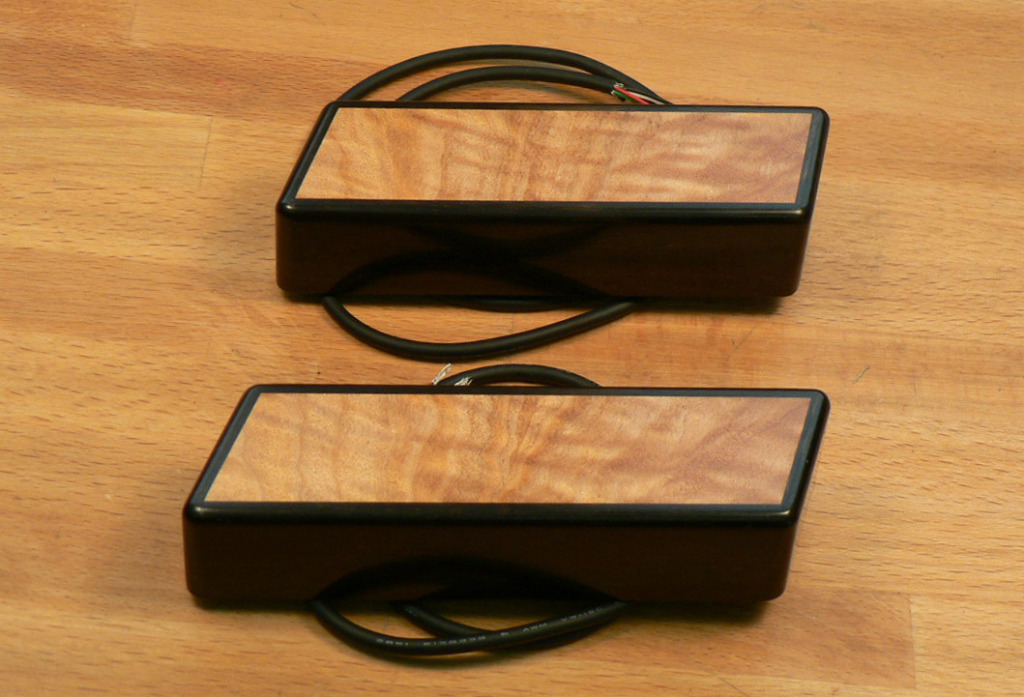
)Here's the next installment.
The first step was to cut another piece off that lump of ebony (see post #50) and transform this into 4 strips each with a small rebate along one edge.
Each strip was cut into over-size lengths and the ends bevelled one corner at a time to create a mitre joint.
To make sure my mitred corners were accurate I checked them on a print of the drawing. I designed the pickups to follow the progression of the fanned frets and the ends are parallel to the outer strings; so, not only are the pickups different lengths, none of the corners have the same angle. As the French say: why make it easy when you can make it complicated? Once the first corner was done, I started on the next corner but leaving the length over-size. Once I got the angle right I could then reduce the length of the piece between first and second corners to its correct length and start on the third corner, etc., etc.
I then simply super-glued the pieces together. If you have perfectly mating surfaces it makes a surprisingly strong joint. I know this because of the effort it took to get one apart when I got the angle wrong.
Here are the two frames glued up.
Although the shape of the covers follows the progression of the fan and the spread of the strings, the pickups themselves only need a rectangular space which allows me to glue in reinforcement at each end. I made these from an off-cut of alder from the body. After sanding the block until it just slid into one of the pickup covers, and the end until it matched the angle, the shape of the block was drawn onto it leaving some spare at the end.
Then a hole for a brass threaded insert was drilled all the way through.
These inserts dont screw in. Theyre actually made for soft plastics and are just pressed in. The easiest way is to use one of the screws with the head cut off.
Screw the insert onto the screw thread and fix the thread in the drill chuck.
And press! The surplus was left on the end to prevent the wood from breaking out at this point (which it did on the first trial piece!). I also wicked a drop of thin CA around each insert.
The surplus is then cut off and the end sanded and the piece cut off.
At this point I cut and fit another piece of the book-matched top wood into the rebate in the top of the covers, but I forgot to take any photos. The blocks were then glued in place, again using CA.
After that I sanded a 3mm radius around all the corners and put several coats of Liberon finishing oil on them. When that had had time to harden I sent them off to Aaron Armstrong to have pickups made and fitted, and this is what they looked like when they came back.

Great looking bass. Please consider one detail: the headstock string anchor arrangment. Please consider making the B string anchor farther from the nut so there is less break angle over the nut to avoid stressing the string and to facilitate smoother tuning.
Great looking bass. Please consider one detail: the headstock string anchor arrangment. Please consider making the B string anchor farther from the nut so there is less break angle over the nut to avoid stressing the string and to facilitate smoother tuning.
You do understand that it's tuned at the bridge, right?
Looking awesome! so many things I'd like to copy for my next build!
off topic: when I first registered on talkbass, I didn't know what nutjobs I'd meet on the site, hence I was reluctant to use my real name. I'd change my user name now if I knew how.
Thank you jmorbita and HammerHed. (I wish people would use a signature with their real first names.
off topic: when I first registered on talkbass, I didn't know what nutjobs I'd meet on the site, hence I was reluctant to use my real name.
I'd change my user name now if I knew how.


