
Enjoy the benefits of a premium membership!
Upgrade Account
-
TalkBass has been independent since 1998. Add your voice.
Create a free account to reply to discussions, view embedded media, and browse with fewer display ads.
Join free Log in
Want zero display ads or expanded classifieds tools? Compare plans.
You are using an out of date browser. It may not display this or other websites correctly.
You should upgrade or use an alternative browser.
You should upgrade or use an alternative browser.
5 string fretless showcase: Habanero V
- Thread starter adam.beauchene
- Start date
More options
Who Replied?
OK senseis, I added a Vref to the second gain stage and went through and reorganized the schematic to make it a little more clear regarding who's-who-in-the-zoo. Please let me know if you see any more errors, or have any more input regarding component values. If this looks good, I'll get crackin'. I plan on using all metal film resistors and polypropylene/polyester film caps with the exception of C5 that, as I understand, makes opamps most happy when it's tantalum.
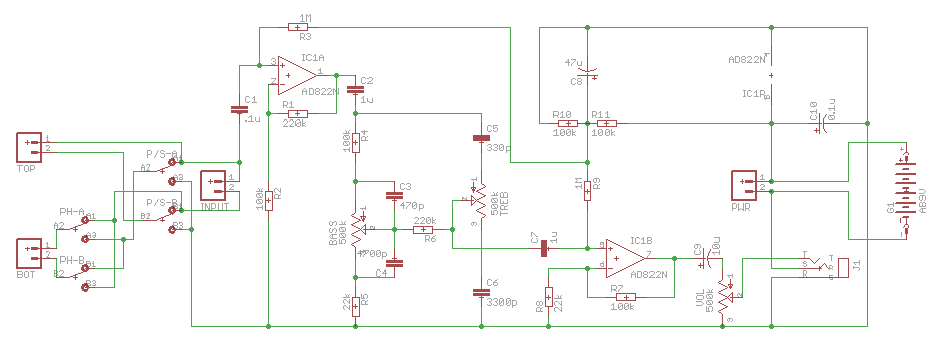
So I'm hoping we're all in agreement that the above should work.  I just uploaded this to www.batchpcb.com:
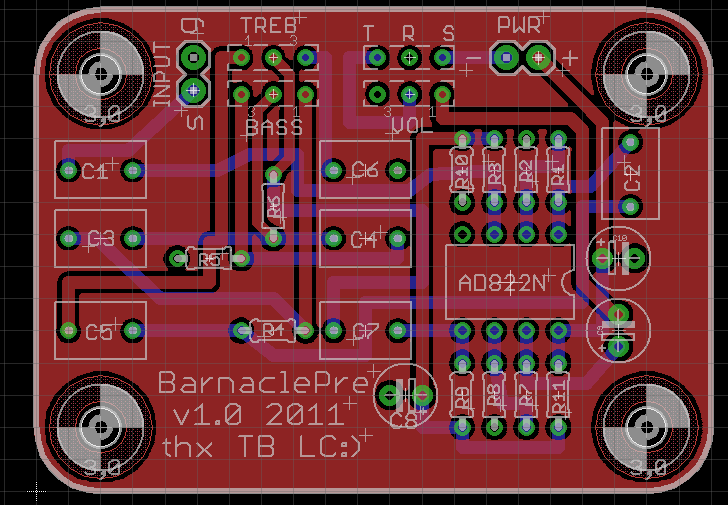
It's about 2.1" wide, and 1.5" high. I'm going with miniature 1/8w metal film resistors, so I saved a lot of space. Once it passes the design rule check, I'll order a few. Only 8 bucks a board! They aren't fast though. My last project board took about 3 weeks. In the mean time, I'll run the pickup through the switches and straight out to the jack.
EDIT: I've also been doing some woodworking. I kinda blew it on the finish, I put up some big-arse lights to keep things warm while I put on my last coat of KTM-9 and it kind of made things worse. And now I'm out of KTM-9...I might just roll with an ugly finish. I want to get a little HVLP next, so I'll have a first project to refinish. Saving my pennies for that little Devilbiss SRI-W, It'll be a while. Anyway, pics soon.
EDIT again: Some of you more astute readers might notice that the ground plane isn't connected to the components it should be. Eagle seems to be weird if you rip up a ground plane polygon and try to do it over...anyway, easy fix, the finished board will barely look different.
I just uploaded this to www.batchpcb.com:It's about 2.1" wide, and 1.5" high. I'm going with miniature 1/8w metal film resistors, so I saved a lot of space. Once it passes the design rule check, I'll order a few. Only 8 bucks a board! They aren't fast though. My last project board took about 3 weeks. In the mean time, I'll run the pickup through the switches and straight out to the jack.
EDIT: I've also been doing some woodworking. I kinda blew it on the finish, I put up some big-arse lights to keep things warm while I put on my last coat of KTM-9 and it kind of made things worse. And now I'm out of KTM-9...I might just roll with an ugly finish. I want to get a little HVLP next, so I'll have a first project to refinish. Saving my pennies for that little Devilbiss SRI-W, It'll be a while. Anyway, pics soon.
EDIT again: Some of you more astute readers might notice that the ground plane isn't connected to the components it should be. Eagle seems to be weird if you rip up a ground plane polygon and try to do it over...anyway, easy fix, the finished board will barely look different.

Was your finishing issue bad enough that you cant sand it flat with some high grit paper and buff out what you have? I am not familiar with the KTM product so if it is a layer building finish like poly then you might have ghost lines left from the finish. If it is a "hot" finish that melts into the previous layers like lacquer buffing it out would probably work as long as you dont sand through the finish. Whatever you decide, good luck with it.

Musiclogic
Commercial User
- Aug 6, 2005
- 6,505
- 75
- 60
- Disclosures
- Owner/Builder: HJC Customs USA, The Cool Lute, C G O
Thanks for the encouragement, guys...Big B, it is a 'hot' type finish, even if you wait days between coats you can wipe it down with alcohol to reactivate it, and I have been doing that.
Here's my setup:
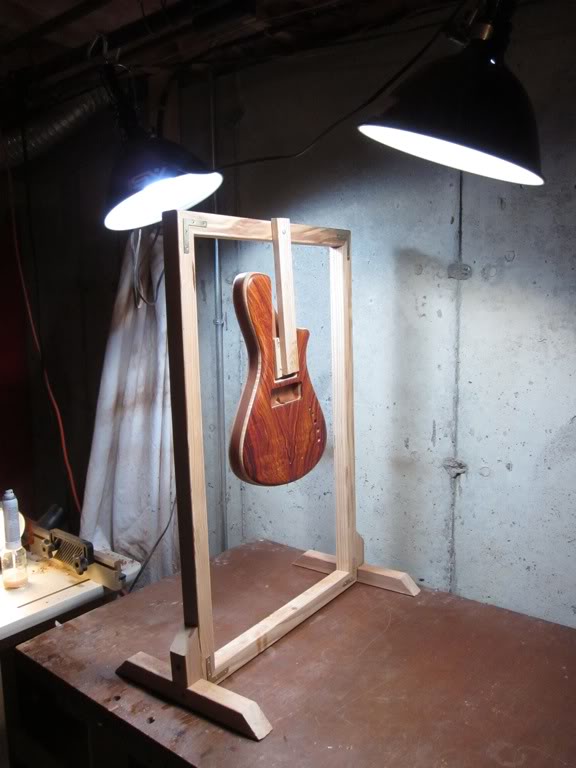
I thought keeping things warm would allow the finish to flow out better (no sprayer, I'm using a foam brush) and for the most part the plan worked well:
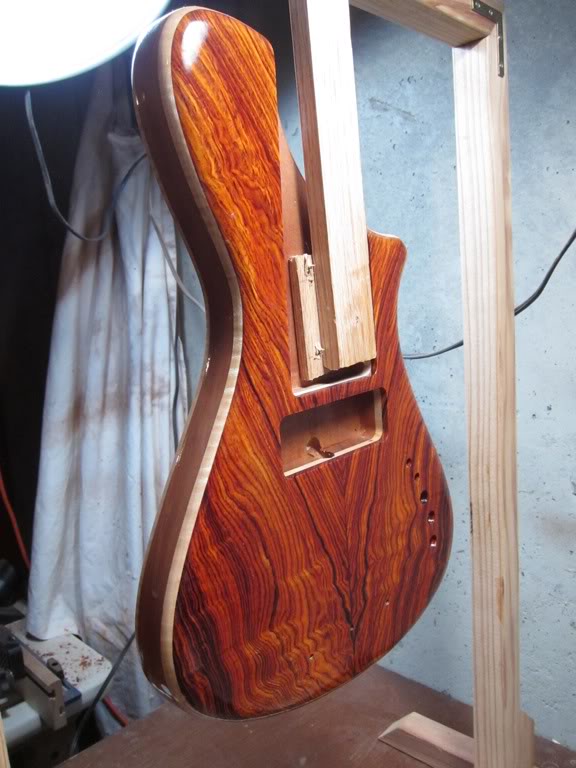
But on the last coat I think things got a little too warm, the finish seemed to dry as soon as it hit the bass, no chance to flow out:
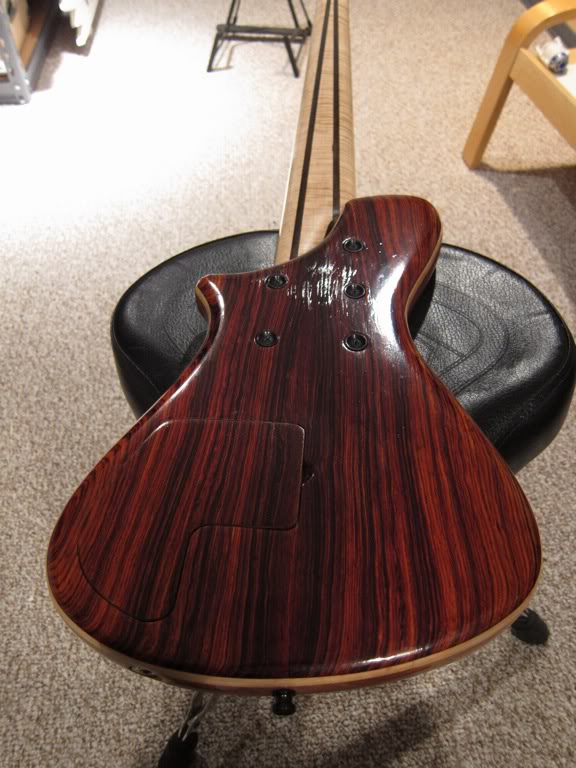
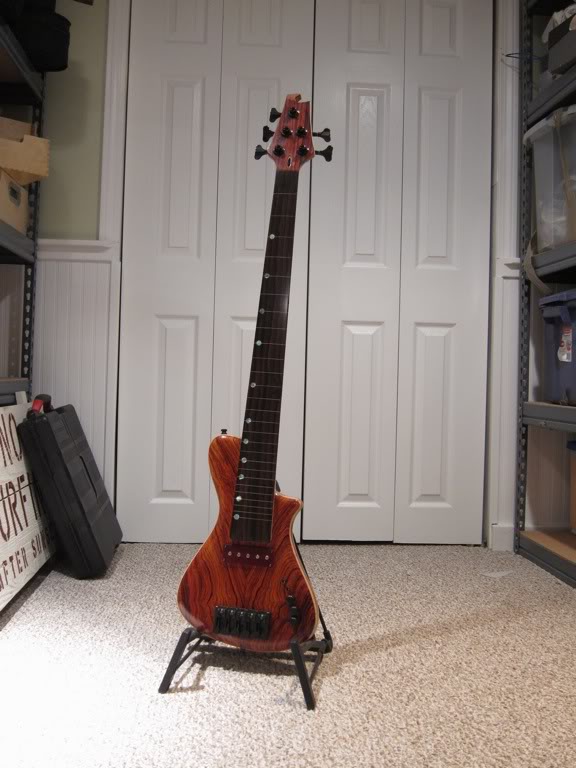
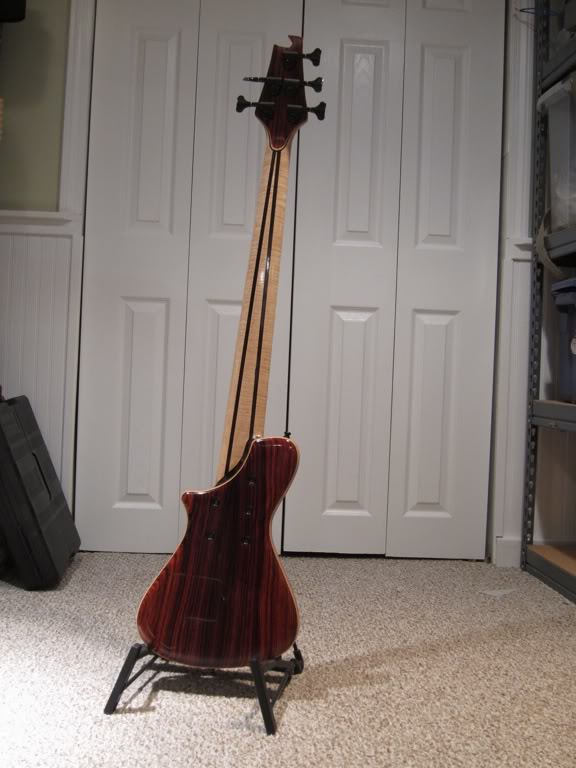
And now I'm out of finish. I may try sanding it out, I've been doing that between coats but it seems that 320 is a bit too aggressive, I blow through in spots pretty easily. I'll stop at the auto store later and get some 400/600/800 wet-or-dry. Here it is all bolted together, though.
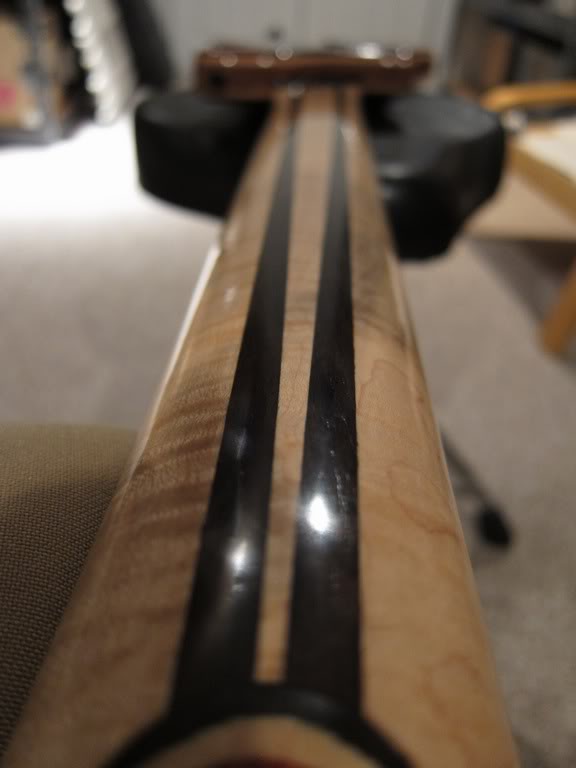
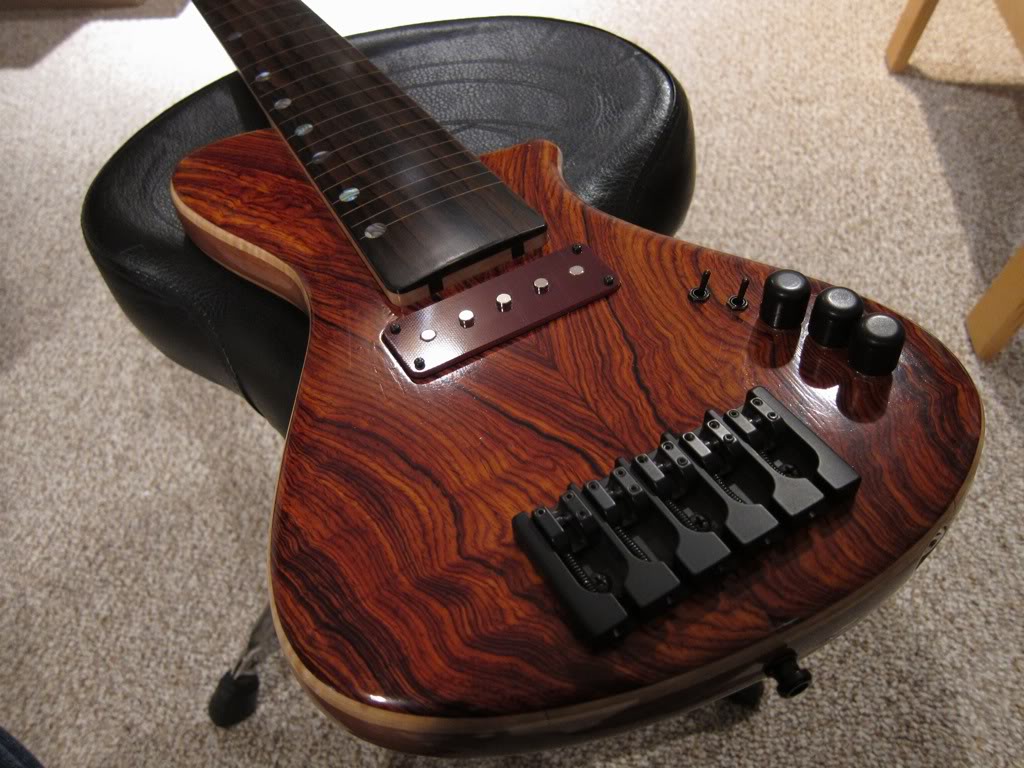
Here's my setup:
I thought keeping things warm would allow the finish to flow out better (no sprayer, I'm using a foam brush) and for the most part the plan worked well:
But on the last coat I think things got a little too warm, the finish seemed to dry as soon as it hit the bass, no chance to flow out:
And now I'm out of finish. I may try sanding it out, I've been doing that between coats but it seems that 320 is a bit too aggressive, I blow through in spots pretty easily. I'll stop at the auto store later and get some 400/600/800 wet-or-dry. Here it is all bolted together, though.
Man, really is a sharp looking bass all put together. As far as I can see the edges dont look so bad, it's more the flat areas that look uneven. I think 320 is probably too low a grit as well. Maybe try some 600 grit and wetsand it with a flat sanding block. The block will keep you from sanding anything but the high spots and as long as you stay away from the edges you shouldnt have a problem sanding through the finish. (you do have to sand the curves a little to keep the scratch pattern consistent but I suggest giving the curves a little extra attention.)
Once the finish is flat at 600 wetsand your way through 1000 to 1500 grit to hide your scratches. From there a bit of hand polishing with some swirl remover will give you a much better final result than the untouched final coat would be any way. If I am telling you stuff you already know (and knowing me I probably am) then my apologies for barging in here and throwing my opinion around but I hate to see such a pretty bass have a finish issue after all your hard work.
Once the finish is flat at 600 wetsand your way through 1000 to 1500 grit to hide your scratches. From there a bit of hand polishing with some swirl remover will give you a much better final result than the untouched final coat would be any way. If I am telling you stuff you already know (and knowing me I probably am) then my apologies for barging in here and throwing my opinion around
but I hate to see such a pretty bass have a finish issue after all your hard work.
Man, really is a sharp looking bass all put together. As far as I can see the edges dont look so bad, it's more the flat areas that look uneven. I think 320 is probably too low a grit as well. Maybe try some 600 grit and wetsand it with a flat sanding block. The block will keep you from sanding anything but the high spots and as long as you stay away from the edges you shouldnt have a problem sanding through the finish. (you do have to sand the curves a little to keep the scratch pattern consistent but I suggest giving the curves a little extra attention.)
Once the finish is flat at 600 wetsand your way through 1000 to 1500 grit to hide your scratches. From there a bit of hand polishing with some swirl remover will give you a much better final result than the untouched final coat would be any way. If I am telling you stuff you already know (and knowing me I probably am) then my apologies for barging in here and throwing my opinion around
Haha, no, I post here because I WANT opinions. And to fill in the gaps in what I know and what I think I know
I am the first to admit, I am weak at applying finish, it is one thing that I have not yet applied myself to learning well so I appreciate your input. I'll do that- I'll start at 600. Thanks! I'm looking forward to getting better at finish of the next couple of years, it is something that would be benefit almost all of my hobbies/diversions.
Musiclogic
Commercial User
- Aug 6, 2005
- 6,505
- 75
- 60
- Disclosures
- Owner/Builder: HJC Customs USA, The Cool Lute, C G O
here is some other advice for ya Adam. LOL Mix up a bowl of water with a drop or 2 of dishsoap. Wetsand with this, helps stop the paper from loading so much, and you can wash off the residue with a finger, and keep using the same piece longer. Also, get a piece of styrofoam(from anything you bought packed with styrofoam) cut all of the flat pieces into 2" x 2" blocks. Use these as your sanding blocks for wetsanding. They are hard enough to keep flat, but not so hard that they become difficult around edges and roundovers, thus making sand through on these areas less likely with a soft touch. It still looks great. Nice job
here is some other advice for ya Adam. LOL Mix up a bowl of water with a drop or 2 of dishsoap. Wetsand with this, helps stop the paper from loading so much, and you can wash off the residue with a finger, and keep using the same piece longer. Also, get a piece of styrofoam(from anything you bought packed with styrofoam) cut all of the flat pieces into 2" x 2" blocks. Use these as your sanding blocks for wetsanding. They are hard enough to keep flat, but not so hard that they become difficult around edges and roundovers, thus making sand through on these areas less likely with a soft touch. It still looks great. Nice job
Sweet, thanks again!
....Also, get a piece of styrofoam(from anything you bought packed with styrofoam) cut all of the flat pieces into 2" x 2" blocks. Use these as your sanding blocks for wetsanding. They are hard enough to keep flat, but not so hard that they become difficult around edges and roundovers, thus making sand through on these areas less likely with a soft touch.
You may also already know this trick, but for edges and such, you can tape a piece of relatively coarse sandpaper *grit up* (away from the bass) to the edge, and then rub the styrofoam on the sandpaper to create a custom sanding block. Once you have shaped the styrofoam, remove the coarse sandpaper taped to the bass and use your new sanding block with finer sandpaper to smooth the edge.
You have an excellent sense of design! I hesitate to make any suggestions on the design of the bass, because it is already really great, but, ever since you put in the abalone dots, I have wanted to see them on the top of the knobs as well, unifying the fretboard with the body, and unifying the "low string" side of the instrument with the "high string" side as well. This photo, with a little bit of glare on top of the knobs, gives me a hint of what that would look like. Of course, the abalone dots on the fretboard will be much less visible once a big fat bass string takes up residence.
The black knobs work great, though; they sleek and understated just as they are. I am just mentioning the abalone idea because it keeps coming back to me each time I check in on this build.
I am really enjoying this bass and this build! Thanks for sharing it with this community.
Joe
Musiclogic
Commercial User
- Aug 6, 2005
- 6,505
- 75
- 60
- Disclosures
- Owner/Builder: HJC Customs USA, The Cool Lute, C G O
...ever since you put in the abalone dots, I have wanted to see them on the top of the knobs as well, unifying the fretboard with the body, and unifying the "low string" side of the instrument with the "high string" side as well. This photo, with a little bit of glare on top of the knobs, gives me a hint of what that would look like. Of course, the abalone dots on the fretboard will be much less visible once a big fat bass string takes up residence.
The black knobs work great, though; they sleek and understated just as they are. I am just mentioning the abalone idea because it keeps coming back to me each time I check in on this build.
I am really enjoying this bass and this build! Thanks for sharing it with this community.
Joe
Thanks Joe! I had thought of doing that as well, for two reasons: 1. The abalone would provide a visual reference for where the center position is on the bass and treble knobs, the pot has no center detent. 2. These knobs are tiny, and I keep drilling the holes deeper to completely cover the pot, I'm afraid of drilling through them. If I drill for the abalone dots, then drill all the way through the knobs, the holes will have flat bottoms once the abalone is in place, and will sit a tiny bit lower.
No surfing after sunset....really???
Like, totally.

Oh my, she's a beauty. I love the Red Baron (aptly named) and I imagine it just sounds beastly. What kind of cover are you going for it (if that hasn't already been asked).
Again, awesome job.
Again, awesome job.
Sorry for lack of updates, day job has been keeping me busy.
I'm still waiting on my preamp pcb's, judging by the website they should ship out next week. I already have all the components, so they will go together quick. I'm really optimistic that the design will work, but we'll see.
I've done some experiments with epoxied fingerboards. Came to the realization that I don't like it. (some of the previous posts show the epoxied board.) I like an oiled board, so I spent the weekend sanding off that tenacious epoxy and re-radiusing the board. Took it down to 800 grit, then wet-sanded with lemon oil and 1000 grit. Also got some more KTM-9 from LMI, re-did the boday and headstock face, it's curing now. I'll sand that out next weekend and show it off. Meanwhile:
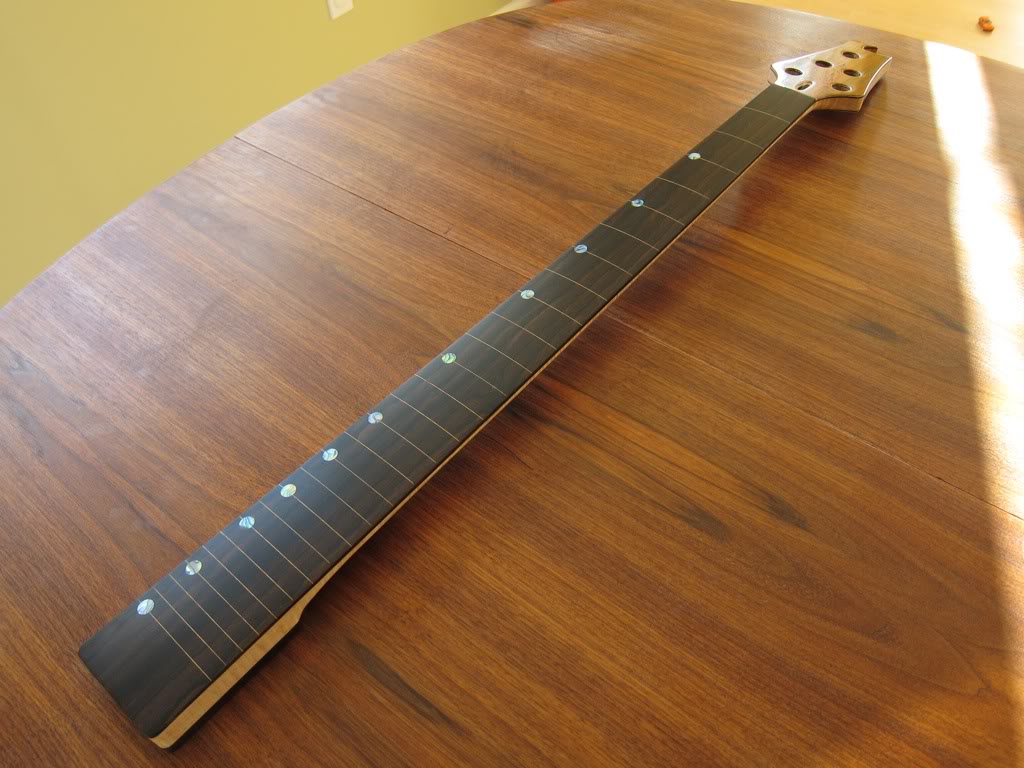
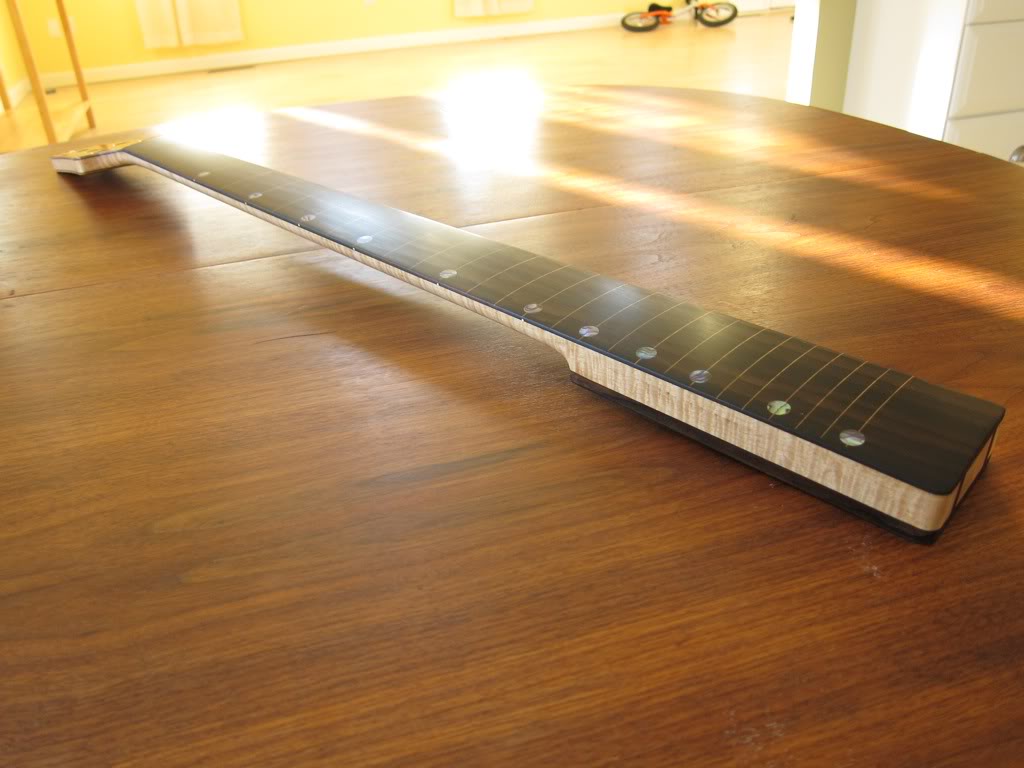
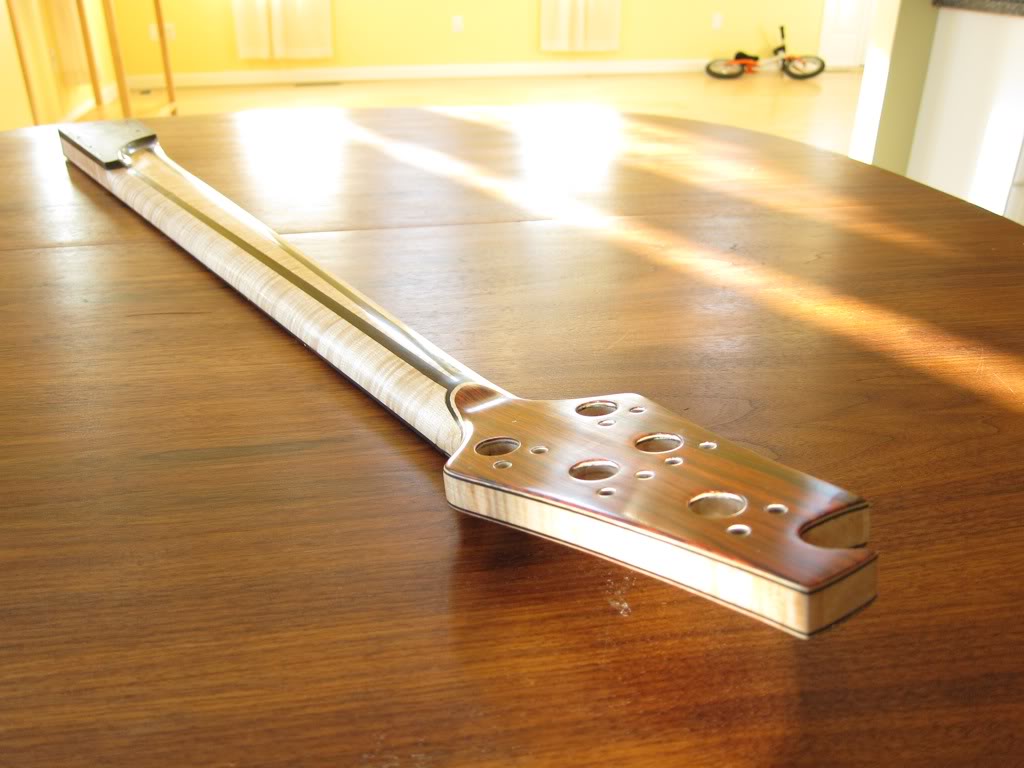
Trayner: no cover on the Red Baron. I like the look of that red board.
I'm still waiting on my preamp pcb's, judging by the website they should ship out next week. I already have all the components, so they will go together quick. I'm really optimistic that the design will work, but we'll see.
I've done some experiments with epoxied fingerboards. Came to the realization that I don't like it. (some of the previous posts show the epoxied board.) I like an oiled board, so I spent the weekend sanding off that tenacious epoxy and re-radiusing the board. Took it down to 800 grit, then wet-sanded with lemon oil and 1000 grit. Also got some more KTM-9 from LMI, re-did the boday and headstock face, it's curing now. I'll sand that out next weekend and show it off. Meanwhile:
Trayner: no cover on the Red Baron. I like the look of that red board.


I've done some experiments with epoxied fingerboards. Came to the realization that I don't like it. (some of the previous posts show the epoxied board.) I like an oiled board, so I spent the weekend sanding off that tenacious epoxy and re-radiusing the board. Took it down to 800 grit, then wet-sanded with lemon oil and 1000 grit.
What about the epoxy wasn't working for you? Was it feel, sound, some combo? Does not having epoxy on the fingerboard mean you need to be prepared to resand the board every so often, or does ebony hold up pretty well without it (I'm thinking of round wound strings here).
Regardless, this is an amazing looking bass, neck and body both.
What about the epoxy wasn't working for you? Was it feel, sound, some combo? Does not having epoxy on the fingerboard mean you need to be prepared to resand the board every so often, or does ebony hold up pretty well without it (I'm thinking of round wound strings here).
I tried different thicknesses (from single brush-on to making a dam and pouring on a 1/4" thick layer and radiusing that to match the fb), and different levels of polish, (dry 600 grit to wet-sanding out to 1000 grit then steel wool and swirl remover). I tried different methods of bubble removal (a sparingly-used heat gun works wonders) and avoiding fisheyes (a xylene additive that comes with Resin Research epoxy works wonders.) Although an epoxied board looks beautiful in many of the photos I have seen in the LC, and epoxy worked out satisfactorily as a finish on the body of my very first build, I wasn't happy with it on this neck. I sanded it off and re-did it 3 times so far. To me it looked like cheesy bar-top. Here are some photos:


