• TalkBass has been independent since 1998. Add your voice.
    Create a free account to reply to discussions, view embedded media, and browse with fewer display ads.
    Join freeLog in
    Want zero display ads or expanded classifieds tools? Compare plans.

A burly refinish

Pappasgrind

Goratory-sour grapes out now!!
Aug 13, 2009
953
234
41
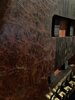
Ok so long story short, I had a bass made and I wasn’t happy with the tone so I’ve decided to swap out the electronics which I will have to do a little routing. Since taking out said electronics I’ve noticed how rough the top finish really is. The top is mallee burl and it is porous but I feel like the builder didnt Give it his all when finishing the top or was over his head when he started sanding and it opened up more pours. So I’m taking the responsibility as I do love the instrument I just feel I can do it justice and give it a better end result. I refinished a bass over a decade ago and it came out great and I know I can do a better job now. So I’m going to sand it starting with a quick go over at 220 and work my way up to 3000 and as it’s already finished I’m going to focus more on the higher grits to really smooth the thing out. Then I plan on using multiple coats of birch wood Casey sealer filler emphasizing on the top and then finalizing it with multiple coats of tru oil. My question is does anyone have any advice? I’ve never finished a burl so porous and I know it won’t be easy. Honestly I’m more nervous about routing the pickups (going from p4 shape to emg45 shape) but the top seems so dry and I feel like it’s getting worse opening more pores. I’ve also noticed the bottom half top is separating from the Wenge middle, should I add glue there? Is there anything (besides epoxy) that will seal the cracks and pores better then the sealer filler? And will the tru oil be enough to finish it? Thanks for everything in advance I know this is a crazy project but I’ve been a carpenter for almost 20 years and I’m pretty competent when it comes to qc. Here’s some pictures to wrap your heads around it:
 

Attachments

  • 8964F880-45E4-4F79-9C79-3DEB30B0A0E5.jpeg
    8964F880-45E4-4F79-9C79-3DEB30B0A0E5.jpeg
    917.8 KB · Views: 434
  • B17B6A2D-0219-4928-9A7B-A5A971611F5D.jpeg
    B17B6A2D-0219-4928-9A7B-A5A971611F5D.jpeg
    683.8 KB · Views: 413
  • 33EB5F81-B87E-4E91-9519-060DD59777FF.jpeg
    33EB5F81-B87E-4E91-9519-060DD59777FF.jpeg
    1.2 MB · Views: 425
  • B82EE9E9-E45D-41B1-B92F-7AEC6EF496B7.jpeg
    B82EE9E9-E45D-41B1-B92F-7AEC6EF496B7.jpeg
    1.3 MB · Views: 423
  • B1C5BC48-F2D9-4030-8598-6308ABD9EECC.jpeg
    B1C5BC48-F2D9-4030-8598-6308ABD9EECC.jpeg
    786.2 KB · Views: 414
  • CA3EFD59-D067-495E-84CC-80DDDD9D810E.jpeg
    CA3EFD59-D067-495E-84CC-80DDDD9D810E.jpeg
    1.3 MB · Views: 432
  • Like
Reactions: Maxi Funkl and Beej
My first thought would be epoxy also. West Systems, not Home Depot 5 minute epoxy. I obviously don’t have the bass in hand but some of those, I hate to call them cracks, incursions maybe, seem deep enough that it’s going to take a lot of the Birchwood Casey filler to fill them. Plus epoxy will help stabilize the burl by soaking in and hardening in the wood.
 
I don't see pores; I see cracks. To me, it looks like that burl had significant shrinkage after glue-up. And the burl surface is not level, if it ever was. If you intend to level the top, I think you'll need more than a "quick go over" with 220 grit. On the other hand, I don't think you'd need to go much beyond 320 before initial fill/finish. The recommendations for epoxy make sense to me.
 
I think you’re ask right with the spicy I’ve already decided on which one to get. How do I apply it to the whole top tho? I also read that mixing the dust from the top in with the epoxy would help blend in the cracks. And a bit of a side note I’m fairly certain they never stabilized it and just soaked it in Howard’s
 
I’m fairly certain they never stabilized it and just soaked it in Howard’s

Ugh. That's a serious problem. A thin burl top like that is like a sponge. If it's soaked with Howard's Feed 'N Wax, it's going to be very difficult to get that out of there and get any other filler or finish to stick down. Almost anything you put on there is going to come loose and peel up. I'm not sure what to advise you to do. You may have to immerse it in a tank of denatured alcohol, and let it dry out for a week.

I have quite a bit of experience with burl tops on guitars, working with my late friend Mike Lipe. Over the years, he built maybe a hundred guitars with thin burl tops, walnut, redwood, all kinds of crazy stuff. It was awful stuff to work with, honestly, but his customers wanted it and were willing to pay for all the extra work. We did a lot of R & D, with plenty of failures, to work out a process for dealing with it.

We milled most of the tops to about 3/16" thick, and they were glued onto an ash or alder body. They were drop-style, with the corner curved down over the elbow cut. Mike would glue them on with Titebond, in a vacuum bag with additional blocks and clamps. It was tricky, because the stuff was so crumbly, it would frequently crack and fall apart. We often had to glue chunks back in.

He would bring those bodies over to my shop. I'd start by slobbing on several coats of Smith's CPES, which is a water-thin epoxy made for stabilizing rotten wood. It would soak down in deep and dry to a somewhat rubbery form. It would add some mechanical strength to the burl, helping to hold the chunks together. Then I would squeegee on several coats of West Systems epoxy, a day apart, enough to completely fill all the gaps and pores up to and above the surface. It took a lot of epoxy. When it cured, I'd block sand the epoxy down to the surface. Sometimes we would tint the epoxy black or brown to dramatize the burl pattern.

Then the bodies would go to Pat Wilkins, who would spray on about ten coats of 2K polyester, sometimes with a tint. Buffed up to a gloss. That made a permanent hard shell over the burl. Those guitars were beautiful (if you like burl), but they were a lot of work. And they were expensive guitars.

That's what we did. But I'm not sure how that helps you. If you put West Systems or Tru-Oil Filler on there over the soaked-in Howard's Wax, it will probably immediately start popping out.
 
The "answer" that I've been looking for!!! Did the research. It seems PERFECT for the 3 spalted maple projects that I'm working on. Now... here's what I couldn't find...


How will it react to/effect TransTint stain, over spalted maple, and being finished with either nitro, OR poly?


Thank you,
Marc

[edit] "it" being West Systems. Sorry...
[2nd edit] I've been "afraid" to finish this "project" for over a year, for FEAR of having the REAR MOUNTED controls "break through." All of the outer imperfections have been "fixed" using SOLAREZ, and are smooth. Yes, I'm a NOOB...
Here's a picture. Any/ALL help is GREATLY appreciated in advance...
theeab_2.jpg
 
Last edited:
  • Like
Reactions: Beej
Ugh. That's a serious problem. A thin burl top like that is like a sponge. If it's soaked with Howard's Feed 'N Wax, it's going to be very difficult to get that out of there and get any other filler or finish to stick down. Almost anything you put on there is going to come loose and peel up. I'm not sure what to advise you to do. You may have to immerse it in a tank of denatured alcohol, and let it dry out for a week.

I have quite a bit of experience with burl tops on guitars, working with my late friend Mike Lipe. Over the years, he built maybe a hundred guitars with thin burl tops, walnut, redwood, all kinds of crazy stuff. It was awful stuff to work with, honestly, but his customers wanted it and were willing to pay for all the extra work. We did a lot of R & D, with plenty of failures, to work out a process for dealing with it.

We milled most of the tops to about 3/16" thick, and they were glued onto an ash or alder body. They were drop-style, with the corner curved down over the elbow cut. Mike would glue them on with Titebond, in a vacuum bag with additional blocks and clamps. It was tricky, because the stuff was so crumbly, it would frequently crack and fall apart. We often had to glue chunks back in.

He would bring those bodies over to my shop. I'd start by slobbing on several coats of Smith's CPES, which is a water-thin epoxy made for stabilizing rotten wood. It would soak down in deep and dry to a somewhat rubbery form. It would add some mechanical strength to the burl, helping to hold the chunks together. Then I would squeegee on several coats of West Systems epoxy, a day apart, enough to completely fill all the gaps and pores up to and above the surface. It took a lot of epoxy. When it cured, I'd block sand the epoxy down to the surface. Sometimes we would tint the epoxy black or brown to dramatize the burl pattern.

Then the bodies would go to Pat Wilkins, who would spray on about ten coats of 2K polyester, sometimes with a tint. Buffed up to a gloss. That made a permanent hard shell over the burl. Those guitars were beautiful (if you like burl), but they were a lot of work. And they were expensive guitars.

That's what we did. But I'm not sure how that helps you. If you put West Systems or Tru-Oil Filler on there over the soaked-in Howard's Wax, it will probably immediately start popping out.
Dang. Hmm I really hope that’s not the case here. I’ve always heard how tough burls can be to work with.
 
Bruce has great points - how thick is the top? On a related note, mallee burl always has those little cracks in it, hence why it's good to fill it with something that won't shrink. For filling, you can put colored filler like timbermate down into the cracks for contrast and then use a thin epoxy finish over top to seal it all up. But plain epoxy will also fill them up. I'd also suggest West System, or System Three products if you can't get West in small quantities locally. Zpoxy (carried by LMII among other places) will also work well as a filler/sealer.

Epoxy is fussy to work with, but not difficult. Get a box of nitrile gloves as you'll go through several pairs when applying. Do very thin coats and scrape/wipe down as much as you can between them, no sanding needed.

For prep, I'd remove everything from the bass and then block sand the top back to 220, no real need to go higher grit, there's no gains and in fact a very high grit may burnish the surface preventing good finish adhesion. I'd also wipe down the top +++ with acetone if you think howard's was involved. At least there's no silicone in howard's but it's still not a drying oil so may have squishy partially-dried oils in the cracks and embedded in the surface.

I'd do as many seal coats of epoxy as needed to fully cover everything and ensure a smooth surface. When filling really porous woods, I find this usually takes at least three coats. Sanding back epoxy can be a pain as it can pill up, melt and creates a sticky mess. My workaround is to have a brush handy and brush down both the sanding block and surface every 2-3 sanding strokes. Takes time, but works well.

Once you have the epoxy sanded to 220 (or up to 320) and it's all smooth and even under oblique lighting, you can then apply the finish of your choice. Tru-oil is easy, but IMHO minwax wipe-on poly is even easier to use, builds faster and gets glossy quicker. It has a more yellowish tinge than the amberish tinge that tru-oil has, so it's advisable to try them both and see what you like. Another option if you're looking for a matte oil-type finish is to look at Osmo Polyx hardwax oil. Super easy to use and repair and it looks fantastic. In this thread, I fill the surfaces of the padauk and walnut with a tinted filler and then multiple coats of epoxy before sanding back and finishing with Osmo. I like it. :D

Winter Build Off 2022 - The Crook
 
Bruce has great points - how thick is the top? On a related note, mallee burl always has those little cracks in it, hence why it's good to fill it with something that won't shrink. For filling, you can put colored filler like timbermate down into the cracks for contrast and then use a thin epoxy finish over top to seal it all up. But plain epoxy will also fill them up. I'd also suggest West System, or System Three products if you can't get West in small quantities locally. Zpoxy (carried by LMII among other places) will also work well as a filler/sealer.

Epoxy is fussy to work with, but not difficult. Get a box of nitrile gloves as you'll go through several pairs when applying. Do very thin coats and scrape/wipe down as much as you can between them, no sanding needed.

For prep, I'd remove everything from the bass and then block sand the top back to 220, no real need to go higher grit, there's no gains and in fact a very high grit may burnish the surface preventing good finish adhesion. I'd also wipe down the top +++ with acetone if you think howard's was involved. At least there's no silicone in howard's but it's still not a drying oil so may have squishy partially-dried oils in the cracks and embedded in the surface.

I'd do as many seal coats of epoxy as needed to fully cover everything and ensure a smooth surface. When filling really porous woods, I find this usually takes at least three coats. Sanding back epoxy can be a pain as it can pill up, melt and creates a sticky mess. My workaround is to have a brush handy and brush down both the sanding block and surface every 2-3 sanding strokes. Takes time, but works well.

Once you have the epoxy sanded to 220 (or up to 320) and it's all smooth and even under oblique lighting, you can then apply the finish of your choice. Tru-oil is easy, but IMHO minwax wipe-on poly is even easier to use, builds faster and gets glossy quicker. It has a more yellowish tinge than the amberish tinge that tru-oil has, so it's advisable to try them both and see what you like. Another option if you're looking for a matte oil-type finish is to look at Osmo Polyx hardwax oil. Super easy to use and repair and it looks fantastic. In this thread, I fill the surfaces of the padauk and walnut with a tinted filler and then multiple coats of epoxy before sanding back and finishing with Osmo. I like it. :D

Winter Build Off 2022 - The Crook
Thanks so much. The top is probably 3/16 so it’s not a veneer there is room for sand. I’ll be honest the builder didn’t nail a lot of my requests shape wise so I’m considering doing a quick reshape nothing to crazy just a little more round and contoured. I’m looking at a spray shellac for the beginning, then a few coats of aquacoat then epoxy then tru oil. I’m trying to be cost effective too I know this things a piece of art and I shouldn’t be hesitating on repairing it but I also have 2 kid$!
 
Thin super glue? Then I would sand it and use the dust which would essentially fill with the super glue. So basically have like a chemical reaction from the heat generated?
 
  • Like
Reactions: bdplaid