• TalkBass has been independent since 1998. Add your voice.
    Create a free account to reply to discussions, view embedded media, and browse with fewer display ads.
    Join freeLog in
    Want zero display ads or expanded classifieds tools? Compare plans.

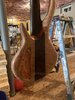
A burly refinish

Epoxy is on. Lessons learned,
1. Could've used less
2. Maybe a credit card would have been a good idea
3.should've used less
So I'll let it sit for a few hours and check it. Probably won't touch it till tomorrow. Definitely have some sanding to do when it's dry. Looks cool though I hope when it's done and the poly is on that the figuring pops through.
 

Attachments

  • 7728F88E-19F7-4EA2-8E78-A7056434CB1B.jpeg
    7728F88E-19F7-4EA2-8E78-A7056434CB1B.jpeg
    1,002.9 KB · Views: 51
  • DA4E573E-E31E-4F26-9AA2-971457C55CF1.jpeg
    DA4E573E-E31E-4F26-9AA2-971457C55CF1.jpeg
    1.3 MB · Views: 52
  • 99E65F65-A46C-4273-9EE2-C87496DF9E52.jpeg
    99E65F65-A46C-4273-9EE2-C87496DF9E52.jpeg
    1.6 MB · Views: 50
  • Like
Reactions: Reedt2000
Epoxy is on. Lessons learned,
1. Could've used less
2. Maybe a credit card would have been a good idea
3.should've used less
So I'll let it sit for a few hours and check it. Probably won't touch it till tomorrow. Definitely have some sanding to do when it's dry. Looks cool though I hope when it's done and the poly is on that the figuring pops through.
A lot of sanding in your future, but that does look much better :thumbsup:
 
  • Like
Reactions: Pappasgrind
On the plus side, you shouldn't need a second coat. :smug: It may have been mentioned above but the best bet is to clear the sand paper every few strokes, with a brush or something similar. It's tedious but it keeps the epoxy from plugging the sandpaper.
Ha I've been walking by it looking at it saying to myself," I wonder if it'll need another coat?" I'm heading to Home Depot so I will grab a brush thanks for the heads up! Does that wipe on poly build up like a gloss finish?
 
Ha I've been walking by it looking at it saying to myself," I wonder if it'll need another coat?" I'm heading to Home Depot so I will grab a brush thanks for the heads up! Does that wipe on poly build up like a gloss finish?


It can. It just depends on how many coats and you apply.


Also, one thing that works for me is to get a paint brush, it doesn't have to be super expensive, and cut the bristles off to about 1" or 1 1/2". That makes it stiffer which seems to work better for this application.
 
I think the best thing to do is level sand, then see where you are. You might need another coat, might just need to drop fill spots. In my experience the wipe-on doesn't build really heavy. If you can lay it down smooth enough to just buff it out it comes out glossy, but it doesn't build enough to heavily wet sand and buff. If that was your plan the aerosol stuff lays on thicker. @Beej is the guy to talk to about wipe-on poly, he gets great results with it.
 
Sanded back the epoxy this morning! Took me longer to get the tape off then to sand it! Had a nice glob on the inside of the lower horn had to bust out the dremel to get it off. After sanding I saw the cracks had been filled but not all the way up so I did a 2nd very light coat with a credit card squeegee. I'll let this sit again for 24 hours and we'll check back in the morning.
 

Attachments

  • 15C5F77B-211E-46CF-A87E-A2F50071498C.jpeg
    15C5F77B-211E-46CF-A87E-A2F50071498C.jpeg
    754.8 KB · Views: 39
  • 8AC79980-8AD4-4697-BDFB-180121440A84.jpeg
    8AC79980-8AD4-4697-BDFB-180121440A84.jpeg
    1.8 MB · Views: 42
  • C7EEE3B1-2D9F-4056-9560-60A0789BFE55.jpeg
    C7EEE3B1-2D9F-4056-9560-60A0789BFE55.jpeg
    1.1 MB · Views: 47
  • 11B78D37-295B-4412-9014-B8F6330248FA.jpeg
    11B78D37-295B-4412-9014-B8F6330248FA.jpeg
    919.4 KB · Views: 44
  • DA0375DF-68F6-4E79-AD71-D42F8DBAE9A4.jpeg
    DA0375DF-68F6-4E79-AD71-D42F8DBAE9A4.jpeg
    998.1 KB · Views: 46
  • 0962CB61-3E0B-42BF-B3B5-291329E7A65C.jpeg
    0962CB61-3E0B-42BF-B3B5-291329E7A65C.jpeg
    1,013.6 KB · Views: 45
  • 22A1D8D1-F833-4A99-9714-A97C49542BBC.jpeg
    22A1D8D1-F833-4A99-9714-A97C49542BBC.jpeg
    1.6 MB · Views: 39
  • D78FDA44-7481-43C0-82A2-323B9E28CC55.jpeg
    D78FDA44-7481-43C0-82A2-323B9E28CC55.jpeg
    1.1 MB · Views: 45
  • 0B4B6178-C880-4F2B-9F72-4937FCB58BB3.jpeg
    0B4B6178-C880-4F2B-9F72-4937FCB58BB3.jpeg
    1.5 MB · Views: 42
That's looking really good. :thumbsup: I've used epoxy to spot fill if there are only a few spots remaining after the 2nd coat. Otherwise, IME it's not uncommon to need a third coat for complete filling with really porous or 'grainy' woods. This driftwood required a lot of attention to get smooth. :D
Invalid Link Removed
 
  • Like
Reactions: Pappasgrind
Sanded back the epoxy this morning! Took me longer to get the tape off then to sand it! Had a nice glob on the inside of the lower horn had to bust out the dremel to get it off. After sanding I saw the cracks had been filled but not all the way up so I did a 2nd very light coat with a credit card squeegee. I'll let this sit again for 24 hours and we'll check back in the morning.

It's looking good! An epoxy fill finish isn't as difficult or nasty as it sounds, once you learn how to apply it and sand it. Epoxy is surprisingly easy to shape and smooth.

By the way, if you fill the epoxy up to the surface, and it's all smooth.....You can sand it and buff it up to a full gloss. Epoxy by itself is a good tough finish. You don't have to put poly over it as a top coat. We usually do just to add some tint or color. But if you like the way the burl looks now, just polish up the epoxy and be done.
 
It is nice, I'm not much of a gloss finish guy I like the feel of satin oil finish but after doing the epoxy I do have a new respect for it.

You can take the epoxy to satin finish too. Sand to 1000, then scrub it with 0000 steel wool. Or for semigloss, sand to 1000, buff with coarse rubbing compound, and skip the fine rubbing compound.
 
  • Like
Reactions: Pappasgrind
Sanded it back up to 1500 gave it a good fret dressing. Soaked it in mineral spirits, wiped down and applied first coat of poly! Drank it right up too crazy!
 

Attachments

  • 6CC62224-EE6A-4D25-B835-9B846274750C.jpeg
    6CC62224-EE6A-4D25-B835-9B846274750C.jpeg
    1.2 MB · Views: 40
  • 8A795932-C889-441C-A2E1-946AA049C16F.jpeg
    8A795932-C889-441C-A2E1-946AA049C16F.jpeg
    1.2 MB · Views: 41
  • 8A161B08-C0C5-4687-949D-7FE8DF462E28.jpeg
    8A161B08-C0C5-4687-949D-7FE8DF462E28.jpeg
    1.2 MB · Views: 41
  • CBD641A2-84D4-45DB-8329-CC546D1E98FD.jpeg
    CBD641A2-84D4-45DB-8329-CC546D1E98FD.jpeg
    1.2 MB · Views: 41
  • 0343A604-46BD-405E-B471-679749E7463C.jpeg
    0343A604-46BD-405E-B471-679749E7463C.jpeg
    1.5 MB · Views: 43
Managed to get 4 coats on today. Sanded it back with 600 on the last one got a pretty good surface shine going. I'll let this one sit over night and check it tomorrow. Poly is a deceiving substance. Also could not at all get the ferrules out so I sanded over them. Amateur hour for sure but I'll color them with a marker and have a laugh about it.
 

Attachments

  • C2CE74E2-D2CC-4C94-8F9A-28E99398B074.jpeg
    C2CE74E2-D2CC-4C94-8F9A-28E99398B074.jpeg
    1,011.7 KB · Views: 39
  • 9339825C-DEA5-47D1-859A-F7FB67C4C0E0.jpeg
    9339825C-DEA5-47D1-859A-F7FB67C4C0E0.jpeg
    1,009.6 KB · Views: 41
It looks pretty awesome. The epoxy and poly also seems to have made the contrast in the wenge pop too

View attachment 4976673
View attachment 4976674

Nicely done :thumbsup:
Yeah the Wenge definitely liked it! So I think going forward I'm going to add a few coats before I sand. It seems to be building good now and I think if I add another few coats and let cure I'll be able to buff a mirror into it.

edit* also thanks I'm new to poly and have for sure second guessed myself a few times but it does look good so I think I'm doing it
 
  • Like
Reactions: Reedt2000
Marc;

I'm not sure I understand your question completely, but I'll try to answer here. Mike Lipe and I also made at least a hundred guitar bodies with spalted maple tops. They were very popular with his customers. We used a similar process with the spalted maple as with the burl tops. Soaked it with Smith's CPES, coated it heavily with West Systems epoxy, block sanded back to the surface, polyester clear by Pat Wilkins. Spalted maple is soft half-rotted wood, and it has very low strength. You have to soak it with something to make it withstand the wear of a guitar.

You can tint West Systems epoxy if you like, but Trans-Tint isn't the best thing to use. It's kind of hard to get it to mix in well. I get better results using pigments like Mixol or Smooth-on's So-Strong Colorant. They just work better with epoxy. Does that answer your question?

About the danger of breaking out the control cavity: yes, that's a real problem with soft top cap bodies. Spalted maple or fancy burls are way too weak structurally to mount controls to. I always cut a 0.060" aluminum plate to fit inside the "roof" of the control cavity, and epoxy it in with West Systems. That provides the structural strength to mount the controls, and it also works as part of the shielding.

I'm currently making a bass with a spalted curly maple (ink line) top. I've ordered the CPES based on Bruce's posts here. I've glued the top onto the swamp ash blank - still rectangular and now my question is: Given the rotted and weak nature of the spalted maple, would I be best off to do the CPES soak before I begin routing, cutting to shape, etc.? As I was preparing to rout the neck pocket I started thinking about possible tear-out and wondering if doing the CPES soak first would help to minimize the likelihood of that. I would also like to apply oil to the top to pop the figure and believe that this must be done first, even before the CPES, yes? And thanks for the great tip on fortifying the control cavity with aluminum.
 
  • Like
Reactions: Beej