• TalkBass has been independent since 1998. Add your voice.
    Create a free account to reply to discussions, view embedded media, and browse with fewer display ads.
    Join freeLog in
    Want zero display ads or expanded classifieds tools? Compare plans.

Acoustic Electric Bass

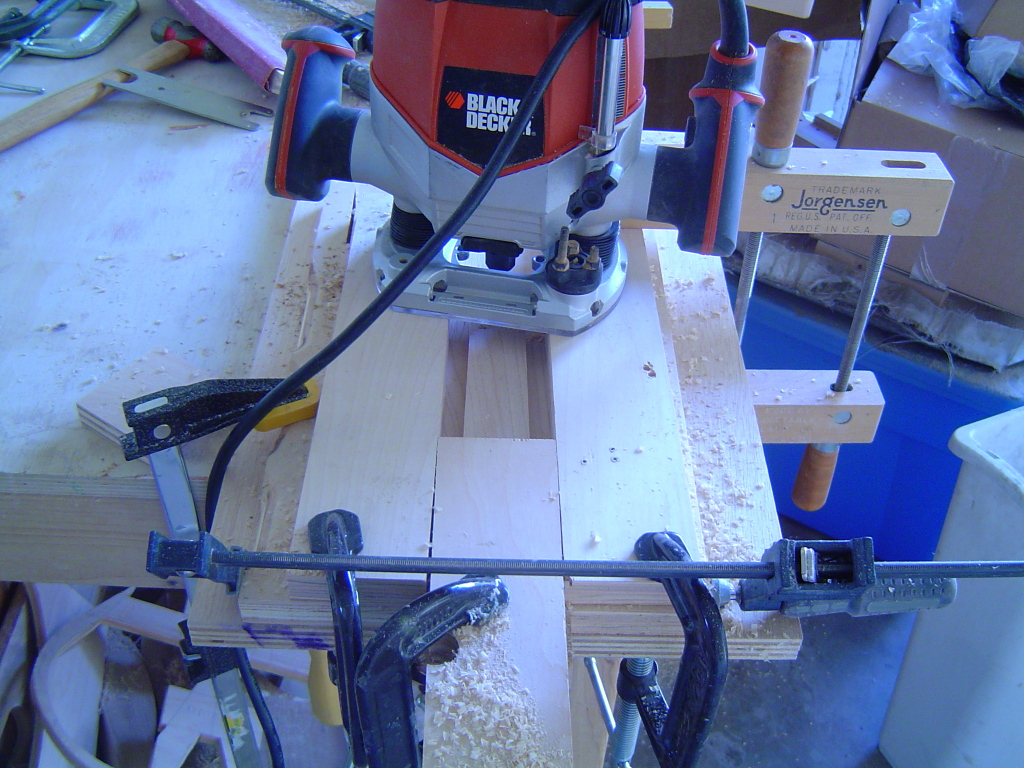
So I started routing the neck pocket this morning.
11186dv.jpg


Because the piece was square, it somehow seemed easier for me this time.

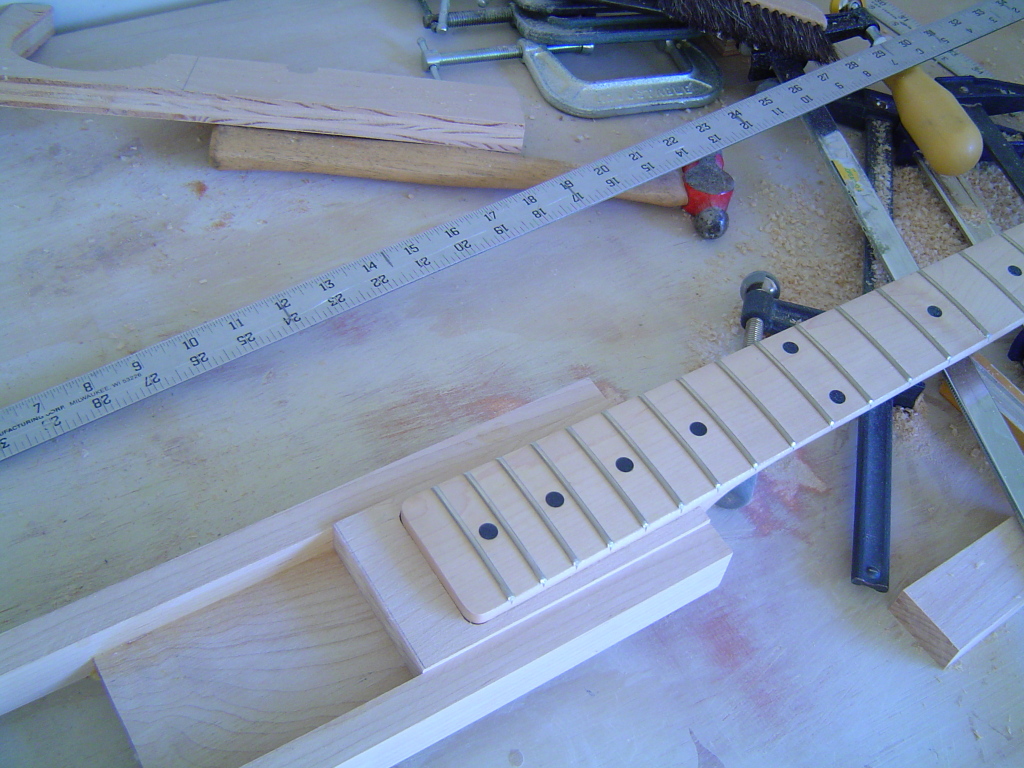
The neck fits nice and tight into the insert, which fits nice and tight into the brace.
beu680.jpg


And here it is getting glued in.

id53kg.jpg


I'll let that cure over night, sand it flat, and start mounting it to the top tomorrow. Obviously, I'll have to rout the top too, but since it's only 1/4" plywood, that should go fairly easily. Though now that I think of it, I may have to get a bottom bearing pattern bit. Routing, or cutting the shell where the neck will go thru may prove a little more troublesome, especially since the shell is curved, so it will be difficult to clamp steady. I'll ask my husband to hold it while I cut, I suppose.
 
  • Like
Reactions: Splods and vmabus
Today I cut down the surface of the brace to allow the proper depth of the neck rout.

2hykjkp.jpg


Made all the center lines.

2zji6w4.jpg


And cut the brace to fit inside the shell.

spapgl.jpg


2dhfjps.jpg


I had been going back and forth between gluing up the brace to the top first, and then to the shell, or gluing up the brace to the shell, and then gluing on the top. But I think now, I'll glue the brace to the shell, rout the neck pocket into the shell, and then gluing on the top. I'll have to get a bottom bearing pattern bit for the router to rout the neck pocket into the top.
 
  • Like
Reactions: vmabus
I think that this bass needs to be extensively play tested by someone other than you....just to make sure you get a good third party opinion mind you. I will very generously offer my services to take on this task once the bass is complete. No don't thank me...it's all in service to the ultimate good.

;)

Seriously though - really nice job so far!
 
  • Like
Reactions: mapleglo
I think that this bass needs to be extensively play tested by someone other than you....just to make sure you get a good third party opinion mind you. I will very generously offer my services to take on this task once the bass is complete. No don't thank me...it's all in service to the ultimate good.

;)

Seriously though - really nice job so far!

Thanks!

And if you're ever in the Phoenix, AZ area, let me know - I'd love an outside opinion :)
 
So once again I realize that all things are, somehow, meant to be. I was all set to glue the top on yesterday, until the "ripple" incident. Today, I realized I should rout the pickup location in before gluing on the top. So I started that process.

20ghc86.jpg


And then I glued in an upper and lower portion, so I can use the router to rout out the top once in place. I used mahogany blocks to help smooth out the tone. Actually, because they were laying around :P

71gt5k.jpg


I'll let that cure for an hour or so while I work on the top. I bought a piece of Birch veneer 1/4" plywood yesterday. I think it'll be easier than trying to glue on veneer, especially after the incident yesterday. Here's the failed attempt:

zn9agk.jpg


It looks much worse in real life. Those ripples are about 1/2" deep. I'm not sure if the iron can smooth them out, but I'll hold on to the piece in case I want to try it later.
 
  • Like
Reactions: gmjhowe and vmabus
...I bought a piece of Birch veneer 1/4" plywood yesterday. I think it'll be easier than trying to glue on veneer, especially after the incident yesterday. Here's the failed attempt:

zn9agk.jpg


It looks much worse in real life. Those ripples are about 1/2" deep. I'm not sure if the iron can smooth them out, but I'll hold on to the piece in case I want to try it later.

I'd have a go at ironing it. You haven't got anything to lose at this point right? Hot iron, oven paper between the iron and the timber. Iron the bubbles out to the edges. Might take a while but have a good go. ;)
 
I'd have a go at ironing it. You haven't got anything to lose at this point right? Hot iron, oven paper between the iron and the timber. Iron the bubbles out to the edges. Might take a while but have a good go. ;)

Since I've already bought and cut the birch veneer plywood, I'll shelve the other top for now. I may try to smooth it at some point, just to see if it's possible.

I did a little more work on the top, and trimmed it to the shell with the drum sander.

34ozdz5.jpg


I also cut the frame to match the sound hole, and enlarged the hole in the pickup route to fit the router bit, but haven't taken a picture of that. I'll take a break, have my husband hold the shell while I rout out the pickup and neck pockets. It seems I've caught a touch of a cold, so I don't want to overdue it. Also, it seems winter (which is really more like spring) has hit Phoenix - we're out of the high 70's/low 80's and into the 60's, and it is rainy today.
 
  • Like
Reactions: vmabus