One of the issues I ran into was the depth of the bolt holding the bearing to the router bit.
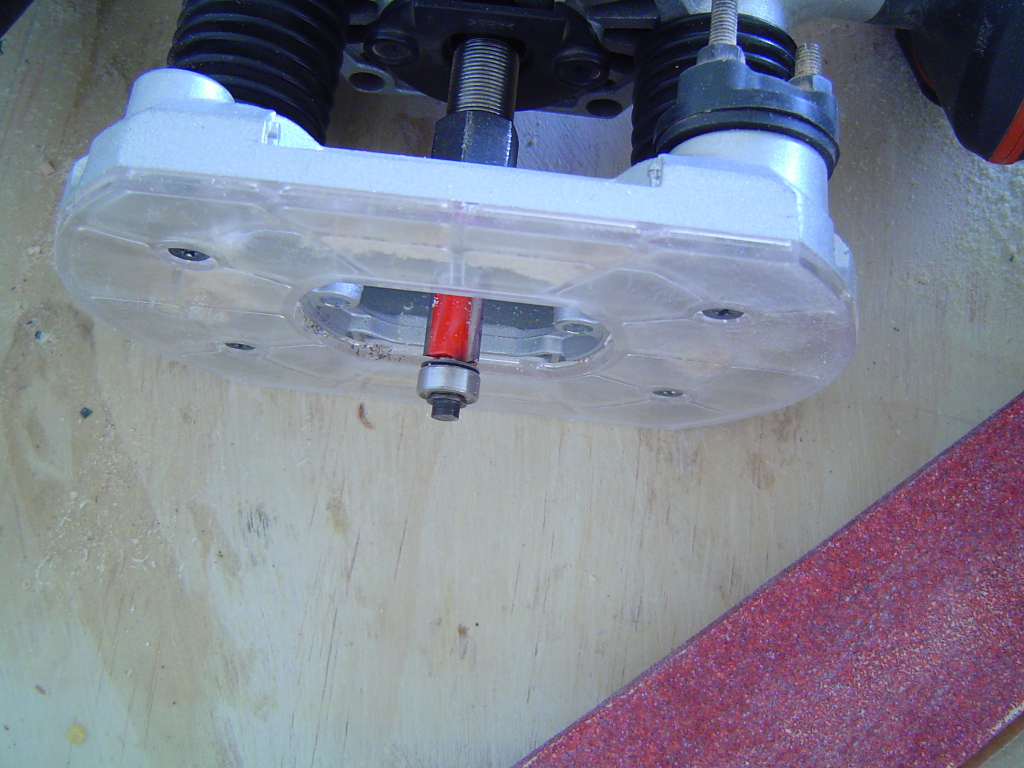
The depth of the neck and pickup cavity prevented the cutting portion of the bit to extend to the entire depth of the 1/4" plywood top.
That left a ridge around the routs.
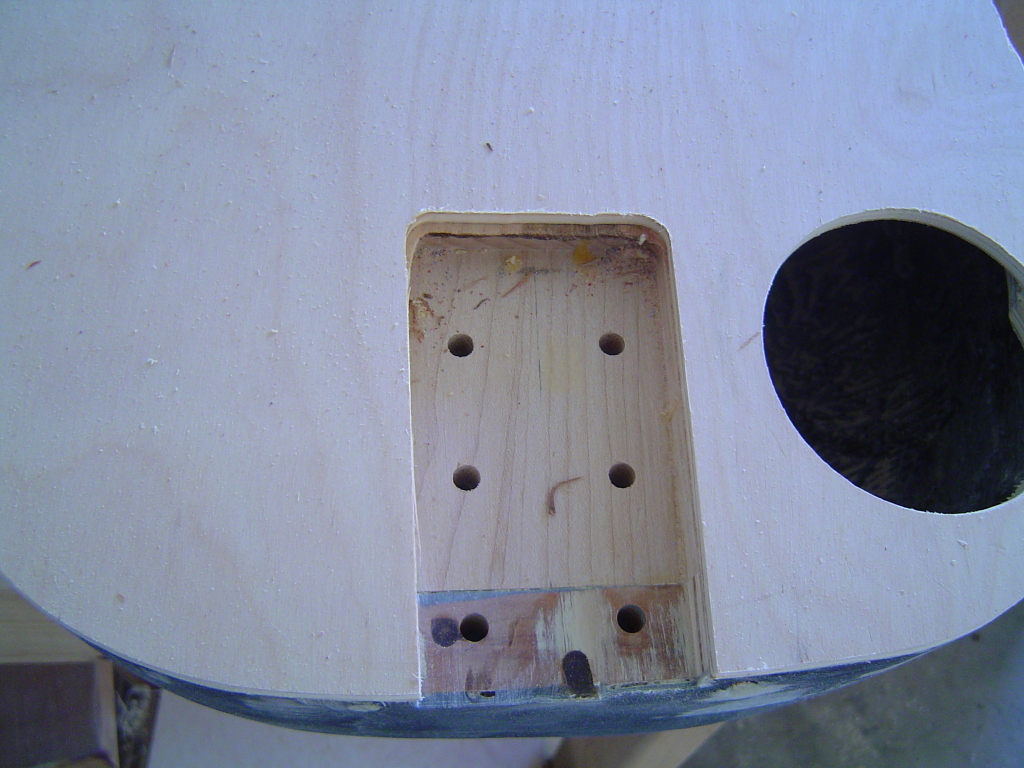
Nothing a little sanding couldn't fix though.
It did leave a slightly burnt area in the pickup cavity though.
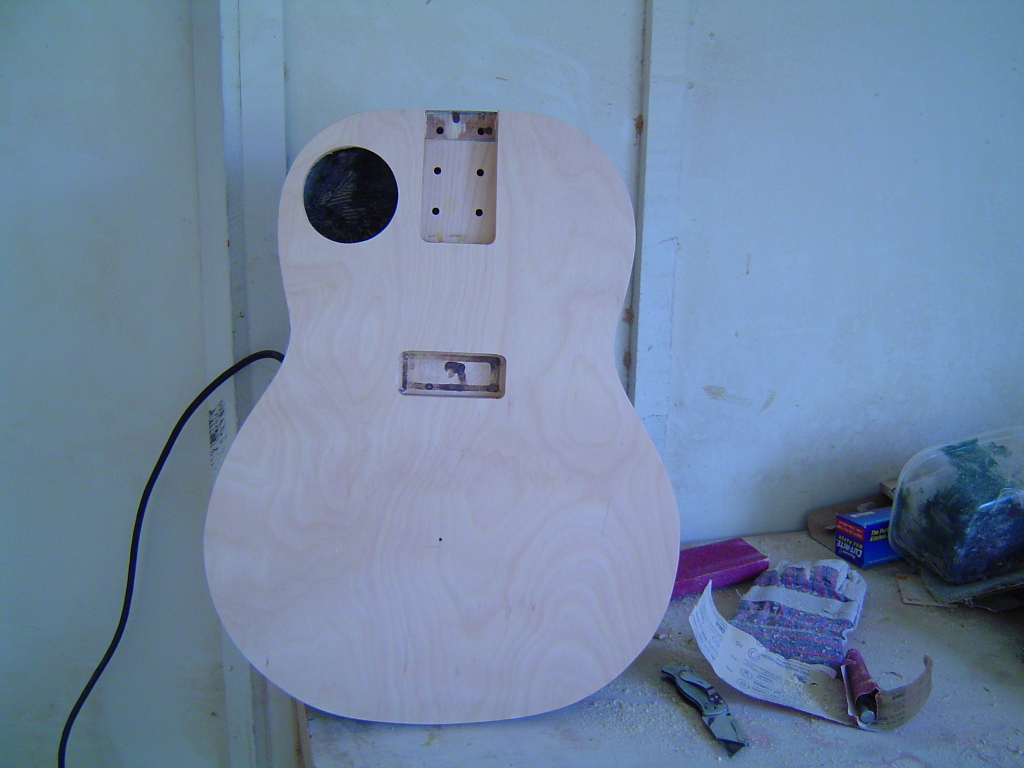
It also appears I didn't set the top part of the pickup cavity perfectly - it was a little high. Not too bad though.
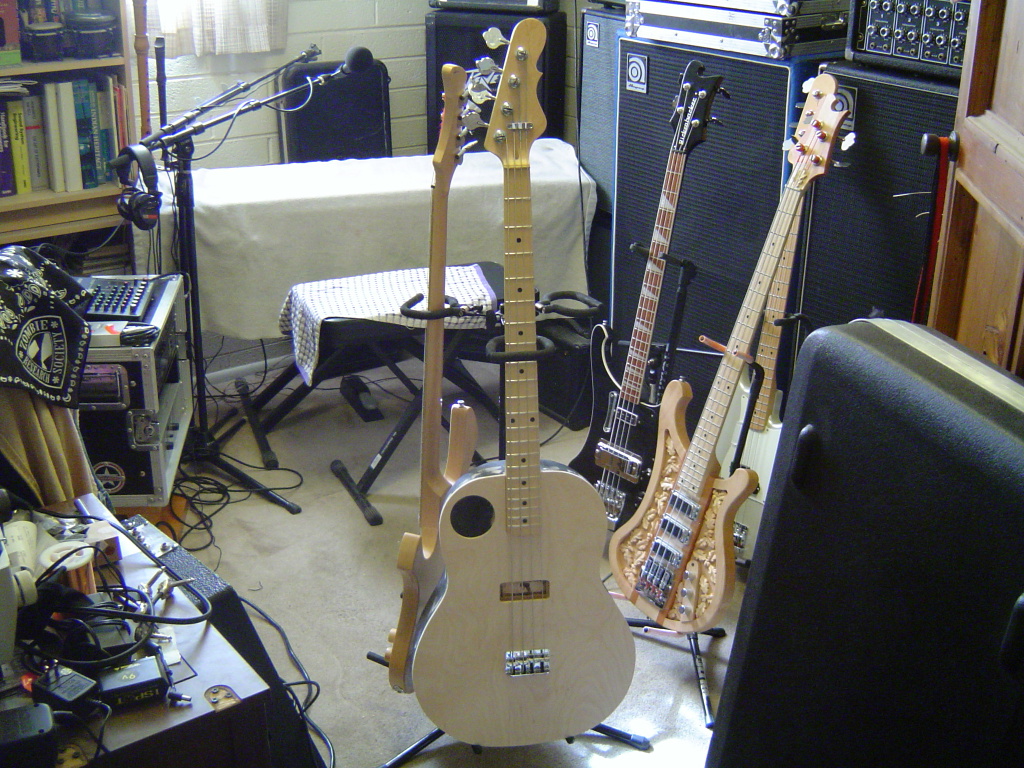
Anyway, I mounted the neck with 2 bolts, the bridge with 2 screws and restrung it. It may sound a little brighter now. It's also weighing in at just about 8.5 pounds on the bathroom scale - a significant reduction in weight. So I'm calling the new shell a success. If I were to do this again, I'd use the light weight hipshot tuners and Babicz bridge, which combined would save about a pound I'd estimate.
I have to decide what I'm going to do about the edge of the top. On the last one, I put a round over, which was quite comfortable. If I do the same on this plywood top, we'll see the plies. I don't think that's too much of an issue, unless there's a void, which I suppose I'll have to fill. Also, I'm thinking of finishing it with some kind of acrylic lacquer, maybe one of those Rustoleum versions, or a poly urethane. I really don't feel like using the nitro - I don't think the finish will be thick enough to offer protection of the birch laminate, and it just takes do darn long to cure. I'll look around home depot next time I stop by. I also need to make another pickup cover, unless I use the darker shedua cover I made for the previous top.
It's pretty close to being done, and so far, I am very happy with the way it's coming out. I'll have to disassemble it, round over the top, refinish the back and top, deal with the pickup cover and wire it up, and then reassemble. I'm also thinking of installing some kind of plastic flared port tube in the sound hole. I can see the vertical brace and interior shell support through it. I'll see what I can come up with.
The depth of the neck and pickup cavity prevented the cutting portion of the bit to extend to the entire depth of the 1/4" plywood top.
That left a ridge around the routs.
Nothing a little sanding couldn't fix though.
It did leave a slightly burnt area in the pickup cavity though.
It also appears I didn't set the top part of the pickup cavity perfectly - it was a little high. Not too bad though.
Anyway, I mounted the neck with 2 bolts, the bridge with 2 screws and restrung it. It may sound a little brighter now. It's also weighing in at just about 8.5 pounds on the bathroom scale - a significant reduction in weight. So I'm calling the new shell a success. If I were to do this again, I'd use the light weight hipshot tuners and Babicz bridge, which combined would save about a pound I'd estimate.
I have to decide what I'm going to do about the edge of the top. On the last one, I put a round over, which was quite comfortable. If I do the same on this plywood top, we'll see the plies. I don't think that's too much of an issue, unless there's a void, which I suppose I'll have to fill. Also, I'm thinking of finishing it with some kind of acrylic lacquer, maybe one of those Rustoleum versions, or a poly urethane. I really don't feel like using the nitro - I don't think the finish will be thick enough to offer protection of the birch laminate, and it just takes do darn long to cure. I'll look around home depot next time I stop by. I also need to make another pickup cover, unless I use the darker shedua cover I made for the previous top.
It's pretty close to being done, and so far, I am very happy with the way it's coming out. I'll have to disassemble it, round over the top, refinish the back and top, deal with the pickup cover and wire it up, and then reassemble. I'm also thinking of installing some kind of plastic flared port tube in the sound hole. I can see the vertical brace and interior shell support through it. I'll see what I can come up with.