

Enjoy the benefits of a premium membership!
Upgrade Account
-
TalkBass has been independent since 1998. Add your voice.
Create a free account to reply to discussions, view embedded media, and browse with fewer display ads.
Join free Log in
Want zero display ads or expanded classifieds tools? Compare plans.
You are using an out of date browser. It may not display this or other websites correctly.
You should upgrade or use an alternative browser.
You should upgrade or use an alternative browser.
More options
Who Replied?


For a bass this fancy the top is going to be incredible. If I had it I wouldn't even think of using something else.Yep, It's pretty crazy. Almost too much so.
I have mixed feelings about using that top vs my first choice. If this was a 4 string I would have used the other. I have changed my mind about using it on the back. I'll save it for another build.

- Feb 28, 2015
- 2,922
- 9,028
- Disclosures
- Owner/Builder- RockHewer Custom Guitars LLC
Got the back of the headstock trimmed down today.
First, since the wings are on the head I tried something to help the neck stay square to the bandsaw blade as I cut it.
I temporarily stuck this piece on to act as not only a spacer, but also a kind of outrigger type thing...
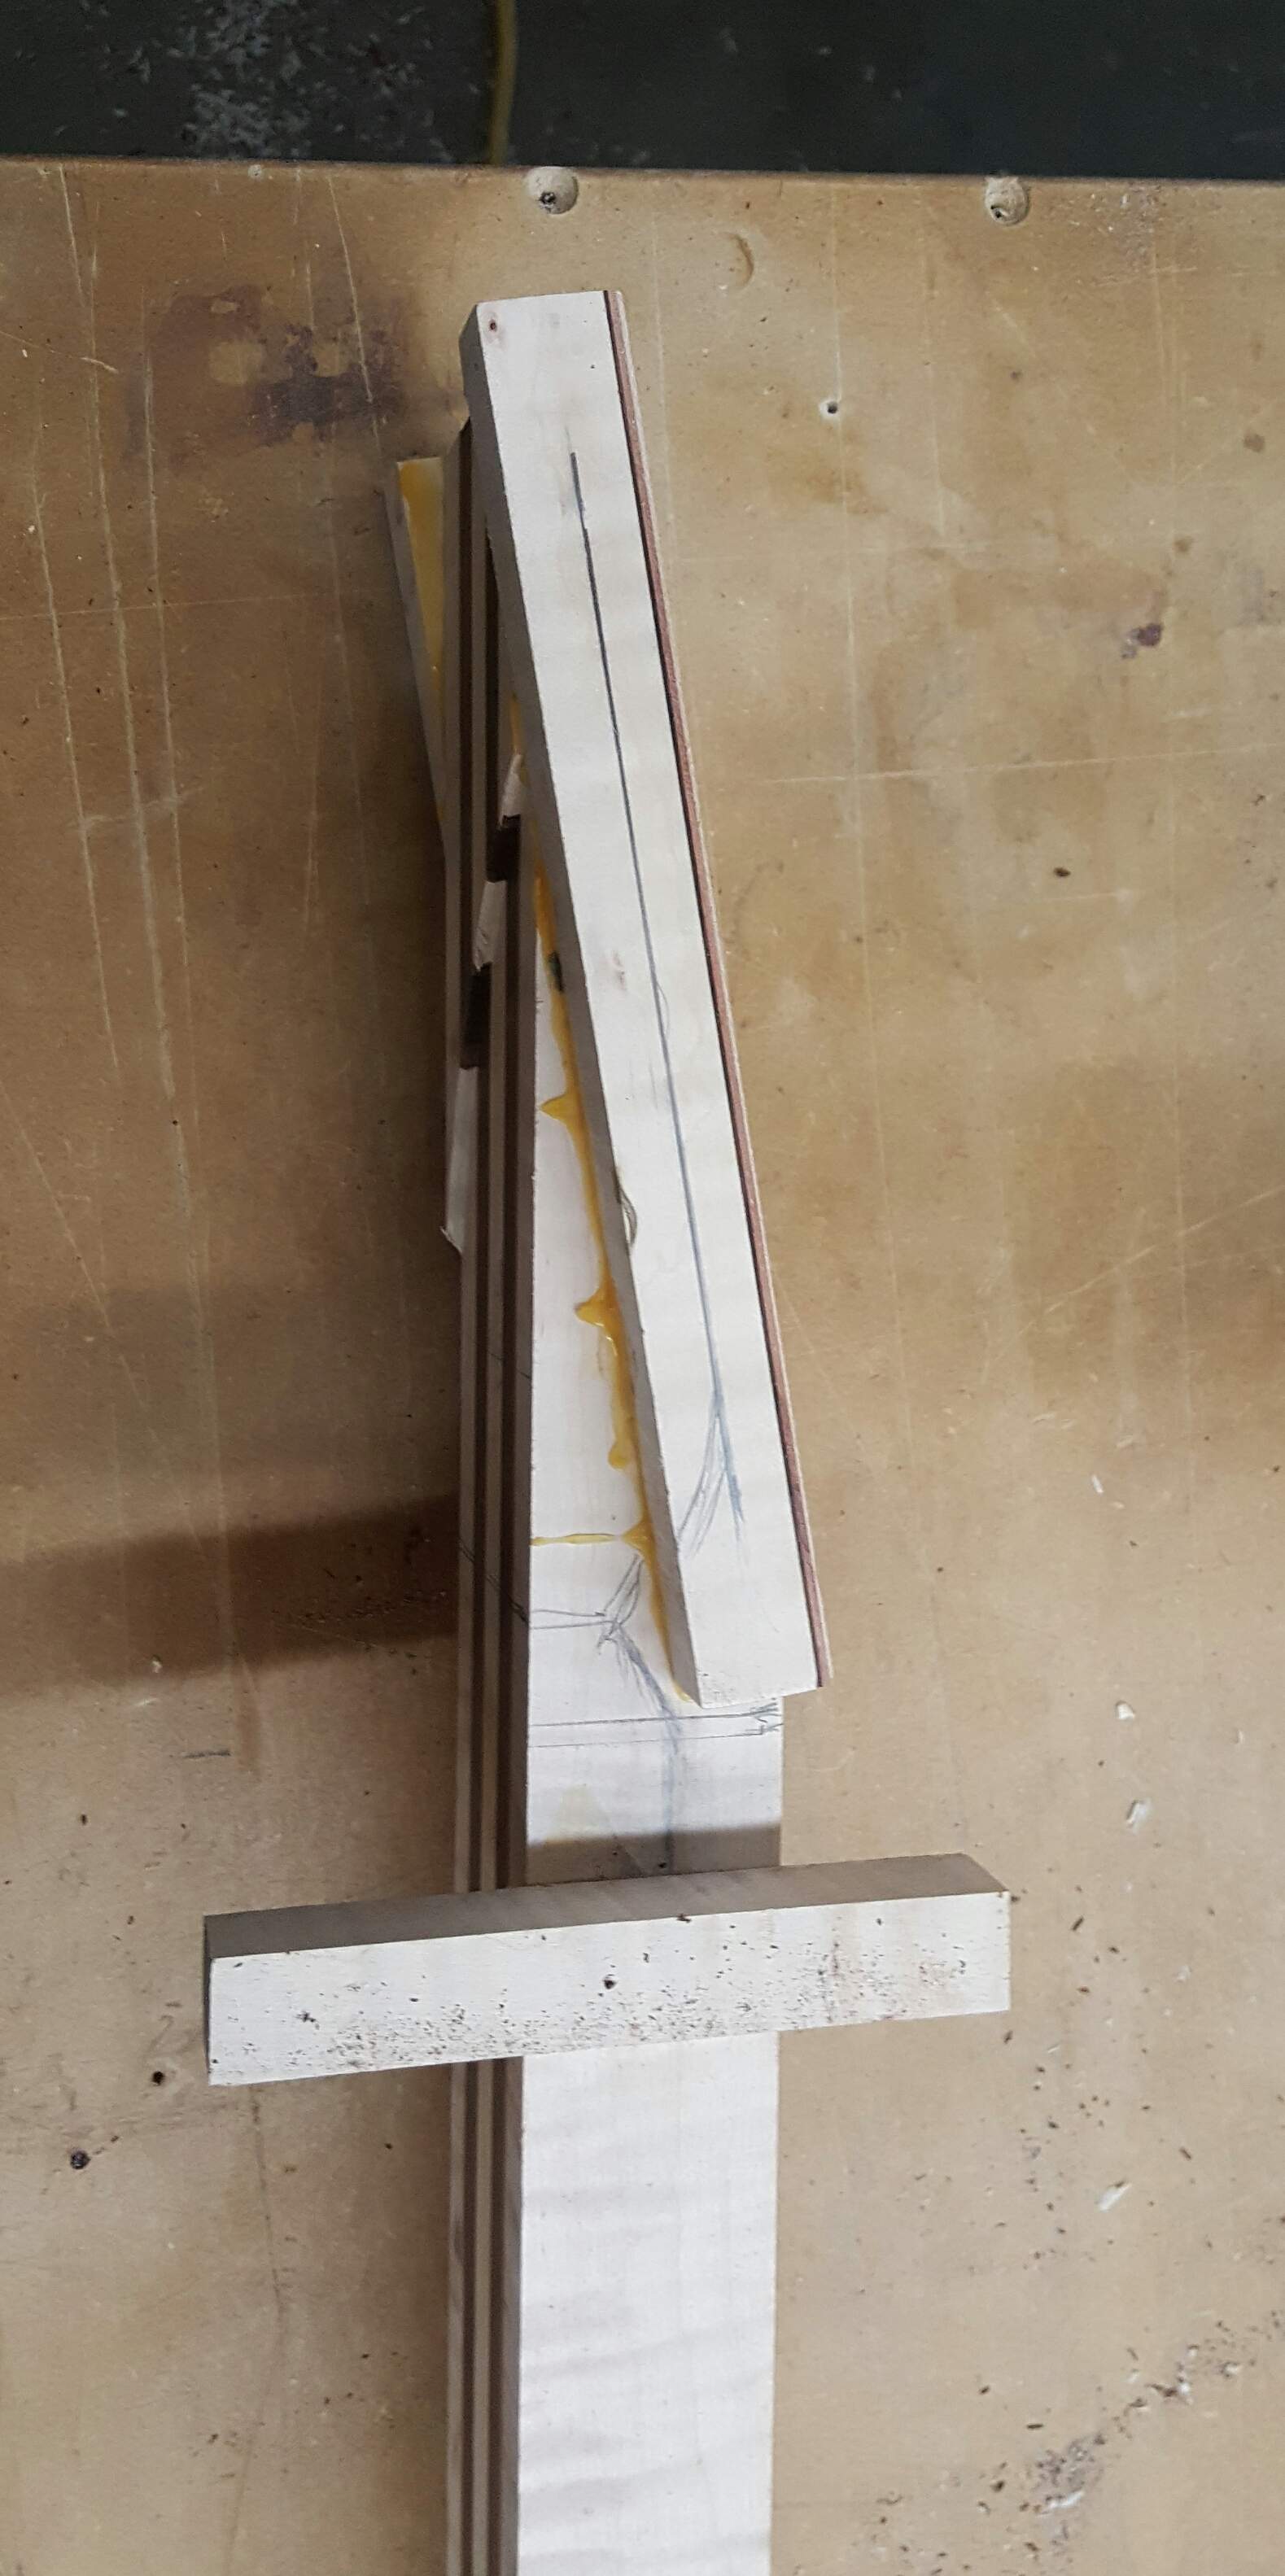
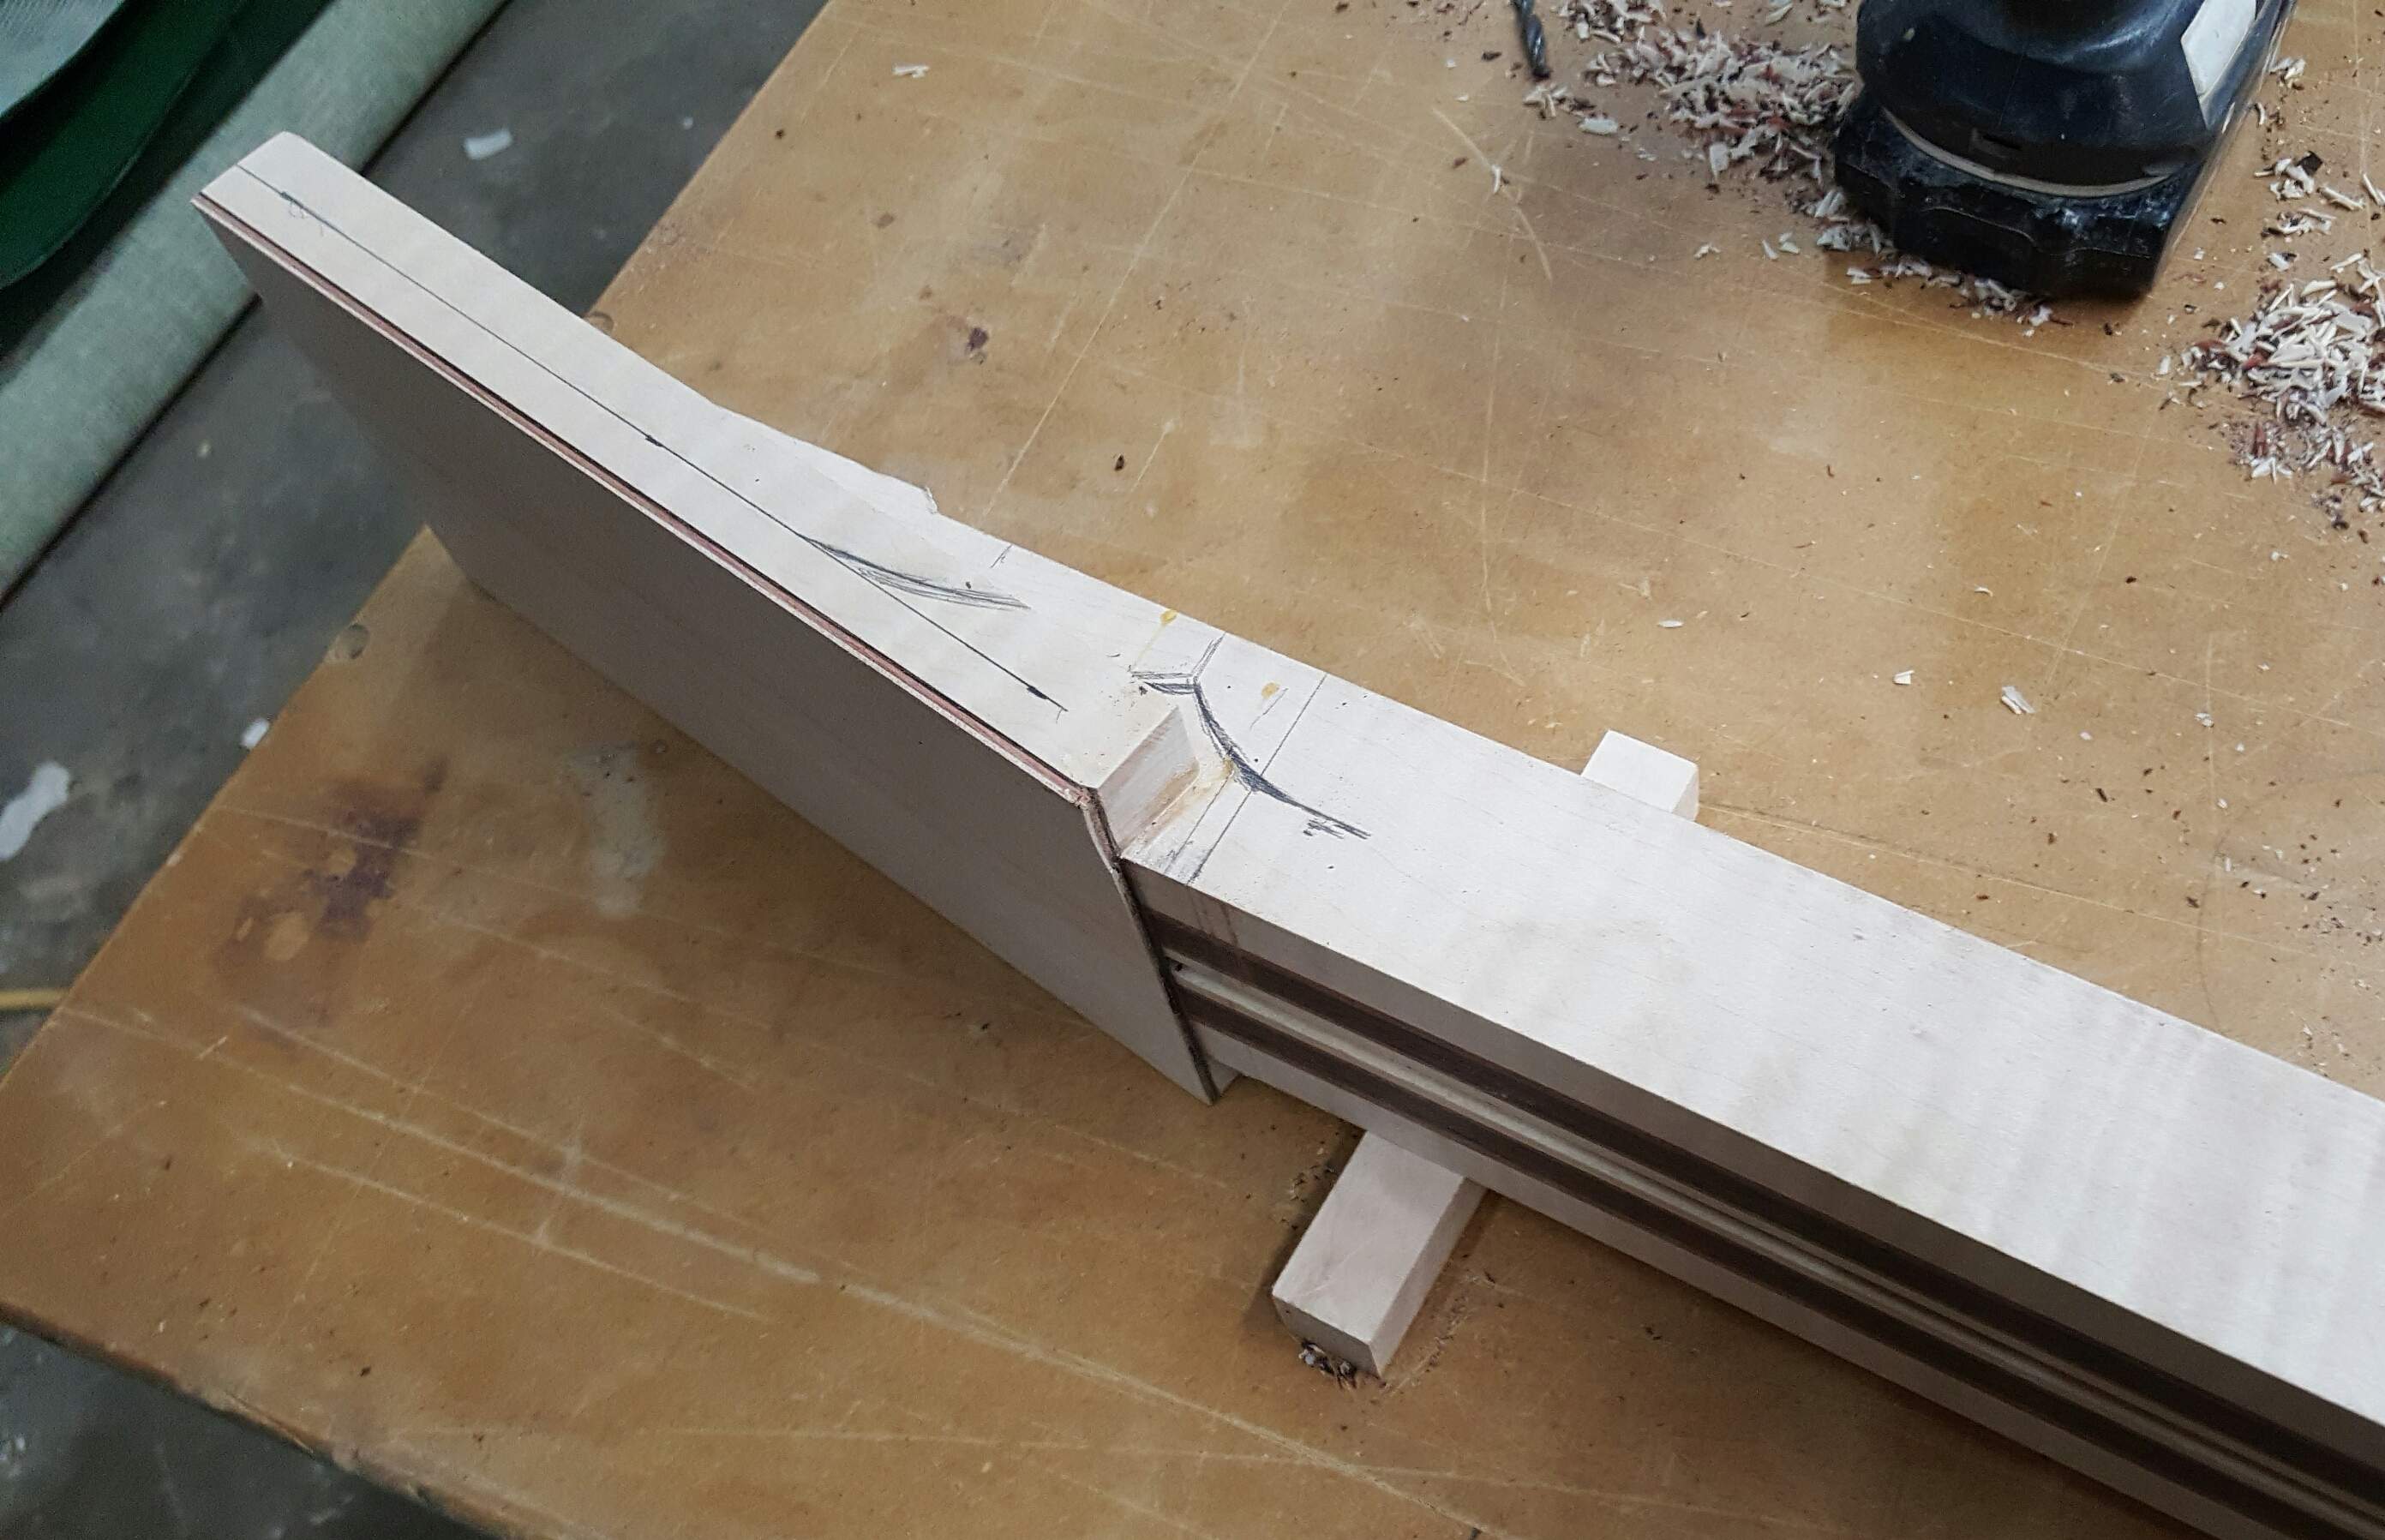
It really helped...the cut I made was square, albeit not perfectly straight..., probably because I left the skinny blade on the saw so I wouldn't have trouble making the curve of the volute....and I haven't taken the time to reset the guides to accommodate the skinny blade...
But it's nothing a few minutes with a sanding block & some elbow grease wont cure...
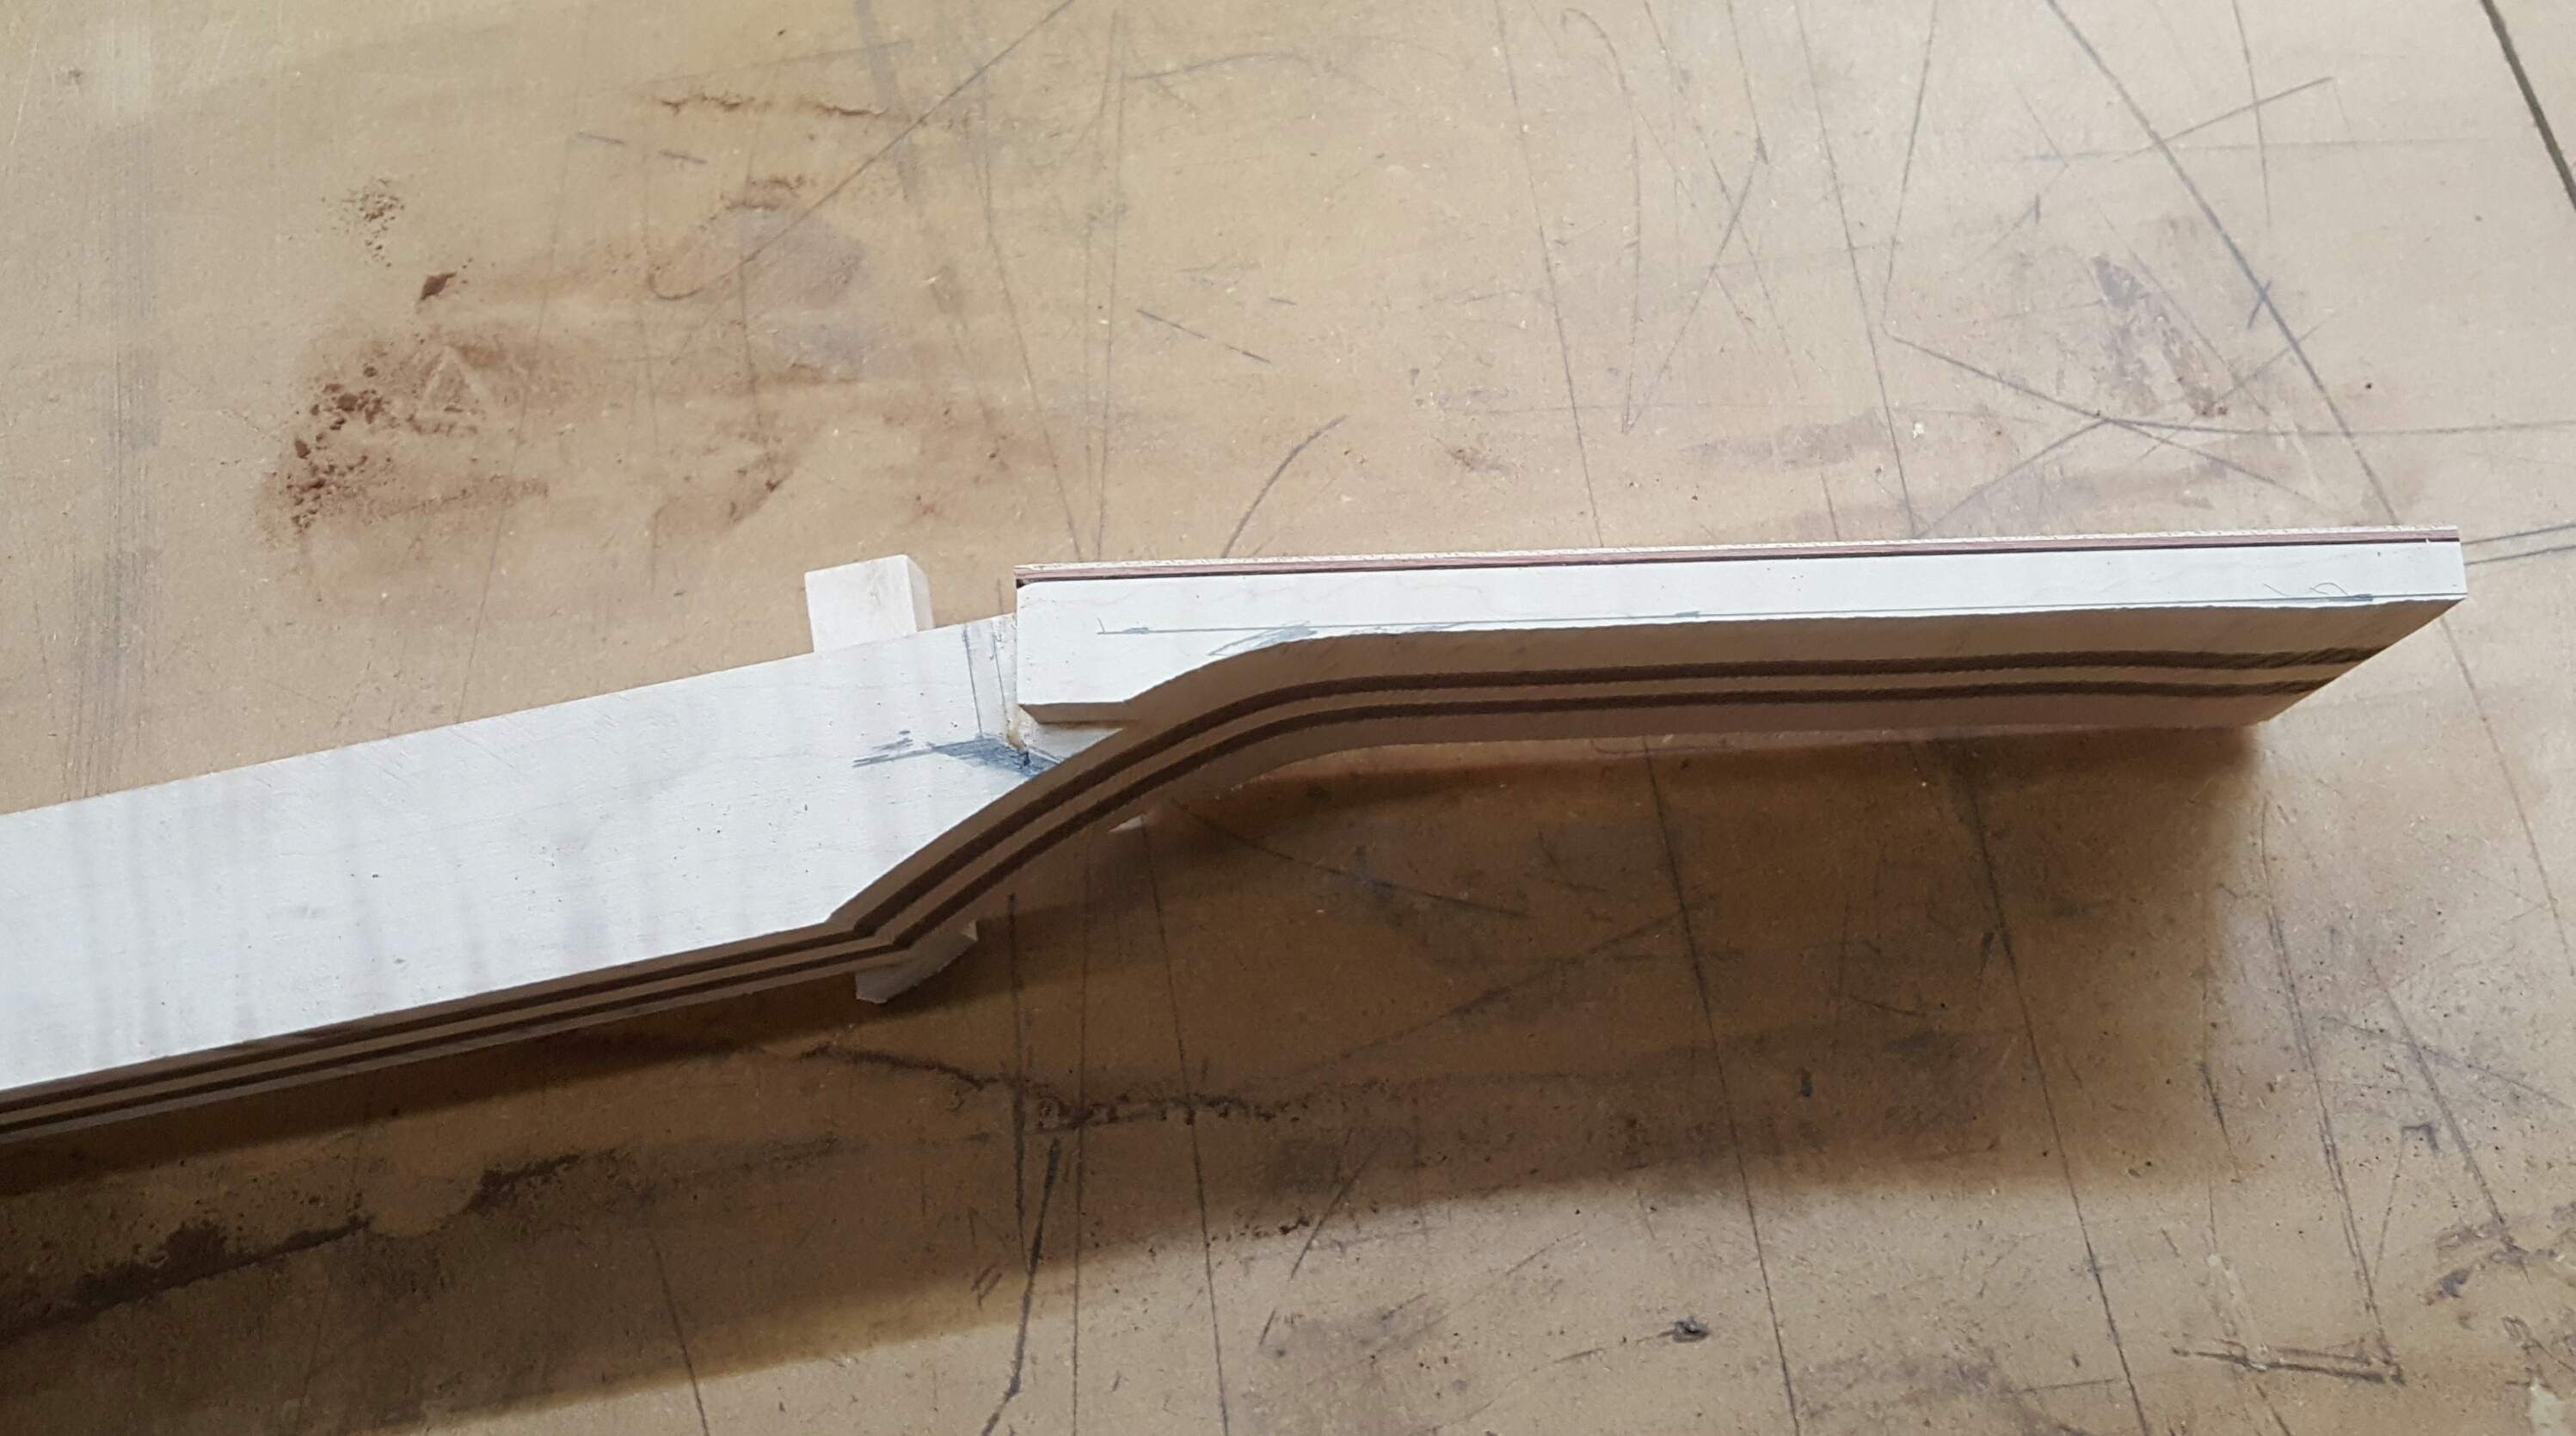
Just a little bit scary cutting it so thin, but I learned my lesson on my last build where I was too cautious & it wound up being too thick....the veneers I still have left to laminate will add plenty of stregth & thickness.
First, since the wings are on the head I tried something to help the neck stay square to the bandsaw blade as I cut it.
I temporarily stuck this piece on to act as not only a spacer, but also a kind of outrigger type thing...
It really helped...the cut I made was square, albeit not perfectly straight..., probably because I left the skinny blade on the saw so I wouldn't have trouble making the curve of the volute....and I haven't taken the time to reset the guides to accommodate the skinny blade...
But it's nothing a few minutes with a sanding block & some elbow grease wont cure...
Just a little bit scary cutting it so thin, but I learned my lesson on my last build where I was too cautious & it wound up being too thick....the veneers I still have left to laminate will add plenty of stregth & thickness.
- Feb 28, 2015
- 2,922
- 9,028
- Disclosures
- Owner/Builder- RockHewer Custom Guitars LLC
I'm afraid the unofficial name of this bass is now "MouseSlayer" !
See...we've been having a problem with mice at my shop, I cant remember how many we have caught in traps or I've found already dead. I dont know why they insist on living in the shop...there's really not that much food laying around.
Anyway, I had just taken the the drops from the top plate, (that I bookmatched & glued up to use to make the headstock face veneer)...out of the clamps. So with that in my hand I saw this little dude run across the floor. Now, I'm an instinctive pest killer,...one time I smooshed a tarantula with my house slipper.... so this little guy doesn't stand a chance! He's going down! It's him or me!...kill or be killed! ....yeah...well...anyway....
I crept up behind him and slammed the edge of that veneer blank down on his neck like a guillotine!!
See...we've been having a problem with mice at my shop, I cant remember how many we have caught in traps or I've found already dead. I dont know why they insist on living in the shop...there's really not that much food laying around.
Anyway, I had just taken the the drops from the top plate, (that I bookmatched & glued up to use to make the headstock face veneer)...out of the clamps. So with that in my hand I saw this little dude run across the floor. Now, I'm an instinctive pest killer,...one time I smooshed a tarantula with my house slipper.... so this little guy doesn't stand a chance! He's going down! It's him or me!...kill or be killed! ....yeah...well...anyway....
I crept up behind him and slammed the edge of that veneer blank down on his neck like a guillotine!!

Hi there folks.
I have always had a thing for Alembics.
Back in the day ('80s) my dream bass was John Entwistle's Spyder bass(es)
These days I find myself enamored to the Balance K body style. (They developed in about '04 I think).
To me, it's one of the sexiest basses out there.
But I don't think I have ever, really had a spare $20K laying around that I was willing to drop to have them build me one!
So, I am going to build myself one
(Or.... a close approximation thereof.)
Specs:
String #: 5
Body type: HIPPIE SANDWICH(of course)
Neck: 7 or 9 pc. laminated
Neck wood: flame maple, wenge, bubinga.
Body wing wood: flame maple core, wenge pin stripes, bubinga accent stripes, hard maple pin stripes.
Top & back panels: figured black walnut
front, bookmatch to center
back, bookmatch to neck
Fretboard : probably wenge, 34" or 35" scale.
Bridge: Hipshot D with self made tailpiece. ...(unless I get a wild hair & make the bridge myself too)
Pickups: 2 EMG TWX soapbars
(no, I cannot afford Alembic electronics!anyway...I like EMG just fine )
Tuners: either Hipshot ultralight, or Gotoh
here's a pic of my woods, including all the "veneer" I cut.View attachment 720803
check out how the top panel grain flows with the body shape:
View attachment 720804
note: that cardboard is Not my pattern or anything....it's just a rough cutout to look at wood through.
That's all for now, I gotta get some sleep.

That's a beautiful piece of wood.
I'm curious to see how you thickness and level the back of the headstock, I'm getting close to that point on my build, scratching my head how best to do it. The only thing I've come up with is some kind of router sled, with the neck held top of headstock down, and the neck sitting on some kind of wedge supports to hold it at the correct angle. Is there a simpler way? I'm going to blatantly and shamelessly steal your idea for the little wood "outriggers" to hold everything square while badsawing out the neck profile. I was cursing myself for attaching the headstock wings before profiling the neck and volute area.

- Feb 28, 2015
- 2,922
- 9,028
- Disclosures
- Owner/Builder- RockHewer Custom Guitars LLC
Honesty, all I did was like i mentioned above....totally low techI'm curious to see how you thickness and level the back of the headstock, I'm getting close to that point on my build, scratching my head how best to do it. The only thing I've come up with is some kind of router sled, with the neck held top of headstock down, and the neck sitting on some kind of wedge supports to hold it at the correct angle. Is there a simpler way? I'm going to blatantly and shamelessly steal your idea for the little wood "outriggers" to hold everything square while badsawing out the neck profile. I was cursing myself for attaching the headstock wings before profiling the neck and volute area.
 ....since my cut was square & fairly close to my line...I just sanded it a bit with an 80g Block.
Checking it every so often with digital calipers and using pencil marks on the surface to make sure the material was being removed where i wanted & not removed in the areas that were done as it got close.
But i didnt have a lot to remove. If I had any more ..... I probably would do it like you said....router sled

- Feb 28, 2015
- 2,922
- 9,028
- Disclosures
- Owner/Builder- RockHewer Custom Guitars LLC
I'm curious to see how you thickness and level the back of the headstock, I'm getting close to that point on my build, scratching my head how best to do it. The only thing I've come up with is some kind of router sled, with the neck held top of headstock down, and the neck sitting on some kind of wedge supports to hold it at the correct angle. Is there a simpler way? I'm going to blatantly and shamelessly steal your idea for the little wood "outriggers" to hold everything square while badsawing out the neck profile. I was cursing myself for attaching the headstock wings before profiling the neck and volute area.
I used a belt sander and spindle sander for getting to the line. Seems to work OK that way, although to use belt you need to position at a bit of an oddball angle (at least with a ROSS).
I think next time I may build an angled support to keep the neck stable on a flat surface and use a router sled or Safe-T-Planer on the drill press.

I'm curious to see how you thickness and level the back of the headstock, I'm getting close to that point on my build, scratching my head how best to do it. The only thing I've come up with is some kind of router sled, with the neck held top of headstock down, and the neck sitting on some kind of wedge supports to hold it at the correct angle. Is there a simpler way? I'm going to blatantly and shamelessly steal your idea for the little wood "outriggers" to hold everything square while badsawing out the neck profile. I was cursing myself for attaching the headstock wings before profiling the neck and volute area.
Honesty, all I did was like i mentioned above....totally low tech
Checking it every so often with digital calipers and using pencil marks on the surface to make sure the material was being removed where i wanted & not removed in the areas that were done as it got close.
But i didnt have a lot to remove. If I had any more ..... I probably would do it like you said....router sled
Here's how I do this: LINK
- Feb 28, 2015
- 2,922
- 9,028
- Disclosures
- Owner/Builder- RockHewer Custom Guitars LLC
Yep....me too. Very cool.Hammer
Thanks for the link, that's almost exactly what I pictured.
AND it would feasibly eliminate the step of cutting the back on the bandsaw first.
And that angled support piece can be re-used on subsequent builds.
The more I do, the more I am converting to stable solutions to procedural issues such as this, instead of the "fly by the seat of ones pants" methodology of building.
It makes for more predictable outcomes, and reduced build times and stress.
So...yeah, thanks for sharing @HaMMerHeD
- Feb 28, 2015
- 2,922
- 9,028
- Disclosures
- Owner/Builder- RockHewer Custom Guitars LLC
Some fairly minimal progress. Especially considering that it has been an entire month since I last updated...
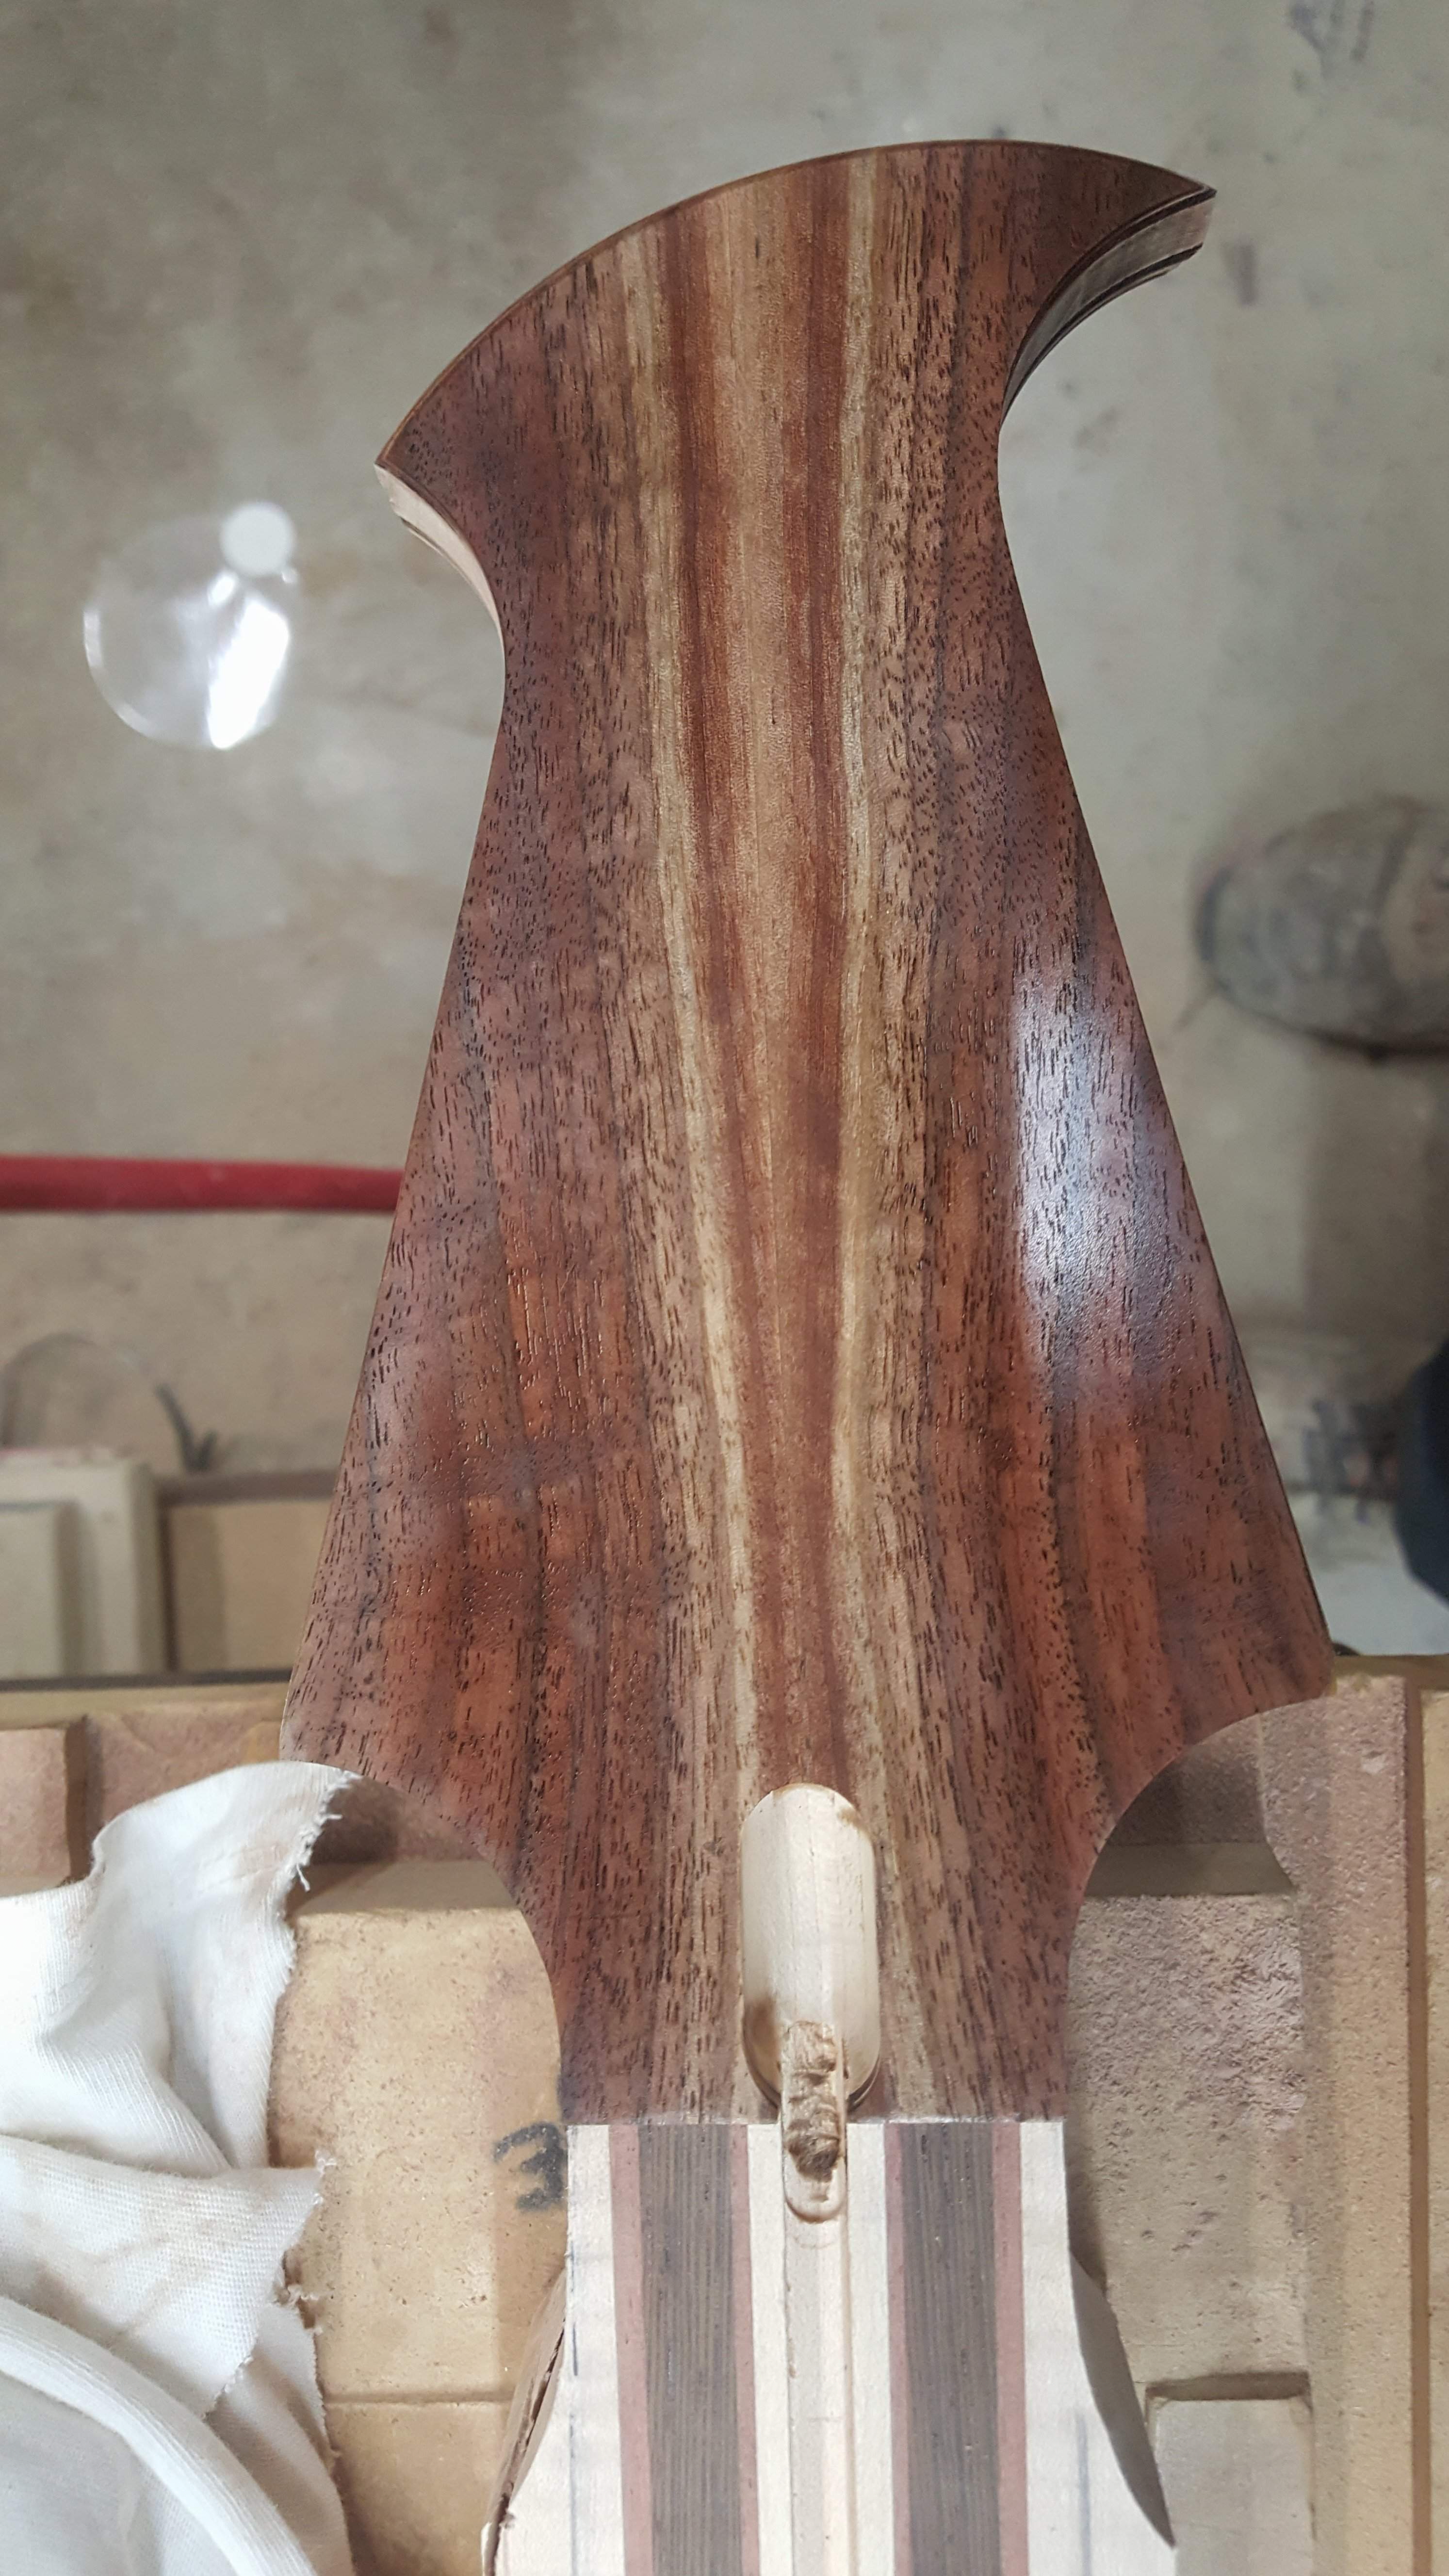
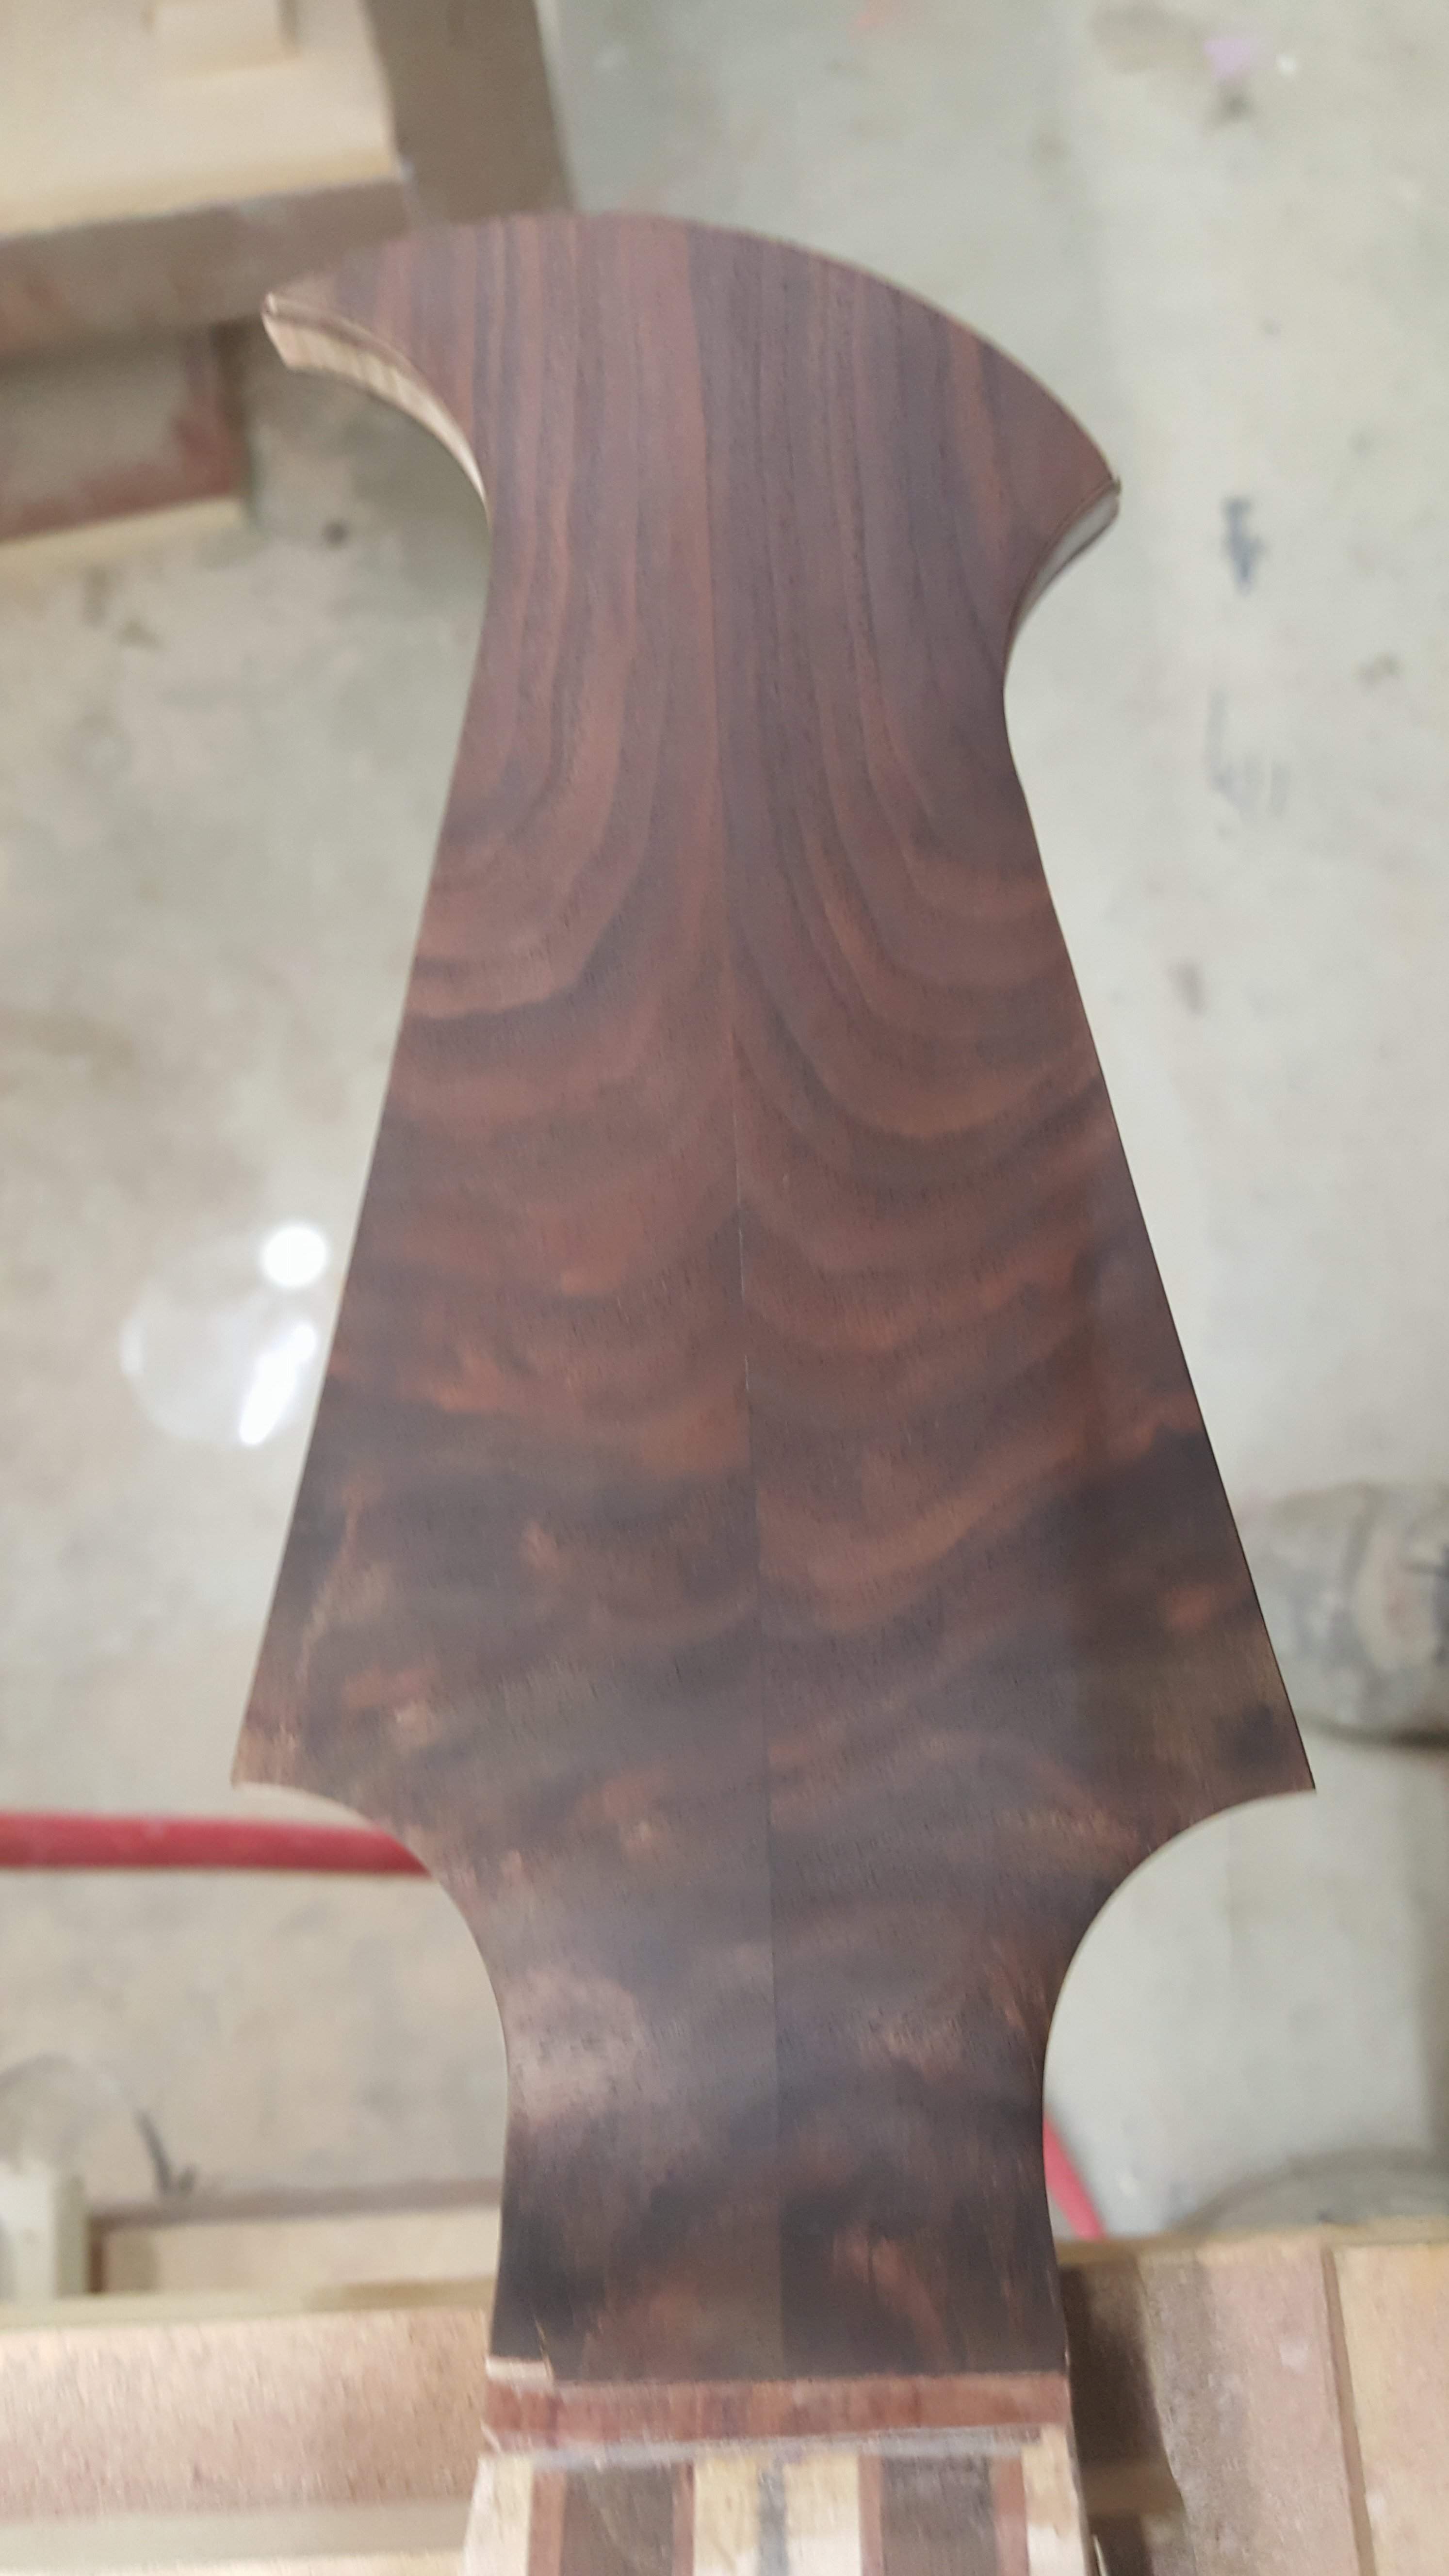
Finished the (8) veneer laminations on the headstock:
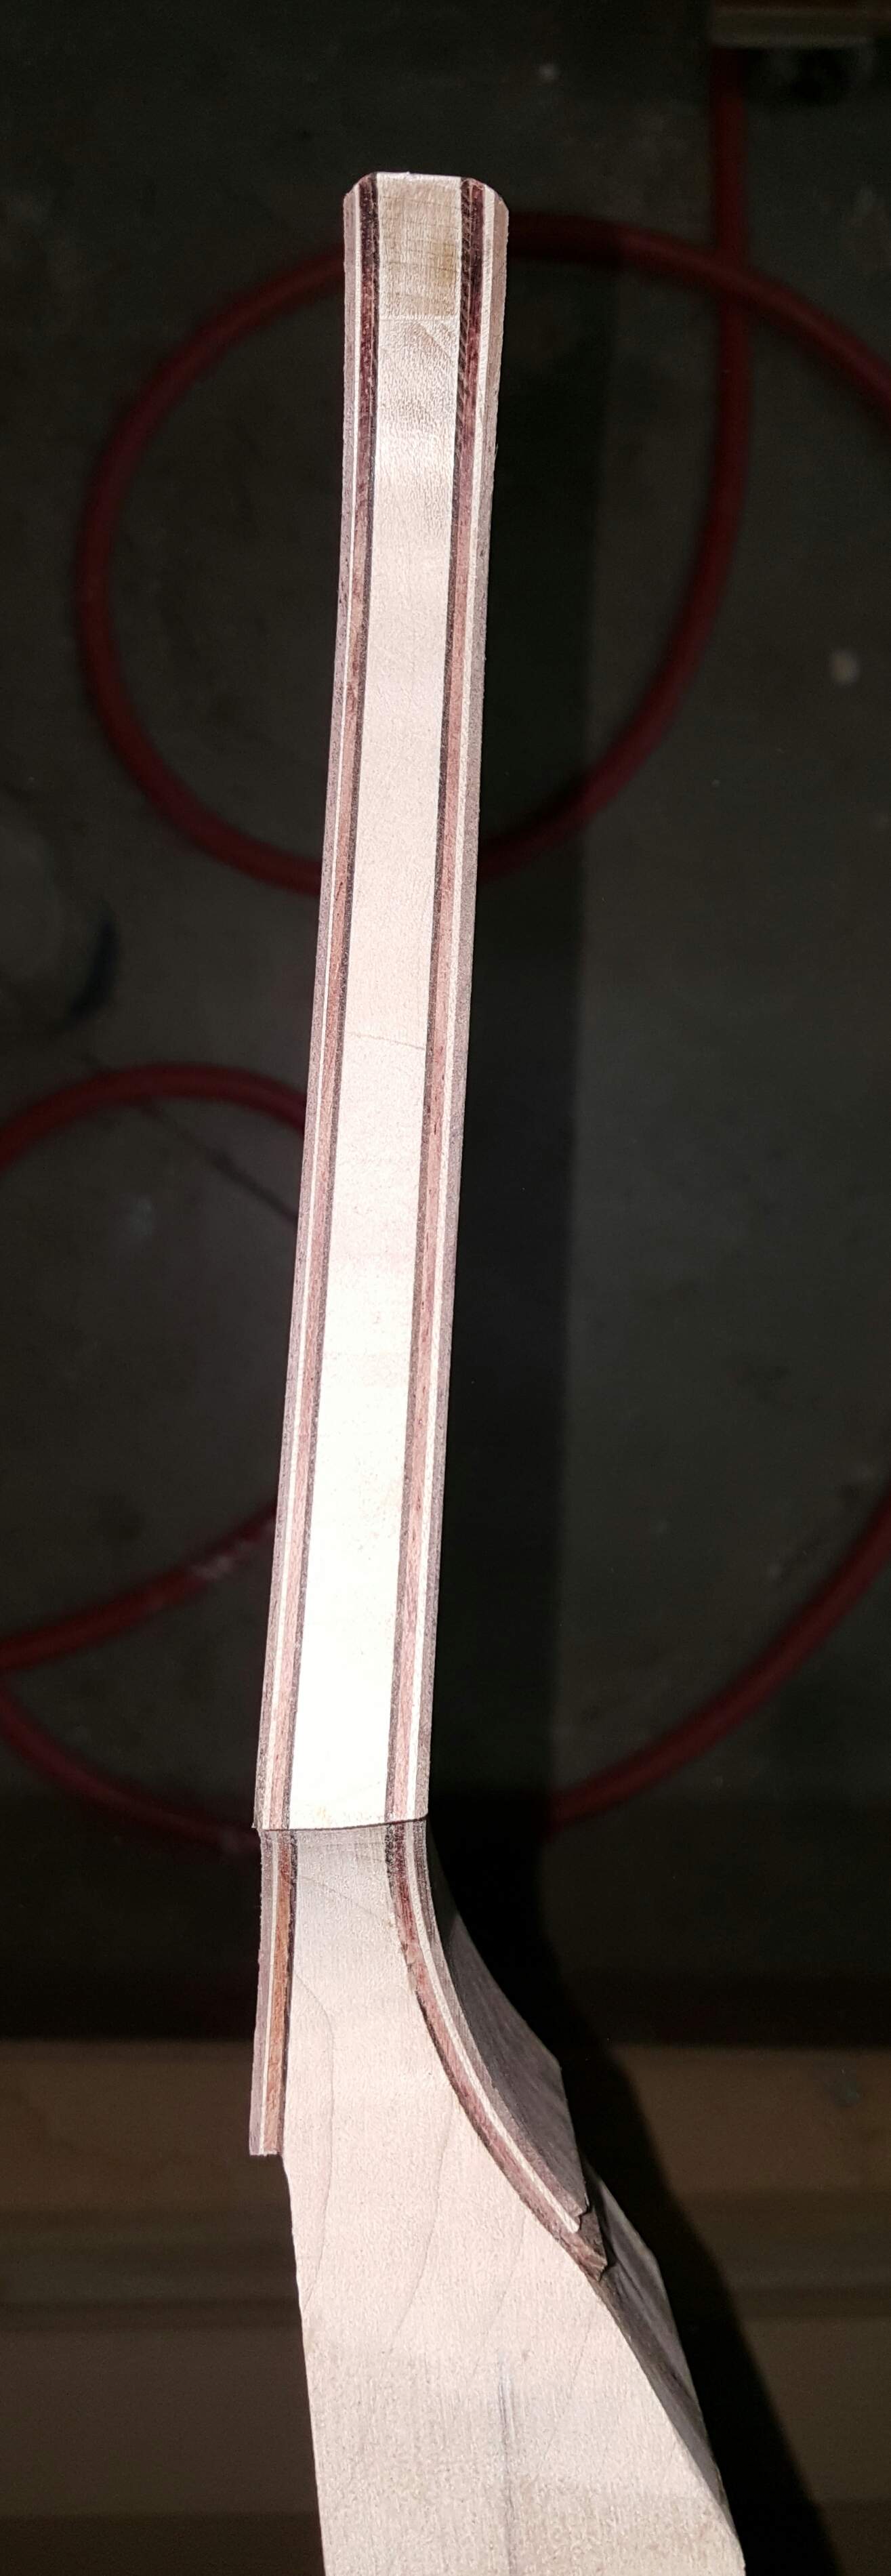
Front:
Back:
I was a bit more successful cutting out the e-cavity access panel, keeping the kerf straight /thin enough for an ok reveal....than I was on my last build. (I had to bend in a filler strip last time)
I did it the same way... (by hand with a coping saw)... but this time I stuck a pattern aligned precisely on both sides with dbl. sided tape...& used that as a guide to make a razor knife cut on each side. The idea for that being, it might be easier to keep the tiny coping saw blade from wandering, by following a 'path of least resistance'.... did it work? ... meh....perhaps it helped. I still wandered a little here & there...so if you look close you can see the darker areas along the kerf where I filled the booboos with CA & walnut dust.
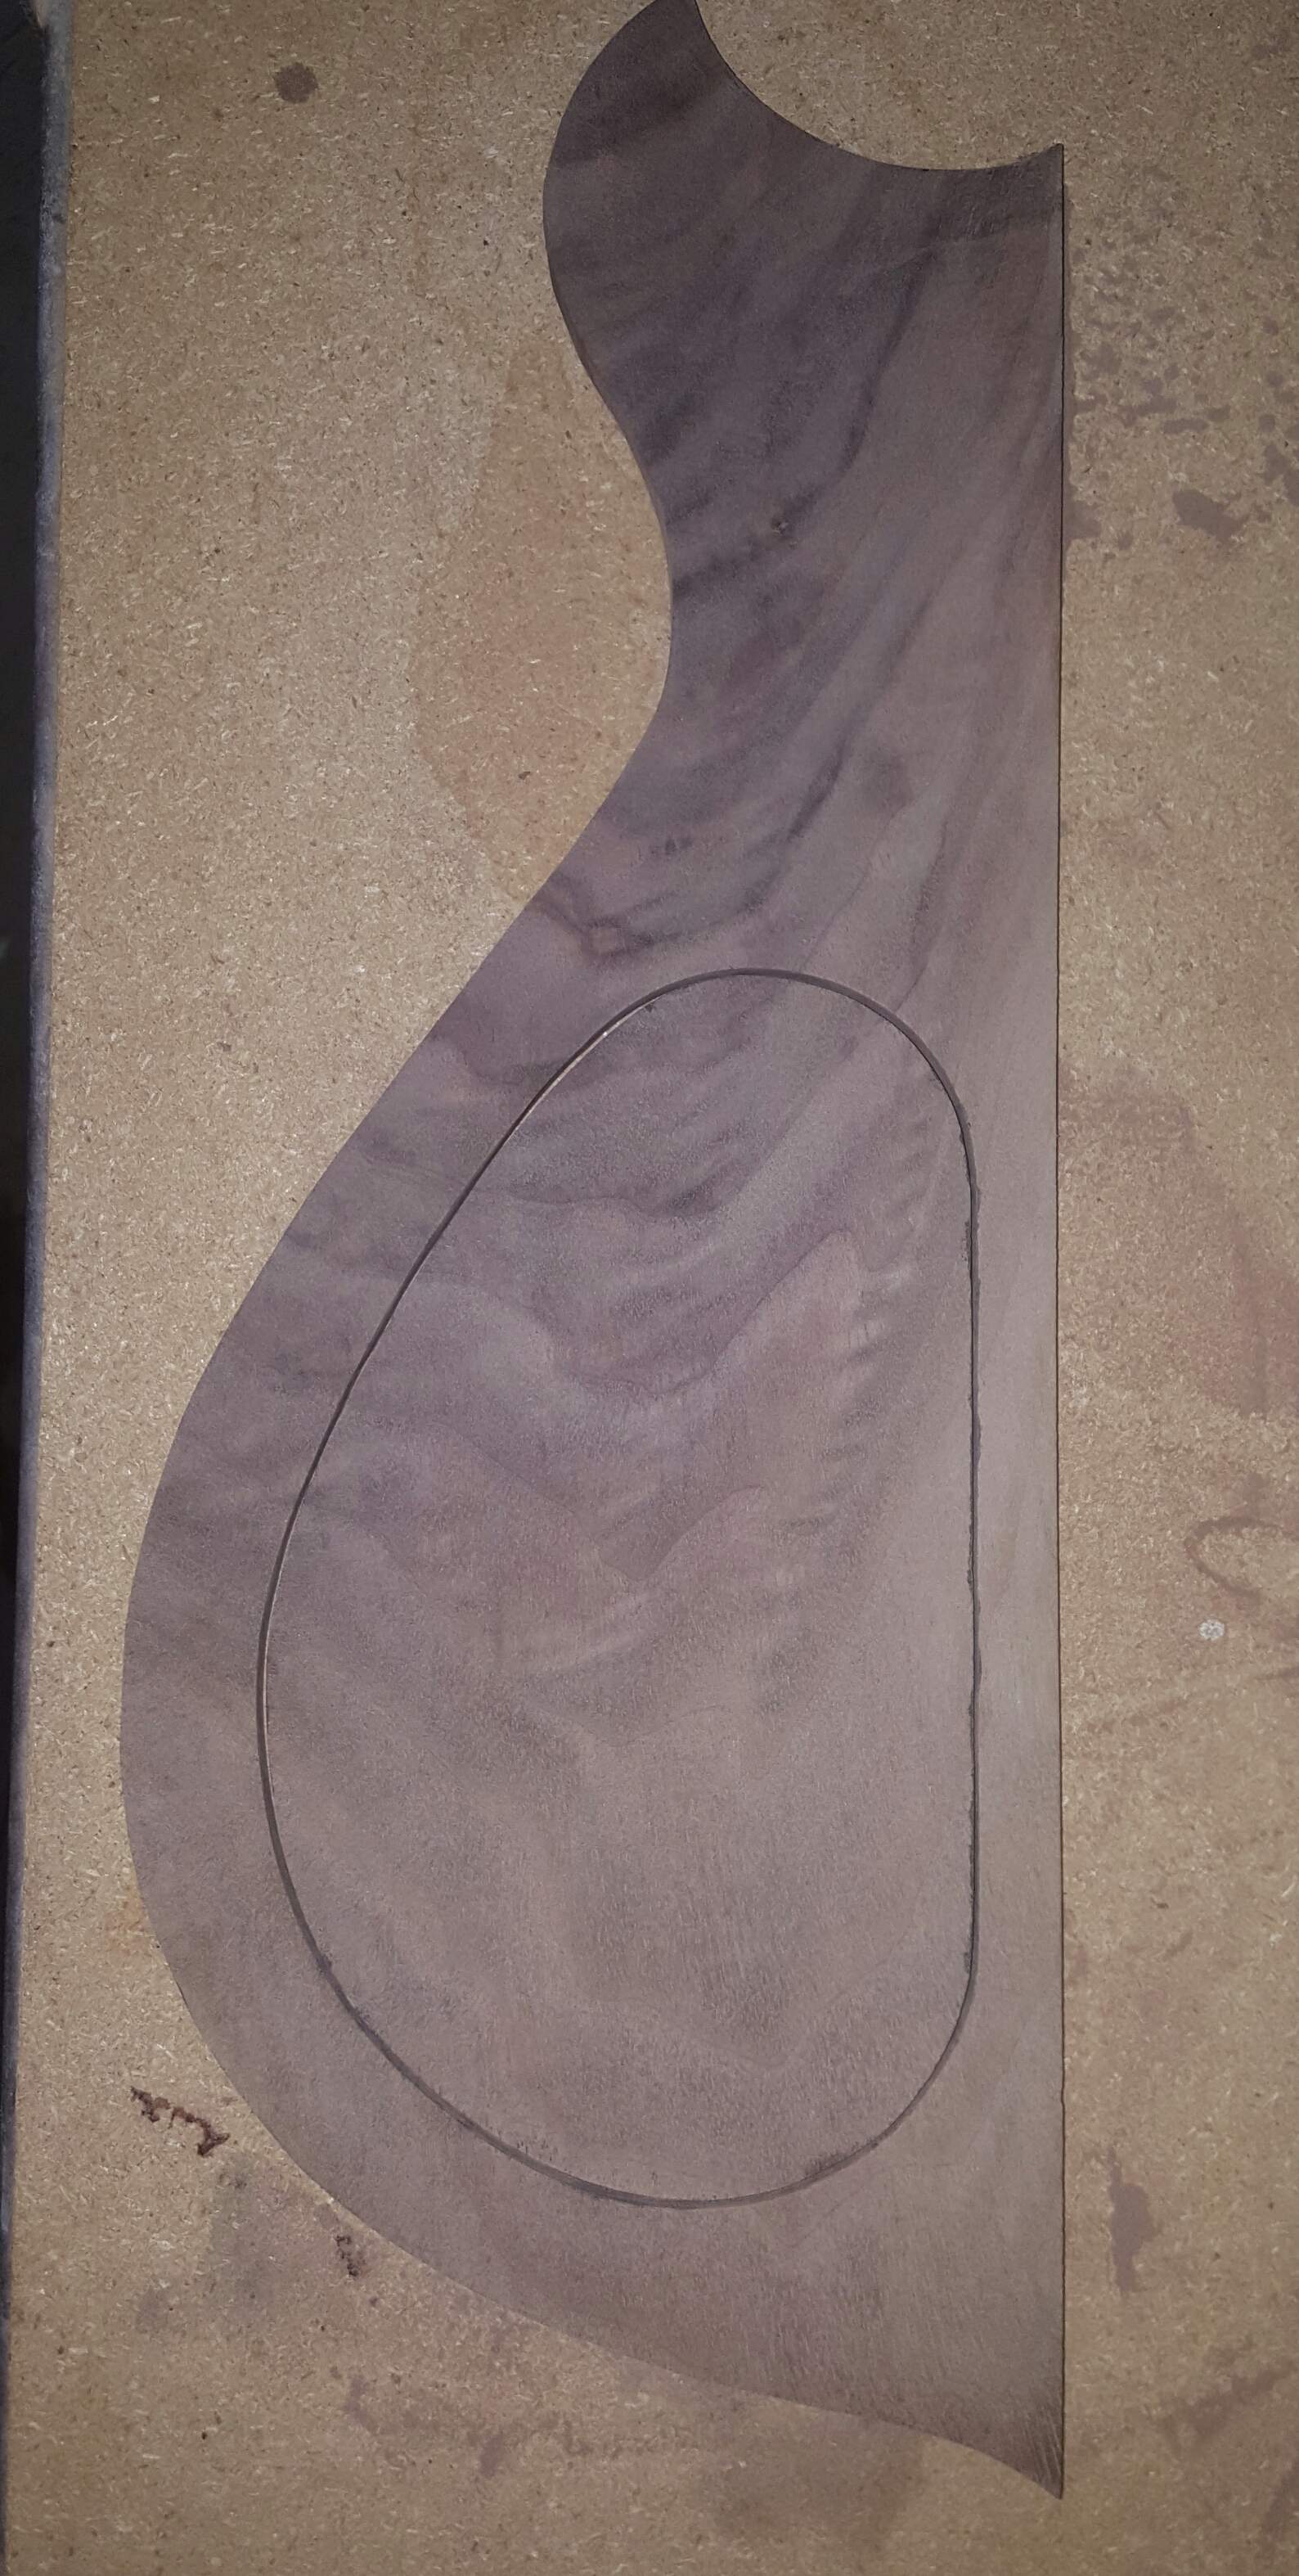
Once it is finish sanded, and clear coat applied, those won't be anywhere near as visible. Plus I am going to lacquer the edge of the access panel & opening, this few mils of buildup will be enough to tighten up the reveal to totally acceptable tolerance.
I'm actually pretty happy with how this turned out.
One of these days I'm going to invest in a scroll saw ...that will make it much easier to stay on my line
Finished the (8) veneer laminations on the headstock:
Front:
Back:
I was a bit more successful cutting out the e-cavity access panel, keeping the kerf straight /thin enough for an ok reveal....than I was on my last build. (I had to bend in a filler strip last time)
I did it the same way... (by hand with a coping saw)... but this time I stuck a pattern aligned precisely on both sides with dbl. sided tape...& used that as a guide to make a razor knife cut on each side. The idea for that being, it might be easier to keep the tiny coping saw blade from wandering, by following a 'path of least resistance'.... did it work? ... meh....perhaps it helped. I still wandered a little here & there...so if you look close you can see the darker areas along the kerf where I filled the booboos with CA & walnut dust.
Once it is finish sanded, and clear coat applied, those won't be anywhere near as visible. Plus I am going to lacquer the edge of the access panel & opening, this few mils of buildup will be enough to tighten up the reveal to totally acceptable tolerance.
I'm actually pretty happy with how this turned out.
One of these days I'm going to invest in a scroll saw ...that will make it much easier to stay on my line
- Feb 28, 2015
- 2,922
- 9,028
- Disclosures
- Owner/Builder- RockHewer Custom Guitars LLC
Teaser:

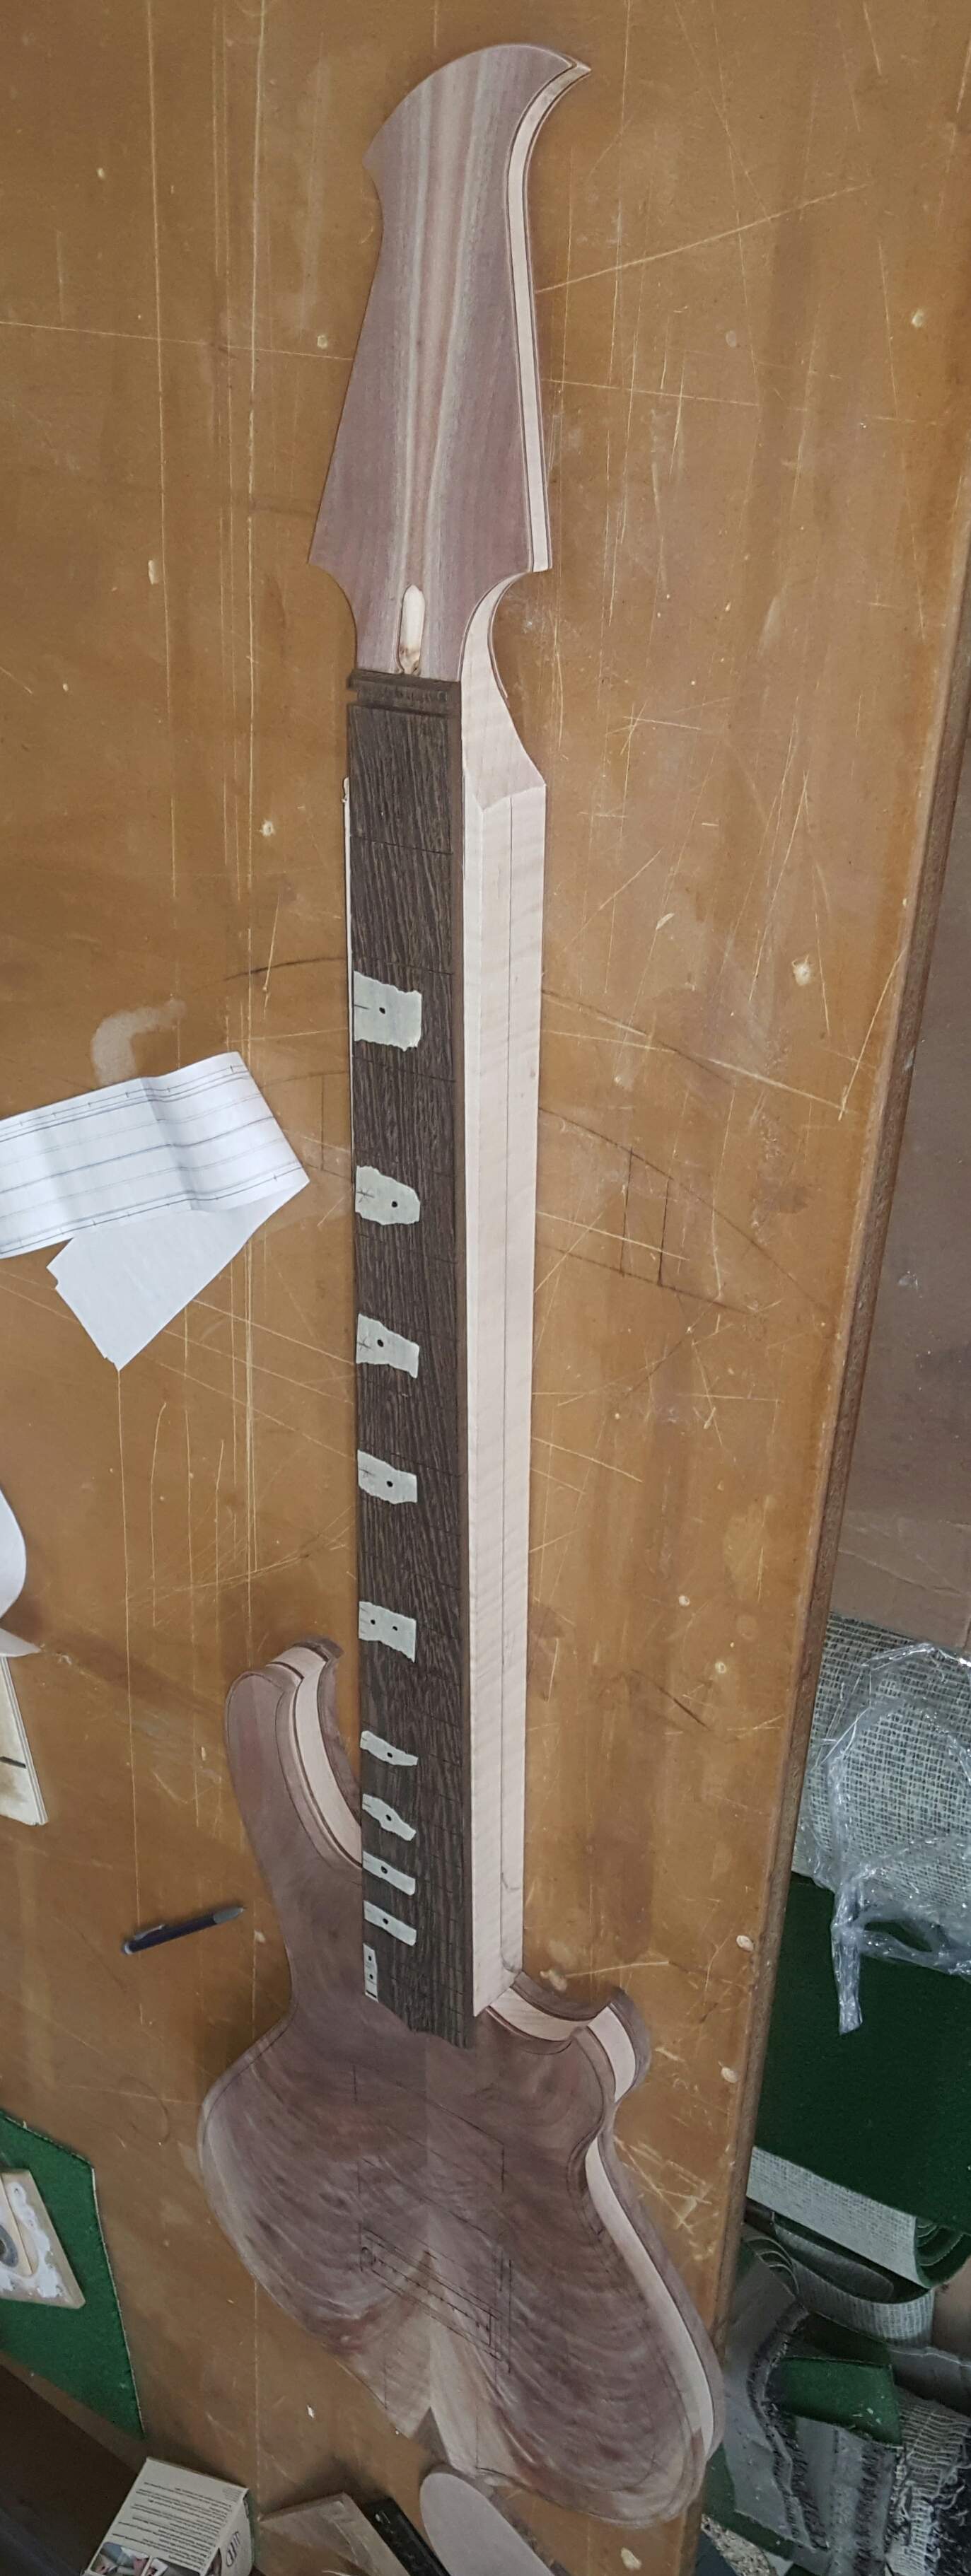
I'm working on the fretboard side marker fiber optics now... I've got the back of the board routed, & I still need to drill the edge... that's why there's tape reminding me which position gets drilled...lest I forget
I'll post some pics of that later.
I'm working on the fretboard side marker fiber optics now... I've got the back of the board routed, & I still need to drill the edge... that's why there's tape reminding me which position gets drilled...lest I forget
I'll post some pics of that later.
Last edited:

- May 1, 2014
- 2,494
- 2,341
- 56
- Disclosures
- Owner Melodious Resonance Constructs
That continues to kill, struggling to find time for my own build too. The one cavity I've done I used a Stewmac set of templates, overpriced, of course, but it was stress free and came out perfect. Their template is designed to be used with a Stewmac (of course) plastic cavity cover, and consists of two templates, one for the cover and the other for the "ledge" with bump outs for screws. I'm thinking you could run a Dremel with a 1/16" spiral down-cut bit around the inside edge of the cover template and cut the cover right out of veneer stock. I'm going to try that if I ever get into a wood cavity cover. I don't own a jigsaw, pretty sure I'd screw it up if I did.

That continues to kill, struggling to find time for my own build too. The one cavity I've done I used a Stewmac set of templates, overpriced, of course, but it was stress free and came out perfect. Their template is designed to be used with a Stewmac (of course) plastic cavity cover, and consists of two templates, one for the cover and the other for the "ledge" with bump outs for screws. I'm thinking you could run a Dremel with a 1/16" spiral down-cut bit around the inside edge of the cover template and cut the cover right out of veneer stock. I'm going to try that if I ever get into a wood cavity cover. I don't own a jigsaw, pretty sure I'd screw it up if I did.
I have the same stew mac template set. I bought their cover and just use that as a third template so I can double stick tape it to any wood I need and make a perfect fit cover.
I hadn't thought of that, obvious solution. I suppose you could just buy the Stewmac matching plastic cover and make a thicker template of it out of MDF using a flush cut bit so you don't trash the original. I'm gonna shamelessly steal that idea! Alembic is famous for cutting their cover plates right out of the veneer, probably using some kind of standard template.


