• TalkBass has been independent since 1998. Add your voice.
    Create a free account to reply to discussions, view embedded media, and browse with fewer display ads.
    Join freeLog in
    Want zero display ads or expanded classifieds tools? Compare plans.

Body Build for the P-Yama

I really like your drilling jig, that’s clever.

For the spots we went too deep in the pocket, I wouldn’t use wood filler as that might be too soft and brittle.

An epoxy you can level would do a better job IMO. I would roughen the pocket at first to increase the adhesion and then apply the epoxy.

 
The router plane really helps. Making slow progress. The transition up out of the heel in the back will be interesting since the heel on the 24 fret neck ends an inch or so before the body ends.
 

Attachments

  • 20_router.jpg
    20_router.jpg
    5 MB · Views: 10
  • 21_rear pocket.jpg
    21_rear pocket.jpg
    5.1 MB · Views: 11
  • 22 partial Pocket.jpg
    22 partial Pocket.jpg
    5.7 MB · Views: 9
Yeah, neck pocket is done. Some sloppy chisel work early on on the E side will need some filler, Cosmetic, not structural.

I realized today that I made a mistake on the pickup routes, by not drilling out the corners before I hogged out the centers. Oh well, dealing with mistakes is part of it, at least for me.
 

Attachments

  • 23 neck pocket.jpg
    23 neck pocket.jpg
    5 MB · Views: 11
  • Like
Reactions: Beej
Pickup route is done. Not pretty, but I'll clean up the top ~1/4" before painting. No one but me will see the rest.


Scrounged up the 'new' spray stand parts, never been used. The base is from my roller guide. I was worried I'd need a big rock on the base, but it's stable! And it made the move halfway across the country last year!
 

Attachments

  • 24 pickup route.jpg
    24 pickup route.jpg
    4.8 MB · Views: 11
  • 25_Spray stand.jpg
    25_Spray stand.jpg
    5 MB · Views: 12
Before I had a spindle sander, I used something like this: https://www.leevalley.com/en-ca/sho...7g41nPWyualrOmpLkrsynYxtOdg2ah5MaAh1LEALw_wcB

Though I made mine out of a bolt, some skateboard bearings and wood with glued on sandpaper. :)

If you clamp your body firmly, you can use both hands on a hand drill to sand those tough areas with this spindle frankenmonster.

That said, for cleanup of those tight areas, my go-to is a half-round file or a rat-tail file and carefully filing with the grain to hide any scrapes/scratches from the file. Once it's ensmoothened, you can then hand sand those spots, again with the grain, to hide any sins. :thumbsup:
 
  • Like
Reactions: boxerrider
Before I had a spindle sander, I used something like this: https://www.leevalley.com/en-ca/shop/tools/supplies/sanding/drums/42502-extra-long-sanding-drum-kit?item=68Z0201&utm_source=free_google_shopping&utm_medium=organic&utm_campaign=shopping_feed&utm_campaign=CAN-EN|PLA|PMax|Tools|LowPriceTier&gad_source=1&gclid=Cj0KCQiAkoe9BhDYARIsAH85cDOjqHThtjbyJq5PvM3w26d7g41nPWyualrOmpLkrsynYxtOdg2ah5MaAh1LEALw_wcB

Though I made mine out of a bolt, some skateboard bearings and wood with glued on sandpaper. :)

If you clamp your body firmly, you can use both hands on a hand drill to sand those tough areas with this spindle frankenmonster.

That said, for cleanup of those tight areas, my go-to is a half-round file or a rat-tail file and carefully filing with the grain to hide any scrapes/scratches from the file. Once it's ensmoothened, you can then hand sand those spots, again with the grain, to hide any sins. :thumbsup:
😃😆😂ensmoothened😃🤣🤪
 
  • Like
Reactions: Beej
Before I had a spindle sander, I used something like this: https://www.leevalley.com/en-ca/shop/tools/supplies/sanding/drums/42502-extra-long-sanding-drum-kit?item=68Z0201&utm_source=free_google_shopping&utm_medium=organic&utm_campaign=shopping_feed&utm_campaign=CAN-EN|PLA|PMax|Tools|LowPriceTier&gad_source=1&gclid=Cj0KCQiAkoe9BhDYARIsAH85cDOjqHThtjbyJq5PvM3w26d7g41nPWyualrOmpLkrsynYxtOdg2ah5MaAh1LEALw_wcB

Though I made mine out of a bolt, some skateboard bearings and wood with glued on sandpaper. :)

If you clamp your body firmly, you can use both hands on a hand drill to sand those tough areas with this spindle frankenmonster.

That said, for cleanup of those tight areas, my go-to is a half-round file or a rat-tail file and carefully filing with the grain to hide any scrapes/scratches from the file. Once it's ensmoothened, you can then hand sand those spots, again with the grain, to hide any sins. :thumbsup:
Thanks. I do have some of those, I'll have to scrounge them up. I also ordered an aggressive half round rasp just now. I may also try the flap wheel I have laying around.

I'll get it, I've got nothing but time. I work till my 60-ish hands tell me to stop for the day.

For the easy parts (outside curves), I previously used a stationary vertical belt sander. While I have a hand held belt sander, it seems too risky. I'll try 80 grit paper in my oscillating sander.

Just weighed it. 5 lb, 3 oz. Old body is 4 lb 6 oz. But, I haven't done the belly and arm cuts yet. Interesting, the old one is just at 1 3/4" thick. New one is a little North of 1 7/8", but it's not finish sanded obviously. I was shooting for a bit more thickness due to the light weight wood.
 
  • Like
Reactions: Beej
On a roll now. Belly and forearm cuts done. Wow, the Shinto rasp is 'da bomb for this! The remnants of the band saw relief cuts are still visible. Nothing that ENSMOOTHING won't fix.
 

Attachments

  • 29 belly.jpg
    29 belly.jpg
    7.2 MB · Views: 10
  • 30 forearm.jpg
    30 forearm.jpg
    4 MB · Views: 14
I'm curious how you do that on the inside of the horn? It's end grain?
I clamp the body so it can't move and then hold the file at both ends so I can move it like a spokeshave to follow the grain. It's awkward but prevents cross grain scratches in the process. I follow that up with sanding and scraping, also with the grain. Overall this reduces the scratches and the work it takes to get things smooth. Although it's end grain, you can still follow along the grain lines. :thumbsup:
 
  • Like
Reactions: Gary_M and lark_z
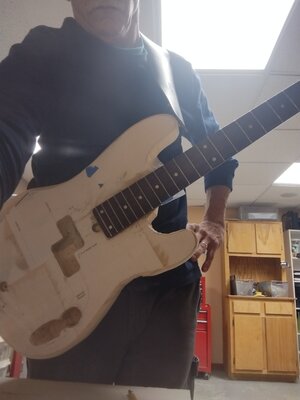
Started easing the edges off with the Shinto rasp. Half-round rasp may arrive today. Installed the strap pins to check the 'hang'. Feels good, just a hint of neck dive, but the body hardware isn't installed, so hopefully it'll be fine.
 

Attachments

  • 33 hang.jpg
    33 hang.jpg
    1.5 MB · Views: 14
  • Like
Reactions: Slidlow
First pass at cleaning up the inner curves and easing the edges. About an hour of that and the ol' hands scream "Enough!". It's getting there. Another hour of so, then it's out the driveway for orbital sanding through the grits.

You really get a good look at how much deeper (toward the bridge) the 24 fret neck is in these pix compared to a 21 fret neck.
 

Attachments

  • 35 Front rounded.jpg
    35 Front rounded.jpg
    4.8 MB · Views: 12
  • 36 rear rounded.jpg
    36 rear rounded.jpg
    5 MB · Views: 10
  • Like
Reactions: Matt Liebenau
First pass at cleaning up the inner curves and easing the edges. About an hour of that and the ol' hands scream "Enough!". It's getting there. Another hour of so, then it's out the driveway for orbital sanding through the grits.

You really get a good look at how much deeper (toward the bridge) the 24 fret neck is in these pix compared to a 21 fret neck.
Wow ! There’s no finish on it yet and it already looks good. Can’t wait to see a glossy or satin finish on this body !
 
Results of the wood filler fixes on the E side top neck pocket and the transition on the rear. I am a frustrated perfectionist. My criteria is "how does it look from 3 feet away", but I'll struggle with saying "good enough, quit".
 

Attachments

  • 37 rear pocket.jpg
    37 rear pocket.jpg
    5.2 MB · Views: 13
  • 38 pocket side.jpg
    38 pocket side.jpg
    5.2 MB · Views: 13
  • Like
Reactions: Matt Liebenau