• TalkBass has been independent since 1998. Add your voice.
    Create a free account to reply to discussions, view embedded media, and browse with fewer display ads.
    Join freeLog in
    Want zero display ads or expanded classifieds tools? Compare plans.

Build #2: Fretless Headless 5

Ok, feel better now, got the upper and lower horns carved out:

Headless3-11-09001.jpg


Decided to do a wider roundover, so that when you look at it straight on, you can see the black from all sides (mostly):

Headless3-11-09003.jpg

Headless3-11-09004.jpg

Headless3-11-09005.jpg

Headless3-11-09006.jpg


Also, we all have boo-boos ;) So, I added a piece of 3/8" teak at the end of the neck. That way, I can do a zero fret in between that space and not screw up the scale (35").

Headless3-11-09007.jpg


I'm debating on ordering another piece of veneer (1mm or 1/2mm) under the fingerboard. The way I see it, the lowest setting on the bridge is a hair over 3mm. I'd like to get it closer, so I don't have to countersink the bridge.

Headless3-11-09002.jpg


Started marking out the positions for the tail, bridge and so forth.

Headless3-11-09008.jpg
 
Cant decide between the red and blue pieces. Can you take a couple of pics outside under sunlight? :)

You just may change your mind on that, I did ;)

Gave a shot at doing a 2-tone... my personal favorite at this point, until I do a 3 tone (yellow,orange and red)

Headless3-15-09008.jpg

Headless3-15-09012.jpg


Started to angle the back, where the tail part is, added a piece of veneer at the back too.

Headless3-15-09002.jpg

Headless3-15-09003.jpg

Headless3-15-09007.jpg

Headless3-15-09006.jpg


Put more finish on the pieces that were previously done.

Headless3-15-09011.jpg
 
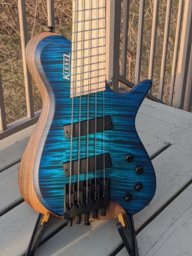
DO THAT FUNKY GREEN BURST!!! still gotta know you secret on bringing out figuring!

oh, and i website that really helped me make my special arm contour. thought you may want to look at the examples too http://www.gwbasses.com/gallery/index.shtml . i just did one on my hollowbody, basing it off those images. took roughly 5 hours, cause i though it help improve my skills to do it 100% with hand tools.

No secret. I took what I found on the subject from the net.

You can do this with either water based, Alcohol based or Mek based dyes.

There are 2 ways to bring the figuring out,

1) With a dark dye.

2) With a dark stain.

Sand from low grit to high grit, get any sand lines out (The stain or dye marks will show in the sand lines if you don't. End with 0000 steel wool). Wet the surface with water, so that the grain raises (This will keep stain or dye from going too deep, or scarring into the grain). Gently sand the stain or dye, once it's set for about 20 minutes, starting at about 320, on up to 0000 sw, until you get your desired darker figuring to your liking (you can even keep some darkness on the light grain too, if you want some tint to the colors). Then just decide if you're going with shellac, poly or any other finish. The finish is the key to the appearance. This is what I generally did, at least.
 
Set the truss rods and glued the veneers and the ebony:

Headless3-18-09001.jpg

Headless3-18-09002.jpg

Headless3-18-09003.jpg


I decided to curve the edges in some more:

Headless3-18-09004.jpg

Headless3-18-09005.jpg


Jordan, this is a sample piece i used to dye (figure is not the greatest). Use a wet paper towel to raise the grain and here I used "ebony" wood stain. 80 grit sandpaper in the vibrating sander.

Headless3-18-09006.jpg

Headless3-18-09007.jpg


Here it is sanded down, also used 000 and 0000 steel wool:

Headless3-18-09008.jpg


I like the alcohol dye (Primary colors, pictured), opposed to the water based, UV is less likely to affect it. i'll be trying to do a 3 tone this time (yellow, orange and red):

Headless3-18-09009.jpg

Headless3-18-09010.jpg


Didn't get the fade completely right, but you get the idea.

Headless3-18-09012.jpg

Headless3-18-09013.jpg