

Enjoy the benefits of a premium membership!
Upgrade Account
-
TalkBass has been independent since 1998. Add your voice.
Create a free account to reply to discussions, view embedded media, and browse with fewer display ads.
Join free Log in
Want zero display ads or expanded classifieds tools? Compare plans.
You are using an out of date browser. It may not display this or other websites correctly.
You should upgrade or use an alternative browser.
You should upgrade or use an alternative browser.
Build number 4
- Thread starter J Lund
- Start date
More options
Who Replied?


Really cool design! I would like to see that bass with finish 6 and a more traditional-like f-hole.
Good Luck!
Good Luck!

- Aug 15, 2011
- 571
- 171
- Disclosures
- Owner/Luthier:RoseBud Basses & Guitars LLC
My thoughts...I like... (Ready) finish 5: F-hole F, it already has a clasic look with a little edg, (witch I'm a big fan of)and I think it would keep it in that theam. Now with that said, on a more masses appeal, I would have too agree with finish 2: F-hole: A (IMHO). what ever you decide it's going to be cool! and I can't wait to see it.
P.S. please excuse any bad spelling
P.S. please excuse any bad spelling


Musiclogic
Commercial User
- Aug 6, 2005
- 6,505
- 73
- 60
- Disclosures
- Owner/Builder: HJC Customs USA, The Cool Lute, C G O
Finish 4, F-hole F, but would like to see an opening in the upper horn. My opinion only, and your work looks fantastic. Thanks for sharing.


I see you got a lot of divergent responses... I wonder how you're going to interpret this information  . I'm a little bored right now, and impatient waiting for your conclusion so forgive me for jumping in...
If you look at the votes as combinations:
combinations with 3 votes: 1A, 3 /w traditional F-hole
combinations with 2 votes: 2A, 5F, 6 /w traditional F-hole
and 12 different single votes
Since the traditional F-hole wasn't an option you presented, the winner would be 1A.
But if you look at he votes seperately:
Finish
3: 8 votes
1: 5 votes
4: 4 votes
Sound hole
A: 7 votes
F: 6 votes
Traditional F-hole: 5 votes
This way, the winner would definitely be 3A. (hint )
)
. I'm a little bored right now, and impatient waiting for your conclusion so forgive me for jumping in...If you look at the votes as combinations:
combinations with 3 votes: 1A, 3 /w traditional F-hole
combinations with 2 votes: 2A, 5F, 6 /w traditional F-hole
and 12 different single votes
Since the traditional F-hole wasn't an option you presented, the winner would be 1A.
But if you look at he votes seperately:
Finish
3: 8 votes
1: 5 votes
4: 4 votes
Sound hole
A: 7 votes
F: 6 votes
Traditional F-hole: 5 votes
This way, the winner would definitely be 3A. (hint
)I see you got a lot of divergent responses... I wonder how you're going to interpret this information
Patience, grasshopper! Just because I haven't updated doesn't mean I haven't been checking this thread.
 And what you might not have known is that I've also been asking people at R-V as well as some facebook friends. So here are the OFFICIAL standings:
Finishes:
1: 7
2: 8
3: 9
4: 3
5: 2
6: 6
F-Holes:
A: 8
B: 3
C: 6
D: 3
E: 8
F: 7
Traditional: 4
So what does all this mean? Well, what I gather is that in general people tend to think that this bass should have a more traditional violin finish with an f-hole that also has a more traditional influence with a modern twist (except for the reasonably sized crowd that likes the circles).
In all reality, this pole was NOT to decided which of those 6 sets of options I would do. Rather, it just a survey in order to get an understanding of what people would like to see on an instrument like this.
I am working on three more designs that I will actually spend some time drawing up, and those will be the three that I choose from. As far as finishes, I have a pretty good idea of what I would like to see, and most people agreed with me (somewhere between 1-3).
Another update on some physical progress in just a second.
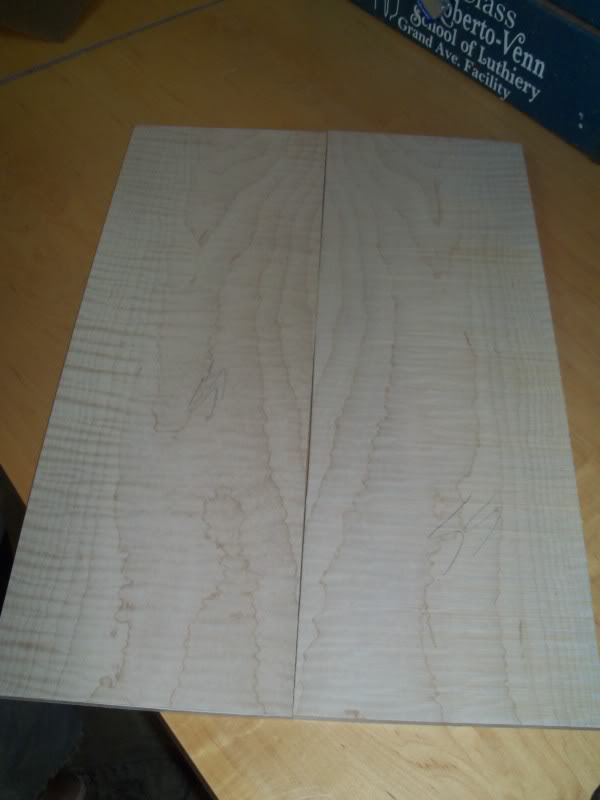
So I FINALLY got my top wood. It is a gorgeous set of 1/4" flamed maple straight out of John Reuter's basement.
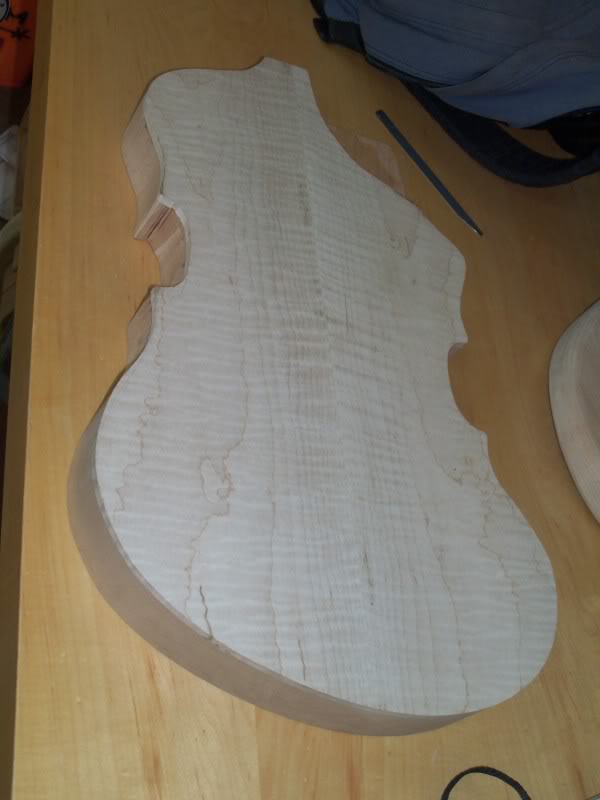
I seamed together the top and glued it onto the alder body. The body thickness is right at 2", and it feels like a good weight (even with the huge chunk of excess around the lower horn).
The shop was open to students for a bit on Saturday, so I stopped in to get a little extra work done. I was able to get the neck pocket routed and a couple other things.
I spent over half an hour lining up the neck on the body... double, triple, and quadruple checking all of my measurements. I even re-taped the mdf straight edges on several times when I felt they weren't solid enough. I wanted this pocket to be perfect.
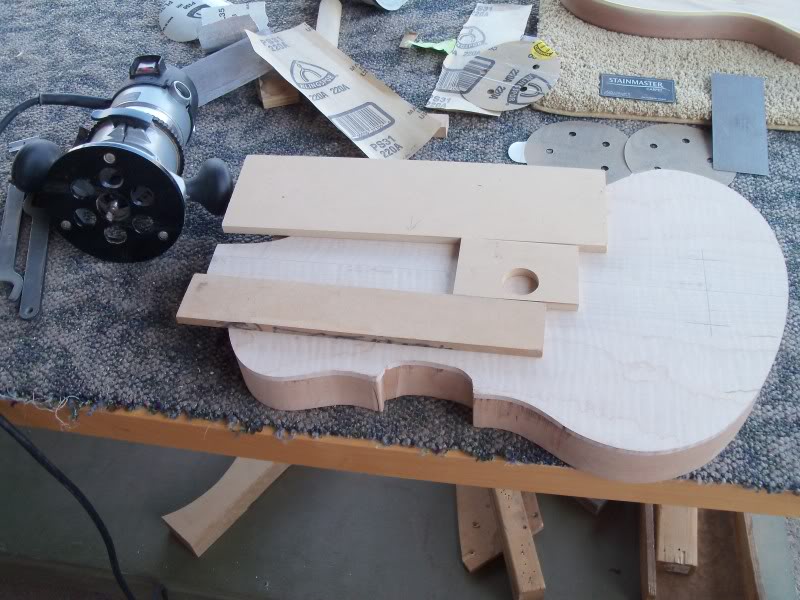
Many many shavings...
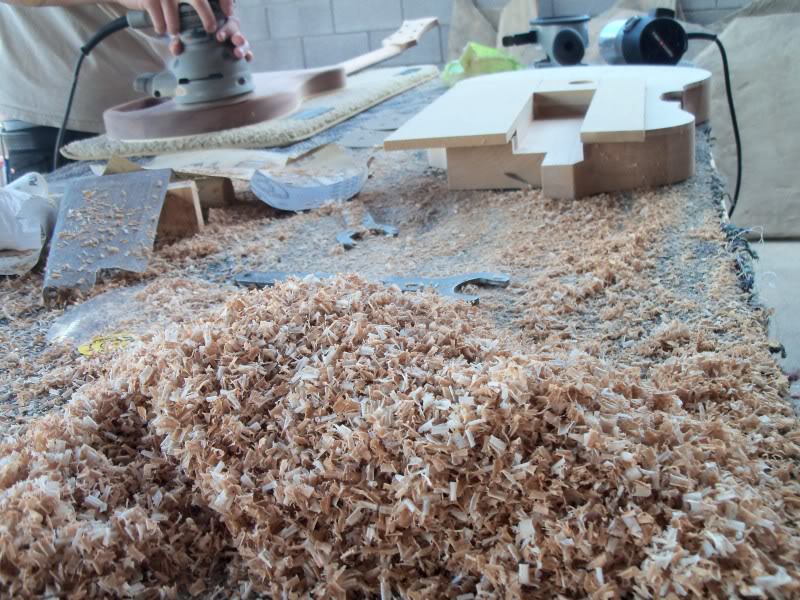
It turns out the neck pocket was a little TOO pefect. It is such a tight fit, I couldn't even press the neck into the bottom of the pocket for fear of breaking something.
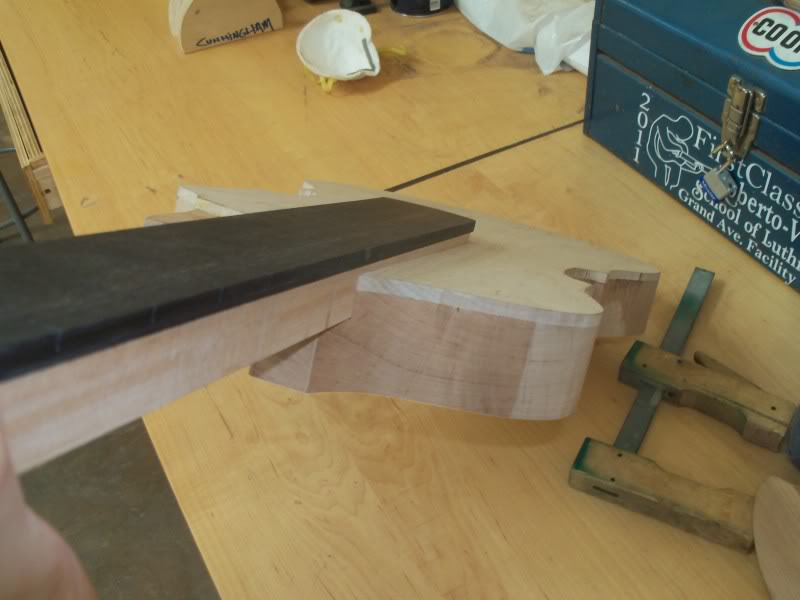
After that shot, I went back with the router on the surface of the bass top itself and cleaned up the base of the neck pocket so that it was a little flatter length wise (I found that was one issue of why it would not sit flat). Now it fits extremely well, and it is the perfect height for my bridge. It almost makes me tempted to make it a set neck instead of a bolt-on so I can have more liberties with carving at the neck joint. We'll see.
The violin corners are much too tight for any of the spindle attachments, so I have not devoted the time to sanding those to shape yet, but it will happen whenever I'm not in the spray booth laquering my other instrument this week!
Like I said, I'll be drawing up more ideas as far as f-holes go, so you'll just have to be patient on that.
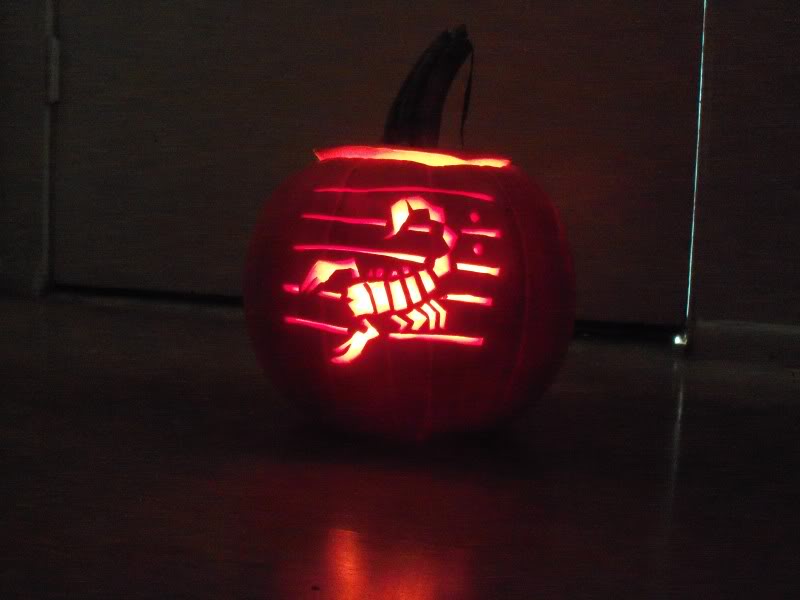
Oh, and a very Happy Halloween from yours truly in AZ!
Josh
I seamed together the top and glued it onto the alder body. The body thickness is right at 2", and it feels like a good weight (even with the huge chunk of excess around the lower horn).
The shop was open to students for a bit on Saturday, so I stopped in to get a little extra work done. I was able to get the neck pocket routed and a couple other things.
I spent over half an hour lining up the neck on the body... double, triple, and quadruple checking all of my measurements. I even re-taped the mdf straight edges on several times when I felt they weren't solid enough. I wanted this pocket to be perfect.
Many many shavings...
It turns out the neck pocket was a little TOO pefect. It is such a tight fit, I couldn't even press the neck into the bottom of the pocket for fear of breaking something.
After that shot, I went back with the router on the surface of the bass top itself and cleaned up the base of the neck pocket so that it was a little flatter length wise (I found that was one issue of why it would not sit flat). Now it fits extremely well, and it is the perfect height for my bridge. It almost makes me tempted to make it a set neck instead of a bolt-on so I can have more liberties with carving at the neck joint. We'll see.
The violin corners are much too tight for any of the spindle attachments, so I have not devoted the time to sanding those to shape yet, but it will happen whenever I'm not in the spray booth laquering my other instrument this week!
Like I said, I'll be drawing up more ideas as far as f-holes go, so you'll just have to be patient on that.
Oh, and a very Happy Halloween from yours truly in AZ!
Josh

Patience, grasshopper! Just because I haven't updated doesn't mean I haven't been checking this thread.

Wonderful wood selection! Love this build

Sorry for the lack of updates. I've been busy, though! There has been tons of progress on this build. I've gotten to try some things that I am very excited about.
First, I got rid of the excess around the neck pocket and cleaned up all of the body to its final shape.
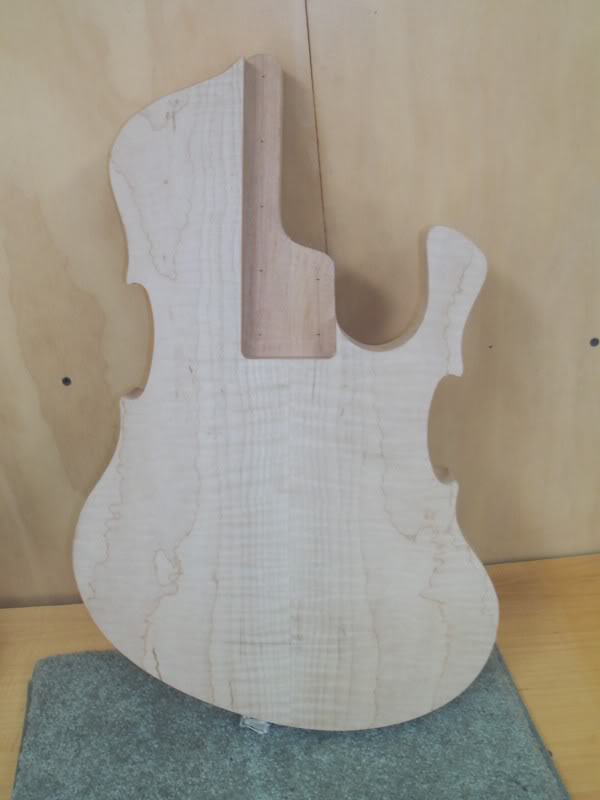
Then, I double checked all the measurements and alignment, and I drilled holes for the bolts and installed the threaded inserts.

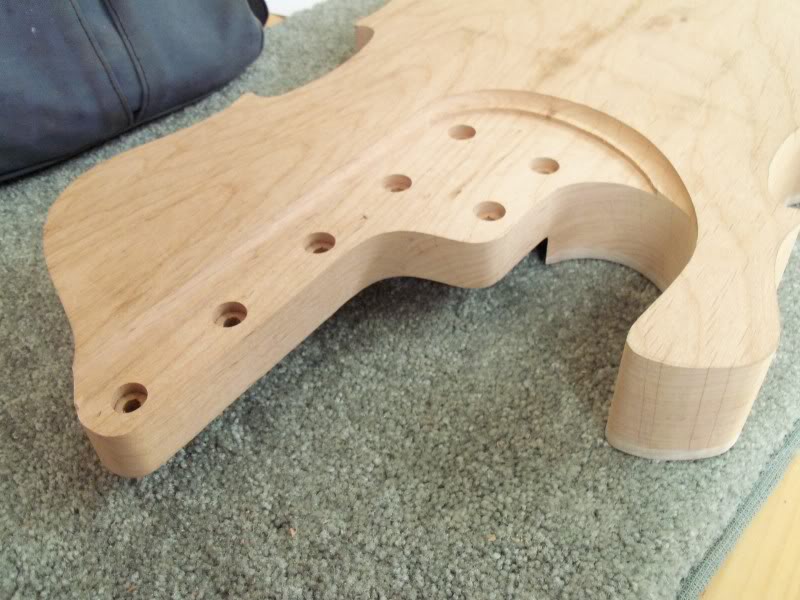
After that, I decided to do a bit of carving at the body joint, so I trimmed it down with a router and template. This will get carved and sanded smooth.
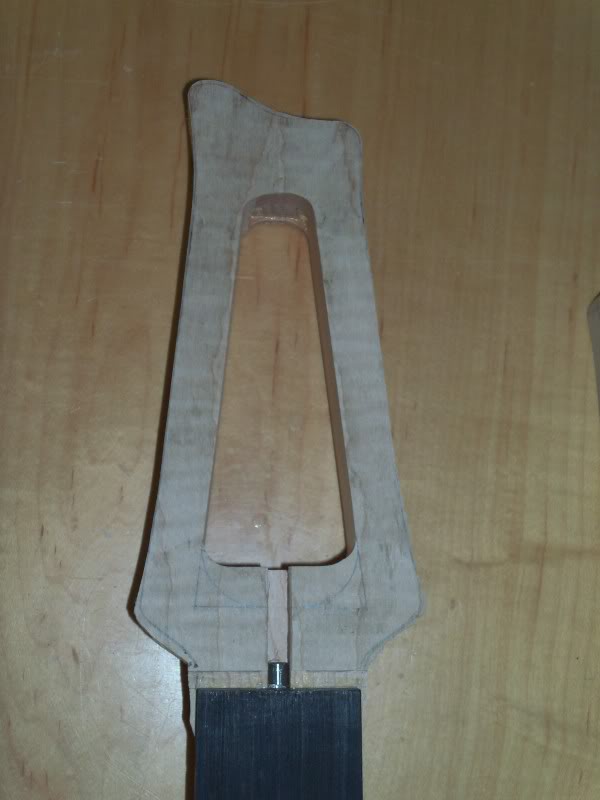
I also did a bunch of work on the neck. I cut out the headstock shape and routed out the inside.
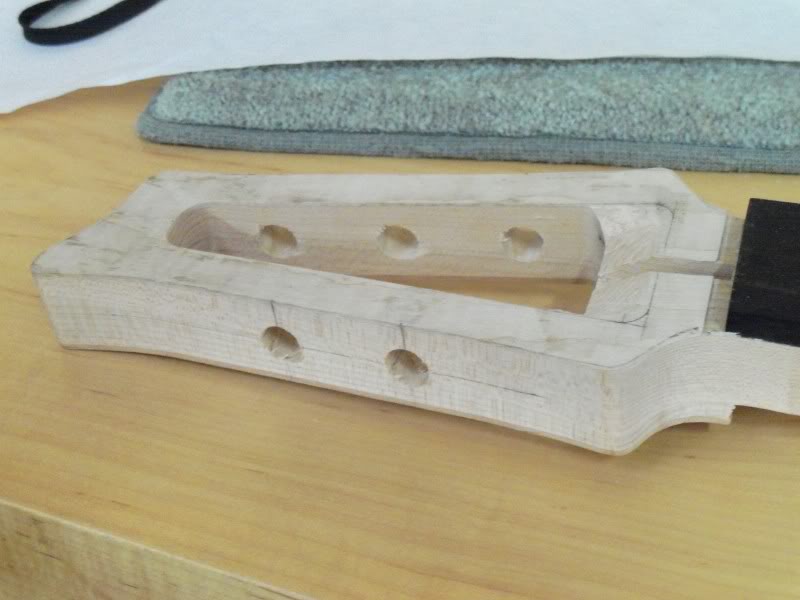
After cleaning up some things a bit, I drilled the tuner holes. Reaming these to final width might be a bit of an issue... I'll deal with that later.
I hand radiused the fretboard. It is 14"-20". It took a bit more time doing it this way rather than using the sanding belt jig, but I felt like I had more control over how much fretboard thickness I had.
Then, I got to work on neck carving. Since I didn't take pictures of the process on my other build, I'll post some of these pictures here.
The first step in the neck carving process is to create divots at the proper depth at the 1st fret and at the body joint. I went with .850" and .950" on this project.
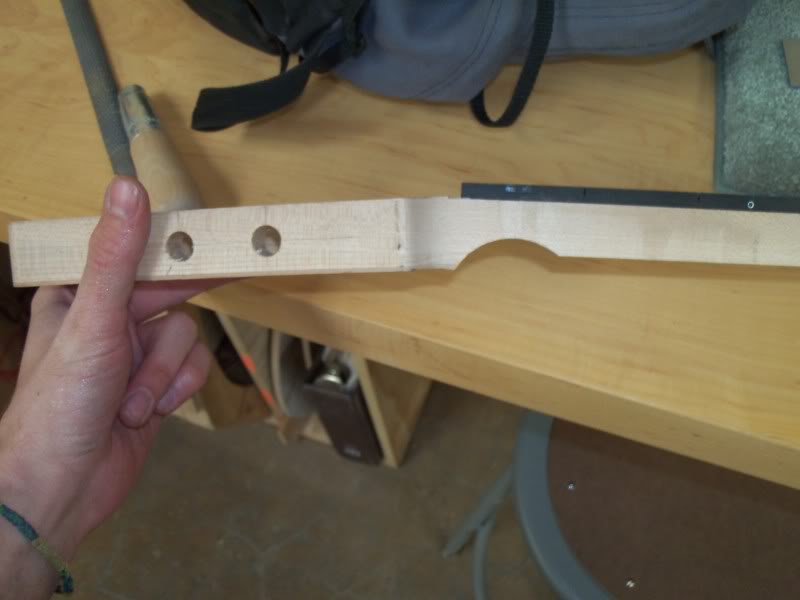
Next, I took a router and hogged away some excess wood with a large chamfer bit.
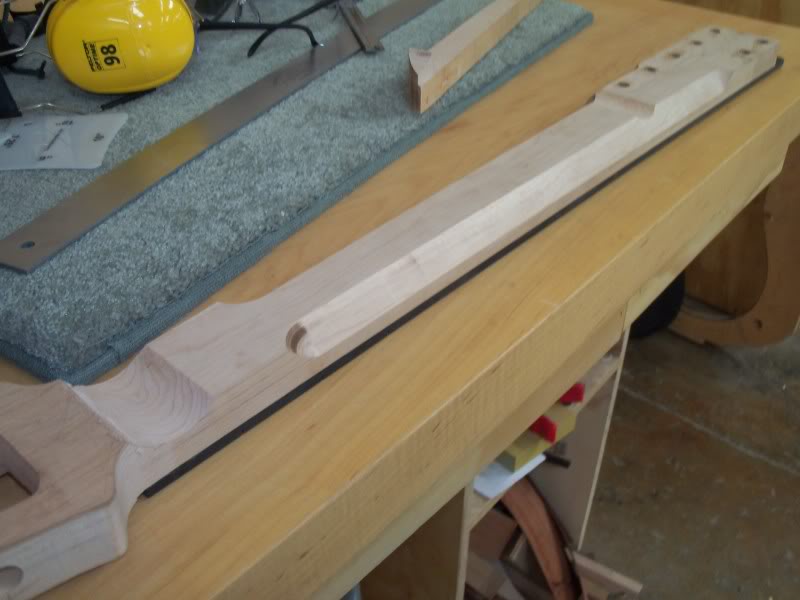
At this point I had a bit of an "oops" when I my brain temporarily ceased to function. At any rate, I fixed the error with a plug and continued carving.
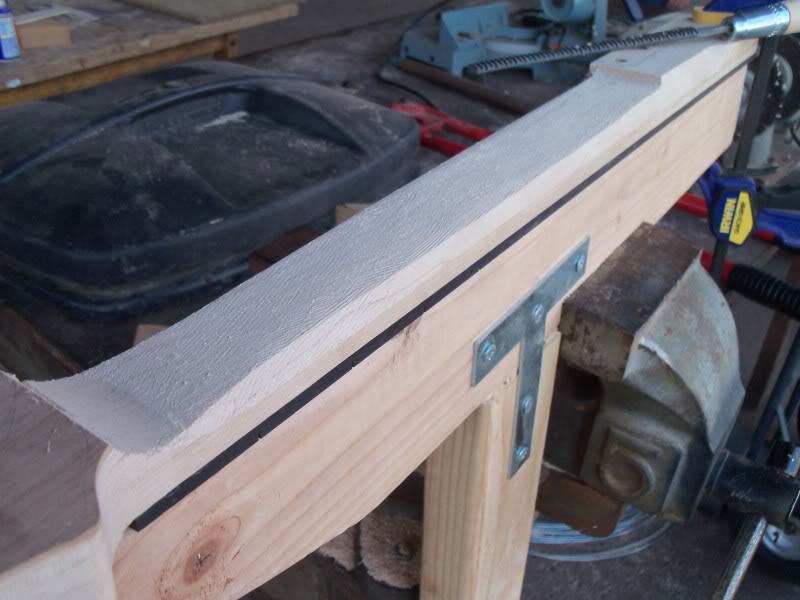
This step is probably the most important and the most time consuming step of the entire ordeal. I had to create a completely flat surface from one divot to the other, thereby creating the desired taper. This is all done with the rasp and a straight edge. You'll notice I also continued the bevels up and down the neck with the rasp.
After the taper is spot-on, I began shaping the neck by forming a series of facets. Each new plane gets the neck closer to a smooth cone shape.
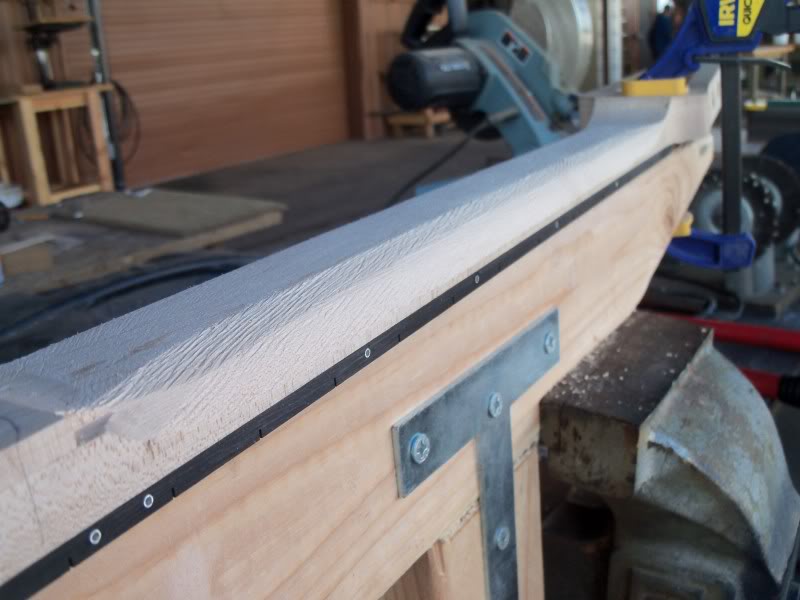
Once the neck is roughed to its approximate shape, I use a file to smooth all the hard edges and blend the sides into the fretboard. Then I used the spindle sander to form the headstock transition and a bit at the heel end. Because it is a single cut, I found carving at the heel fairly difficult. I used chisels to rough out the shape, but I have not attempted to clean up that area yet.

The neck is still in it's rough form right now, but I plan on spending another day getting it all cleaned up and finish sanded, all in one shebang.
Friday, since I was done spraying my other project, I spent the entire day devoted to purfling on this instrument. The whole morning was spent building a purfling jig for my dremel. I made a prototype Thursday, but after some further thought and receiving some acrylic, I knew it could be improved.
Original scrap alder/maple design:
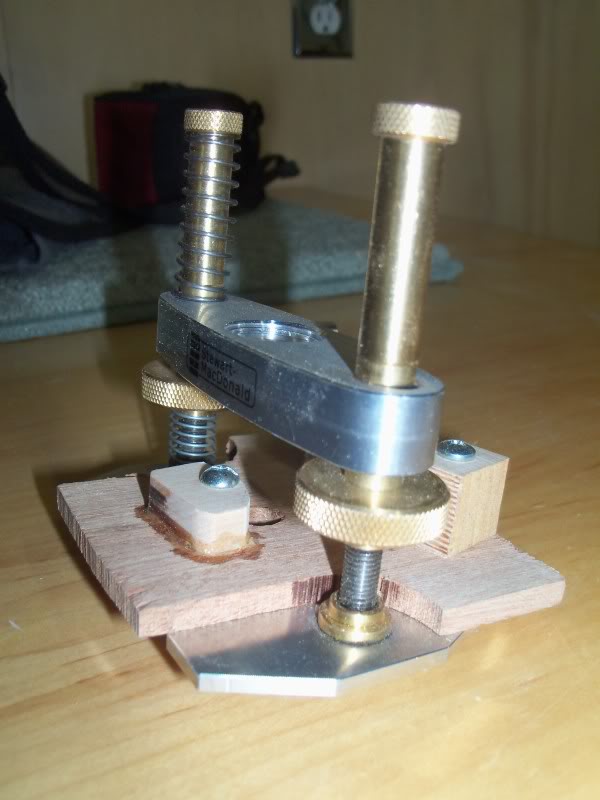
The idea was that the bolt would ride along the edge of the piece and the bit would cut a perfectly offset channel (as long as the dremel was perpendicular to the edge at all times).
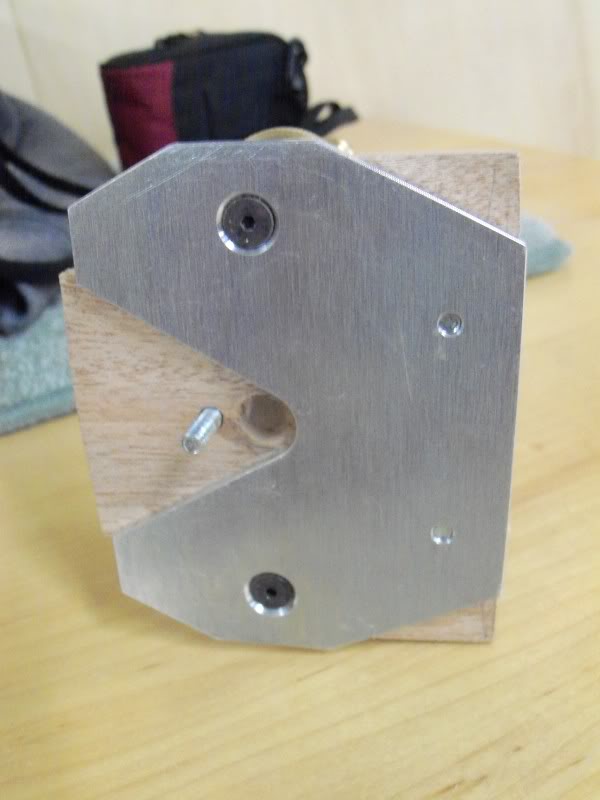
The improved design:

In this jig, the dowel that rides along the edge is 1/2" in diameter, a hair smaller than the tightest corner on the instrument. The dowel is also fully adjustable from 0" to 1-1/8" clearance. I created a couple other fittings including a straight edge and a concave half circle for doing other types of things.
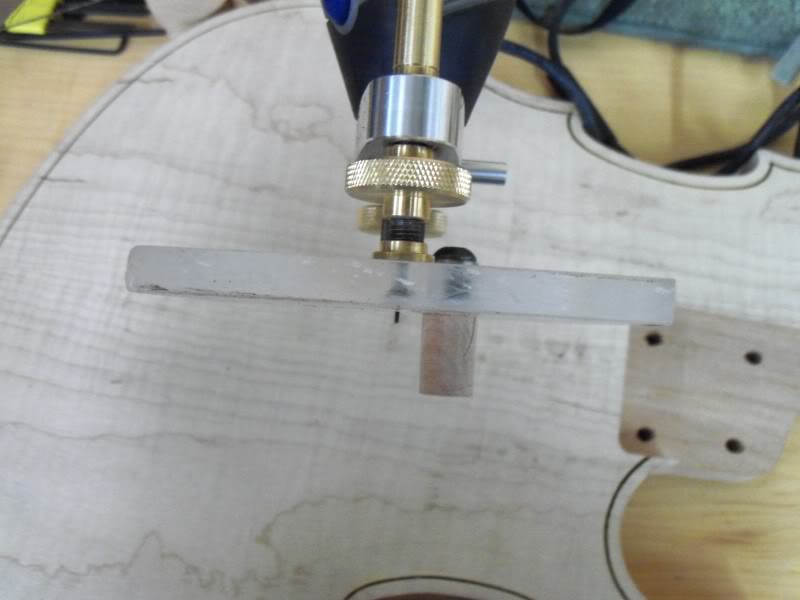
The clear acrylic is very nice because it allows me to have a good view of the material I am cutting, being sure to keep the bit and dowel perpendicular to the edge.
I was nervous about actually using this jig to cut grooves into my very lovely flamed maple top, so I experimented and practiced on scrap wood until I felt comfortable with it. After some mental preparation and psyching myself up for a solid 20 minutes, I bit the bullet and routed the purfling slot for real.
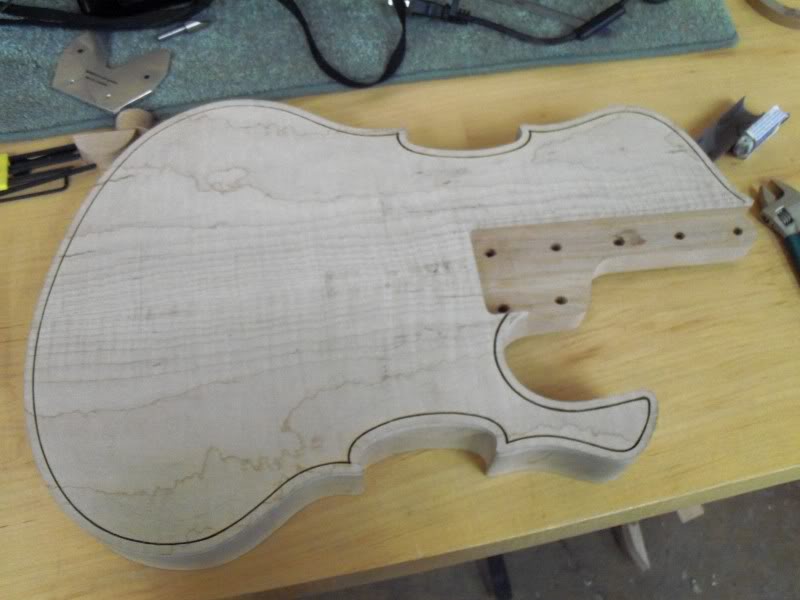
Success!! It required three passes to get the proper depth, and I had specific checkpoints on each pass that I had to stop, reset the dremel, and restart cutting (in the violin corners and lower horn). So this operation required a grand total of 18 individual cuts, all which had to be flawless. Phew...glad that is over with.
Close up of violin corners:
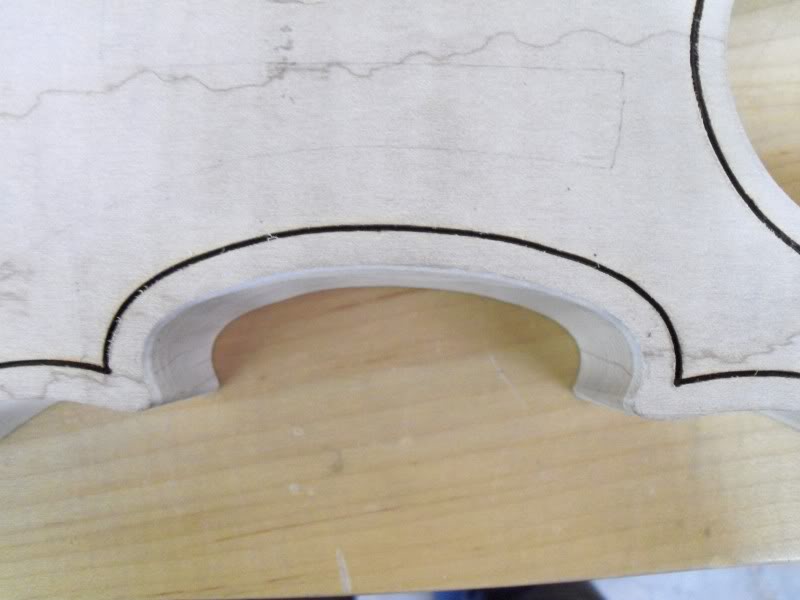
The next step is to inlay the purfling which I have started doing. It is B/W/B purfling that is .045" thick. The purfling slots are approx. 0.35-.40" thick, so I have to scrape the purfling down with a razor blade before installing. Even after thinning the purfling, I have found it very difficult to hammer in in some places.
Here is one mitered corner. The purfling has to be a little bit lower than the surface so that it won't be routed off when I do the roundover. Don't worry... I did the math!
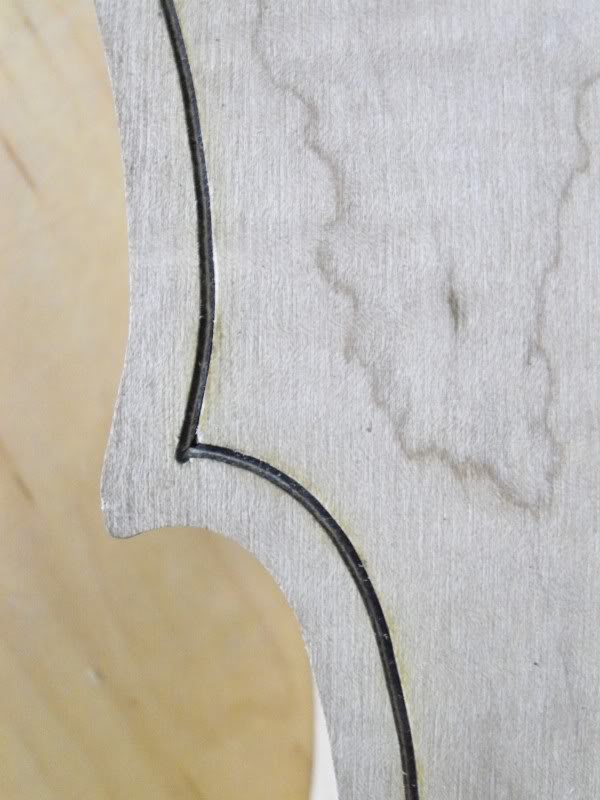
I'm excited to see how this will look once the roundover is on it. As always, I did a test piece (a replica of the lower horn) and I really liked the look.
Thanks for looking. More updates next week!
First, I got rid of the excess around the neck pocket and cleaned up all of the body to its final shape.
Then, I double checked all the measurements and alignment, and I drilled holes for the bolts and installed the threaded inserts.
After that, I decided to do a bit of carving at the body joint, so I trimmed it down with a router and template. This will get carved and sanded smooth.
I also did a bunch of work on the neck. I cut out the headstock shape and routed out the inside.
After cleaning up some things a bit, I drilled the tuner holes. Reaming these to final width might be a bit of an issue... I'll deal with that later.
I hand radiused the fretboard. It is 14"-20". It took a bit more time doing it this way rather than using the sanding belt jig, but I felt like I had more control over how much fretboard thickness I had.
Then, I got to work on neck carving. Since I didn't take pictures of the process on my other build, I'll post some of these pictures here.
The first step in the neck carving process is to create divots at the proper depth at the 1st fret and at the body joint. I went with .850" and .950" on this project.
Next, I took a router and hogged away some excess wood with a large chamfer bit.
At this point I had a bit of an "oops" when I my brain temporarily ceased to function. At any rate, I fixed the error with a plug and continued carving.
This step is probably the most important and the most time consuming step of the entire ordeal. I had to create a completely flat surface from one divot to the other, thereby creating the desired taper. This is all done with the rasp and a straight edge. You'll notice I also continued the bevels up and down the neck with the rasp.
After the taper is spot-on, I began shaping the neck by forming a series of facets. Each new plane gets the neck closer to a smooth cone shape.
Once the neck is roughed to its approximate shape, I use a file to smooth all the hard edges and blend the sides into the fretboard. Then I used the spindle sander to form the headstock transition and a bit at the heel end. Because it is a single cut, I found carving at the heel fairly difficult. I used chisels to rough out the shape, but I have not attempted to clean up that area yet.
The neck is still in it's rough form right now, but I plan on spending another day getting it all cleaned up and finish sanded, all in one shebang.
Friday, since I was done spraying my other project, I spent the entire day devoted to purfling on this instrument. The whole morning was spent building a purfling jig for my dremel. I made a prototype Thursday, but after some further thought and receiving some acrylic, I knew it could be improved.
Original scrap alder/maple design:
The idea was that the bolt would ride along the edge of the piece and the bit would cut a perfectly offset channel (as long as the dremel was perpendicular to the edge at all times).
The improved design:
In this jig, the dowel that rides along the edge is 1/2" in diameter, a hair smaller than the tightest corner on the instrument. The dowel is also fully adjustable from 0" to 1-1/8" clearance. I created a couple other fittings including a straight edge and a concave half circle for doing other types of things.
The clear acrylic is very nice because it allows me to have a good view of the material I am cutting, being sure to keep the bit and dowel perpendicular to the edge.
I was nervous about actually using this jig to cut grooves into my very lovely flamed maple top, so I experimented and practiced on scrap wood until I felt comfortable with it. After some mental preparation and psyching myself up for a solid 20 minutes, I bit the bullet and routed the purfling slot for real.
Success!! It required three passes to get the proper depth, and I had specific checkpoints on each pass that I had to stop, reset the dremel, and restart cutting (in the violin corners and lower horn). So this operation required a grand total of 18 individual cuts, all which had to be flawless. Phew...glad that is over with.
Close up of violin corners:
The next step is to inlay the purfling which I have started doing. It is B/W/B purfling that is .045" thick. The purfling slots are approx. 0.35-.40" thick, so I have to scrape the purfling down with a razor blade before installing. Even after thinning the purfling, I have found it very difficult to hammer in in some places.
Here is one mitered corner. The purfling has to be a little bit lower than the surface so that it won't be routed off when I do the roundover. Don't worry... I did the math!
I'm excited to see how this will look once the roundover is on it. As always, I did a test piece (a replica of the lower horn) and I really liked the look.
Thanks for looking. More updates next week!


