

Enjoy the benefits of a premium membership!
Upgrade Account
-
TalkBass has been independent since 1998. Add your voice.
Create a free account to reply to discussions, view embedded media, and browse with fewer display ads.
Join free Log in
Want zero display ads or expanded classifieds tools? Compare plans.
You are using an out of date browser. It may not display this or other websites correctly.
You should upgrade or use an alternative browser.
You should upgrade or use an alternative browser.
Build number 4
- Thread starter J Lund
- Start date
More options
Who Replied?
Great work on the purfling channel! Really suits this design too. There's one thing I'd like to know: how come those channels are black? Did you paint them or did the bit burn the wood? Or do I miss something?
Great work on the purfling channel! Really suits this design too. There's one thing I'd like to know: how come those channels are black? Did you paint them or did the bit burn the wood? Or do I miss something?
The dremel bit burned the wood, even though I went about 1/32" deep in each pass. I was using the Stew Mac burred inlay bits. It might not have burned if I had access to a spiral down-cut bit or something of that nature.
Oh and I forgot to mention... I ordered the Bartolinis the other day (I found out that RV couldn't order them direct because of a 90 day wait??? I had never heard of something like that). Anyway, I found the pickups I was looking for at music store near Phoenix, so they will probably arrive on Monday.
The dremel bit burned the wood, even though I went about 1/32" deep in each pass. I was using the Stew Mac burred inlay bits. It might not have burned if I had access to a spiral down-cut bit or something of that nature.
My experience is (and I just spent another few hours routing) that the feeding speed (to slow) combined with the router speed (to fast) causes burn marks. I always need to find a good combination of those two speeds per type of bit and per type of wood. The amount of wood taken at a time relates to the smoothness of the cut (or tear out in the worst case), as I understand / experienced.


Just great, keep it coming!
Didn't understand if you burned it on purpose but it's looking really nice
Didn't understand if you burned it on purpose but it's looking really nice
Just great, keep it coming!
Didn't understand if you burned it on purpose but it's looking really nice
Hehe...no, I did not burn it on purpose. I took three passes, each about 1/32" deep. With the tiny burr bit I used and the small channel being routed, the combination of high speeds and friction caused it to burn despite my best efforts. But the bottom line is that it doesn't matter because the purfling strips are Black/White/Black and I did a round over after gluing in the purfling (it's all done, by the way). I will have pictures up tomorrow or the next day. I have been crazy busy with night classes this week from Scott Walker about metallic patina finishes. Very interesting stuff. Anyway, updates soon!

Okay, big update.
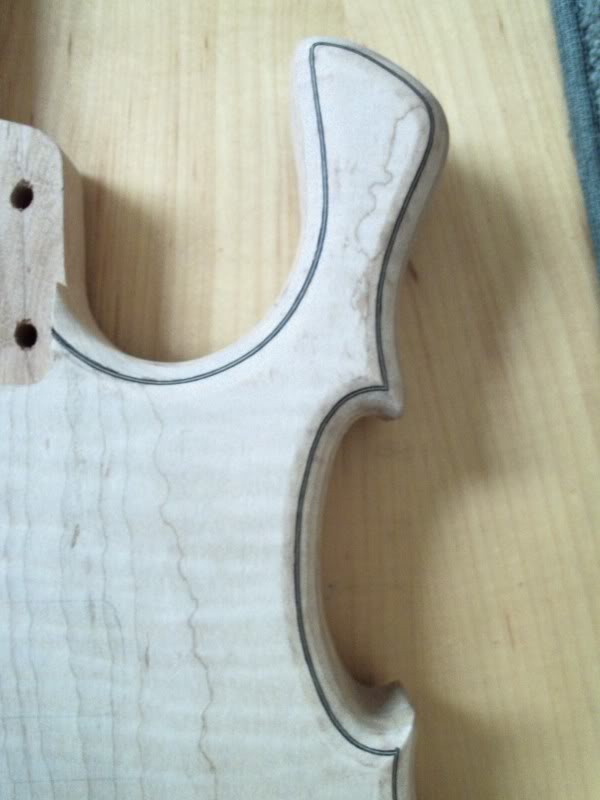
Purfling all glued in and rounded over (and cleaned up; the school roundover bits were so dull, it was hard to watch).
Link Removed
Detail of lower horn; I used a soldering iron to bend the purfling around the tight corners, and I did proper miters on the violin corners.
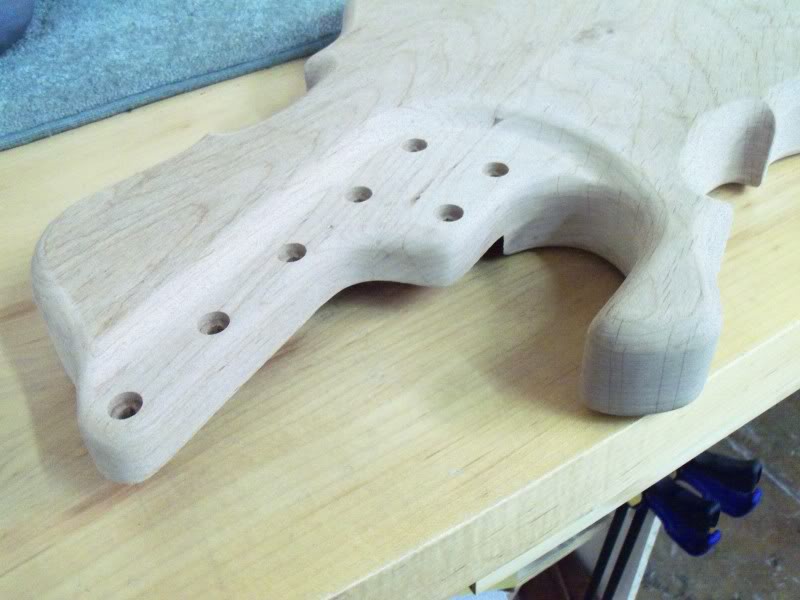
View of the back and side to see the overall shape. It is very comfortable!

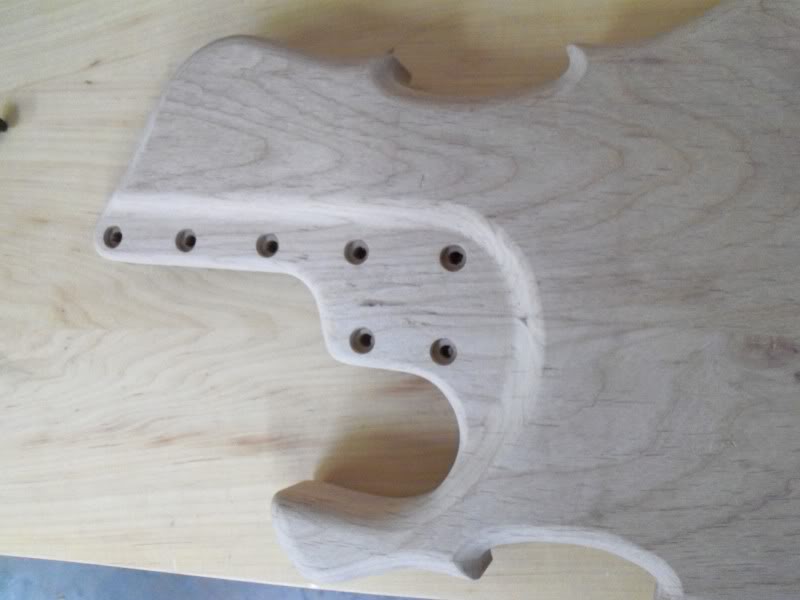
In addition, I cleaned up the body "heel". I didn't really have proper tools for the job, so I used my straight 1/4" chisel to make tiny cuts around the whole area to get a smooth transition, then I smoothed it all out with some 80 grit and a couple gallons of elbow grease.
I'd say it's about 90% there. There are a few tiny chisel marks that will have to come out with 80 grit before I can start finish sanding that area.
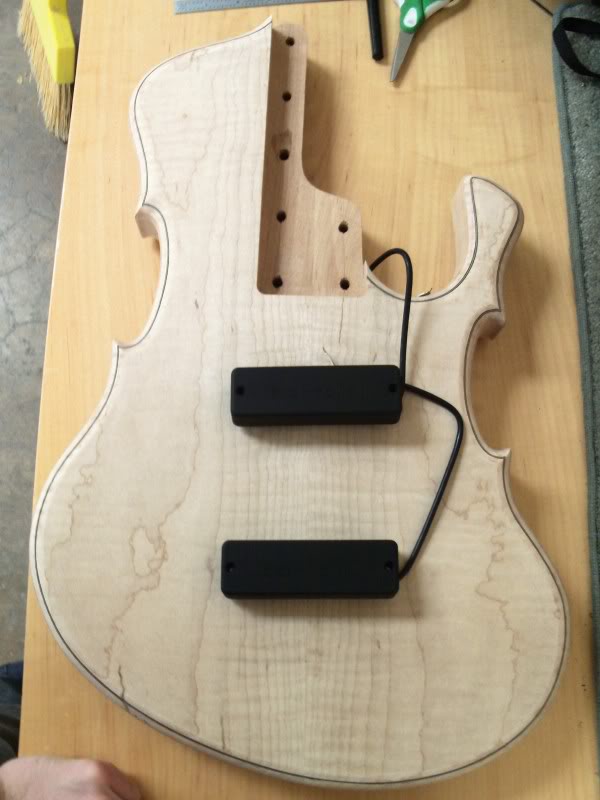
I got my pickups, too! Man, they are good lookin. I only hope they sound as good as they look.
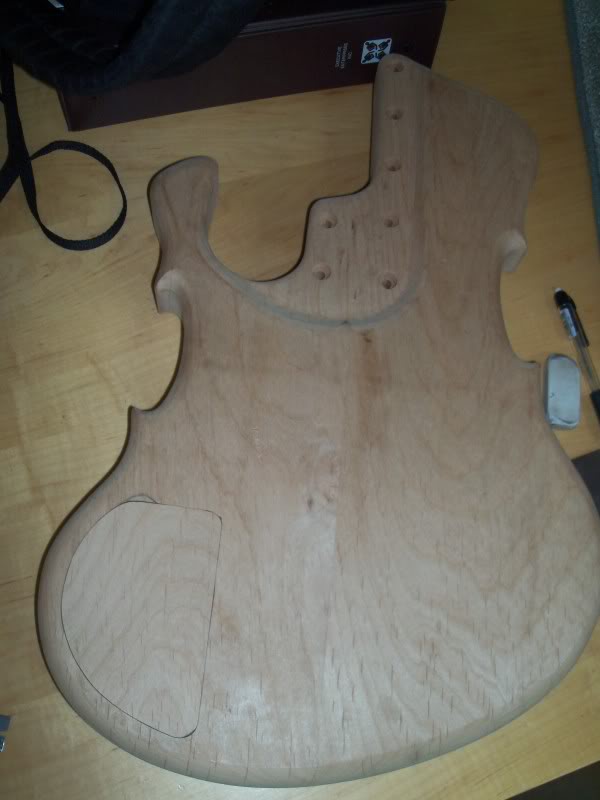
I drilled control holes and routed for the control cavity and cover.
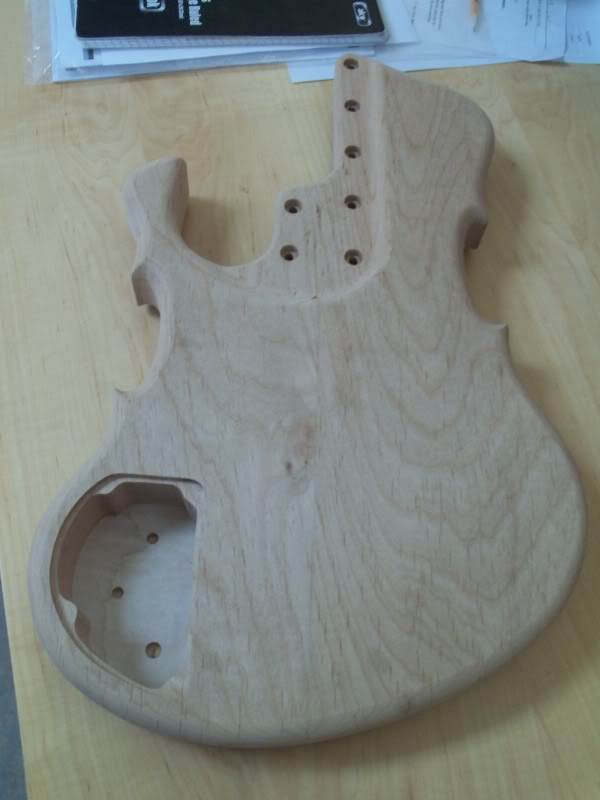
I also made the cover for it (with the aluminum backing, like the other build). Magnets are installed in the body, but not yet on the cover.
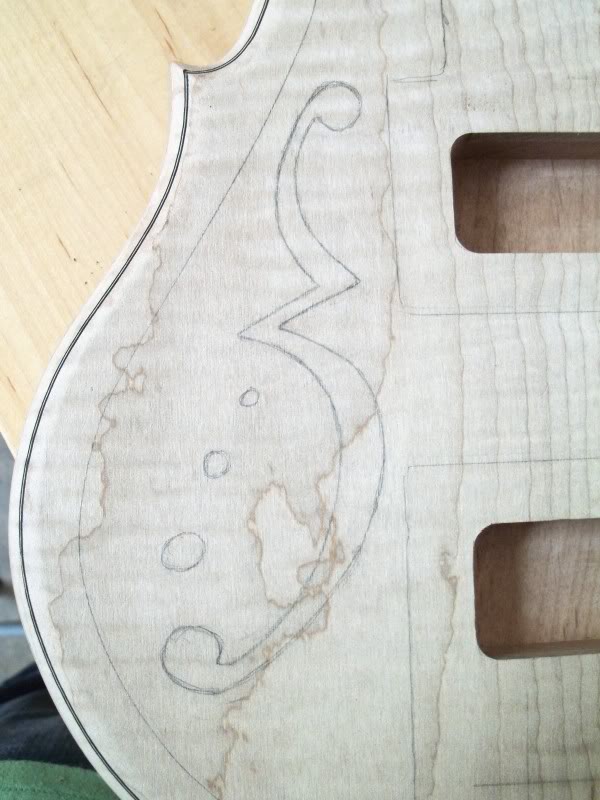
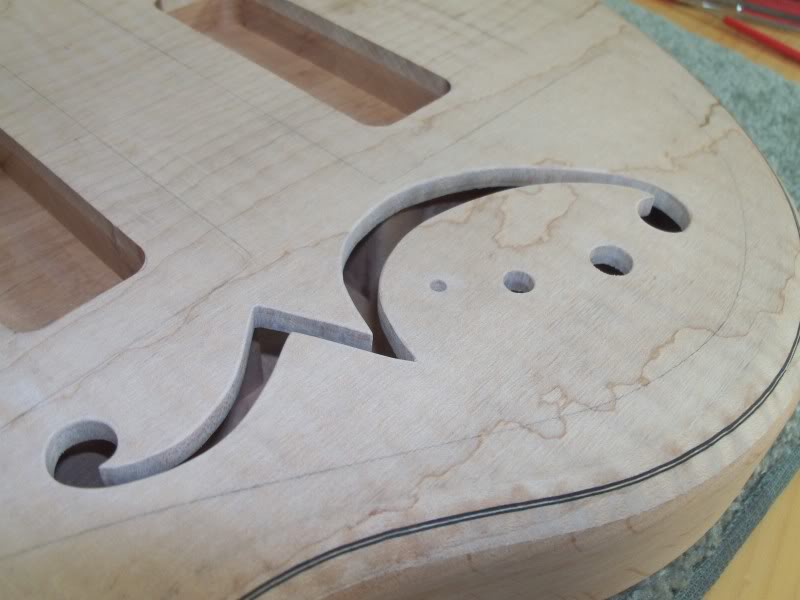
Probably the biggest news of all is that I decided on an f-hole! Three weeks is long enough to think it over, right?
Before it was routed, and also showing my pickup cavity routs:
After!

I think it really goes well with the instrument design, and it incorporates many elements of the other designs that I had that people seemed to like.
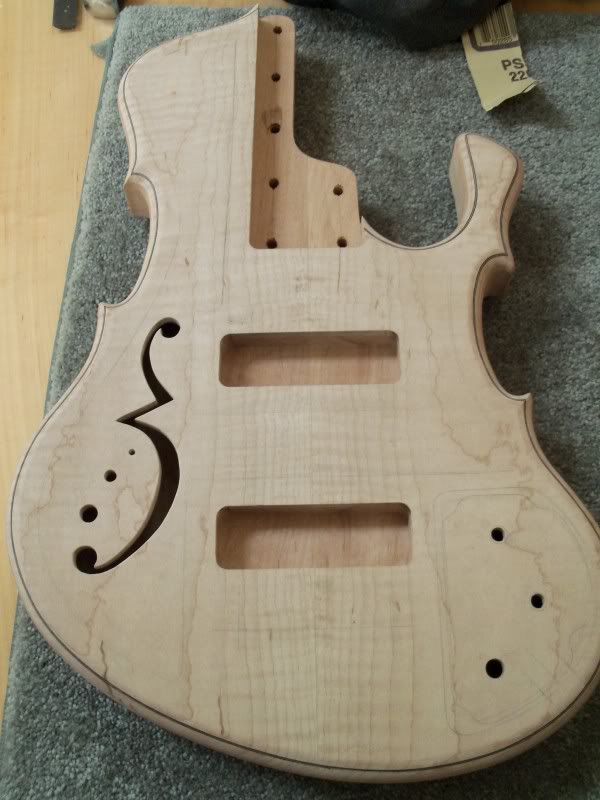
I did some glue clean-up inside from when the top was glued on. That was a bit tricky, but I got rid of all the glue I could see.
That is all on this build for now. Thanks for checking it out!
Purfling all glued in and rounded over (and cleaned up; the school roundover bits were so dull, it was hard to watch).
Link Removed
Detail of lower horn; I used a soldering iron to bend the purfling around the tight corners, and I did proper miters on the violin corners.
View of the back and side to see the overall shape. It is very comfortable!
In addition, I cleaned up the body "heel". I didn't really have proper tools for the job, so I used my straight 1/4" chisel to make tiny cuts around the whole area to get a smooth transition, then I smoothed it all out with some 80 grit and a couple gallons of elbow grease.
I'd say it's about 90% there. There are a few tiny chisel marks that will have to come out with 80 grit before I can start finish sanding that area.
I got my pickups, too! Man, they are good lookin. I only hope they sound as good as they look.
I drilled control holes and routed for the control cavity and cover.
I also made the cover for it (with the aluminum backing, like the other build). Magnets are installed in the body, but not yet on the cover.
Probably the biggest news of all is that I decided on an f-hole! Three weeks is long enough to think it over, right?
Before it was routed, and also showing my pickup cavity routs:
After!
I think it really goes well with the instrument design, and it incorporates many elements of the other designs that I had that people seemed to like.
I did some glue clean-up inside from when the top was glued on. That was a bit tricky, but I got rid of all the glue I could see.
That is all on this build for now. Thanks for checking it out!


OMG that's... Wow! If it existed I would nominate this bass for the TB LC bass of the year award 
That bass is absolutely top-notch. Its hard to believe that its only your 4th build. Well done sir, maybe one day ill be buying my basses from you...

If you described this bass to me, I would not expect to like it. But when I look at it, it's freaking genius. Amazing design, and perfect detailing. I think you picked the right f-hole design, for sure! It's a perfect marriage of traditional and modern, just like the bass itself.



