• TalkBass has been independent since 1998. Add your voice.
    Create a free account to reply to discussions, view embedded media, and browse with fewer display ads.
    Join freeLog in
    Want zero display ads or expanded classifieds tools? Compare plans.

Converting an Acoustic Guitar to a Bass, and String Selection

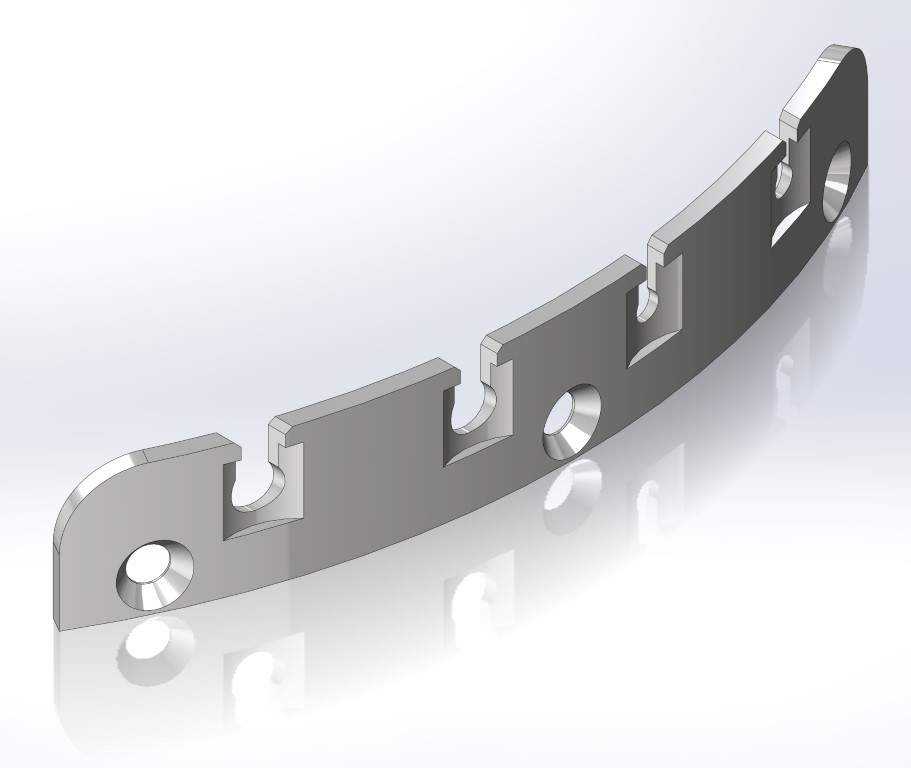
Here's the slotted version. With ball ends.

I also made the saddle 1/16" lower. The approx. height of the saddle from the top is now 9/16". Only 1/16" above the normal guitar height.
YamaBass Bridge Assy v6.2_6.JPG

YamaBass Bridge Assy v6.2_5.JPG

YamaBass Bridge Assy v6.2_4.JPG

YamaBass Bridge Assy v6.2_3.JPG

YamaBass Bridge Assy v6.2_2.JPG

YamaBass Bridge Assy v6.2_1.JPG
 
  • Like
Reactions: Matt Liebenau
I probably missed some posts, but - why did you move from the 4 saddle design? I really thought that was awesome.
Complexity and no vertical adjustment. This is much simpler and more adjustable. I can put in compensation flats if I want later. If it's needed. It would be interesting if it had the capability to change to the 4 saddle version.

The latest version fits the exact footprint of the old bridge with no added tailblock. The archtop saddle on a pin bridge is going to look weird!

1 each set of cream & black bridge pins (whatever looks better), endpin reamer, and thumbwheels on order. Should have everything by the end of next week.
 
Well, I've run into a road block. I bought the only acoustic bass bridge pins I've found for sale. From AllParts, available in Cream or Black. Since they're only $7 a set (plastic) I bought them both. I got them today. THEY ARE CRAP!!! They have about a half degree taper on a side and the diameters vary. 2 of the black pins have bulges close to the top. The cream pins fit pretty good in a .316 diameter hole, but taking them in and out of the straight hole a few times is going to leave the top of the hole oversize and eventually loose. NOT GOOD!!

I stupidly emailed GoldTone and Wayne quickly got back to me that the M-Bass doesn't use bridge pins. DUH!!!!

Ibanez and Fender make micro length basses with bridge pins, but I'd assume getting a response from them might be futile.

I just looked at the Taylor GS-Mini. It uses unique split pins. They look to have a straight shaft. The ball goes thru the pin and is locked against the BACK SIDE against a small notch. They can't pop out!! Interesting!!! Take a look!! Invalid Link Removed I'll email Taylor about buying some. I doubt they're going to be cheap!!

3019-GSM-Bass-restring-Fig-2.jpg


3019-GSM-Bass-restring-Fig-4-flipped.jpg


Any other ideas on acoustic bass bridge pins??? I thought this would be the easy part!!! I can't make the bridge for the YamaBass until I know what pins I'm using!
 
  • Like
Reactions: Matt Liebenau
As I figured they would, Taylor got back to me fairly quickly. The GS-Mini Bass bridge pins are available thru their TaylorWare store. I’d have to CALL them to place the order. I thought everything was done online now??? They’re $16 for a set of 4 plus shipping. So about $20 total, hopefully.

I’m in the process of redesigning my bridge system again. With the failure to find useable bridge pins (although the Taylor pins sound like they might work) I made a 1/16” x ½” brass tail plate wrapped around the back side of the bridge with holes and slots to allow the strings to be removed easily. I need to be able to take the strings on and off many times for the neck reset. This is the same concept as an earlier design that had those features in the wood but any mistake would scrap the whole bridge.
YamaBass Tail Plate v8.0 (Medium).jpeg

ALSO, I thought it might be a good idea to change the bridge to be bolted on (If I can find flat head screws long enough. Longest – steel flat hd sheet metal - #6 x 2” & #8 x 3-1/2”, brass flat hd wood screw - #6 x 1-1/2” & #8 x 2-1/2”), into the bridge doctor below. The bridge doctor will give me the ability to keep the bridge flat (don’t think that will be a problem) AND to be able to add weight to “tune” the resonant frequency of the top. I’d expect the very light top to have a nasty mid-bass peak that I can probably tame (or move) by screwing washers to the bridge doctor.

The problem with the bolt on redesign is it has to work with all 3 existing bridge designs (just in case) AND not interfere with the X braces! The advantage is I’d be able to swap the bridge out easily to change to a different design or if something gets messed up. So I’d be able to change from the current single adjustable saddle & pin bridge, to a bridge with the individual saddles. I think I have a design that will work, although it’s REALLY close!! I wouldn’t truly know where the braces are without drilling a couple of holes (where I think the mounting holes should be) and measuring the distance from the X braces with wedges. I have some small high power magnets, they might tell me if I’m close before I drill any holes.

YamaBass Bridge Body, BOLT ON Layout v1.1.jpg

I ordered the Taylor pins, $16.00 plus $3.95 for USPS Priority shipping, 1-3 days, probably 3 days since it’s going across the country. But I’ll have to wait to get them before I can go much further. I need to know how thick my bridge will have to be to work with them. The groove that locks the string won’t work if my bridge/top/bridge plate assembly is too thick.

One possible problem is the Taylor E string is .090”. The LaBella Silverback E string is .115”. The slot in the pins may not be wide enough. Won’t know if that will be a problem until I get the pins. Hopefully, I'll see them on Saturday. Oh well, I’ve got plenty of other stuff to do!

BUT… If the Taylor pins work I may just stick with the single adjustable saddle, glued on pin bridge design I already have, without complicating it further. K.I.S.S. Keep It Super Simple!!!! Oh well, I already failed at that!!!
 
  • Like
Reactions: Matt Liebenau
Well, it's been over a week. I got the Taylor pins and figured out how thick the bridge has to be. .28". A bit thin, but that's what it needs to be too look like their pictures and allow it to keep the string ball ends in place, using the double thickness bridge plate and the top. I drilled a 5/16" hole in a 1/2" (all the thicknesses added up) piece of wood to confirm it works.

BUT!! Instead of the complication of removable bridges, I redesigned the bridge to work with either the individual saddles (like the earlier designs) and the single archtop type adjustable saddle.

BUT 2.0!!! I have no idea of either saddle is going to work!! There's a chance string tension will pull them over while tensioning!! So I designed a full scale mockup of the bass!!! I'll make a bridge and headstock, bolted to a piece of aluminum extrusion. Don't ask me how I'm going to make the 2 piece headstock. I saw that's how they're done, but I have no idea how I'm going to cut & joint both pieces.
YamaBass Bridge Assy v10.0 - Individual Saddles_1 (Medium).jpeg

YamaBass Bridge Assy v10.0 - Single Saddle_1 (Medium).jpeg

YamaBass Bridge Assy v10.0 - Individual Saddles_2 (Medium).jpeg

One thing I forgot to mention is the Taylor pin have a .100 slot thru them. That's fine for the LaBella CB40 strings, but not for the LaBella Silverbacks or the flat wounds. I'd have to make a fixture to mill the slot open to .125".
 
  • Like
Reactions: Matt Liebenau
You are a talented designer. Kudos for keeping the individual saddles in the game. I do think it will be worth it.

If there is concern about those saddles tipping, make the bridge a little longer, and make the saddles a little wider.

... Also, as I'm taking a second look, the height of those saddles is pretty high. I imagine you can cut some of the base off of those.

If someone could take your multiple saddle design, shrink that, and mount that on top of a traditional single saddle that could slide into an existing bridge slot, that would - change the world.
 
Unfortunately, the single adjustable saddle design sets the height of the individual saddles. I need to set the neck angle to work with both designs. Also, this has to fit in the footprint of the original Yamaha bridge (which is already pretty wide!), AND I need enough adjustment for compensation for the flat wound strings which may need another 1/4" more.

I think the saddles will need to be close to the back of the bridge to properly intonate, which I could test with this mockup if I put a 12th fret in the right place at the right height! I can learn a lot from this mockup as long as it's accurate. But I still have to make all the parts!!

I forgot what micro scale strings you've tried. I expect the nylon core strings to be a little floppy in comparison to normal steel strings, but probably better than the silicone strings.

And dropping single saddles into a slotted saddle bridge would require changing the neck angle since the new saddles would be much higher.

While I'm trying to make things adjustable, I have some constants I can't get rid of.
 
Just a thought, have you considered something on the lines of a Hofner Violin bass bridge? (4 full slots across the bridge with individual pieces of fret wire that can go in any slot to set the intonation.)
I have one of those!! They probably did that so the strings don't chew up the wooden saddle. And that design assumes a very long string break angle to keep the strings from hitting the wood part of the saddle. It is cool looking! The bridge is floating. Reproductions are available on eBay from China and Hong Kong CHEAP!!

Maybe the mockup with give me other ideas.
 
  • Like
Reactions: delta7fred
I hadn't thought about the break angle, yea the Hofner tailpiece starts a long way back!
With a pin bridge I'm going to have a large break angle from the pins. But that can be changed. Maybe I need to take a closer look at that before building anything. OH!!! WAIT!!! I can't if I'm using the Taylor pins, which are the only real pins I can find. DAMN!! I'm sure I could have someone custom make some, but I'm not THAT crazy!!!
 
  • Like
Reactions: delta7fred