• TalkBass has been independent since 1998. Add your voice.
    Create a free account to reply to discussions, view embedded media, and browse with fewer display ads.
    Join freeLog in
    Want zero display ads or expanded classifieds tools? Compare plans.

Crispy Cherry

No margarita's for me today I'm doing stuff! :D
20220529_123737.jpg

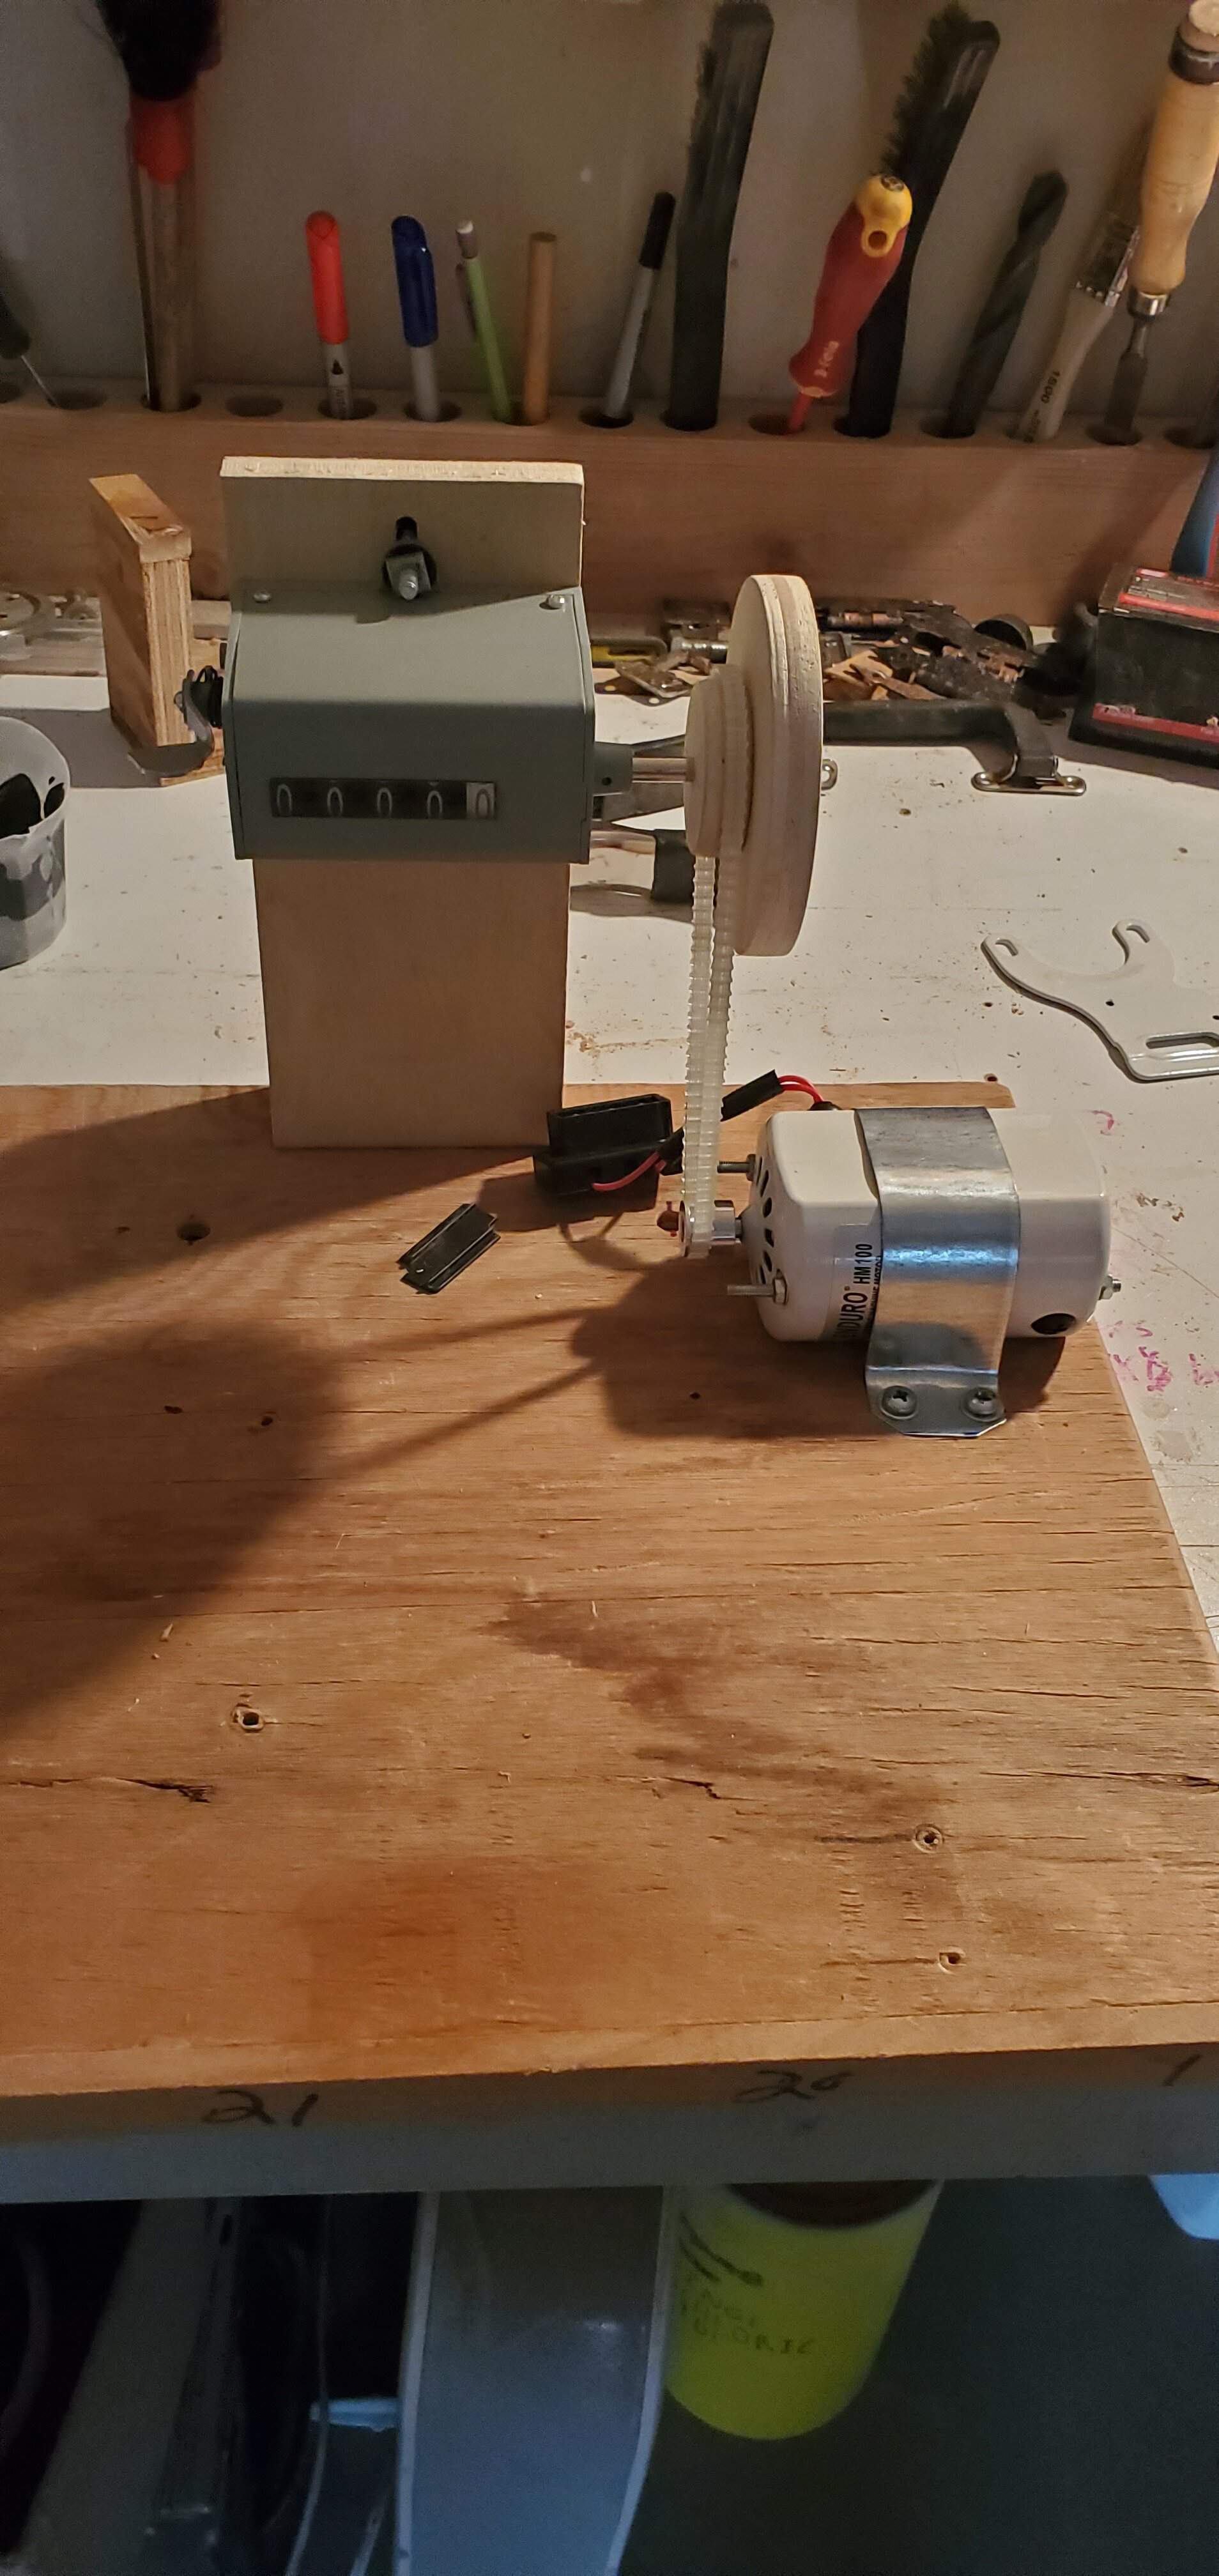
I glued and screwd the counter holder down and screwed the motor down. And I'm surprised at how easy this all was! The thing actually works! Also the speed adjust is waaaaay smoother with a little torque applied, so maybe I'll just Variac it and call it good. Next step will be to make some guides and clean the whole thing up. I'll probably paint it too just to make it look really clean.
 
No margarita's for me today I'm doing stuff! :D
View attachment 4704729
I glued and screwd the counter holder down and screwed the motor down. And I'm surprised at how easy this all was! The thing actually works! Also the speed adjust is waaaaay smoother with a little torque applied, so maybe I'll just Variac it and call it good. Next step will be to make some guides and clean the whole thing up. I'll probably paint it too just to make it look really clean.

I like it! That's a good simple framework for a winder. I think that's the first time I've seen someone use the counter itself as the spindle, and that's a great idea. The counters' bearings and shaft look strong enough. There isn't much load on the spindle of a pickup winder. You can also take it easy on the belt tension to reduce the side load on the counter shaft. Because the counter is solid direct drive, it doesn't really matter if there's some slippage in the belt drive.

If you want to, you can control the speed of the sewing machine motor with a rheostat wall lamp dimmer. Save your big Variac for some other exciting machine project.
 
  • Like
Reactions: SamanthaCay
I like it! That's a good simple framework for a winder. I think that's the first time I've seen someone use the counter itself as the spindle, and that's a great idea. The counters' bearings and shaft look strong enough. There isn't much load on the spindle of a pickup winder. You can also take it easy on the belt tension to reduce the side load on the counter shaft. Because the counter is solid direct drive, it doesn't really matter if there's some slippage in the belt drive.

If you want to, you can control the speed of the sewing machine motor with a rheostat wall lamp dimmer. Save your big Variac for some other exciting machine project.
I was thinking about trying a rheostat, that or a smaller Variac if that wouldn't handle the load. I do on occasion use my Variac for working on amps. (Used to all the time because I was repairing amps professionally) I'd too like to free up some space and weight. I'll hook it up later and see what the draw is and that'll tell me if a rheostat is an option. If so that would look pretty nice in a pedal enclosure mounted to the base.
 
I always have a fifth of my favorite shop solvent on my bench... Everclear. If I just keep a few cans of Mountain Dew on hand then it sounds like I got the fixins for a good Margie-Rita any time I want. :)

My Dad was a biology professor at the University and had access to some unusual stuff occasionally. He kept this bottle around in the garage and occasionally brought it out for holiday parties.
20171231_192829.jpg
 
  • Like
Reactions: Beej
I was thinking about trying a rheostat, that or a smaller Variac if that wouldn't handle the load. I do on occasion use my Variac for working on amps. (Used to all the time because I was repairing amps professionally) I'd too like to free up some space and weight. I'll hook it up later and see what the draw is and that'll tell me if a rheostat is an option. If so that would look pretty nice in a pedal enclosure mounted to the base.

Here's a cute little motor from the 1930's that a friend gave me. It may have come from a sewing machine. It's a Universal (AC/DC) motor, 1/10 HP, similar in performance to your sewing machine motor. I have it rigged up with an old-style rheostat lamp dimmer and a switch in a standard square box. A simple clean installation, and it works very well. Smooth control of the speed all the way down to a crawl, like 30 rpm.

IMG_8698B.jpg


IMG_8699B.jpg


I rigged this motor up originally to make a small fret tang grinding machine. It didn't have enough torque to do grinding, though, so I ended up building that machine with a bigger motor. But I've kept this one aside, thinking it would be perfect for a small pickup coil winder. My big coil winder has been doing the job just fine for 17 years, but it's an oversize overkill monster. I eventually want to build this little motor into a similar design mechanical auto-feed coil winder, made just for my standard pickup bobbins.
 
Good use for a repurposed universal motor, Bruce.

If there's a need for variable speed from a small motor then the universal motor is a good candidate for that.

Note: For those of you who are unsure of your motor's general classification, look for the tell tale presence of brushes to tip you off to the motor type. Brush holders are often exposed on older motors because manufacturers made them accessible for easy replacement by end users. Universal motors are often used in hand tools such as rotary hobby tools, electric drills, or a raft of other small tools due to the motor's relatively high torque at low speeds and ease of speed control by lowering the voltage.

I'd personally look for a cast off universal motor or perhaps an old hand tool to use as a base for building a winder.

Lowering the voltage to control the speed of a standard induction motor increases the amount of "slip" as the rotor chases the magnetic field generated by the motor's fixed stator windings. It works, but you pay for that in lowered torque, increased heat, and lack of stable control of the motor's speed.

With the increasing use of electronics there has been a commensurate increase in the availability of variable A.C. frequency drives that do offset the disadvantages of trying to control speed on a standard induction motor. That's a viable solution for slightly larger motors, but not so much for a small motor like what we would want on a winder. There is also the cost to factor in.

The universal motor on the other hand, is easily controlled by means of a simple rheostat, variac, or any other means of reducing the voltage applied to it.

Probably TMI, and I don't mean to side-track the topic, but these are salient points about motor selection that should be taken into account when home-brewing a special purpose machine. (Since one of my driving forces is "frugality" that's why I went with a $10 drill to gain speed control and good torque at minimal rpm when ramping up to winding speed. :) )
 
First off, loving this build and the docs - learning lots, so thanks!
Further more I need about an inch of depth here. My initial rout being 1" 1/8th means I'll want to come back later and rout that pine using a guide bit almost all the way to the mahogany. Stoping an 1/8th shy to get the right depth and hide the ugly underneath. Sheesh what a process..
Just a little proud so I can cut it down later. The top plug got hammered into place with glue and was a very (almost too) tight of a fit
This is a very basic question, but what kind of glue did you use? I just routed a bass too deep and need to toss a little plug in. First I need to figure out how to get a good template to route the body a bit better and cut a plug that'll fit nicely, but after that I'm not entirely sure what glue to use. Due to the position, I don't have clamps that I can position, so (I think) wood glue is out unless I glue it and toss a couple screws in, which I'd rather not do. Epoxy is probably a better bet? Toss it on, place in the plug, press down for a minute and let it cure over night?