

Enjoy the benefits of a premium membership!
Upgrade Account
-
TalkBass has been independent since 1998. Add your voice.
Create a free account to reply to discussions, view embedded media, and browse with fewer display ads.
Join free Log in
Want zero display ads or expanded classifieds tools? Compare plans.
You are using an out of date browser. It may not display this or other websites correctly.
You should upgrade or use an alternative browser.
You should upgrade or use an alternative browser.
DIY 3015 Cabinet
- Thread starter V63
- Start date
More options
Who Replied?
The drawing indicates "string tension bolts". Is there a turnbuckle or something similar added for even more bracing?
I like the way that the bracing cradles the driver. Mesa uses "aircraft" style braces with holes to lighten the bracing. This takes it to a higher level.

- Nov 24, 2008
- 4,343
- 7,163
- Disclosures
- Owner & designer, AudioKinesis; Auth. mfg, Big E (Home Audio only)
These pictures make me ashamed and embarrassed that I started this post. The most I can do at this stage is put a 1" MDF strip along the back of the baffle by taking one off the back panel. This is my first and only build! Does your son want to build me a cab?
Really beautiful.
Puts me to shame.
You have absolutely nothing to be ashamed of! That build puts us all to shame, even those of us who do this for a living. It's like you said, "hey I just took up golf" and Tiger Woods shows up in disguise.
If my 4" Precision Ports are 18 mm less then 4 inches from the sides and bottom how much will this lower the tuning?
What gage wire should I use to connect the driver?
I didn't realize you were using Precision Ports - very nice!! That's what use. They are more forgiving of ending up a little bit closer to the cabinet walls because the flare helps out the airflow. Your tuning frequency might go down 1 or 2 Hz at the most, not nough to worry about.
I use 16 gauge wire in my cabs that use single Kappalite class woofers, but you can go heavier if you want. If you have 18 gauge on hand, just do a double run and you'll be fine. A few bands of tape to bundle the wires together will keep 'em from buzzing.
The point of bracing is more volume at less power correct? How much volume am I losing here?
You probably won't lose appreciable SPL, but you may lose impact - that "thump" at the beginning of the note.
Just glue some 1x2 white pine edgewise in between the cut-outs and you should be fine. Even if it partially overlaps the Precision Port cutout, that shouldn't be a problem, as you can install the inner flare from inside the box if it won't fit through the cut-out.
I strongly recommend using tape to wrap the joints of the Precision Ports and hold them together, instead of gluing them. You may well find that the ideal port length is different from your first try.
Also, if you're going to install the assembled Precision Ports through their cut-outs (instead of attaching the inner flare from the inside), here's a little tip: Take a knife and whittle a "flat spot" on either side of the inner flare, maybe reducing its diameter by 1/4" as measured across from flat spot to flat spot. This will make it easier to fit the inner flare through the hole, but most important, if you ever have to remove the port, you can align those flat spots so that you never have a tight friction fit against the sides of the cut-out. That tight friction fit can tear out little chunks of wood, so that you have to fill them in if you want an airtight seal (and you do, otherwise you'll get "flutter" at high volumes).
Speaking of airtight seals: Four mounting screws may not be enough to prevent air from escaping underneath the port flange. I drill 4 more mounting screw holes in the perimeters of my 3" ports, one in between each factory screw hole; you may want to drill two additional mounting screw holes in between each factory hole for those big 4" diameter ports.
Finally, I like your internal dimensions, and maybe we can take advantage of the midrange-friendly nature of those big port flares. I suggest trying the cab with zero stuffing. You'll get some midrange energy bouncing back out the ports, but because the port openings have a generous round-over instead of a sharp edge, it should sound pretty good. In fact, I think it may even be slightly beneficial to the overall sound of your cab. If you suspect otherwise, it's easy to go back inside and install some damping material. But don't overdo it... too much will start to suck the life out of the sound.
Imo, ime, ymmv, etc.
Very best of luck with your project.
Thanks for your reply and the kind words Duke. I do really appreciate it.
The front part of the ports are glued in with PL so I hope there won't be any air escaping. The screws are just there to hold the flanges until the glue cures. The tape idea is a good one that I was planning to use. I'll see if I can get some wood on the baffle between the ports and the driver.
Now for the part I don't understand:
My plan was to line the 5 sides of the cab with denim insulation. I thought that this was a must. Could you explain ".. too much will start to suck the life out of the sound" a little for me?
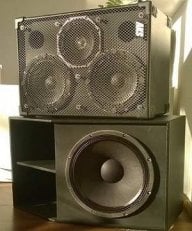
A cross between this

and this
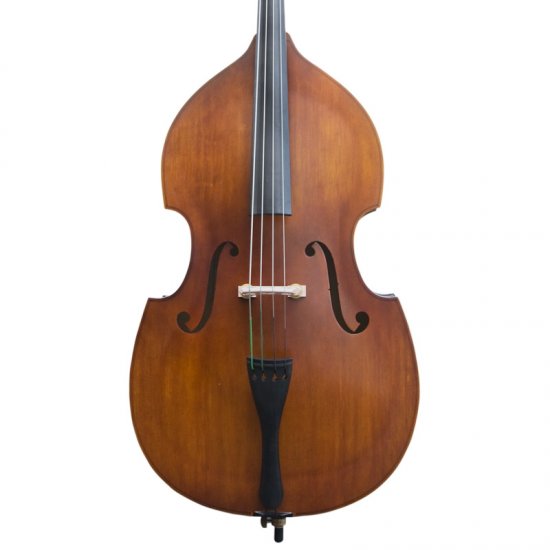
would be my wildly impractical never-gonna-happen tone goal.
I owned a MesaBoogie Walkabout Scout I didn't like the sound of but I did really like the Ampeg SVT-410HE I tried. It was just too big and heavy for me.
I have a Markbass F500 head that I like.
Thanks
The front part of the ports are glued in with PL so I hope there won't be any air escaping. The screws are just there to hold the flanges until the glue cures. The tape idea is a good one that I was planning to use. I'll see if I can get some wood on the baffle between the ports and the driver.
Now for the part I don't understand:
I suggest trying the cab with zero stuffing. You'll get some midrange energy bouncing back out the ports, but because the port openings have a generous round-over instead of a sharp edge, it should sound pretty good. In fact, I think it may even be slightly beneficial to the overall sound of your cab. If you suspect otherwise, it's easy to go back inside and install some damping material. But don't overdo it... too much will start to suck the life out of the sound.
My plan was to line the 5 sides of the cab with denim insulation. I thought that this was a must. Could you explain ".. too much will start to suck the life out of the sound" a little for me?
A cross between this
and this
would be my wildly impractical never-gonna-happen tone goal.
I owned a MesaBoogie Walkabout Scout I didn't like the sound of but I did really like the Ampeg SVT-410HE I tried. It was just too big and heavy for me.
I have a Markbass F500 head that I like.
Thanks

- Nov 24, 2008
- 4,343
- 7,163
- Disclosures
- Owner & designer, AudioKinesis; Auth. mfg, Big E (Home Audio only)
My plan was to line the 5 sides of the cab with denim insulation. I thought that this was a must. Could you explain ".. too much will start to suck the life out of the sound" a little for me?
I used to think it was a must too. Then one day I was preparing a pair of "satellite" speakers (designed to be used with subwoofers) for a high-end audio show. I'd used this same woofer (Kappalite 3012LF) before in a big box with good results, and figured that, if anything, I'd need to get more aggressive with the damping material in this little box.
But the darn thing sounded lifeless. So I started experimenting with damping material type, quantity, and placement. Before long I noticed a trend: less seemed to sound better. So just to see what that end of the scale sounded like, I took out all the damping material and listened (I was making the changes to one speaker at a time so that I could compare with the previous "best"). Well guess what - zero damping material blew away everything else I'd tried. I did go back to using just a little bit, to address the top-to-bottom standing wave mode (which is usually the one that's most severe), but all of the vertical walls were bare.
Okay that's one story.
Here comes another, and it may relate to your port configuration.
Over in the guitar cab world, someone "invented" a thing called "de-tuning". It's simply where you leave out half of the guitar speakers in what would otherwise have been a closed cab. So you end up with a high-tuned ported box, as the unused speaker cut-outs act like ports, and they also allow a lot of midrange energy to escape after one or more bounces inside the box. Well the combination of warm bottom end (it's now a ported box) and rich mids (they add to the mix) is often considered to sound better than the cab would have with its full complement of speakers.
So I'm thinking, just speculating really, that you might get some beneficial midrange energy bouncing off a bare back wall. Wouldn't cost you anything to try it.
If you do add damping material, I'd start with the top and/or bottom, as in my experience that's the standing wave mode that's most likely to cause audible coloration. But in my opinion, use only enough damping material to adequately suppress audible box colorations. And in my experience that sweet spot is most efficiently found by ear, by trial and error.
On how much to dampen a cabinet greatly depends on the cabinet size/shape, the frequency range of the driver that uses the volume and the "quality" of the cone. With "quality" I mean how much reflective sound of the inside of the cabinet will come through the cone once it is bounced back by the inner surfaces.
Only trial and error will give you the results you want.
There's only one good way to "fight" a standing wave in a tall cabinet, an internal Helmholz-absorber. It's actually a small bassreflex cabinet inside the main cabinet that is tuned to the frequency of the standing wave, it will "absorb" it's energy.
Only trial and error will give you the results you want.
There's only one good way to "fight" a standing wave in a tall cabinet, an internal Helmholz-absorber. It's actually a small bassreflex cabinet inside the main cabinet that is tuned to the frequency of the standing wave, it will "absorb" it's energy.
- Nov 24, 2008
- 4,343
- 7,163
- Disclosures
- Owner & designer, AudioKinesis; Auth. mfg, Big E (Home Audio only)
There's only one good way to "fight" a standing wave in a tall cabinet, an internal Helmholz-absorber. It's actually a small bassreflex cabinet inside the main cabinet that is tuned to the frequency of the standing wave, it will "absorb" it's energy.
Dangit, is there any trick you don't know??
In my forty-something inches tall home audio speakers, I often tune the area behind the horn to behave as a Helmholtz resonator, by using a brace that is mostly solid except for the "port" cut-out.
Seriously, that is beautiful. A real artisan DIYer like your son will leave a commercial builder in the (saw)dust because we can't afford the time to do something like that. And most of us (myself included!) never would have thought to do that.
Great brace-job

The only thing that I see with a lot of people that do this kind of bracing (chamfer all the holes, etc)is that they take to much thought and time into the esthetics and not into the functionality, not to say that the bracing isn't functional but you should brace in such a way that you split all the surfaces as asymetrical as possible. Bracing is not only to create a rigid cabinet and push the panel resonance to a higher frequency but also to "smear" out the frequencies of the panel resonances.
In my forty-something inches tall home audio speakers, I often tune the area behind the horn to behave as a Helmholtz resonator, by using a brace that is mostly solid except for the "port" cut-out.
That's exactly the way to do it
I'm a really indecisive guy. Trial & error and choosing between fine gradations is not my forte. Would the difference in the sound be very audible so that with 2 panels damped I'd hear angels singing, and with 3 damped it would sound like a garbage truck emptying a dumpster?
I'll try it without damping first.
To "smear" the sound the braces on the back panel should be a little off centre correct?
I'll try it without damping first.
To "smear" the sound the braces on the back panel should be a little off centre correct?


I have NL4MPR speakon jack with 4 prongs. How do I wire it to my single Kappalite 3015? I think I know but I want to be sure.
+ (red) goes to +1 on the speakon, -1 goes on the return (black) speaker terminal.
It is a good idea to check that the speaker is wired properly. Connect the "-" on the speaker to the "-" on an alkaline battery. 9V will work . The cone should move forward (outward) when the battery "+" is momentarily brought into contact with the speaker "+". Just tap the contact, do not hold the battery "+" connected.
It is a good idea to check that the speaker is wired properly. Connect the "-" on the speaker to the "-" on an alkaline battery. 9V will work . The cone should move forward (outward) when the battery "+" is momentarily brought into contact with the speaker "+". Just tap the contact, do not hold the battery "+" connected.
Thanks, there seems to a place on the speaker frame itself to attach a ground wire or something, what is this for?
It's little tab with a hole through it and it is just to run cable through and maybe tie them to the frame? Is that what you're saying? Sorry but this little do-hickey is making me paranoid that there's something I'm missing.
Best if you can post an image of it to be sure what you are concerned about.
Yes, I am saying you would use a cable tie through the do-hickey on the frame to tie down the cable so it won't vibrate. Some speakers have this attachment point.
As seen below, there are the two speaker terminals.
Yes, I am saying you would use a cable tie through the do-hickey on the frame to tie down the cable so it won't vibrate. Some speakers have this attachment point.
As seen below, there are the two speaker terminals.


