
With the limited options for short scale strings, especially for short scale 5 string sets for a short scale Low B, I’ve just recently figured out a way how to make my own short scale string out of a long scale.
I have only tried this on a .130 B string, but it seems like it will work for tapered springs in general. I also cannot speak for any long term results with this method, as this is my first time trying it myself and it worked out well for me on my miKro.
I used the following commonly available materials and household tools:
The first thing you want to do is measure your new long scale string against your existing short scale string that you are replacing. Mark where the taper is supposed to begin. Measure and cut out the length of heat-shrink tubing you want for your taper. You want to use the smallest diameter tube that will still allow you to slip over the thickest part of the string.
Step 2: Glue, Unwind, Trim
To make things easier later, slide the heat-shrink tube over the string before you proceed. Place just a small bead of super glue on the thick side of the string where you will start the taper. Gently dab away any excess.
Securely anchoring the ball end of the string will help make the next step easier.
At the very end of the string, begin unwinding with the small winding around the core. It may be a little difficult at first, but once you get a few inches unwound, you should be able to quickly unwind it by pulling straight back in line with the string.
As you are unwinding, you will see another inner layer of winding if you are doing this on a .130 string. Leave this alone for now. Keep pulling away and slow down when you get close to your taper mark. Unwind until you are just short of where you applied the super glue. Trim the excess winding and tuck the end neatly against the string so it’s not sticking out.
Step 3: Glue, Unwind, and Trim Next Layer
If you are working on a similary built string with three windings, you will want to repeat the process again with the inner winding that you uncovered from Step 2. Super glue the newly exposed winding at the point where you cut the outermost winding, then resume unwinding from the core end. You will eventually uncover the innermost layer, which you will also leave alone for this step. Keep going, just like in Step 2, stop before the point where you placed your applied the super glue. Cut the excess winding and tuck the end against the string.
Step 4: Position and Shrink the Tube
Position the heat shrink tube over your new taper, and shrink it with heat. I used a butane soldering iron with the tip removed, but you can use a candle or a lighter if you are careful not to burn your string or yourself.
Step 5: Install
Congratulations! You just made yourself a short scale string. Go ahead and install it like you would any other string.
I’m not entirely sure if super glue is the best adhesive for this application, or if it even works, but intuitively I wanted to use an adhesive that could flow between the windings in combination with the heat-shrink to keep the taper as secure as practical. If there is a better adhesive, or if it’s even necessary, please share.
I have only tried this on a .130 B string, but it seems like it will work for tapered springs in general. I also cannot speak for any long term results with this method, as this is my first time trying it myself and it worked out well for me on my miKro.
I used the following commonly available materials and household tools:
- Heat-Shrink Tubing
- Pliers
- Sharpie
- Super Glue
- Wire Cutters
The first thing you want to do is measure your new long scale string against your existing short scale string that you are replacing. Mark where the taper is supposed to begin. Measure and cut out the length of heat-shrink tubing you want for your taper. You want to use the smallest diameter tube that will still allow you to slip over the thickest part of the string.

Step 2: Glue, Unwind, Trim
To make things easier later, slide the heat-shrink tube over the string before you proceed. Place just a small bead of super glue on the thick side of the string where you will start the taper. Gently dab away any excess.

Securely anchoring the ball end of the string will help make the next step easier.
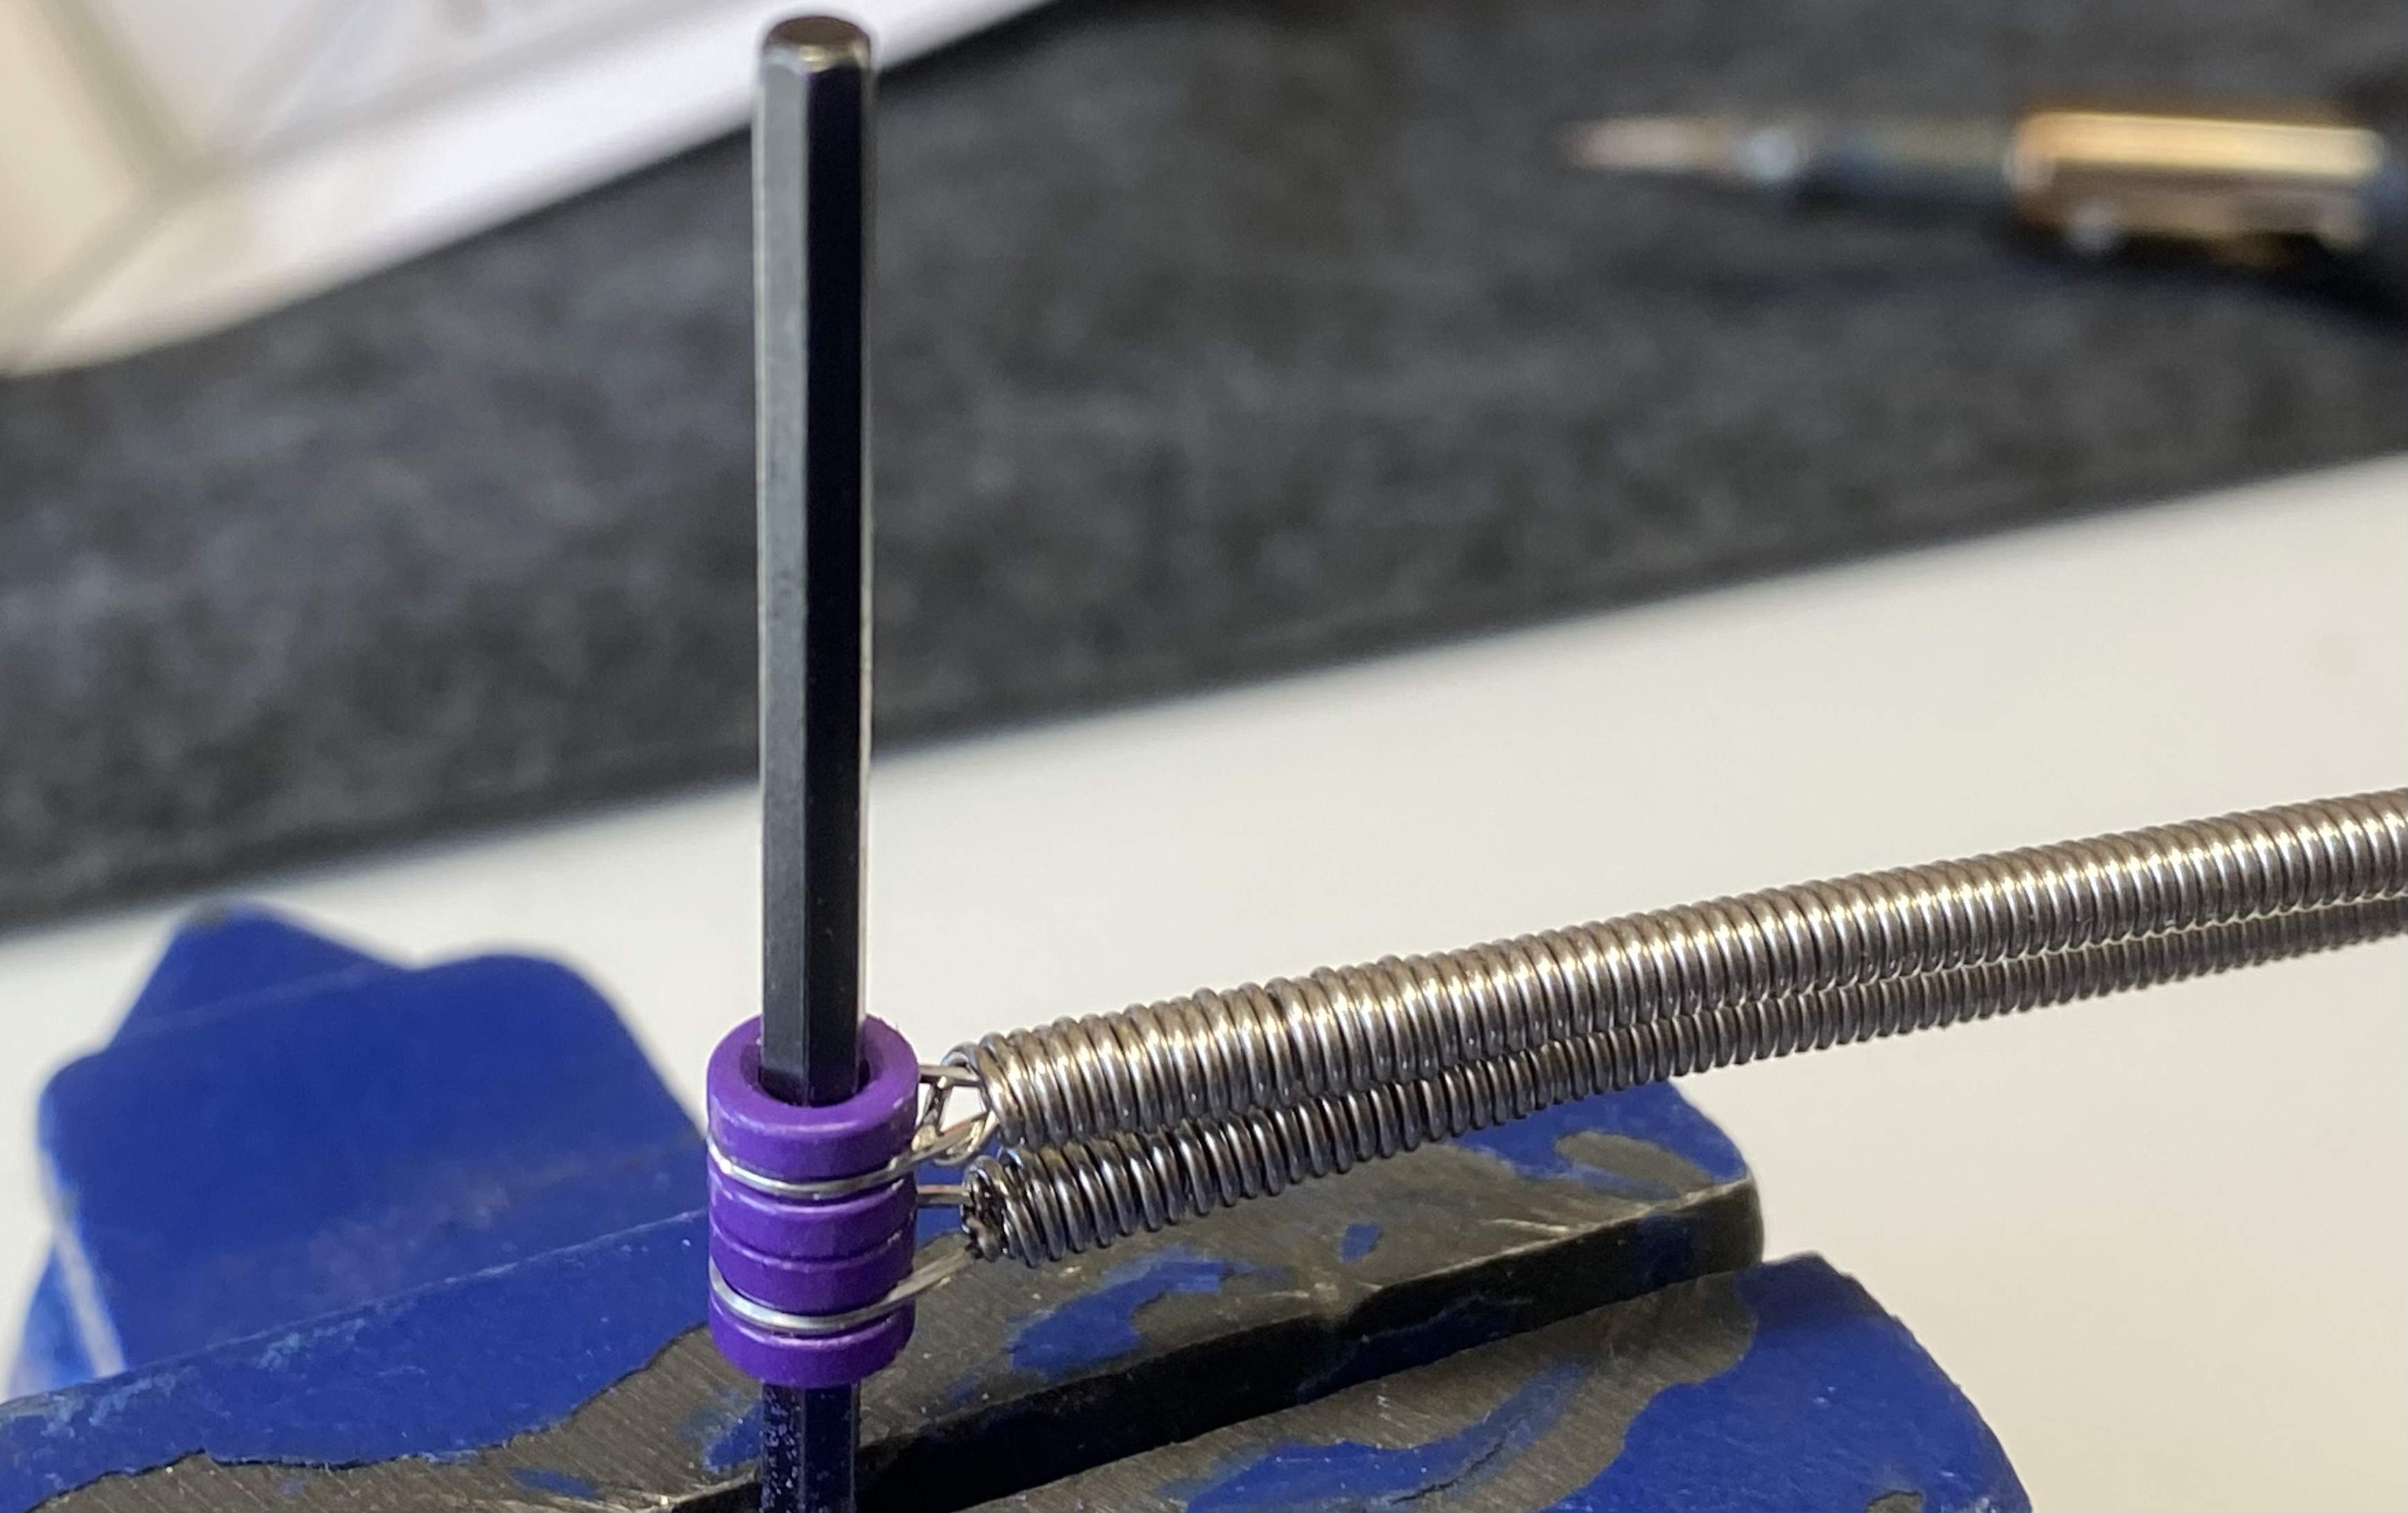
At the very end of the string, begin unwinding with the small winding around the core. It may be a little difficult at first, but once you get a few inches unwound, you should be able to quickly unwind it by pulling straight back in line with the string.
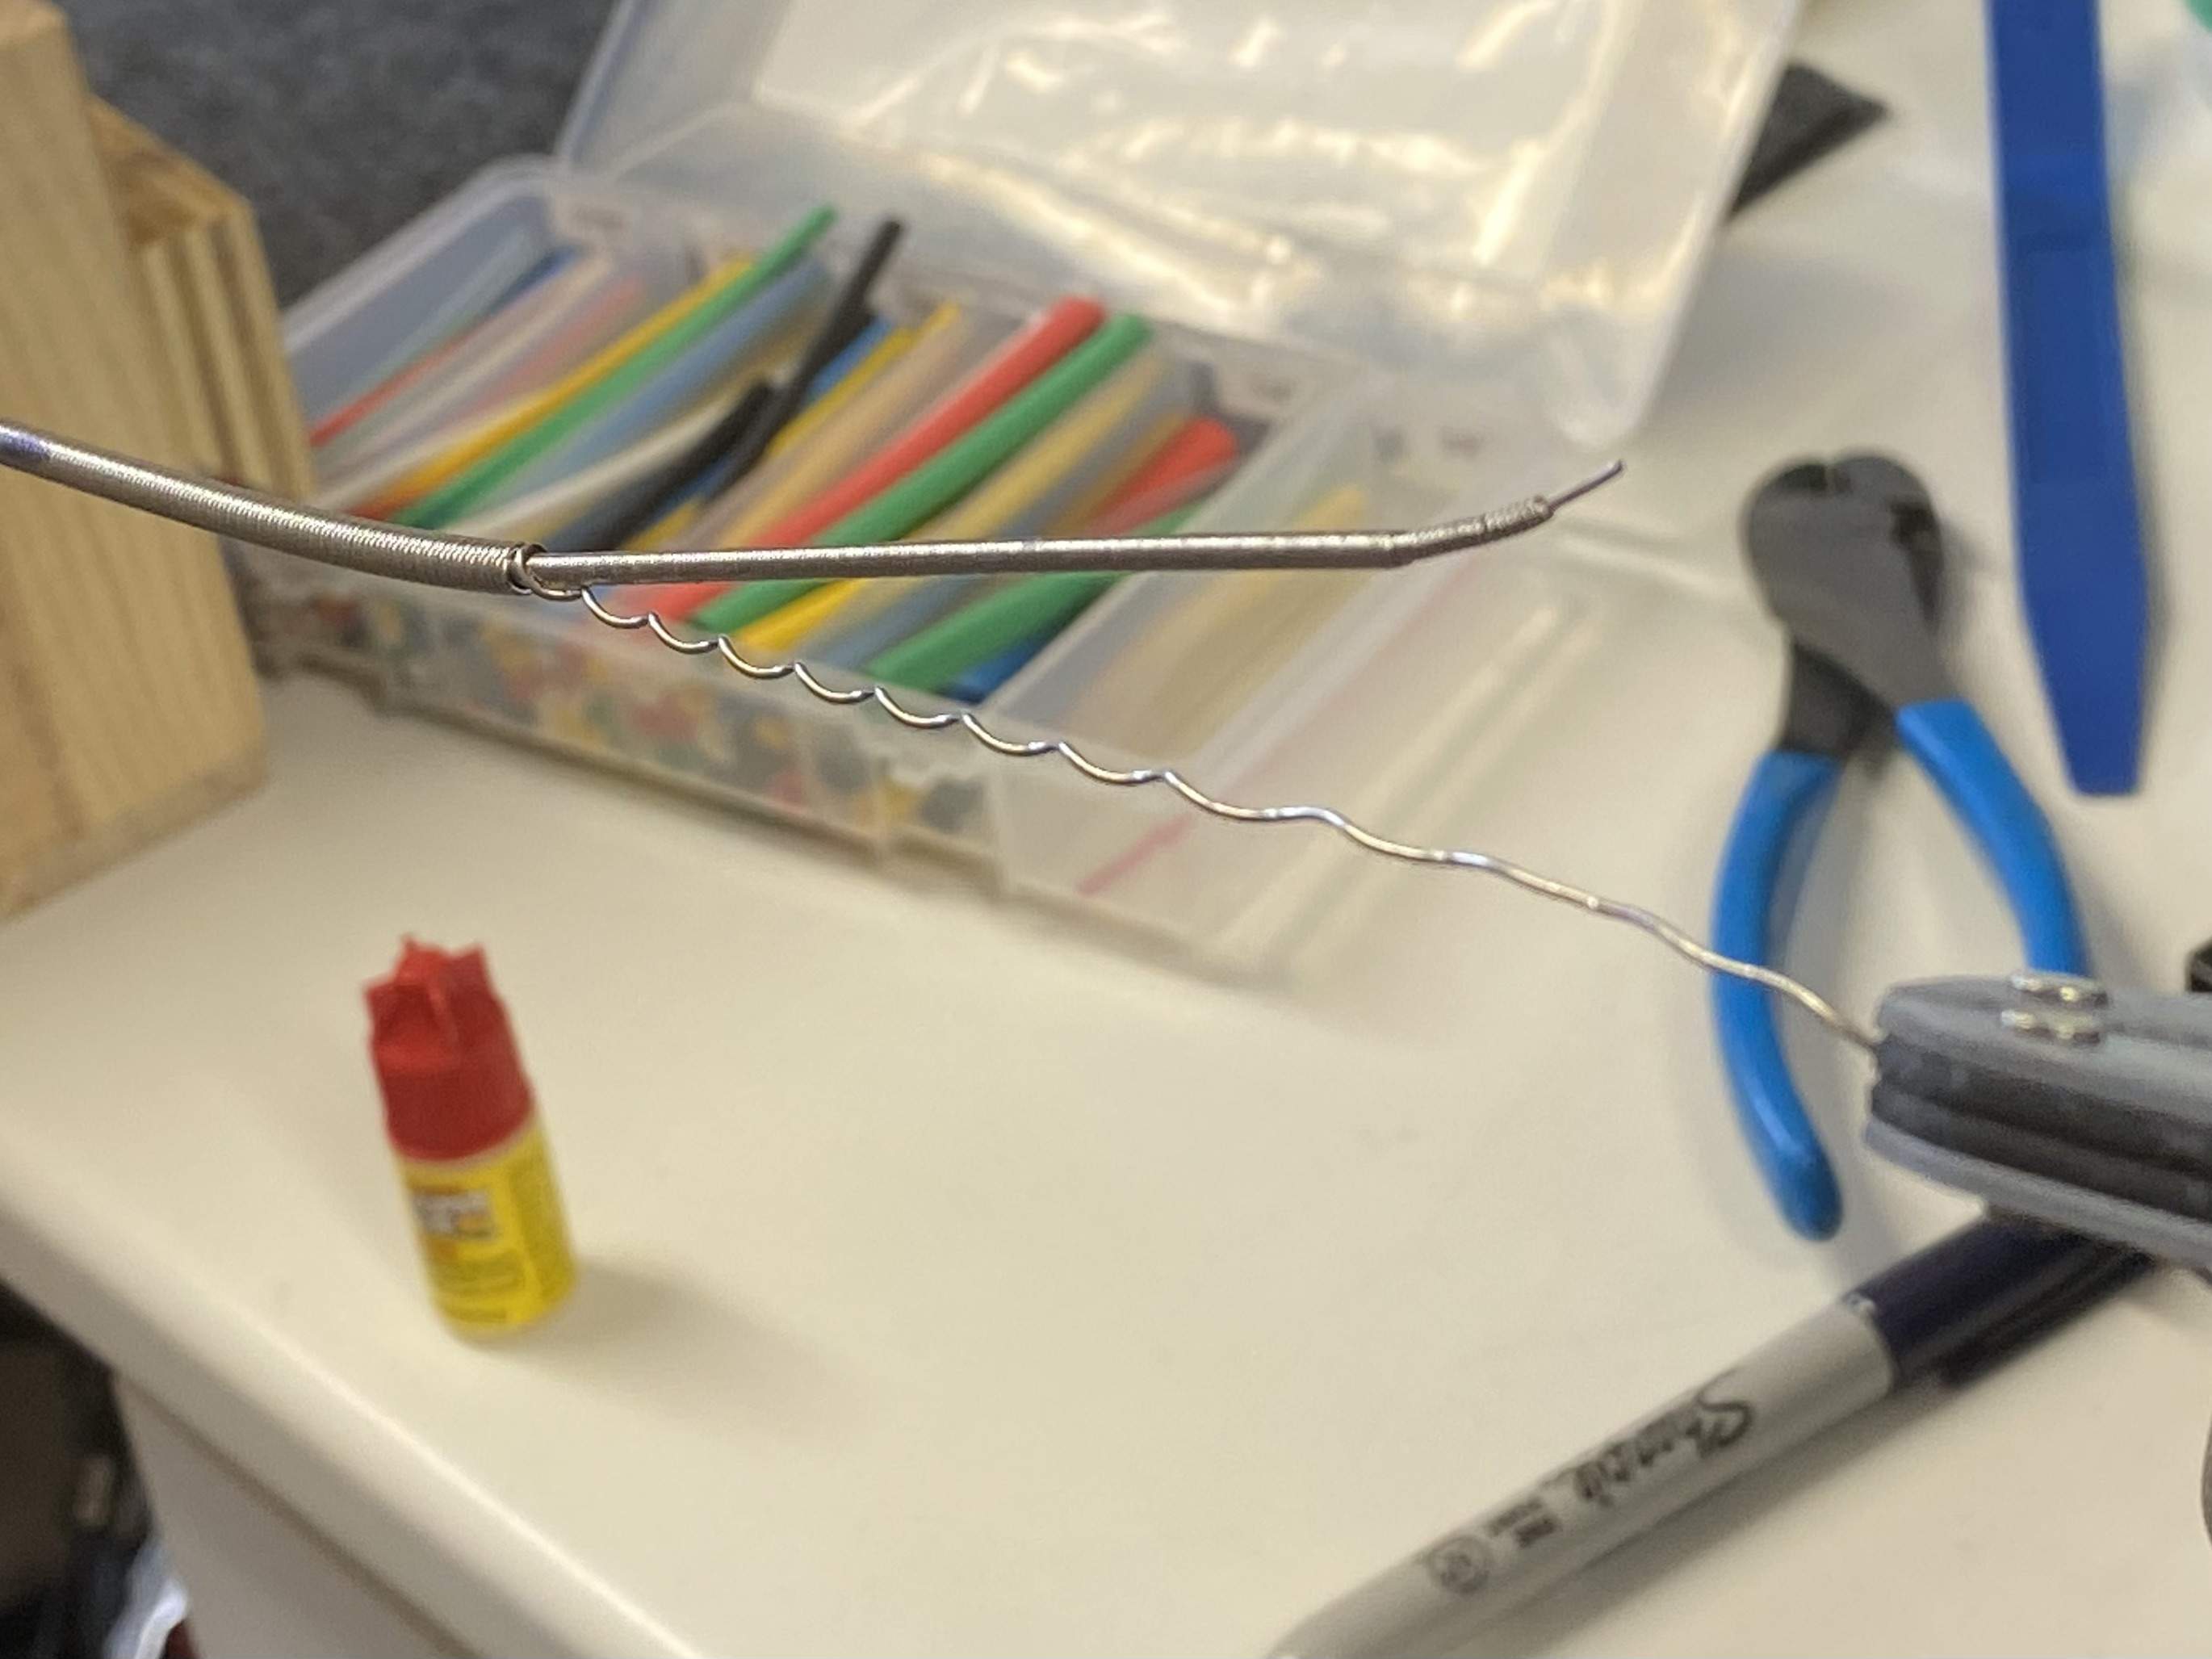
As you are unwinding, you will see another inner layer of winding if you are doing this on a .130 string. Leave this alone for now. Keep pulling away and slow down when you get close to your taper mark. Unwind until you are just short of where you applied the super glue. Trim the excess winding and tuck the end neatly against the string so it’s not sticking out.

Step 3: Glue, Unwind, and Trim Next Layer
If you are working on a similary built string with three windings, you will want to repeat the process again with the inner winding that you uncovered from Step 2. Super glue the newly exposed winding at the point where you cut the outermost winding, then resume unwinding from the core end. You will eventually uncover the innermost layer, which you will also leave alone for this step. Keep going, just like in Step 2, stop before the point where you placed your applied the super glue. Cut the excess winding and tuck the end against the string.

Step 4: Position and Shrink the Tube
Position the heat shrink tube over your new taper, and shrink it with heat. I used a butane soldering iron with the tip removed, but you can use a candle or a lighter if you are careful not to burn your string or yourself.

Step 5: Install
Congratulations! You just made yourself a short scale string. Go ahead and install it like you would any other string.
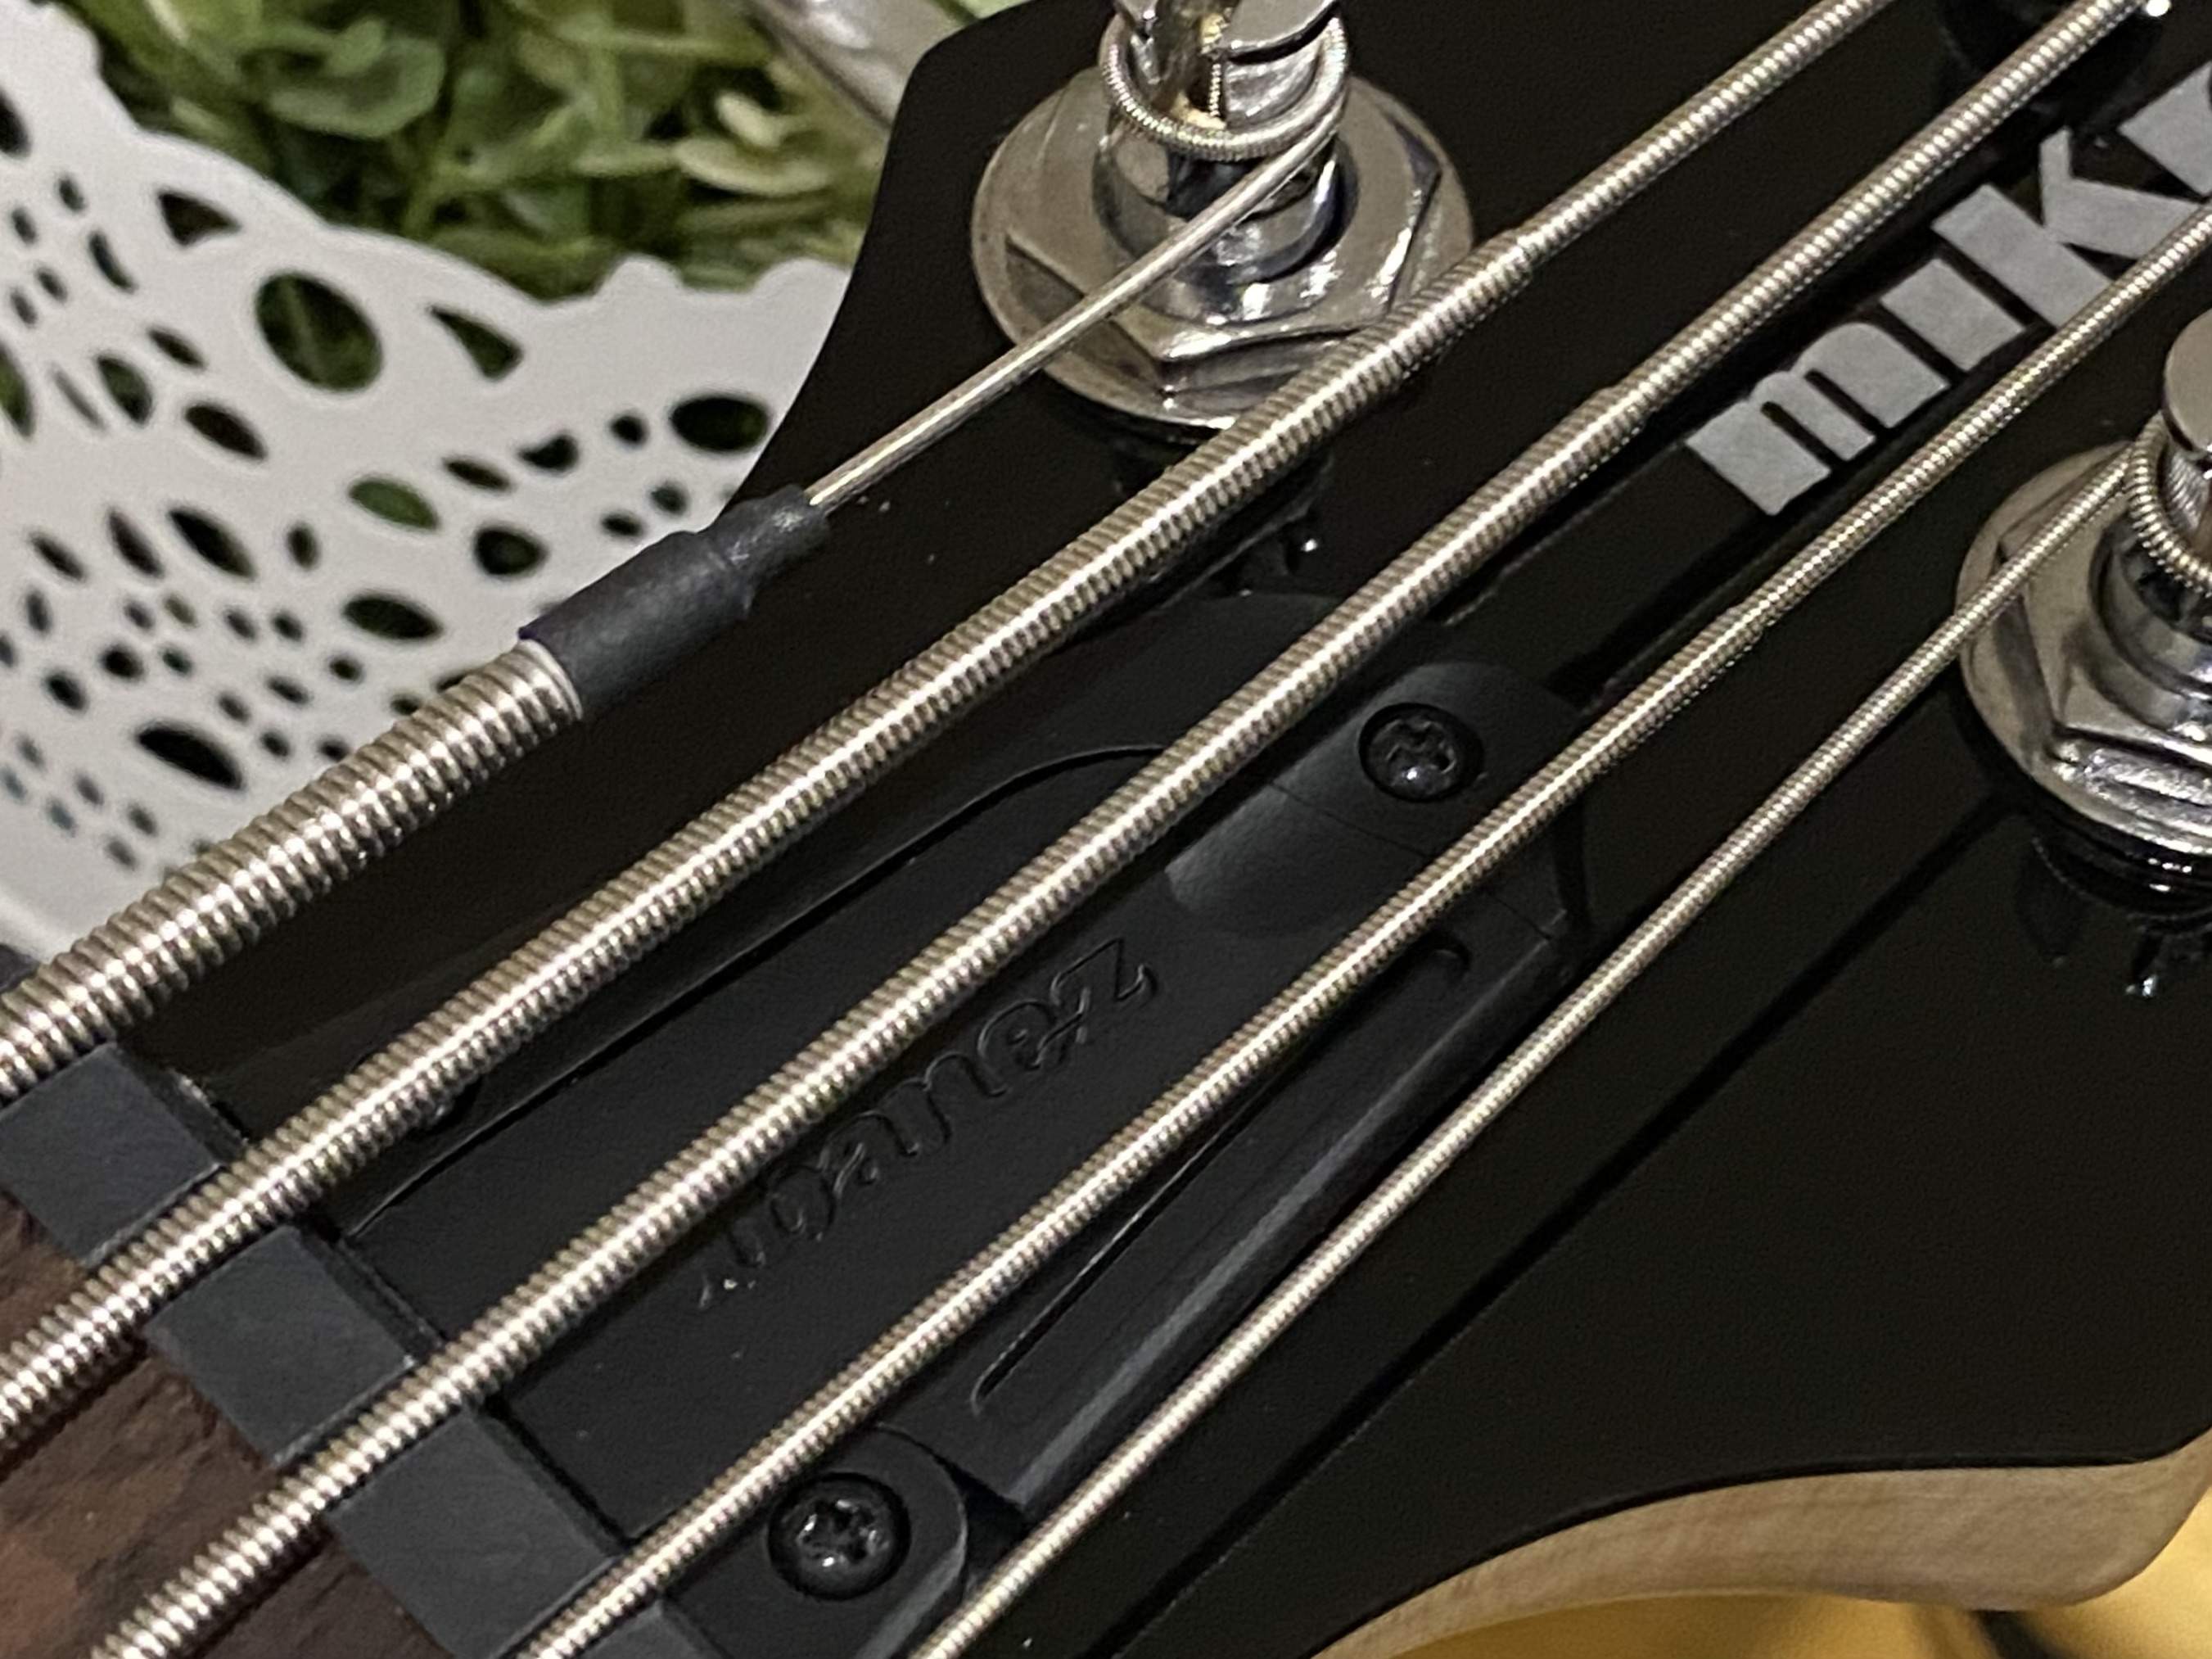
I’m not entirely sure if super glue is the best adhesive for this application, or if it even works, but intuitively I wanted to use an adhesive that could flow between the windings in combination with the heat-shrink to keep the taper as secure as practical. If there is a better adhesive, or if it’s even necessary, please share.
Last edited:







 )
)