
Enjoy the benefits of a premium membership!
Upgrade Account
-
TalkBass has been independent since 1998. Add your voice.
Create a free account to reply to discussions, view embedded media, and browse with fewer display ads.
Join free Log in
Want zero display ads or expanded classifieds tools? Compare plans.
You are using an out of date browser. It may not display this or other websites correctly.
You should upgrade or use an alternative browser.
You should upgrade or use an alternative browser.
First Bass Build - Semi Hollow EB-2 Inspired
- Thread starter Ben Umlaut
- Start date
More options
Who Replied?
- Apr 18, 2008
- 16,016
- 1
- 31,730
- Disclosures
- I'm highly opinionated and extremely self-assured

I tapered the fret board this morning and started on the blood wood binding. The bottom corner needs some work, but I'll get there.
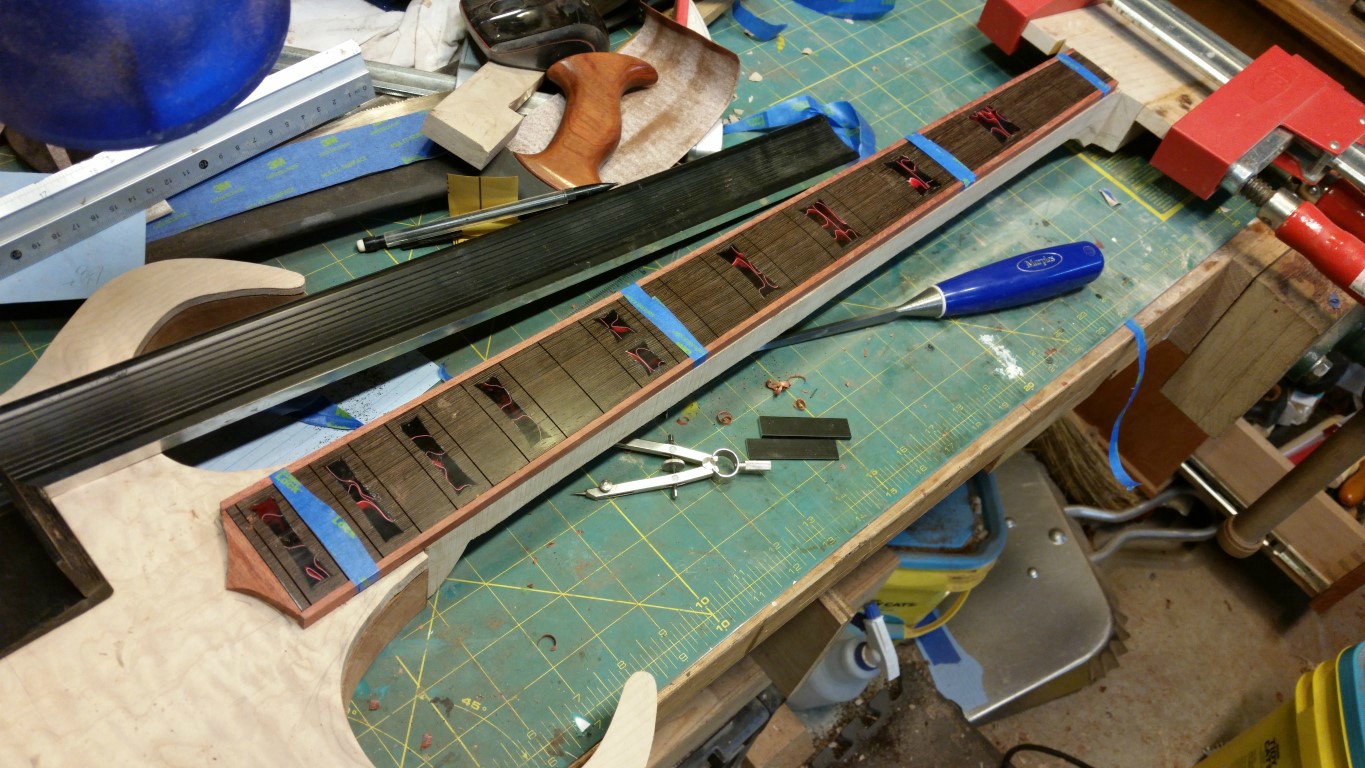
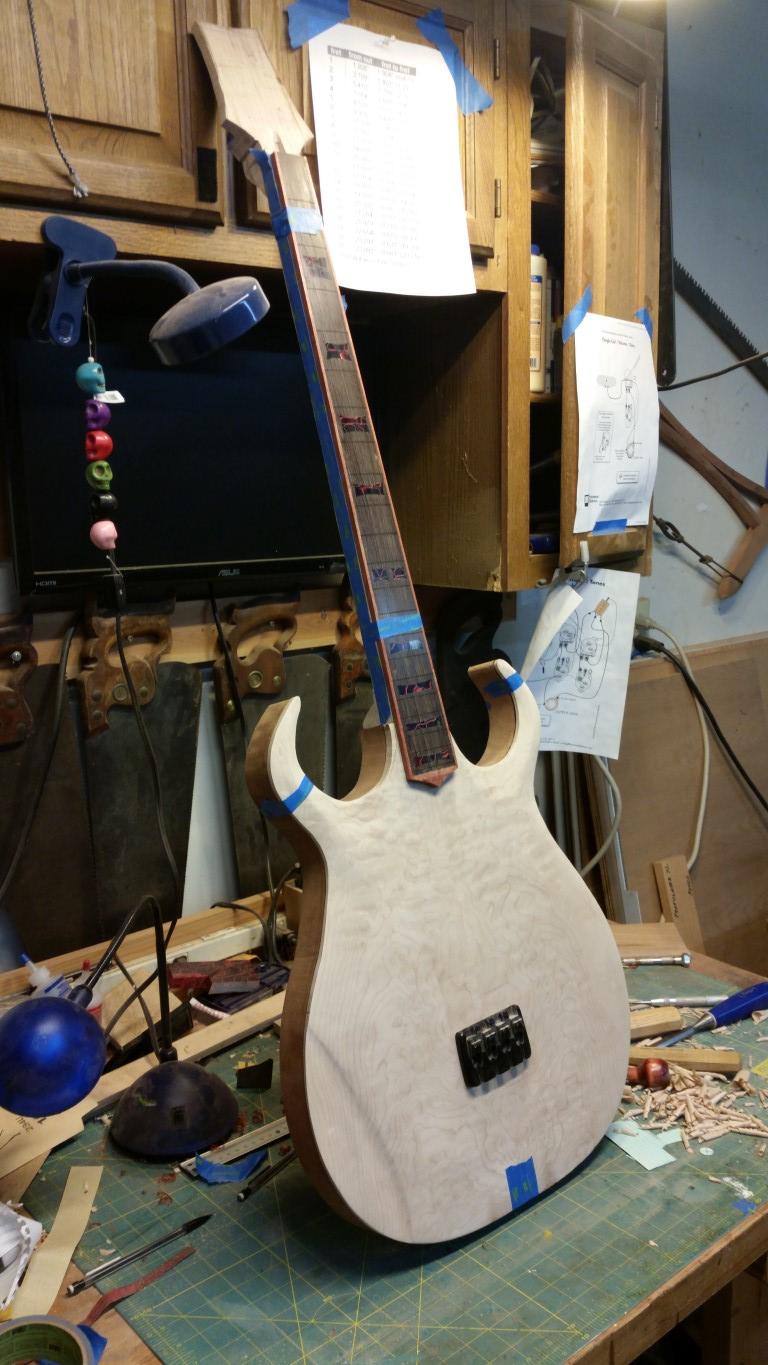
I have the patience of a three year old on a Snickers bender so I went ahead and taped everything together. This is with the bloodwood binding on the fretboard.
I started work on the headstock veneer. It is blood wood, same as the fretboard binding. I use waterslide decals for logos but the black print is hard to see on the brownish-red background. To get around this, I inlay a small piece of maple into the headstock. I trace around the inlay with a marking knife and then remove the waste with sharp chisels and a router plane.
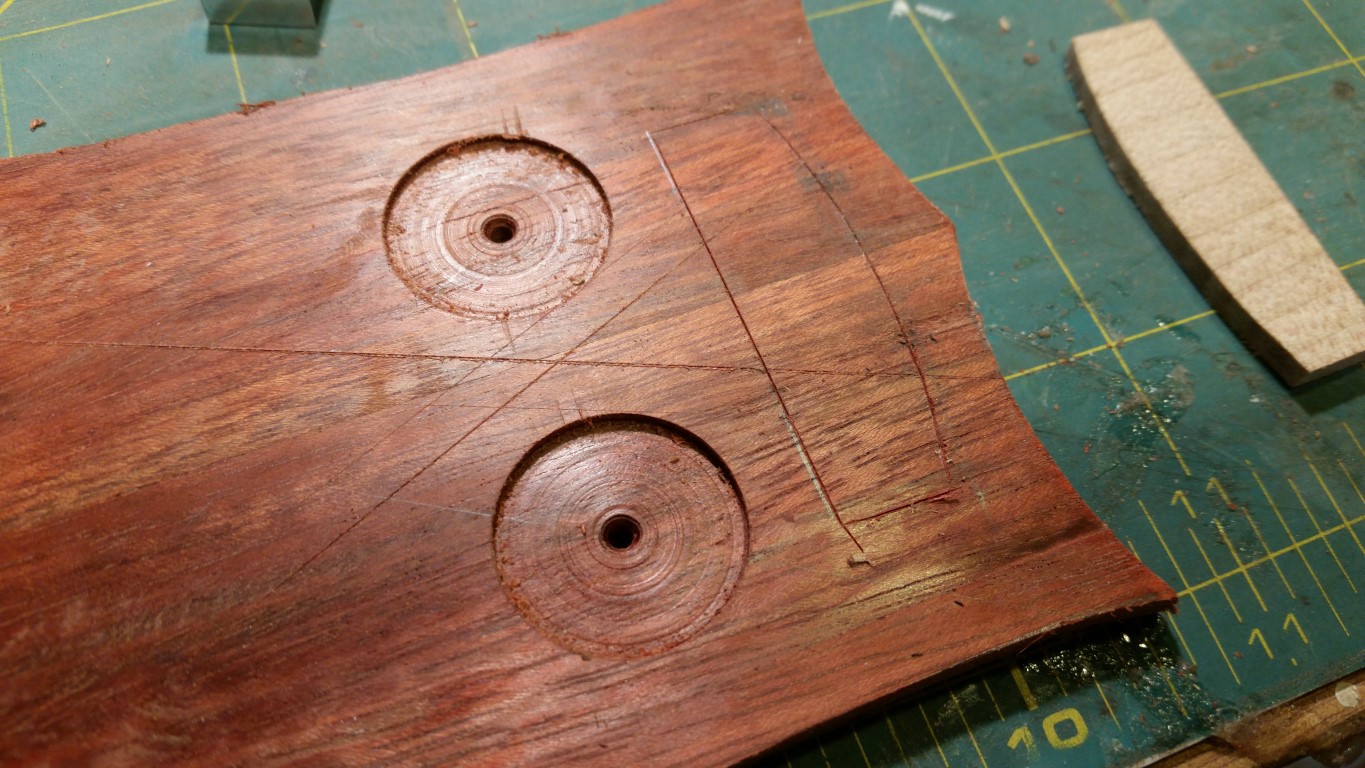
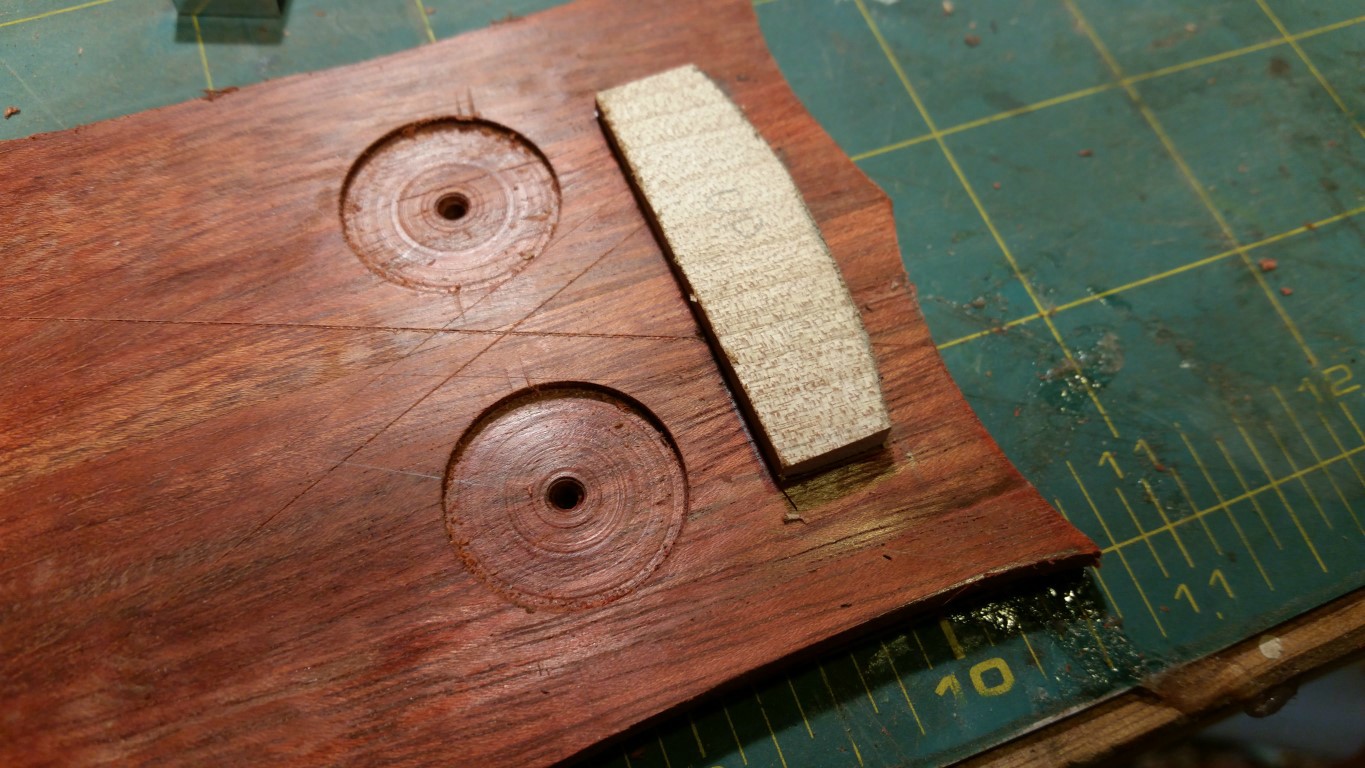
I'm also hand checkering the veneer in the same style that you see on many rifle stocks. I start with a couple of intersecting lines. I eyeball these with a ruler because I don't know where my layout template is hiding.
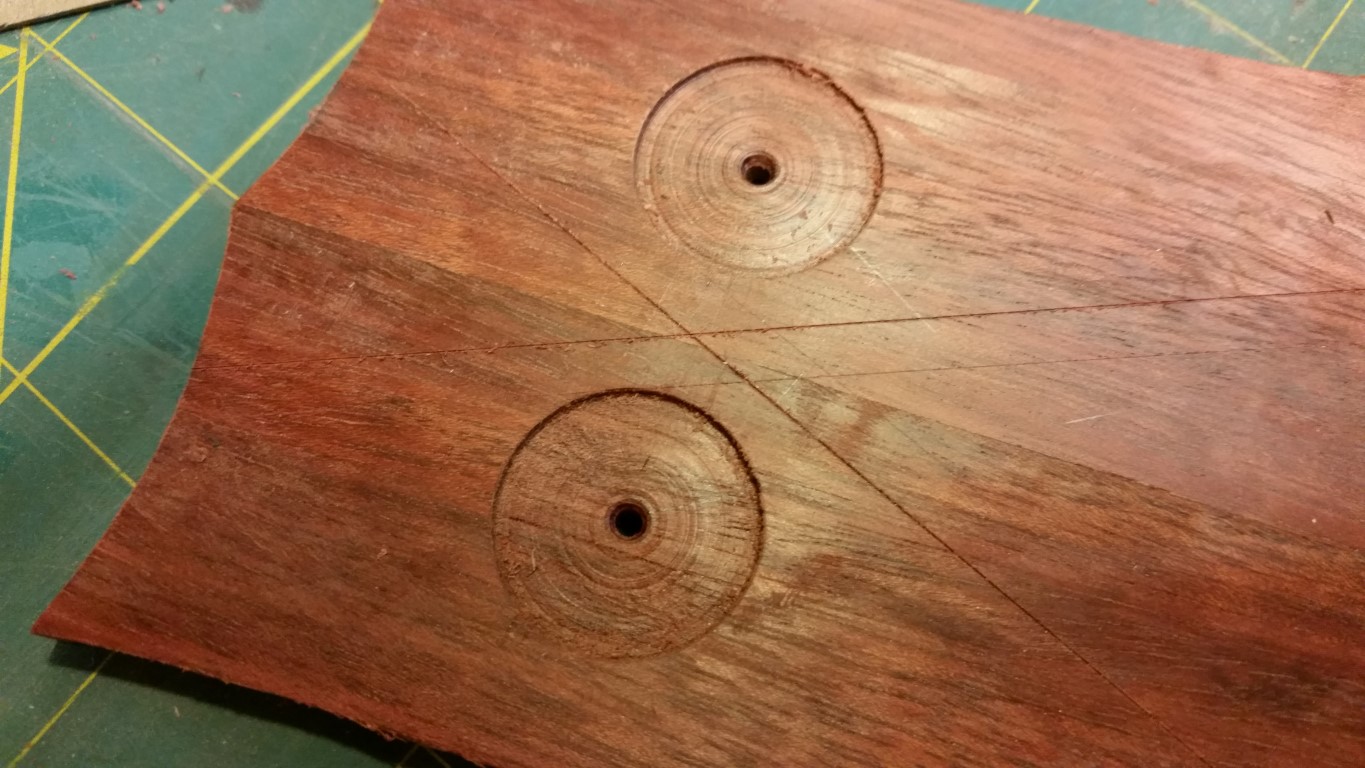
I then use a special set of files to cut in the lines of checkering.
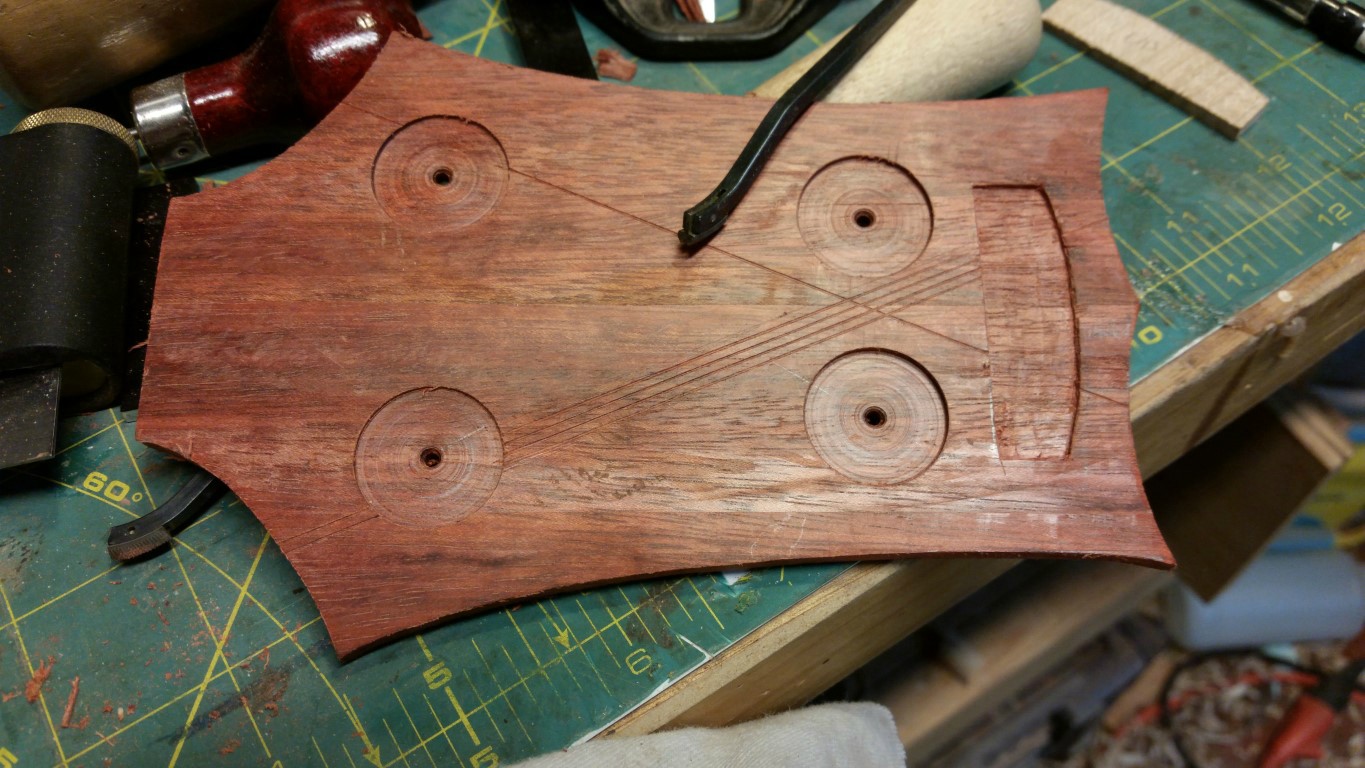
It's tedious, but the lines start looking like something soon.
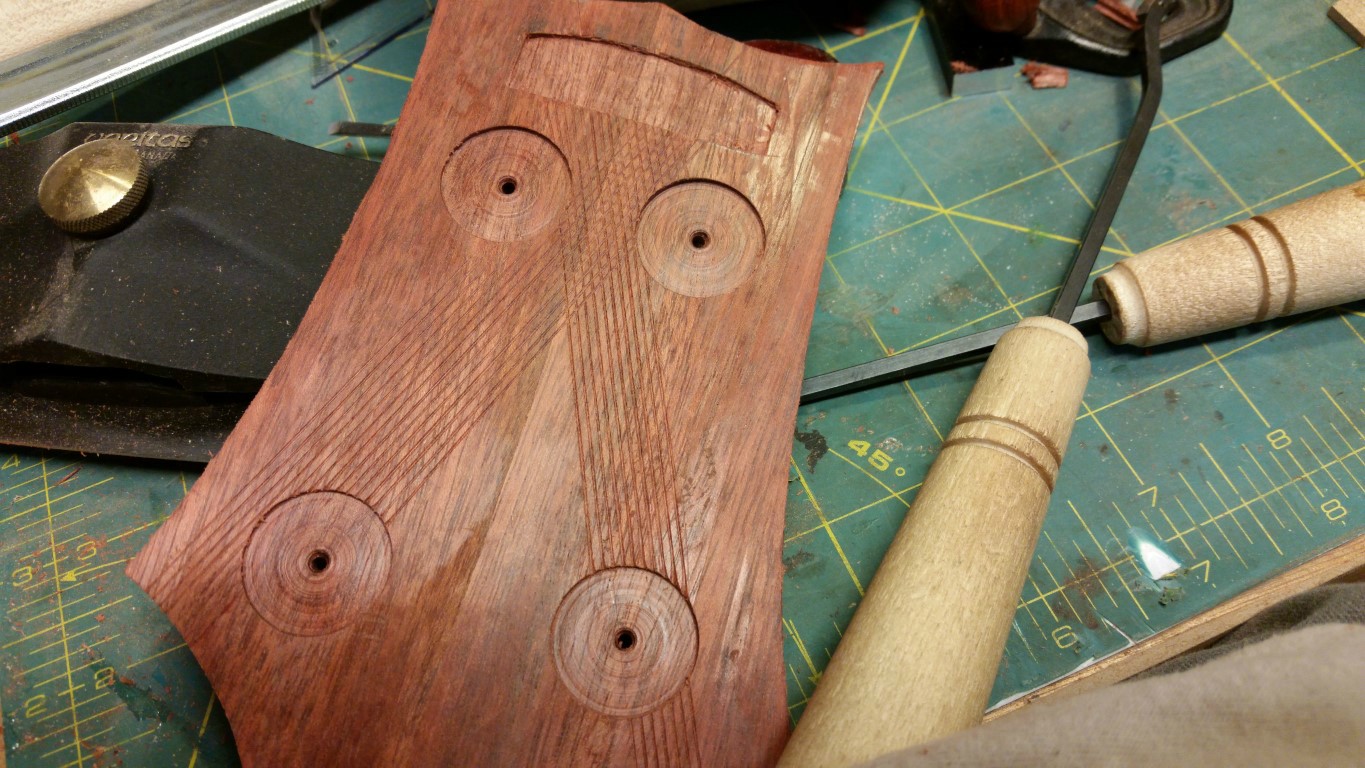
This still needs a final pass with the files to put the points on the diamonds, but you can get the rough idea.
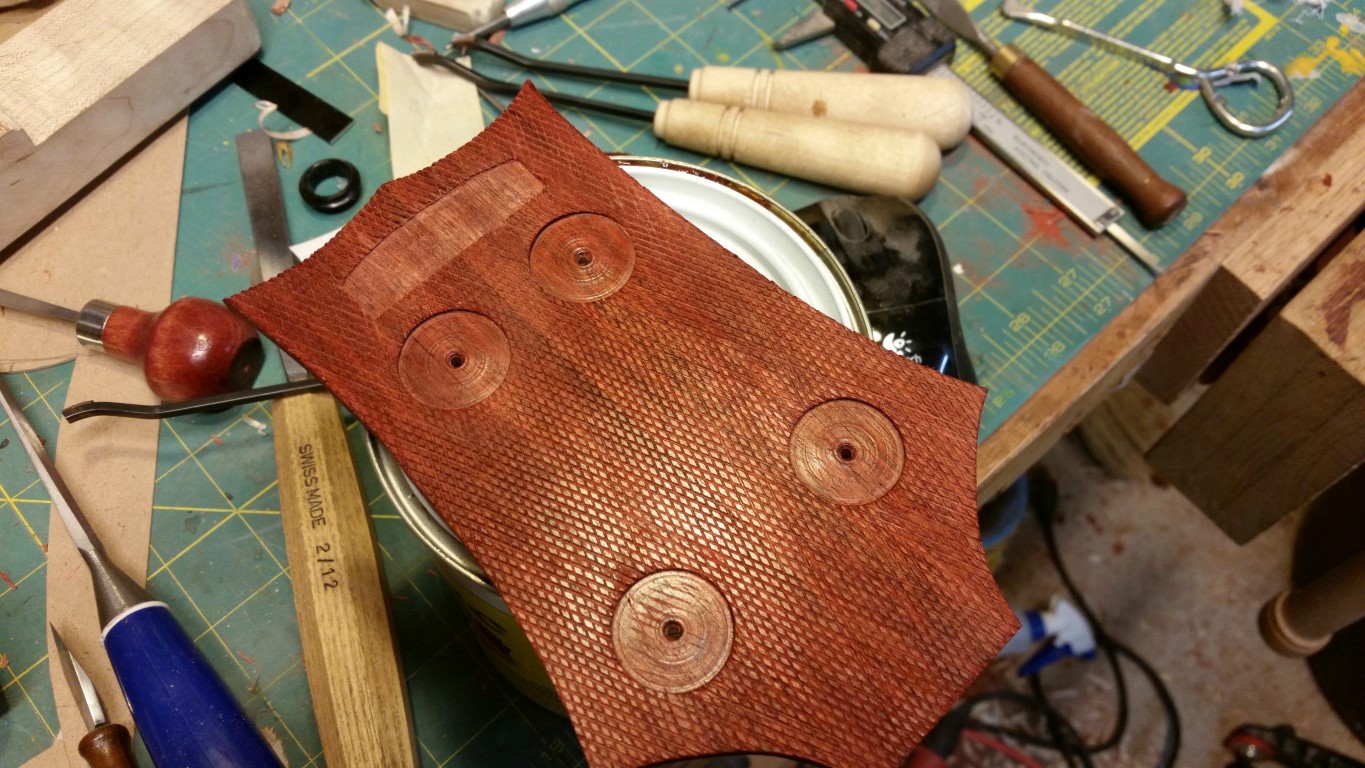
I'd be happy to answer any questions.
I started work on the headstock veneer. It is blood wood, same as the fretboard binding. I use waterslide decals for logos but the black print is hard to see on the brownish-red background. To get around this, I inlay a small piece of maple into the headstock. I trace around the inlay with a marking knife and then remove the waste with sharp chisels and a router plane.
I'm also hand checkering the veneer in the same style that you see on many rifle stocks. I start with a couple of intersecting lines. I eyeball these with a ruler because I don't know where my layout template is hiding.
I then use a special set of files to cut in the lines of checkering.
It's tedious, but the lines start looking like something soon.
This still needs a final pass with the files to put the points on the diamonds, but you can get the rough idea.
I'd be happy to answer any questions.


This one took about 60 or 90 minutes, but I've been doing it a while. This is a borderless layout, they are much faster, at least for an imposter like me. I learned on rifle and shotgun stocks, so something flat like this is for me is probably like a real musician playing scales. It's not hard with a little bit of practice, but I made some ugly scrap much uglier when I started.Wow.
I've got a question....
How long to cut all those lines?!?
Amazing work, very unique!
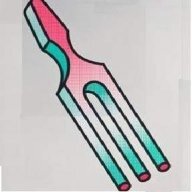
Did you do each and every line with a single cutter or did you use one of the file bits that does three lines at once? I had watched a few rifle/shotgun tutorials and thought that would be a really cool thing to do that would require more patience than I have - I'd be sure to slip and cut through a border or leave a long gouge in an area where there shouldn't be any checkering.
It's really fun to watch your process as this bass comes to life.
Here's a guy doing a rifle stock and at one point shows the three line cutter I was asking about:
It's really fun to watch your process as this bass comes to life.
Here's a guy doing a rifle stock and at one point shows the three line cutter I was asking about:
Did you do each and every line with a single cutter or did you use one of the file bits that does three lines at once? I had watched a few rifle/shotgun tutorials and thought that would be a really cool thing to do that would require more patience than I have - I'd be sure to slip and cut through a border or leave a long gouge in an area where there shouldn't be any checkering.
It's really fun to watch your process as this bass comes to life.
Here's a guy doing a rifle stock and at one point shows the three line cutter I was asking about:
I use a double cutter, a three line is something that I'll end up buying at some point. When I started out, I used a double cutter that was a file on one side and a smooth "skate" on the other. The skate would ride the previous line. Now I just use the double cuter as long as the wood cooperates.
I wanted to drill the holes to receive the tuner grommets before gluing on the headstock veneer so that I could take advantage of having a flat reference surface for the drill press table. This is one of those no second chance operations; this time it worked out.
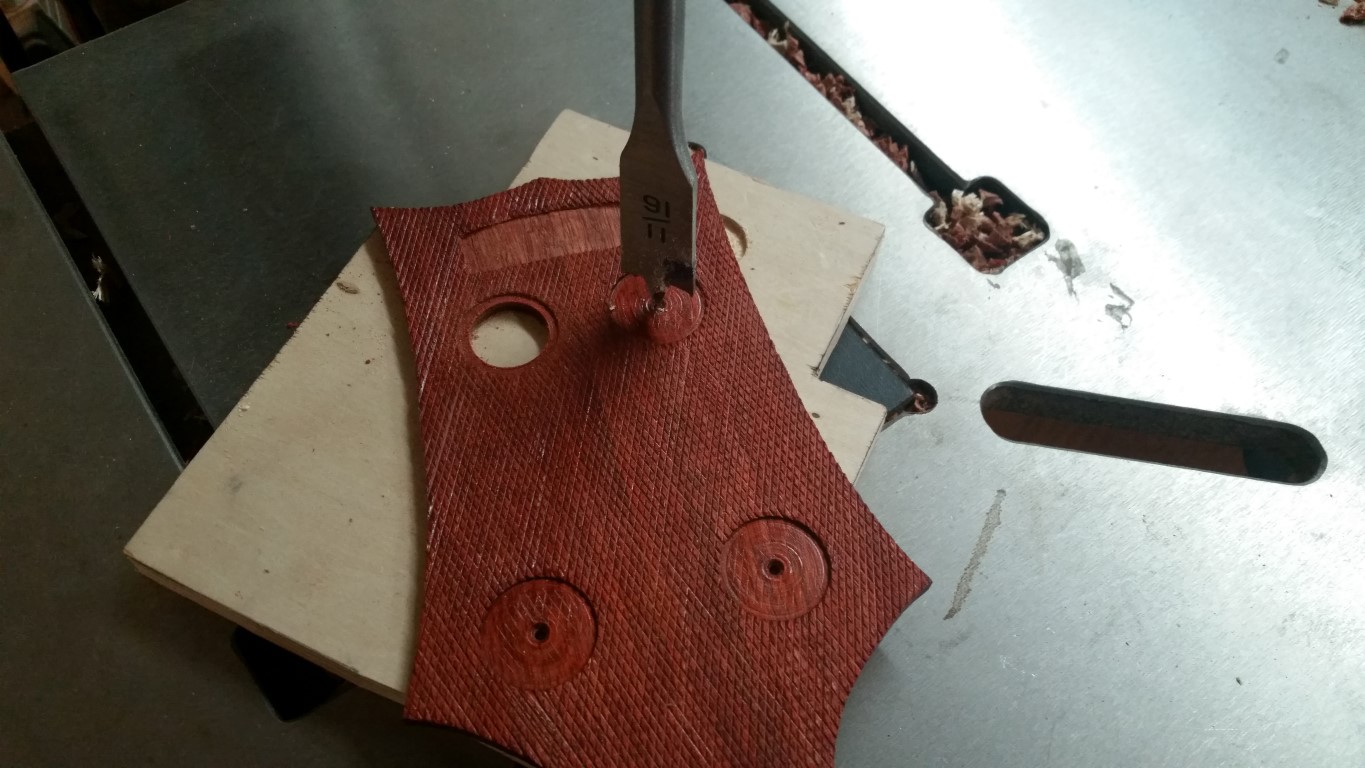
The bushings require a hole that is just a little bigger than 11/16" so I spent some time sneaking up on a snug fit with a file. This blood wood is very brittle so I don't want to have to force the fit too much.
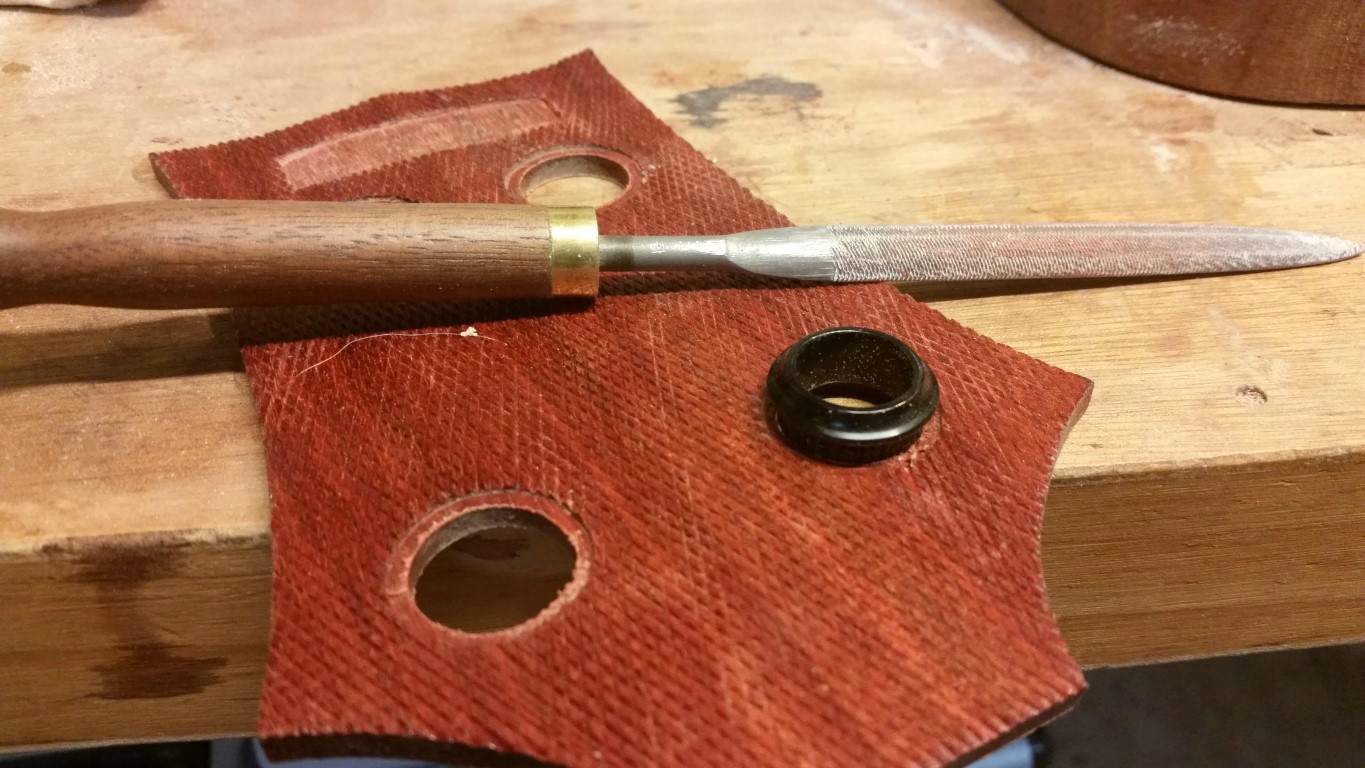
Here it is mocked up. The bushings are not fully set and the logo is not the final version, but it's good enough to get a rough idea.
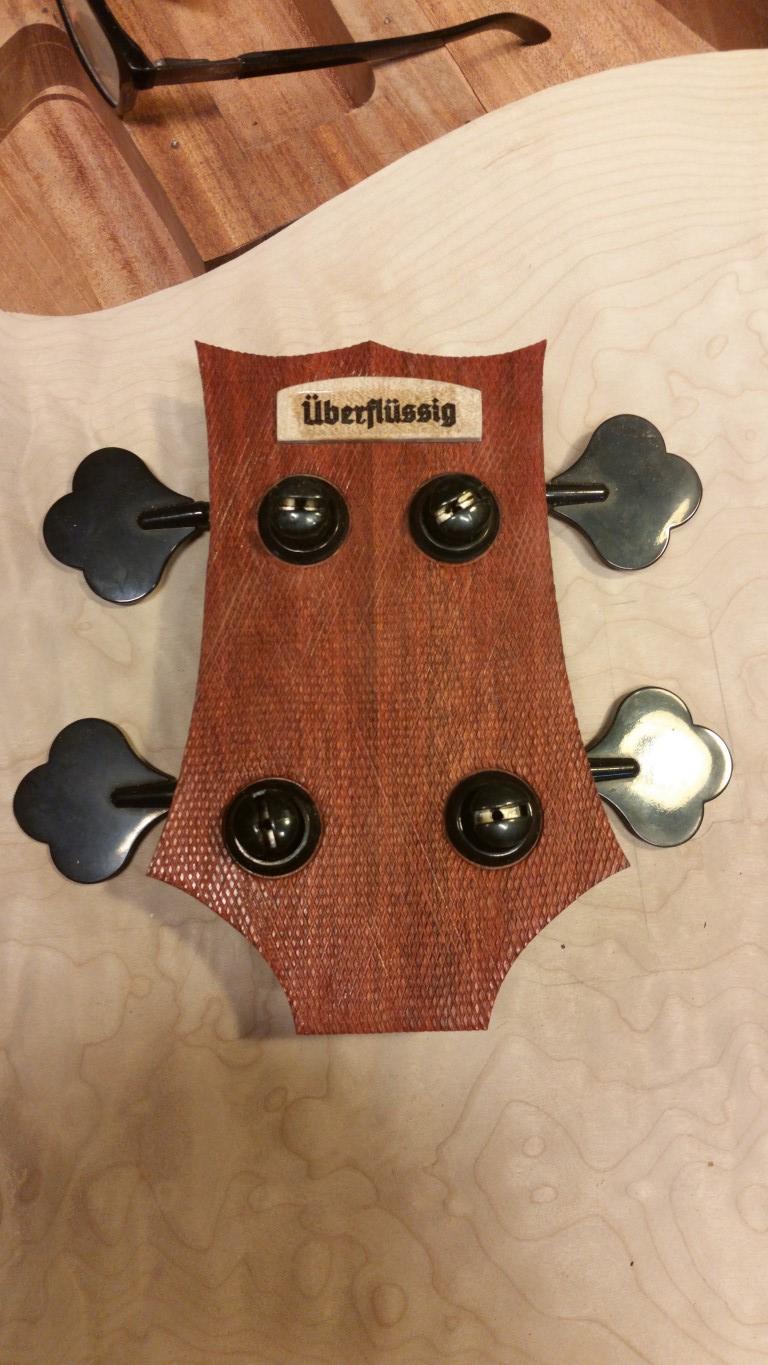
I realized later that I still need to account for access to the truss rod, but that's a fight for another day.
The bushings require a hole that is just a little bigger than 11/16" so I spent some time sneaking up on a snug fit with a file. This blood wood is very brittle so I don't want to have to force the fit too much.
Here it is mocked up. The bushings are not fully set and the logo is not the final version, but it's good enough to get a rough idea.
I realized later that I still need to account for access to the truss rod, but that's a fight for another day.
I realized later that I still need to account for access to the truss rod, but that's a fight for another day.
With the veneer off is there anyway you could use a bandsaw or jeweler's saw to cut a truss cover out of it without damaging it? That way you could lay it over a lighter wood to raise it up and have a sort of matched cover with a nice lighter wood offset.
With the veneer off is there anyway you could use a bandsaw or jeweler's saw to cut a truss cover out of it without damaging it? That way you could lay it over a lighter wood to raise it up and have a sort of matched cover with a nice lighter wood offset.
One of the happy accidents of the checkering is that I don't have to worry as much about a perfect grain match if I stick with the blood wood. I'll probably end up trying out a few different combinations from some of the scraps from the different woods I've used in this project. I do agree about the lighter maple veneer on the bottom.
I glued the neck in last week, but not the fretboard. It seems so "flexy" on the tuner end. I can visibly move the head stock up and down without dangerous amounts of force. The neck profile is a 1:1copy of an Ibanez that my friend prefers other than the addition of a beefier volute. I'm sure it will firm up with the fretboard and truss rod, but is this normal when making basses? I'd really appreciate any insight.
Not a luthier, but some woodworking experience, I've got to think that gluing on the fretboard will make a huge difference in reducing flexibility.

It will. Once assembled it will be much stiffer.Not a luthier, but some woodworking experience, I've got to think that gluing on the fretboard will make a huge difference in reducing flexibility.
Played around with cutting the f-holes. I'm sure that it's been done before, but I think it fits with the look that we're going for. This was far more time consuming than I expected. Getting the face details right took more patience than I can usually muster.
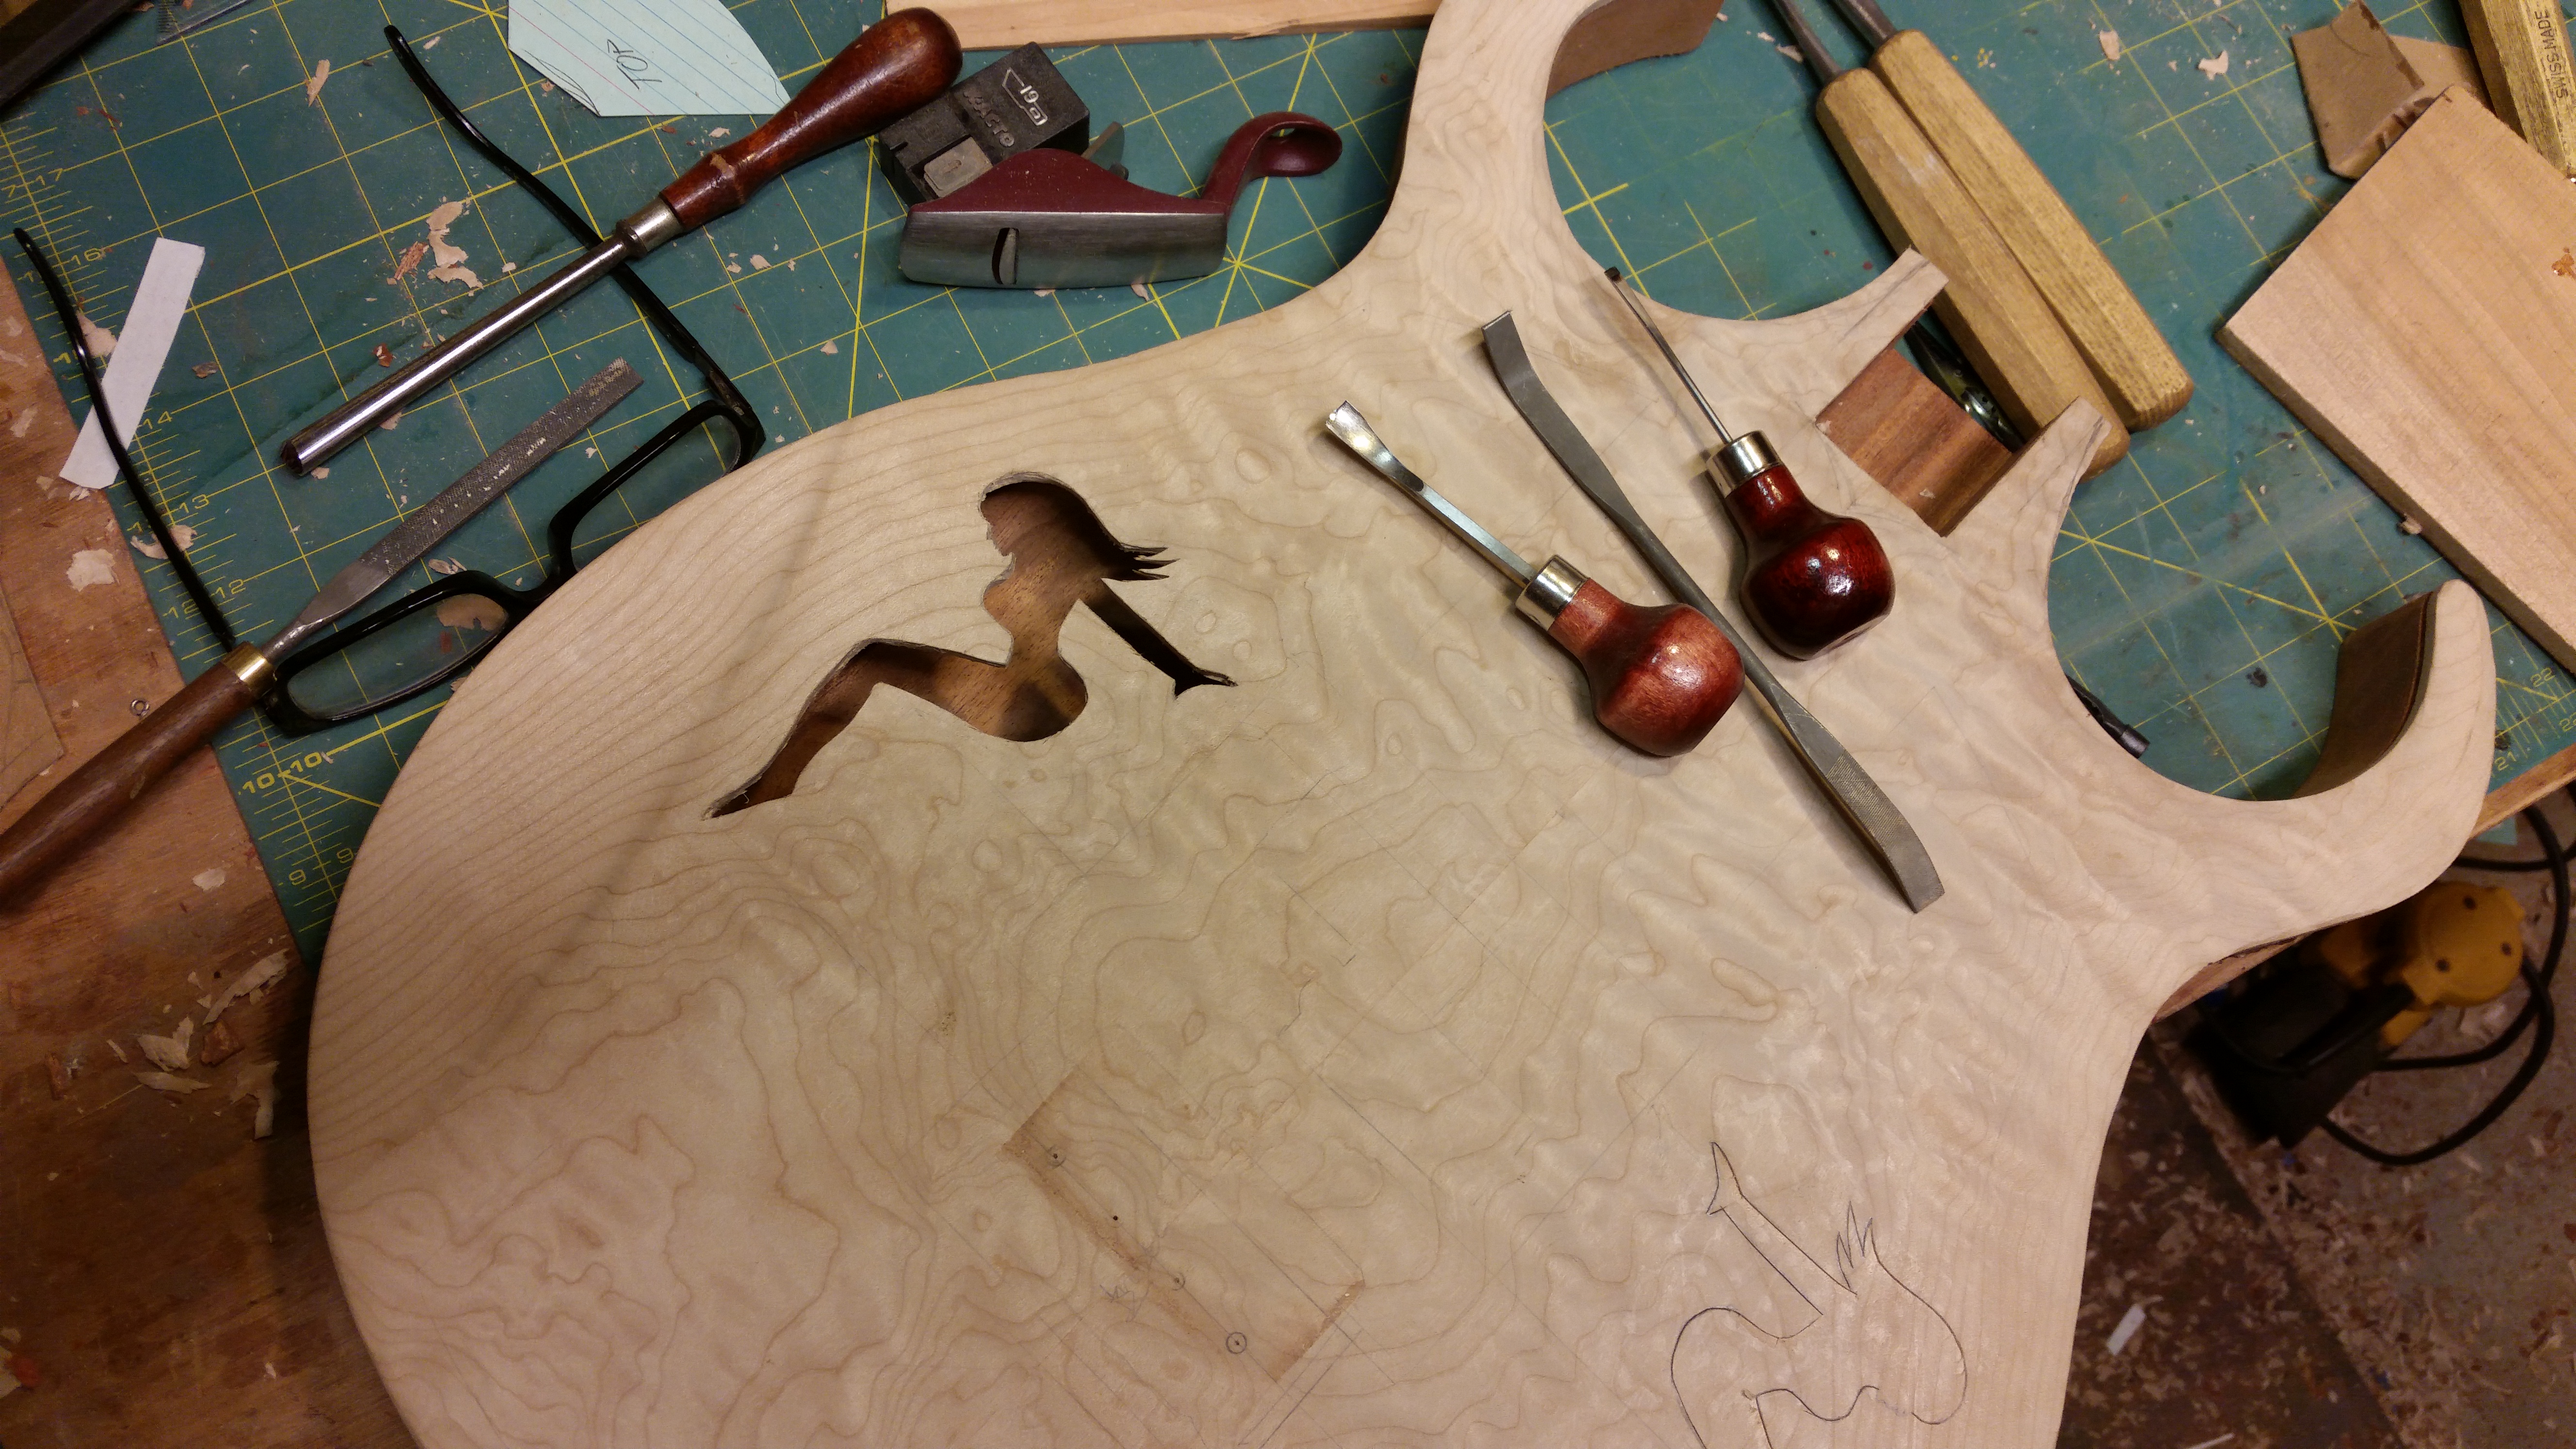
And for that extra tacky look, the holes are backlit with some blinding LEDs. I haven't checked to see how long they last on a set of batteries, if we can get one song, I'll be happy.
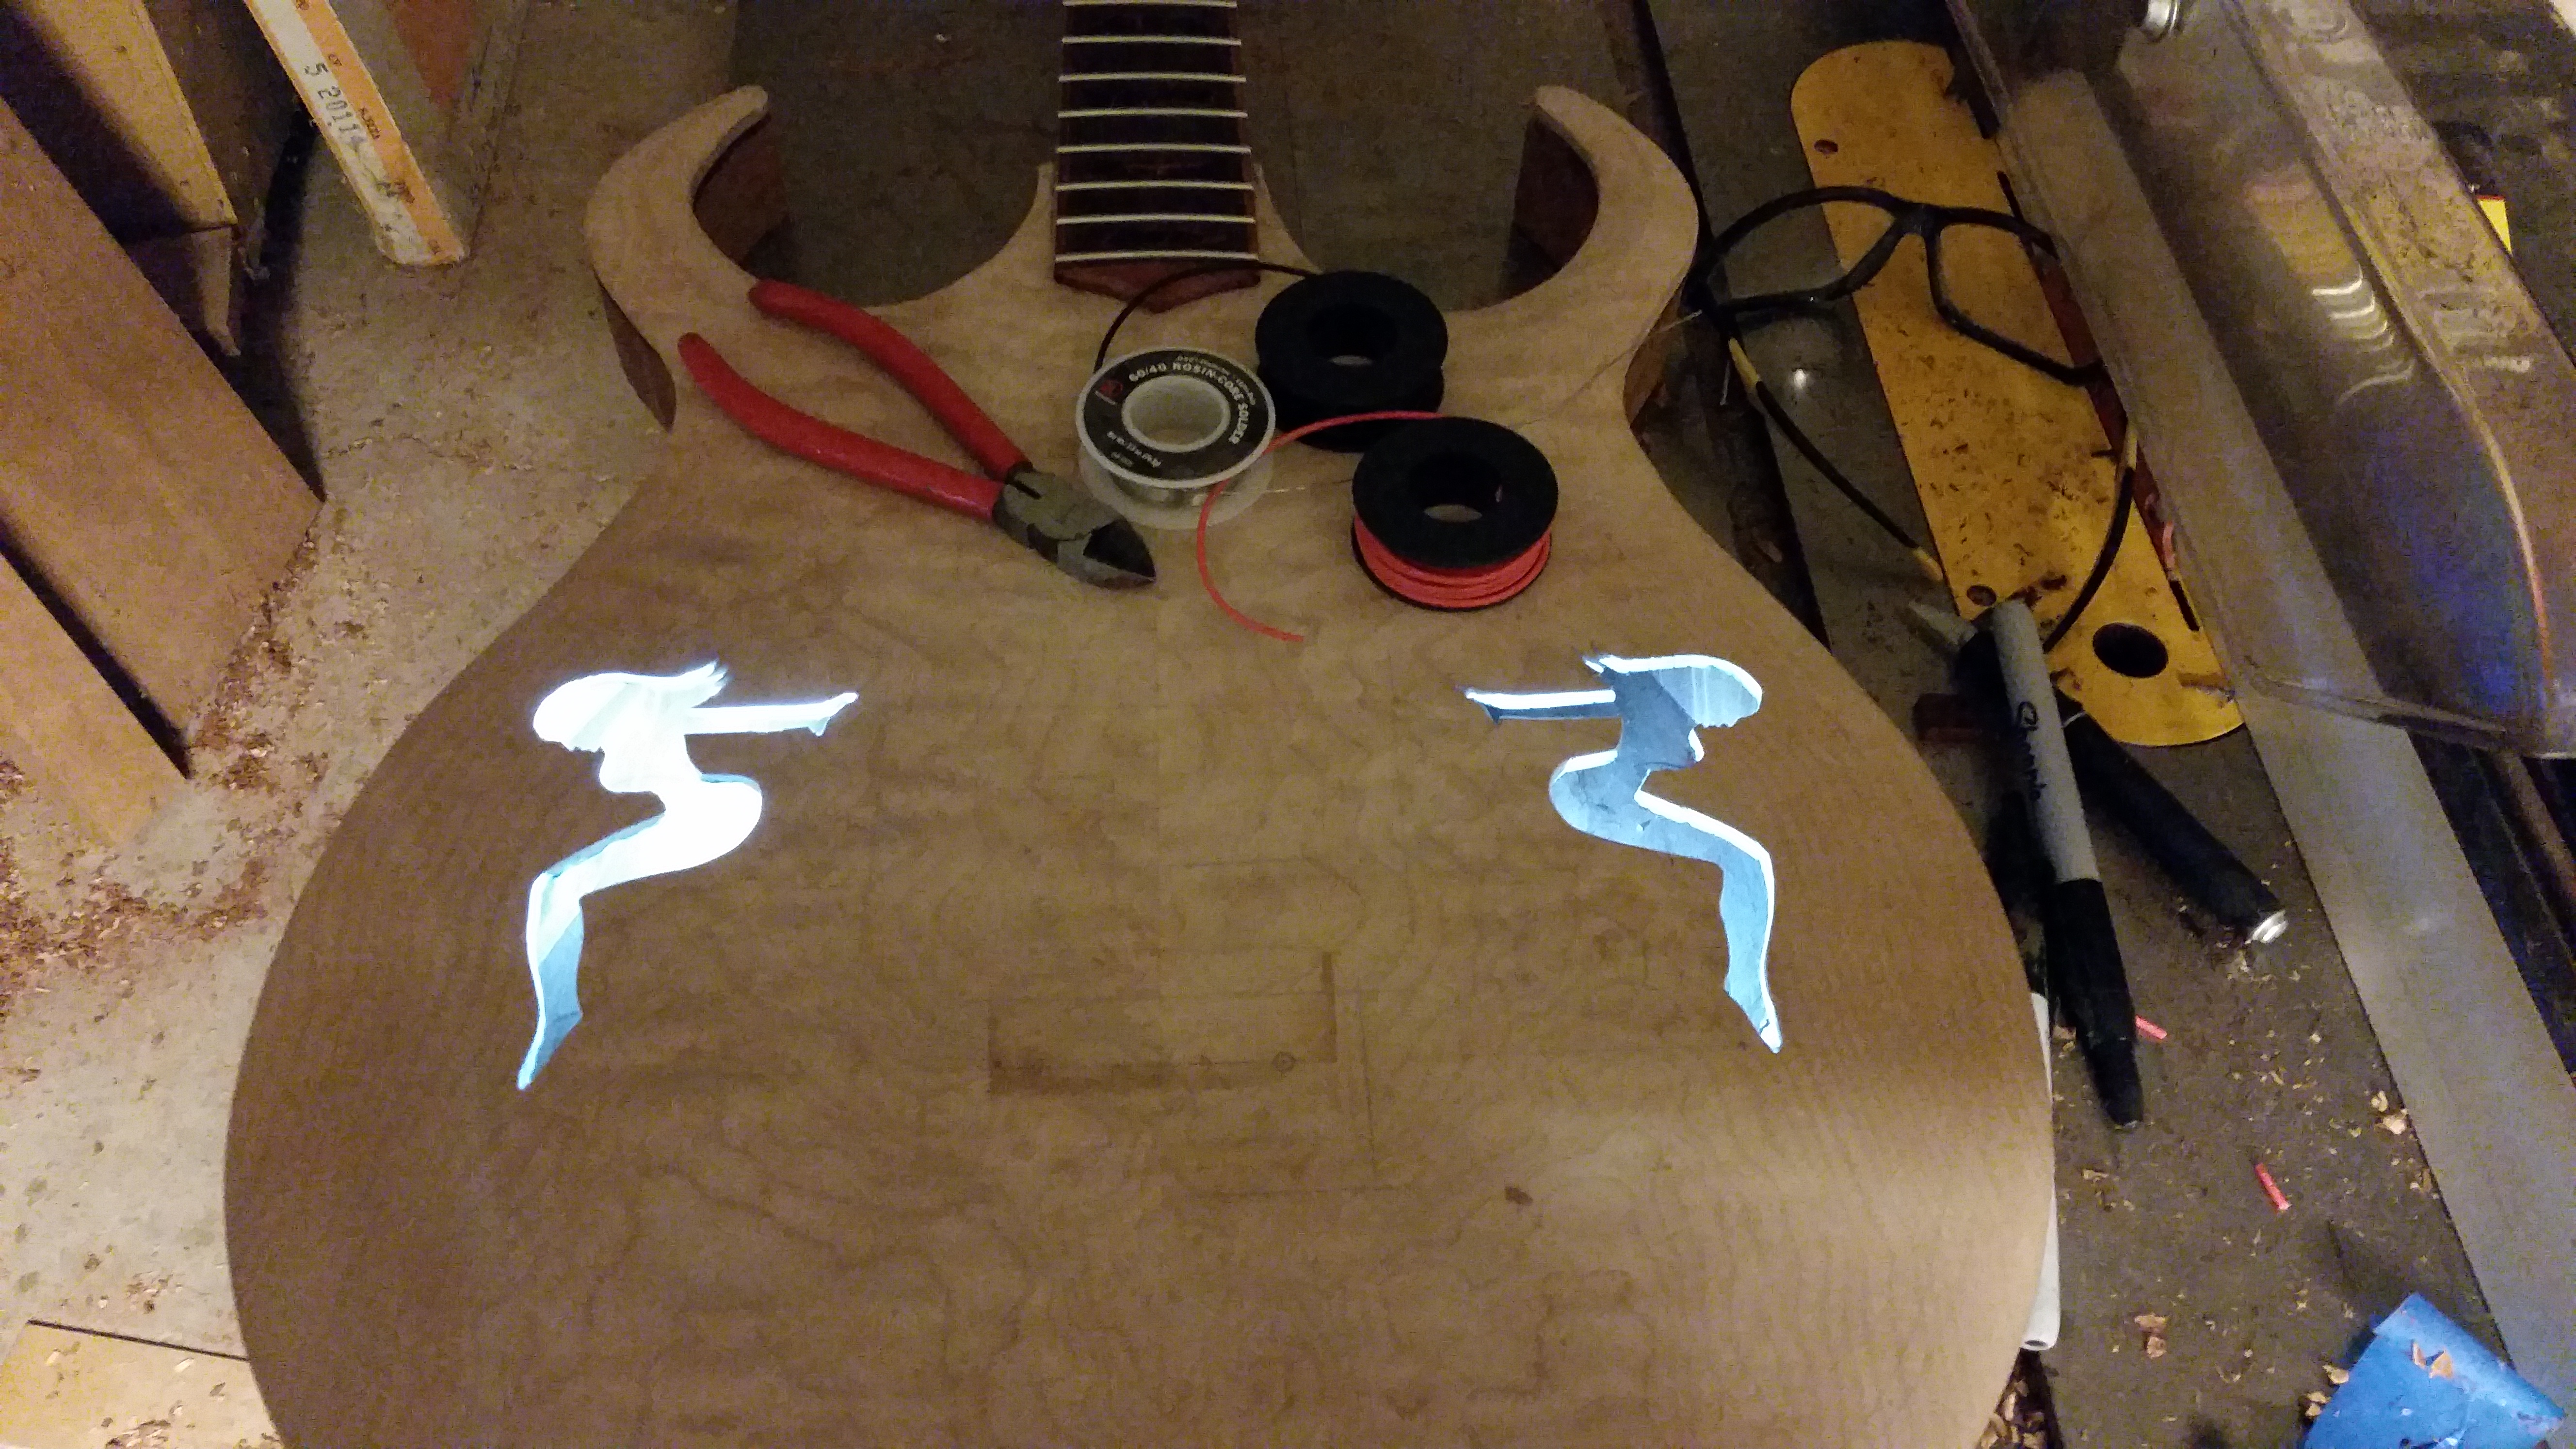
If anyone is interested, I have more pictures of how I thinned the top, but I imagine that it's been covered here before.
And for that extra tacky look, the holes are backlit with some blinding LEDs. I haven't checked to see how long they last on a set of batteries, if we can get one song, I'll be happy.
If anyone is interested, I have more pictures of how I thinned the top, but I imagine that it's been covered here before.


Not a luthier, but some woodworking experience, I've got to think that gluing on the fretboard will make a huge difference in reducing flexibility.
It will. Once assembled it will be much stiffer.
Thanks for the input. I come from a furniture and casework background, so I'm used to things being a bit more "stout". Hopefully I can get everything glued up this weekend and alleviate some of my concern.
Ha ha! The mudflap chicks! That is retro-tastic. Nice work, and sounds like you are having fun.
I've designed and built everything from entertainment centers to a six foot long toothbrush, and this has definitely been the most fun. My buddy that I'm building this for is a fairly accomplished bass player, the whole idea of this build was for him to get the instrument that he wanted without having to worry about what was available commercially or what would be cost effective in a custom order. We both grew up on 70's rock and 80's metal, This is our vague tribute to that time.
I'm digging the chick f-holes! YEAH!
I think we're going to call them DD holes. Actually, I just made that up, but will be using it for now on.


