

Enjoy the benefits of a premium membership!
Upgrade Account
-
TalkBass has been independent since 1998. Add your voice.
Create a free account to reply to discussions, view embedded media, and browse with fewer display ads.
Join free Log in
Want zero display ads or expanded classifieds tools? Compare plans.
You are using an out of date browser. It may not display this or other websites correctly.
You should upgrade or use an alternative browser.
You should upgrade or use an alternative browser.
First project: Folk Bass DIY upright
- Thread starter NKBassman
- Start date
More options
Who Replied?

Holiday Monday glue up over a cup of coffee. May have used too much glue and not enough clamps. That’s the way she goes.


A few weeks ago I stuck a piece of steel wool in a jar of vinegar. After 24-48 hours of soaking, it produced a nice greying effect when applied to the maple electric bass neck that I originally had on the folk bass, giving it a grimey, played-in look, which was pretty fun as a trial experiment.

Looks like, after sitting forgotten about in the garage for a few weeks, the steel wool has now completely dissolved in the vinegar and the solution is now a dark reddish brown. Trying it on a sanded piece of this Douglas Fir, and it actually looks quite nice! I feel like I might as well commit to using this. The cheap DIY stain aspect is very much in the spirit of the build.

Looks like, after sitting forgotten about in the garage for a few weeks, the steel wool has now completely dissolved in the vinegar and the solution is now a dark reddish brown. Trying it on a sanded piece of this Douglas Fir, and it actually looks quite nice! I feel like I might as well commit to using this. The cheap DIY stain aspect is very much in the spirit of the build.
Last edited:

That solution is reacting with the tannins in the wood. Woods with more tannins like oak will take it better. Some suggest mopping the wood prior to with a tea solution to add some tannins.A few weeks ago I stuck a piece of steel wool in a jar of vinegar. After 24-48 hours of soaking, it produced a nice greying effect when applied to the maple electric bass neck that I originally had on the folk bass, giving it a grimey, played-in look, which was pretty fun as a trial experiment.
Looks like, after sitting forgotten about in the garage for a few weeks, the steel wool has now completely dissolved in the vinegar, and the solution is now a dark reddish brown. Trying it on a sanded piece of this Douglas Fir, and it actually looks quite nice! I feel like I might as well commit to using this. It’s very much in the spirit of the build.
Ebonizing Wood with Steel Wool and Vinegar - FineWoodworking
The Douglas Fir has darkened up a lot more than the maple did even after multiple coats, and I actually quite like the colour. I don’t think there’s any reason to add more tannins.That solution is reacting with the tannins in the wood. Woods with more tannins like oak will take it better. Some suggest mopping the wood prior to with a tea solution to add some tannins.
Ebonizing Wood with Steel Wool and Vinegar - FineWoodworking
Edit: I even tried sanding a section back and applying a second coat, but it looks identical side-by-side with the original single coat. This tells me that the vinegar solution is strong enough to fully oxidize all of the available tannin in the wood when applied, so adding more vinegar won't make it any darker because there's nothing left to react on the wood surface. Which is good, because it saves me effort down the line.
It did look good sanded back a little to lighten up the softwood part of the grain for higher contrast though... Maybe I'll "wet sand" with oil when I'm finishing the back of the neck for a subtle burst effect, as with the vids I just posted below.

Last edited:

A few weeks ago I stuck a piece of steel wool in a jar of vinegar. After 24-48 hours of soaking, it produced a nice greying effect when applied to the maple electric bass neck that I originally had on the folk bass, giving it a grimey, played-in look, which was pretty fun as a trial experiment.
View attachment 5070614
Looks like, after sitting forgotten about in the garage for a few weeks, the steel wool has now completely dissolved in the vinegar, and the solution is now a dark reddish brown. Trying it on a sanded piece of this Douglas Fir, and it actually looks quite nice! I feel like I might as well commit to using this. It’s very much in the spirit of the build.
View attachment 5070618
So that's how they make wenge!
I took the clamps off the glue-up this morning, and everything looks good at first glance. A friend of mine just bought a brand new thicknessing planer over the weekend, so we're going to try it out once he gets it set up this week.
The other thing I wanted to try with regards to finishing was using a combination of tannic acid with iron nitrate solution to darken the grain, and then finishing with oil, as is common with gunstock finishing (so I've learned). The deep warm colour and high grain contrast that this guy achieves on curly maple with this method is just beautiful.
The vids are a bit long but provide a lot of good information on the process, so I recommend bumping the speed up to get through it if you're interested. Essentially, the combination of tannic acid and iron nitrate turns the wood almost black, then applying the oil with a scotchbrite pad brings the grain back. It really looks wonderful, but in the interest of time, effort, and money, I'm going to save that for neck blank #2.
The other thing I wanted to try with regards to finishing was using a combination of tannic acid with iron nitrate solution to darken the grain, and then finishing with oil, as is common with gunstock finishing (so I've learned). The deep warm colour and high grain contrast that this guy achieves on curly maple with this method is just beautiful.
The vids are a bit long but provide a lot of good information on the process, so I recommend bumping the speed up to get through it if you're interested. Essentially, the combination of tannic acid and iron nitrate turns the wood almost black, then applying the oil with a scotchbrite pad brings the grain back. It really looks wonderful, but in the interest of time, effort, and money, I'm going to save that for neck blank #2.
Last edited:

I didn't watch the whole video, but I was surprised at the lack of PPE with iron nitrate. That stuff is really toxic. No fume hood, gloves or eye protection, and didn't even use a respirator. I don't get it...I took the clamps off the glue-up this morning, and everything looks good at first glance. A friend of mine just bought a brand new thicknessing planer over the weekend, so we're going to try it out once he gets it set up this week.
The other thing I wanted to try with regards to finishing was using a combination of tannic acid with iron nitrate solution to darken the grain, and then finishing with oil, as is common with gunstock finishing (so I've learned). The deep warm colour and high grain contrast that this guy achieves on curly maple with this method is just beautiful.
The vids are a bit long but provide a lot of good information on the process, so I recommend bumping the speed up to get through it. Essentially, the combination of tannic acid and iron nitrate turns the wood almost black, then applying the oil with a scotchbrite pad brings the grain back. It really looks wonderful, but in the interest of time, effort, and money, I'm going to save that for neck blank #2.

Good note, thanks Beej!I didn't watch the whole video, but I was surprised at the lack of PPE with iron nitrate. That stuff is really toxic. No fume hood, gloves or eye protection, and didn't even use a respirator. I don't get it...
My partner used to work in a testing lab. I chuckle every time she refers to the exhaust fan over the stove as a fume hood.
Last edited:

Good note, thanks Beej!
My partner used to work in a testing lab. I chuckle every time she refers to the exhaust fan over the stove as a fume hood.
That could say more about the cooking then past occupations.


We've been repeatedly assured that Wenge is made from concrete and spite. See @TerribleTim68 and @RichterScale builds using it from a year or three back.So that's how they make wenge!
OK, this post says hatred, not spite: Winter Buildoff 2022: Still A Diva
I wish the exhaust fan was as good as a fume hood.
As far as I know, steel wool or other scrap iron and vinegar (acetic acid) gets you iron acetate, not iron nitrate or nitrite.
Last edited:
I'm a little rusty (pun definitely intended) on my chemistry, but I'd say you're correct. The iron nitrate blushing is a totally different thing which I had wanted to try. We'll leave that alone for this build though. Documented for future reference, and anyone else's interest.As far as I know, steel wool or other scrap iron and vinegar (acetic acid) gets you iron acetate, not iron nitrate or nitrite.
Last edited:

Yes! Concrete and Hatred! Lots of hatred! I can't claim that tho, I got it from my buddy Scott over at Bonehead Guitars. Him and I both have a seriously complicated love/hate relationship with wenge. It's borderline abusive.We've been repeatedly assured that Wenge is made from concrete and spite. See @TerribleTim68 and @RichterScale builds using it from a year or three back.
OK, this post says hatred, not spite: Winter Buildoff 2022: Still A Diva
I wish the exhaust fan was as good as a fume hood.
As far as I know, steel wool or other scrap iron and vinegar (acetic acid) gets you iron acetate, not iron nitrate or nitrite.
Yes! Concrete and Hatred! Lots of hatred! I can't claim that tho, I got it from my buddy Scott over at Bonehead Guitars. Him and I both have a seriously complicated love/hate relationship with wenge. It's borderline abusive.
Maybe try some oxidized Douglas Fir for your next build
 . We'll call it Faux Wenge. It cuts nicely but you do have to watch out for razor sharp splinters...
How much am I going to hate trying to trim my ebony fingerboard?
Last edited:
I've been racking my brain over how to best approach the scroll, and after a bit of googling I found myself an acceptable cheat... 
Kay and Engelhardt Upright Bass Replacement Volute (Scroll) PAIR

I've ordered the Kay Post-1952 Round scroll and it should fit nicely on what I already had planned. If it's good enough for Kay, it's good enough for me.
Kay and Engelhardt Upright Bass Replacement Volute (Scroll) PAIR
I've ordered the Kay Post-1952 Round scroll and it should fit nicely on what I already had planned. If it's good enough for Kay, it's good enough for me.
Last edited:
Neck blank is all cleaned up and ready to party. love the way the grain colours match up on the one side. The other side has a few hairline cracks and other imperfections that didn’t come out with the planer, so that’ll be the fingerboard side.
The carbon fibre bars are a pretty snug fit with my 1/4” router bit, and the metric 6mm truss rod is just a wee little bit loose in a 1/4” (6.34mm) slot. I’ll have to see if I can’t find a proper 6mm bit somewhere.
Overall the truss rod looks kinda wimpy and does not inspire a tonne of confidence, but that’s what I get for buying the cheapest one I could find in Canada I guess . Hopefully with the CF bars and extra chunky profile it’ll be stable enough.


The carbon fibre bars are a pretty snug fit with my 1/4” router bit, and the metric 6mm truss rod is just a wee little bit loose in a 1/4” (6.34mm) slot. I’ll have to see if I can’t find a proper 6mm bit somewhere.
Overall the truss rod looks kinda wimpy and does not inspire a tonne of confidence, but that’s what I get for buying the cheapest one I could find in Canada I guess
. Hopefully with the CF bars and extra chunky profile it’ll be stable enough.
Last edited:
Some progress today.
Template routing the headstock block. One half at a time. My template bit is a little short, so some creativity was needed to make it all the way around the full thickness of each piece. A little more cleanup is needed but I’ll do that after the glue is cured.
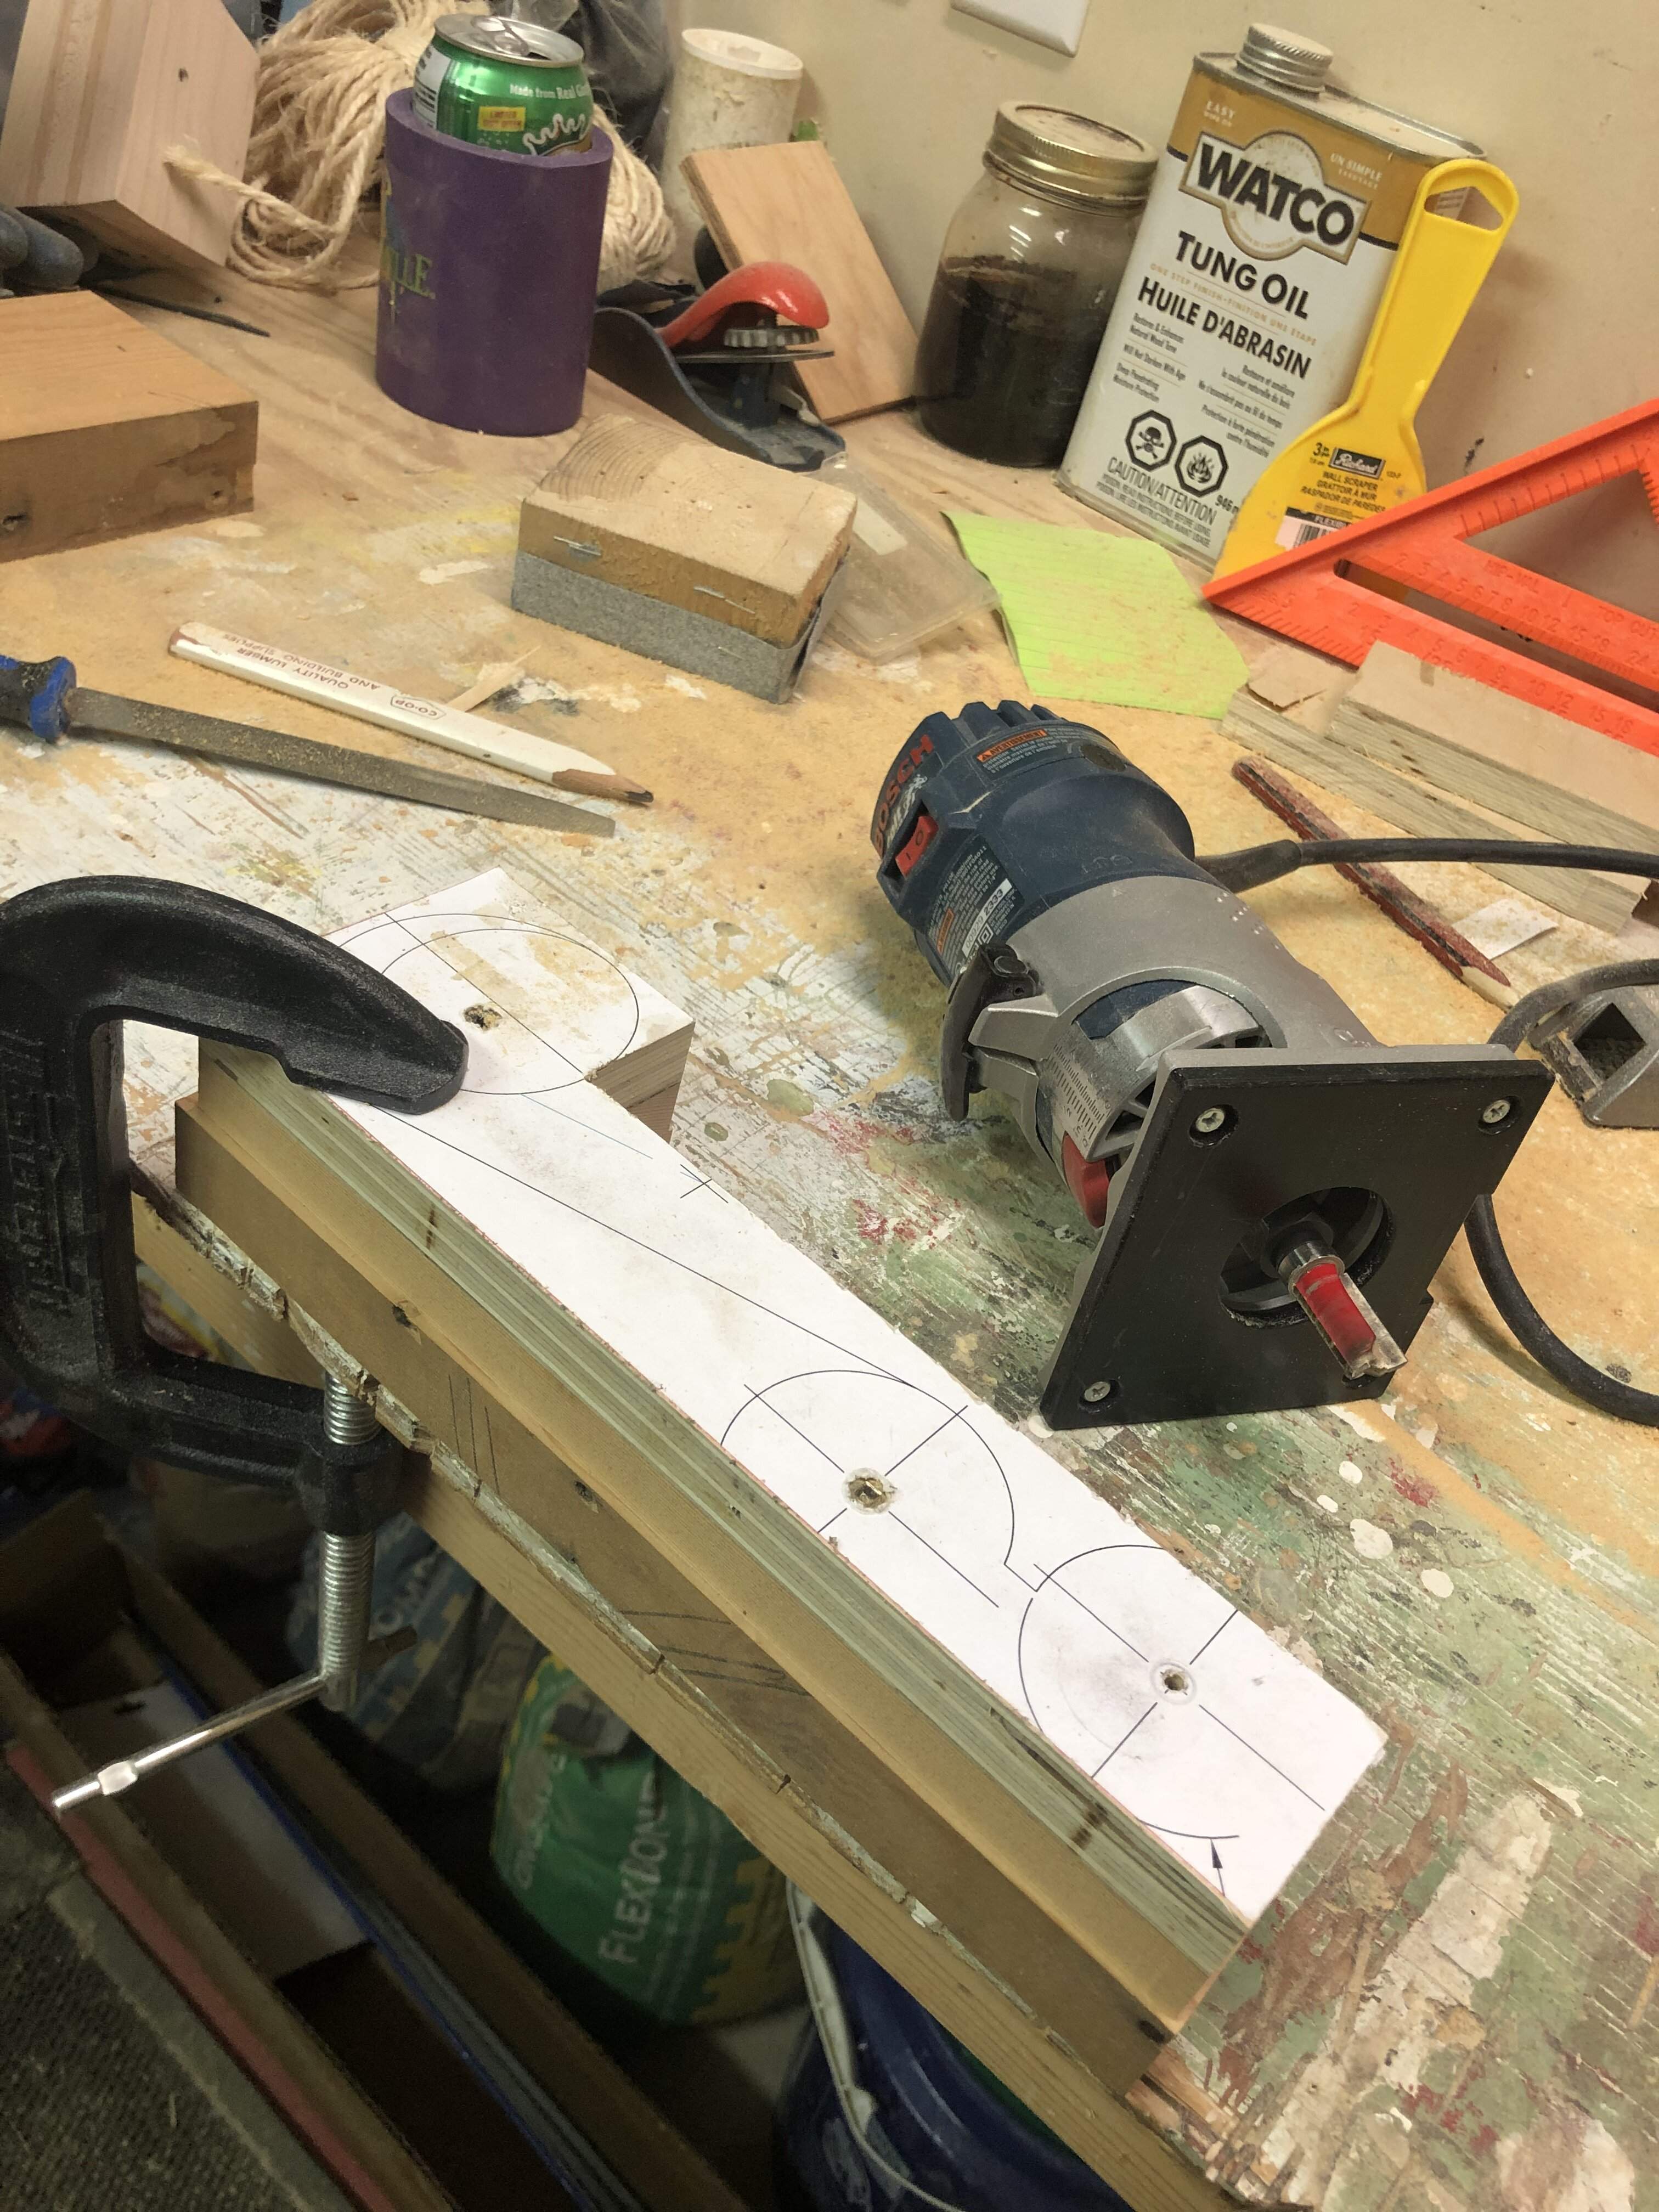
Headstock block glueup.

I hogged out the fork with the ol’ chop saw. This was the first tool I bought when we bought our house a decade ago, and it’s been absolutely invaluable ever since. After all that time I just now realized how cheap new blades are for these things! lol. New 60 tooth blade cuts like a chop saw through butter!
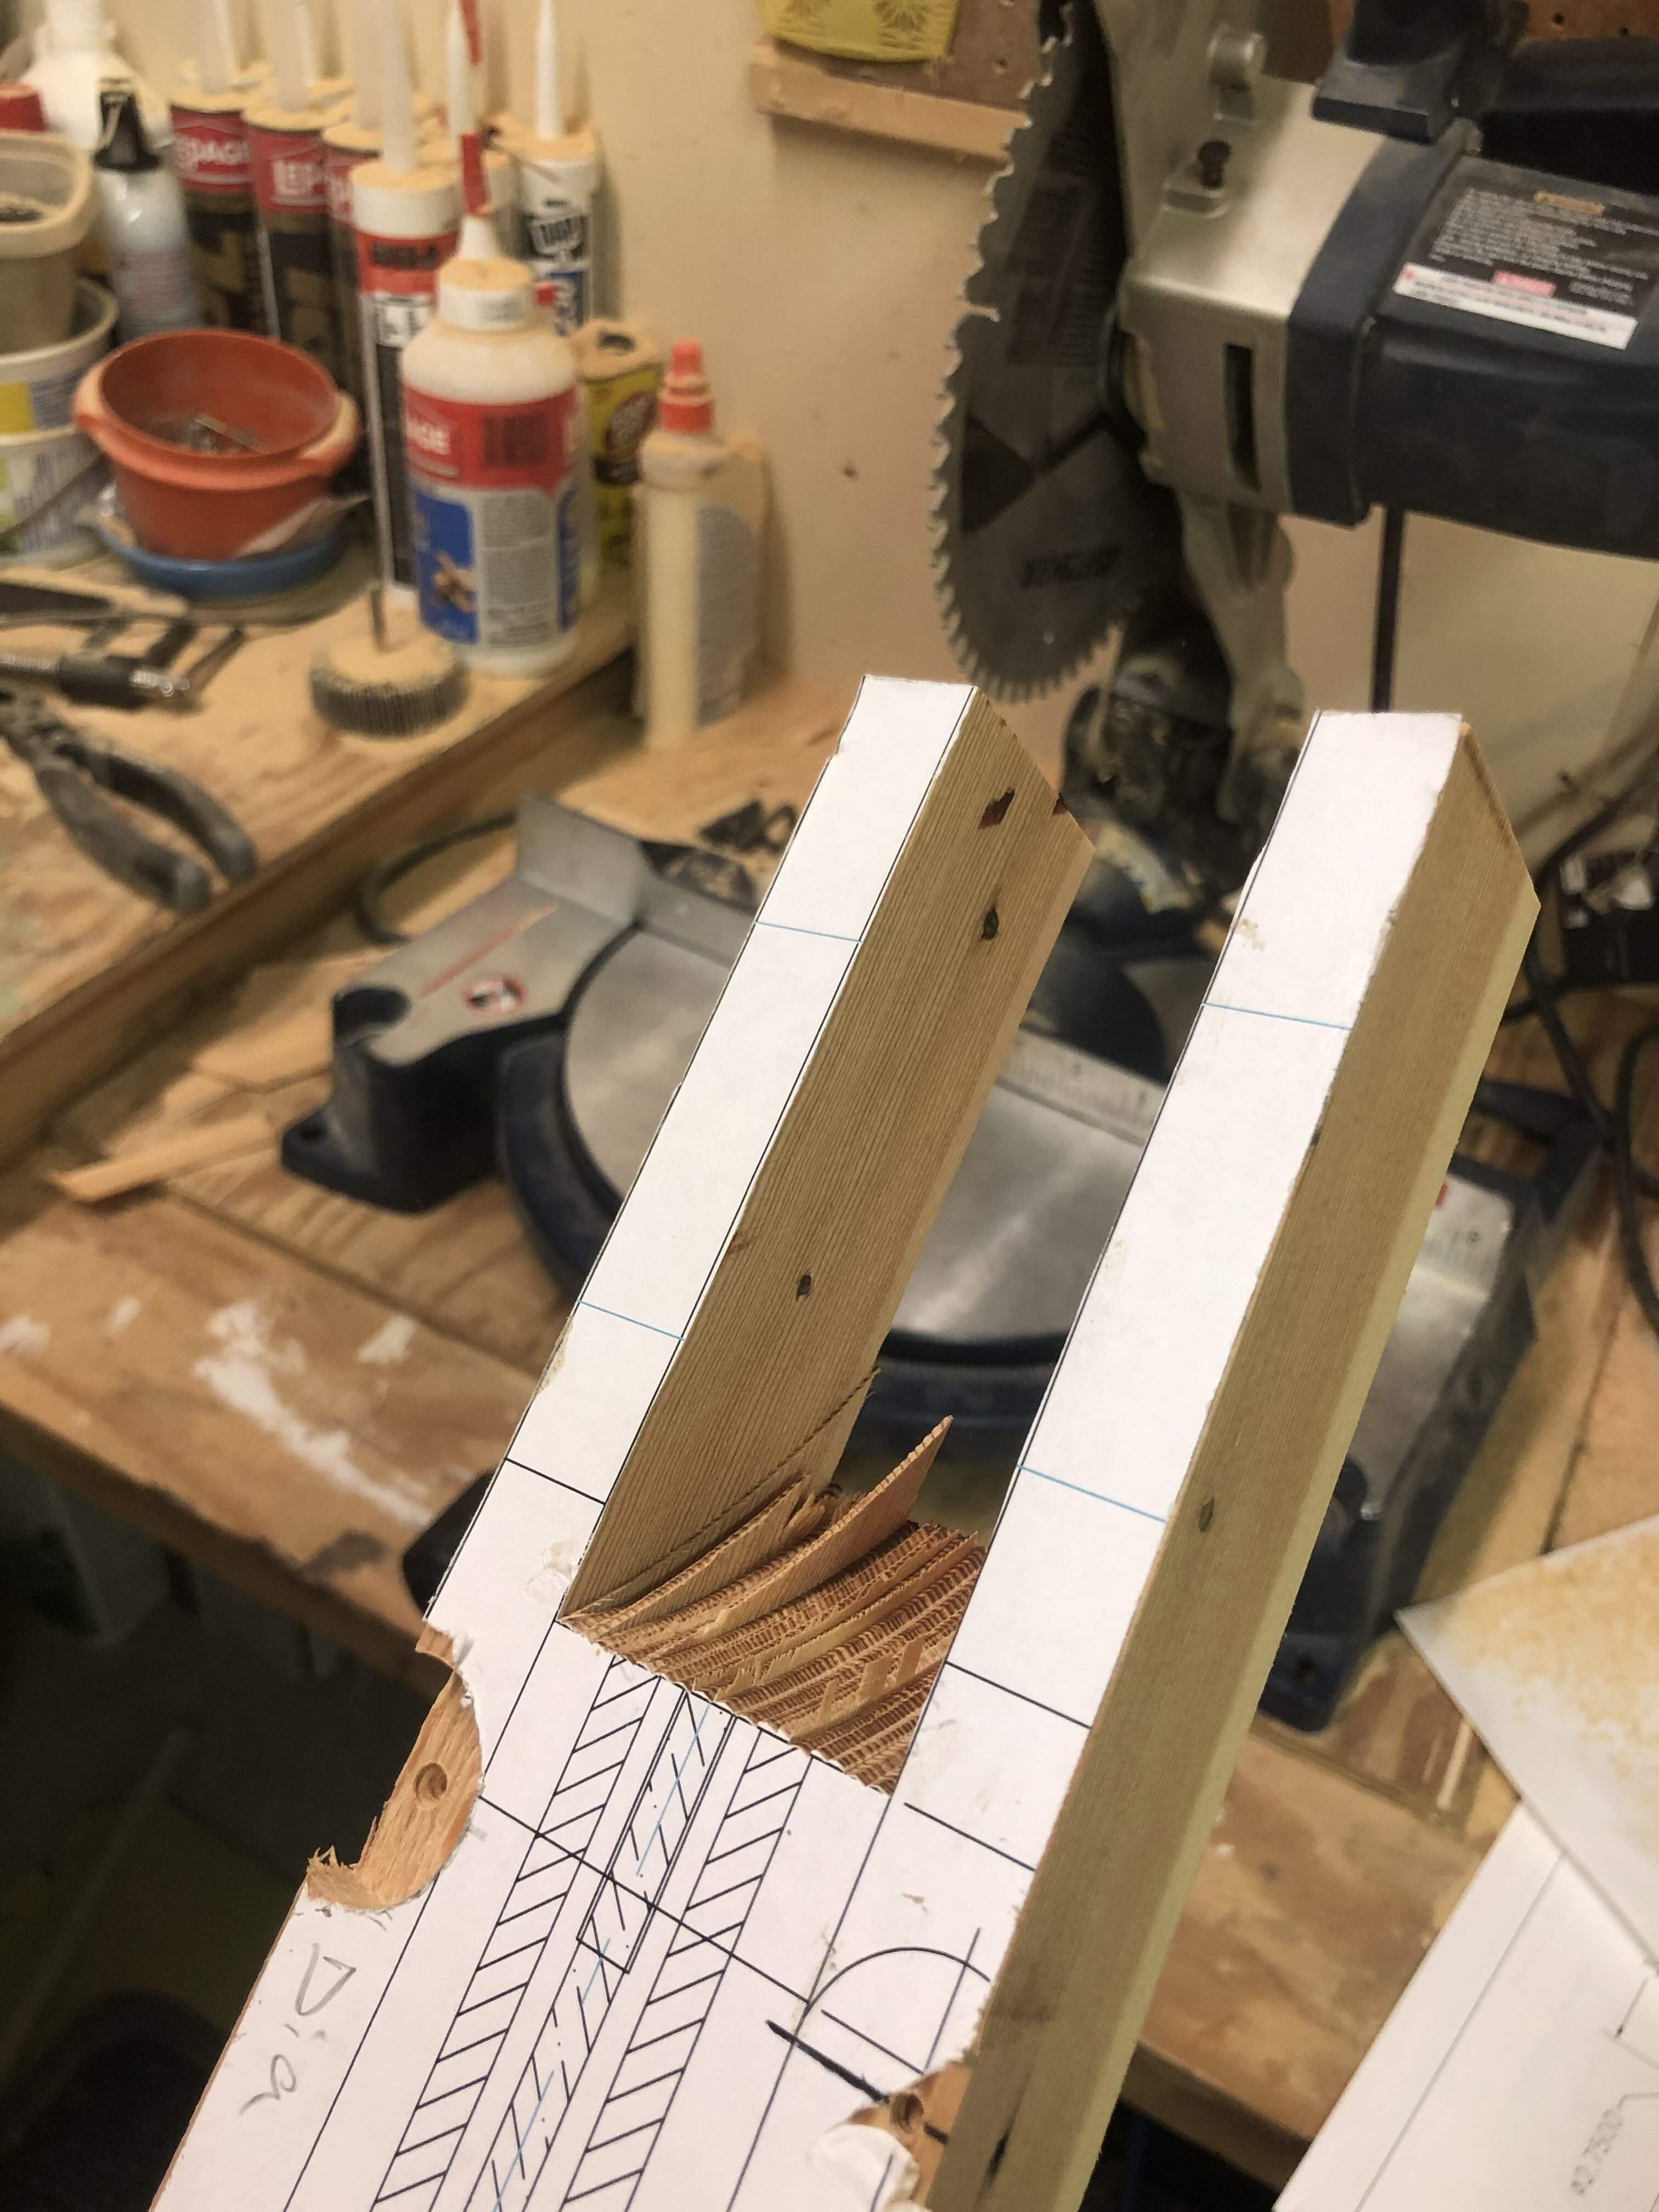
Sanded out by hand with 60 grit paper.
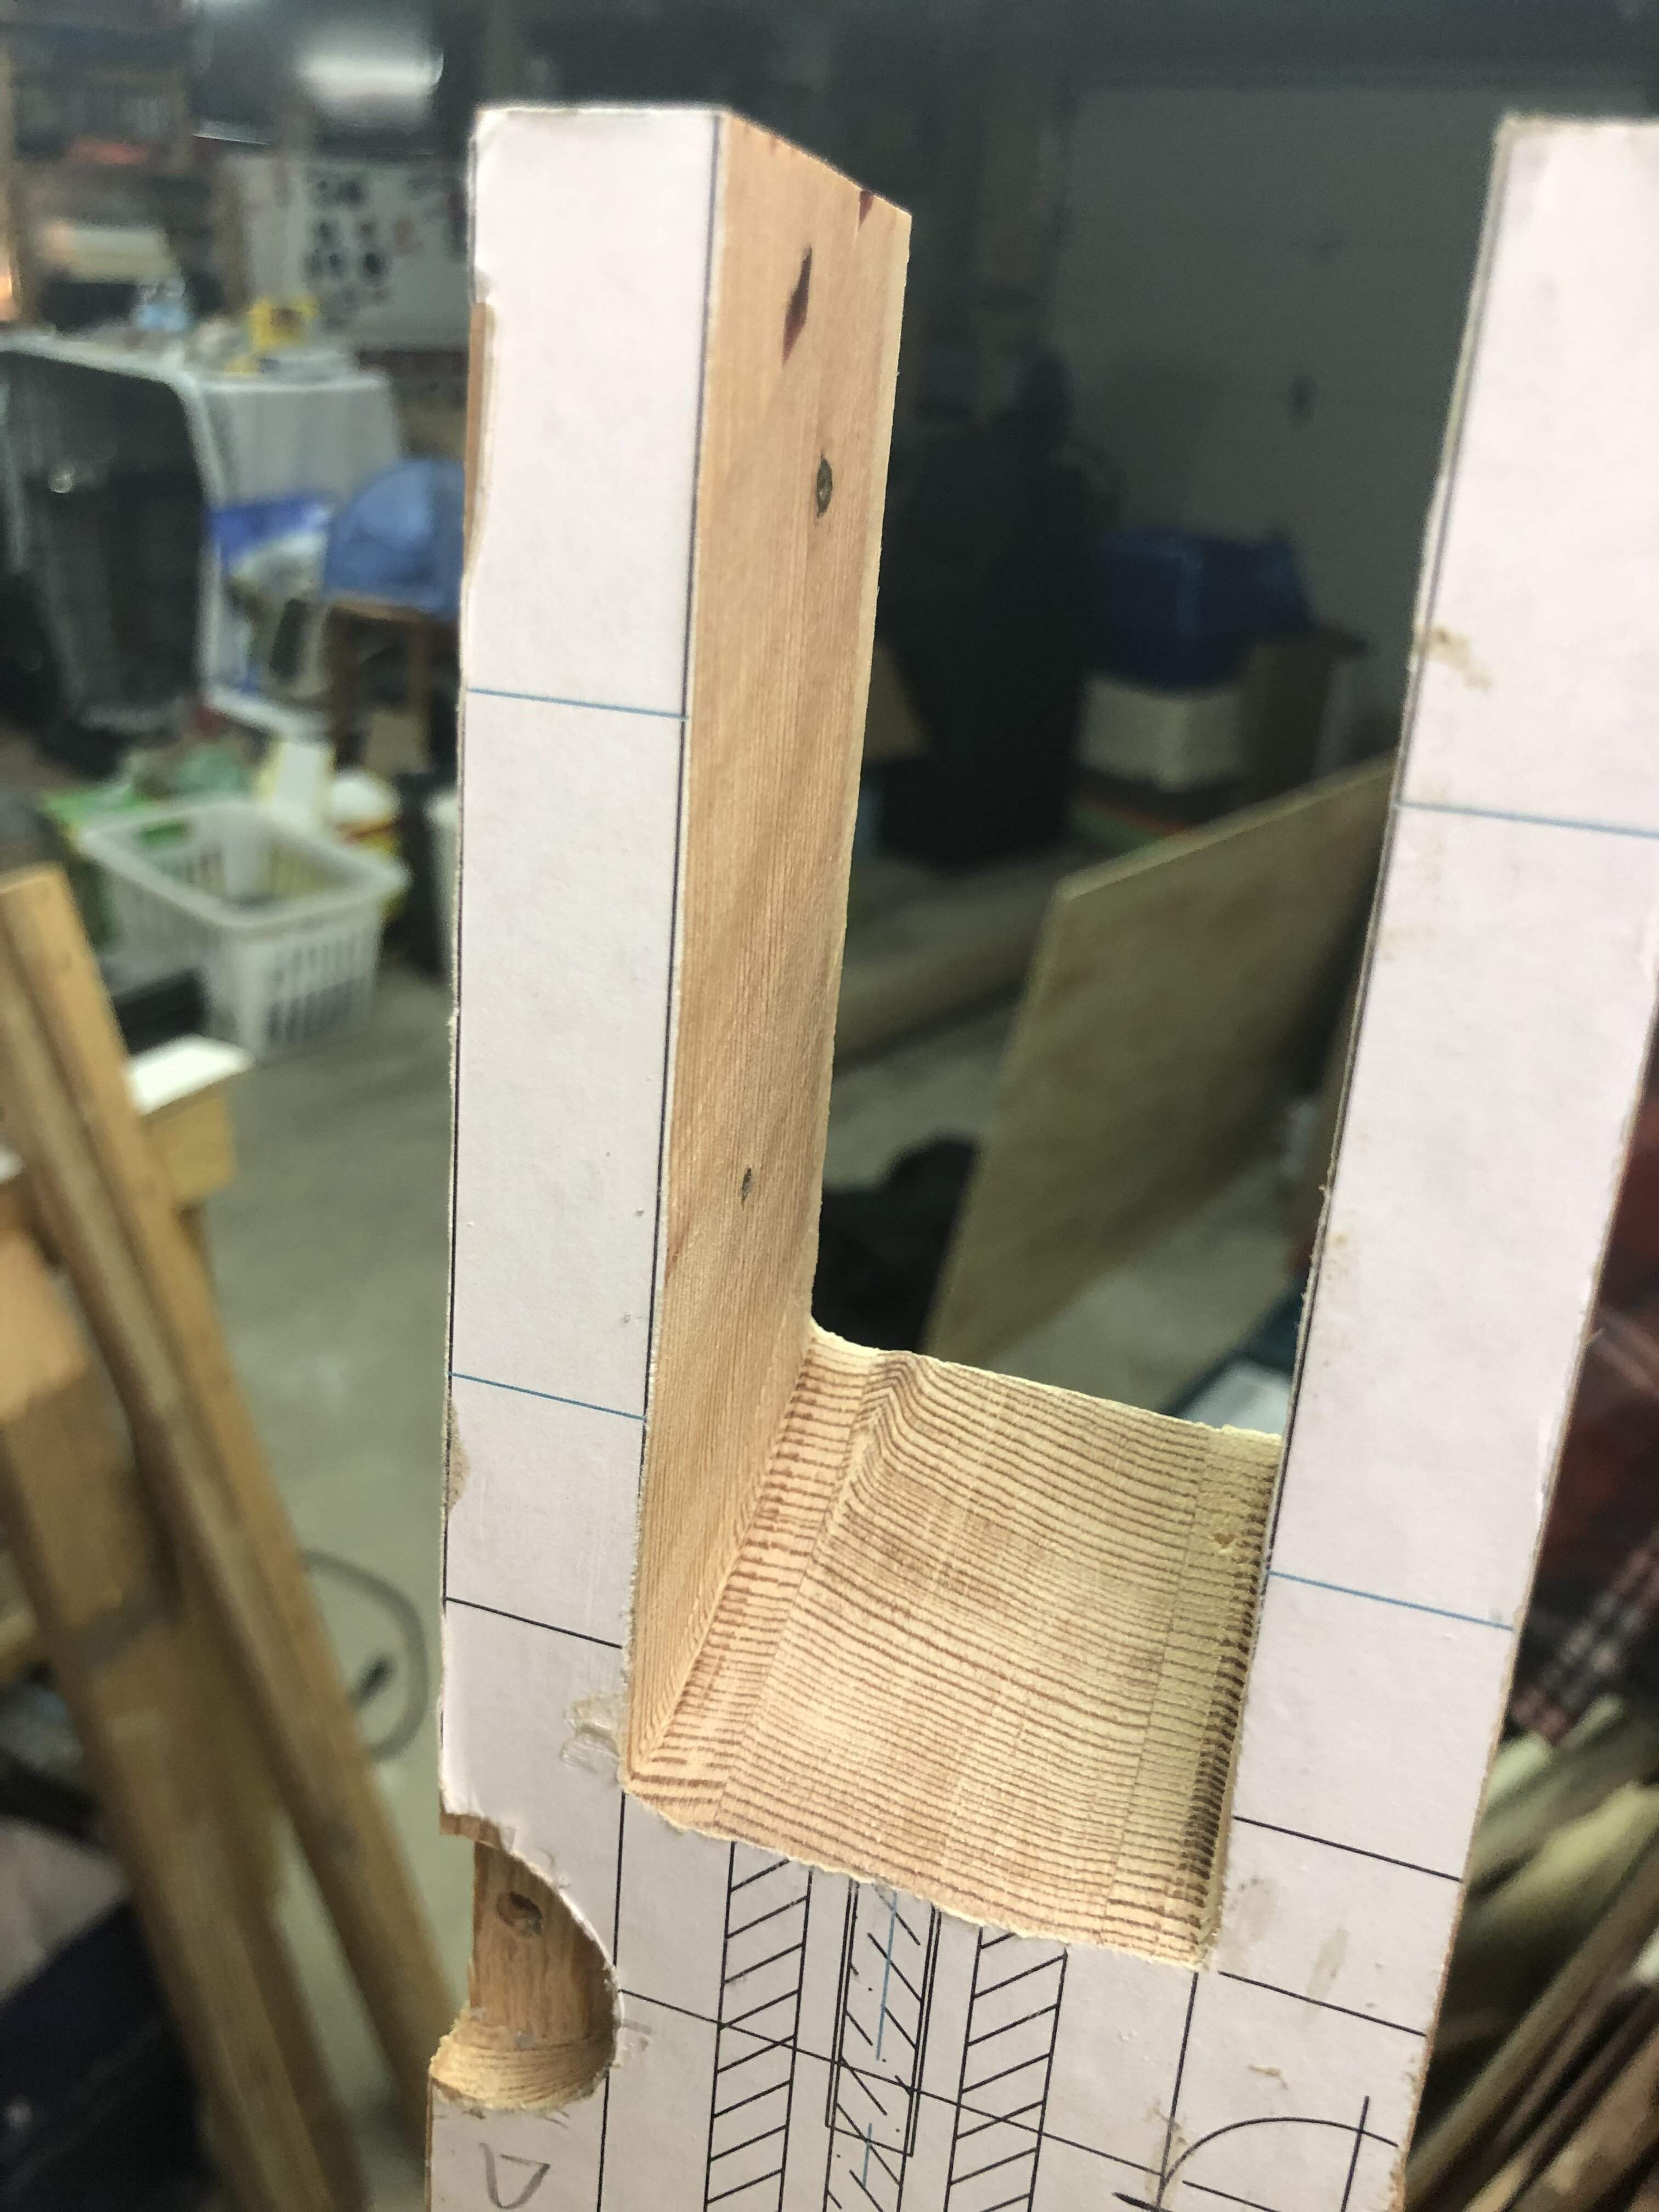
Next: route channels for the truss rod and reinforcing bars, slope the front face of the fork, and glue the neck to the headstock scroll block.
Template routing the headstock block. One half at a time. My template bit is a little short, so some creativity was needed to make it all the way around the full thickness of each piece. A little more cleanup is needed but I’ll do that after the glue is cured.
Headstock block glueup.
I hogged out the fork with the ol’ chop saw. This was the first tool I bought when we bought our house a decade ago, and it’s been absolutely invaluable ever since. After all that time I just now realized how cheap new blades are for these things! lol. New 60 tooth blade cuts like a chop saw through butter!
Sanded out by hand with 60 grit paper.
Next: route channels for the truss rod and reinforcing bars, slope the front face of the fork, and glue the neck to the headstock scroll block.
Last edited:

My wife bought one of those for me for my birthday a few years ago, before we bought our house. Since then, it has been so unbelievably useful in building out my workspace and band room.Hogged out the fork with the ol’ chop saw. This was the first tool I bought when we bought our house a decade ago, and it’s been absolutely invaluable ever since.
Some recent progress. I’ve been spending most of my evenings this week working on replacing the old laminate and MDF treatment in the front entrance sunroom with a new sheet vinyl floor and real wood trim, so sadly I haven’t had a lot of time for “vanity projects”. Whoever thought putting MDF laminate in an entrance way was a good idea??

Might not make the deadline to have the new neck done for this year’s folk festival at this rate, but I’m pressing ahead slowly anyway.
Laid out and sloped the front face of the headstock. Rough freehand chop with the router (pictured), and then finished off with rasp, hand plane, and sanding block. The slope isn’t critical for anything dimensionally, so it doesn’t have to be perfect.


Played a fun gig (on electric bass):

Cut channels for the carbon fibre bars. I don’t have a router table, so I had to get creative with a makeshift fence. Could have spaced the bars a little further off center, but at least it’s done.

I also realized that, since this neck will be fretless, I don’t have to worry about what the scale length ends up being. Decided to make use of the full length of ebony fingerboard for my layout of the CF channel, which is why it’s a little off from the sketch in the picture.
Might not make the deadline to have the new neck done for this year’s folk festival at this rate, but I’m pressing ahead slowly anyway.
Laid out and sloped the front face of the headstock. Rough freehand chop with the router (pictured), and then finished off with rasp, hand plane, and sanding block. The slope isn’t critical for anything dimensionally, so it doesn’t have to be perfect.
Played a fun gig (on electric bass):
Cut channels for the carbon fibre bars. I don’t have a router table, so I had to get creative with a makeshift fence. Could have spaced the bars a little further off center, but at least it’s done.
I also realized that, since this neck will be fretless, I don’t have to worry about what the scale length ends up being. Decided to make use of the full length of ebony fingerboard for my layout of the CF channel, which is why it’s a little off from the sketch in the picture.
Last edited:


