• TalkBass has been independent since 1998. Add your voice.
    Create a free account to reply to discussions, view embedded media, and browse with fewer display ads.
    Join freeLog in
    Want zero display ads or expanded classifieds tools? Compare plans.

Harrison inspired 4001 ric build

Maybe the order would need to be: press indentations, drill holes, bend into curve
That’s my thought as well. I wonder what the thickness on the stock piece is, I feel like the sheet steel I have is too thick to do this with general home resources. I’ll have to see if they have thinner small sheet stock locally, or maybe aluminum.
 
I'm sure the Ric ones are stamped on a big hydraulic pres, pretty hard to replicate that in home shop situation. Is that stainless steel, if not can you get a hold of some? Otherwise maybe just laquer it to keep from rusting? Nice job on it, I don't have much experience with metal work either, as my partly botched brass nut fab shows. Is that a Craftsman 12" bandsaw? If so I have the same one. I wish I had something a little bigger,but it works for most luthiery stuff.

 
  • Like
Reactions: Verner
I'm sure the Ric ones are stamped on a big hydraulic pres, pretty hard to replicate that in home shop situation. Is that stainless steel, if not can you get a hold of some? Otherwise maybe just laquer it to keep from rusting? Nice job on it, I don't have much experience with metal work either, as my partly botched brass nut fab shows. Is that a Craftsman 12" bandsaw? If so I have the same one. I wish I had something a little bigger,but it works for most luthiery stuff.
Good call with that lacquer, I didn’t even think of that! I just sanded and polished it up, no protection otherwise.

Yes to the craftsman, good eye. I have no complaints on it, really. It was very cheap, and with a Timberwolf blade it has resawn full capacity boards without issue (can’t remember max, somewhere between 6-7”, right?). I had to put new tires on, and adjust it a bit, but I’m always surprised how well it does.
 
Well, most of the parts arrived, but no pickguard material. Too bad, I was really hoping to get that wrapped up tomorrow and make sure everything lined up before my vacation ended. I did manage to get the template set.

So tomorrow is it for me, I’ll fit and drill the bridge screw holes, it is an interesting unit. I will also get the jack holes drilled, fingers crossed. That’s the last potentially catastrophic action left.
IMG_9719.jpeg
IMG_9720.jpeg


Softball and tee ball season starts this week and my calendar is blacked out with sports and school functions for the next three months, but I wanted to thank everyone for all the encouragement and advice. The forum here is a huge motivator to keep moving forward, and I really appreciate it. My family and students think the end product is really cool, but the real enjoyment for me (as I know you all understand) is the process. Each step towards the next, the singular concentration, and the daily problem solving inherent in the build is the draw.

I am very happy with all the work that was accomplished this vacation, it’s very liberating to have that giant walnut stick off my shelf. closing the book on one of the pandemic remnants feels good. Hopefully I’ll have time here and there to get out and finish the pickguard fit, and then I can get to sanding during my kids’ practices. Spray season will be here before we know it. Have to start planning for the summer build season!
 
Alright, all went well drilling the jack holes, I have side to side movement for adjustment so there should be plenty of room. I was able to clamp a small backing piece so it didn’t blow out into the cavity as well.
IMG_9721.jpeg
IMG_9722.jpeg
IMG_9723.jpeg


Did a test fit of the bridge, the new style uses an anchor for the strings that sits under the bridge itself, I assume this is to eliminate the bridge lift in older models. The saddles roll on threads for side to side adjustment, pretty clever way to keep the form factor while improving the original design.
IMG_9724.jpeg
IMG_9725.jpeg
IMG_9726.jpeg
IMG_9727.jpeg


So I think that’s all I can do for the moment, until my pickguard material arrives.
 
Anyone ever do this their first time? Because for a second I thought the neck must have pulled out before I remembered there is no joint and there IS a pickup cover.
IMG_9734.jpeg


And I have no excuse, I built and own my ‘52 P Bass complete with covers. Shameful.

I’m glad I strung this up before finishing for a few reasons. I just made a temp nut out of maple. First, the pros:

1. Looks freaking cool. So cool.
2. The neck is rock solid, it didn’t budge under pressure. The EB3L next to it (they will be fraternal twins) was a banana instantly. It hasn’t needed much tweaking since, but this bass is solid.
3. Everything lines up, although I did have to take a forstner to the neck cavity to clear some space for the wire on the treble side.

IMG_9735.jpeg
IMG_9736.jpeg
IMG_9737.jpeg
IMG_9738.jpeg


Now the cons:

1. the bridge is as low as it will go, decked. I get 6/64” at the 12th fret, which is fine, but even with 1/2” of fingerboard over the neck it can’t go lower,
2. I’ve heard complaints about this, but I can only hope the neck pickup is good where it is, because it won’t go any higher.
3. I HATE the neck. Feels awful. I’ll have to remove a bunch more meat from the corners, but I don’t think this will ever be my fav player. Actually, that EB3L is, although not my fav sounds.

But it does look really cool.
 
Yeah, routing the bridge into the body is probably your only option, outside of replacing the fretboard for a thicker one. Could you make a riser ring for the pickup if it needs to go higher? With the 3d printer?
 
  • Like
Reactions: Verner
Yeah, routing the bridge into the body is probably your only option, outside of replacing the fretboard for a thicker one. Could you make a riser ring for the pickup if it needs to go higher? With the 3d printer?
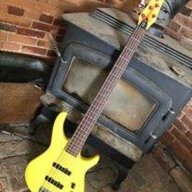
I haven’t heard the pickup, no wiring yet. It is probably fine, this is how the instrument is designed, just not used to these quirks.
 
  • Like
Reactions: Reedt2000
Well, gave it an hour to settle in and it hasn’t budged, and it plays very nicely considering I have done zero setup work. I think I can carve a substantial amount from the corners still. I’ll do that with the strings on so I can get a sense under my hand of where it needs to go. I was probably too glum in my initial assessment. My last three instruments just came out so nice right out of the gate I think I got a bit spoiled.
 
  • Like
Reactions: Reedt2000