
• TalkBass has been independent since 1998. Add your voice.
    Create a free account to reply to discussions, view embedded media, and browse with fewer display ads.
    Join freeLog in
    Want zero display ads or expanded classifieds tools? Compare plans.

Holly and Ebony Rick

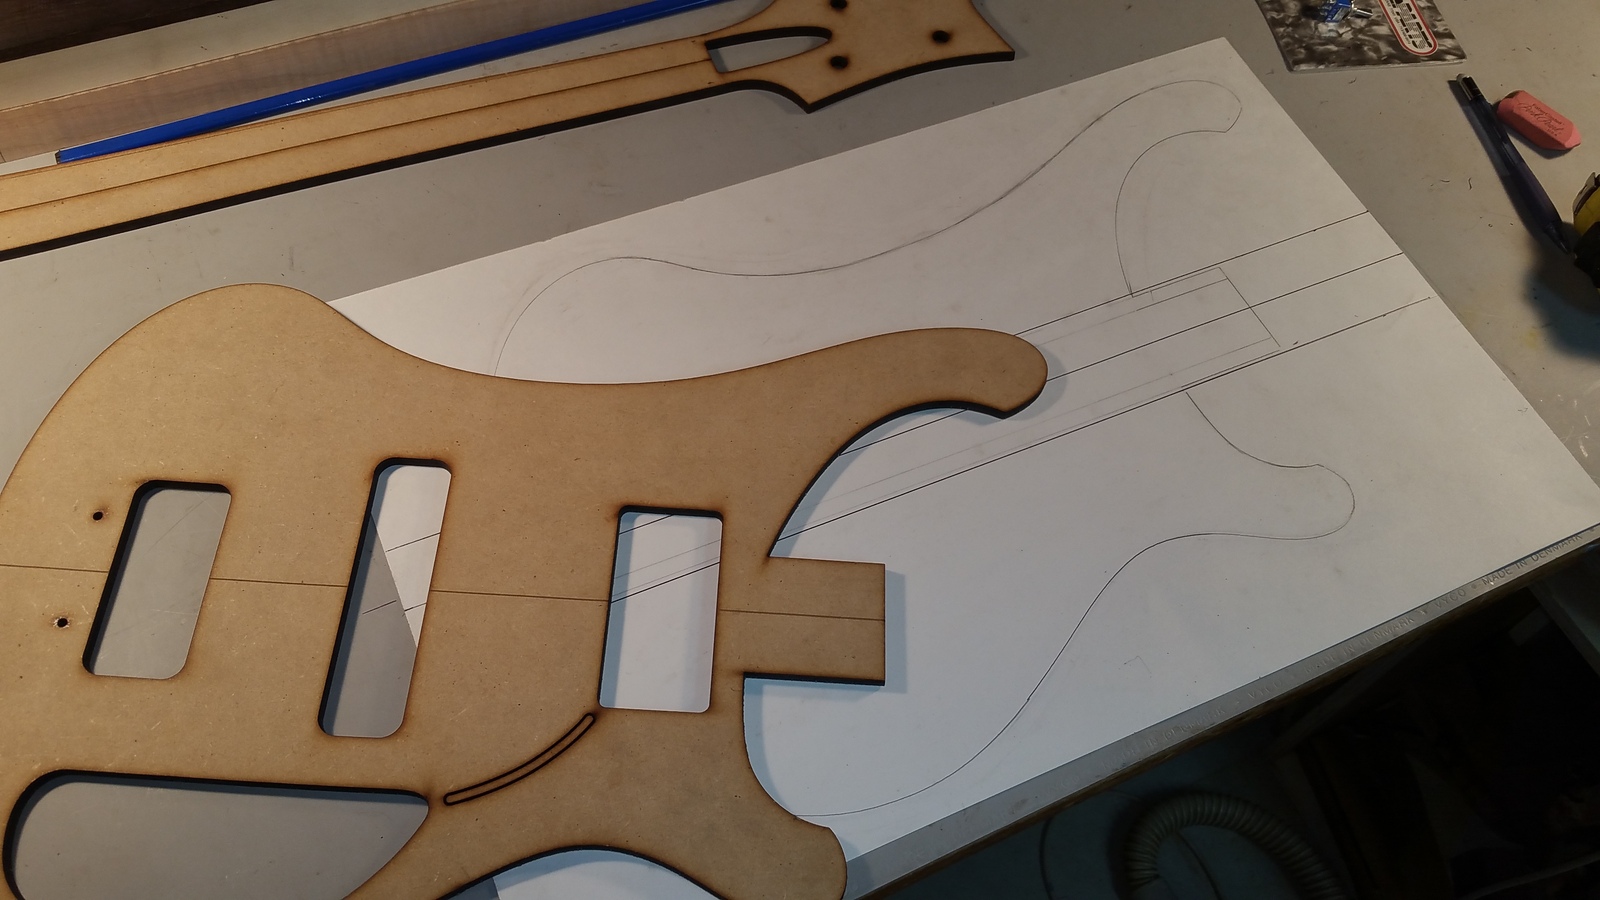
Been a bit busy for the past few days, but I did finally get a drawing of where I want this to go.
Rick12.jpg
 
Fabricated the wing templates this morning. The Paper cutouts are reflective of what I cut my MDF templates to. The templates that are below the paper cutouts are what I purchased online, and I used them as an aid to come up with a slightly modified version of a Rick Bass. It's just a little trimmer.

Have a nice day

Rick13.jpg
 
Update,

Got the wings roughed out.

I have come across a problem, and I'm pretty sure I know how I'll deal with, but I float it out there. If any body else has any suggestions, I would love to hear what you have.
If you take a look at the center strip. The grain seems to stand out a bit. True, the grain is oriented differently in the wings vs the center strip. But the big reason is that I took a piece of sandpaper to the center section, and the black dust from the ebony is getting embedded in the grain. I really want to make this as white as possible. To solve for this , I'll use a scraper on the center section, and when it gets to the neck (and I'll need to do some sanding), I'll be repeatedly wipe down the neck with the lightest shellac I have. In theory, this should fill the pores of the Holly, and keep the black dust from the ebony out.

Cheers
Rick18.jpg
 
Why not replace finish sanding with scraping?

On the flat surfaces, this is what I will be doing. The back of the neck where the rounded surface present a set of challenges that I haven't experienced before. I looked for concave scrappers. I found one, but it's unclear if I'd even be able to use it due to the radius. Maybe I could make one out of what I have, but how would I sharpen it?

Do you scrap the back of your necks to a finish? If so, would you be willing to share?

Cheers!
 
I do scrape the neck instead of finish sanding. I use the concave edge on this set:

Buy Lynx 4pc Curved Scraper Set at Woodcraft.com

It's a flatter radius than any neck I've made, so it's just a matter of scraping slightly overlapping swath, and using a light touch. It's not so great on areas where the grain changes direction. In those spots, scraping can give you a lot of tearout, so some sanding is inevitable. But wherever possible, I do prefer the scraper. It leaves a nicer surface finish and is a heck of a lot faster.

Note here that I'm not talking about rough-sanding. I do sand everything up to 220 grit (usually starting at 80, then going up) after rough shaping with rasps and files, but from there, I use scrapers to get to a finished surface.

 
I do scrape the neck instead of finish sanding. I use the concave edge on this set:

Buy Lynx 4pc Curved Scraper Set at Woodcraft.com

It's a flatter radius than any neck I've made, so it's just a matter of scraping slightly overlapping swath, and using a light touch. It's not so great on areas where the grain changes direction. In those spots, scraping can give you a lot of tearout, so some sanding is inevitable. But wherever possible, I do prefer the scraper. It leaves a nicer surface finish and is a heck of a lot faster.

Note here that I'm not talking about rough-sanding. I do sand everything up to 220 grit (usually starting at 80, then going up) after rough shaping with rasps and files, but from there, I use scrapers to get to a finished surface.

@HaMMerHeD

Thanks for the info. This is what I was suspecting. I have a grinding wheel, so I'd probably be able to get a good working radius by working it into one of my scrapers. I have figured out how I can do this. Also, by making my own, I'll be able to sharpen it as needed for future needs. As you cite, some sanding will need to be done, so I'll need to take some steps to prevent the ebony dust from getting into the grain.

Thanks
 
Hey Scoops:
Can't remember if I already asked this (because I am a scatterbrain) , what are you using to pattern route the bodies? That looks really clean. I had a lot of tearout at the grain changes around curves using a straight pattern bit. Didn't seem to matter if i used climb cuts, reversing direction around curves, etc., or any of the common tips you see for routing guitar body curves. Was it a shear-cut bit? Brand? I want to try a walnut 4003W clone next, no way I can do that with the bits I have. I had to use a lot of good-old bondo to fill the gouges, not an option with walnut or Holly!
 
  • Like
Reactions: kaoskater08
Hey Scoops:
Can't remember if I already asked this (because I am a scatterbrain) , what are you using to pattern route the bodies? That looks really clean. I had a lot of tearout at the grain changes around curves using a straight pattern bit. Didn't seem to matter if i used climb cuts, reversing direction around curves, etc., or any of the common tips you see for routing guitar body curves. Was it a shear-cut bit? Brand? I want to try a walnut 4003W clone next, no way I can do that with the bits I have. I had to use a lot of good-old bondo to fill the gouges, not an option with walnut or Holly!

I used Whiteside Pattern bits. Short one (1/2 inch) for the shallow cuts, and a longer one (1 inch) for the deeper cuts. They were all new bits, so they had a nice edge on them. I had 2 instances of chip out. 1 I had hit a knot. The other was a stupid mistake on my part. When I route out the body, I try to cut away as much of the unwanted material as possible. Usually bandsaw to @.125 material to be removed with router. I left a section considerably larger than that on an inside angle. I got a chip out there, but it didn't go deep into the body, so I was able to sand it out on the spindle sander.

I have had success when I route as little as possible. I usually do alot of passes to get the body routed. I rarely try to go more that a quarter to a third of an inch depth for each pass. I go slow, and dont force the cut. I always try to go downhill. But that's not always what happens.

I do need to give credit to the wood for the cuts though. Holly was very forgiving when it came time to do the routing. I've never worked with Holly before, so this is a bit unique. It is a little on the softer side when it comes to hardwood, so sawing and routing was relatively easy.

Cheers
 
  • Like
Reactions: Beej
I try to cut to within 1/16" of the line on the bandsaw, and then use a Whiteside solid carbide bearing-guided spiral bit to take the excess off in a single pass. The bits are expensive, but the time saving is tremendous.
 
  • Like
Reactions: Beej
I try to cut to within 1/16" of the line on the bandsaw, and then use a Whiteside solid carbide bearing-guided spiral bit to take the excess off in a single pass. The bits are expensive, but the time saving is tremendous.

I'm assuming you are using the 1/2" shank.

Edit: Yikes, you aint kidding when you say the bit is expensive
 
I try to cut to within 1/16" of the line on the bandsaw, and then use a Whiteside solid carbide bearing-guided spiral bit to take the excess off in a single pass. The bits are expensive, but the time saving is tremendous.
What length? I tried a shear-cut pattern bit by Yonico that was 1" long with a 1/4"shank, and it vibrated so bad it notched my template. I think I got a defective bit. Mind sharing a link to the Whiteside bit you use?
 
Sure.

It's a Whiteside RFTD5200, solid carbide downcut spiral flush trim bit.

https://www.amazon.com/Whiteside-Router-Bits-RFTD5200-Diameter/dp/B0012JGBX8 - $82.59 US

It has a 1/2" diameter, 2" cutting length, and 1/2" shank. I also have a 1-1/4" cutting length version for necks. The shearing, slicing action of the spiral bit reduces vibration considerably, compared to a standard straight-cut bit, which has more of a chopping action. It makes the cutting action such that only a small portion of the cutter surface is in contact with the wood at any given time, so there is also less heat build up and less grain tear-out, especially when cutting figured wood, or wood with interlocked grain.

I use the downcut because I use works better for my dust management stuff.
 
As an Amazon Associate, TalkBass may receive commissions from qualifying purchases made via links on this site.

