- Feb 28, 2015
- 2,922
- 9,028
- Disclosures
- Owner/Builder- RockHewer Custom Guitars LLC
Winter 2017 Build Off - Challenge yourself
With the "challenging" theme of this build off... this one should fit in fairly well I'm thinking.
My wonderful repeat client from NY submitted this challenge to me a couple months ago, for his third commission.
He wanted me to put my style of building into a homage to Jerry Only's bass (Misfits) ...
"Devastator"

It will resemble said bass in body shape only. He knew I would not be into doing a "copy" & painting it black.... so he let me run with it.
I'm not a huge fan of this bass anyway...so I was happy to morph it into something I would enjoy.
After a few ideas from me and a couple of mutual brainstorming sessions...this is what we came up with. Given its sorta "spidery" visage ...we have dubbed it - ARACHNOPHILIA.
Specs:
9 lam. Neck-through 34" scale.
8 string (Dual course -octave tuned).
7 layer "hippie sandwich" body.
Grover 'Titan' tuners- gold...
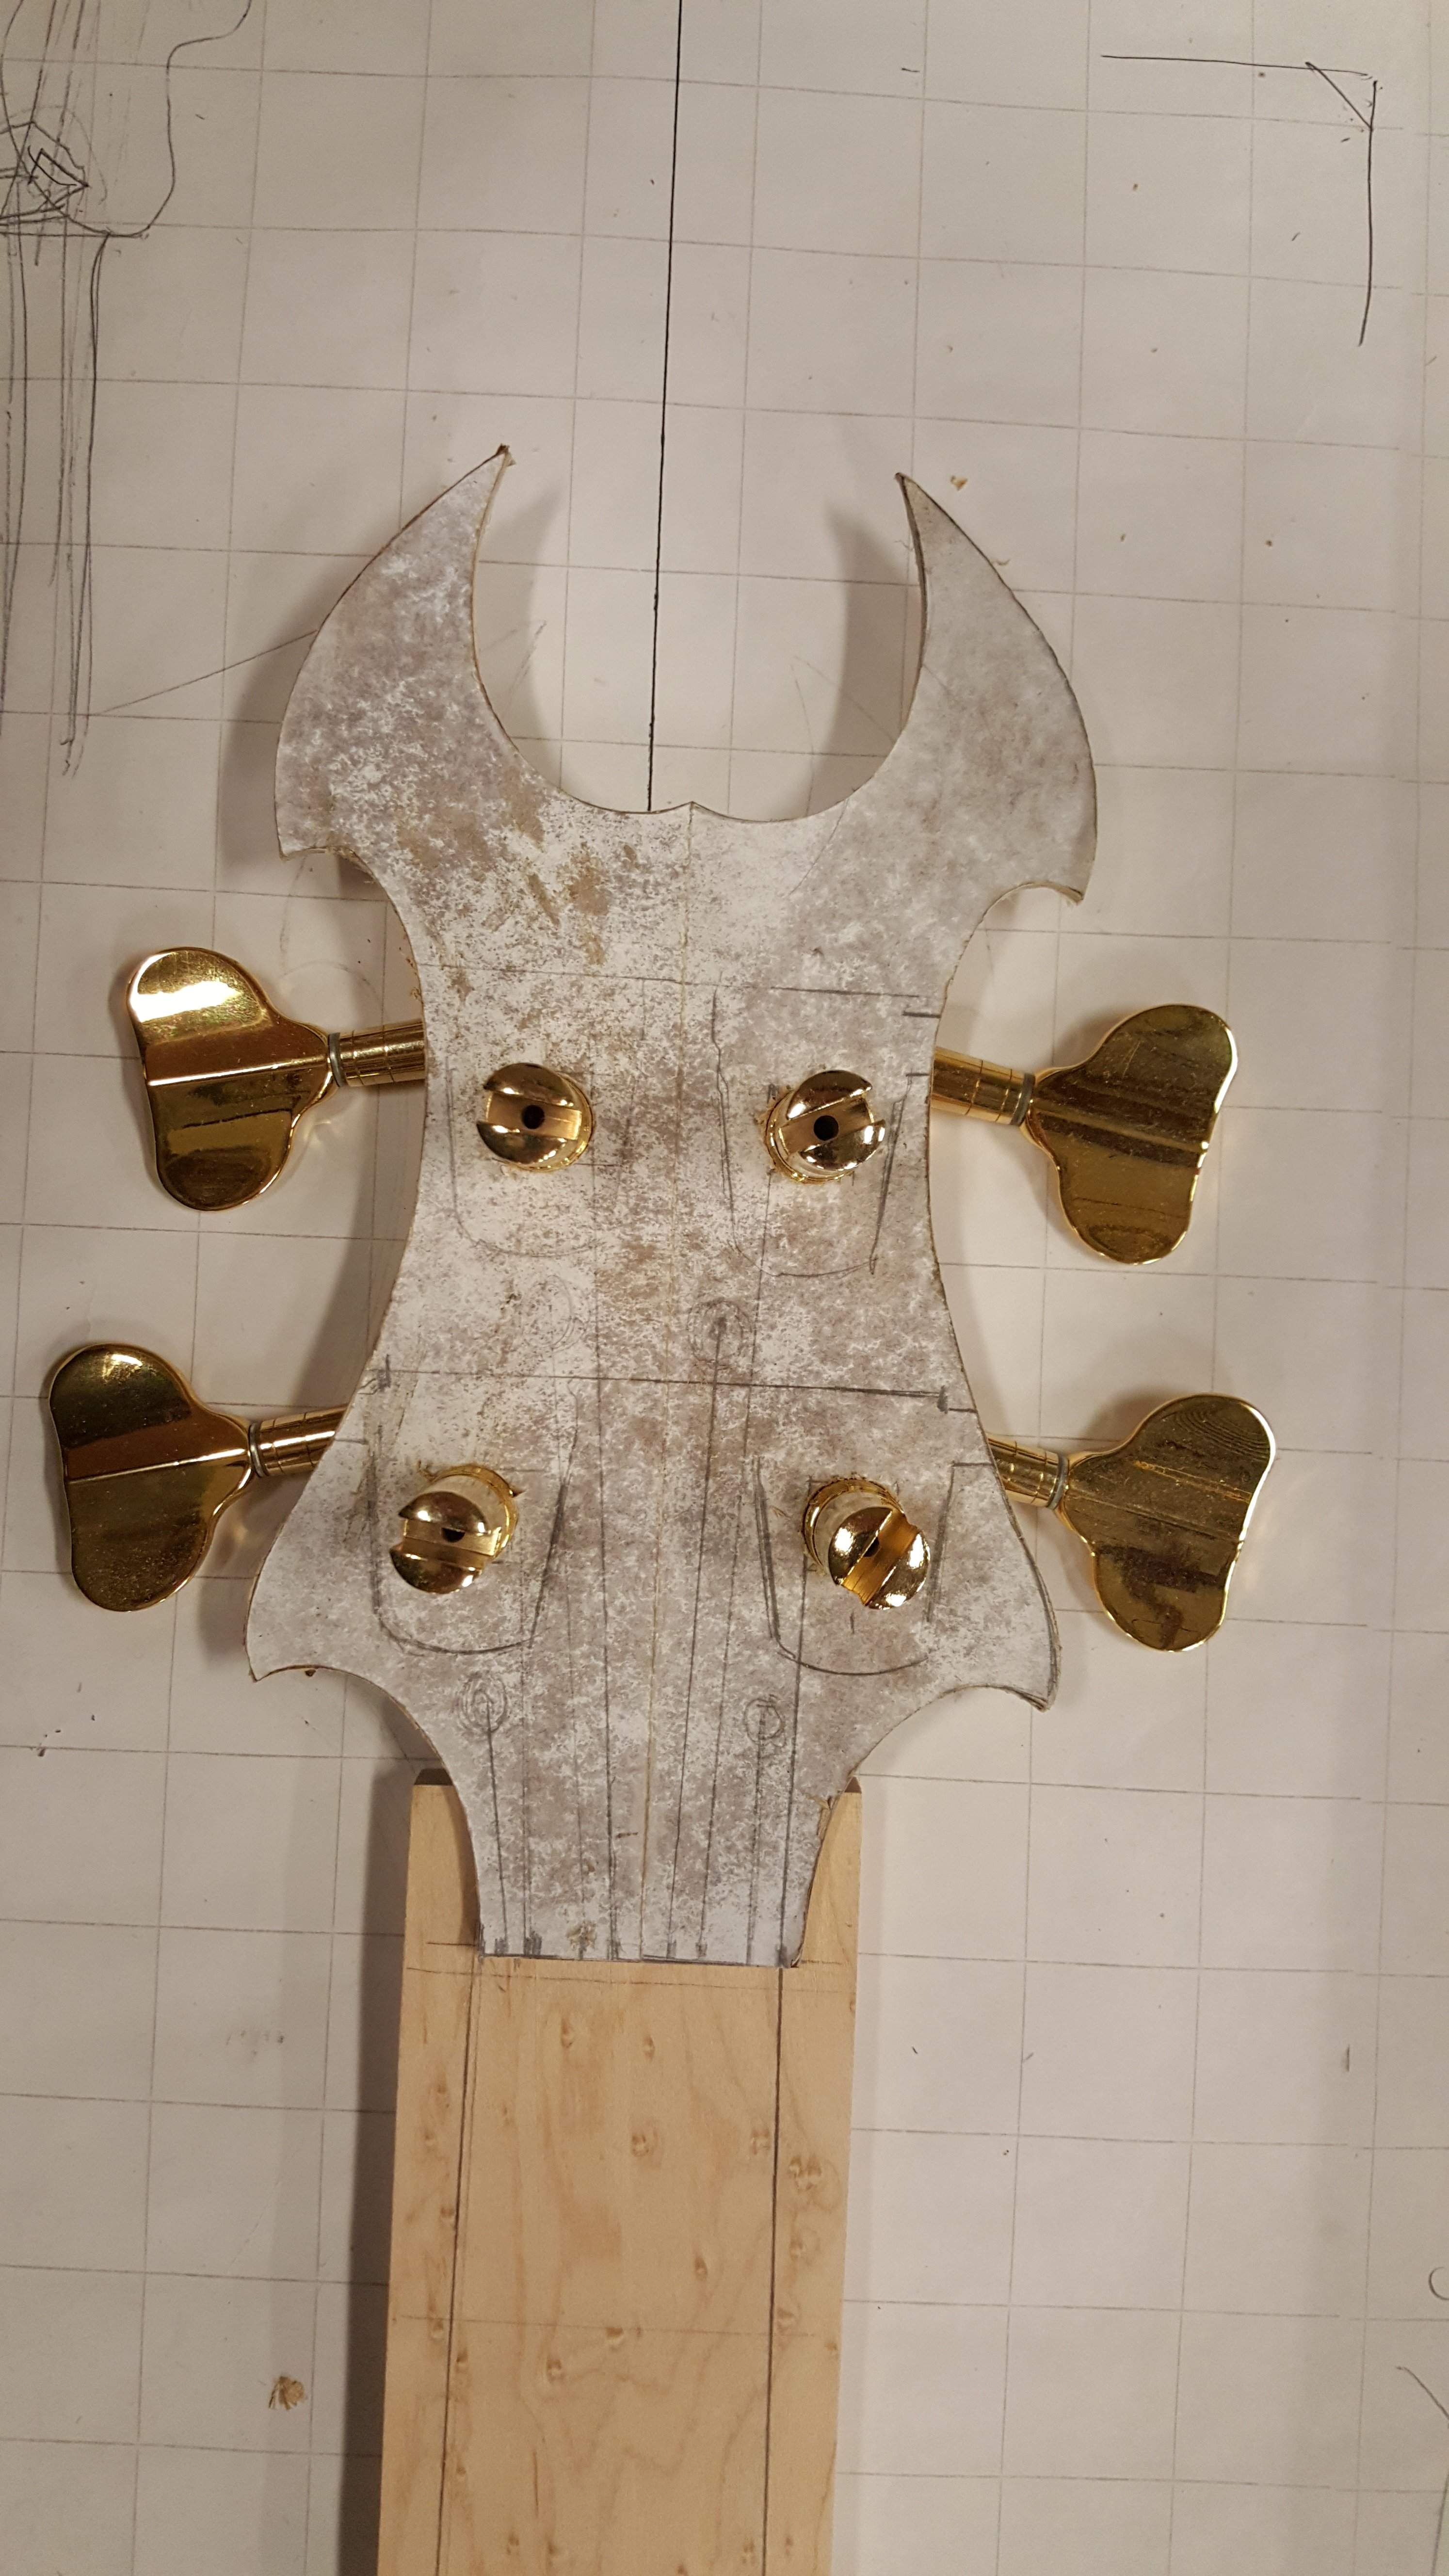
BCR - 'Widow-ish" headstock, with 4 fund. tuners & ferrules for the octave strings . Then 4 small tuners on body behind bridge.
At first, the plan was to go with 2 sets of DiMarzio split P pickups... and a Badass bridge, modified for 8 string (ala- BCR). But once the top wood bookmatch was seen, it bacame obvious that it was far too ...glorious ...to obscure.
So I suggested that I could create a minimal footprint acoustic style bridge, with an under saddle piezo transducer as the sole pickup.
(Me & my big mouth) I mean, ...I have no doubt I can pull off the bridge itself ....but making an 8 string sound good...piezo only? Will surely prove somewhat... challenging. I might attempt to embed a magnetic pup... somewhere, as well.
The woods:
For the body I had a vision of this instrument being clad in a sort of "demon hide" of bloody flesh & sinew.
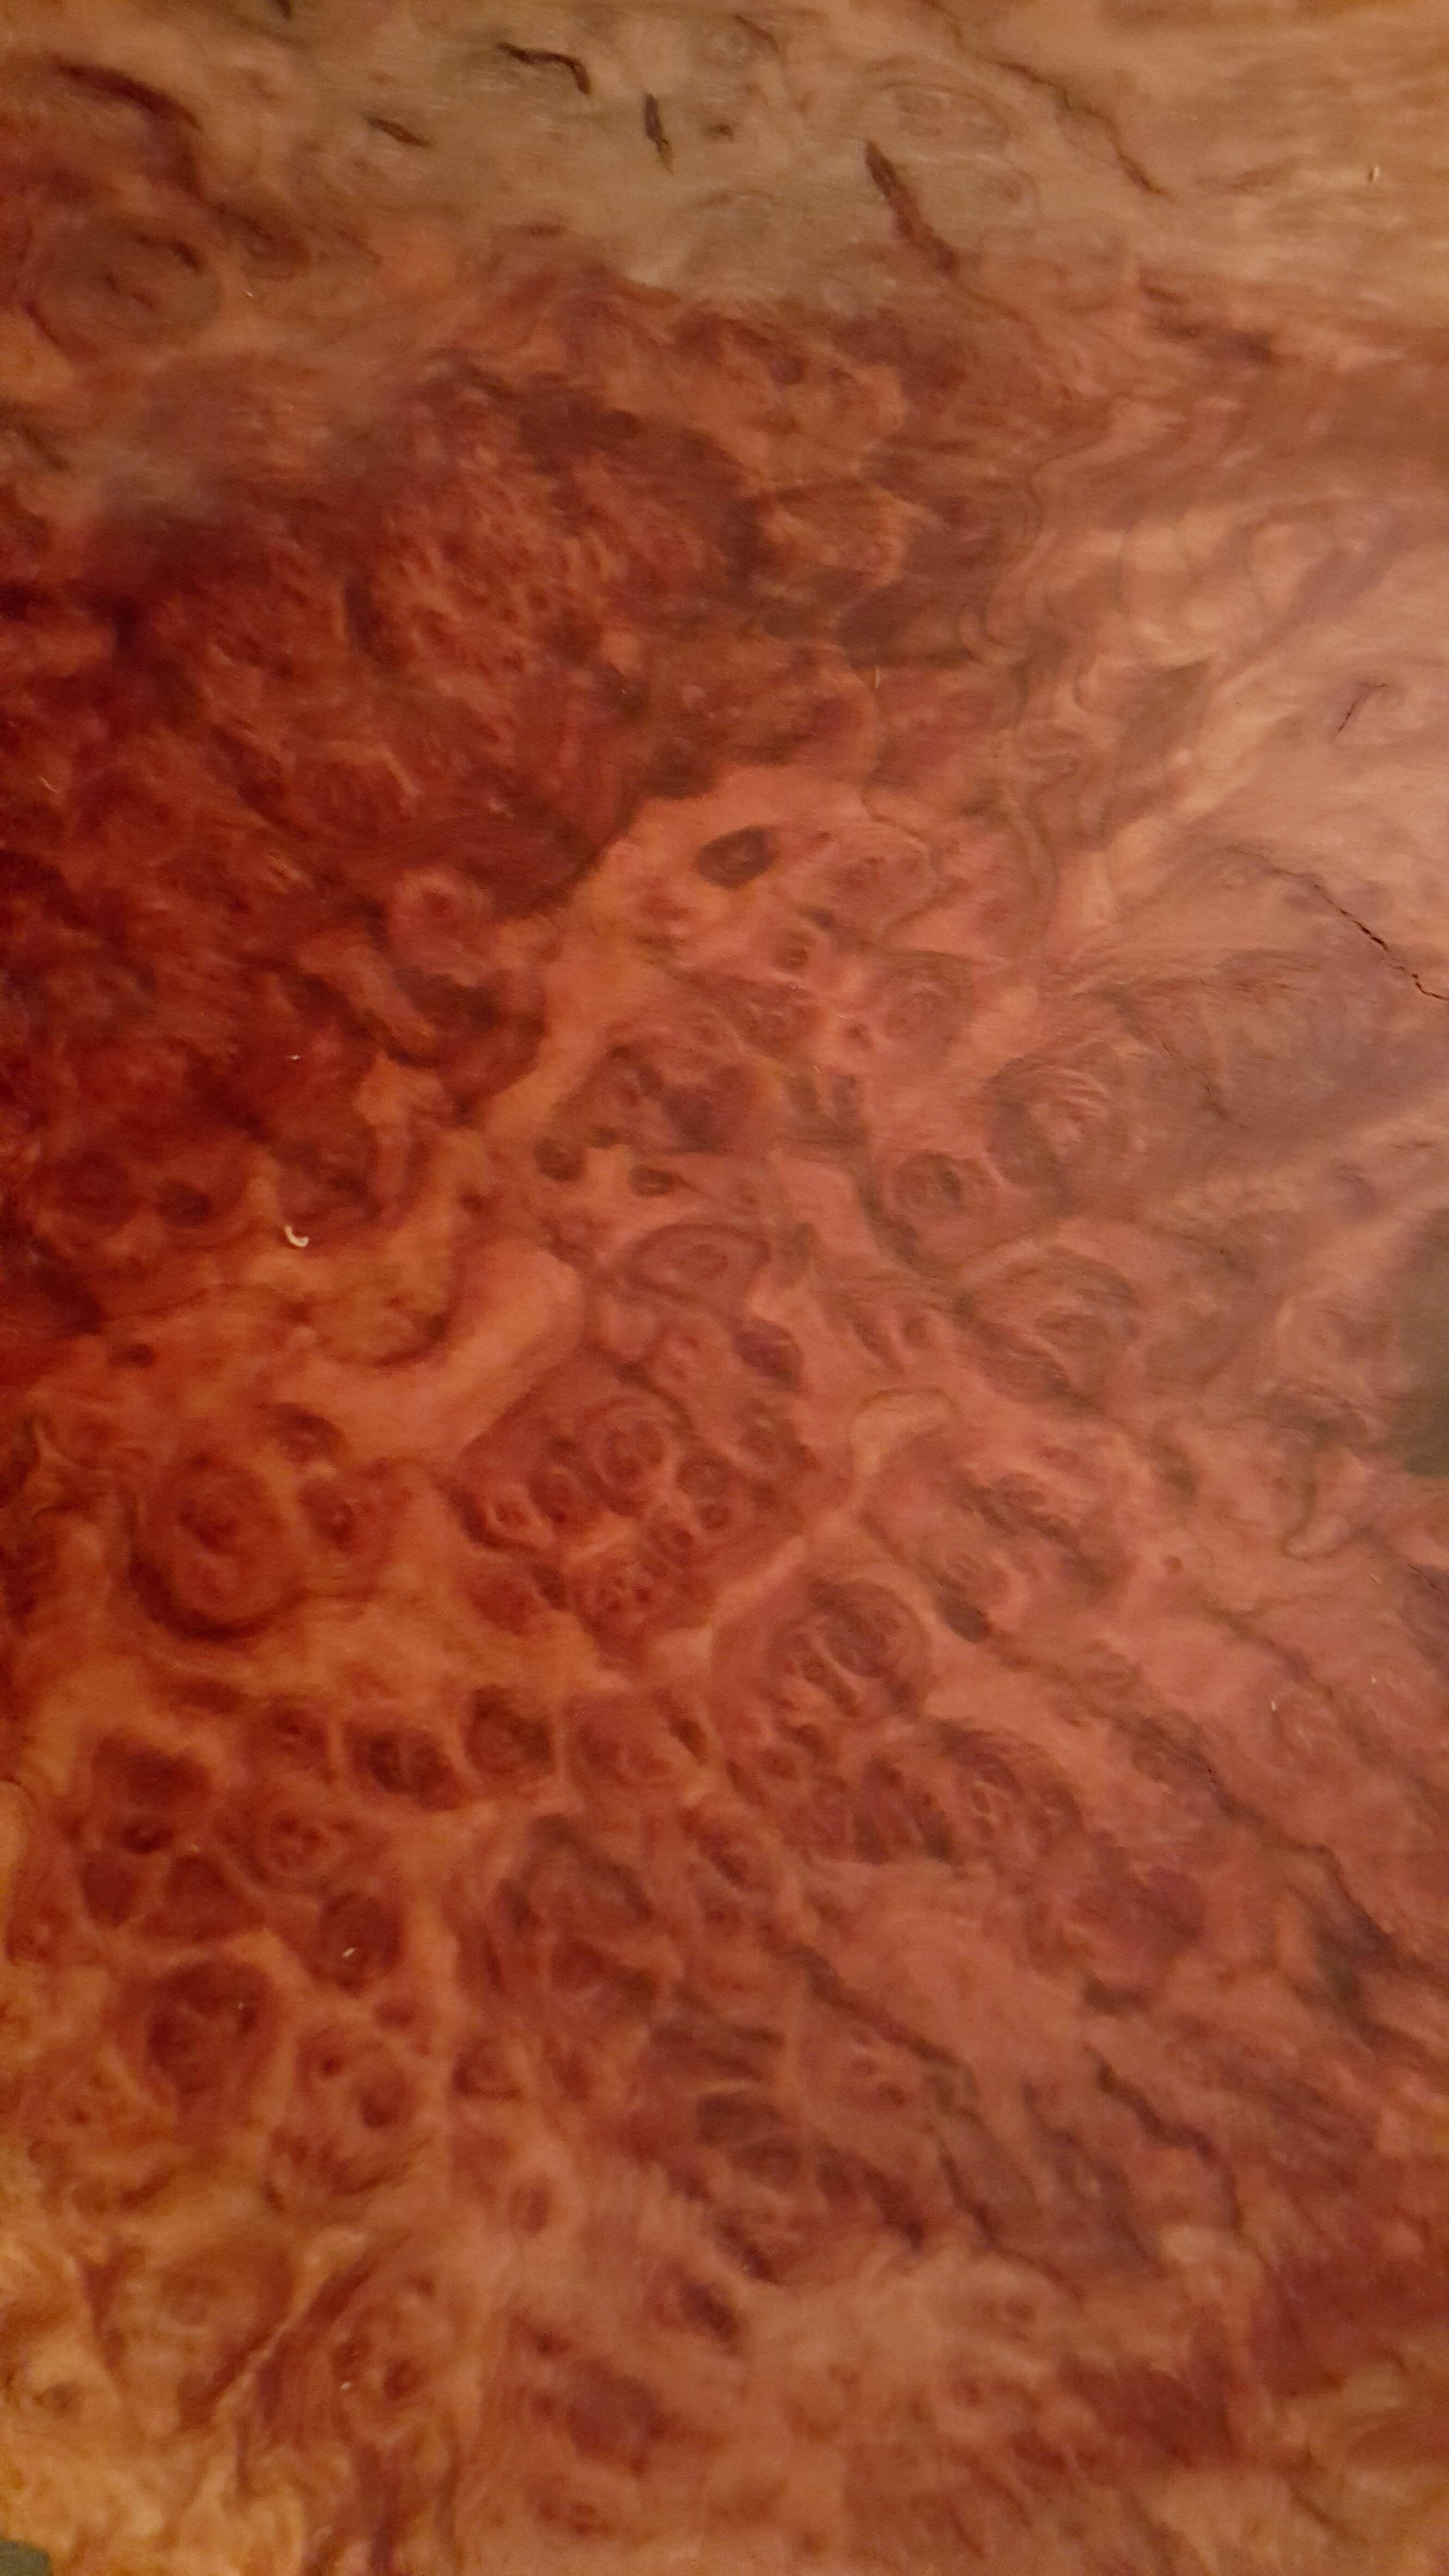
Behold this amazing slab of Red Mallee burl from Australia:
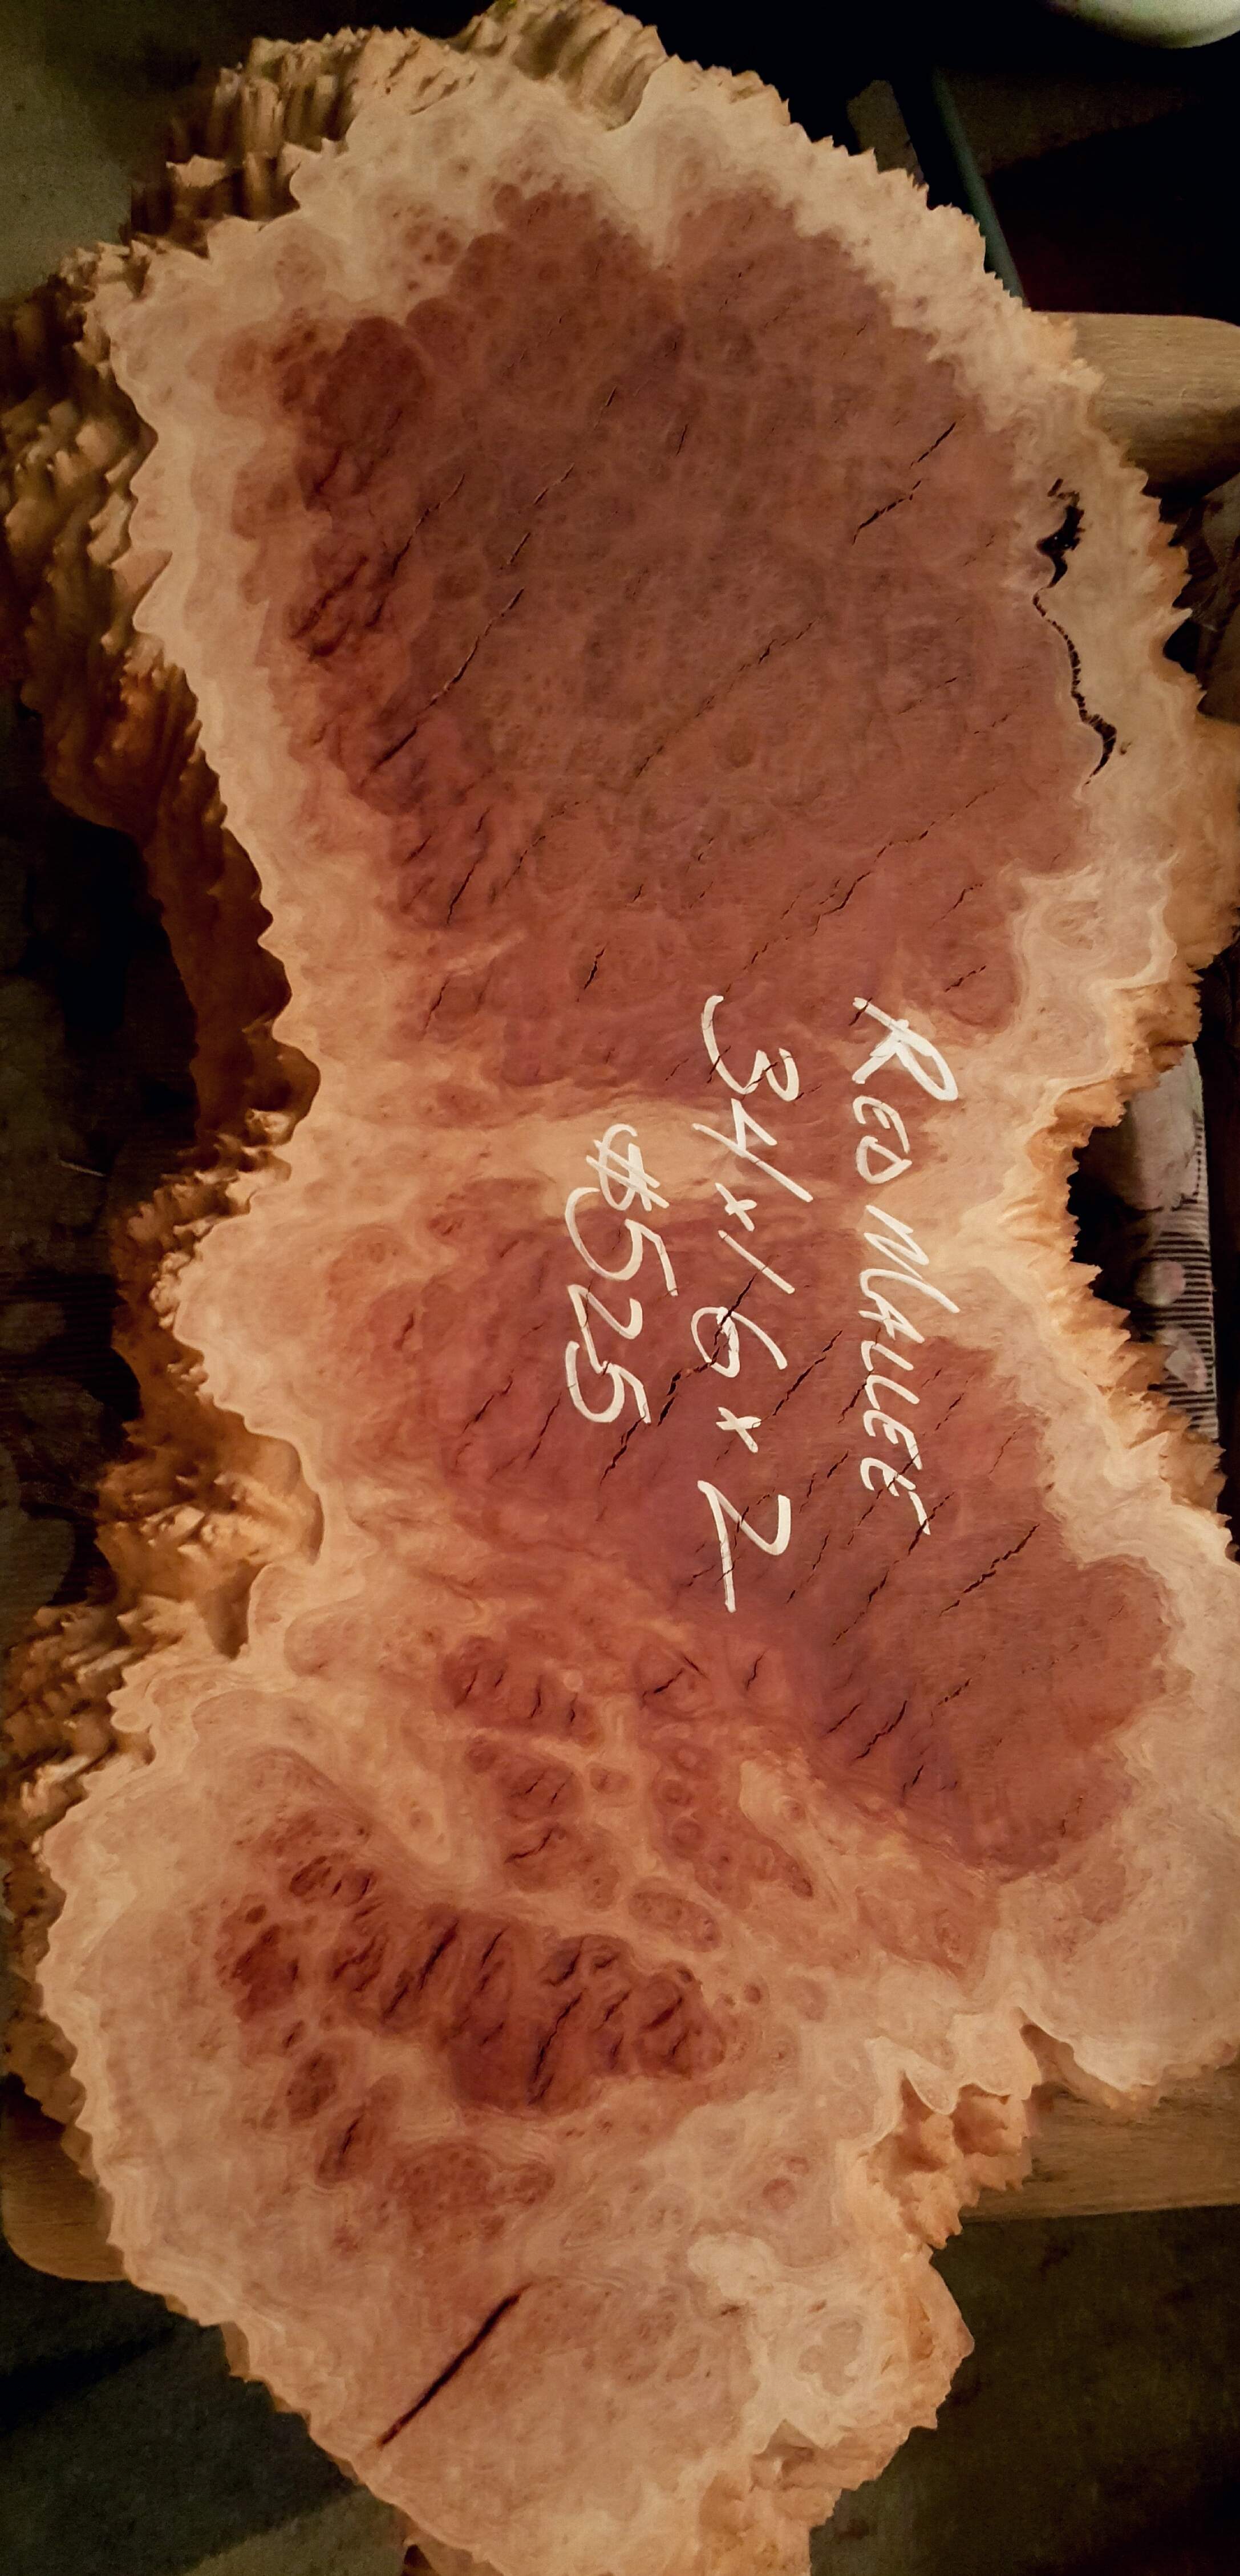
From which I have hewn these:
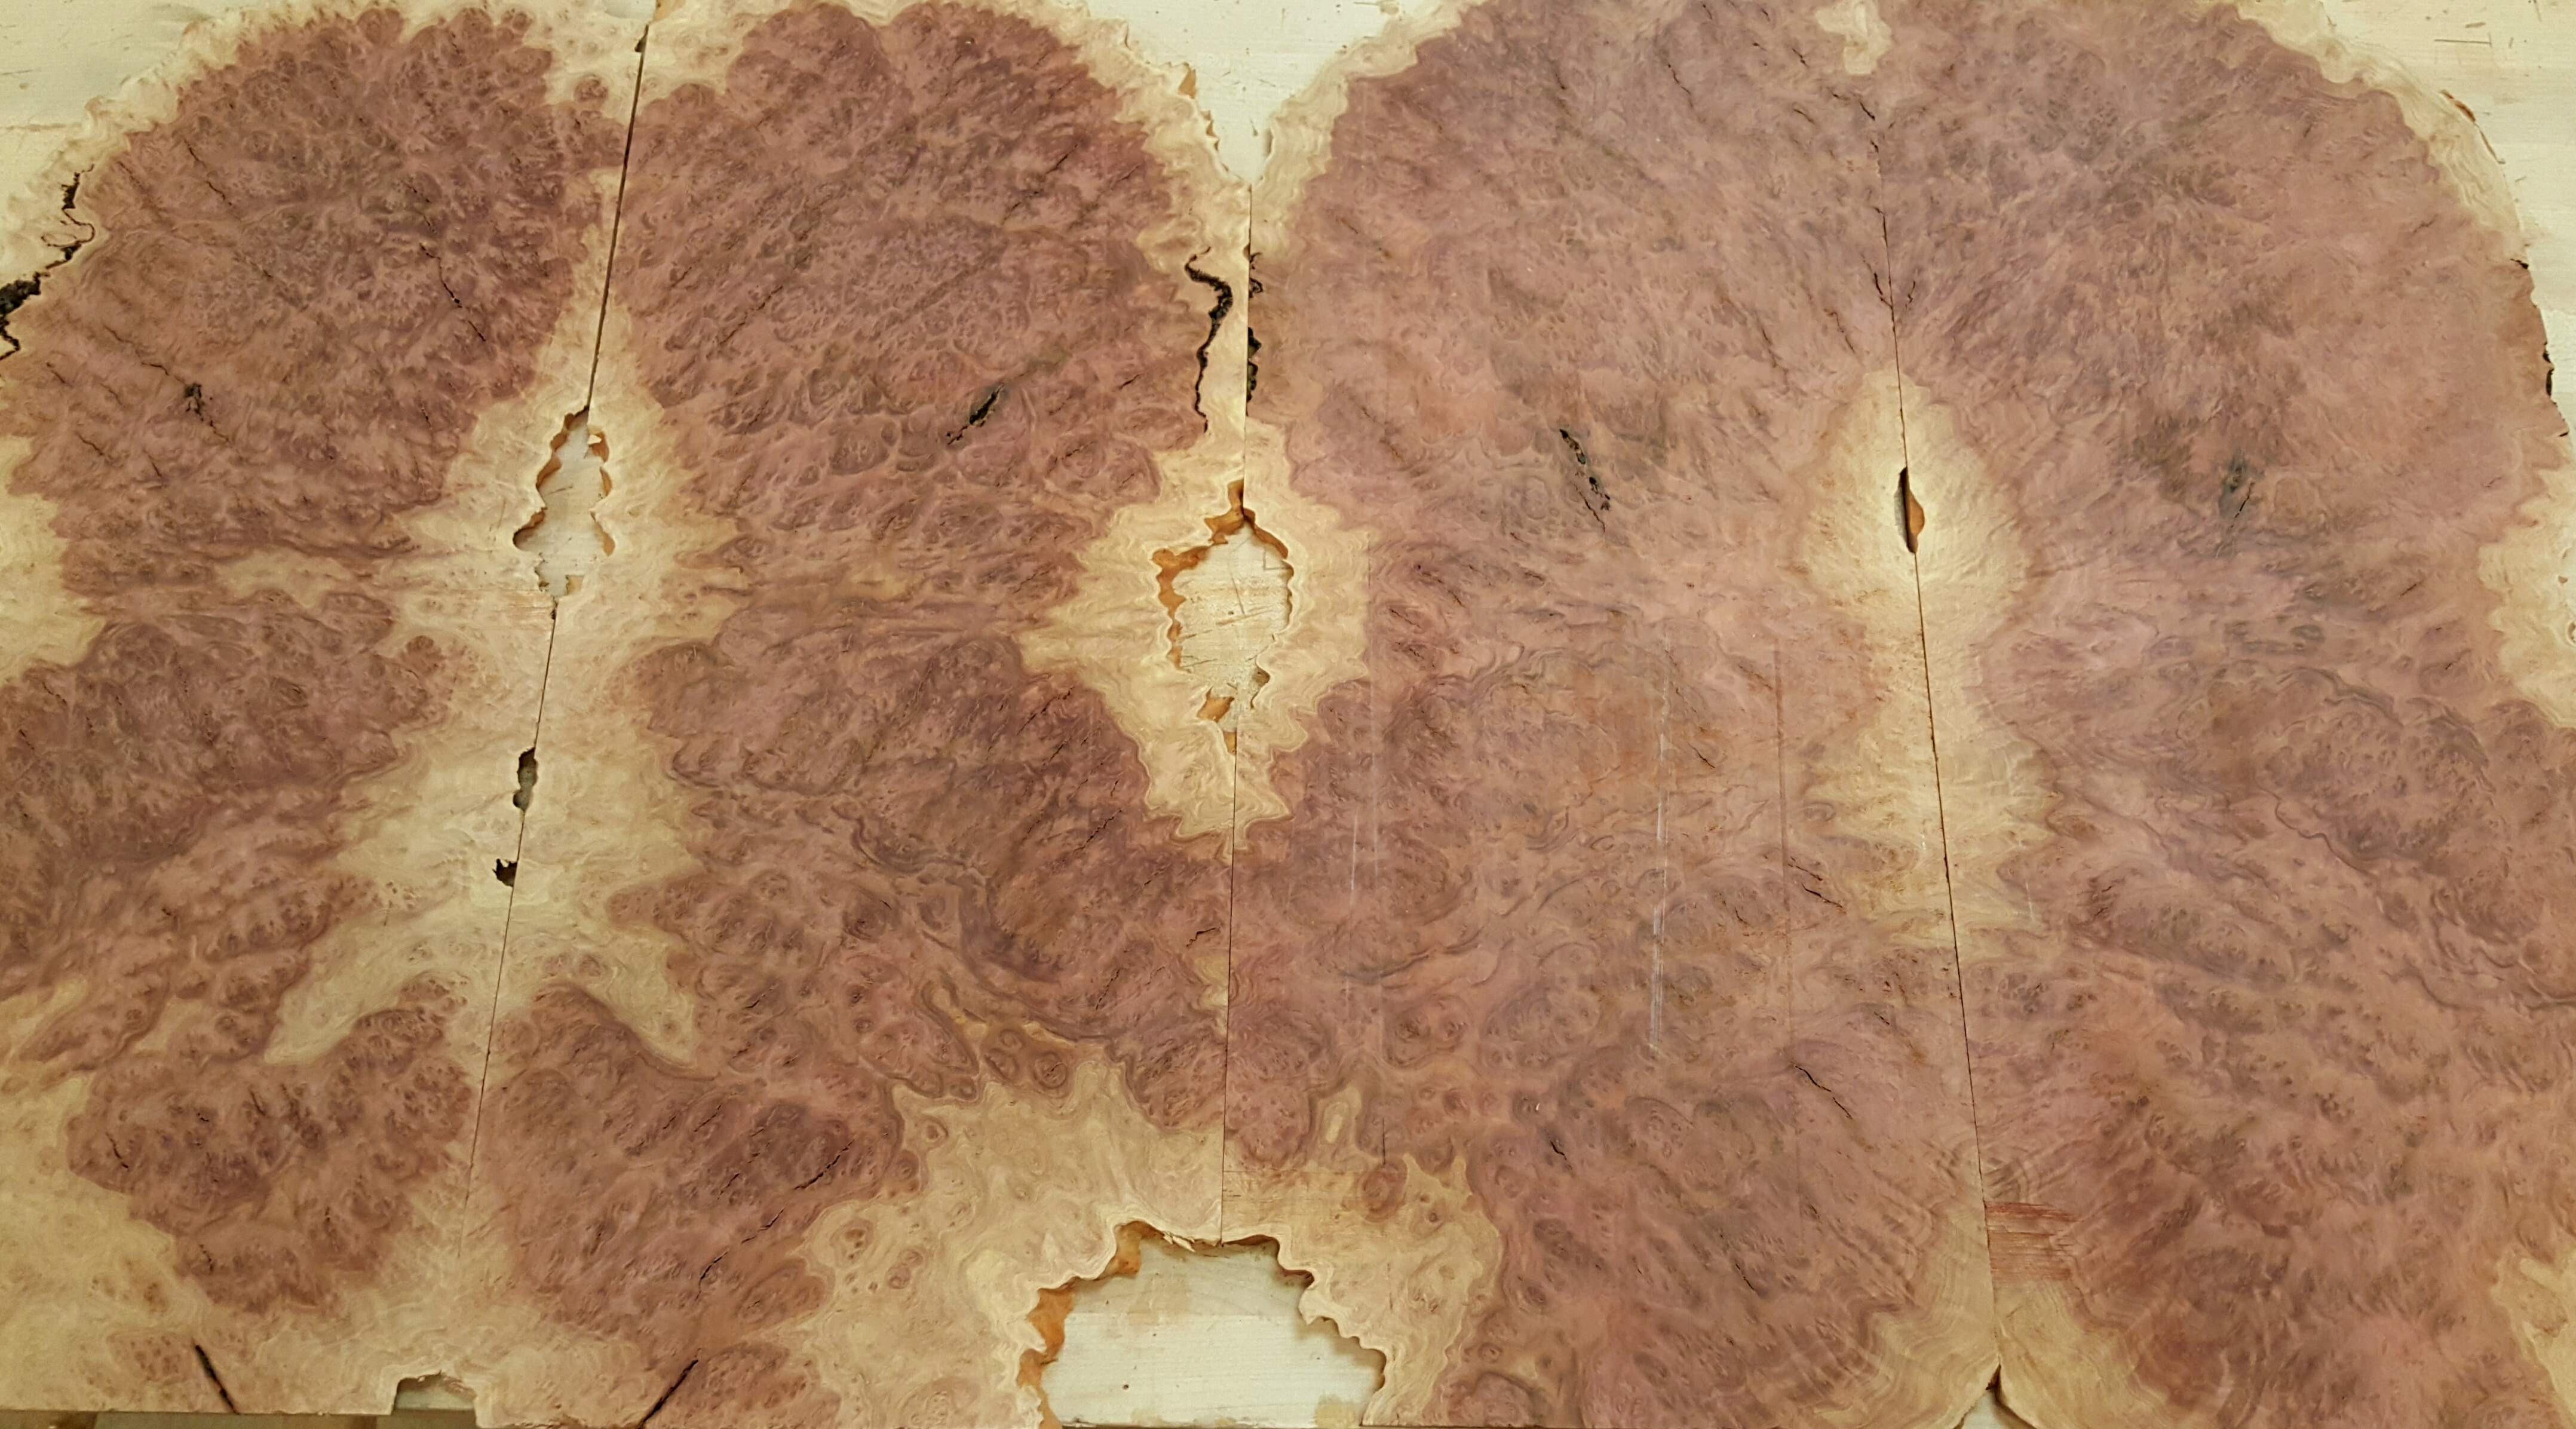
These dry pictures don't do these justice...and they will obviously darken up when finished. drool
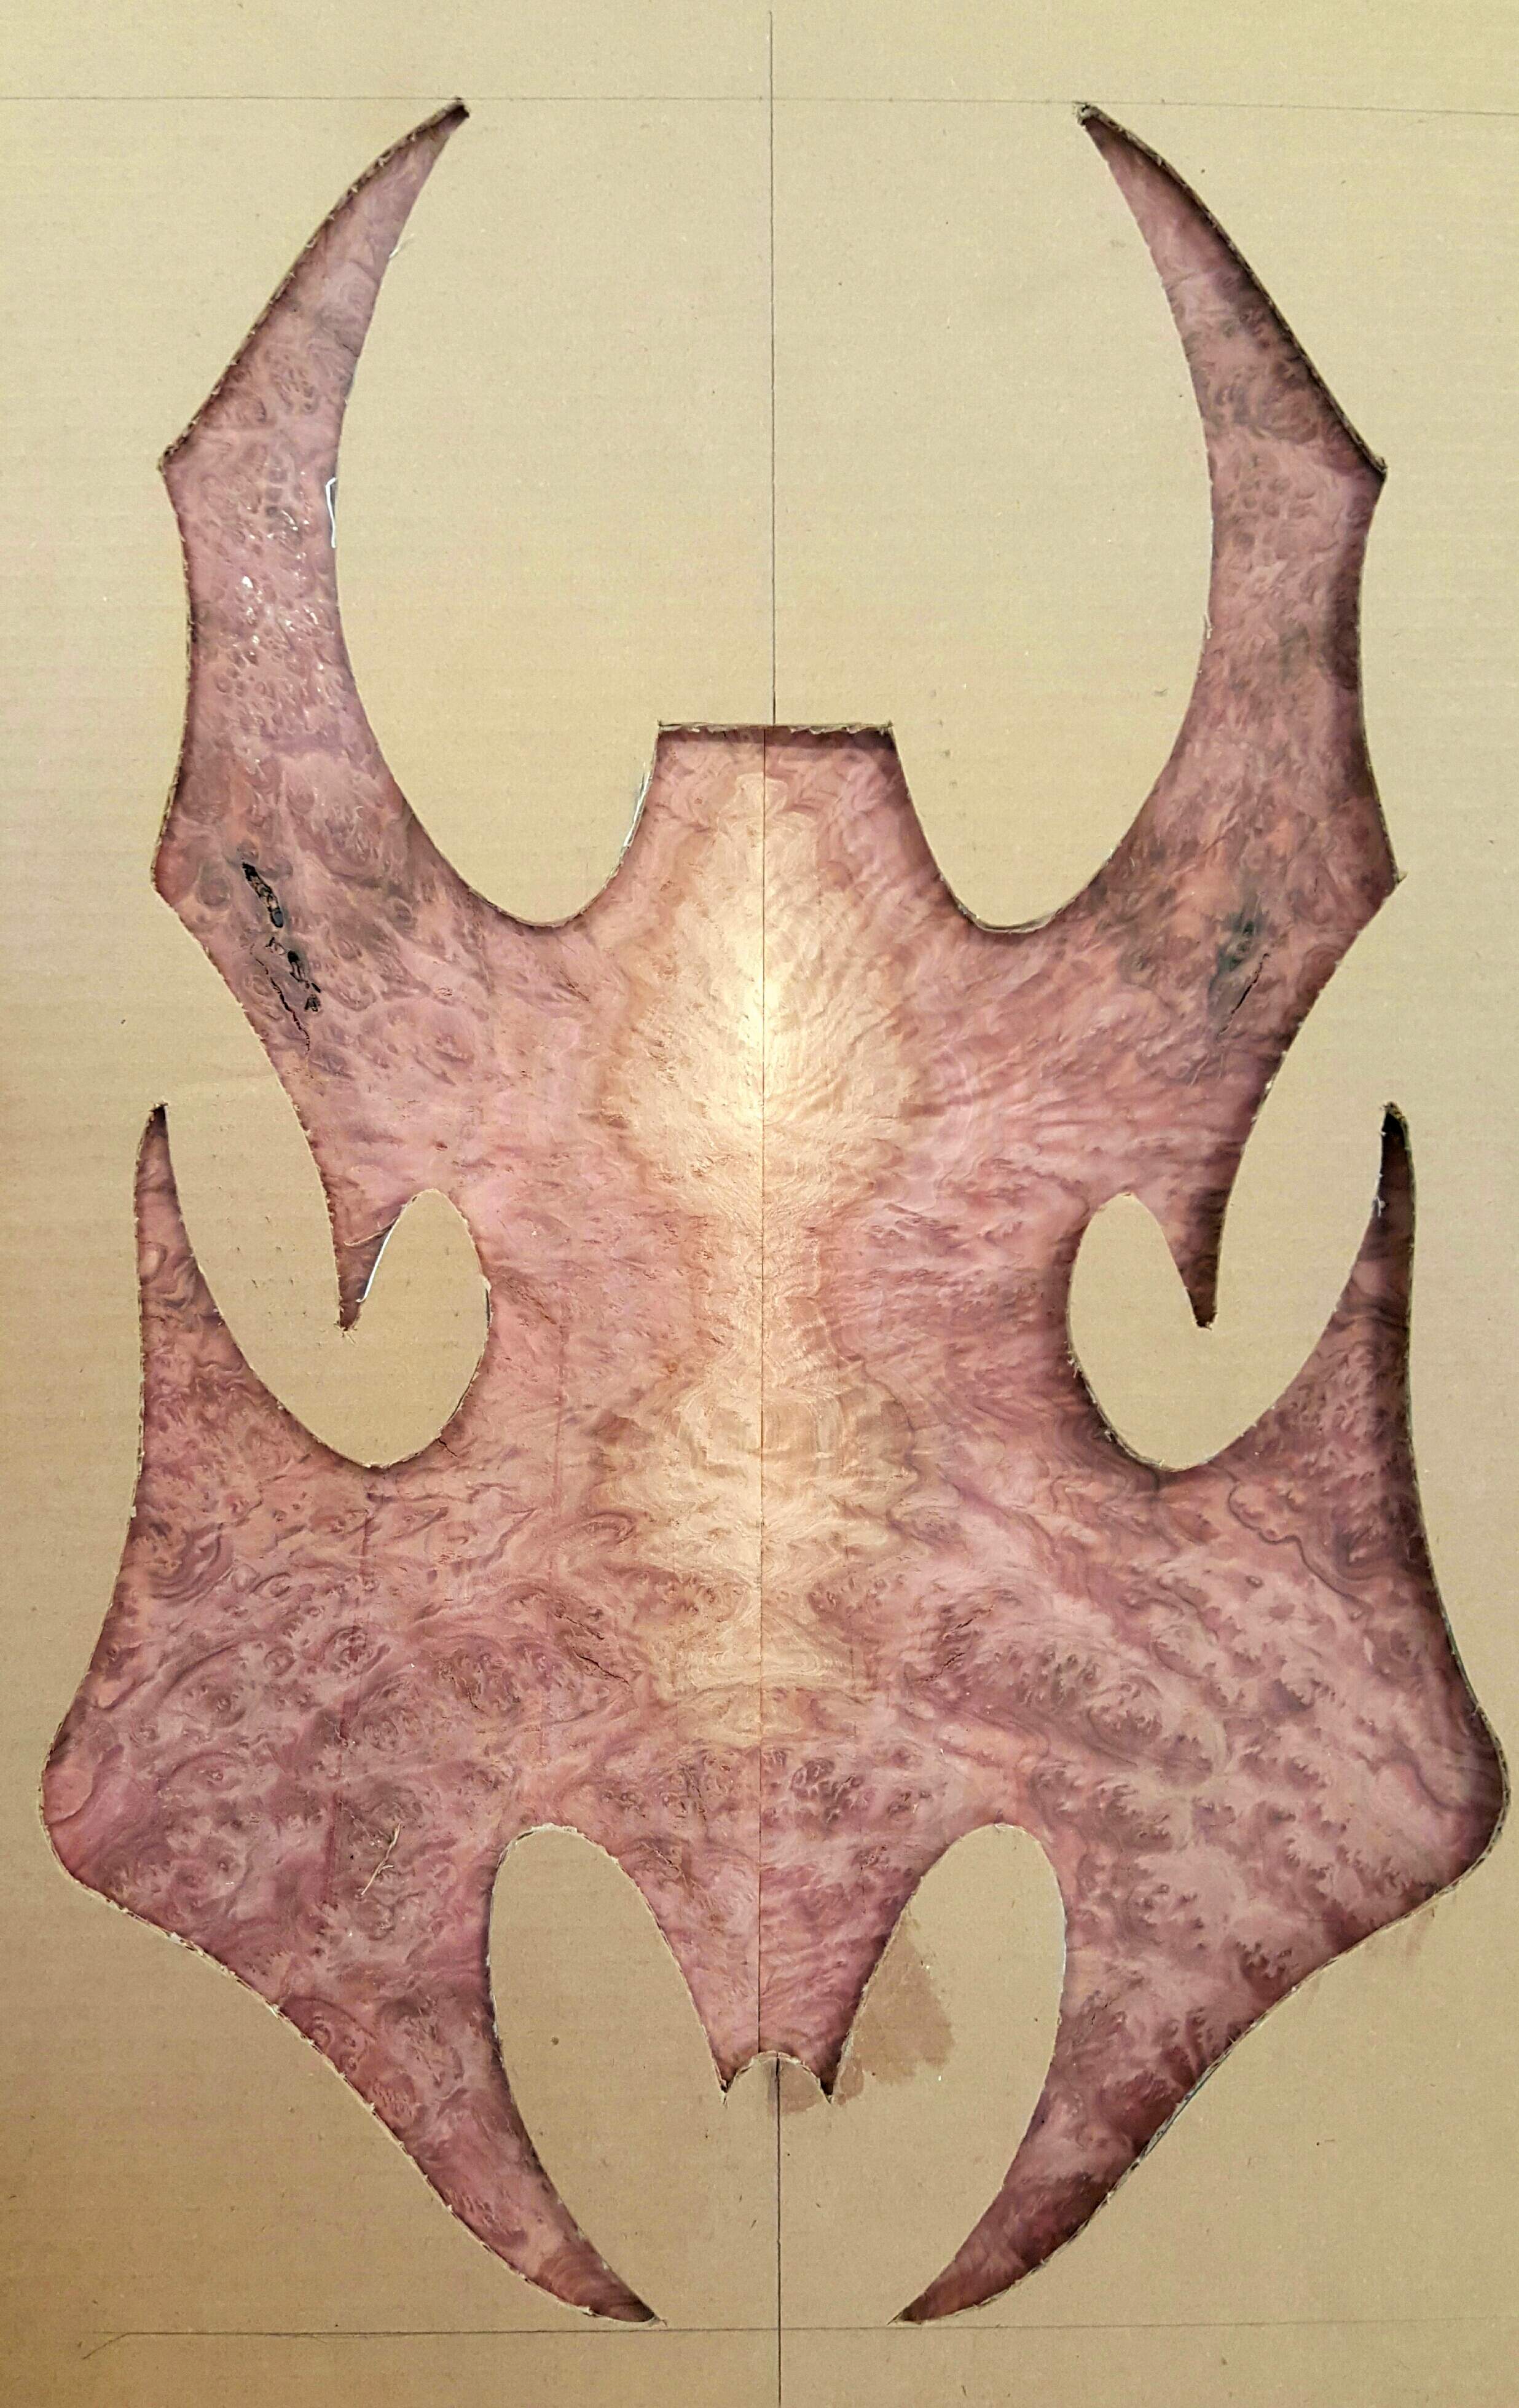
So, yeah... covering/ cluttering any of this up... would amount to a mortal sin, in the eyes of the gods of luthiery.
The fretboard is going to be BirdsEye maple ....and will transition nicely, out of the burl sapwood figure in the center of the body.
* There will be an inlay of a somewhat tribal-ish spider at the twelfth fret area ...as big as I can fit on the fretboard. Where the 'x' is in the following picture.
Inlay material TBD ...(thinking about using ebony, redheart, & maybe a little abalone for sparkle)

These neck of the woods.....
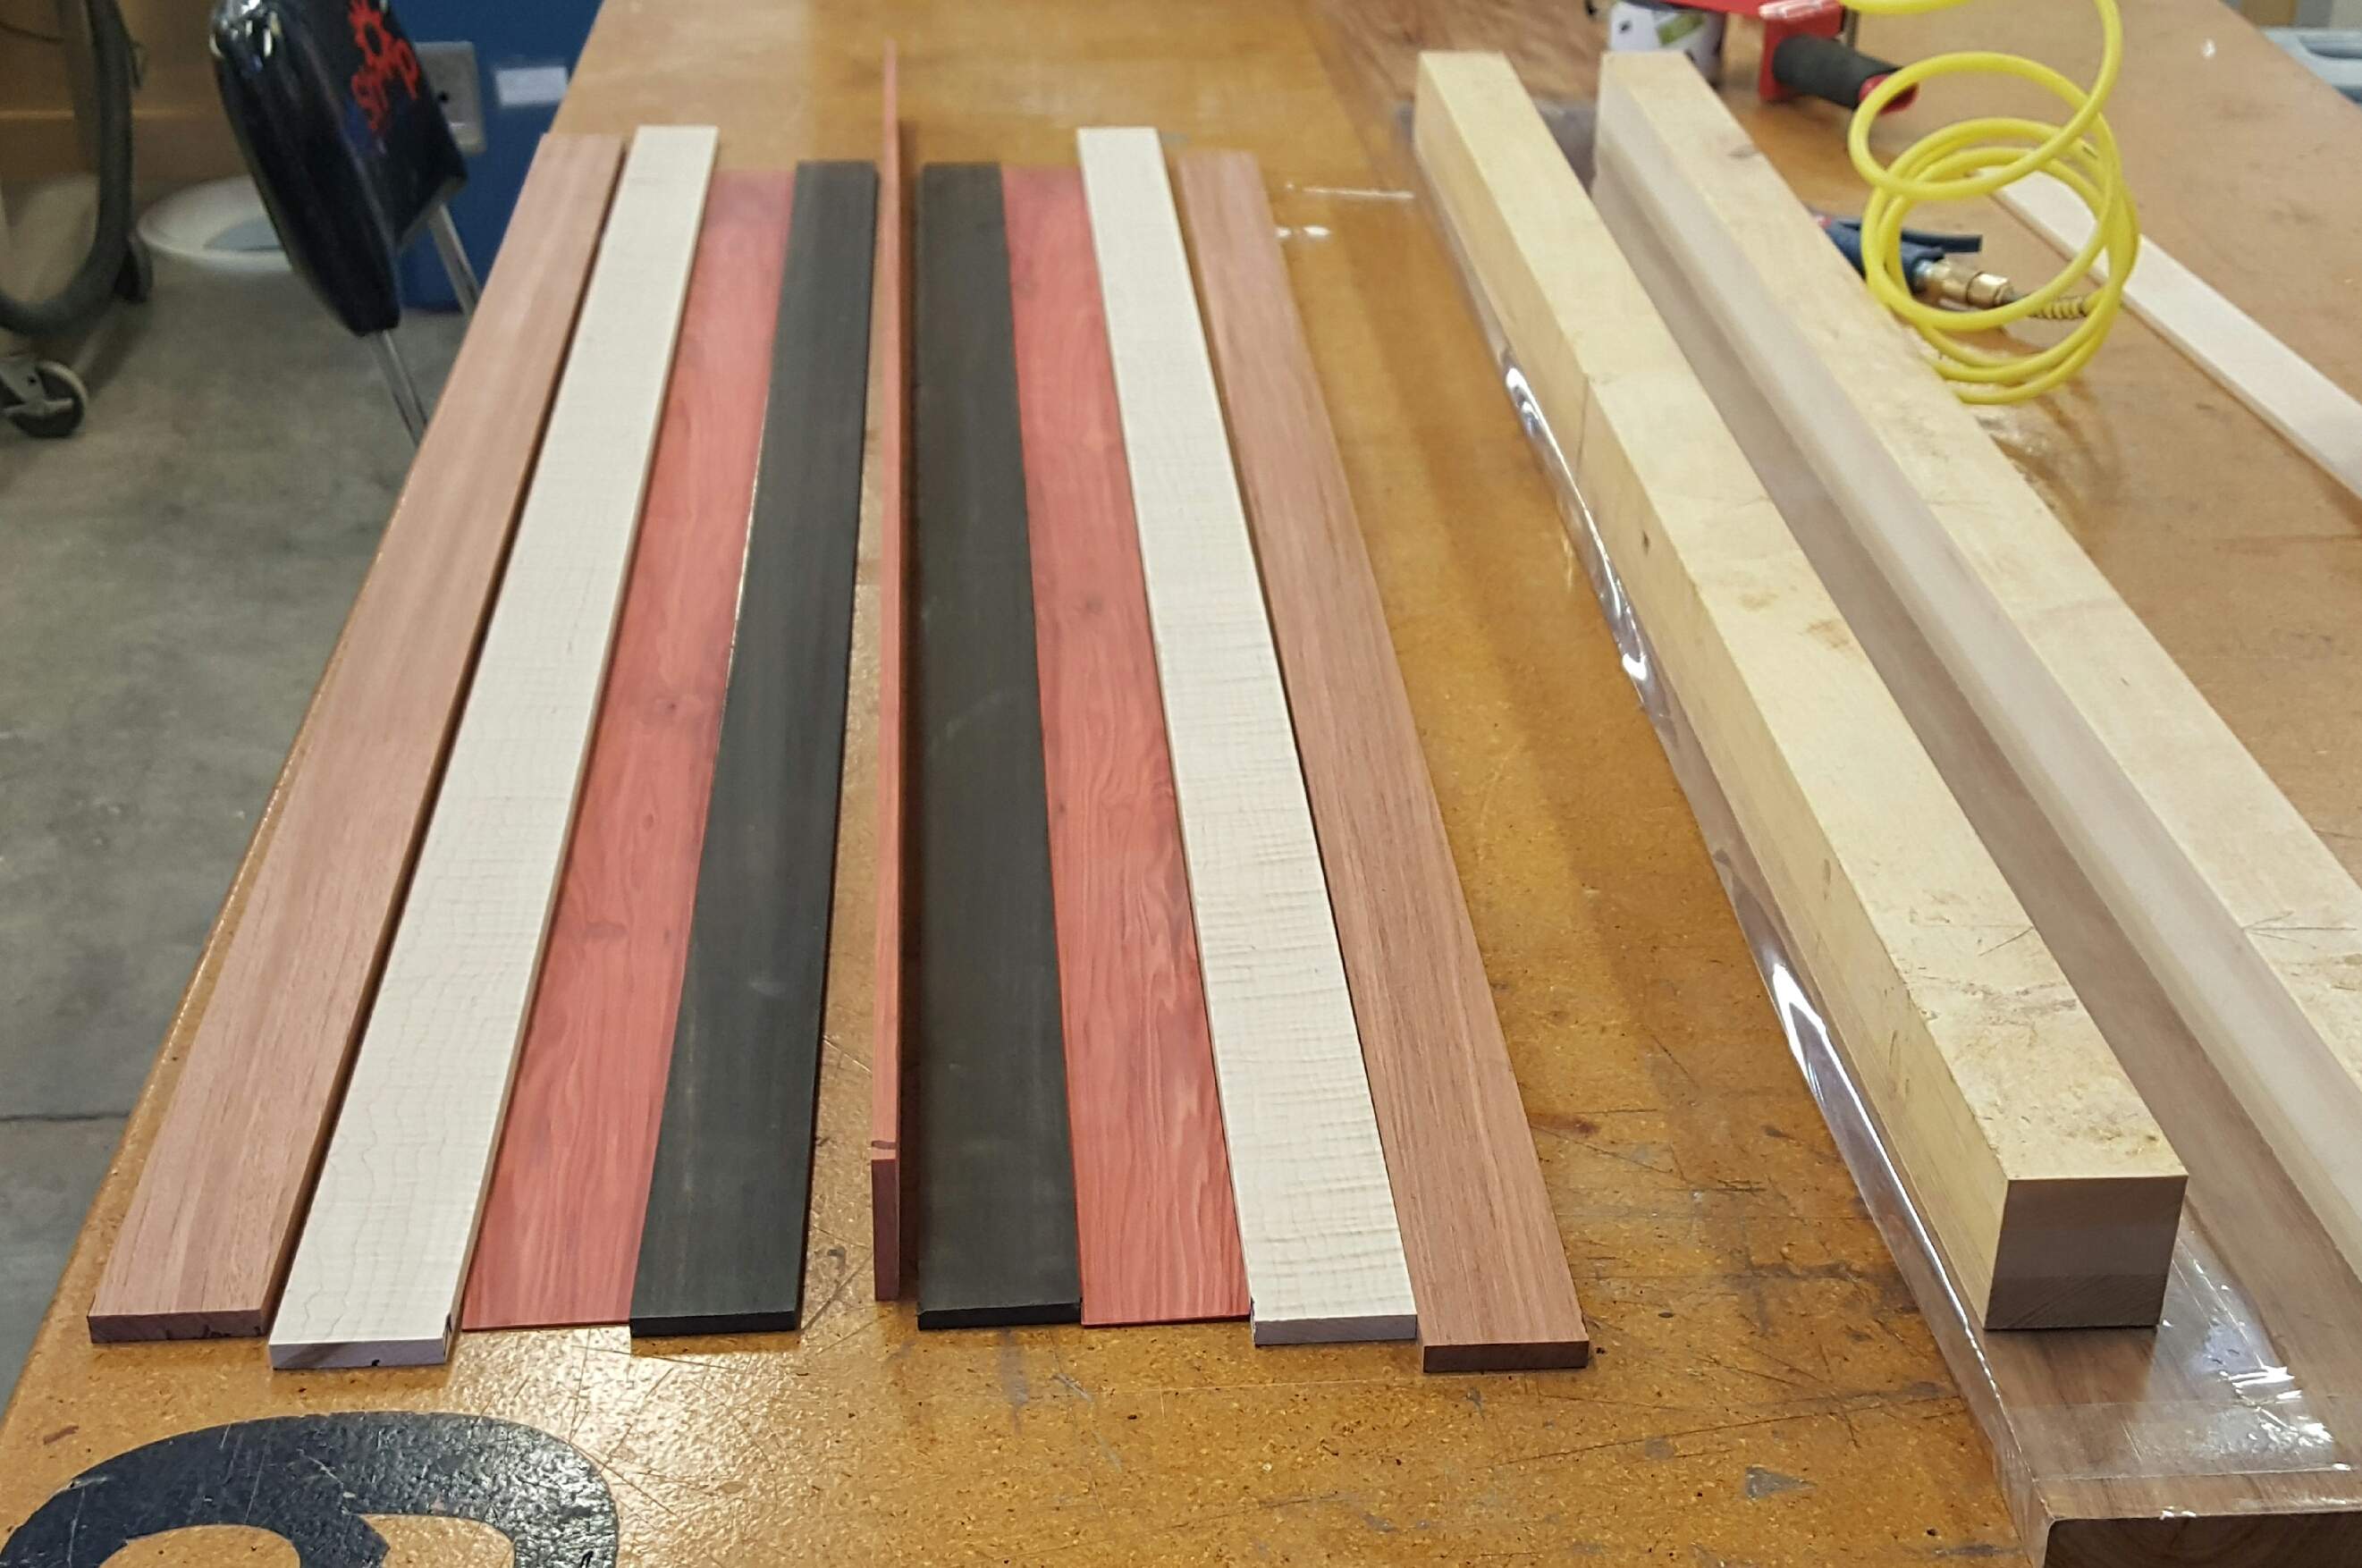
Center out: Redheart - Gaboon Ebony - Redheart pinstripes - Curly Maple - Bubinga.
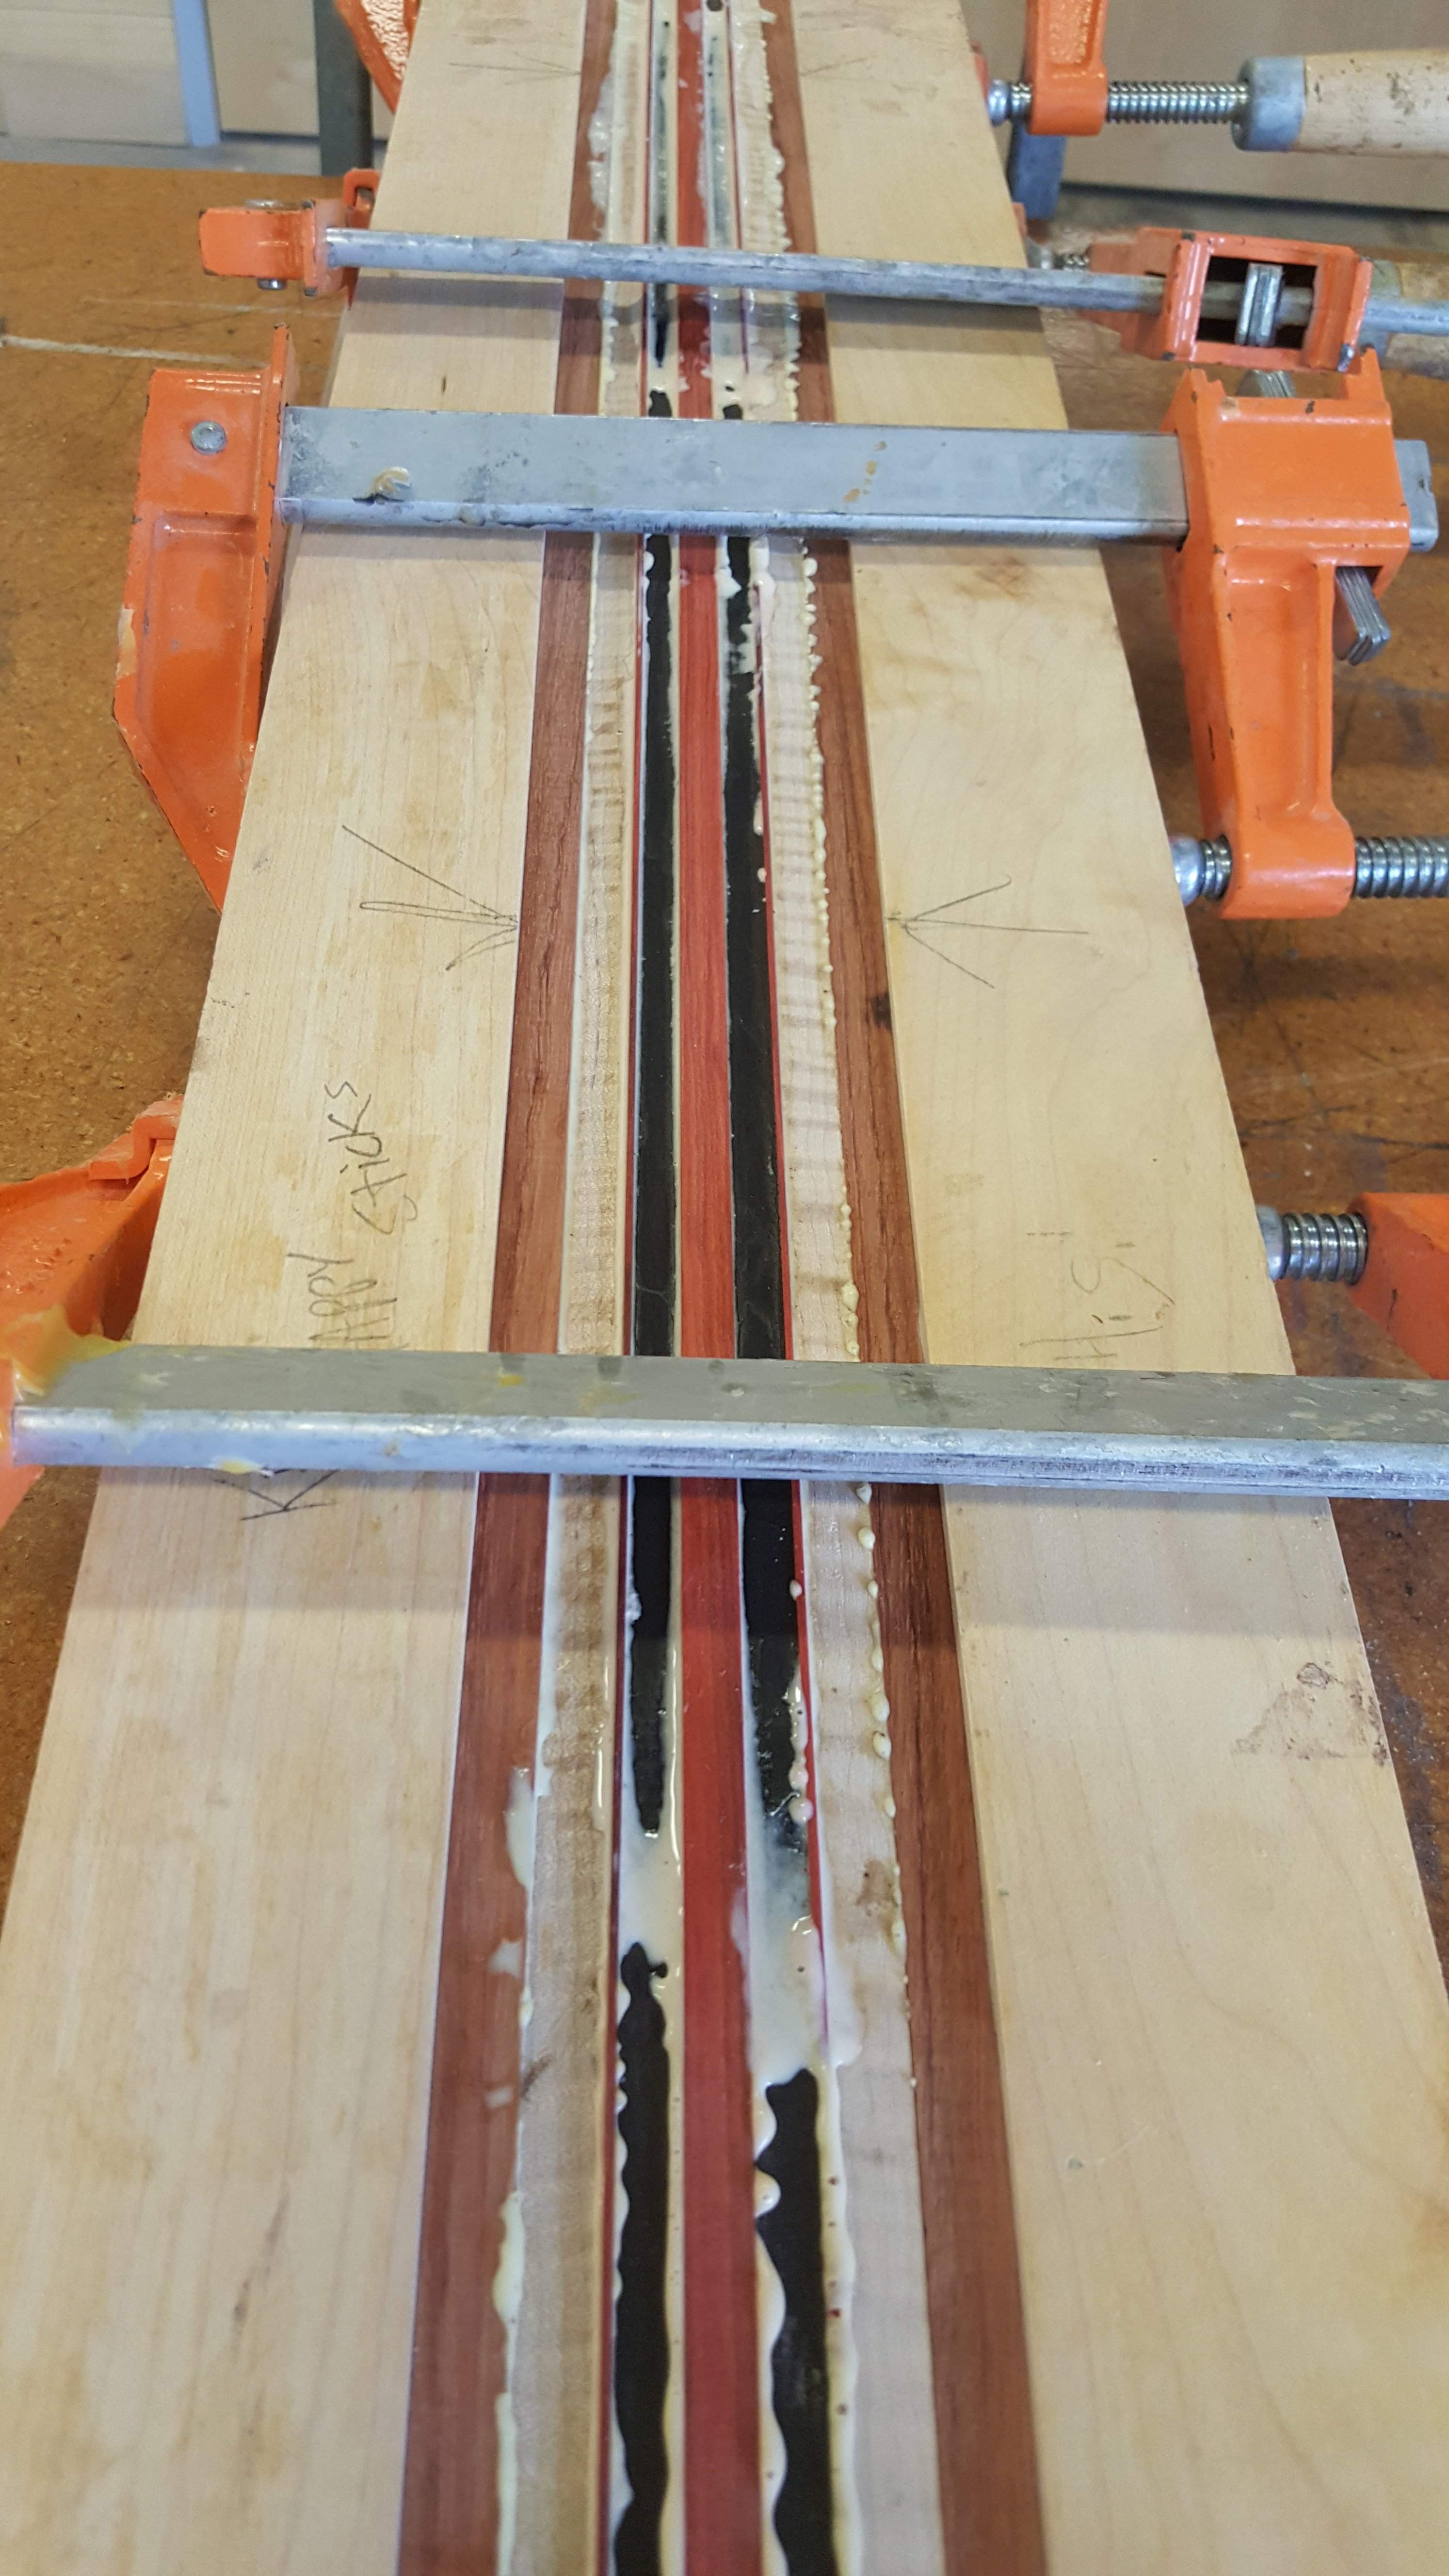
The body core is Bubinga ... and will have curly maple and ebony pinstripe layers on either side.

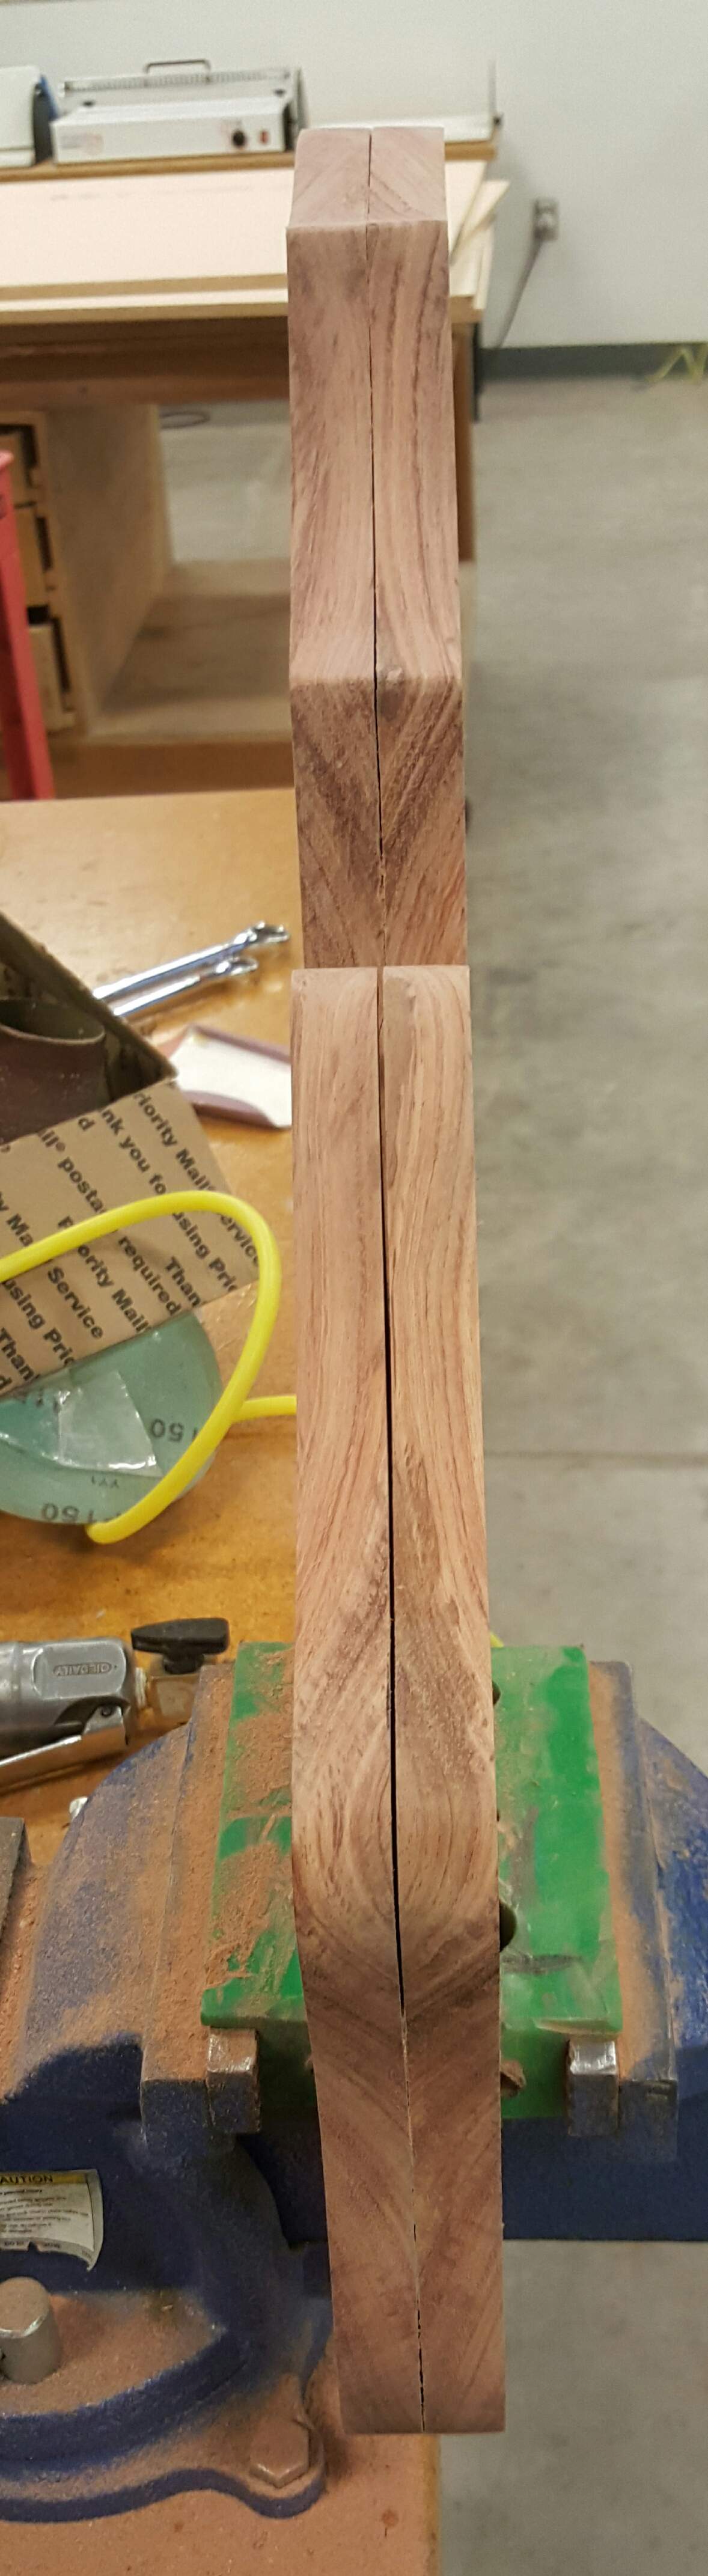
Core pieces w/opposing grain orientation.
Cut & sanded together with double sided tape for maximum symmetricality
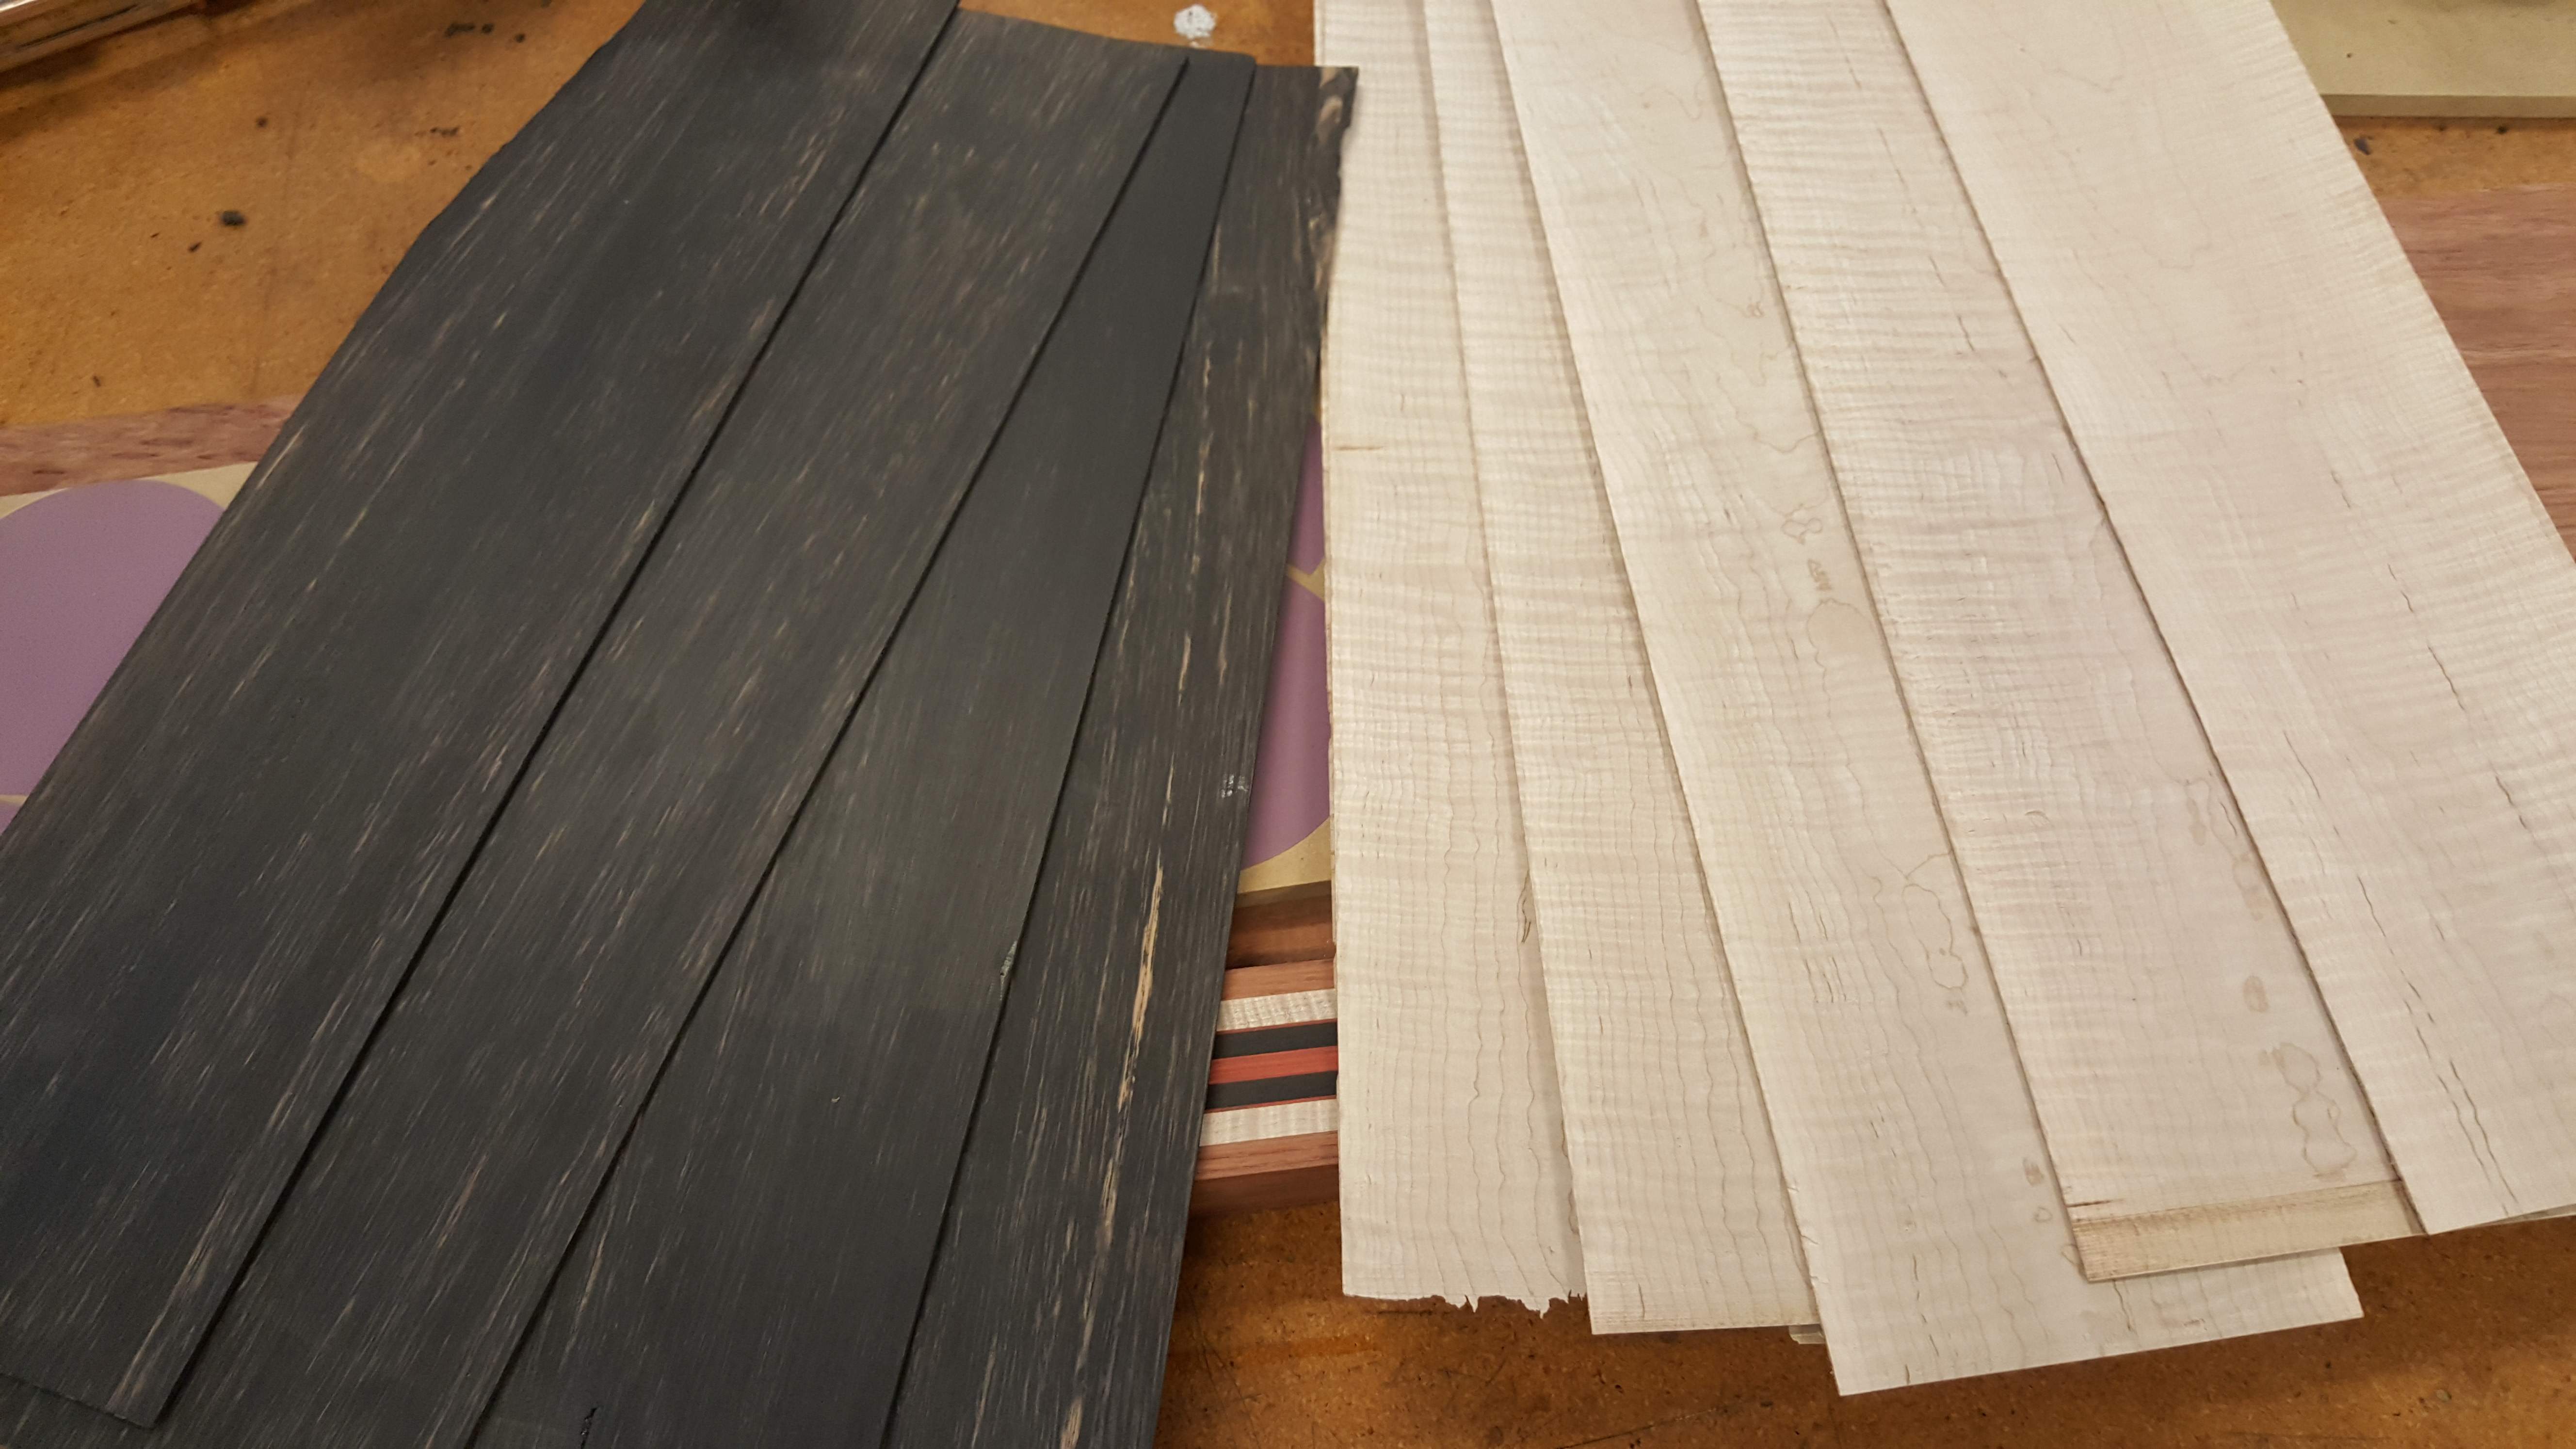
Ebony & curly maple resawn & planed thin for accent pinstripes.
Headstock template, modeled loosely after a BCR Widow peghead. (That's what he wanted)
Thats all I got for now...
Oh yeah, I forgot to list the challenges outside of my comfort zone.
• 8 string
• well...the body shape is gonna be a challenge for several of the steps involved.
• Piezo only... although it looks like I am not the only one attempting this...within this challenge alone.... so maybe we should compare notes?
•Acoustic style bridge...never done one...let alone one for an 8...and a piezo.
• The spider inlay....the only inlay work I've done has been my logo.
• The Red Mallee burl is providing its own special challenges.
Another challenge will be getting this build done by March... as it is actually currently in limbo having been placed on hold.
And I have TWO other commissioned builds going on right now as well.
Looking forward to getting back on this one

With the "challenging" theme of this build off... this one should fit in fairly well I'm thinking.
My wonderful repeat client from NY submitted this challenge to me a couple months ago, for his third commission.
He wanted me to put my style of building into a homage to Jerry Only's bass (Misfits) ...
"Devastator"
It will resemble said bass in body shape only. He knew I would not be into doing a "copy" & painting it black.... so he let me run with it.
I'm not a huge fan of this bass anyway...so I was happy to morph it into something I would enjoy.
After a few ideas from me and a couple of mutual brainstorming sessions...this is what we came up with. Given its sorta "spidery" visage ...we have dubbed it - ARACHNOPHILIA.
Specs:
9 lam. Neck-through 34" scale.
8 string (Dual course -octave tuned).
7 layer "hippie sandwich" body.
Grover 'Titan' tuners- gold...
BCR - 'Widow-ish" headstock, with 4 fund. tuners & ferrules for the octave strings . Then 4 small tuners on body behind bridge.
At first, the plan was to go with 2 sets of DiMarzio split P pickups... and a Badass bridge, modified for 8 string (ala- BCR). But once the top wood bookmatch was seen, it bacame obvious that it was far too ...glorious ...to obscure.
So I suggested that I could create a minimal footprint acoustic style bridge, with an under saddle piezo transducer as the sole pickup.
(Me & my big mouth)
I mean, ...I have no doubt I can pull off the bridge itself ....but making an 8 string sound good...piezo only? Will surely prove somewhat... challenging. I might attempt to embed a magnetic pup... somewhere, as well.The woods:
For the body I had a vision of this instrument being clad in a sort of "demon hide" of bloody flesh & sinew.
Behold this amazing slab of Red Mallee burl from Australia:
From which I have hewn these:
These dry pictures don't do these justice...and they will obviously darken up when finished. drool
So, yeah... covering/ cluttering any of this up... would amount to a mortal sin, in the eyes of the gods of luthiery.
The fretboard is going to be BirdsEye maple ....and will transition nicely, out of the burl sapwood figure in the center of the body.
* There will be an inlay of a somewhat tribal-ish spider at the twelfth fret area ...as big as I can fit on the fretboard. Where the 'x' is in the following picture.
Inlay material TBD ...(thinking about using ebony, redheart, & maybe a little abalone for sparkle)
These neck of the woods.....
Center out: Redheart - Gaboon Ebony - Redheart pinstripes - Curly Maple - Bubinga.
The body core is Bubinga ... and will have curly maple and ebony pinstripe layers on either side.
Core pieces w/opposing grain orientation.
Cut & sanded together with double sided tape for maximum symmetricality
Ebony & curly maple resawn & planed thin for accent pinstripes.
Headstock template, modeled loosely after a BCR Widow peghead. (That's what he wanted)
Thats all I got for now...
Oh yeah, I forgot to list the challenges outside of my comfort zone.
• 8 string
• well...the body shape is gonna be a challenge for several of the steps involved.
• Piezo only... although it looks like I am not the only one attempting this...within this challenge alone.... so maybe we should compare notes?
•Acoustic style bridge...never done one...let alone one for an 8...and a piezo.
• The spider inlay....the only inlay work I've done has been my logo.
• The Red Mallee burl is providing its own special challenges.
Another challenge will be getting this build done by March... as it is actually currently in limbo having been placed on hold.
And I have TWO other commissioned builds going on right now as well.
Looking forward to getting back on this one
Last edited: