• TalkBass has been independent since 1998. Add your voice.
    Create a free account to reply to discussions, view embedded media, and browse with fewer display ads.
    Join freeLog in
    Want zero display ads or expanded classifieds tools? Compare plans.

Leafenbacker

Thanks! Those look promising. Thanks for the link :)


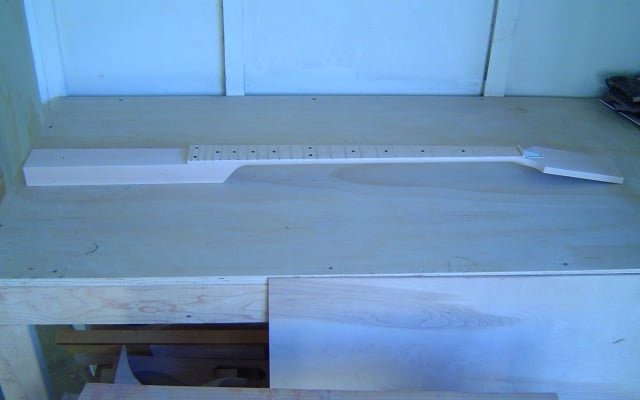
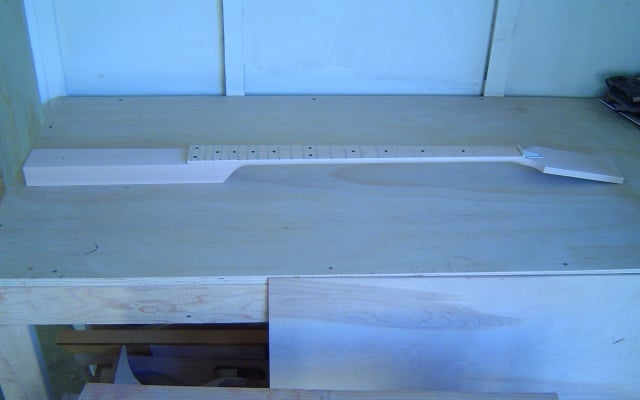
And in other news, the neck arrived today.


2u7m004.jpg


24 frets? Very Interesting! More pics please :)
 
Here's a link you might be interested in;

http://www.inlaystickers.com/servlet/the-126/Tree-Of-Life-fdsh-For-BASS/Detail


No affiliation, but I have ordered from them and the service is excellent.

Great looking build BTW.

FWIW, I have ordered and installed a set of fret marker decals from this company. They've been on my 8 string bass for quite a while now. (I can provide pics if you like)

I found the fit and finish to be excellent. The installation was a bit tricky as some of the pieces are quite small and trying to get them exactly centered can be a challenge, but quite doable for someone like you who is building a whole bass :)

Make sure that the neck is completely clean of dirt and oil you'll have a problem with them adhering (don't ask how I know :hiding:)

They are quite durable and have not yet torn or moved. However, just last week I noticed a couple of them looked like they were peeling off. It ended up being just a top layer of clear film. Now, I'm not sure if that film was supposed to come off in the first place, or if this is the beginning of the end. I'll let you know, if you want.

The price was reasonable and the shipping was VERY fast (at least it was coming to Greece).

I have no affiliation whatsoever with the company.
 
FWIW, I have ordered and installed a set of fret marker decals from this company. They've been on my 8 string bass for quite a while now. (I can provide pics if you like)

I found the fit and finish to be excellent. The installation was a bit tricky as some of the pieces are quite small and trying to get them exactly centered can be a challenge, but quite doable for someone like you who is building a whole bass :)

Make sure that the neck is completely clean of dirt and oil you'll have a problem with them adhering (don't ask how I know :hiding:)

They are quite durable and have not yet torn or moved. However, just last week I noticed a couple of them looked like they were peeling off. It ended up being just a top layer of clear film. Now, I'm not sure if that film was supposed to come off in the first place, or if this is the beginning of the end. I'll let you know, if you want.

The price was reasonable and the shipping was VERY fast (at least it was coming to Greece).

I have no affiliation whatsoever with the company.

This is giving me ideas - my Supernova neck is being made now and I specified no fretboard markers (I do like the clean look) but after seeing this pic on another thread, I may consider "ovular" markers… So, these decals are very thin? I'll be having the maple finished/clear-coated so if they were thin enough it would be just like a hs decal.

1020352.jpg
 
This is giving me ideas - my Supernova neck is being made now and I specified no fretboard markers (I do like the clean look) but after seeing this pic on another thread, I may consider "ovular" markers… So, these decals are very thin? I'll be having the maple finished/clear-coated so if they were thin enough it would be just like a hs decal.

Very thin is a bit relative :)

I'd say they're a little thicker than a piece of writing paper. They are some sort of plastic or vinyl material.
 
Very thin is a bit relative :)

I'd say they're a little thicker than a piece of writing paper. They are some sort of plastic or vinyl material.

You just answered my question - not a decal but a vinyl appliqué

Thanks for the idea - I know someone who can make decals of "ovular dots" (a Tubular Bells cover band) :rolleyes::bassist::D
 
The decals look very cool, though I'm not sure the tree of life will work. I haven't come across any kind of leaf decal that comes close to the oak leaves. I've sent an email to Ozark Vinyl Works who makes custom decals, for a price quote for oak leaf decals. I attached a picture of the body. We'll see what they come up with.

Thanks again for the input, the decals are a great idea.
 
Ok, a bit more progress from last night and this morning. The crock pot and wax arrived from Amazon.

1677b82.jpg


So I set it up, filled some water in the crock pot, and placed a bar of wax in a glass, in the water, and set it to high. After about an hour and a half, the wax finally completely melted, and I dipped in the pickup.

orjzev.jpg


I let it soak in there for a few minutes, pulled it out, let it dry. and dipped it in again.

2l8hna.jpg


Seems to work. The impedance went up to about 11k. I'm not sure what that's all about. Knowing now that I can actually wind functional pickups, I measured the string spacing at the projected pickup locations, and made three sets of bobbin ends. I'll glue in the magnets and wind them at a later time. The jig was already set up on the drill press so I figured I'd get this out of the way.

174sok.jpg


Next I made a template for the Kahler tremolo bridge.

e6u5g4.jpg


Then it was on to working on the neck. The Kahler bridge is pretty thick from top surface to bottom. Apparently, it's not unusual to have to sink the bridge into the face of the bass in order for the action to be right. So after some measuring, I lowered the surface of the neck through portion that goes through the body to just over a half inch below the fret board at the edges, and a little more in the middle, due to the radius. I used the router as a thicknesser.

o7jar9.jpg


Again, multiple passes routing off a little at a time.

122i4qx.jpg


After making lots of saw dust, it's done.

5o5wjt.jpg


I also trimmed down the thickness of the mahogany for the head stock wings, and cut the headstock to size. I was originally going to use the table saw for that, but wasn't feeling it. I couldn't figure out a way to make sure it would cut correctly, so I just used the jig saw. After some sanding, I glued up the headstock wings. The traditional sea of clamps.

zvwivm.jpg


I'm not sure how much more I'll do today. I may put together the bobbins, and do some winding, or just prepare for band practice tomorrow. I got up pretty early this morning, so I may actually take a nap :)
 
No significant progress, other than taking off the clamps.

351s6yv.jpg


I've got some sanding and shaping in my future. I've set aside some time for this Saturday. I also ordered the last 2 pickup covers from Pick of the Ricks. They shipped them out within an hour of my order. Very impressive.

I also ordered a sheet of ABS plastic for the pickup covers, and a piece of aluminum for the pickup bottoms from Amazon. Those should arrive next week. I should have some time on Saturday to do some pickup assembly and winding.

Thanks again for the interest and comments :)
 
This is a real interesting build. It's going to be a beautiful instrument.

Thanks for posting this... Nice work.

Moonshine :bassist:

That is high praise, thank you :)

I managed to get a little more work done on this today. First, I checked the spacing and positioning of the tuners compared to the nut. I originally took those measurements from my Reformer, which employs the same neck. Apparently, there is some variation with the Carvin necks, as this one is slightly different, so I made some adjustments in Illustrator. Printed it out, and double-stick taped it to the headstock.

33or5a9.jpg


There I started cutting away with the jig saw.

30jpwyc.jpg


I got most of it cut out.

20uveih.jpg


Then I went at it with my homemade spindle sander/drill press. I really need to get a real spindle sander one of these days.

4i0t2r.jpg


Most of it rough shaped.

2kngqw.jpg


I left a bit of extra mahogany on the back, so had to sand it flat with the maple. Smoothed it down with 60 grit for now.

23j5ssw.jpg


Then I drilled out the holes for the tuning machines.

2rqfznr.jpg


I'm not sure what my issue is, but I can never find the exact size drill bit for the tuner ferrules. Same issue happened on the Rerformer build. I used a 1/2" bit, which left a hole just slightly undersized. I enlarged them using a piece of sandpaper wrapped around a breaker bar.

Here's the front.

2ccuro6.jpg


And back.

2rmb8gj.jpg


I still have to correct the shape at the bottom of the neck, the part that goes through the body, so that the sides are parallel. I wanted to have some of the frets below where the body meets the neck, to keep the length of the bass under control, but I'm not sure that's going to happen. It'll also interfere with the neck pickup placement. Next time, I'm building my own neck.

If I find more time today, I'll work on the remaining pickups.

So, all of the parts have been ordered, most of them received, with the exception of the finish - most likely oil. With my credit card pretty much paid down, I saw that the Rickenbacker 4003W was coming into stock at Musician's Friend on Friday. If this model is a color of the year, the value of these will jump. I've already seen one on ebay for close to 4 grand, not that they'll get that. Yet.

In any event, I ordered one. It should arrive in about 2 weeks.

I had to promise my husband that this would be the last bass I buy. Of course, I'm free to build as many more as I'm able :)