
Enjoy the benefits of a premium membership!
Upgrade Account
-
TalkBass has been independent since 1998. Add your voice.
Create a free account to reply to discussions, view embedded media, and browse with fewer display ads.
Join free Log in
Want zero display ads or expanded classifieds tools? Compare plans.
You are using an out of date browser. It may not display this or other websites correctly.
You should upgrade or use an alternative browser.
You should upgrade or use an alternative browser.
Multi-Build
- Thread starter Jason_A
- Start date
More options
Who Replied?
Looking good, looking good, looking good, looking good, looking good, looking good..( note to self...: is that eight?..) nope ....looking good and looking good.... awesome job!

You'll have to excuse my little tool gloat here... Picked up my new drill press after work tonight. Took a few minutes to get it assembled, but was able to fire it up and drill a few holes. It runs so much smoother and quieter than my old drill press. And wonder of wonders, it drills round holes!
I got this drill press from the same liquidator that I got the drum sander from. It's another Palmgren, and it seems to be very nicely made, with some thoughtful touches - nice sturdy cast iron handle, the crank for raising/lowering the table is offset so it won't smack into an accessory table (that was an annoyance on my old DP). It's also built considerably heavier than my old one, which I'm sure plays into why operates smoother.
I started building a table for the DP. I'm going to pick up some T-track tomorrow to install in the table so I can use my router fence with it.
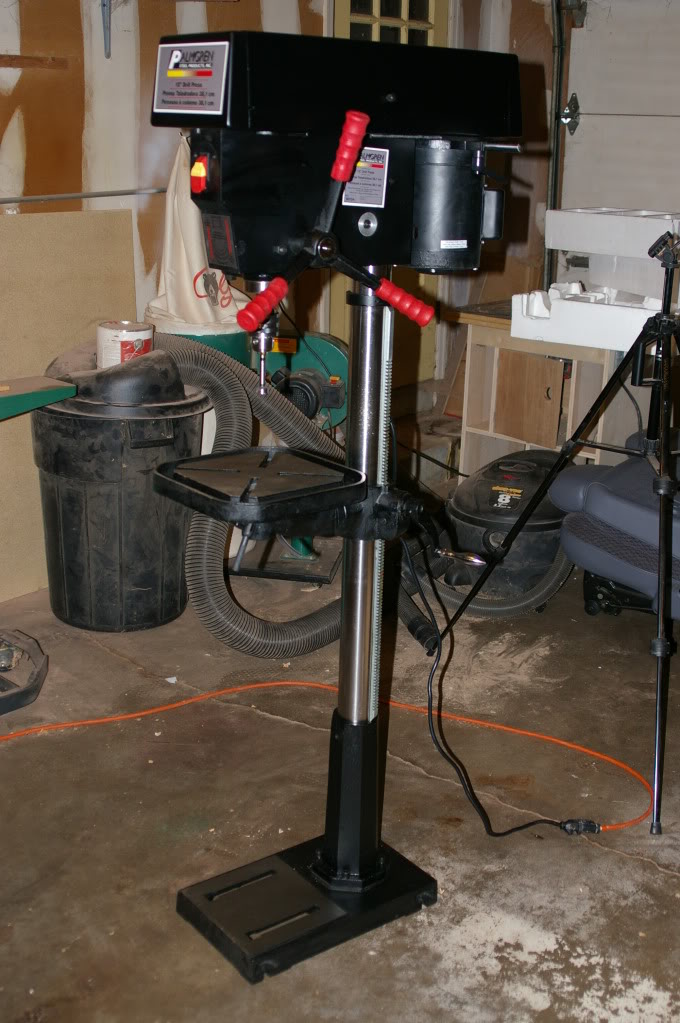
I got this drill press from the same liquidator that I got the drum sander from. It's another Palmgren, and it seems to be very nicely made, with some thoughtful touches - nice sturdy cast iron handle, the crank for raising/lowering the table is offset so it won't smack into an accessory table (that was an annoyance on my old DP). It's also built considerably heavier than my old one, which I'm sure plays into why operates smoother.
I started building a table for the DP. I'm going to pick up some T-track tomorrow to install in the table so I can use my router fence with it.
That's a gorgeous drill press. Makes me really want to upgrade from the Ryobi 10" I just bought...... 

I have a little more progress to post about... mostly just pictures, though.
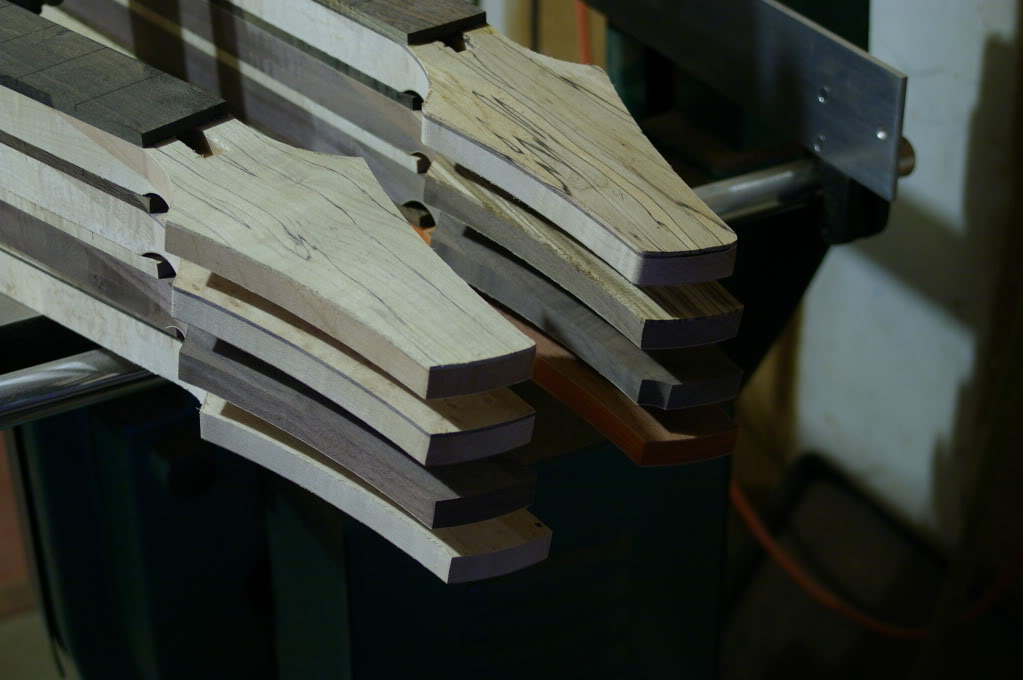
I edge sanded the headstocks, so they're all good to go now. Tried a couple slight variations on a few of them, just for something different.
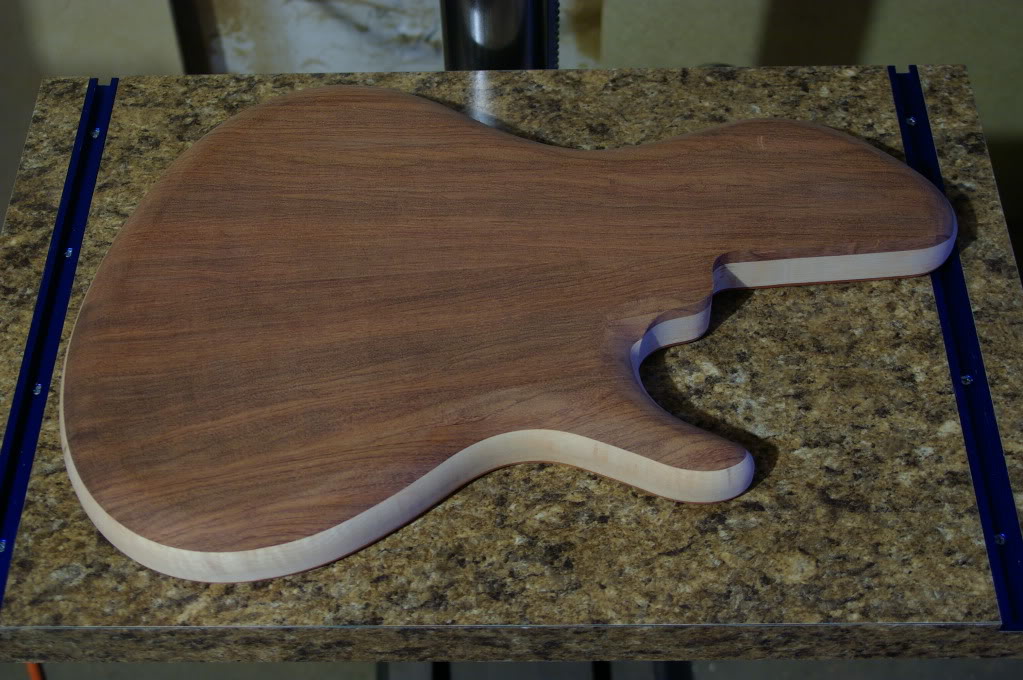
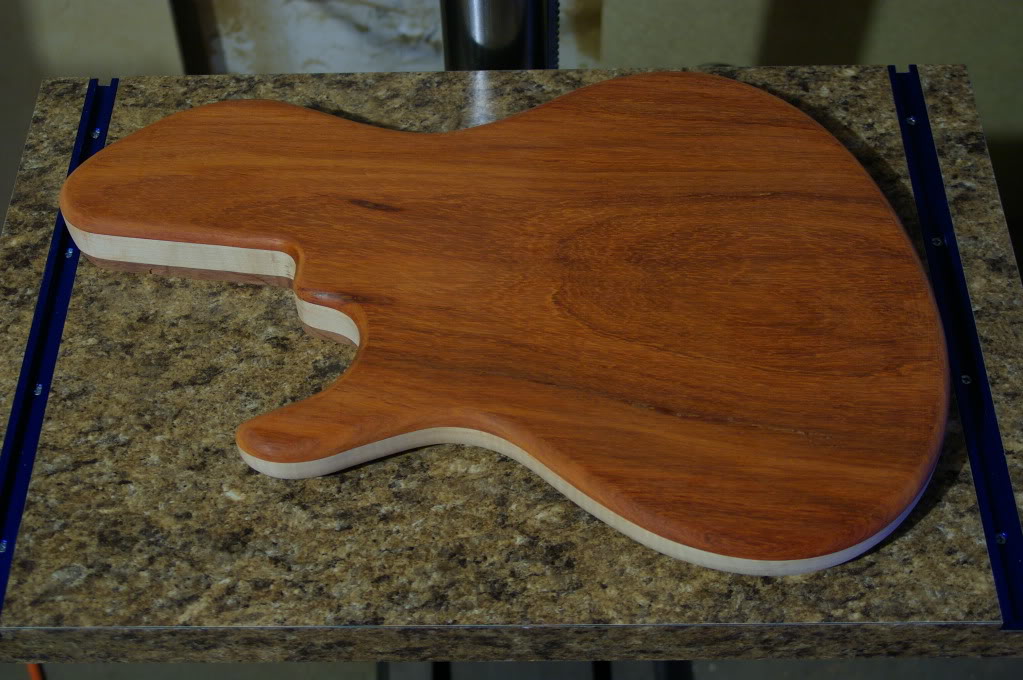
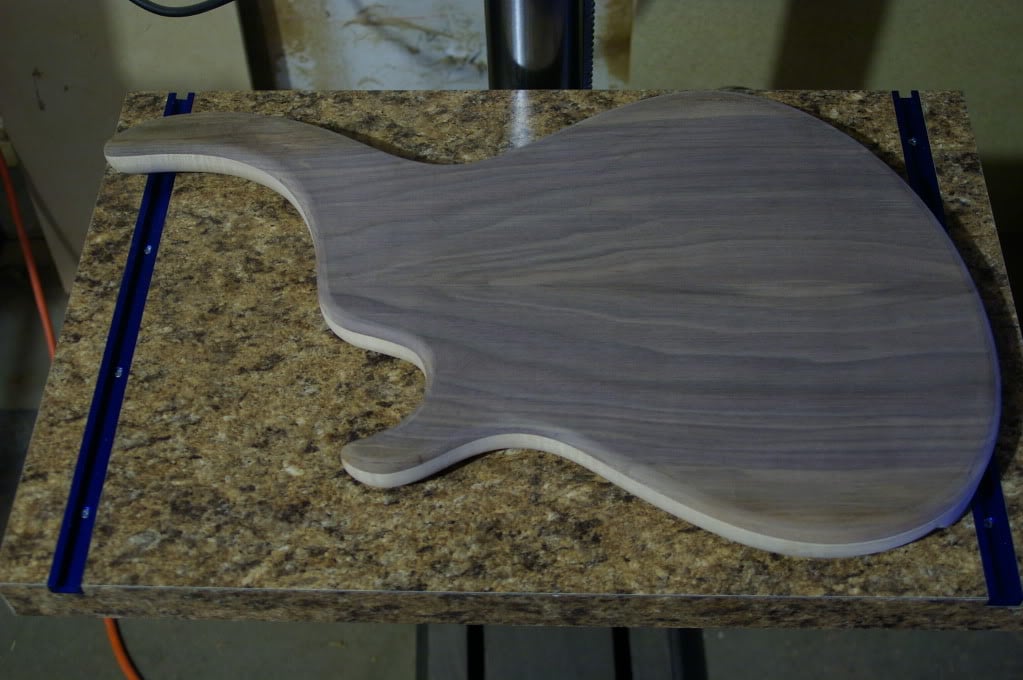
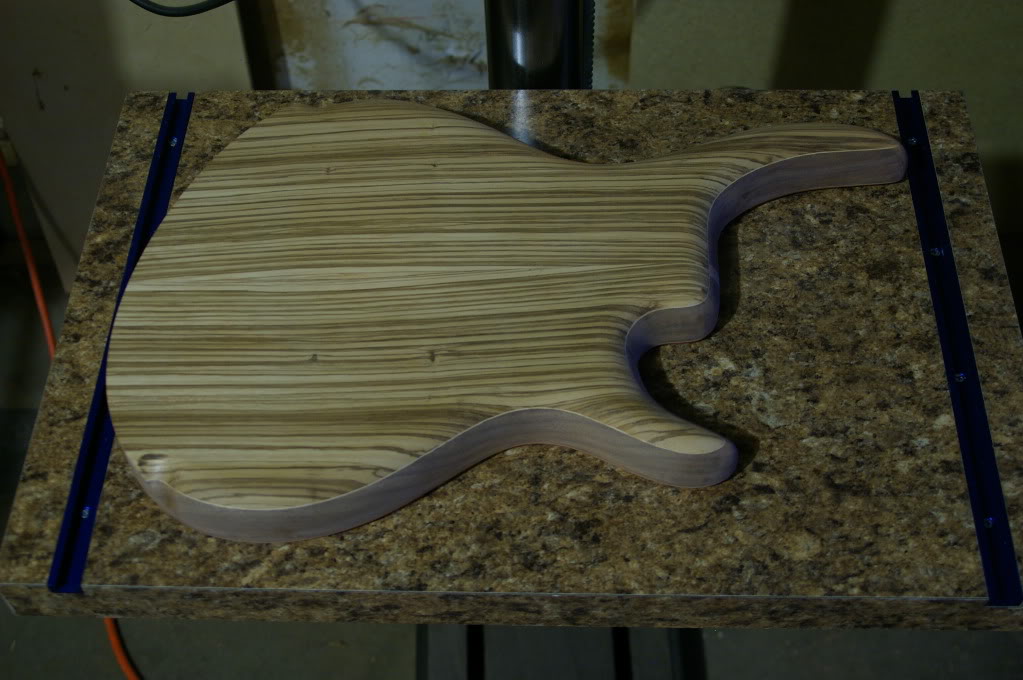
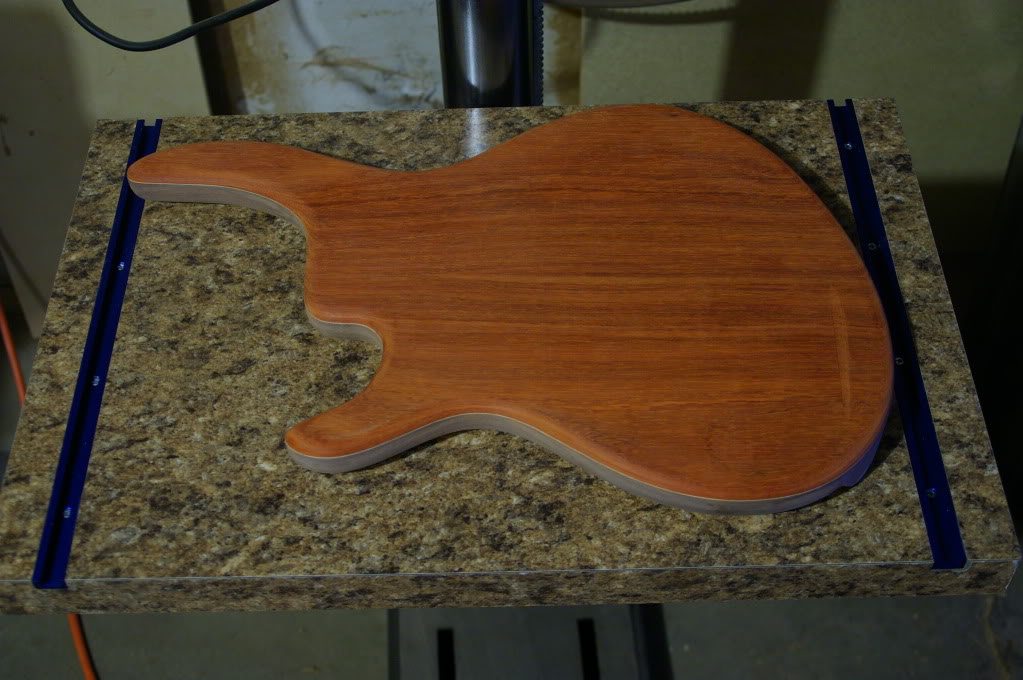
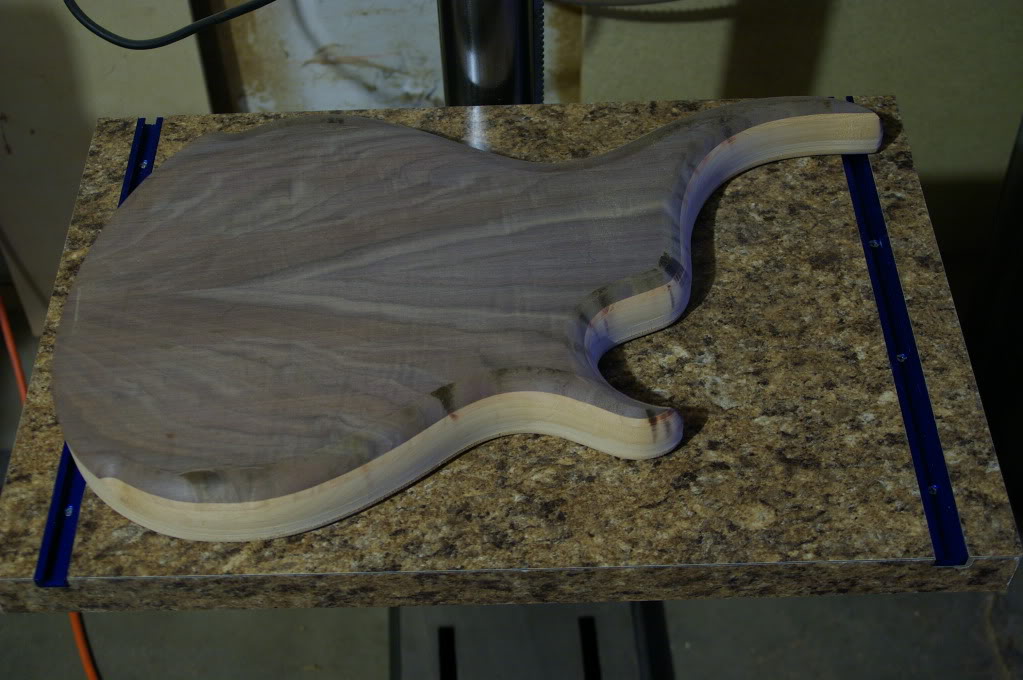
I also got all of the roundovers routed on the bodies. The fronts all got a 1" roundover, and I think I put a 3/8" on the back. You'll probably notice that the roundover doesn't go all the way around the body. I'm going to try to "taper" the roundover at the tail end down to almost no radius so I can get the bridge as far to the end as I possibly can. So all of that will be done by hand with a rasp. Of course, there are still all of the contours to carve as well. I started sanding out some of the bodies to get rid of some of the burn marks from the router bits. I'll probably put that on hold for a little bit as I want to move on to cutting the neck pockets before I get too much farther.
#1
#2

#3
#4


#5


#6
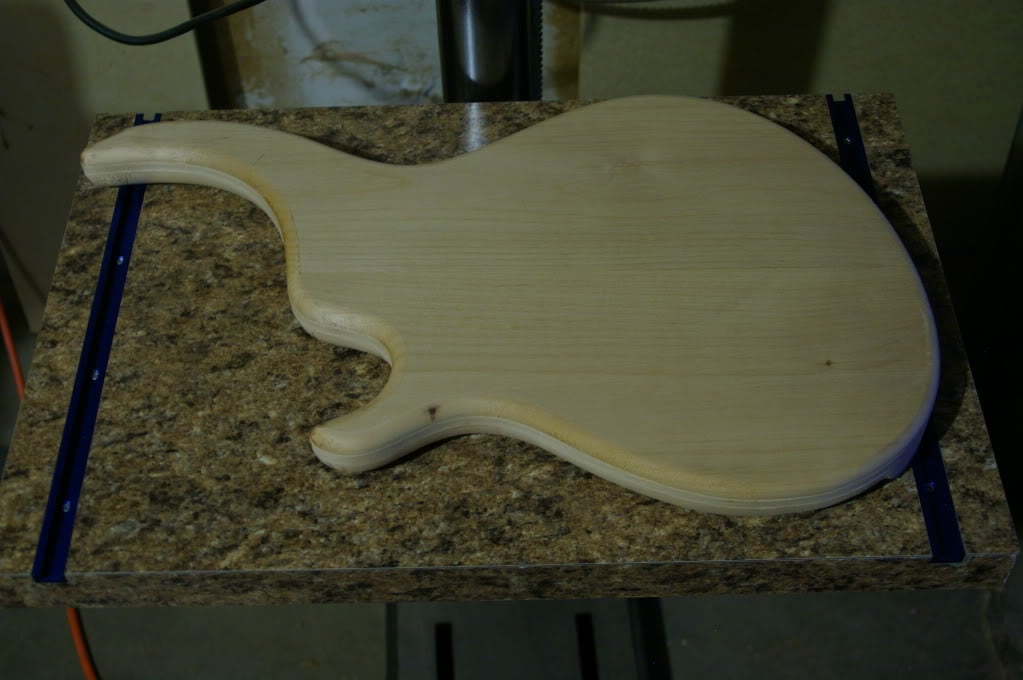
#7
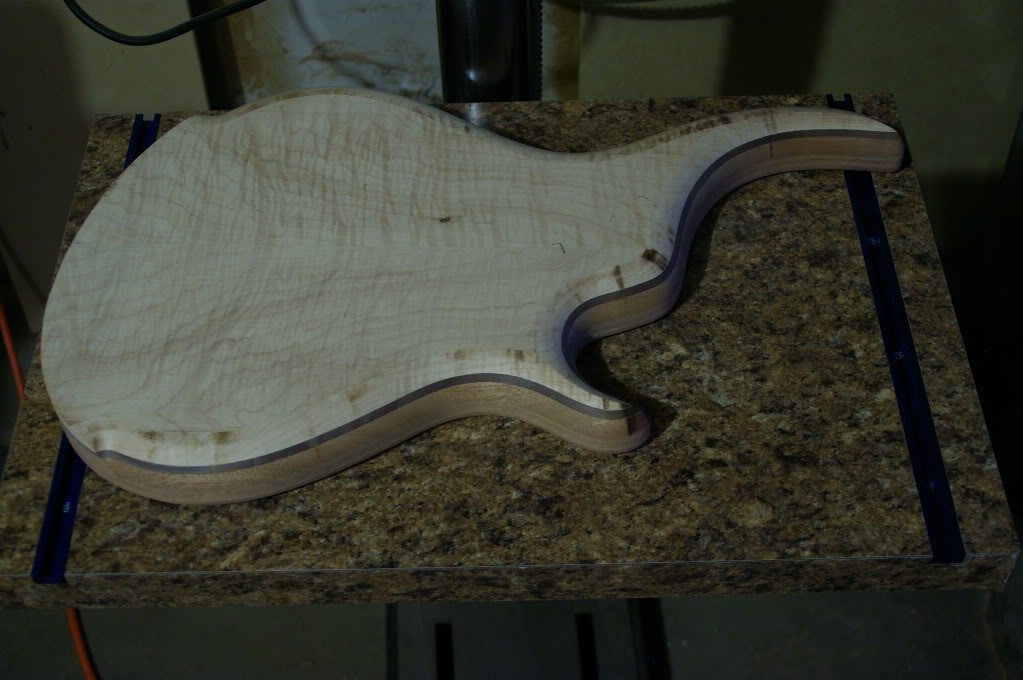

#8
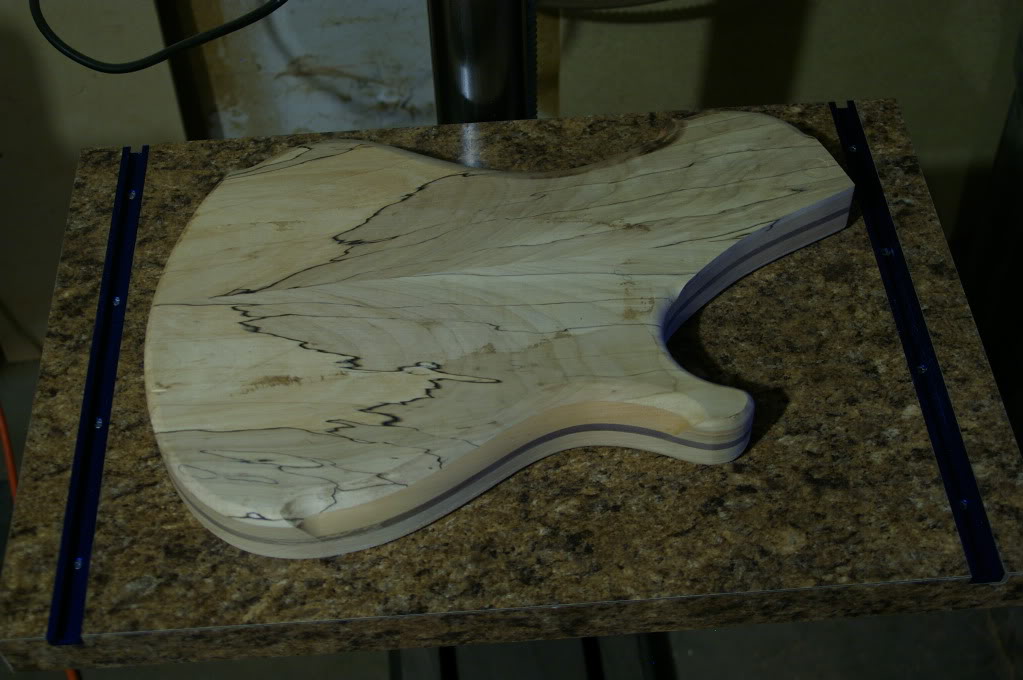
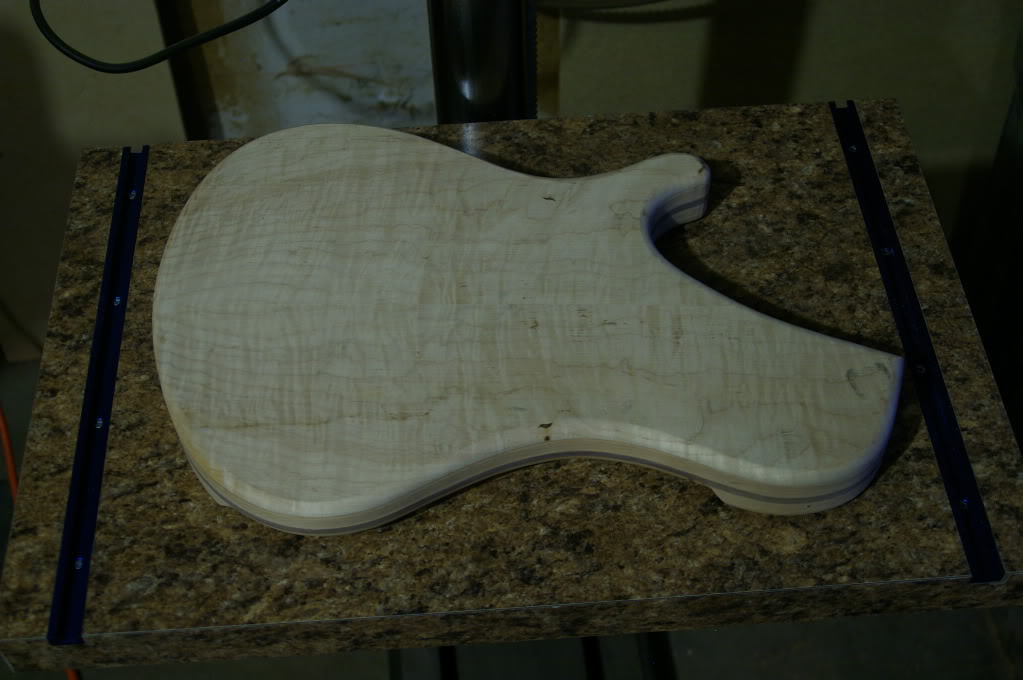
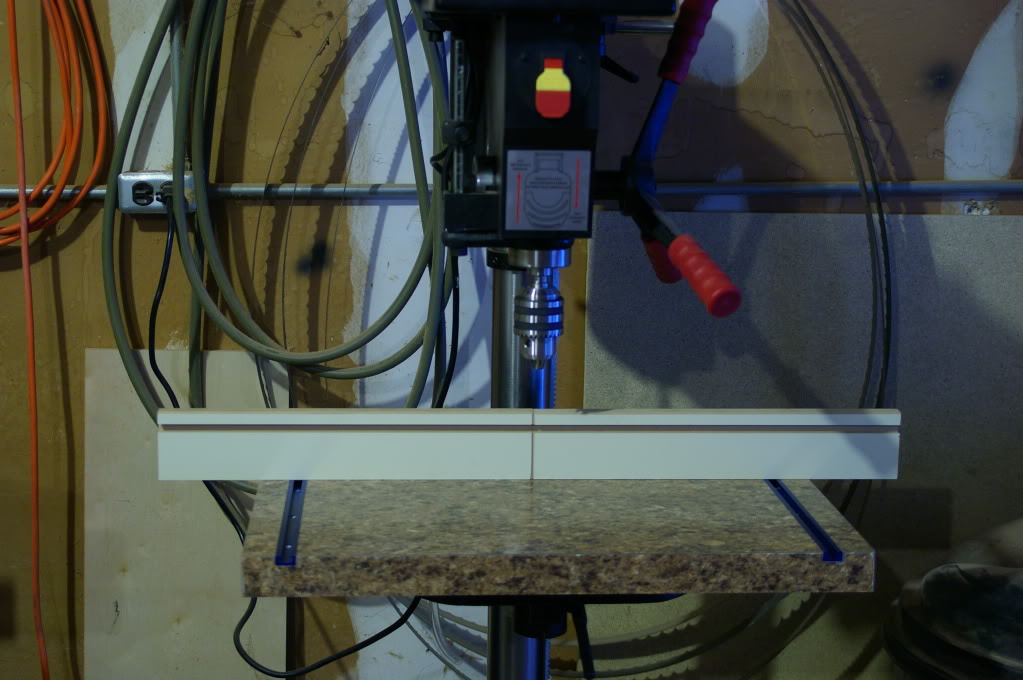
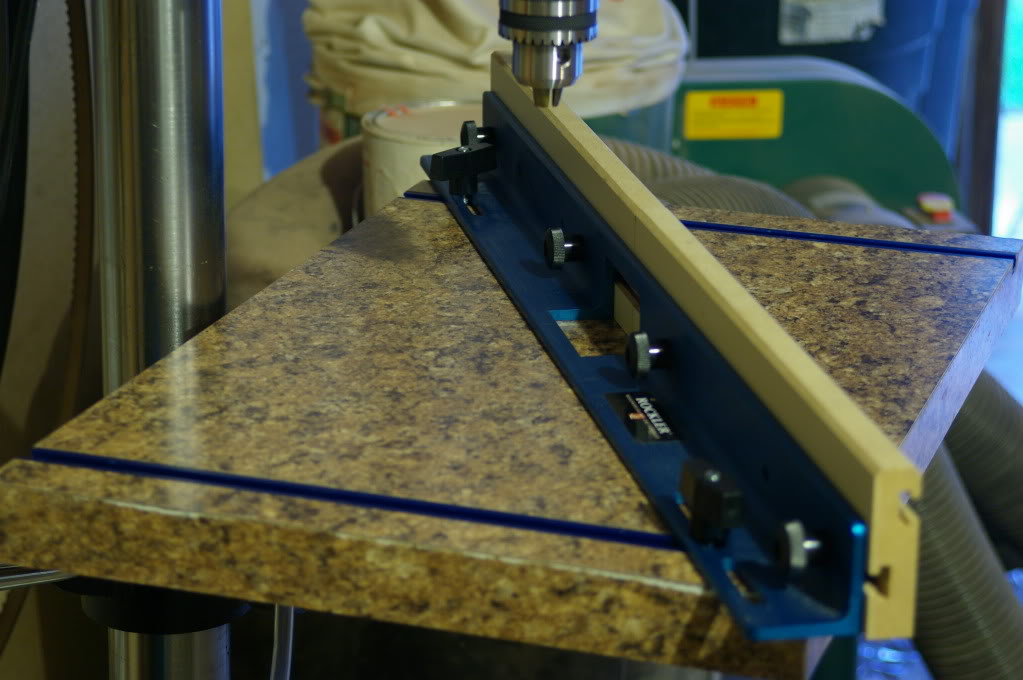
Before I can route the neck pockets, I need to rough out the recesses with a Forsner bity. In preparation for that, I spent some time today building a drill press table. It's nothing special - just MDF laminated with some of the finest pseudo-marble Formica I could find Besides the extra swankiness, I have a couple of T-tracks that the fence attaches with, and that can hold other accessories. The nice thing is that I am sharing the fence with my router table.
I edge sanded the headstocks, so they're all good to go now. Tried a couple slight variations on a few of them, just for something different.
I also got all of the roundovers routed on the bodies. The fronts all got a 1" roundover, and I think I put a 3/8" on the back. You'll probably notice that the roundover doesn't go all the way around the body. I'm going to try to "taper" the roundover at the tail end down to almost no radius so I can get the bridge as far to the end as I possibly can. So all of that will be done by hand with a rasp. Of course, there are still all of the contours to carve as well. I started sanding out some of the bodies to get rid of some of the burn marks from the router bits. I'll probably put that on hold for a little bit as I want to move on to cutting the neck pockets before I get too much farther.
#1
#2
#3
#4
#5
#6
#7
#8
Before I can route the neck pockets, I need to rough out the recesses with a Forsner bity. In preparation for that, I spent some time today building a drill press table. It's nothing special - just MDF laminated with some of the finest pseudo-marble Formica I could find
Besides the extra swankiness, I have a couple of T-tracks that the fence attaches with, and that can hold other accessories. The nice thing is that I am sharing the fence with my router table.
These are really looking sharp! I like what you're doing with the roundover. And conrats on the drill press. I'd love to have one some day. Keep crankin' out them basses!

Coming along beautifully.
I like the roundover, too. Reminds me of some of the Ric guitars - except I think your putting a small roundover on the backside instead of binding looks better.
Do you find that the large roundover cramps your control cavity layouts?
How will it work into the backside body contouring?
I like the roundover, too. Reminds me of some of the Ric guitars - except I think your putting a small roundover on the backside instead of binding looks better.
Do you find that the large roundover cramps your control cavity layouts?
How will it work into the backside body contouring?
#7 and 8 are gorgeous! My mind has trouble imagining the sheer beauty of all 8 finished in one room ... GAS attack
Awesome stuff..very clean..no fancy tops, just beautiful ... ur helping me understand I don't need a fancy top...to have a beautiful ....clean...bass..thank you for posting
Coming along beautifully.
I like the roundover, too. Reminds me of some of the Ric guitars - except I think your putting a small roundover on the backside instead of binding looks better.
Do you find that the large roundover cramps your control cavity layouts?
How will it work into the backside body contouring?
This is pretty similar to what I did on my first couple of builds in terms of the roundovers. The blue one in my avatar pic has the same 1" radius on the front, although I think I did a slightly larger 1/2" radius on the back as opposed to the 3/8" I used on these. I really like the larger radius on the front for a couple of reasons. First, ergonomicaly I like it because there are no sharp edges, so it's quite comfortable. You'd also be surprised at how much material gets removed, so it shaves a few ounces. The other thing I like is that it really helps show off the laminated top, and the contrast between the woods. I think it also makes the body appear smaller - sort of an optical illusion.
I haven't had any difficulty with the control layouts. The first bass I did had a 3-band active pre (Bart w/ 4 knob + mini-switch layout) and while it was a little tight in the control cavity, everything fit fine, the controls weren't cramped, etc. No real issues with the body contouring either - you just need to blend the radiused edges into the contours.
Awesome stuff..very clean..no fancy tops, just beautiful ... ur helping me understand I don't need a fancy top...to have a beautiful ....clean...bass..thank you for posting
I wish I could say I didn't use "fancy" tops on these because I'm sophisticated and refined... but the reality is - they're expensive. I could have easily spent as much on one top set as I did on all of the wood for all 8 basses. I think there are some "interesting" woods in here... just not quite as over the top as some of the quilts or bulrs out there. The one "fancy" wood that I really wanted to use was figured redwood. It's surprisingly inexpensive (for as amazing as it looks). I just got impatient and bought woods locally, rather than buying something online. Maybe next time

I wish I could say I didn't use "fancy" tops on these because I'm sophisticated and refined... but the reality is - they're expensive. I could have easily spent as much on one top set as I did on all of the wood for all 8 basses. I think there are some "interesting" woods in here... just not quite as over the top as some of the quilts or bulrs out there. The one "fancy" wood that I really wanted to use was figured redwood. It's surprisingly inexpensive (for as amazing as it looks). I just got impatient and bought woods locally, rather than buying something online. Maybe next time
I think you missed my point....but nevertheless, nice build..

I think you missed my point....but nevertheless, nice build..
I got your point, and I agree that you don't need fancy tops to have a great (looking) bass. I was just saying that I don't have the fancy tops because I'm cheap, not because I have a philosophical objection to them



Last night I routed all of the neck pockets. Not a whole lot to talk about - I first plowed out most of the material with a 7/8" Forstner bit at the drill press, and then attached the neck pocket template to the body with double-sided carpet tape, and cleaned up the pockets with a router and template bit.
I snapped a few pics of the necks with the bodies. The photos kind of suck, but at least it gives a sense of what the bodies and necks will look like together. The ergonomics of all of them seems pretty good so far, although we'll have to see how the new single cut body shape works out... I'm afraid they might be neck heavy.
#1 & #2
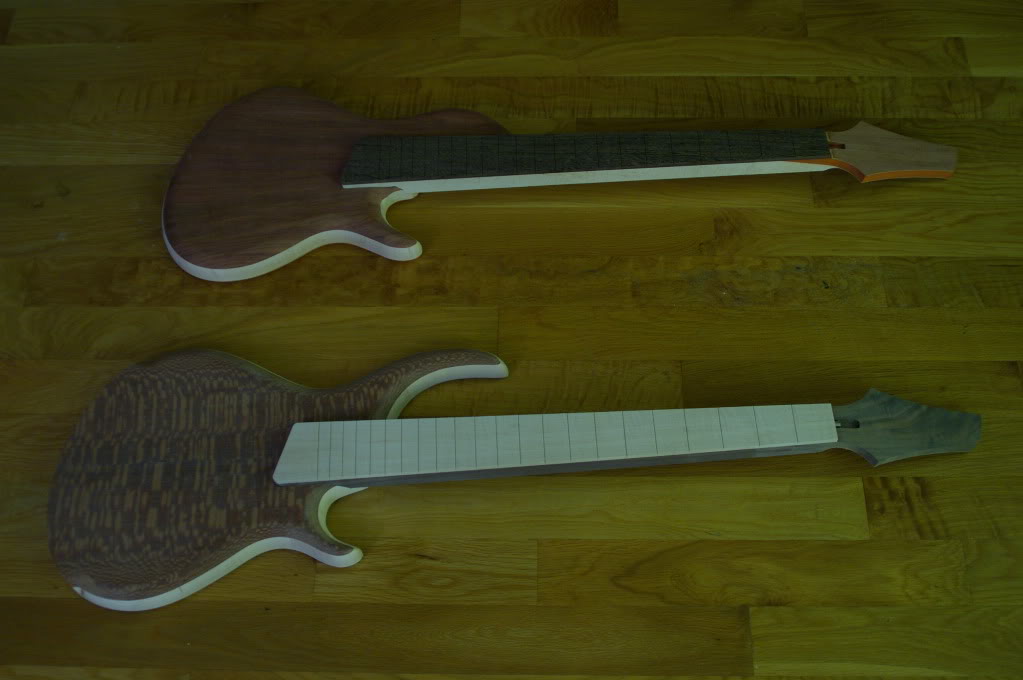
#3 & #4
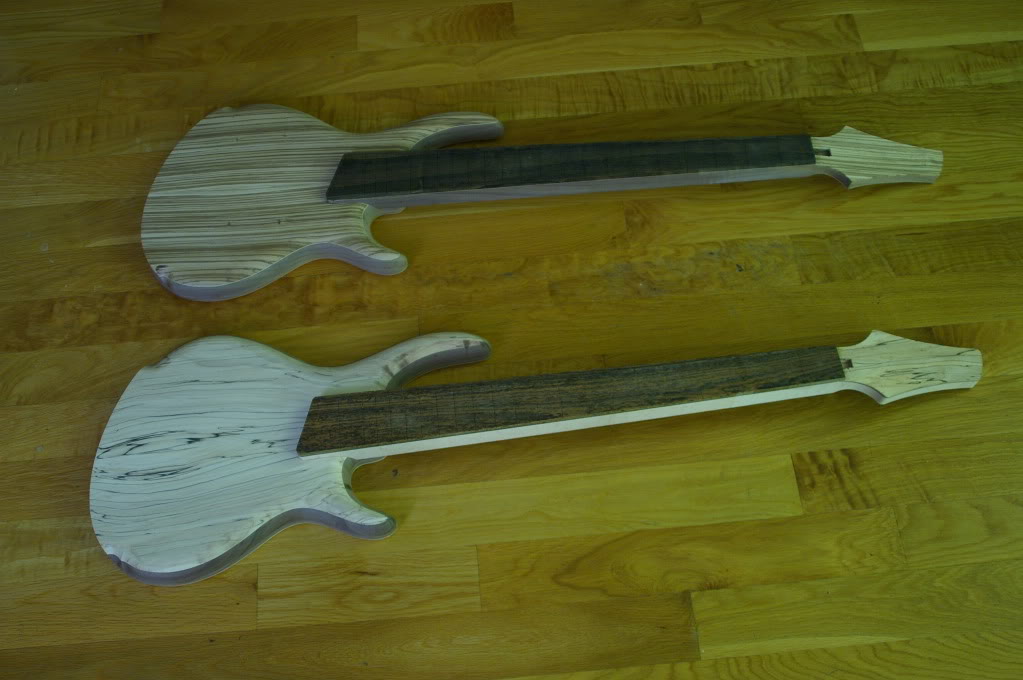
#5 & #6
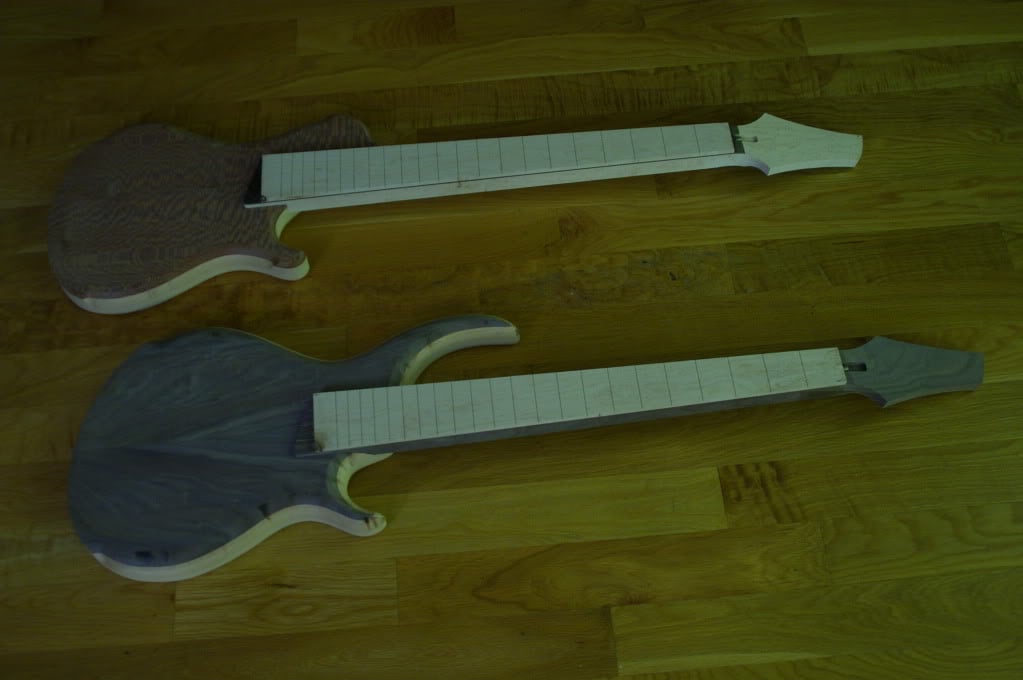
#7 & #8
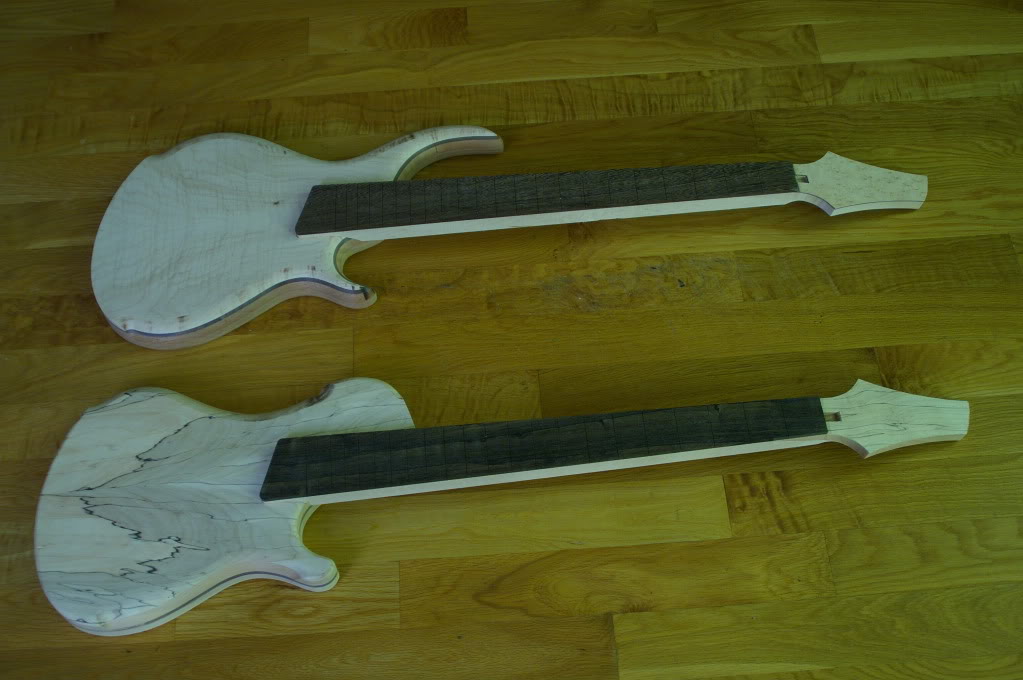
I snapped a few pics of the necks with the bodies. The photos kind of suck, but at least it gives a sense of what the bodies and necks will look like together. The ergonomics of all of them seems pretty good so far, although we'll have to see how the new single cut body shape works out... I'm afraid they might be neck heavy.
#1 & #2
#3 & #4
#5 & #6
#7 & #8

Musiclogic
Commercial User
- Aug 6, 2005
- 6,505
- 73
- 60
- Disclosures
- Owner/Builder: HJC Customs USA, The Cool Lute, C G O
#6 & #8 are by far my favorites, #8 has the most incredible top. Great builds, love the quantity and quality!!!
+1 (pause) 2,3,4,5,6,7 and 8These are just looking great Jason.


