• TalkBass has been independent since 1998. Add your voice.
    Create a free account to reply to discussions, view embedded media, and browse with fewer display ads.
    Join freeLog in
    Want zero display ads or expanded classifieds tools? Compare plans.

Multi-Build

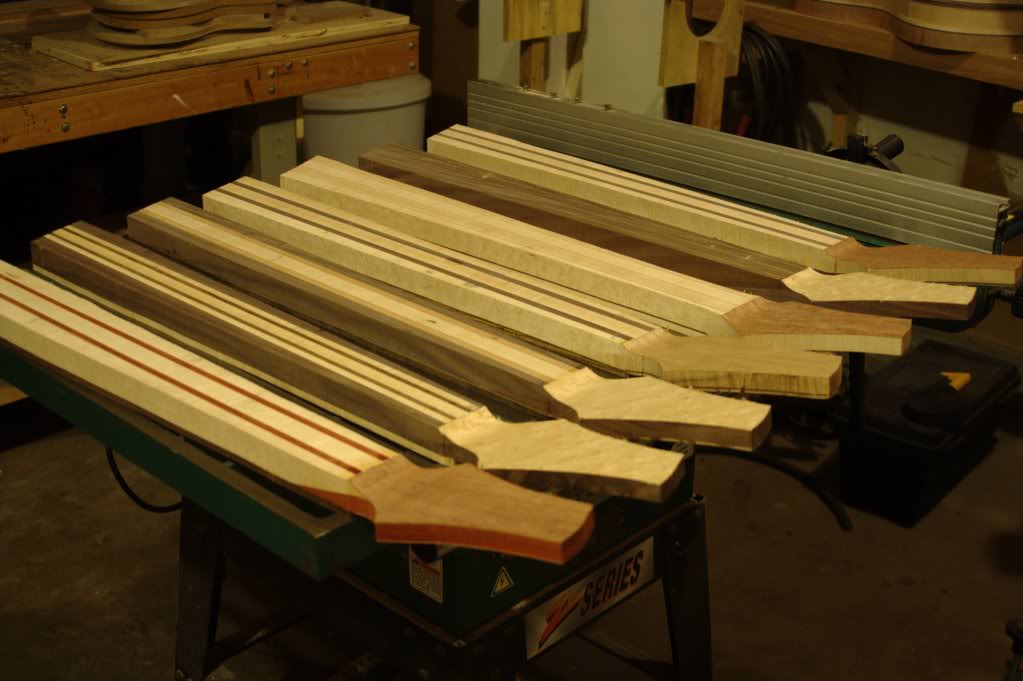
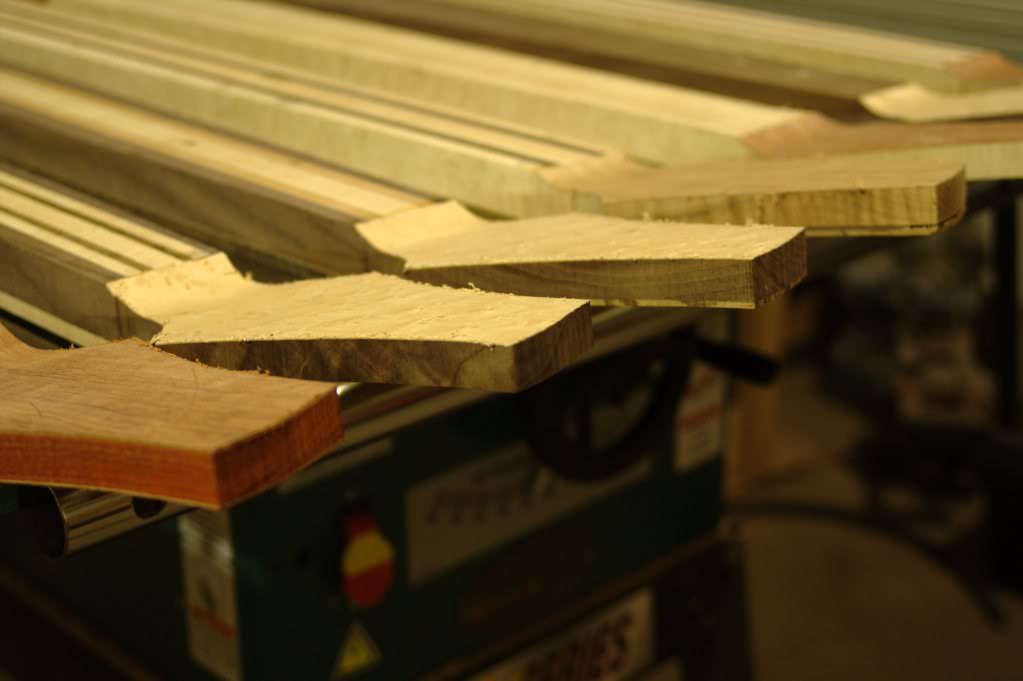
And here's a rear shot where you can see the veneered headstock back sides:
IMGP0634.jpg


And one more showing the headstock veneers in a little more detail:
IMGP0635.jpg


As I mentioned before, this was my first time doing headstock veneers. To be honest, it's kind of a pain. Fortunately they all turned out well, but it's quite time consuming. I admit it looks nice, but I'm not convinced it's worth the extra effort :hmm:

)

I have got to the rear headstock veneer stage on my latest build (first time trying veneers) and got a little confused, so have a question if you dont mind. How is it that you wont feel a bump between the veneer and neck where they meet in the middle? Is the veneer inlet into the neck shaft? Or is it just smoothed at the edge on a slope. Would be great if you could help.
 
I have got to the rear headstock veneer stage on my latest build (first time trying veneers) and got a little confused, so have a question if you dont mind. How is it that you wont feel a bump between the veneer and neck where they meet in the middle? Is the veneer inlet into the neck shaft? Or is it just smoothed at the edge on a slope. Would be great if you could help.

There are a couple different ways you can do it. If you aren't doing a volute, you would run the veneer past the transition from the headstock to the neck, like this:
13220_voluteM.jpg


If you have a volute, it will end up looking more like this:
Invalid Link Removed

In either case, you more or less carve the neck/volute just as you normally would.
 
This afternoon I worked on binding one of the necks. When I was doing the final trimming on one of the necks, a nice chunk of fingerboard split off. I think the ziricote board had a small crack in it, and it let loose when the router bit hit it. Fortunately it was a relatively shallow bit of tearout, which I was considering just trying to sand down. But I figured that would end up looking stupid, so I am using it as an opportunity to try a bound neck. First I went back with my fret saw and made sure all of the slots were a little deeper than normal. Usually after I radius the fretboard, I go back and deepen all of the fret slots because they get half sanded away along the edges. With the binding in place, I won't be able to easily go back and fix the slots, so now is my chance. I also had to trim down the end of the neck so it is flush with the top of the body, which I did at the router table using a straight cutting bit and a miter gauge.

The "proper" way to cut the slots for the binding would probably be to use a special router bit that makes a very shallow rabet. Places like Stewmac sell them, but I didn't feel like shelling out for one, so I did it the old school way... First I cut some thin curly maple strips and sanded them down to about 1/8" thick to use for the binding. Then I jointed/planed a 2x4 to use as a straight edge with a flush trim bit to cut the channels. I used the maple binding as a "depth gauge" to position the straight edge (held to the neck with double-sided carpet tape) and then ran it through the router table. I set the depth of cut so that it left a little bit of the ziricote board, which made for a nice accent line. I had previously put a maple veneer between the walnut neck and the ziricote FB, so I actually ended up with a double accent line. Then a little glue and some tape to hold things in place. Here are a few pics of how it looks now.

IMGP1023.jpg


IMGP1028.jpg


IMGP1029.jpg
 
There are a couple different ways you can do it. If you aren't doing a volute, you would run the veneer past the transition from the headstock to the neck, like this:
13220_voluteM.jpg


If you have a volute, it will end up looking more like this:
Invalid Link Removed

In either case, you more or less carve the neck/volute just as you normally would.

Thanks for taking the time to reply, its most helpful, guess I will (continue to) give it a go! Still a little confused as to how the veneer wont be proud of the neck at the middle where it isnt carved away (on the non volute, as mine is).
 
Sub'd
Can't wait to see what this long weekend brings us...

We'll have to see how much gets done over the long weekend. It's 97 degrees here today - I just went out to the garage to sand down the binding... I might have been out there 10 or 15 minutes and came back in completely drenched. If temps are a little more bearable, I might be able to get a little more done, but I'm not a fan of being in the garage when it's that sweltering out.

In any event, here are a couple pics of the neck after the binding was sanded down flush. I stuck it on the body to see how it would look. It think this one (#3 for those of you keeping track) is turning into my favorite. I think it's the most "over the top" of all of the builds (in terms of woods, colors, etc), and the one that's most likely to become my main player when all is said and done.

IMGP1032.jpg


IMGP1033.jpg


The pictures don't capture it very well, but there's a nice amount of flame in the binding, which I think will really pop under a finish.

IMGP1034.jpg
 
Thanks for taking the time to reply, its most helpful, guess I will (continue to) give it a go! Still a little confused as to how the veneer wont be proud of the neck at the middle where it isnt carved away (on the non volute, as mine is).

After thinking about it more, I understand what you're saying now. Yeah.... I'm not sure how that works out - it does seem like the veneered section would be a little higher. I guess you just have to do your best to "feather" it in to the rest of the neck like they did in that picture, but towards the headstock that area definitely would be a little proud of the rest of the neck.
 
After thinking about it more, I understand what you're saying now. Yeah.... I'm not sure how that works out - it does seem like the veneered section would be a little higher. I guess you just have to do your best to "feather" it in to the rest of the neck like they did in that picture, but towards the headstock that area definitely would be a little proud of the rest of the neck.

Yeah, thats what I thought, I will give it a go and hope for the best.

Lovely builds by the way, serious balls taking on so many at the same time ;).
 
I made a little more progress the past couple of days. I got my first order of stuff from StewMac the other day - fretwire, control cavity templates, and neck ferrules. I started work on the control cavities and actually took pictures of several stages of the process, and figured I'd show them here. This is the same basic procedure that's used for routing neck pockets and pickup routes as well.

First, I trace the outline of the cavity on the body and remove the majority of the material with a Forsner bit (the largest I have is a 7/8" which works pretty well). I drill to within about 1/8" of the line, and down to about 1/4" above the final depth.

IMGP1038.jpg


Although the StewMac templates are durable, I feel safer making a "slave" template out of scrap plywood A) so I don't ruin the master and B) so I have a thicker template.
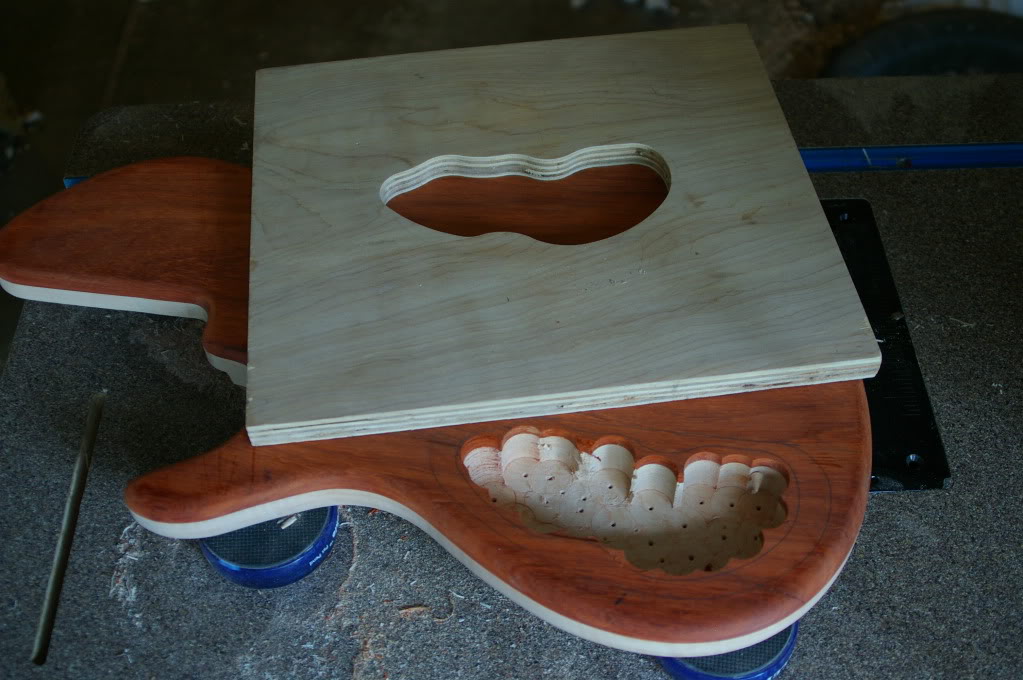
IMGP1039.jpg


The template gets attached to the body with double sided carpet tape. I use the Duck brand, which you can get at Menards, Home Depot, etc. It's actually the cheaper indoor/outdoor stuff - it's very thin, and seems to stick pretty well. You need to make sure you use an adequate amount of tape, make sure both surfaces (body and template) are extremely clean, level and smooth, and that you apply good pressure when sticking the two together. Then it's just a matter of slowly routing away the remainder of the material using a router and a template bit. You can't really see the bit in this picture, but it's a 1/2" diameter bit with a 1" long cutting length. There are two types of "flush trim" router bits, and both can come in handy, but for this operation, the bearing is attached at the shank end of the bit, which allows you to use it with a template.
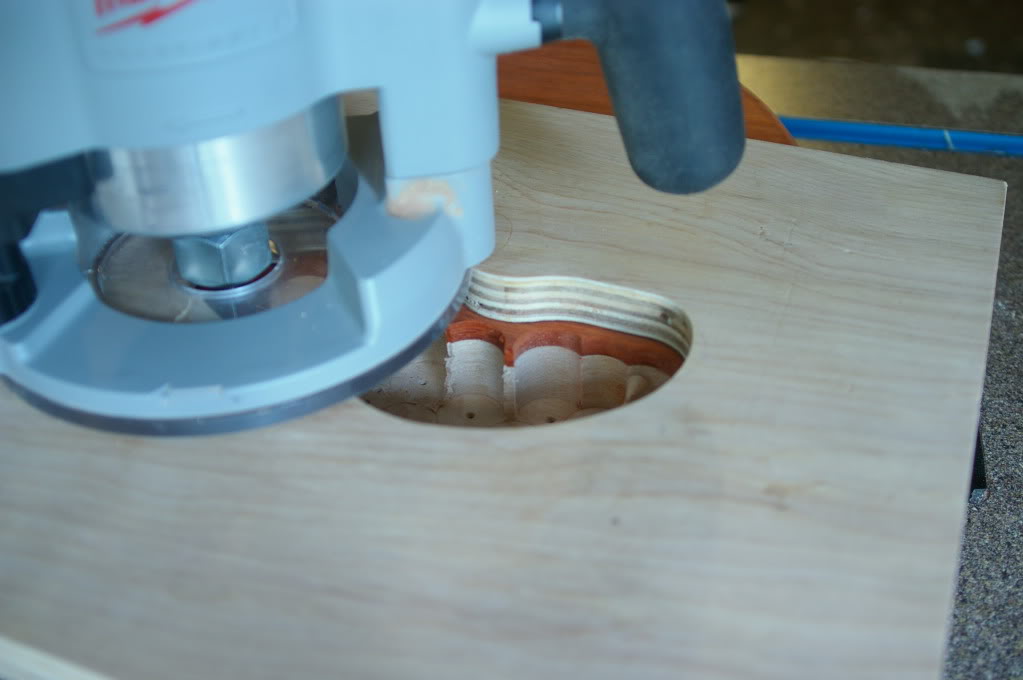
IMGP1040.jpg


Here's what it looks like after the first pass. Because my router bit is only 1" long, I have to make the cut in two stages for the control cavity. The first pass is about an inch deep. For the second pass, the template isn't required, as the bearing just rides on the portion of the cavity that has already been routed to the desired shape.

IMGP1041.jpg


IMGP1042.jpg


Here's the final result after the second pass. The depth of the cavity is 1/4" less than the body thickness. 1/4" seems thick enough to me for the front side of the control cavity (where the controls will be mounted). Most pots don't have threads longer than 1/4", so in most cases additional material will need to be removed for each of the controls, but I like to leave as much material in place as practical for durability sake.

IMGP1043.jpg


Routing for the cavity requires two separate templates - one to do the inside of the cavity, and then a shallow route to accept the cover plate. When I was making my "slave" template for the control plate recess, the collar holding the bearing on the router bit came loose, and the bearing slid out of position... which let the bit dig right into the template. So I'll have to route the outter recess later, after my new template arrives from StewMac.

Up next will be drilling all of the recessed sockets to accept the ferrules for the neck bolts. I also need to see if I can find any place locally that sells something other than brass or zinc threaded inserts (I'd like to use steel if I can find them). Then I'll be able to mount the necks. Lots more work to do before I can actually start finishing any of these - fretboard radiusing, installing the frets, carving the necks and bodies, etc. Some day one of these will actually be usable!
 
It's a sad day... I'm caving in. I decided that I'm going to go ahead and just finish one of these basses. I think I'm to the point where all of the efficiencies of doing the batch build are probably over - most every thing from here on out is hand work that doesn't require significant machine setup time. I'm also impatient and just want one of these done (my wife is also pregnant and due in less than 2 months, so I want one finished before then).

Not sure what my rationale was for picking Bass #2 as the first one to complete, but that's the one I'm doing first. Here are the specs on this one:

Body: Flamed Maple core with Leopardwood top and Walnut back
Neck: 5-piece Walnut/Flamed Maple/Bocote
Electronics: Nordstrand Dual Coils (series) passive (V-V-T)
Bridge: (the same one Carvin uses on the SB basses; chrome)
Tuners: Gotoh GB7 (chrome)

Last night I got the neck carved. Still needs some more sanding, but you get the idea:

IMGP1064.jpg


IMGP1065.jpg


IMGP1066.jpg


IMGP1067.jpg


IMGP1068.jpg


So here's where the bass is now. I'm hoping to have the fingerboard radiused and the frets installed by the end of the weekend. Things should move along pretty quickly now.

IMGP1071.jpg


IMGP1072.jpg