

Enjoy the benefits of a premium membership!
Upgrade Account
-
TalkBass has been independent since 1998. Add your voice.
Create a free account to reply to discussions, view embedded media, and browse with fewer display ads.
Join free Log in
Want zero display ads or expanded classifieds tools? Compare plans.
You are using an out of date browser. It may not display this or other websites correctly.
You should upgrade or use an alternative browser.
You should upgrade or use an alternative browser.
Multi-Build
- Thread starter Jason_A
- Start date
More options
Who Replied?


I spent a little time tonight radiusing the fingerboard (16") and installing the frets. I didn't spend any time dressing the frets yet, other than to bevel the fret ends and do a quick level. They'll get cleaned up more later after the neck has been sprayed.
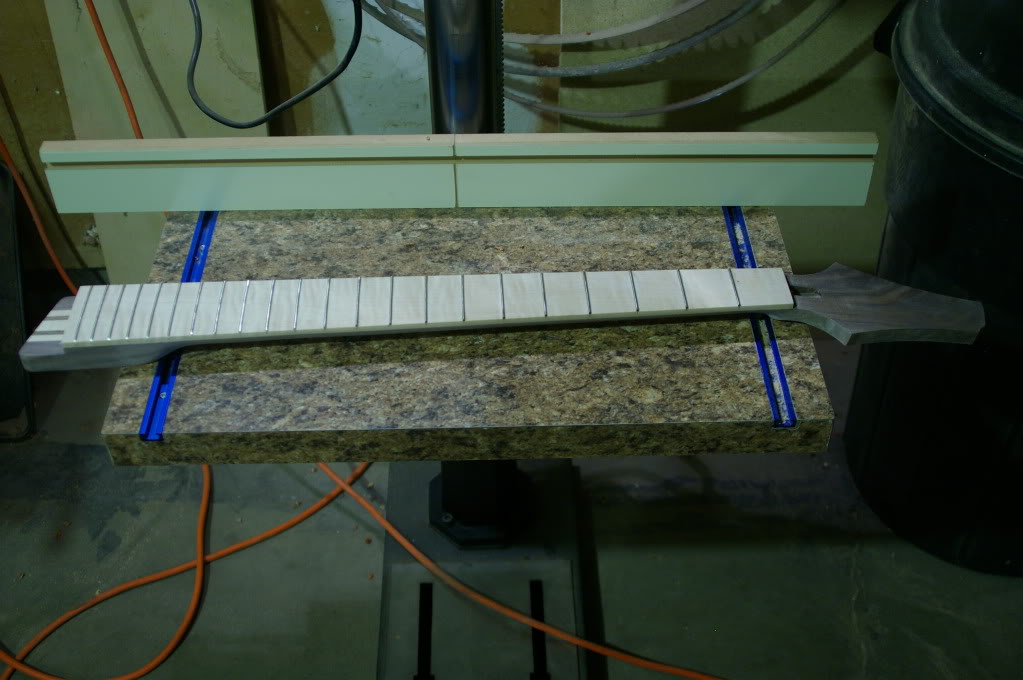
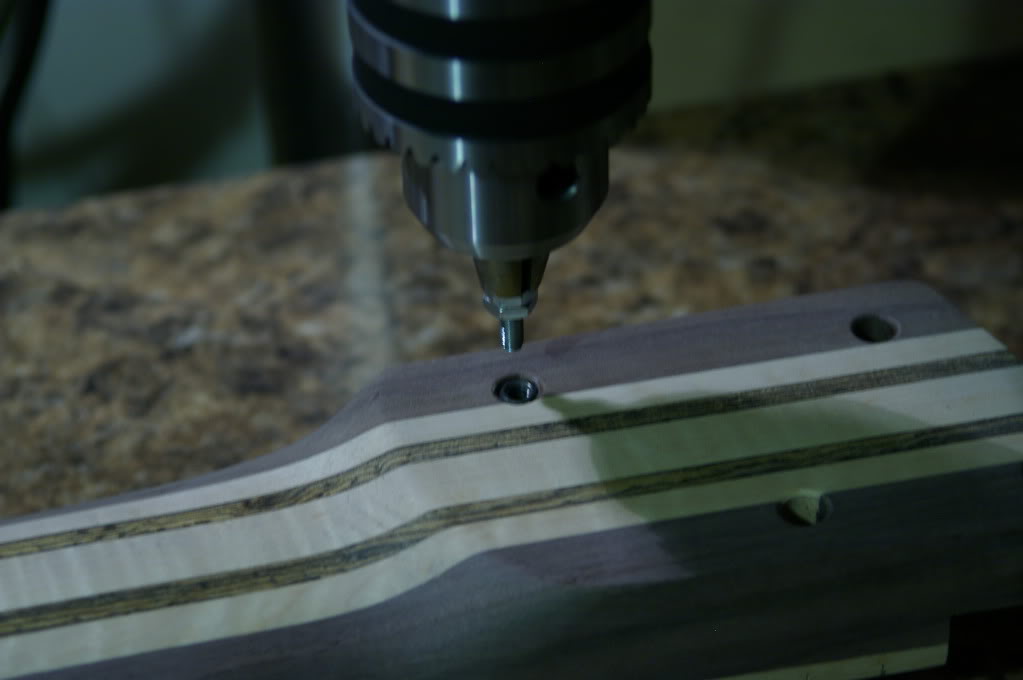
I installed the threaded inserts in the neck and have the neck attached to the body now. I took pictures of the process for installing the threaded inserts. This has been posted by others many times before, but I thought I'd show it again. This method (as opposed to using a screw driver or even a hex driver) seems to be the most fool-proof interms of getting the insert installed without destroying it and while keeping it square.
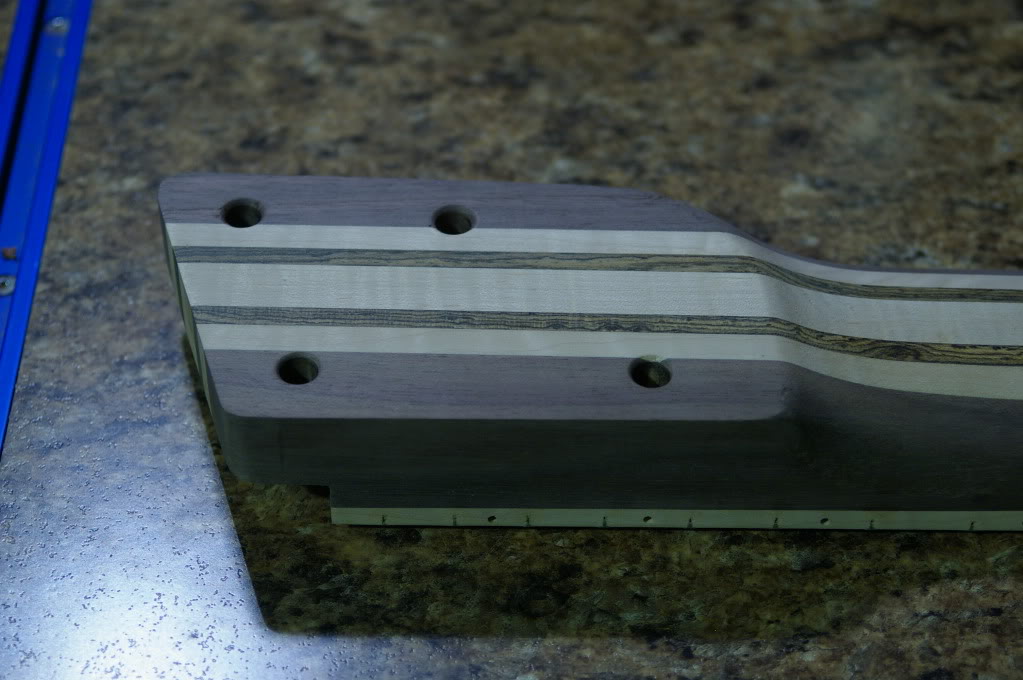
First, drill the appropriate sized holes to receive the threaded inserts. I'm using 10-24 internal threads, and for these steel inserts that requires a 5/16" hole. Make sure you drill it deep enough. I like to use a countersink to bevel the edges of the hole - not sure that does anything functionally or aids in installing the inserts, but it does make for a little cleaner looking install.
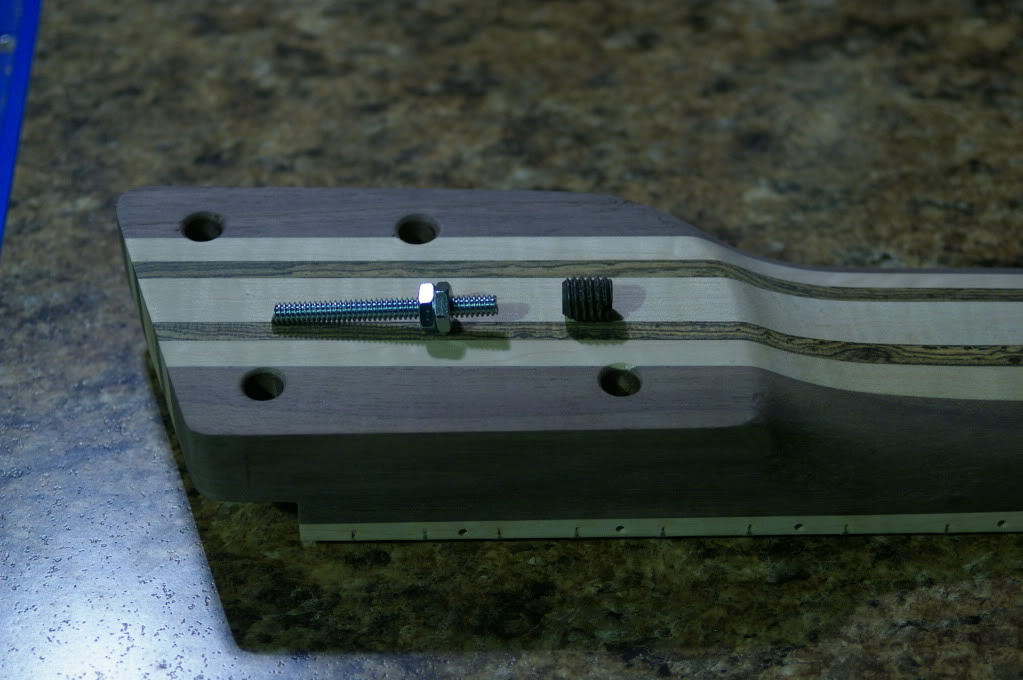
I nipped the head off a 10-24 screw and installed two nuts leaving the same amount of thread at the end as the length of the insert.
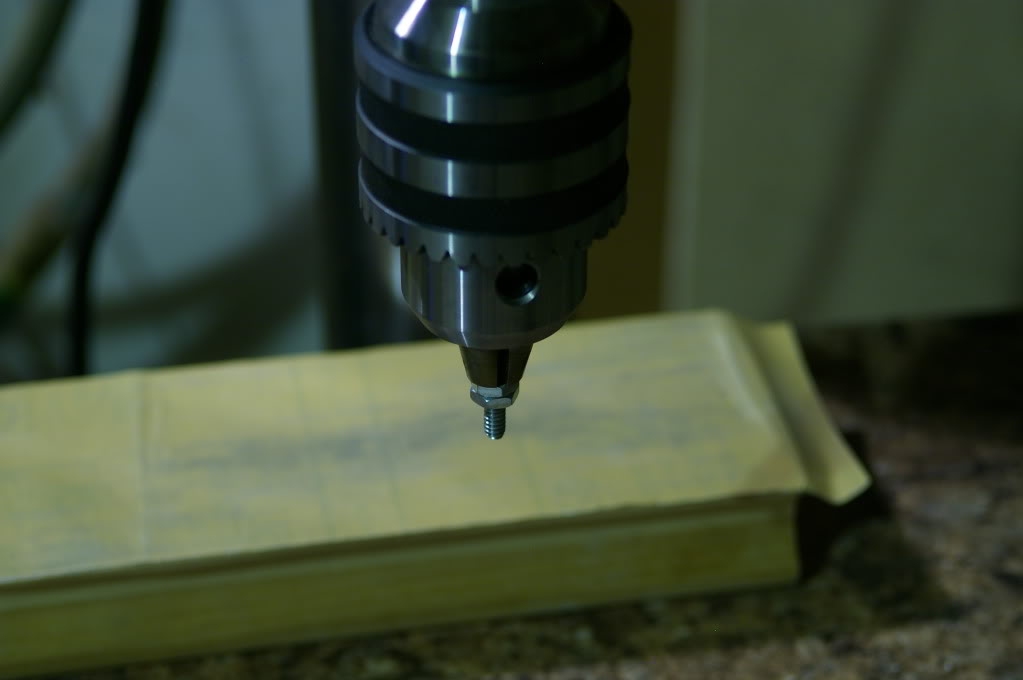
The screw gets installed in the drill press. If you can, it's a little easier to install if you are able to release tension on the drill press belts... or remove one of them.
Then the insert gets threaded onto the screw...
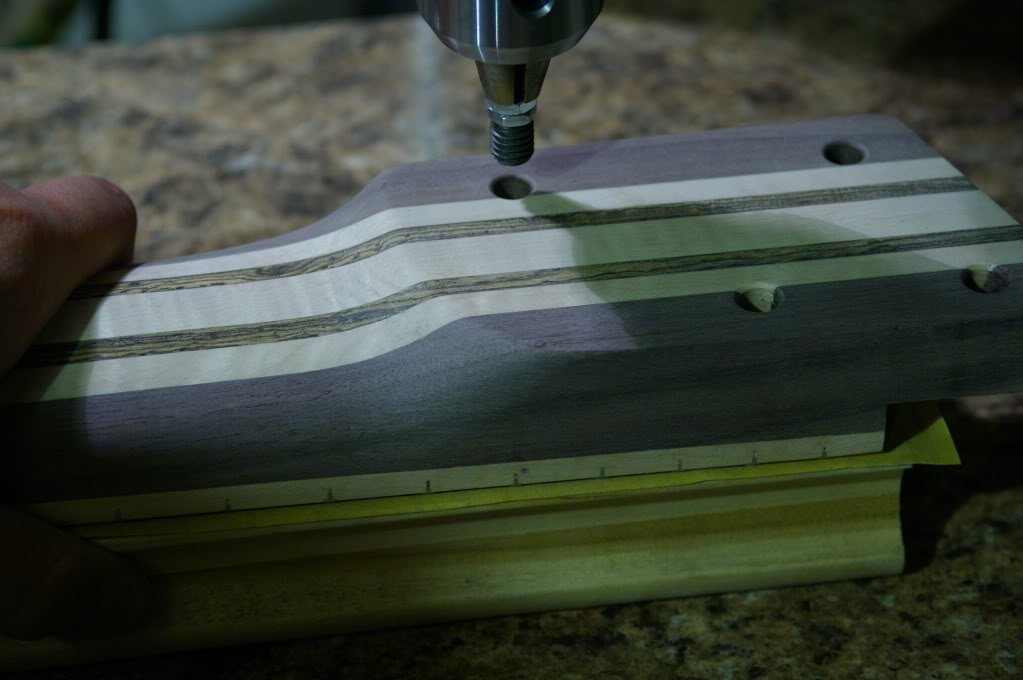
And then screw it in. This is done MANUALLY - don't attempt to do this under power. With one hand, keep steady pressure on the spindle lever, and with the other turn the chuck to screw the insert into the neck, making sure to install it flush or just below the surface of the neck. When you're done, just unscrew the screw by turning the chuck counter-clockwise and you're done.
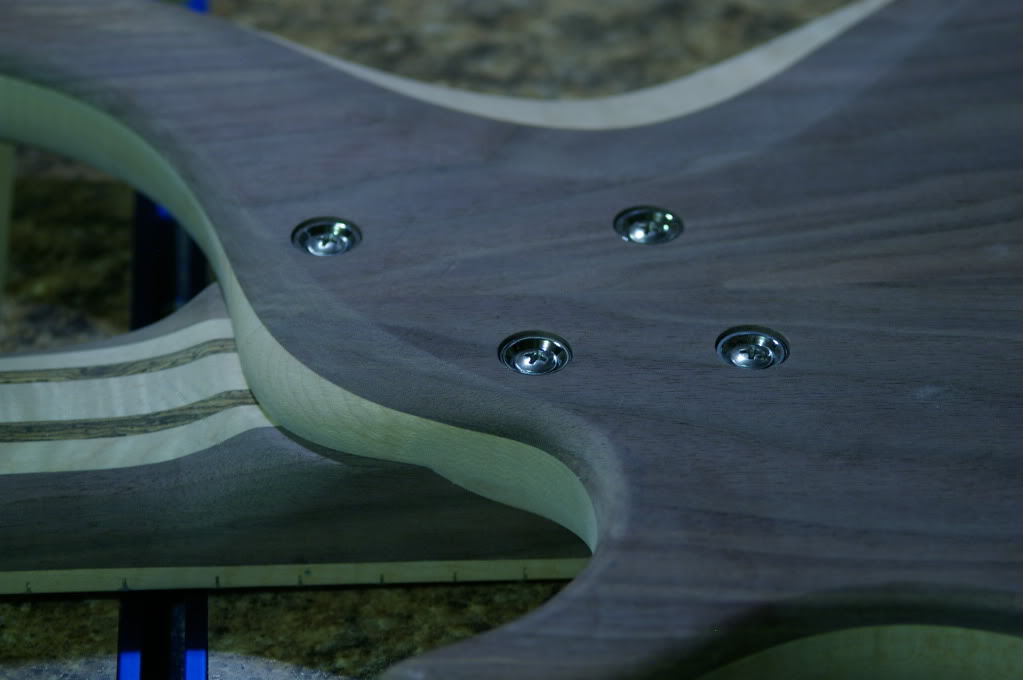
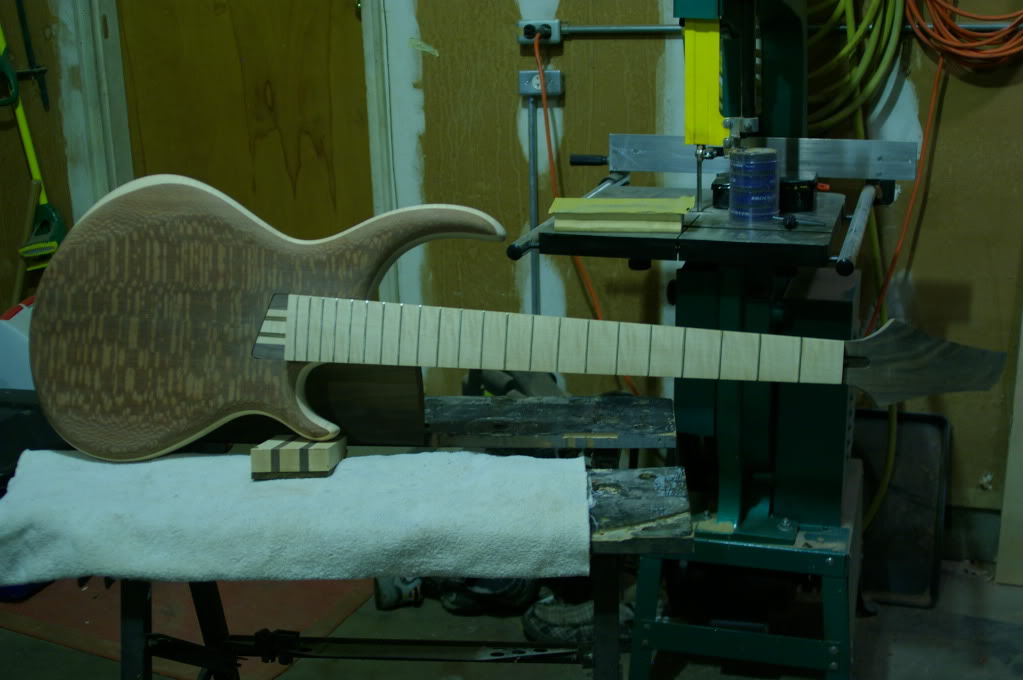
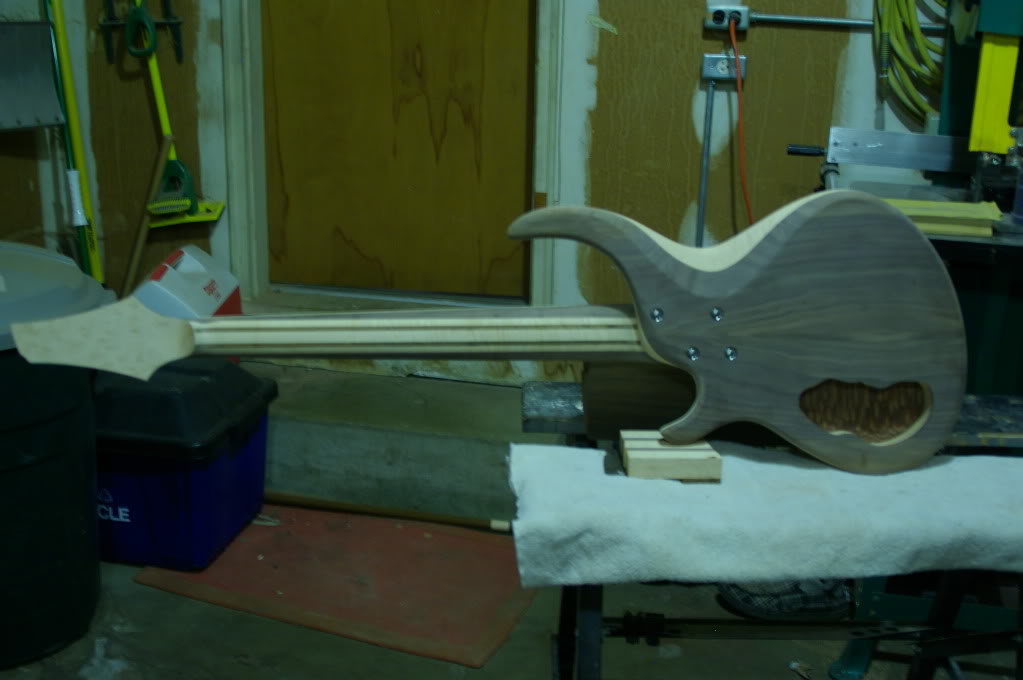
And here is the bass with the neck bolted on... one small step closer.
First, drill the appropriate sized holes to receive the threaded inserts. I'm using 10-24 internal threads, and for these steel inserts that requires a 5/16" hole. Make sure you drill it deep enough. I like to use a countersink to bevel the edges of the hole - not sure that does anything functionally or aids in installing the inserts, but it does make for a little cleaner looking install.
I nipped the head off a 10-24 screw and installed two nuts leaving the same amount of thread at the end as the length of the insert.
The screw gets installed in the drill press. If you can, it's a little easier to install if you are able to release tension on the drill press belts... or remove one of them.
Then the insert gets threaded onto the screw...
And then screw it in. This is done MANUALLY - don't attempt to do this under power. With one hand, keep steady pressure on the spindle lever, and with the other turn the chuck to screw the insert into the neck, making sure to install it flush or just below the surface of the neck. When you're done, just unscrew the screw by turning the chuck counter-clockwise and you're done.
And here is the bass with the neck bolted on... one small step closer.


Jason,
Love the progress so far, Please be sure to keep us posted on the other builds. Until then, though, I am very captivated by this one! Thanks for the tip on the inserts! Where do you find yours? Thanks again,
Thumpin_P
Love the progress so far, Please be sure to keep us posted on the other builds. Until then, though, I am very captivated by this one! Thanks for the tip on the inserts! Where do you find yours? Thanks again,
Thumpin_P

We'll have to see how much gets done over the long weekend. It's 97 degrees here today - I just went out to the garage to sand down the binding... I might have been out there 10 or 15 minutes and came back in completely drenched. If temps are a little more bearable, I might be able to get a little more done, but I'm not a fan of being in the garage when it's that sweltering out.
In any event, here are a couple pics of the neck after the binding was sanded down flush. I stuck it on the body to see how it would look. It think this one (#3 for those of you keeping track) is turning into my favorite. I think it's the most "over the top" of all of the builds (in terms of woods, colors, etc), and the one that's most likely to become my main player when all is said and done.
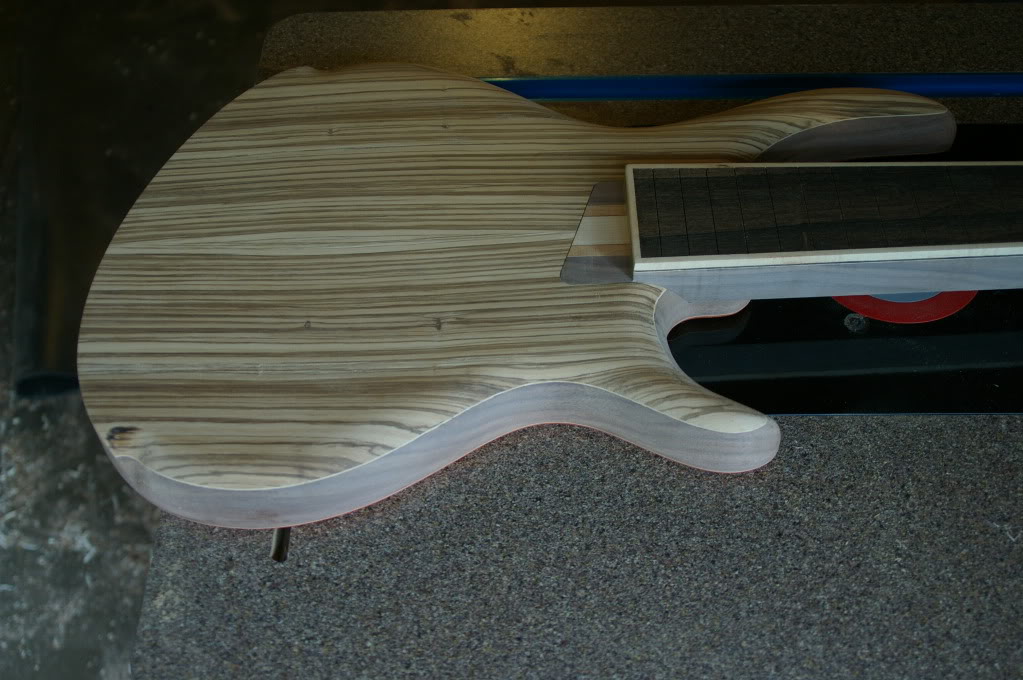
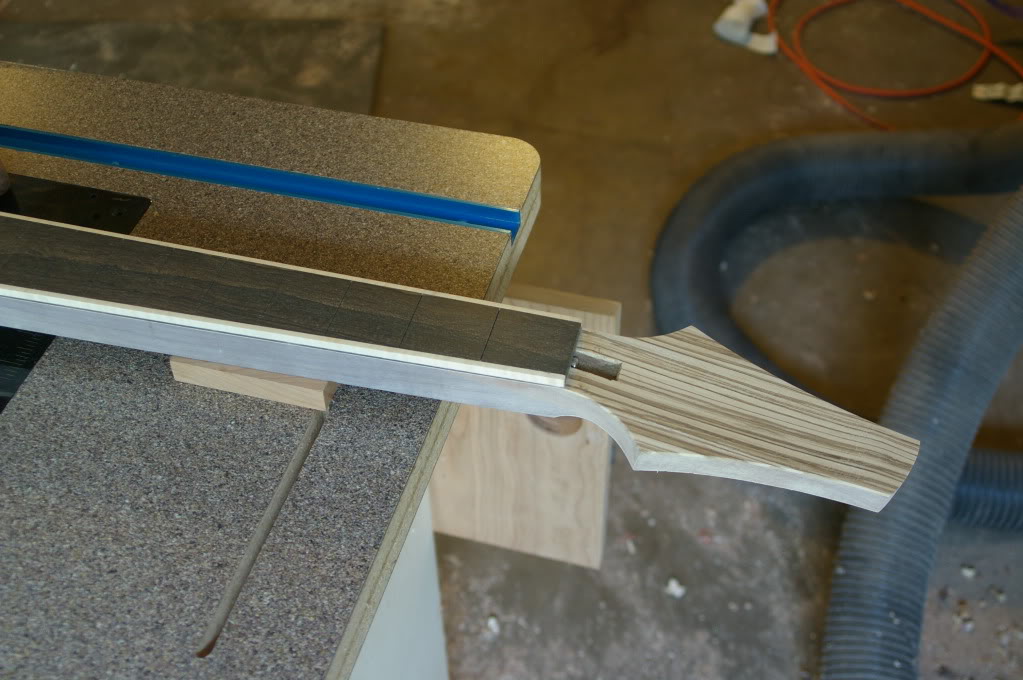
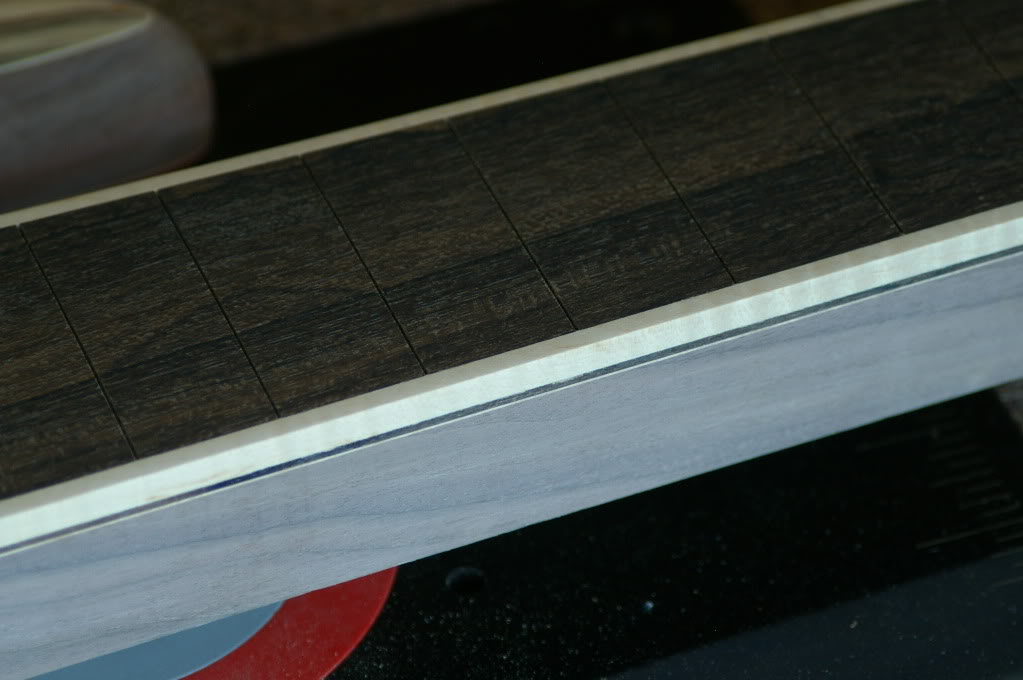
The pictures don't capture it very well, but there's a nice amount of flame in the binding, which I think will really pop under a finish.
really like the way this one is going, do you have a buyer yet? Also whats the pickup config going to be on this one? Got my Eye on number 6 as well, maybe more so.
Hey guys, thanks for the interest in the basses. At the moment, none of these basses are for sale. If you're interested, a PM would be a more appropriate means to communicate about that sort of thing. That being said, I'm expecting my progress to slow pretty considerably starting in about September, so it's anybody's guess when any of these basses will actually get finished.
Progress has been a little slow. Between the hot weather and waiting for parts to arrive, not much got done this week. However, I now have all of the parts except the tuners, so I should be able to finish up the woodworking in the next couple of days.
Here's the little bit of progress I made today. First, I got the side dots installed. They are 2mm black mother of pearl. I couldn't get a good picture that captures the shimmer, but they do look nicer than the plastic dots I've used before.
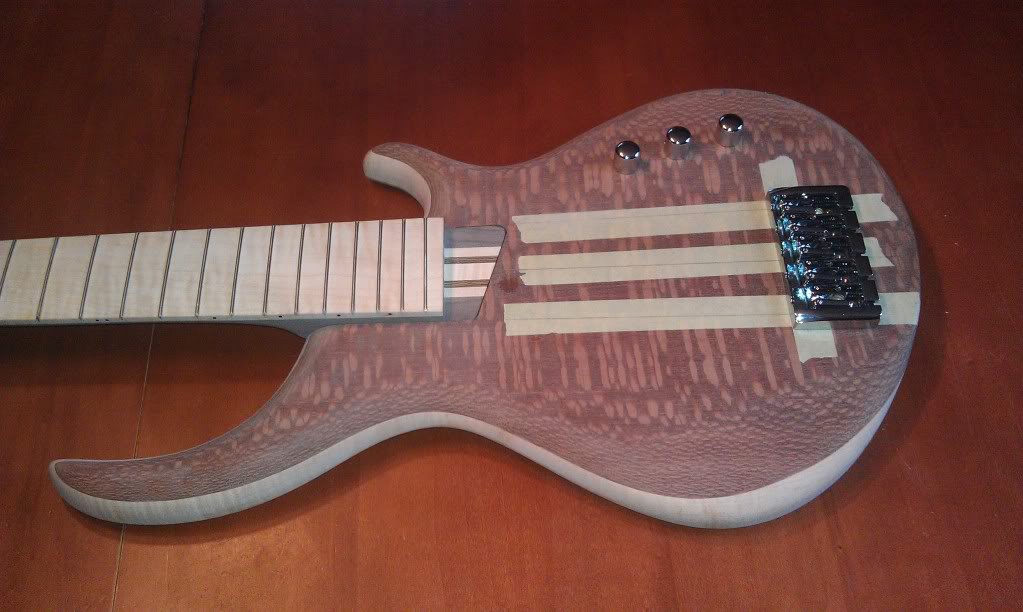
I also positioned the bridge and drilled the volume and tone pot holes. I'm using Nordstrand Dual Coil pickups which can be wired in a variety of ways. One of the popular options is to wire the pickups with an on/on/on toggle switch for each pickup to switch them between series/single coil/parallel modes. I left enough room in the cavity to add the switches down the road if I want.
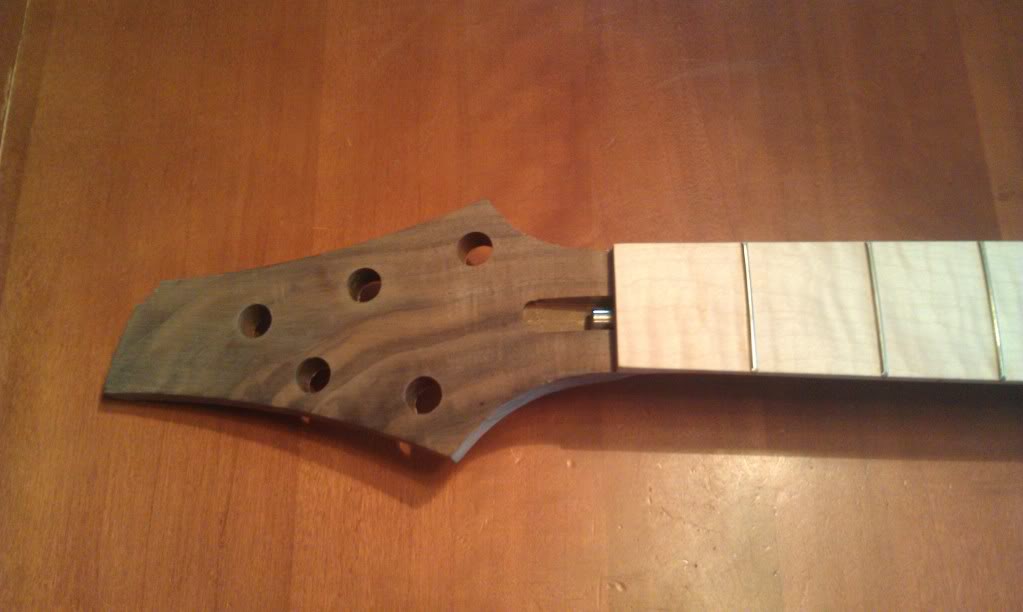
I also drilled the tuner holes in the headstock.
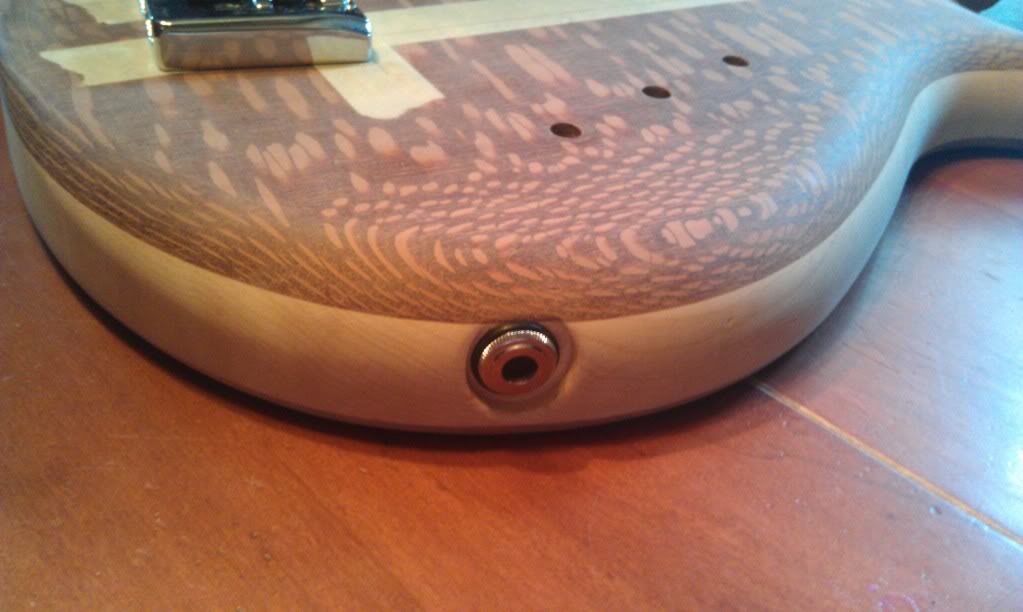
Finally, I drilled the input jack hole. Because the body sides are so asymmetric, I had to recess the jack using a Forstner bit, which actually worked quite nicely. Drilling the hole and recess required some creative clamping in the drill press, but ended up working quite nicely.
I need to route the for the pickups, as well as for the control cavity cover. Then its just a bunch of final sanding before I start spraying. Hopefully the weather will cooperate and the temps and humidity will drop so I can spray soon.
Here's the little bit of progress I made today. First, I got the side dots installed. They are 2mm black mother of pearl. I couldn't get a good picture that captures the shimmer, but they do look nicer than the plastic dots I've used before.
I also positioned the bridge and drilled the volume and tone pot holes. I'm using Nordstrand Dual Coil pickups which can be wired in a variety of ways. One of the popular options is to wire the pickups with an on/on/on toggle switch for each pickup to switch them between series/single coil/parallel modes. I left enough room in the cavity to add the switches down the road if I want.
I also drilled the tuner holes in the headstock.
Finally, I drilled the input jack hole. Because the body sides are so asymmetric, I had to recess the jack using a Forstner bit, which actually worked quite nicely. Drilling the hole and recess required some creative clamping in the drill press, but ended up working quite nicely.
I need to route the for the pickups, as well as for the control cavity cover. Then its just a bunch of final sanding before I start spraying. Hopefully the weather will cooperate and the temps and humidity will drop so I can spray soon.
Made some more progress today...
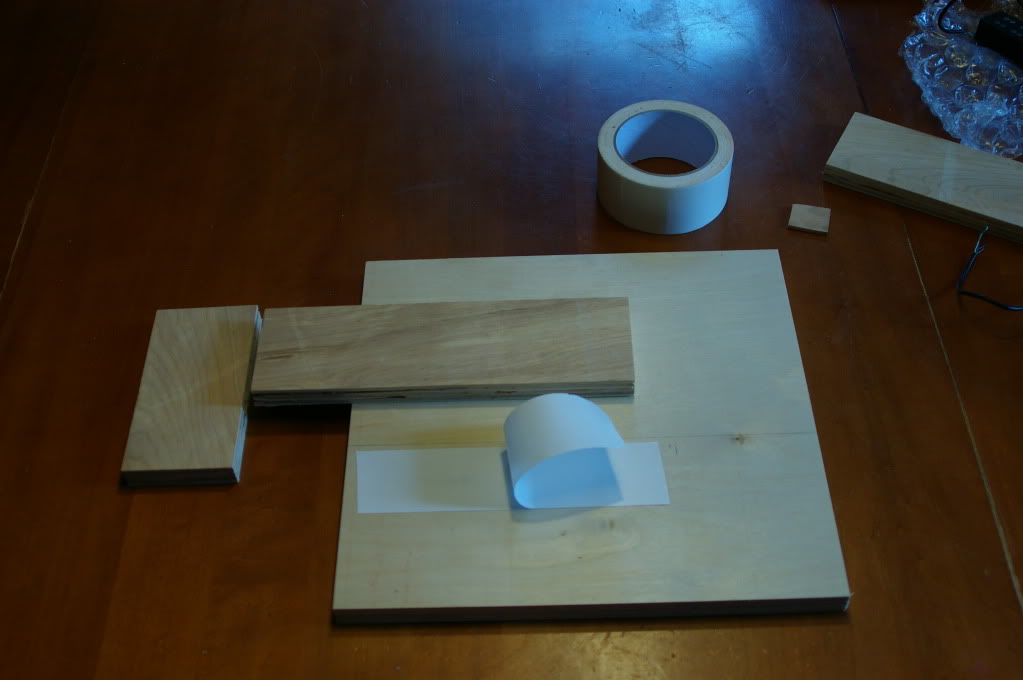
First, I had to make a template for the pickup cavities. Since I'm using soapbars, making the templates is pretty easy. Here's what you need: a piece of plywood or MDF, a few scraps of wood about 3" wide, some double sided tape, and some thin material to use as a shim (twice the thickness of the gap you want around the pickups).
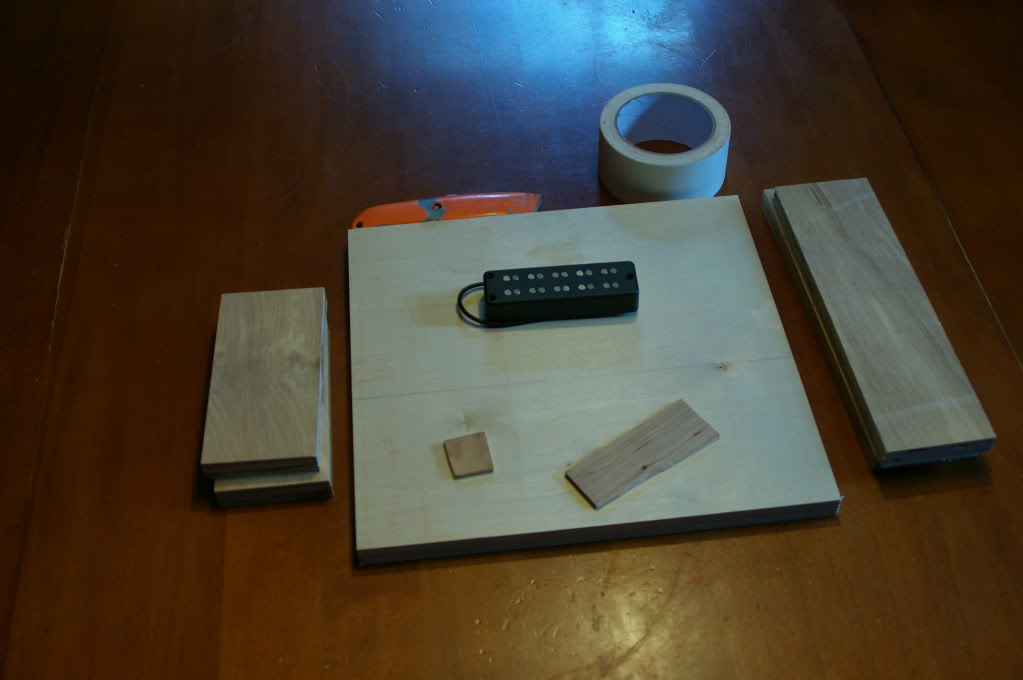
First, stick one of the longer scrap pieces to the template board with the double sided tape.
Then add a second piece of scrap to form one of the short sides.
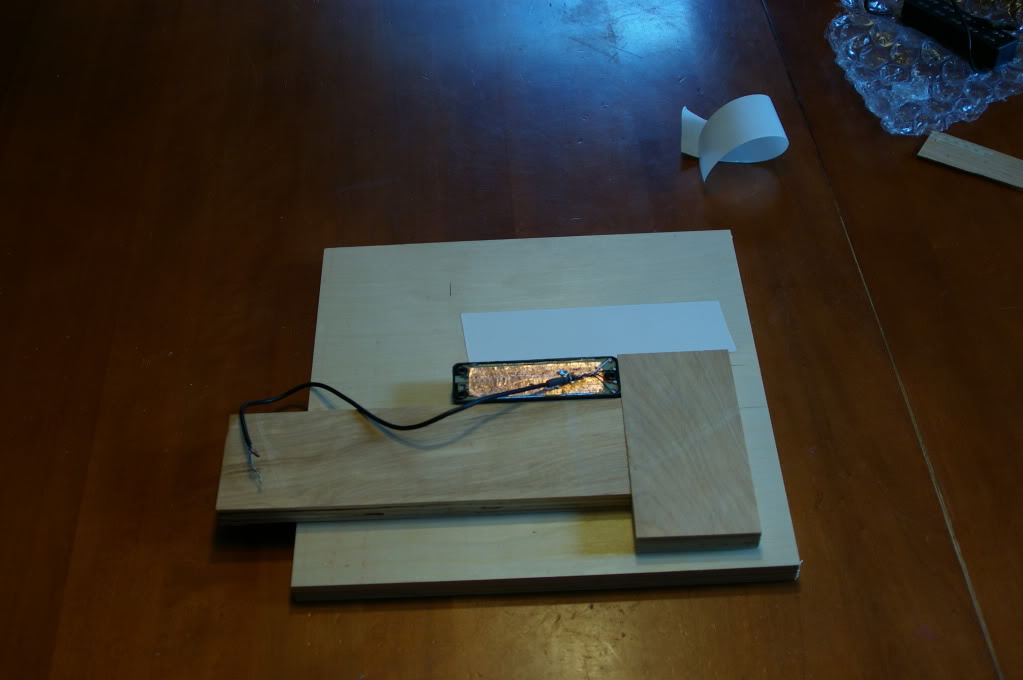
You'll be building the scrap pieces all the way around the pickup, and using a couple of thin strips of wood, poster board, etc. to "shim" the scrap pieces away from the sides of the pickup to allow for a small uniform gap around the pickup. The nice thing about this method is that you don't have to do any measuring, so there's a lot less chance for error.
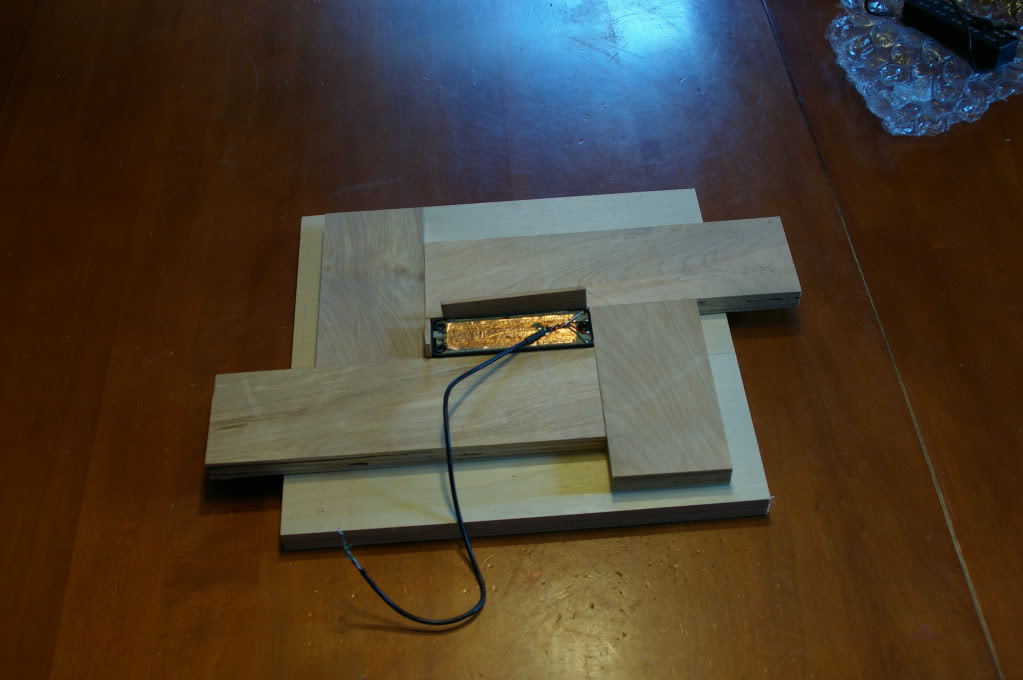
Then remove the pickup and shims and you have a temporary "template".
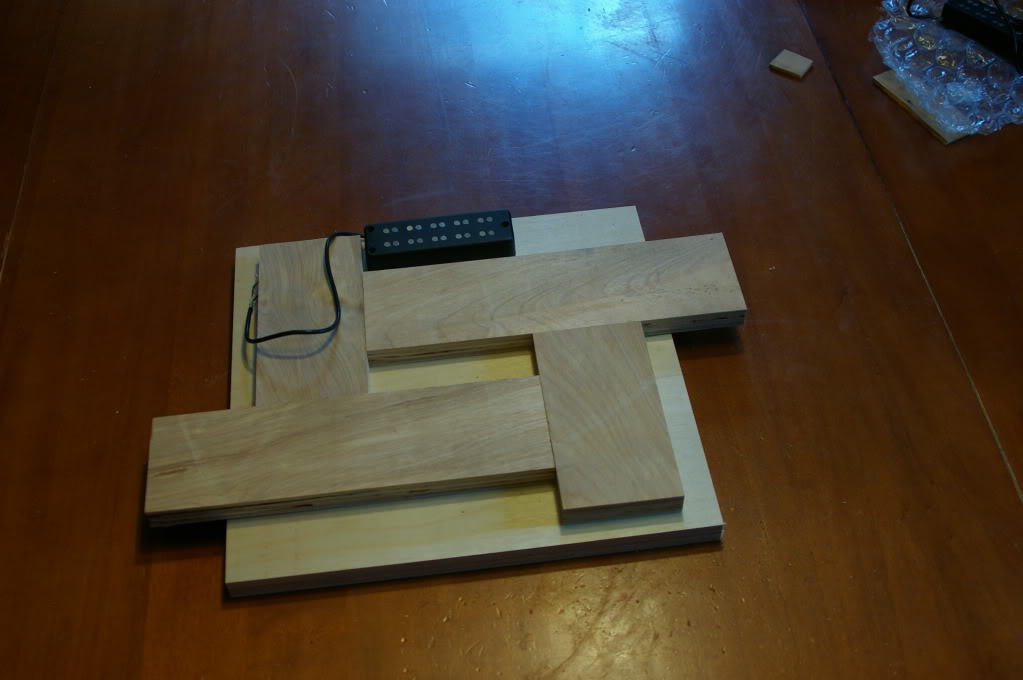
Run it carefully through the router with a flush trim bit (I hogged away the bulk of the material from the center at the drill press) and you have a nice template. Remove the scrap pieces and carefully measure and mark the center lines.
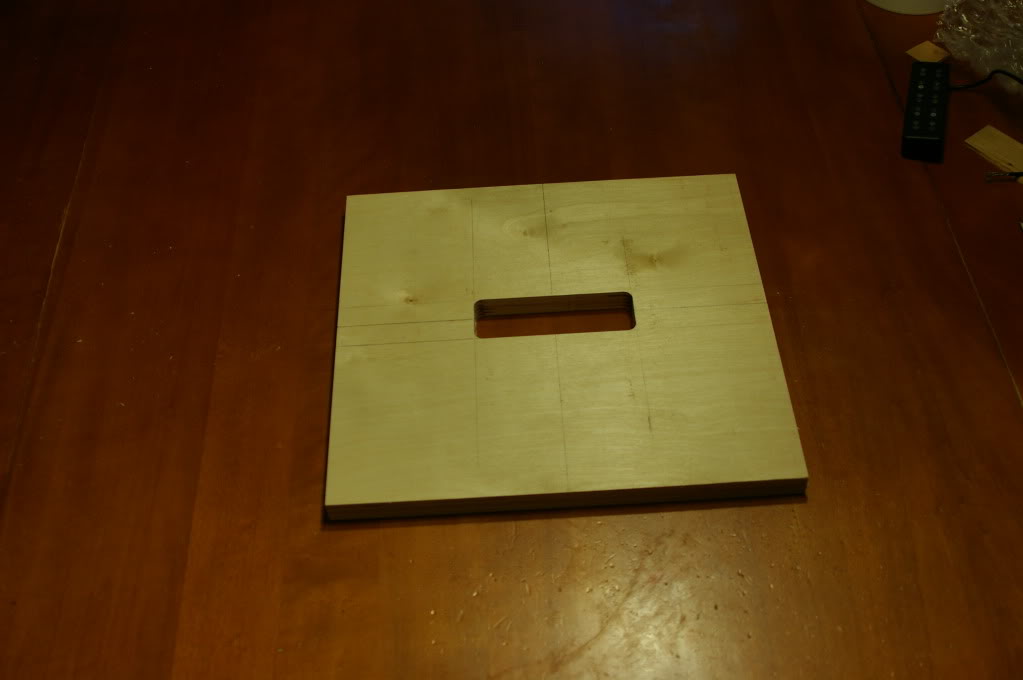
This can then be clamped or taped to your body to route the pickup cavities.
First, I had to make a template for the pickup cavities. Since I'm using soapbars, making the templates is pretty easy. Here's what you need: a piece of plywood or MDF, a few scraps of wood about 3" wide, some double sided tape, and some thin material to use as a shim (twice the thickness of the gap you want around the pickups).
First, stick one of the longer scrap pieces to the template board with the double sided tape.
Then add a second piece of scrap to form one of the short sides.
You'll be building the scrap pieces all the way around the pickup, and using a couple of thin strips of wood, poster board, etc. to "shim" the scrap pieces away from the sides of the pickup to allow for a small uniform gap around the pickup. The nice thing about this method is that you don't have to do any measuring, so there's a lot less chance for error.
Then remove the pickup and shims and you have a temporary "template".
Run it carefully through the router with a flush trim bit (I hogged away the bulk of the material from the center at the drill press) and you have a nice template. Remove the scrap pieces and carefully measure and mark the center lines.
This can then be clamped or taped to your body to route the pickup cavities.
I also had to make a template for the recess for the control cavity plate. Since it's such a shallow route, I first glued two pieces of 3/4" plywood together to make a 1-1/2" thick template. I screwed the Stew-Mac template to the plywood and created my "slave" template, and then routed the body.
I also used the new pickup template to route for the pickups. Then just a little more drilling for the bridge ground wire and the pickup wires into the control cavity. And with that, I believe all of the woodworking is complete. I did an initial rough sanding with 120 grit to try and get most of the major tooling marks cleaned up. There's plenty more sanding that needs to be finished up on both the neck and body, but it's really close to being ready to be sprayed. Now to get the weather to cooperate. I'll be spraying nitro lacquer (Behlen Stringed Instrument lacquer), which isn't a fan of high temps and high humidity.
I slapped the bass together quick to give a rough idea of how this thing is going to look. I wiped the leopardwood and walnut with lacquer thinner to get a feel for what the wood will look like under a finish, and both are going to darken pretty considerably - I think it's going to be quite striking when finished.
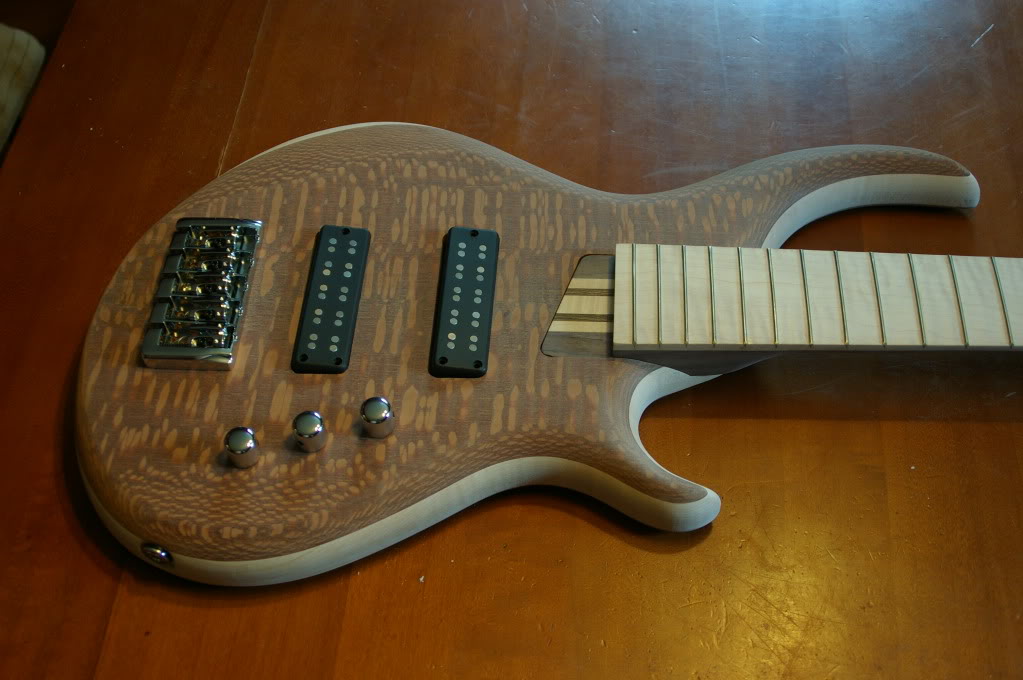
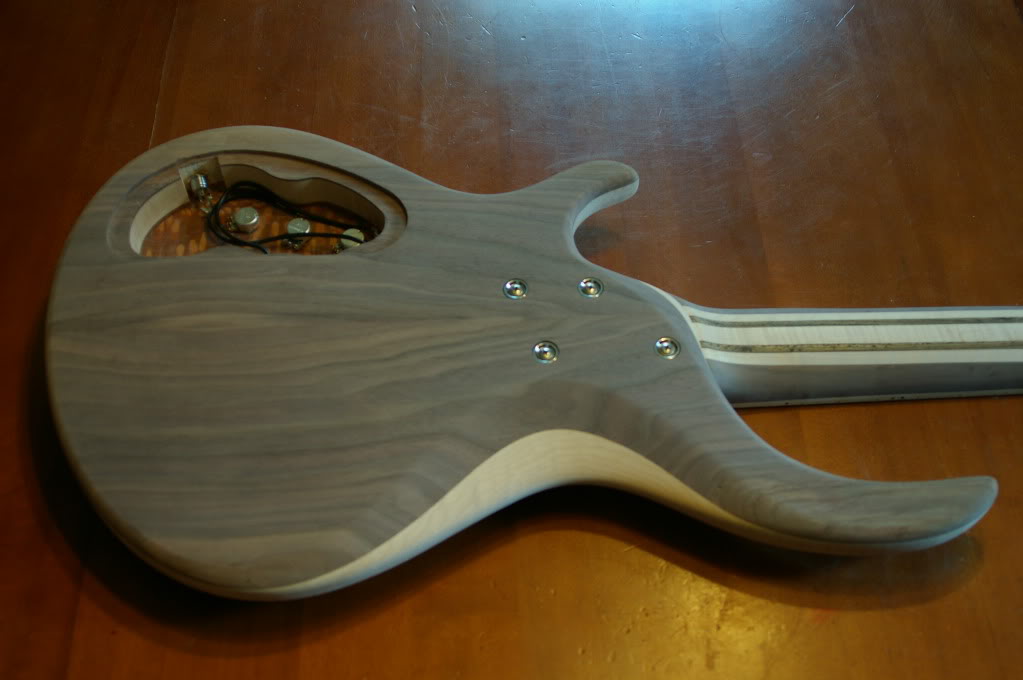
I also used the new pickup template to route for the pickups. Then just a little more drilling for the bridge ground wire and the pickup wires into the control cavity. And with that, I believe all of the woodworking is complete. I did an initial rough sanding with 120 grit to try and get most of the major tooling marks cleaned up. There's plenty more sanding that needs to be finished up on both the neck and body, but it's really close to being ready to be sprayed. Now to get the weather to cooperate. I'll be spraying nitro lacquer (Behlen Stringed Instrument lacquer), which isn't a fan of high temps and high humidity.
I slapped the bass together quick to give a rough idea of how this thing is going to look. I wiped the leopardwood and walnut with lacquer thinner to get a feel for what the wood will look like under a finish, and both are going to darken pretty considerably - I think it's going to be quite striking when finished.

Hopkins
Commercial User
If you ever wanted to donate a bass to a poor fellow bass player, I don't have to much pride to take that leopardwood one as charity
Jason, what bridge are you using? It looks awesome.
The bridge is actually a relatively inexpensive Asian unit. It's the same one that Carvin is using on their SB and Bolt basses. I used it on one of my previous builds, and was pretty happy with it, especially for the price. It's the only reasonably inexpensive 5-string bridge with full 19mm spacing I could find. There are a few other cheap 5 string bridges, but they're all 16-17mm. For what ever reason, it seems all of the other wide 5-string bridges are at least two or three times as expensive as these. For the money, they have a lot of heft, nice adjustment, and the finish is really good looking. I like Hipshot's stuff, but there's a lot of sharp edges on them, and this bridge is all rounded and sleek. I got my previous one from guitarpartscentral.com, but they were out of stock when I ordered, so I ended up getting this one from guitarpartsdepot.com (interestingly they were exactly the same price, and quite a bit cheaper than getting the same bridge from Carvin).

when you round the edges of the body, why do you not continue the roundover to the bridge-end of the body? Also, How to cut the shape of the neck and headstock so clean? I always have difficult when it gets to the angle on the headstock...


