At almost 40yrs old, I haven't played bass for many years. I gave it up for 6-string, then life, family and kids got in the way of my music and I slowly lost interest.
last year, I picked up a Tanglewood rebel 4K when my interest in musk was sparked again, and I realized that although my interest in 6-string was gone, I still liked the bass.
I found it difficult to play the Tanglewood, partly cuz the action was crap, and partly cuz a childhood accident meant that my left elbow didn't quite grow properly. Normally, it doesnt give me any problems, but as I have a slight loss of rotation in my left forearm, playing a 34" scale bass caused me some discomfort.
Initially, I thought of getting a 30" scale bass, but I thought it would be too "plinky" for my taste. so I thought, maybe 32" scale would be better if the top horn was positioned such that the nut was closer to my body, but, i couldn't find anything out there in 32" scale.
So, as I had tinkered with guitars as a kid and taught myself how to repair them and even maintained the guitars in my school with the knowledge I had gained, I decided to build myself a bass.
Although this web site was one of the ones i found that i could use for research while building the bass, i decided not to post a project thread until it was Complete (Well, almost). There are plenty of people on here who would have given sound advice, but I wanted to do this on my own. "You learn more by doing than by being told" is one of my life motto's, so that's exactly what I did.
Introducing, the DM Semel:-
The build Begins !
First off I had bought an ebony fretboard blank with slots cut. using that, some card and some imagination, I came up with a shape I was reasonably pleased with after my 6th attempt
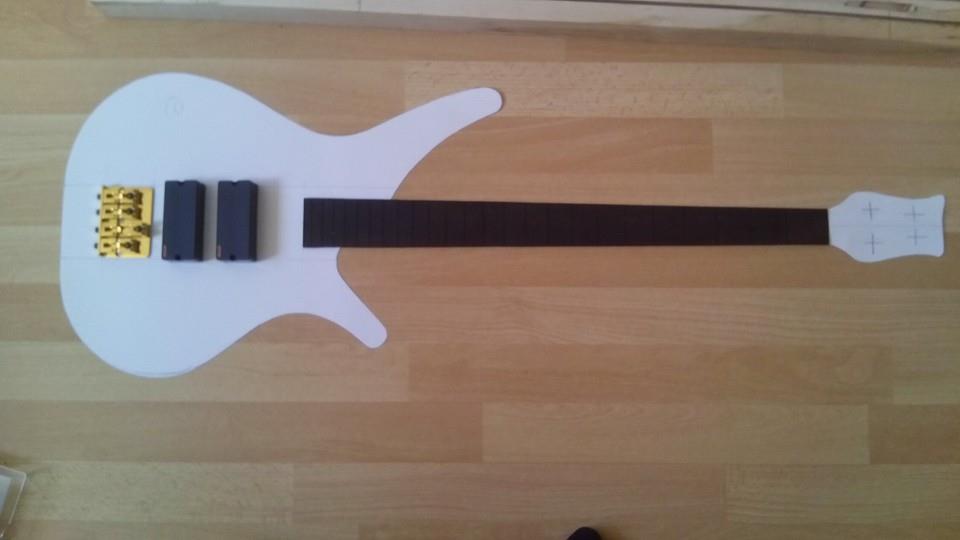
I had decided on having a "Through Neck".
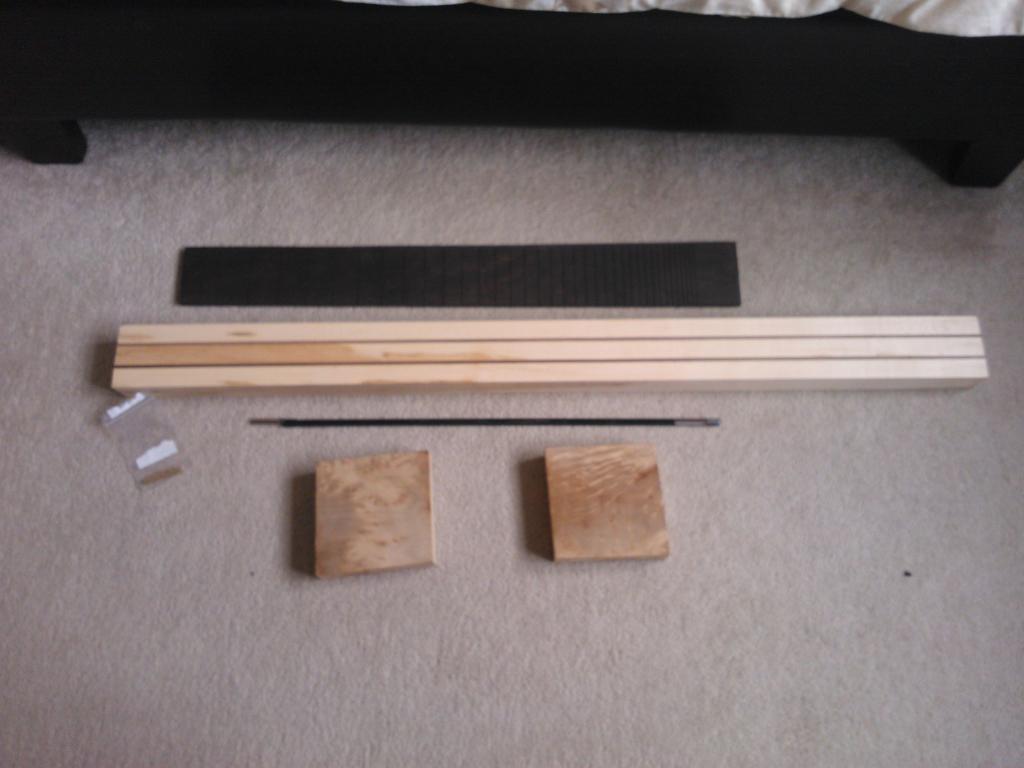
The price for these bits of wood was the same as I could buy that bit already made up for me so below is what I bought next. The laminate lump for the through-neck, the trussrod and 2 lumps of Golden Camphor burl which I imported from Canada (I am UK based). I originally intended to use them as covers for parts of the bass like Pickups, but decided against that in the end
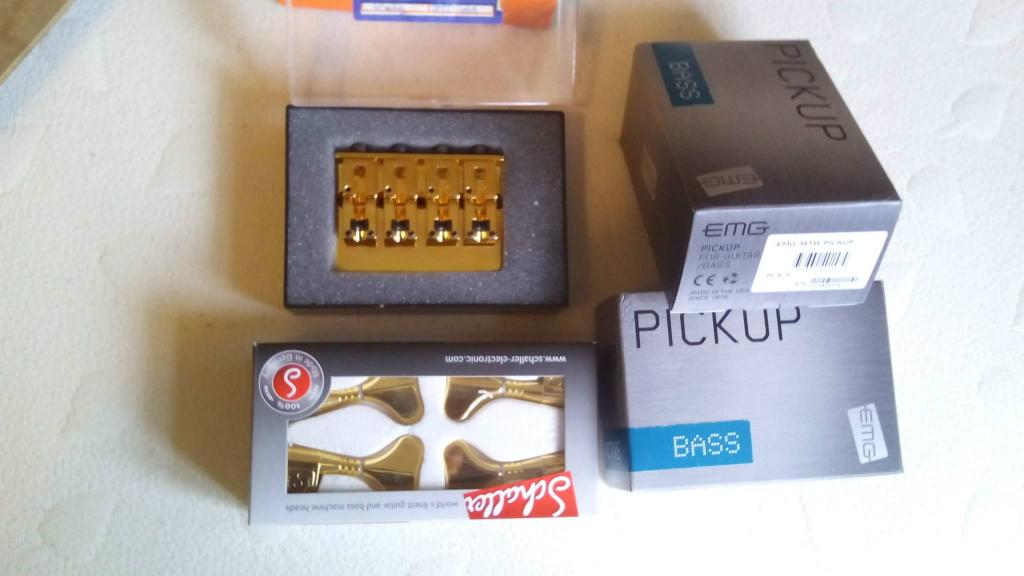
Hardware came next. These items can be bought over here in England, but everyone seemed to be out of stock so the pickups, gold bridge and tuners all had to be imported from America.
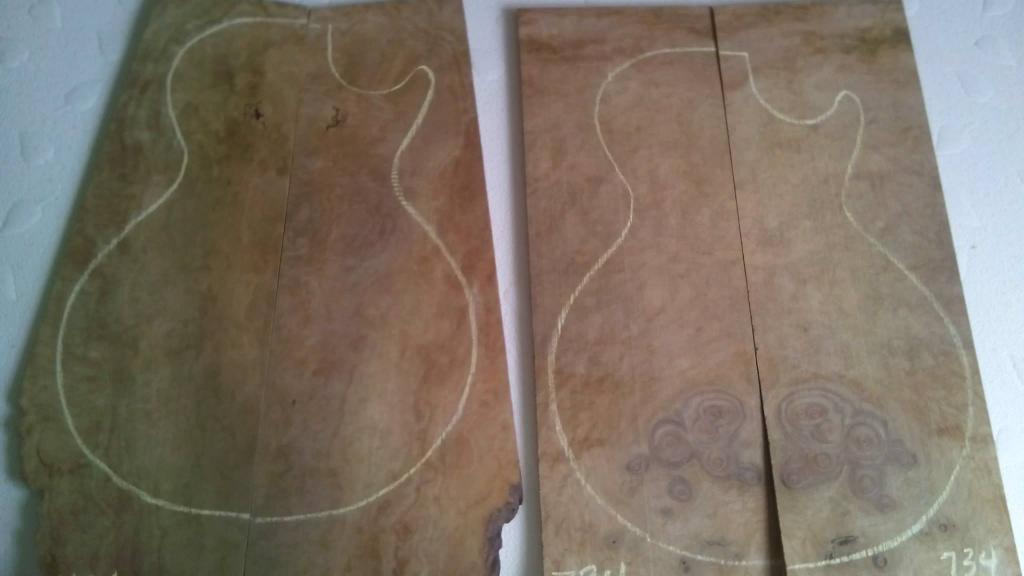
I also bought 2 bookmatched pairs of Walnut Burl, again imported from America.
Not pictured is a large plank of Maple, which I managed to source over here in England.
Originally, I planned to have a maple body with the wallnut on the front and back. I later changed my mind as they are both nice pieces and would be wasted on the back of a guitar. I decided to keep the second set for another build in the future
Mt father is a carpenter and has access to a large workshop, which I do not. I therefore marked out the channel I needed him to use the router on for me to put the trussrod in. We also cut the Ebony fretboard to size/shape
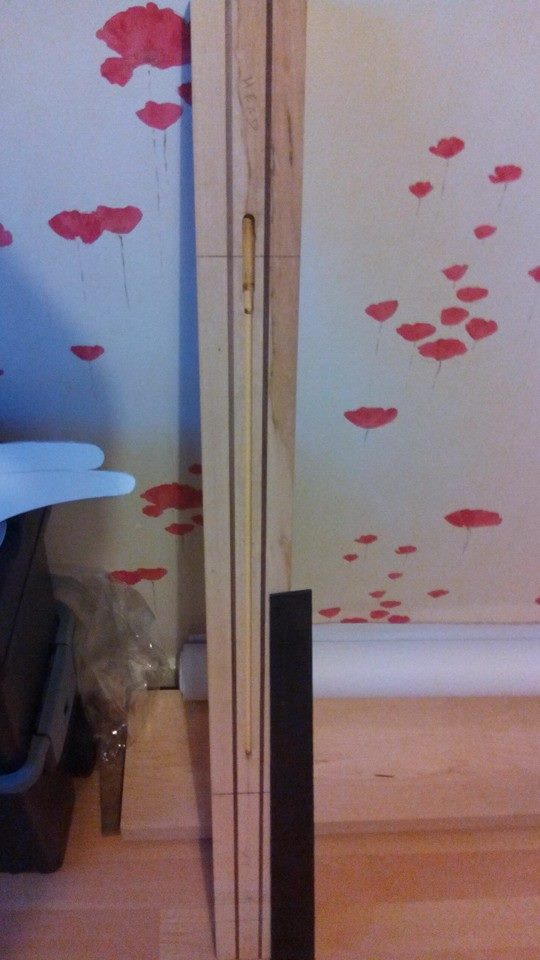
I then cut the trussrod down to size as it was for a longer scale bass and re-welded the end.
I Installed it in the routed channel and then glued the fretboard in place over it
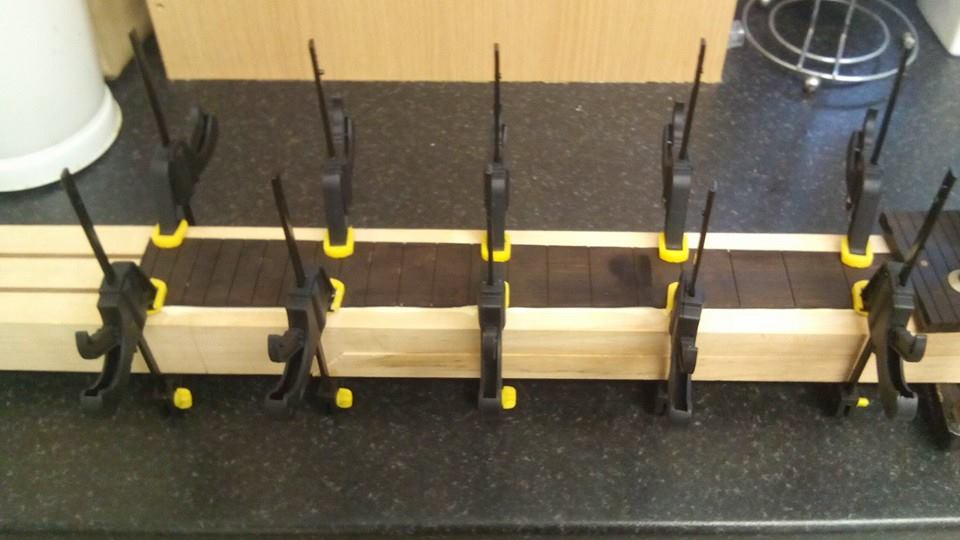
Using the bandsaw, I got my dad to cut the back profile of the neck and the face of the headstock. He also took a little off the front of the body end with the router so that the fretboard would be sitting higher than the body.
I then got my father to use a router bit with a bearing on top to cut the side profile of the neck using the fretboard as a guide. This left me with a neck that was now the desired width, but obviously still square. So, out came the spoke shave till I got this:-
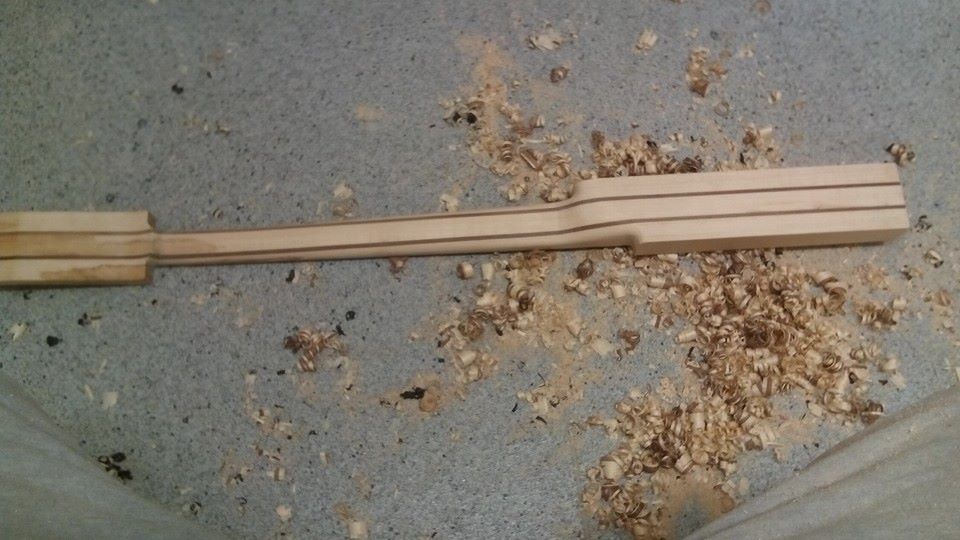
The last job I needed my fathers assistance on was the body thickness. He put the Maple plank through the planer-thicknesser at work for me and glued on the bookmatched Walnut for the face of the guitar.
Once these were the right thickness, I glued the body wings either side of the neck piece.
From this point on, I didnt need any big workshop machinery so dad didnt see it again untill recently.
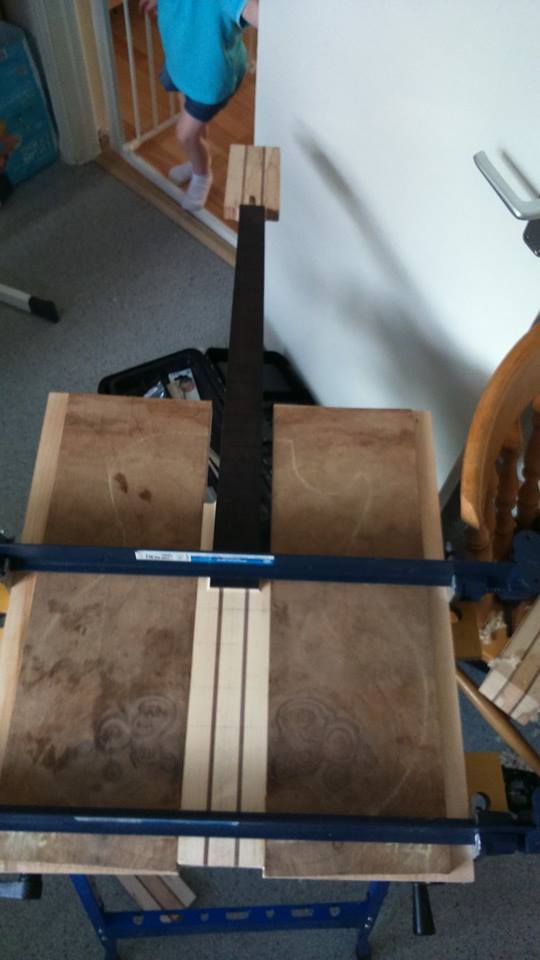
Using some MDF, i made a template for my Dremel Router to cut out the pickup cavities. This was done before I cut the shape of the guitar out so that I could screw the template down in to the excess bits of wood and stop it moving. I blew up my dremel half way through the routing process (It was one of the smaller ones), so I bought a bigger and better one to complete it.
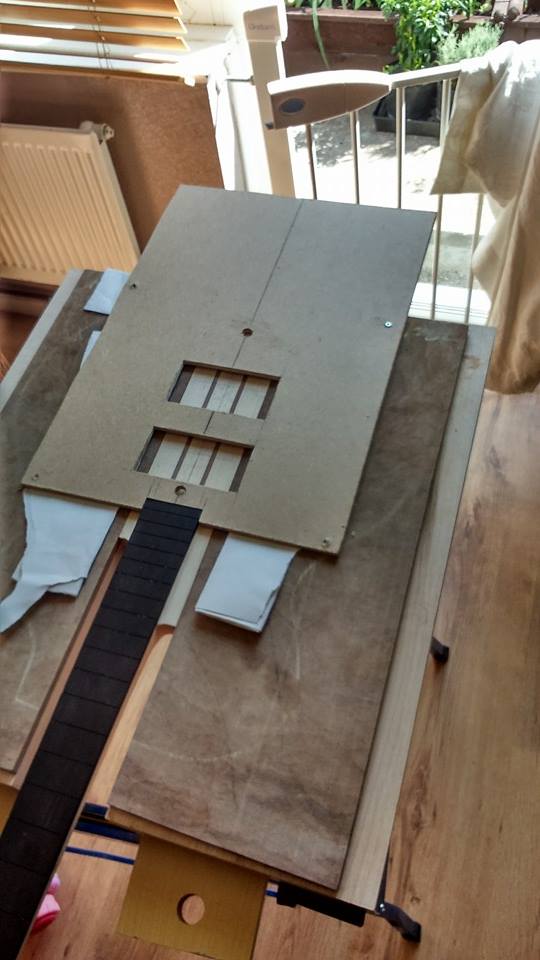
I also did the same on the back, but realized that the dremel wouldn't go deep enough. I really needed a proper router for that but didnt have one, so after the first few cuts with the Dremel, I went old-school on the guitar and stitch drilled the outer edge, then got the hammer and chisel out.
Routers also scare me a little, the same with the large circular saws. I have respect for the tools, but was told if they scare me, i'm likely to have an accident with them, hence why I don't own either. The dremel router is a diferent story though. too small for me to be scared of using it !
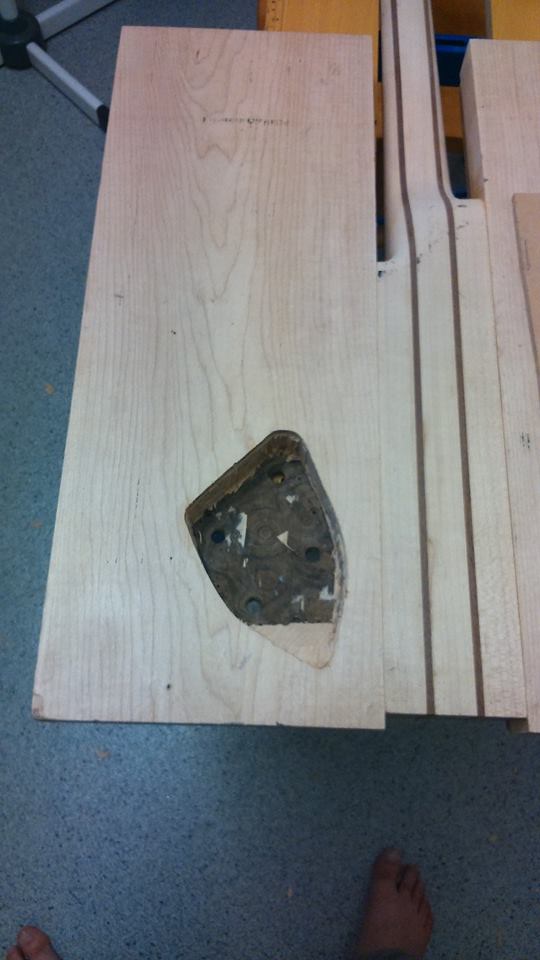
I then had to get some extra long Jigsaw blades and cut the shape out. I could have got my dad to do it in the large bandsaw at work for me, but i was gaining more confidence in my work so I just went for it.
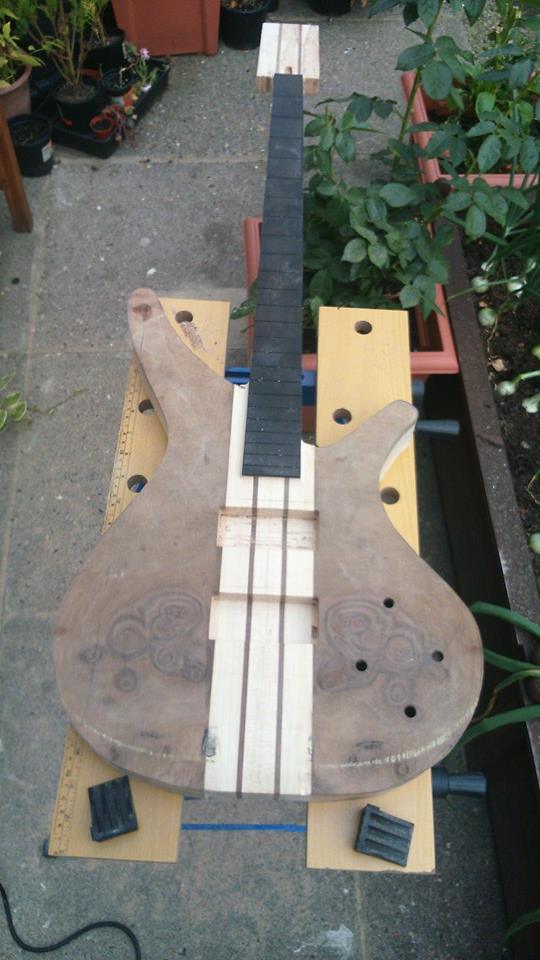
out with the files and rasps then and on with tidying up the edge cut by the jigsaw, and shaping some of the body curves
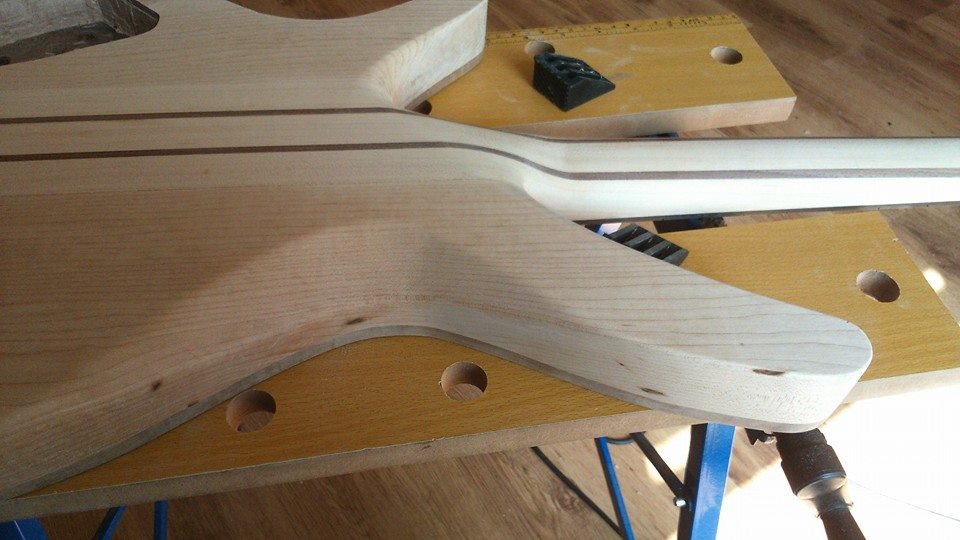
I then realized that I had forgotten to cut a cavity for the battery holder. I had a pair of EMG TW35's, which needed a 9v battery as a minimum.
Anyway, out with the dremel router attachment again
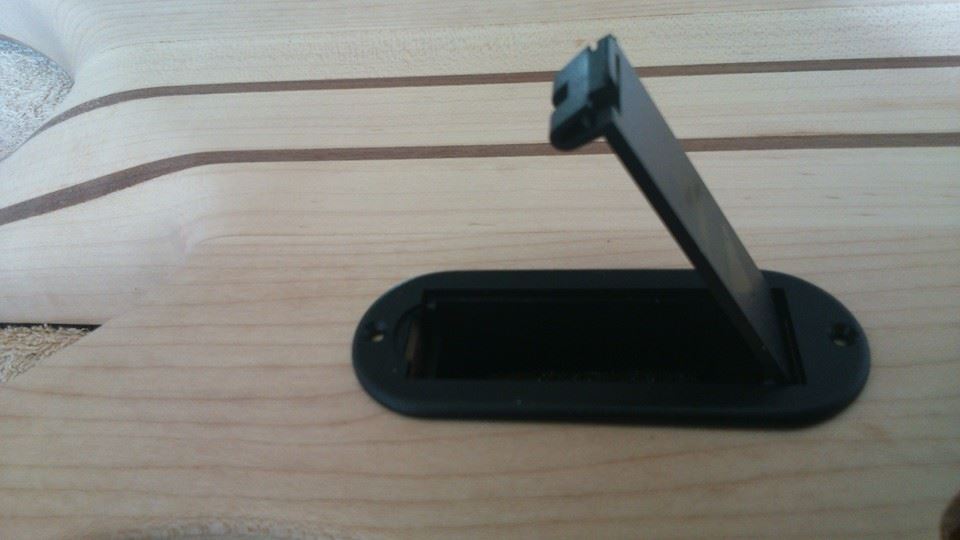
More filing and sanding then..... and it was baking hot weather at the time too
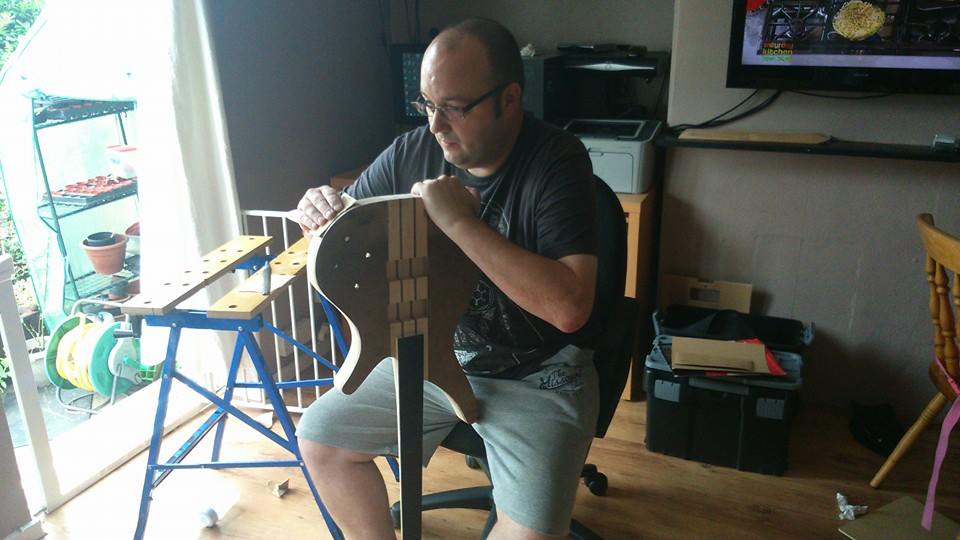
At least now though, it was starting to look like a guitar
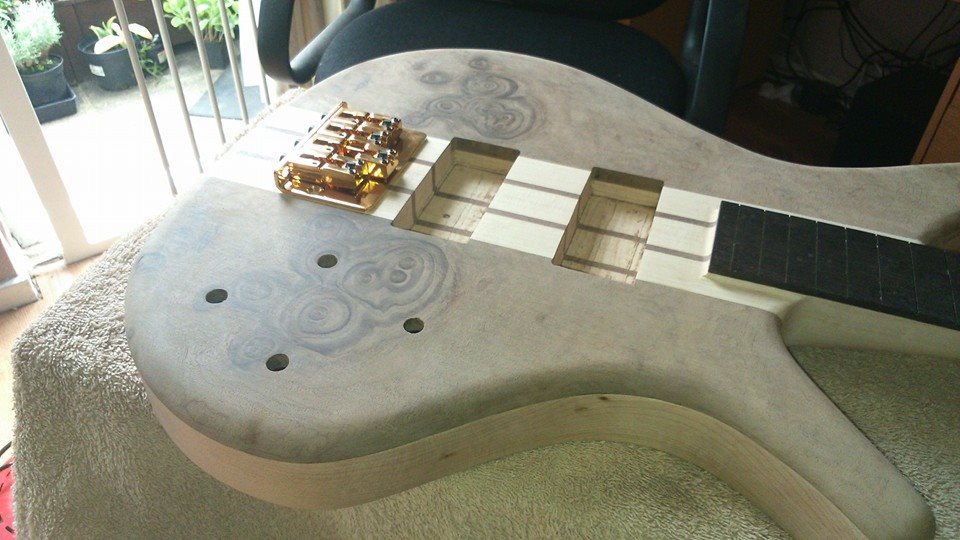
I then cut the headstock shape and used the rasps, files and sandpaper.
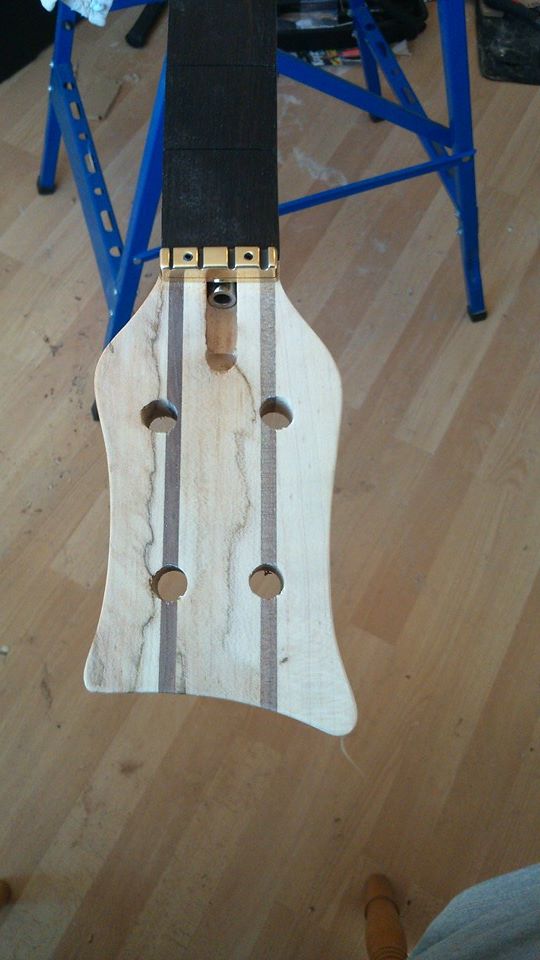
to make the fret markers, I decided to use some of that Golden Camphor burl.
You can't get 4mm plug cutters as they don't go that small so I had to get a 4mm leather punch and put it in my drill.
After doing a number of these as the picture below, I cut across it from the top so that all the little plugs fell out.
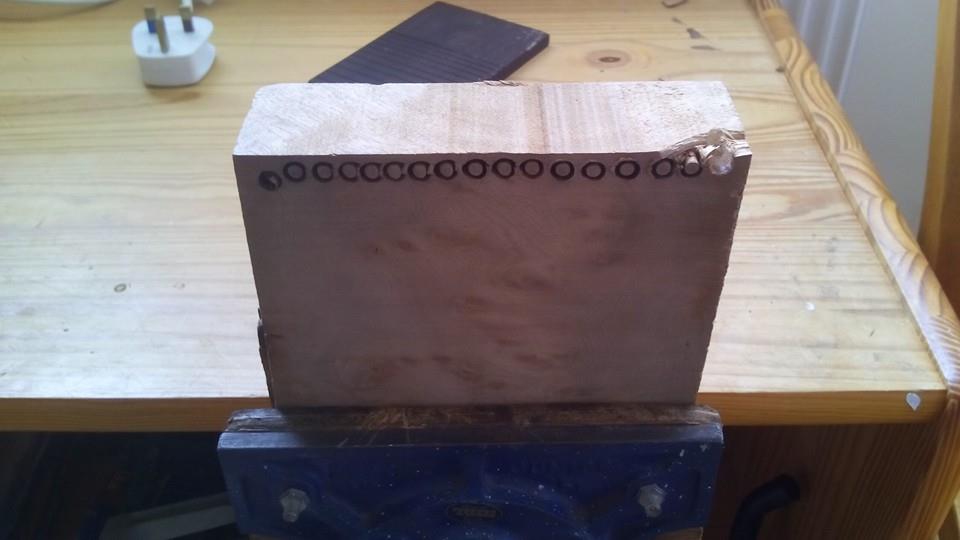
Tested one in a scrap bit of Ebony to see if sanding it would contaminate the camphor with ebony dust, but it was fine
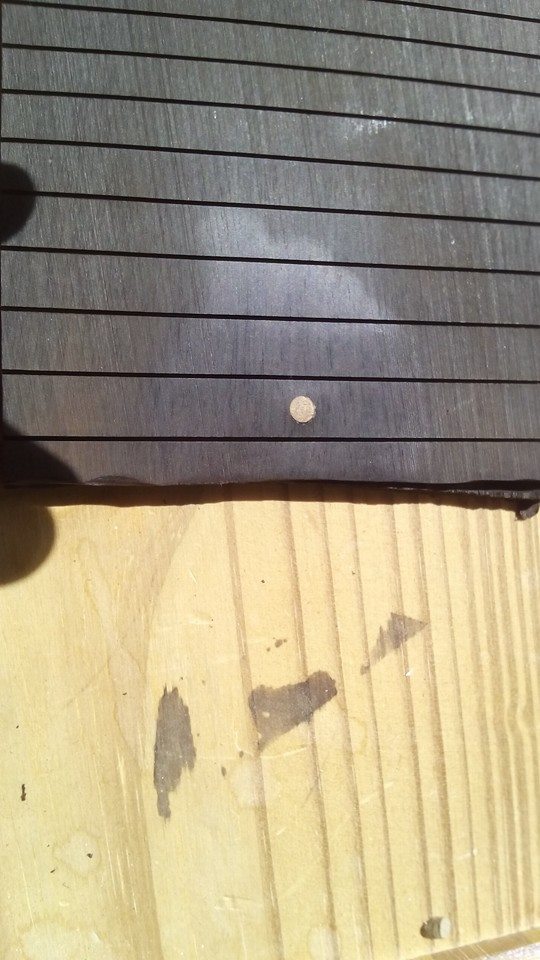
So, 4mm holes drilled in the fretboard
last year, I picked up a Tanglewood rebel 4K when my interest in musk was sparked again, and I realized that although my interest in 6-string was gone, I still liked the bass.
I found it difficult to play the Tanglewood, partly cuz the action was crap, and partly cuz a childhood accident meant that my left elbow didn't quite grow properly. Normally, it doesnt give me any problems, but as I have a slight loss of rotation in my left forearm, playing a 34" scale bass caused me some discomfort.
Initially, I thought of getting a 30" scale bass, but I thought it would be too "plinky" for my taste. so I thought, maybe 32" scale would be better if the top horn was positioned such that the nut was closer to my body, but, i couldn't find anything out there in 32" scale.
So, as I had tinkered with guitars as a kid and taught myself how to repair them and even maintained the guitars in my school with the knowledge I had gained, I decided to build myself a bass.
Although this web site was one of the ones i found that i could use for research while building the bass, i decided not to post a project thread until it was Complete (Well, almost). There are plenty of people on here who would have given sound advice, but I wanted to do this on my own. "You learn more by doing than by being told" is one of my life motto's, so that's exactly what I did.
Introducing, the DM Semel:-
The build Begins !
First off I had bought an ebony fretboard blank with slots cut. using that, some card and some imagination, I came up with a shape I was reasonably pleased with after my 6th attempt
I had decided on having a "Through Neck".
The price for these bits of wood was the same as I could buy that bit already made up for me so below is what I bought next. The laminate lump for the through-neck, the trussrod and 2 lumps of Golden Camphor burl which I imported from Canada (I am UK based). I originally intended to use them as covers for parts of the bass like Pickups, but decided against that in the end
Hardware came next. These items can be bought over here in England, but everyone seemed to be out of stock so the pickups, gold bridge and tuners all had to be imported from America.
I also bought 2 bookmatched pairs of Walnut Burl, again imported from America.
Not pictured is a large plank of Maple, which I managed to source over here in England.
Originally, I planned to have a maple body with the wallnut on the front and back. I later changed my mind as they are both nice pieces and would be wasted on the back of a guitar. I decided to keep the second set for another build in the future
Mt father is a carpenter and has access to a large workshop, which I do not. I therefore marked out the channel I needed him to use the router on for me to put the trussrod in. We also cut the Ebony fretboard to size/shape
I then cut the trussrod down to size as it was for a longer scale bass and re-welded the end.
I Installed it in the routed channel and then glued the fretboard in place over it
Using the bandsaw, I got my dad to cut the back profile of the neck and the face of the headstock. He also took a little off the front of the body end with the router so that the fretboard would be sitting higher than the body.
I then got my father to use a router bit with a bearing on top to cut the side profile of the neck using the fretboard as a guide. This left me with a neck that was now the desired width, but obviously still square. So, out came the spoke shave till I got this:-
The last job I needed my fathers assistance on was the body thickness. He put the Maple plank through the planer-thicknesser at work for me and glued on the bookmatched Walnut for the face of the guitar.
Once these were the right thickness, I glued the body wings either side of the neck piece.
From this point on, I didnt need any big workshop machinery so dad didnt see it again untill recently.
Using some MDF, i made a template for my Dremel Router to cut out the pickup cavities. This was done before I cut the shape of the guitar out so that I could screw the template down in to the excess bits of wood and stop it moving. I blew up my dremel half way through the routing process (It was one of the smaller ones), so I bought a bigger and better one to complete it.
I also did the same on the back, but realized that the dremel wouldn't go deep enough. I really needed a proper router for that but didnt have one, so after the first few cuts with the Dremel, I went old-school on the guitar and stitch drilled the outer edge, then got the hammer and chisel out.
Routers also scare me a little, the same with the large circular saws. I have respect for the tools, but was told if they scare me, i'm likely to have an accident with them, hence why I don't own either. The dremel router is a diferent story though. too small for me to be scared of using it !
I then had to get some extra long Jigsaw blades and cut the shape out. I could have got my dad to do it in the large bandsaw at work for me, but i was gaining more confidence in my work so I just went for it.
out with the files and rasps then and on with tidying up the edge cut by the jigsaw, and shaping some of the body curves
I then realized that I had forgotten to cut a cavity for the battery holder. I had a pair of EMG TW35's, which needed a 9v battery as a minimum.
Anyway, out with the dremel router attachment again
More filing and sanding then..... and it was baking hot weather at the time too
At least now though, it was starting to look like a guitar
I then cut the headstock shape and used the rasps, files and sandpaper.
to make the fret markers, I decided to use some of that Golden Camphor burl.
You can't get 4mm plug cutters as they don't go that small so I had to get a 4mm leather punch and put it in my drill.
After doing a number of these as the picture below, I cut across it from the top so that all the little plugs fell out.
Tested one in a scrap bit of Ebony to see if sanding it would contaminate the camphor with ebony dust, but it was fine
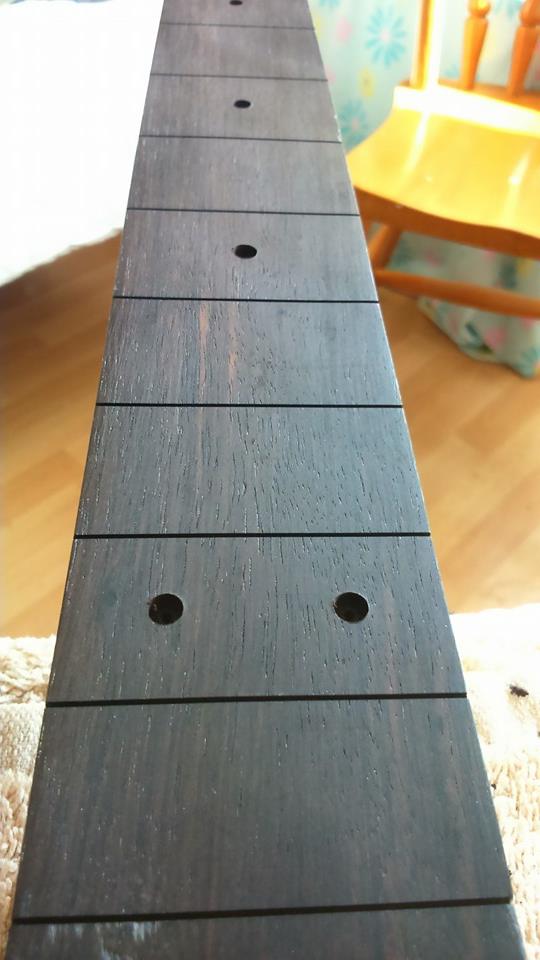
So, 4mm holes drilled in the fretboard
Last edited: