

Enjoy the benefits of a premium membership!
Upgrade Account
-
TalkBass has been independent since 1998. Add your voice.
Create a free account to reply to discussions, view embedded media, and browse with fewer display ads.
Join free Log in
Want zero display ads or expanded classifieds tools? Compare plans.
You are using an out of date browser. It may not display this or other websites correctly.
You should upgrade or use an alternative browser.
You should upgrade or use an alternative browser.
My New Studio Build (perhaps overly detailed)
- Thread starter silky smoove
- Start date
More options
Who Replied?
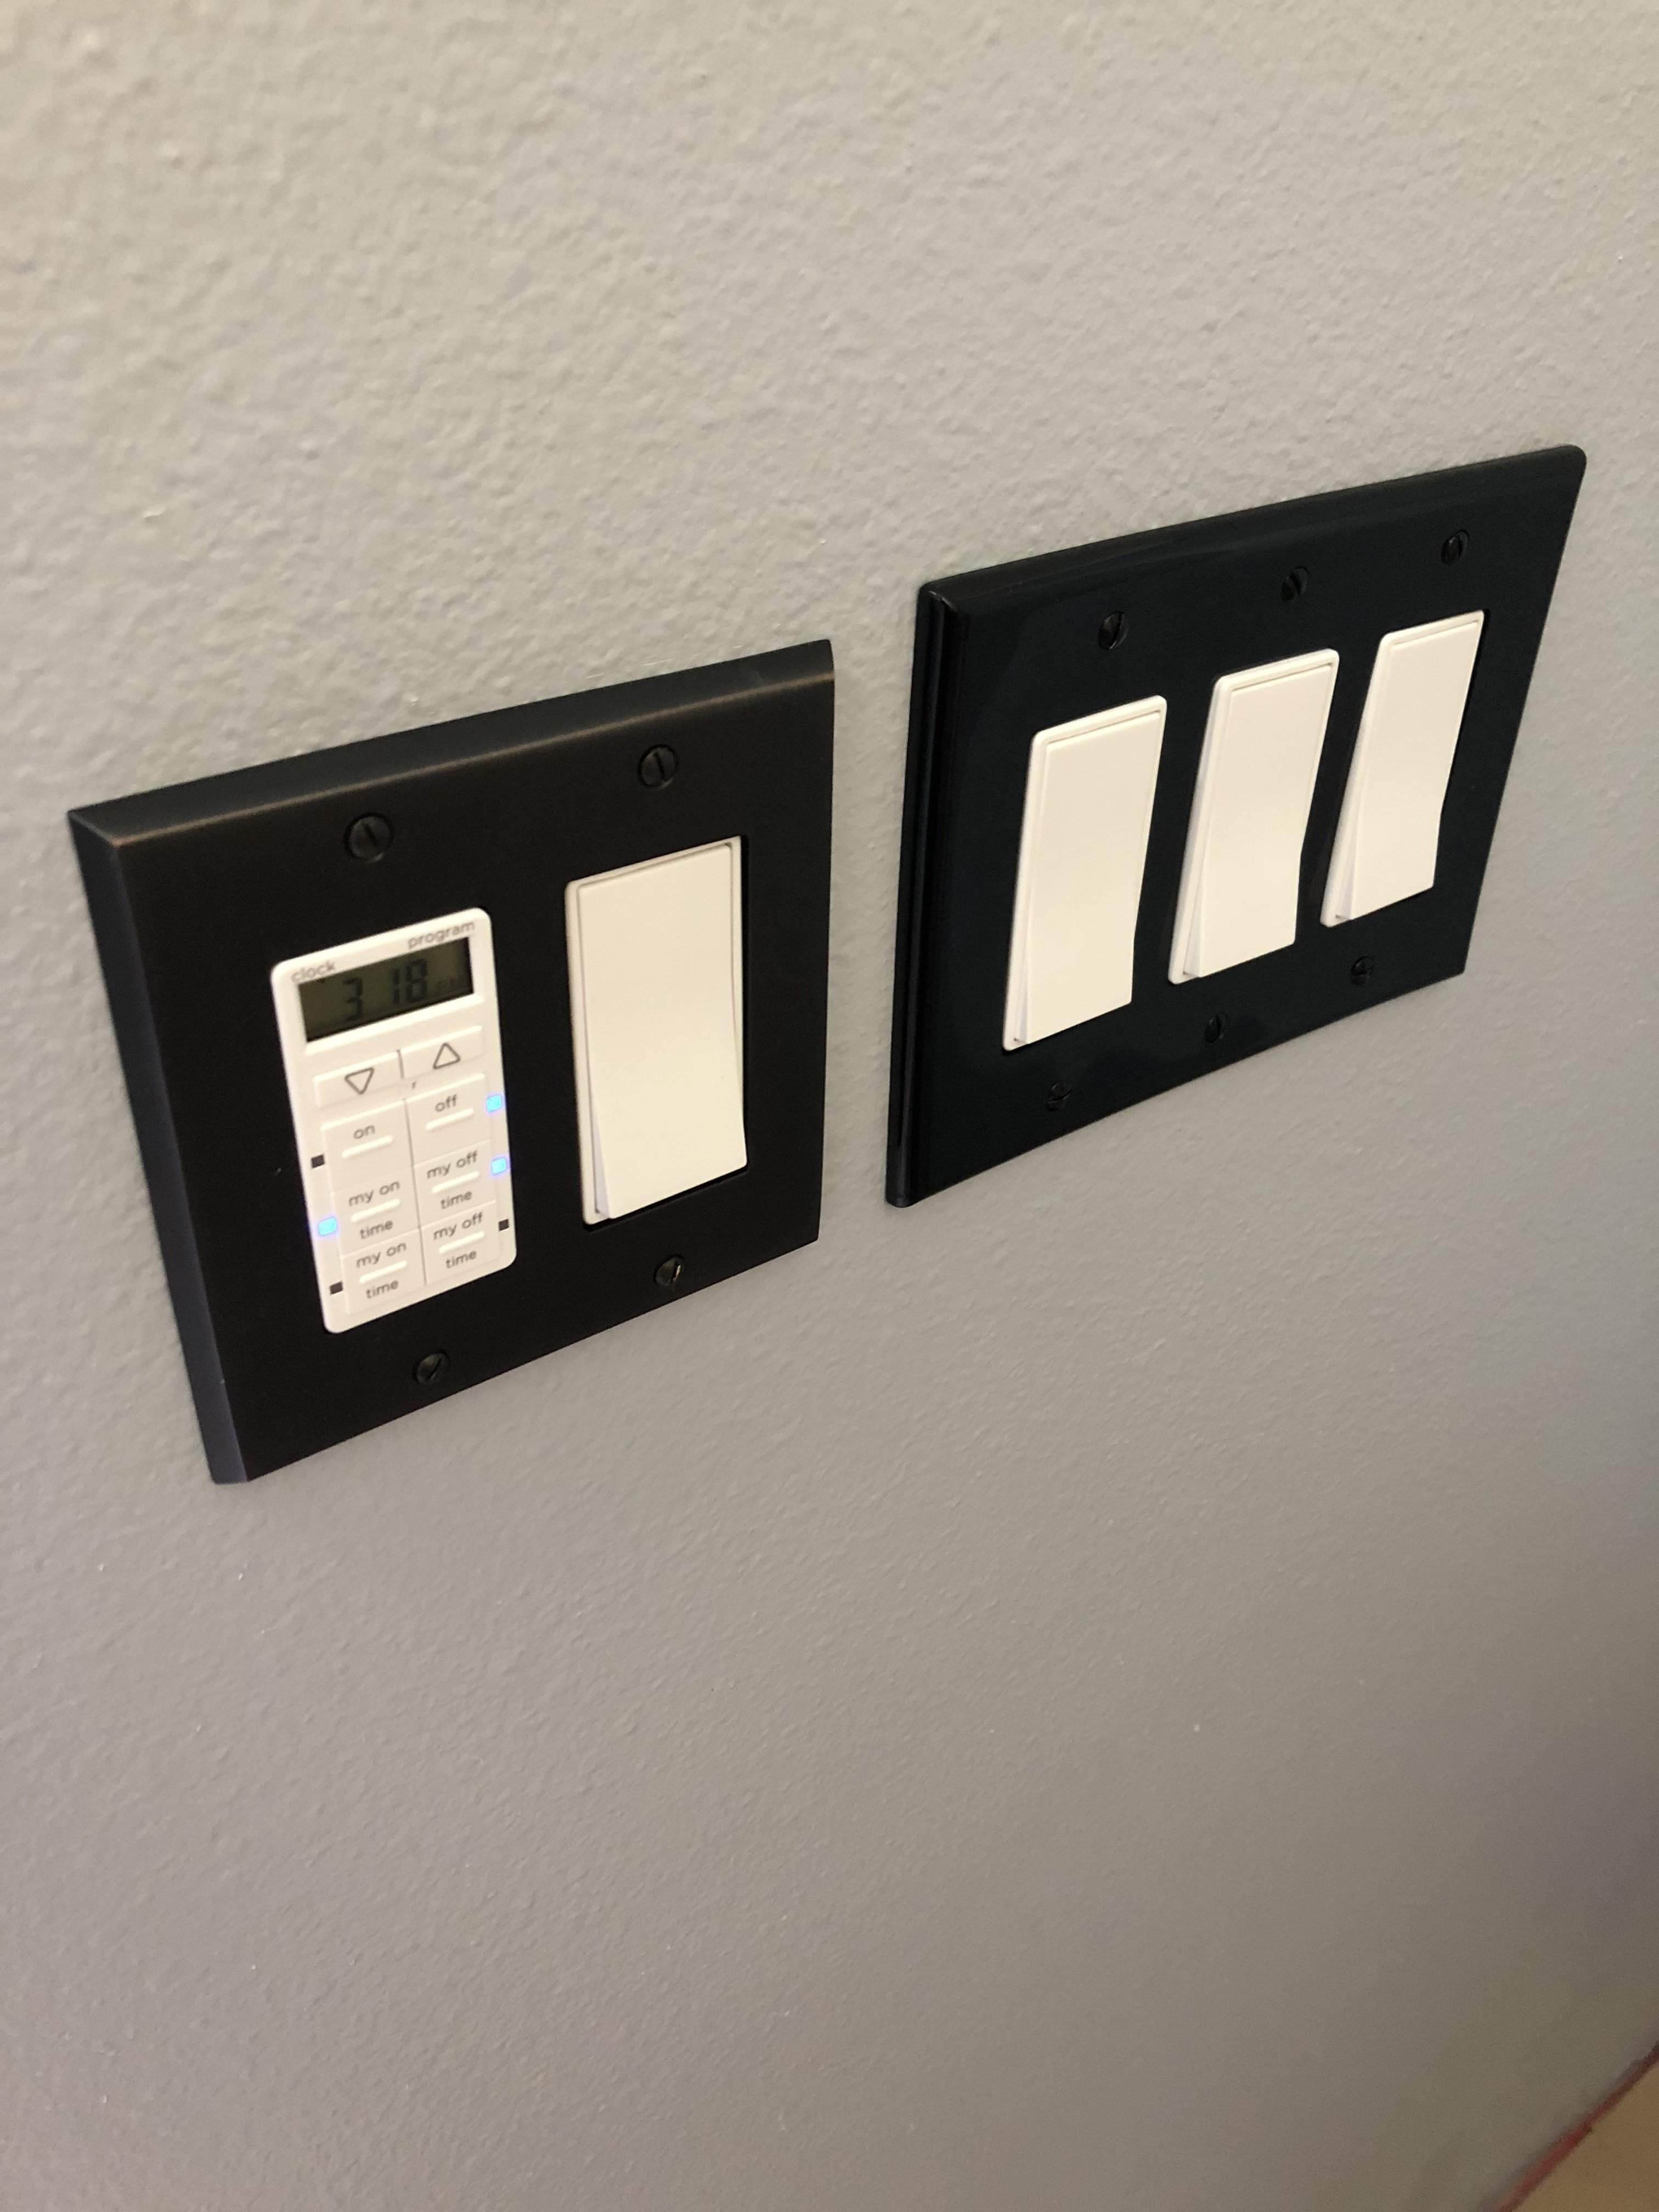
The new switch plates arrived. They look WAY better. Two gang is new, three gang is old for comparison.
Here’s a close up to show the difference in finishes. The material of the new ones is way nicer too. Brass versus ultra thin and overly shiny vinyl.
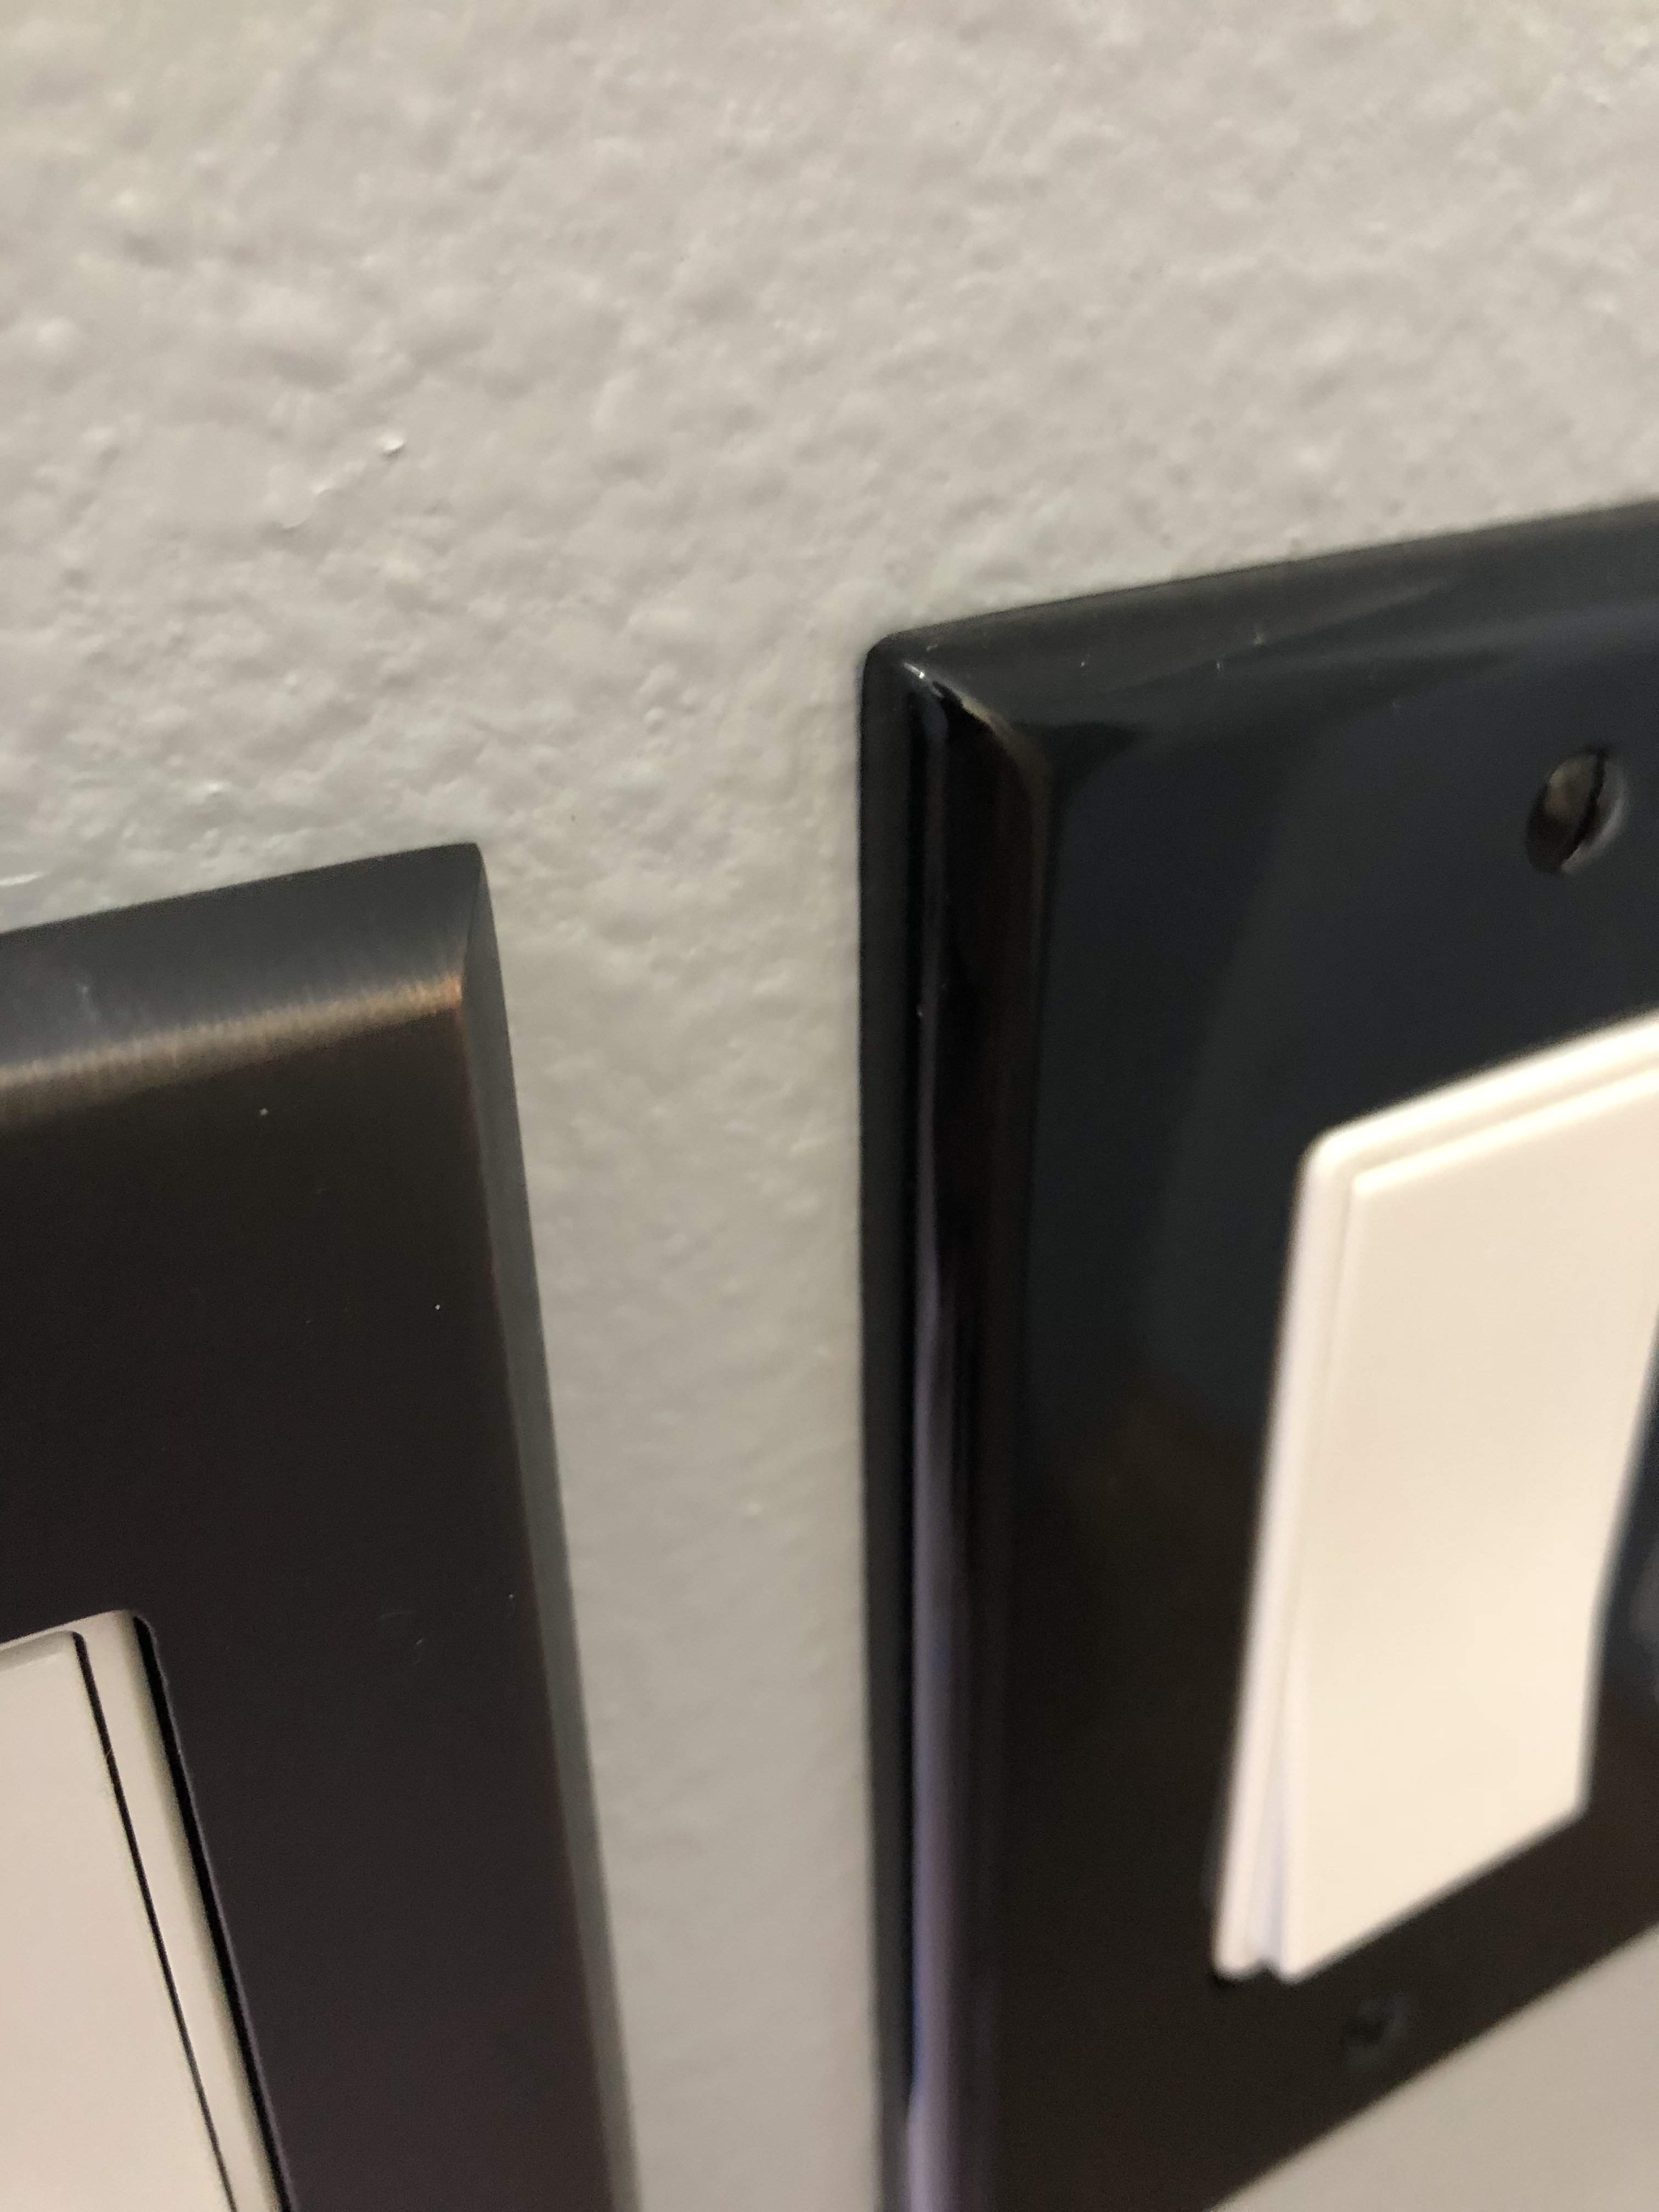
Here’s a close up to show the difference in finishes. The material of the new ones is way nicer too. Brass versus ultra thin and overly shiny vinyl.
The base trim that I installed is actually one of the 6” boards I bought for the header casing above the doors. I bought 15 8” boards for the base trim, but when I mocked it up on the walls it was too tall. It was too loud visually and the clearance between the top of the trim board and the bottom of the outlet was too narrow. I’m going to return all of the 8” boards and replace them with 6” boards. It’s another run but it’ll look better and will even be a minor cost savings!
8” returned, 6” procured. I’m taking tomorrow off to spend Thanksgiving with my wife (our annual tradition is to go for a long walk in the morning, prepare food while drinking and listening to Beatles tunes in the afternoon, chowing done and then become useless couch inhabitants afterwards while watching bad 80s movies... It’s a simple tradition, but we dig it). Friday I’ll be back to it with the goal of having all of the trim installed, nail set and caulked by the end of the weekend.
Oh, and the screws for the outlet plates aren’t long enough, so I’ll need to procure long enough machine screws in the right thread size with an oil rubbed bronze finished pan head. Hopefully the retailer that I purchased them from will have some insight.
Oh, and the screws for the outlet plates aren’t long enough, so I’ll need to procure long enough machine screws in the right thread size with an oil rubbed bronze finished pan head. Hopefully the retailer that I purchased them from will have some insight.

Happy Thanksgiving. Enjoy the day.8” returned, 6” procured. I’m taking tomorrow off to spend Thanksgiving with my wife (our annual tradition is to go for a long walk in the morning, prepare food while drinking and listening to Beatles tunes in the afternoon, chowing done and then become useless couch inhabitants afterwards while watching bad 80s movies... It’s a simple tradition, but we dig it). Friday I’ll be back to it with the goal of having all of the trim installed, nail set and caulked by the end of the weekend.
Oh, and the screws for the outlet plates aren’t long enough, so I’ll need to procure long enough machine screws in the right thread size with an oil rubbed bronze finished pan head. Hopefully the retailer that I purchased them from will have some insight.


Forgive my ignorance, but what is the need for those wooden wedges under the boards?
I think I’m on the track when I say it’s for expansion. Laminated/flooring changes shape and size as the temperature changes so you need a bit of wiggle room. The gap won’t be obvious once removed.
@silky smoove have to admit I wasn’t overly keen on the colouring(I do like that shade of blue) but the white trim is really making it work for me now! Despite many of us questioning the dark colours I guess you knew it was always going to pan out for the best. 
@Microbass is on the right track, except that in a typical laminate installation the base trim and quarter round (or base shoe) is placed directly on the flooring. In my case I’m trying to avoid an acoustic bridge between the walls and the floor. The gap I put between the floor and the drywall wouldn’t function if I didn’t place a gap on the trim. For isolation to work it’s imperative to place decoupling measures anywhere you can.Forgive my ignorance, but what is the need for those wooden wedges under the boards?
Credit my wife on that one. I was resistant at first, but when mocked the whole thing up with the acoustic treatment samples I knew it was the way to go.@silky smoove have to admit I wasn’t overly keen on the colouring(I do like that shade of blue) but the white trim is really making it work for me now! Despite many of us questioning the dark colours I guess you knew it was always going to pan out for the best.
1 of 3 door casings is done. The side casings are 4”, and the top is 6” for visual interest. Additionally I left the top casing an inch longer on each side to match the way it’s done in my house.
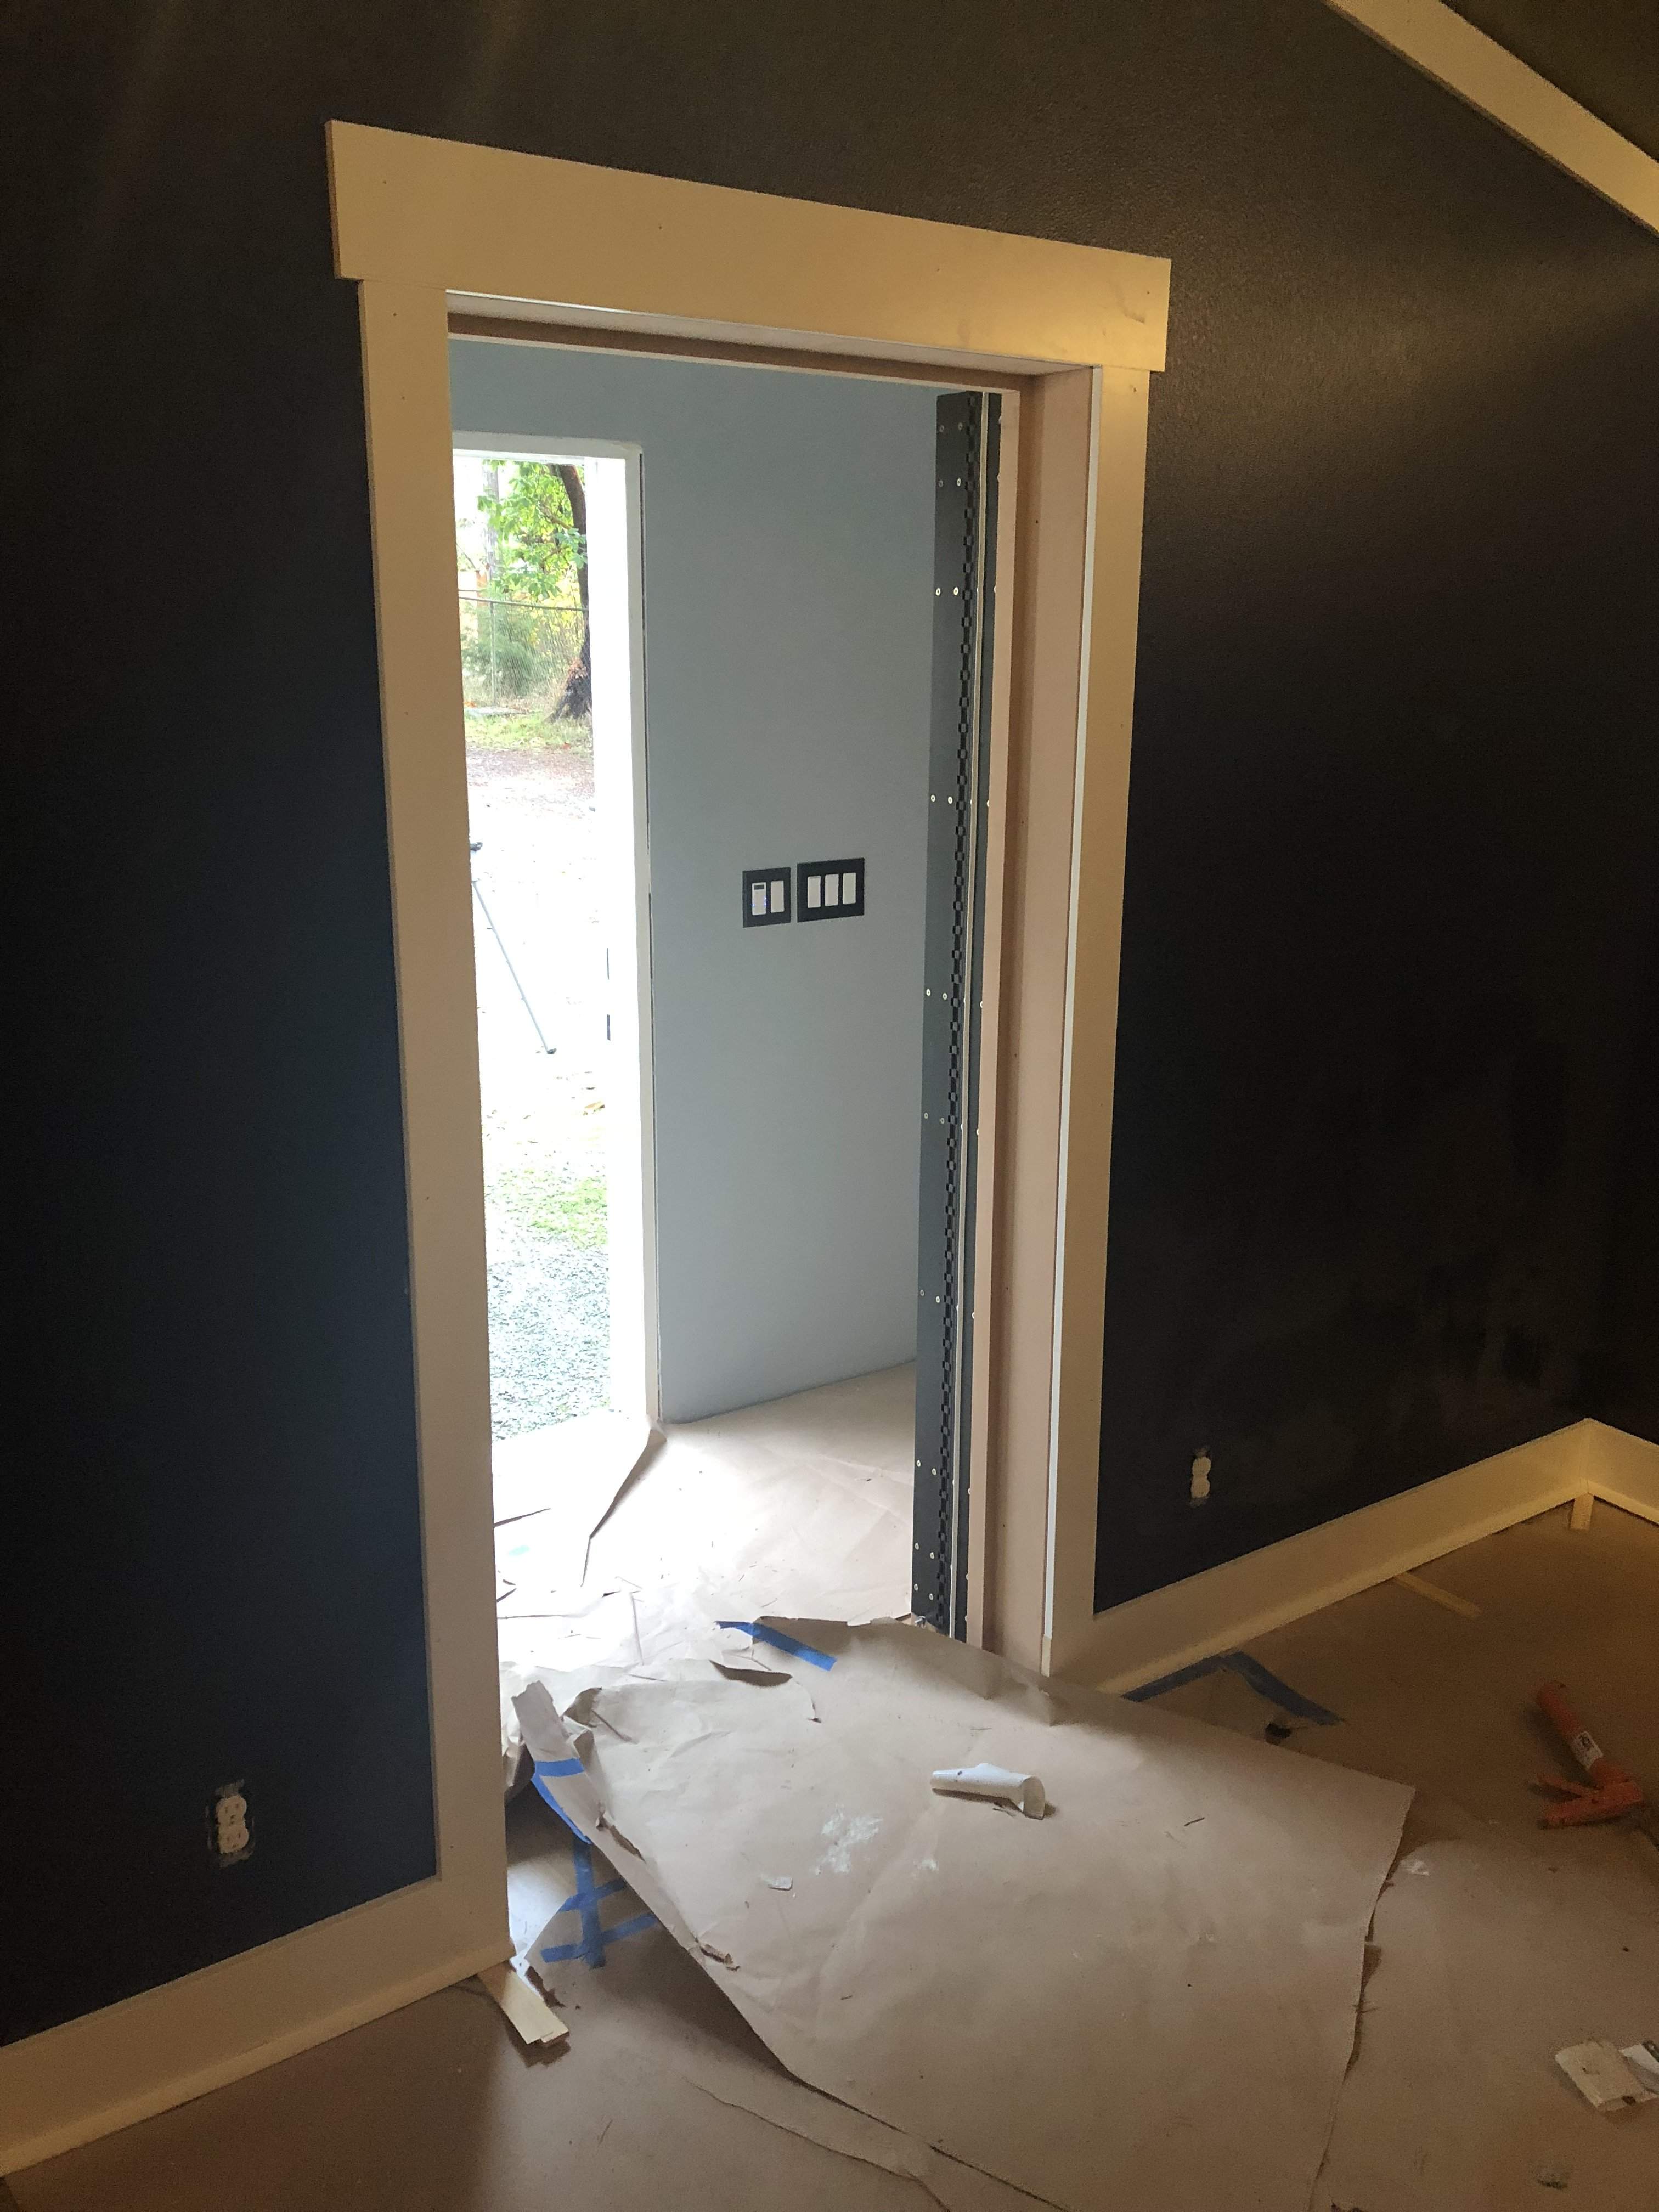
Got one half of the vestibule done, and two of the four vertical casing boards up. I’ll get it finished tomorrow and/or Sunday.

Over the course of two years I removed the plants and soil lining my courtyard, replaced all the irrigation and lighting, including fountain lights, upgraded to smart home timers for everything, and replanted. My wife asked how come it took so long. I just told her be glad I wasn't building a recording studio out there instead.

Over the course of two years I removed the plants and soil lining my courtyard, replaced all the irrigation and lighting, including fountain lights, upgraded to smart home timers for everything, and replanted. My wife asked how come it took so long. I just told her be glad I wasn't building a recording studio out there instead.
hahahahahah,
man this is gonna be so sweet when it is done.
Just link her to this thread anytime there’s a dispute while pointing at the computer and menacingly screaming “You see?! You see?!”Over the course of two years I removed the plants and soil lining my courtyard, replaced all the irrigation and lighting, including fountain lights, upgraded to smart home timers for everything, and replanted. My wife asked how come it took so long. I just told her be glad I wasn't building a recording studio out there instead.

All the trim and casing is installed. I’m going to step back and let the glue dry for the rest of the day. Tomorrow I’ll nail set, DAP, and caulk all the trim.
Had to shift my plans slightly. The shipment of my treatments already shows that they’re in Portland. That’s typically a one day delivery to Seattle, and yet the delivery date is still Thursday. I’m guessing that somehow they’ll still take four days to get to me as opposed to just one, but on the off chance that they do show up early I need to be ready for them. That meant cleaning out the studio rather than spending time nail setting, DAP’ing, caulking, etc. In order for that to happen I needed to empty my storage shed and make room for everything, the biggest offenders being the sliding compound miter saw and table saw. I’m nearly done with that effort and may still get to it with finishing off the trim and casing, but... ugh... I might just enjoy my Sunday 
Tiny little details always amaze me. I hadn’t aimed the vestibule light since it was installed a few weeks ago. The idea with this dual head light was to spill lots of light to both sides of the vestibule to make finding things in my storage area as easy as possible, while also not adding a spot light through the glass into the main room. It’s unlikely that I’ll have the vestibule light on while working in the main room, but I still didn’t want an inadvertent spotlight through the door. I just aimed the light and it does exactly what I wanted.


